Bunty - '71 Tin-Top Sunshine Bus Resto

Early Bay Forum

Help Support Early Bay Forum:

This site may earn a commission from merchant affiliate links, including eBay, Amazon, and others.

Darrencambs

Well-known member
Joined
Nov 14, 2010
Messages
76
Reaction score
0
Hi All.

You may have seen this thread in another forum, but I'm reposting it here as it Earlybay seems like a more appropriate place considering this is an Early Bay..

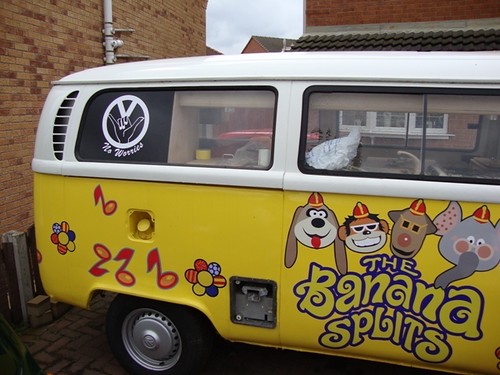
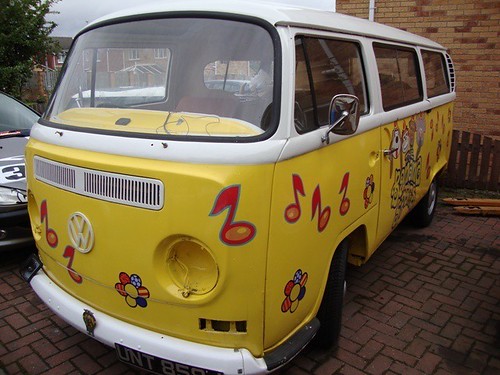
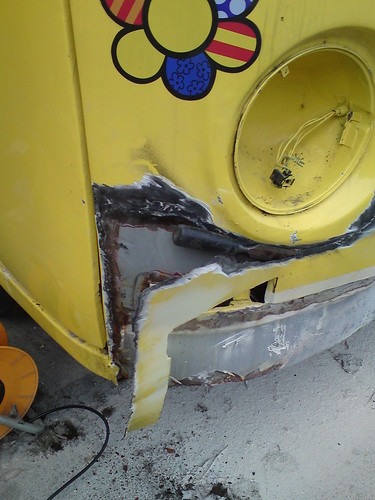
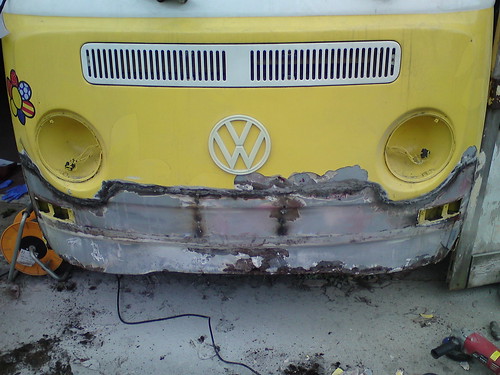
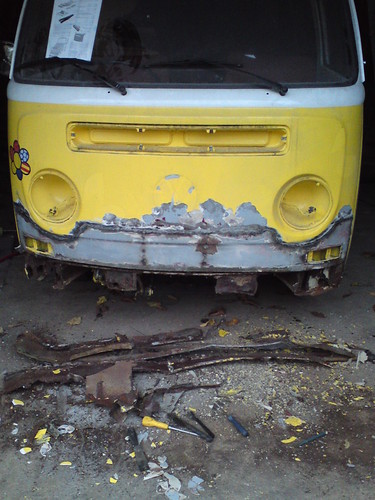
We'd been looking for a Bay camper to add to our fleet, and after looking at a number of candidates, we ended up placing a spur of the moment bid on an abandoned restoration on ebay, and ended up with this... nicknamed Bunty (reg is 'UNT', and Bunty was the cleanest suggestion!).

Unfortunately, Bunty is a non-runner at the moment as the engine is not installed and with some serious end float issues will is likely to be more use as a garden ornament.

Having been abandoned by more than one previous restorer, bits of her are missing - scattered around garages around the UK no doubt, so we've already spent a small fortune at JK on various goodies like headlights, tail lights, heat exchangers, exhaust... the list goes on.

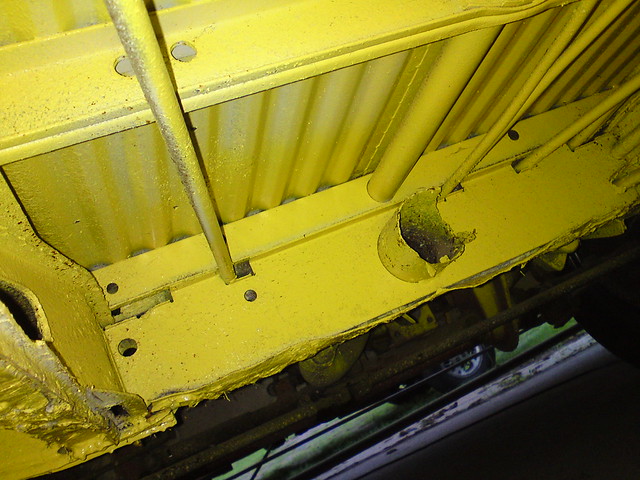
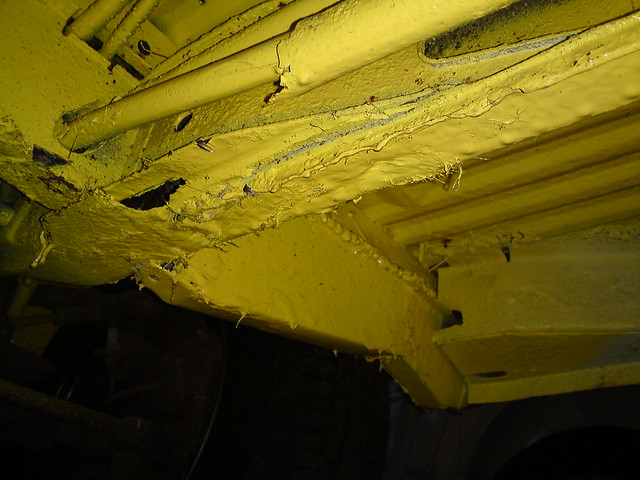
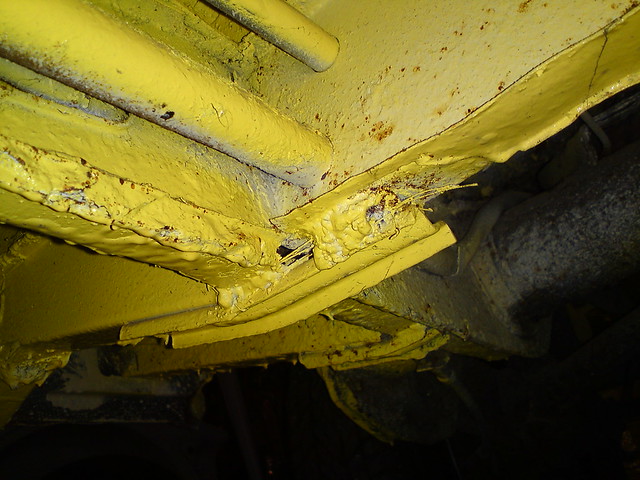
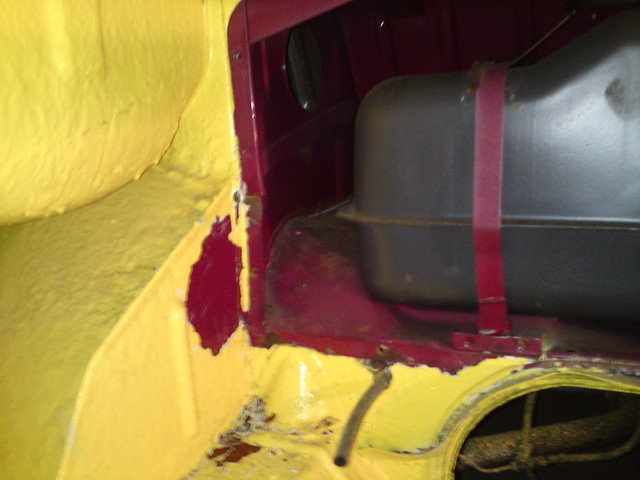
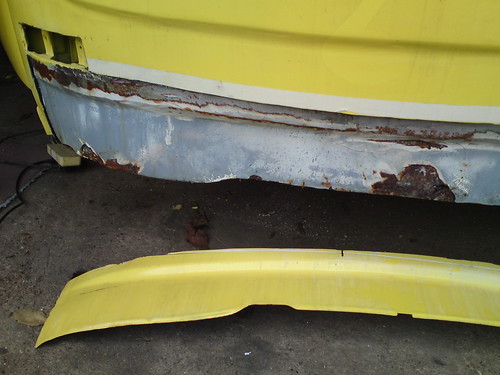
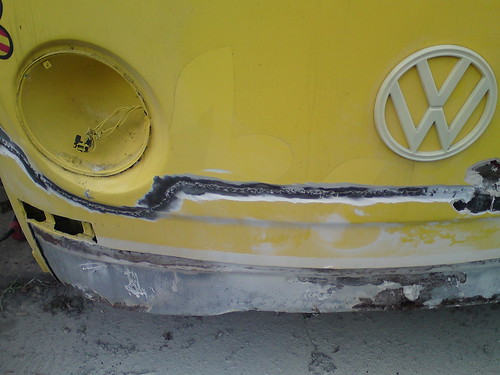
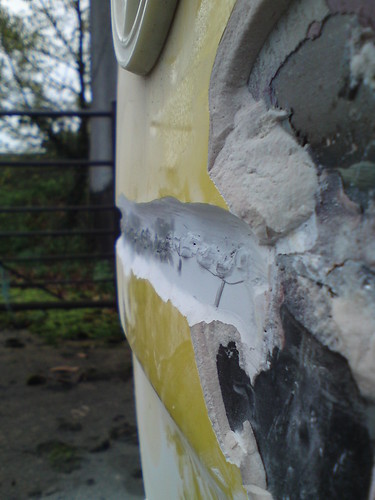
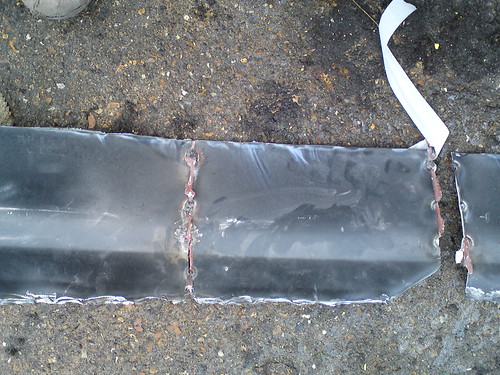
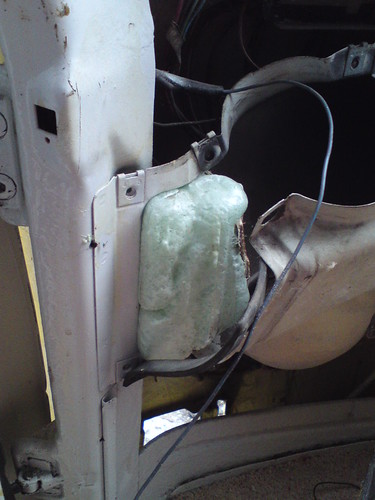
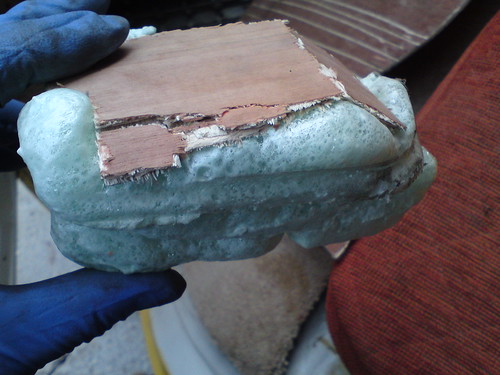
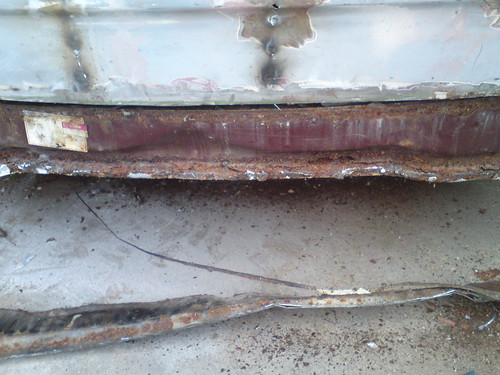
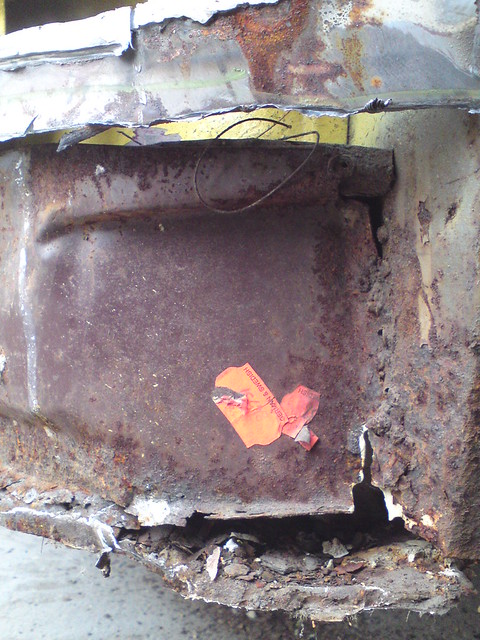
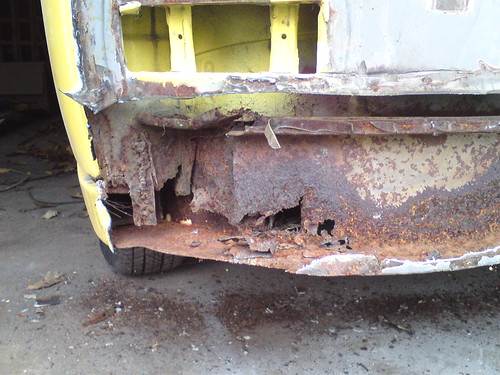
I'm yet to make a serious start on fixing her up, but my initial assessment suggests I'll be spending a few months on my back undoing the bodged welding underneath and getting her fit for an MOT. Long term plan is a full front to back / top to bottom restoration to return her to her former glory. Hopefully she'll be on the road by March next year, although at that point she will still be 'work in progress'

I'll be adding pics to my Flickr page (http://www.flickr.com/photos/darren-cambs/collections/) as progress is made. You can also see my current TR6 project there. I will, of course, add photos here as well.

As Bunty is quite a few slices short of a full loaf... anyone with a set of early bay 'one year only' front brake callipers going spare? Or a fuel tank? Also - I picked up a 'D' spec 1200 engine, thinking I could use that to move the bus around the barn - of course, my 1600 exhaust doesn't fit so I've looking picked up a used silencer that I can shorten and patch up and bolt on to save annoying the neighbours too much!

Pics to on their way...
 
And so to the photos..

You can see why we picked the phrase 'sunshine bus'. Bit too bright in my opinion!

First up, a few pics you may recognise as these were from the ebay ad

Banana Splits stickers (these have been removed now, but were probably only put on to stop the chunks of body filler from falling out anyway!)
5115526278_18d4f2c409_d.jpg


5114925939_1aa2c0537f_d.jpg


5115525450_6b6001929b_d.jpg
 
Spent a bit of time getting the barn cleared out so I've got some room to work on Bunty over the winter, so I should be able to make some progress now.

Have had a poke around under the van to get a plan of what needs to be done. A few pics posted below to show the interesting repairs that have been carried out and need to be rectified - chassis rails repaired with bacofoil stuck on with blobs of bird poo it seems!

Front crossmember - Both chassis rails and crossmembers have been 'repaired' like this:
5114980445_cb53617590_z_d.jpg

5115603466_b95cb0cf11_z_d.jpg


And the outriggers and jacking points are interesting. I won't be using them as jacking points for now as I think they would just collapse into the van:
O/S Rear
5115000369_69556a26f0_z_d.jpg


Also have taken the fuel tank out which is completely shot with rust. Just as well really, as it was secured to the rear bulkhead by a few extra screws for the home brew seat / bed brackets.
Bracket:
5114947345_8fe6b468d2_d.jpg

Removing screw:
5115554622_3e5e4c8458_z_d.jpg

Finally out, a shot that shows to scale how long these screws are. Suppose screwing them into the bulkhead and tank made sure the seat back was going to be 'extra secure' :rolleyes:
5114961897_f7da560e32_z_d.jpg


Found out the original paint colour of the bus. A rather fetching shade of burgundy:
5114943787_9f0b8deac2_z_d.jpg


She's no Banana Split at the moment... looking more like we've bought a lemon!
 
So, uncovering bodge after bodge at the moment and the 'buy list' keeps growing.

Already got new chassis rails and cross members delivered. Was hoping I could save the jacking points and outriggers, but I think it's going to be easier just to buy new.

I'll chop out the rot and weld the new bits in first, and make good the front wheel arches where they meet the jacking points. Aim is to get her on the road by March next year by getting all the things done to get an MOT. Need to source seat belts (although the bodger has patched over the anchor nuts so I'll have to rectify that too).

Got a feeling I'm going to find a few problems with the electrics too as there's probably a few 4 inch screws through the loom somewhere :rolleyes:

Style wise, plan is to keep her reasonably standard - not going for any radical slamming as there are a few too many speed bumps round this way.
 
Finally got a chance to make a start on the bus at the weekend - having got my other jobs done, and making room in the barn.

Will post some pics of the 'progress' below, but the full set / full size can be found here: http://www.flickr.com/photos/darren-cambs/collections/

First job was to cut a section out of the front lower panel so I could get access to the deformation panel and repair / replace that together with the ends of the chassis legs. I was expecting a skim of filler, but the cutting disc seemed to go a little way before it hit metal.

I took a slice out just below the indicators, and was surprised to see another flat panel beneath. Looks like the previous 'restorer' was of the opinion that just welding a panel over the top of the corroded one would magically make the rust disappear.

5171908489_78a5efa658.jpg


So, a little investigation inside the cab after having removed the dash, kick panels, etc revealed a line of welding that I was able to follow outside with my angle grinder...

5171928805_15d3ae7c16.jpg


Once the dust cleared, I was able to see how thick the body filler was on the front. After repairing this properly, the bus should be quite a bit lighter and a few inches shorter.

5172527992_aacc59ee15.jpg


I ground out the old welds and sliced off the patch-panel. Had hoped to be able to salvage this to re-use, but the bodgery was of such a degree that this panel is only going to be fit for scrap.

5172538490_f057bbd5bf.jpg
 
Got the patch off to reveal the original panel underneath... rusted out at the very bottom, but still solid above that as far as I can see.

5171937011_f2bb37db99.jpg


For some reason the repair panel had been sliced through in a couple of places. I guess it wouldn't fit properly over the top of the existing panel. Strange that!

5172547360_f0977a4561.jpg


It always amazes me the lengths people will go to in order to bodge... surely it must be simpler to do the job right in the first place? In the time it took to shape all that filler, it would have been quicker and easier to cut out the rot?

On the subject of bodges, I found some interesting work you might like to see...

When you need to attach a 3mm or 4mm length of plastic to a 1mm or 2mm thick bit of metal, do you really need to use screws 20mm or 30mm long? Exhibit A, one of the 3 screws attaching the home-brewed kick panel to the A-post:
5172545200_1d01805c85.jpg


Then we have a novel way of blocking the heater channel (to stop the draught, presumably?). 'No more gaps' foam filler and a bit of ply:
5172551894_8f57fdef91.jpg

5171950123_919cfe05bd.jpg


Finally (for now - I'm sure there will be many more), we have the mystery of the screw in the pipe from the brake fluid reservoir. Not screwed all the way in, but with a small washer on.
5171887563_63a442f2d1.jpg
 
Spent Sunday chopping the numerous patches out, finally getting to the rusted front chassis rails.

Cut off the bottom of the front panel - well, what was left of that which was tacked to a previous repair panel then covered up with filler. Looks like this crossmember was also replaced at some point in the past. Still had the labels stuck on - 'Klokkerholm' on the white label, and says 'German & Swedish' on the small orange label.

5175745204_b44e86bde4.jpg

5175748552_e5e51ca2a5.jpg

5175148759_0c3a9d4475_z.jpg


Kept the indicator holes there for now to serve as a reference point for when I offer up the new panel. Probably will go for the same size repair panel that was used before, although this may give me some problems if it lines up with the old snotty weld line.
5175158743_e63b561f59.jpg


Just need to tidy up the ends of the chassis rails up now and offer up the new crossmember (when I buy it). That will then give me a reference point for letting in the new chassis rail sections.
5175741852_6fa96fbd75.jpg


Spent the rest of the afternoon scraping off the Schutz stonechip that had been blasted around underneath the cab area. As it had been sprayed on over the old rust, road grime and grease it didn't put up much resistance. A strong breeze would have taken most of it off so I don't think it would have given much protection against bouncing stones. Would have made a great place for moisture to hide though.

I need to make a decision as to what route I'm gonna go down at this ponit with the restoration... Although the front arches are new panels, it looks like they've been welded in too low down - probably because the patched cab floor / seat floor sections are all to cock. I can either live with that for a while and concentrate on getting the bus back on the road as a rolling restoration, or I can go for it and cut out the floors and arches now - more ££££ and won't be on the road as soon as I'd hoped. :rolleyes:
 
dubscum said:
5172527992_aacc59ee15.jpg


fucking hell fire :shock: looks like your braking its back though good work mate


Breaking it's back.... Breaking mine too at this rate!

Got plenty of sheet steel on the way for chassis repairs, so we'll be cracking on soon ;)
 
just read your thread again and had a good look at the pictures ............. stupid good looking volkwagens hiding all that rust :x :D getting there mate, i might book mine in with you afterwards :D
 
Bloody Hell! i saw that on ebay and nearly bid! i think it said all restored just needed engine and some wiring!!!! Good luck with it, like you said its easier to do it right than spend hours bodging!!!!
 
dubscum said:
just read your thread again and had a good look at the pictures ............. stupid good looking volkwagens hiding all that rust :x :D getting there mate, i might book mine in with you afterwards :D

You might be waiting a long time until I'll be taking bookings... :lol:

All that filler and paint - just goes to show you can polish a turd after all!


ironage said:
Bloody Hell! i saw that on ebay and nearly bid! i think it said all restored just needed engine and some wiring!!!! Good luck with it, like you said its easier to do it right than spend hours bodging!!!!

Yep, that's the one. Never believe anything you read on ebay! To be fair, I did expect it to be full of filler, but the price looked quite reasonable compared to some of the buses I'd looked at. I only placed one bid at the starting price and expected to get outbid... just think: for the sake of a few quid more, she could have been yours and saved me all this grief!
 
well it looks like you know what you are doing and i wish you good luck with it, its not fixing the rot thats the problem but un doing all the bodges that takes the time!
 
wow - that's some scary stuff there - thankfully you appear to be handy with a welder and cutting disk and up for the challenge! :shock: :)

Will be watching your resto thread with interest - I have to admit I did chuckle at the random screw in pipe question!

At least karma is in play here.....bodge a van (lol @ screwing through your own fuel tank :lol: ) and rather than pass it off to some mug then walk away, you end up with someone stripping it back and every little short cut that was hidden is posted!

Good luck with the resto :) - btw - where abouts are you? I assume the "cambs" in your username is cambridgeshire?
 
ironage said:
..... its not fixing the rot thats the problem but un doing all the bodges that takes the time!

Oh so true. By now you'd have thought I'd realise it would be easier to buy an honest project that showed all it's rust and battle scars, but no - I have to go for the shiny turd :roll:


lard said:
... At least karma is in play here.....bodge a van (lol @ screwing through your own fuel tank :lol: ) and rather than pass it off to some mug then walk away, you end up with someone stripping it back and every little short cut that was hidden is posted!

Good luck with the resto :) - btw - where abouts are you? I assume the "cambs" in your username is cambridgeshire?

:lol: I hadn't thought of it like that, but it made me smile... yes - gonna post every little thing on here. You've hit the nail on the head though: find one fundamental schoolboy error and you start to wonder what else has been done that might just kill me?

We're west cambridgeshire, just west of the A1. Often see the dubs off to Santa Pod along the A14 which is one of the things that got us hankering after a bus in the first place!
 
Looks like you have your handsfull with that little beauty......

Familiar story though as mine was the same - looked really good, but once I dug a bit deeper :evil:
Like you say, the amount of effort and time to do the bodge, they could have easily have fixed it properly :(

Looking forward to your updates and good luck ;)
 
Hi Andy, thanks for your encouragement - I had a look through your gallery last night, and it does look like a similar situation! Great thing about this site is there are some very well documented restorations with lots of pics... helps me understand what various sections should look like and how panels should meet up. Hopefully my post will also prove useful to someone in the same boat.

OK, update for anyone interested.....

Not had any time to do anything more on her yet as I've been out working trying to earn the cash to buy more of the bits she needs. Did manage to find time to part with more cash yesterday with JK, so I'm expecting a delivery of 1 o/s wheel arch, 2 x front arch closing panels, front valance repair section and inner front valance / crossmember today!

Made a decision to strip out the complete interior as all the cutting and welding I'll be doing on the cab and wheel arches means I'll probably be in danger of setting her alight. Also, as I'm finding so much dodgy workmanship and bodges I need to know exactly what's solid and what's not. I was told by the previous owner that the floors have all "been done", but I'm guessing they've 'been done' with dollops of filler and fibreglass resin (finding quite a lot of what I assume is resin... brittle, pink-tinged stuff??).

Got some time today, so I'll get stripping! Will post some pics later of what I find. I'm intrigued to see how the gas water heater and gas / electric fridge have been plumbed in :shock:

Now.... just need to find some space to store the bus interior. Got a feeling a fair amount of it might be best stored in a skip though!
 
Right, just got in from the barn having stripped out the interior of the bus - got her down to the bare floors now, and just the very rear to get ripped out. Came in as I'm running out of room to stack the stuff up, so need to wait til I can have a look and sort out in the daylight.

Have taken quite a few pics which I'll post here once I've sorted and uploaded them. If you fancy a giggle at my expense then stay tuned.

In the meantime, I thought I'd copy and paste the ebay ad here so it can be kept for posterity....

"VW Camper Van Tin Top

1971 J Reg. Tax excempt.

As stated it is an early bay with small rear lights, indicators at bottom on front and side steps on bumpers.

This is a project that is not finished. Stickers can be removed if not to your taste.

It has been stripped, new floor cill steps in fact all welding about 3 years ago. It was then painted stone chipped and ready for blasting with waxoyle(not done). Bumpers powder coated. Brand new wheels and tyres. I have most parts to complete but you really need to talk to me or visit and view. You bid and you buy so view first (not that you would be dissapointed).

Interior is nearly finished. Trim is nearly finished .Kitchen is nearly finished. If there are any tasks you can't undertake then call me to sort a cost for me to complete.

No engine ( Have got an engine block to be done up if required, not running at the minute)

Vehicle electrics and camper to finish and check. gas piped and ready to connect to bottle, water to pipe and waste to pipe.

This item has had to be relisted due to timewaster who bid on our item was kindly given a month to pay, was given 6 weeks then still did not have the money, so please please no time wasters as this item is a bargain. When completed will be worth approx £8000 to £10,000."


I'm saying nothing. You be the judge... :?
 
it cool that you taking this in good sprit and not going off on a massive rant, it would be interesting to know how much you paid, but i wouldn't tell :p have you been in contact with the person that sold it to you ? just to see what he has to say. Its always going to be a gamble when you buy a 40+ year old bus, but it says the welding has been done, which is a little bit of a porkie pie.

i've owned my bus for a couple of years and it appears its not as solid as i thought and worth £1000plus less then i thought :? i'm going to sell my wheels and buy a better welder i think :D
 
dubscum said:
it cool that you taking this in good sprit and not going off on a massive rant, it would be interesting to know how much you paid, but i wouldn't tell :p have you been in contact with the person that sold it to you ? just to see what he has to say. Its always going to be a gamble when you buy a 40+ year old bus, but it says the welding has been done, which is a little bit of a porkie pie.

i've owned my bus for a couple of years and it appears its not as solid as i thought and worth £1000plus less then i thought :? i'm going to sell my wheels and buy a better welder i think :D

No problem letting people know what we paid for it as it can be seen on ebay... £3500 was what we paid. Probably will need £1000 of panels by the time it's finished, so £2500 would have been more realistic.

It was a bit of a punt: 50:50 chance of getting a bargain or not, and I only have my self to blame for not going to look at it before I bid. Fortunately I'm able to do all the work myself so I'm not forking out a fortune in labour to get someone else to do the work, plus I know it will be done to a reasonable standard.

I could do with buying a better welder myself - got a cosmo / sip jobbie that isn't great, but I've tweaked the wire feed mech a little that seems to be doing the trick for now, plus I'm using 0.6mm wire which is a bit better for body panels. A great site for welding tips and tutorials is http://www.mig-welding.co.uk" onclick="window.open(this.href);return false; - taught me everything I know! lol.

Anyway, gonna post up some of the pics I took yesterday to show what I've stripped out and what I'm left with.
 

Latest posts

Top