Bunty - '71 Tin-Top Sunshine Bus Resto

Early Bay Forum

Help Support Early Bay Forum:

This site may earn a commission from merchant affiliate links, including eBay, Amazon, and others.
OK, here's a few pics I took yesterday whilst stripping out the interior. More on Flickr if you want to have a look at the whole lot.

Interior looks OK from a distance:
5187435541_69f65626f6.jpg


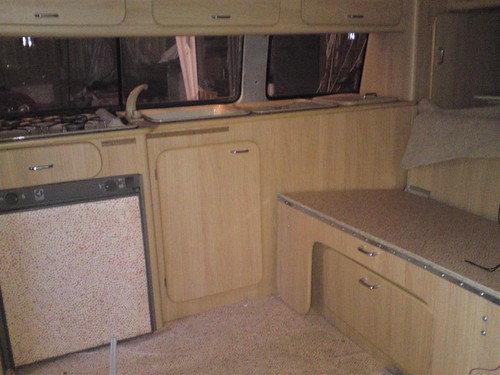
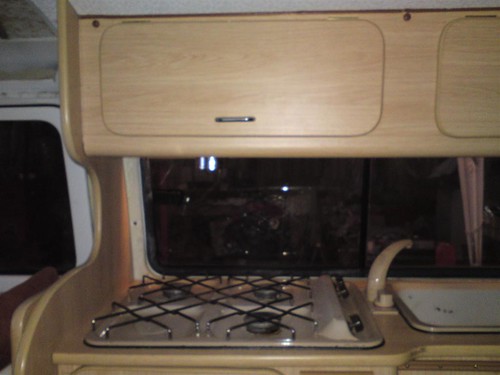
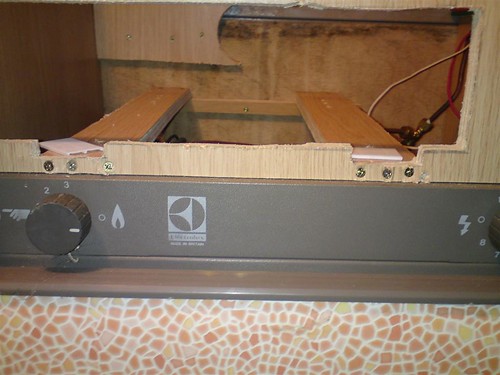
I do have a few concerns about how close the cupboards are to the hob :shock:
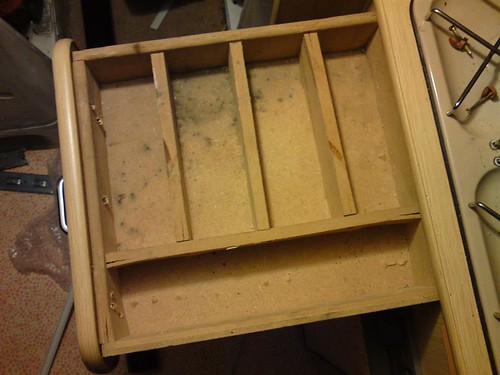
5188035864_2d865584ab.jpg


Home made drawer
5187436051_c5bc7d2d06.jpg


Slide-out bed. Frame made from Garden Decking
5187436337_8b5199033a.jpg


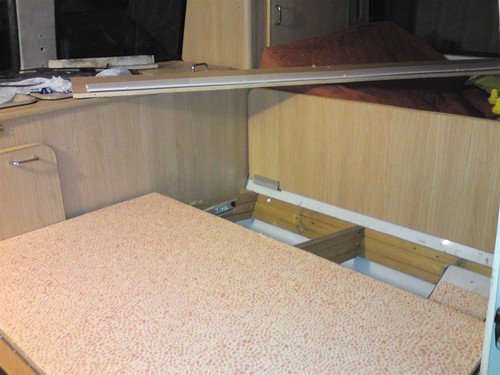
Underside of bed.. bit flimsy, so a bit of 'Rock n Roll' ;) on this could be dangerous!
5187436919_d47b05f827.jpg


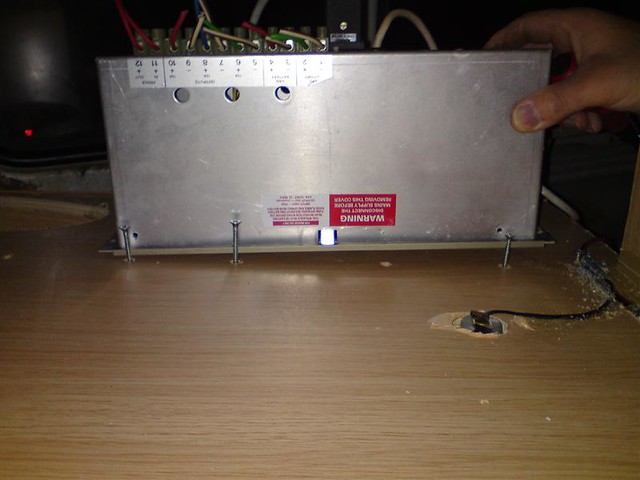
Wonky water heater and the cupboard for the gas bottle
5187437673_d1506a1f41.jpg


Wires and gas feed to fridge and hob - not actually connected to the hob, so I'm glad I didn't just connect up the bottle!
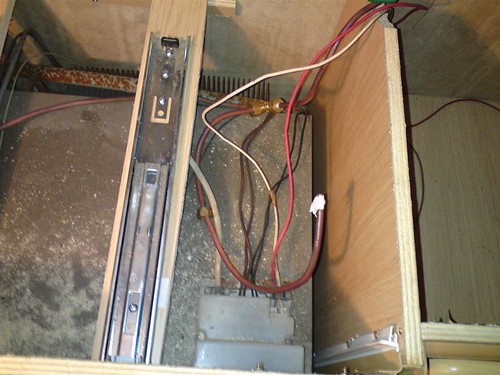
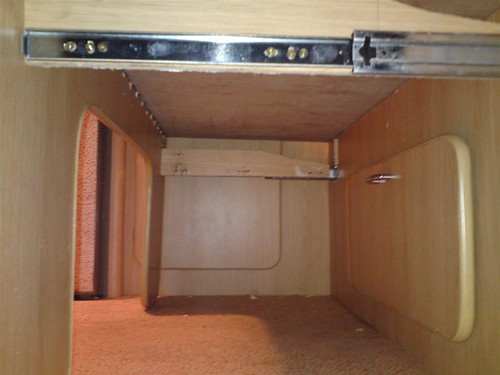
5187438555_7a4961f06f.jpg


Drawer runner
5187439079_6beb5152cd.jpg


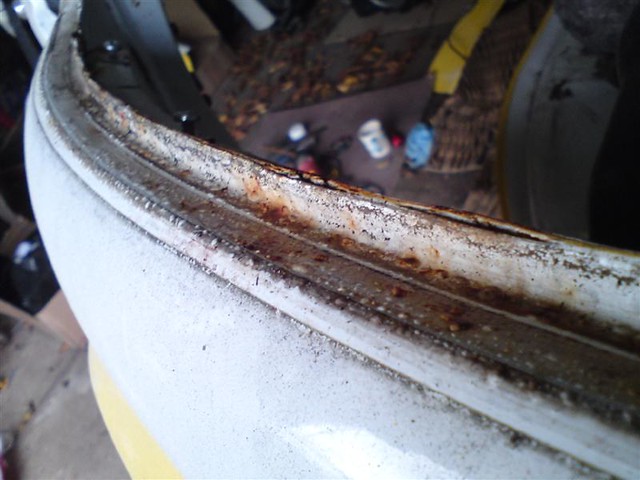
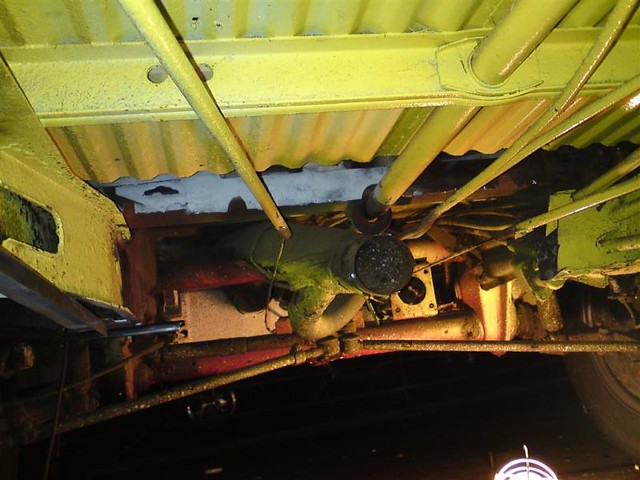
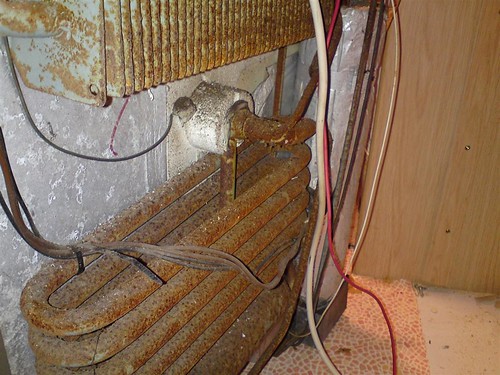
Back of the fridge looking very rusty (anyone know what's running through that coil - butane or CFC refrigerant? Got a feeling the tube could well be porous with so much rust)
5188040352_ac50f22898.jpg


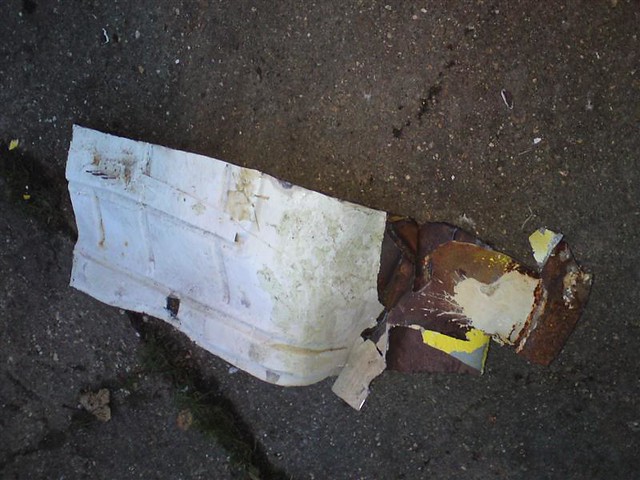
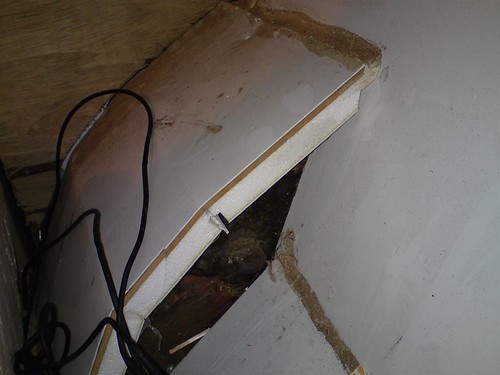
Lots of this Plastic/Polystyrene sandwich board inside the bus. Previous owner manufatured and installed conservatories for a living, so I guess he could get it cheap!
5187441463_d8c8997c12.jpg

5188042018_0c19f8a93f.jpg


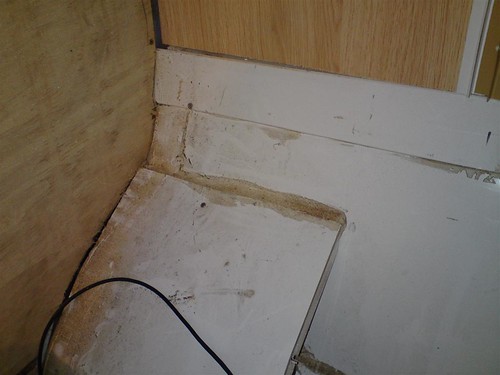
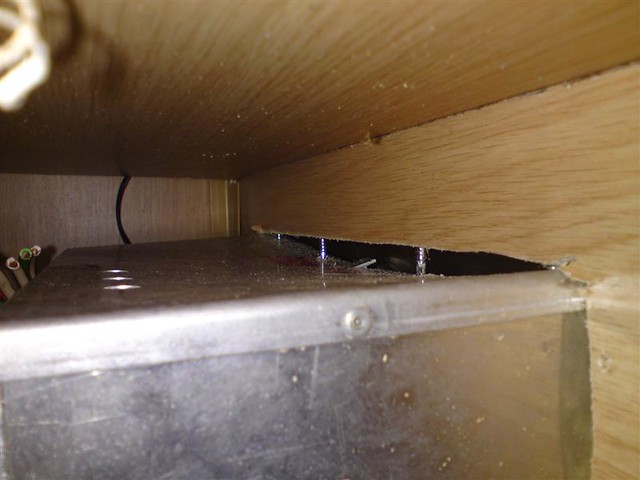
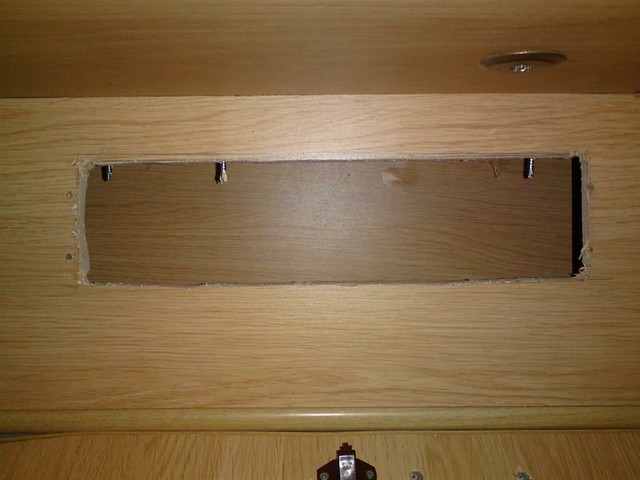
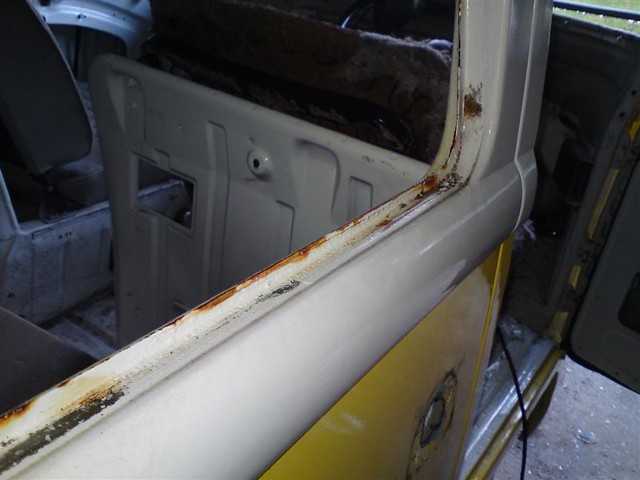
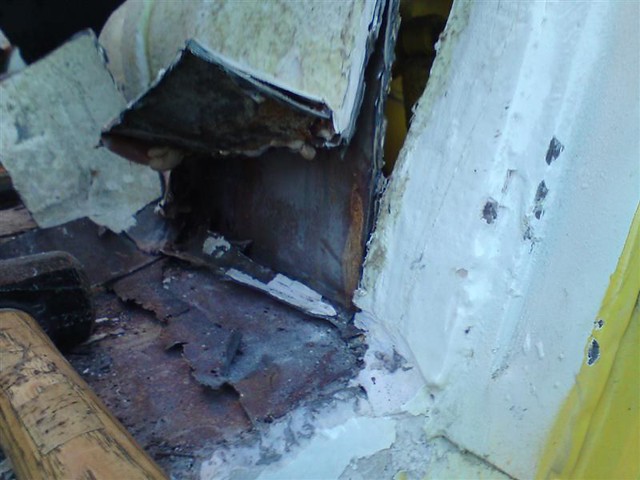
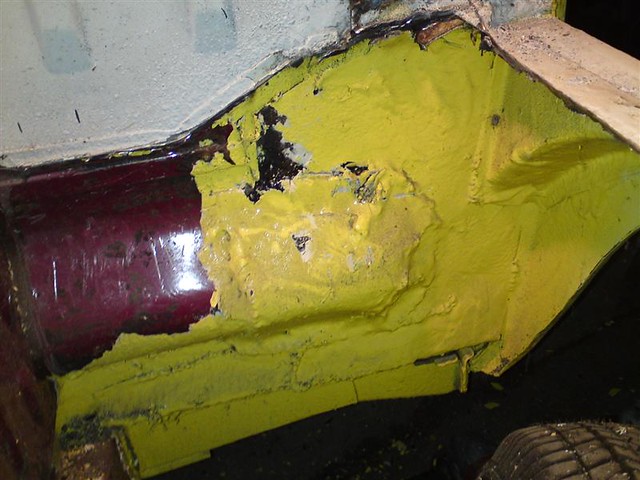
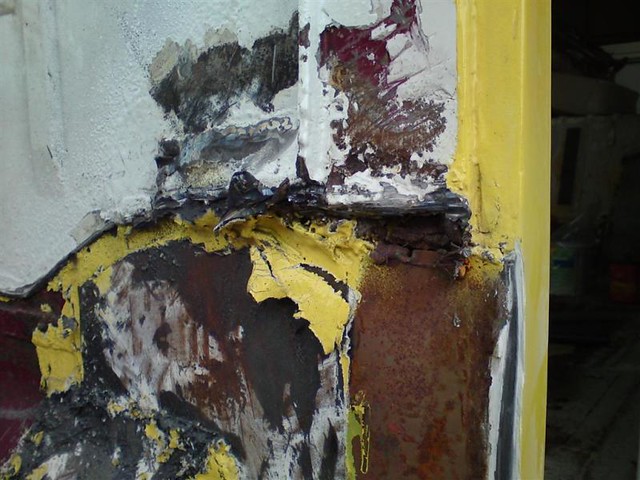
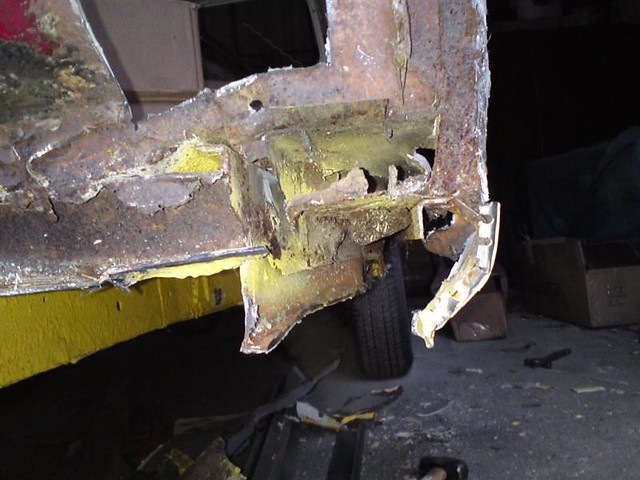
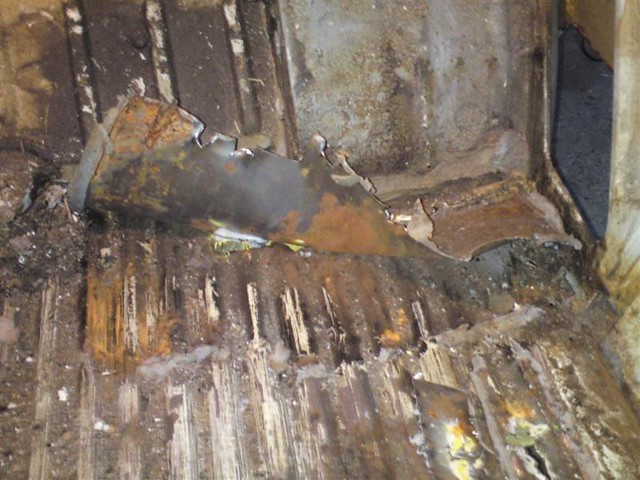
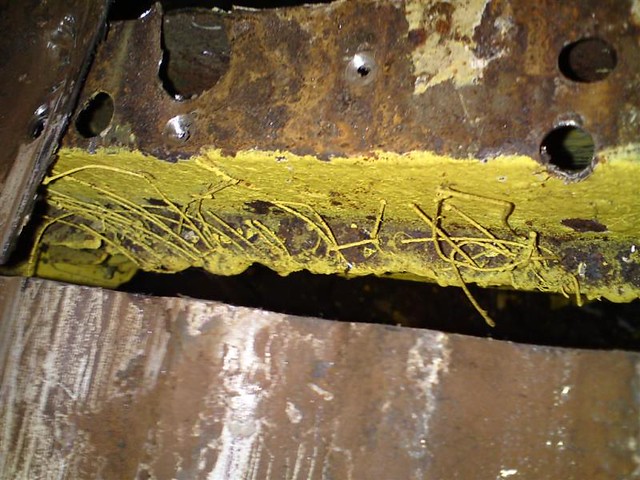
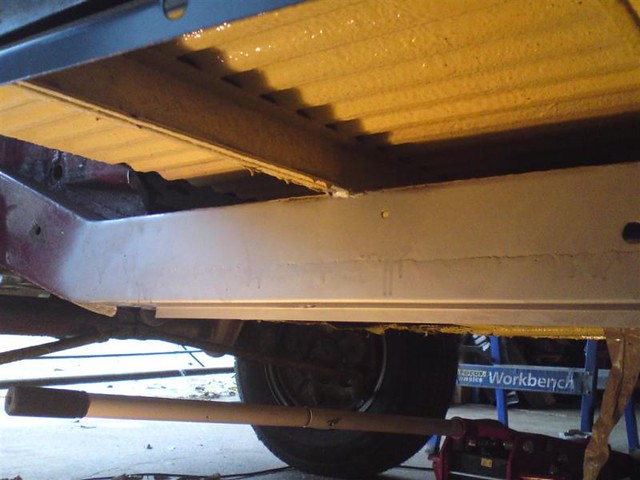
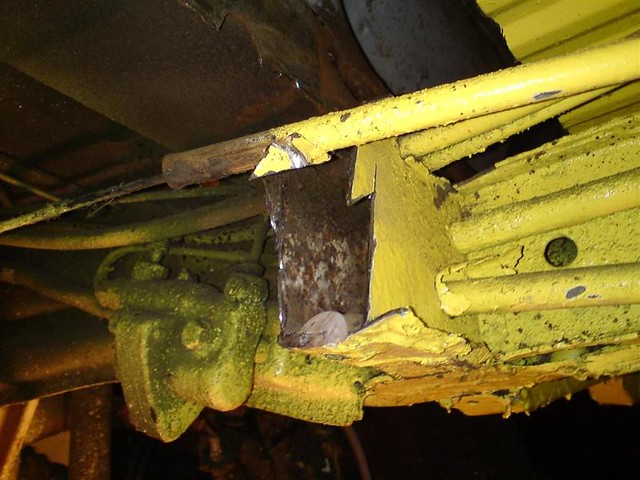
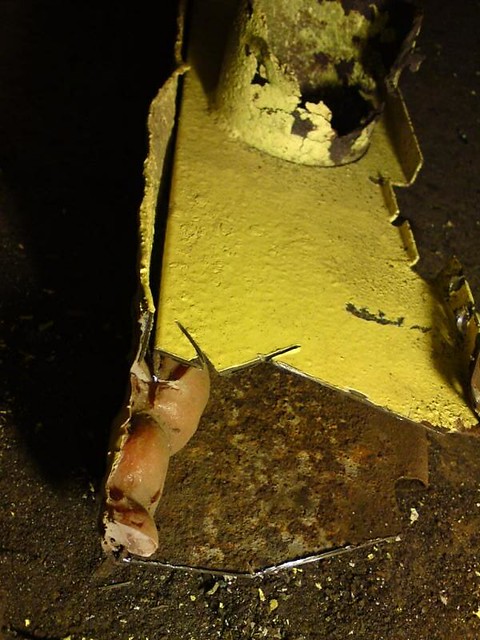
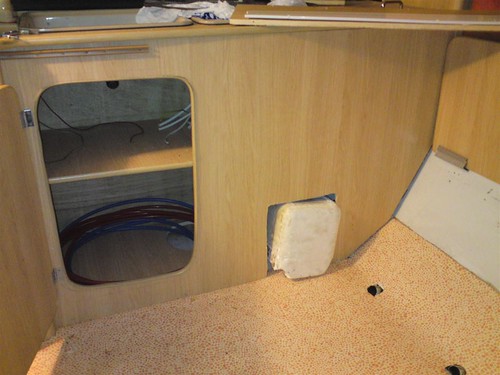
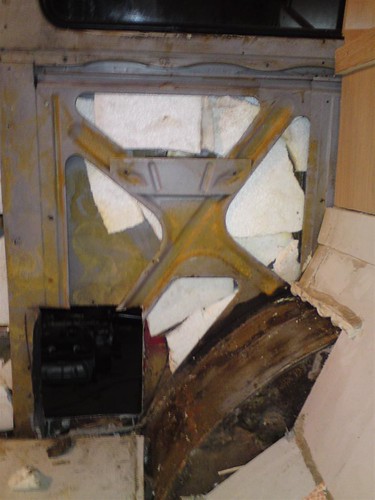
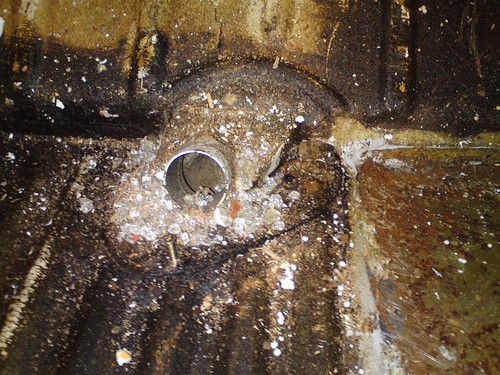
This is the hole the water heater was fitted through :roll:
5188042316_01668af24a.jpg

5188042580_81fdfb0811.jpg


Reinforcing webs have been hacked through... Think I'll close this hole up and graft the webs back in as I've got a feeling that water heater is likely to go bang or poison us with CO.
5187442791_9f629fb6e5.jpg


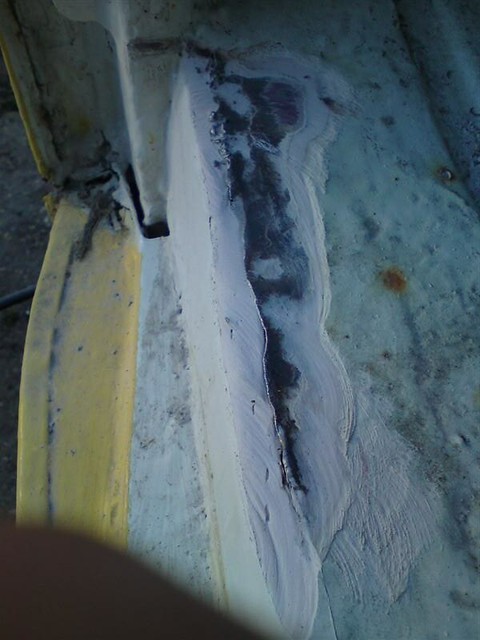
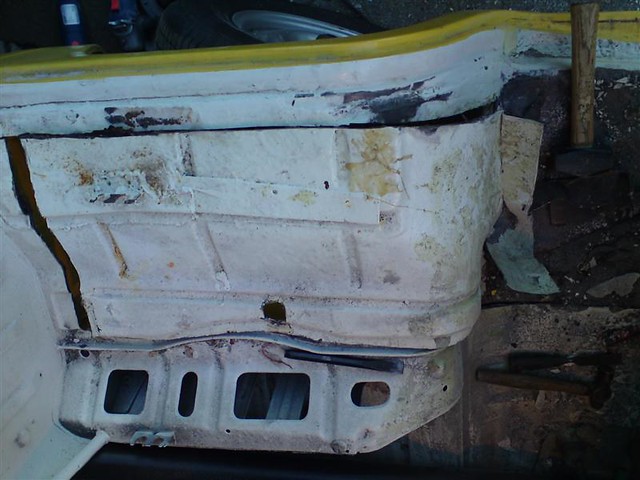
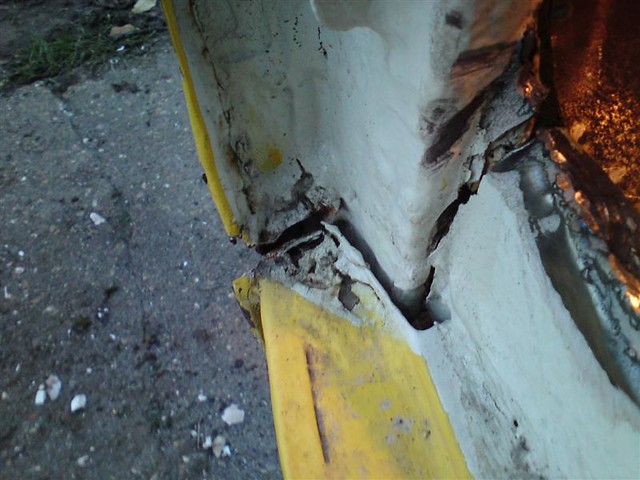
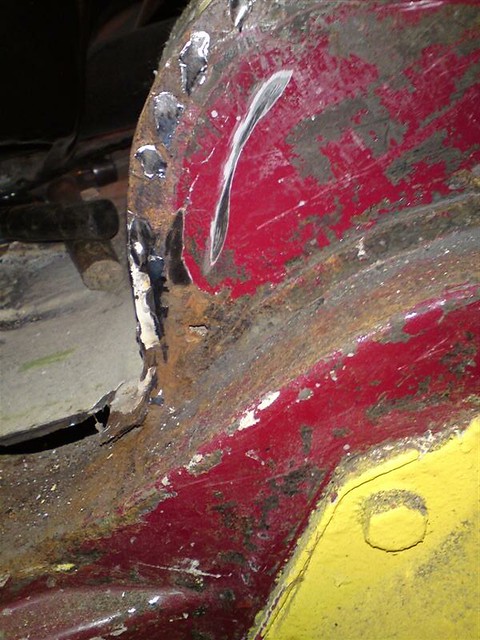
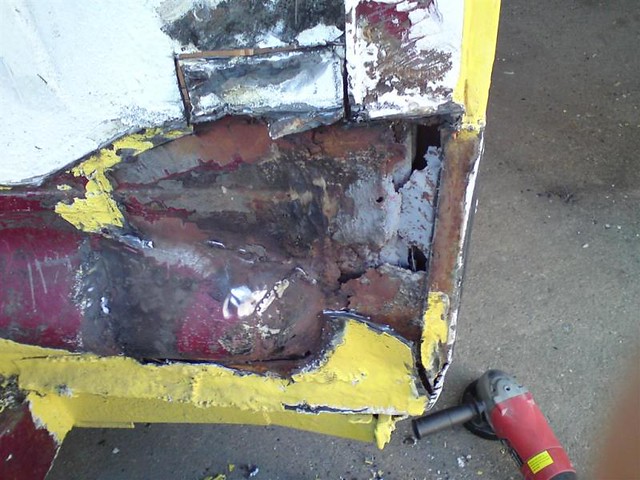
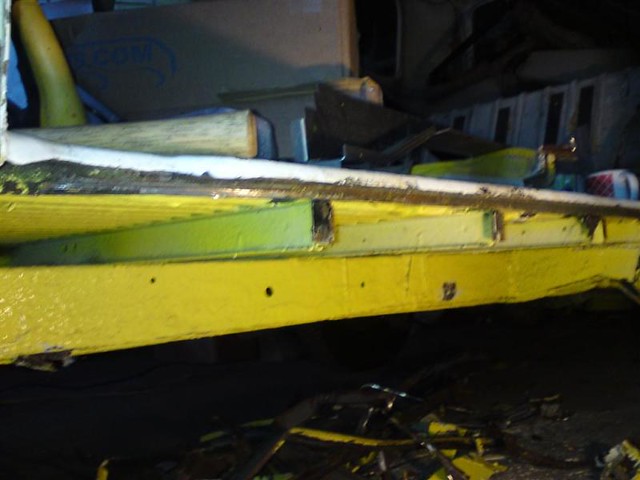
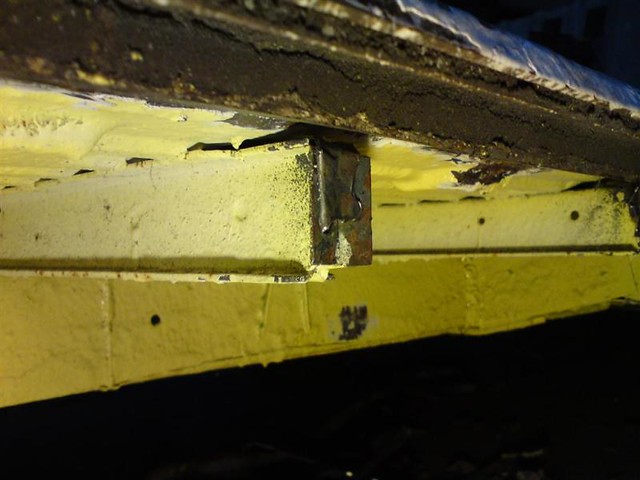
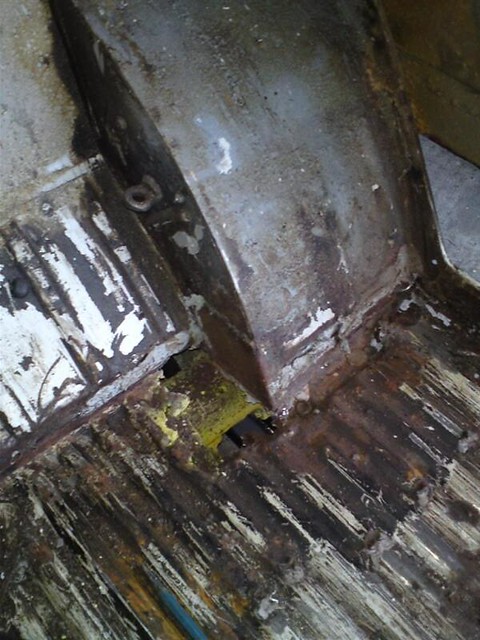
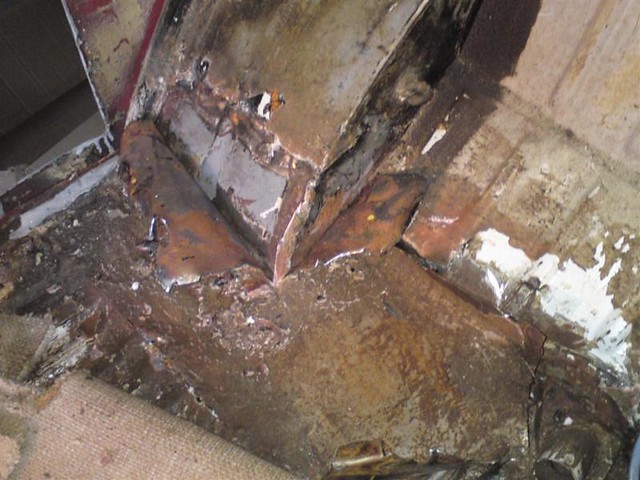
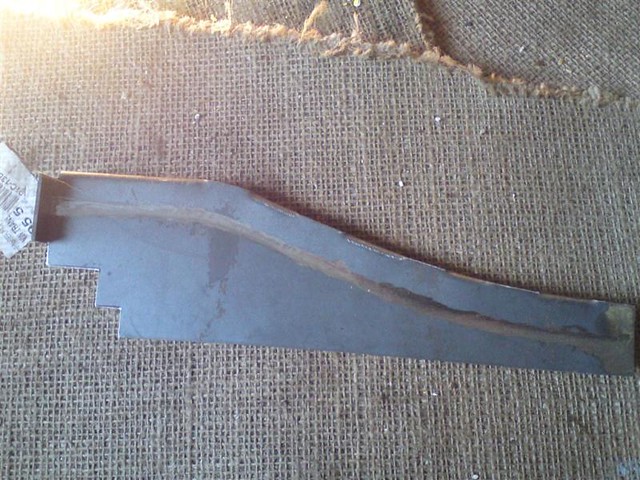
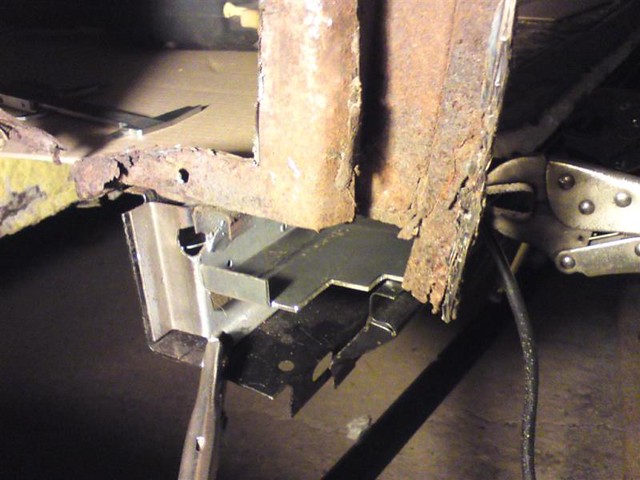
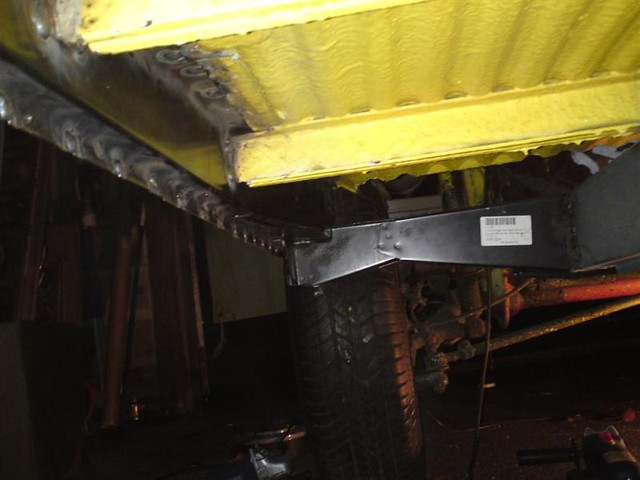
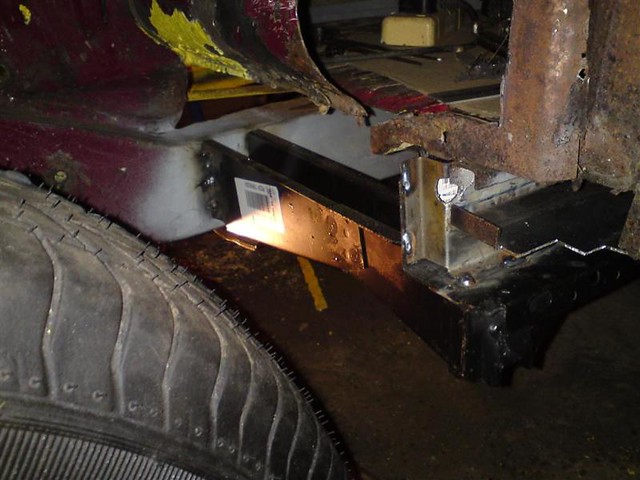
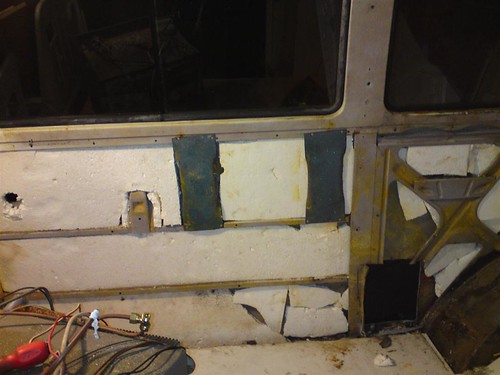
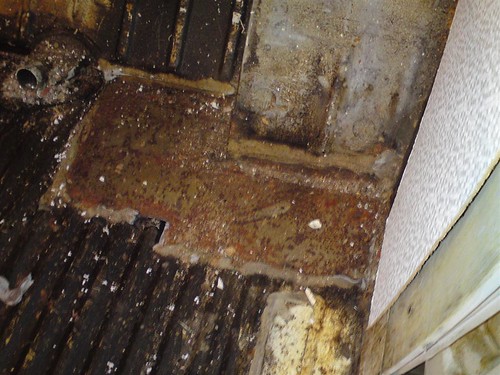
Metal plates in both rear corners - from what I can see, not actually welded but stuck on with resin and sikaflex.
5188044054_8d096f8e0c.jpg


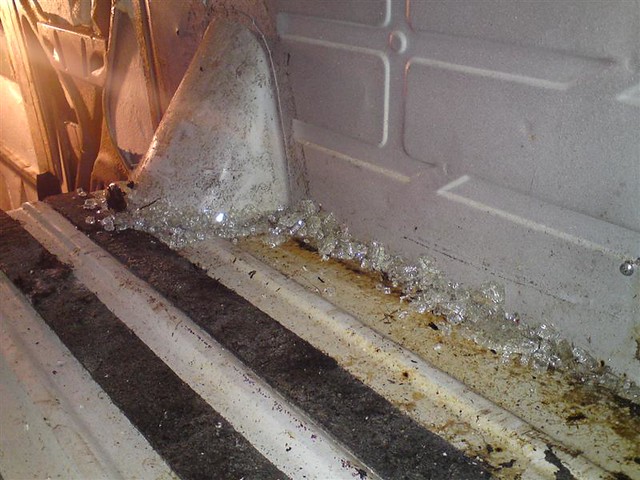
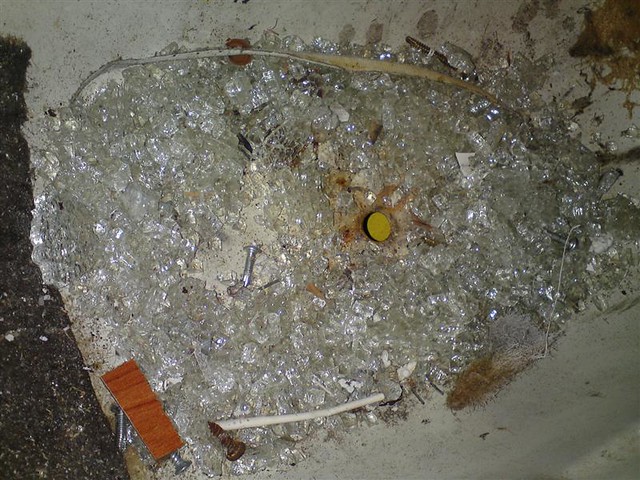
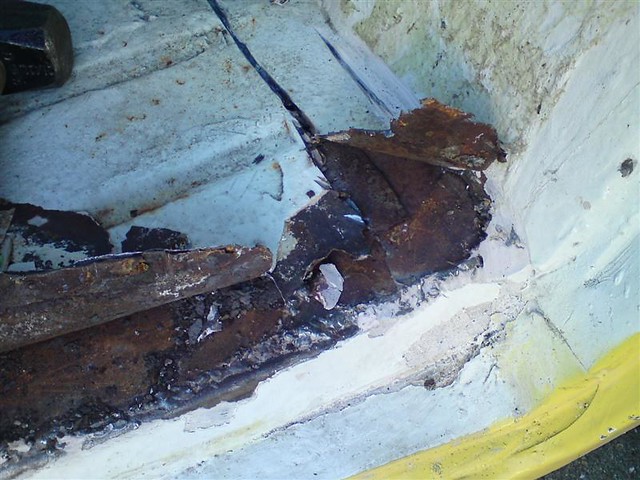
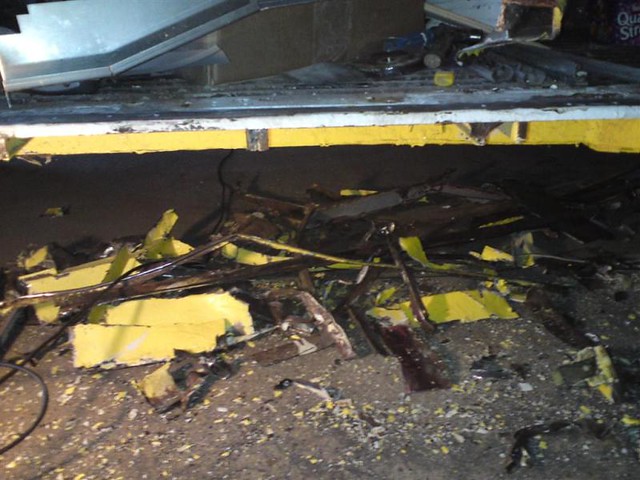
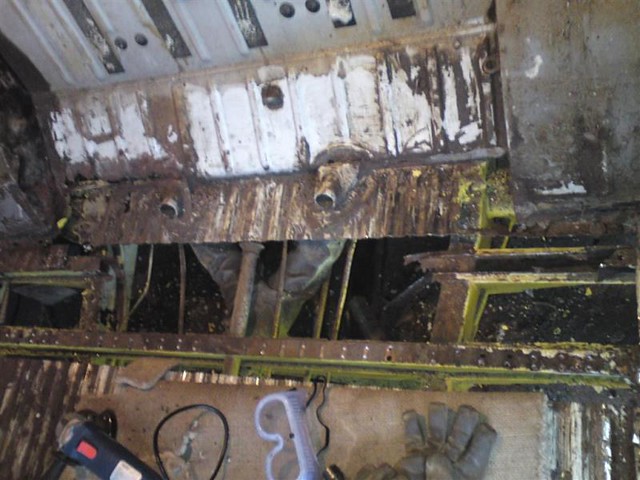
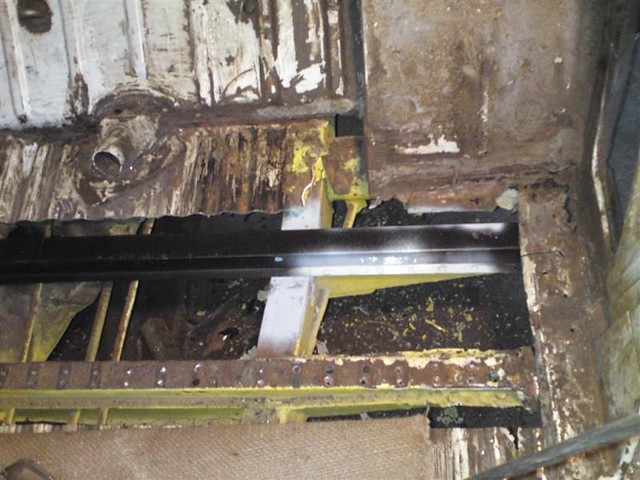
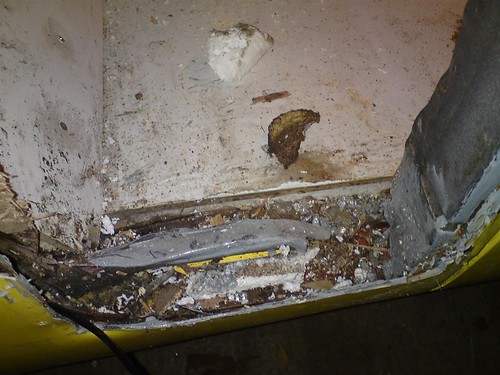
Crap all over the floor when I lifted the floor boards...
5187444249_e667fb06a8.jpg


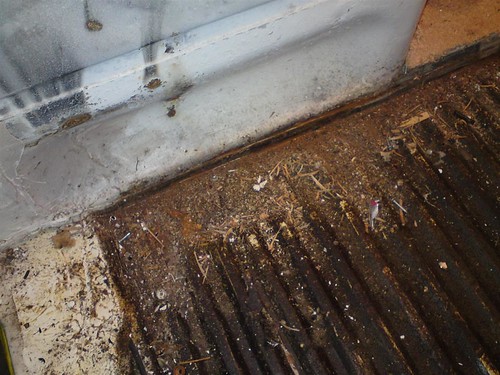
... and glass everywhere. I think he must have smashed a few windows getting them out, but didn't bother to sweep up!
5188033646_e417c9a1d8.jpg


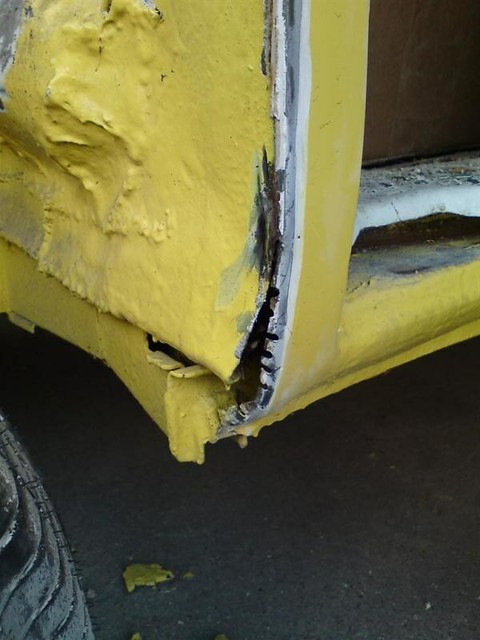
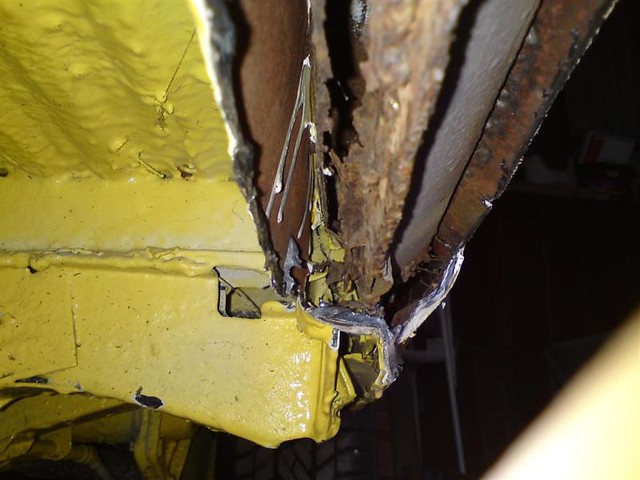
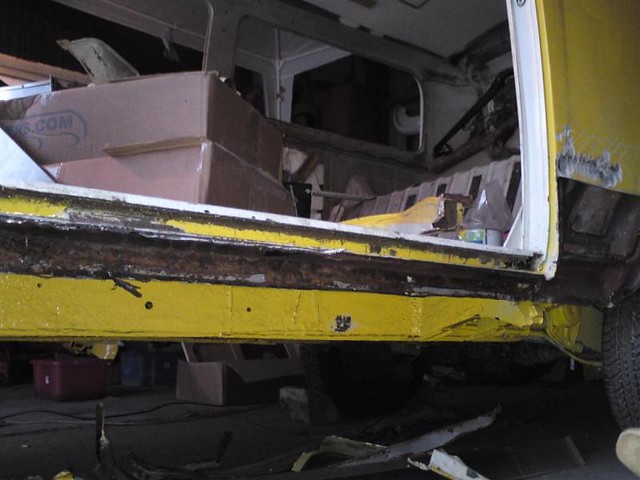
All in all, the floors don't look too bad - need some repairs around the rear arches and the front bulkheads but now the bus is stripped I can get on with the welding without worrying about setting something alight. There is some wax on the panels, but it looks like it's been thrown on by the handful so it's not in the seams and should be easy enough to scrape off.

The workmanship on the homemade interior is shocking to be honest, and I'm not keen on using the fridge, cooker, water heater, etc. May just scrap the lot and run the bus for a season with just a blow-up mattress and a portable stove. Focus for now is getting the chassis and shell sound and roadworthy.
 
I can feel you having a fire soon :D

From what you say, some of the interior work sounds typical of what PO's get up to :(

Most of what you reported is pretty standard fair though and shouldn't cause you to many issues ;)
 
Oh my god, and I thought I had seen it all, fair play to you for going ahead with it, if this was mine I think I would have broken it, you are brave.
I run VW Endangered Species in Trowbridge so we see stuff like this all the time, I am allways banging on about the importance to customers wishing to find and buy a bus to find someone who knows what to look for but they still don't listen.
I have a 130 mig turbo sitting in my workshop that has had a service but I bought a bigger welder for the amount of work we do, it needs a new torch but in the service it had a new mains cable fitted and new liner, passed fine, as a gift to you if you want it, you can have it for nowt, you collect, I was going to put it on flea bay but you have given me hope, there are good guys out there doing good work.

Keep up the good work, anything we can do to help, just call VW Endangered Species on 01225-762528

Rocket Ron.
 
That is a very nice offer you have made Ron :D

This is what EarlyBay is all about :mrgreen:
 
Rocket said:
Oh my god, and I thought I had seen it all, fair play to you for going ahead with it, if this was mine I think I would have broken it, you are brave.
I run VW Endangered Species in Trowbridge so we see stuff like this all the time, I am allways banging on about the importance to customers wishing to find and buy a bus to find someone who knows what to look for but they still don't listen.
I have a 130 mig turbo sitting in my workshop that has had a service but I bought a bigger welder for the amount of work we do, it needs a new torch but in the service it had a new mains cable fitted and new liner, passed fine, as a gift to you if you want it, you can have it for nowt, you collect, I was going to put it on flea bay but you have given me hope, there are good guys out there doing good work.

Keep up the good work, anything we can do to help, just call VW Endangered Species on 01225-762528

Rocket Ron.
This is why I joined this site you can't beat the Vw family feel reading your post brought a lump to the back of my shorts :)
By the way my screen is leaking into the cab on both bottom corners I could be opening a big can of worms soon
 
Ron, that's a very, very kind offer - but one that I'll graciously decline as my welder does the job and I'm sure someone else would find use for the one you have. I will take a note of your number though and give you a shout if I need any help! lol! Thanks again for your kind offer.

I must say this site is certainly a lot friendlier than others out there. Good to see in this day, and something I hope to be able to contribute to.


Well, I decided the interior isn't going to go back into Bunty when she's all done - so it's now on ebay! £40 start price which it's got to be worth for the 12v lights and bed foam alone. Including the fridge and water heater too, along with the various bits of insulation. When she's all done I'll knock up my own custom interior - not really keen on the hob inside the van so will probably go for a swing out arrangement or a simple portable hob. Also will install a proper rock and roll bed.

Not going to have a chance to do anything on her this weekend, but I did manage to pop into our local Wilkinsons earlier and pick up a couple of new angle grinders for £17 each - hopefully they'll last the distance! Just need to get a supply of cutting and grinding discs in and I'm all set.
 
Finished stripping out the rest of the bus, and got the windscreen and all the windows out now.

Had a bit of a problem getting the Zig unit removed. Took the four screws out of the front of the unit expecting it to just slide out, but it wouldn't budge. A little investigation proved that it too had become victim to the super size screws:
5199529182_68d1edfc5c_z.jpg


Two either end had punctured the case, the middle ones just bending it. Haven't opened it up yet to see if any damage has been done.
5198934397_c5bf989e38_z.jpg


This is how far they went into the top of the zig:
5199529868_d649b8e049_z.jpg


Windscreen frame is much better than I expected. The new paint is bubbling up, probably due to trapped moisture. Will need a couple of small repairs inside the cab at either end, but that should be all.
5199530540_5426173874_z.jpg


Window frames have a little rust; mainly in the seams. Quite a lot of soapy water in there, poss washing up liquid, which must have been used to put the seals in.
5199530696_141ab4c837_z.jpg


Now the bus is naked, I can clear up all this broken glass. Fortunately I didn't break any windows getting the out. Looks like PO's favoured method was to smash them though judging from this lot!
5198933149_337039607c_z.jpg

5198932973_6dce90cd19_z.jpg


Had some steel delivered today so now the bus is stripped I can get cracking with chopping out the rot and letting in new metal.

Hope to be able show some constructive progress over the weekend!
 
Made a little progress this afternoon. Was trying to take the afternoon off, but was slowed down by numerous emails and phonecalls... Why does work always have to get in the way? :roll:

Bloody cold out ther today. Having to work outside as too much stuff in the barn I'd rather not cover in grinding sparks or set light to.

Have managed to cut out the passenger side cab floor and under seat panel. Took ages as I had to go through numerous patches once I'd got through the filler. Not snowing here yet, but I looked like I'd been caught in a blizzard with all that dust.

Pics ....

As mentioned before, the arches look like they're new panels, so trying to take them out without damage. Had to grind through filler to try to find the seam.
5209226133_c614a41933_z.jpg


Filler quite thick (surprise), so ended up chipping it out with a chisel.
5209825912_f46a174d62_z.jpg


Lifted the floor seam to find....... another floor. Will have to rename this bus 'Patch'.
5209826136_4756108918_z.jpg


Three sheets and blobby weld half an inch thick in places - perhaps the reason the bottom door gaps are large enough to lose a small child through. The arches were welded on below all this lot.
5209826314_abe2695bac_z.jpg


5209226939_7ae1c38189_z.jpg


Sliced around the seat panel, making sure not to cut through anything else underneath, and not into the wheel arch.
5209826770_ae8e9ebc85_z.jpg


Once that was out, I found out the wheel arch wasn't actually attached to the A-post. Probably didn't reach far enough due to the half inch thick floor, so it was just bodged with filler.
5209826902_51e7a5a8dd_z.jpg


The remains
5209227383_d8f98e824c_z.jpg


A strong breeze blew the stonechip off the chassis. Don't think that was genuine Shutz... more like cheap supermarket own brand 'Shitz' :lol: . Not too bad under here.
5209828406_ce35a535fe_z.jpg


Got this lot to tackle tomorrow. Need to get through the filler, shutz, seam sealer, paint, fibreglass resin and all that so I can try and pick the rest of the wheel arch off.
5209229043_b52b81e3fc_z.jpg


Then on to cutting some rot out of the front chassis legs and making good there so I can get on with rebuilding this side.

Happy days!
 
So annoying when you try to remove a panel only to find the old one underneath :evil:

Yours is looking par for the course so far so you are not on your own with what you are finding ;)
 
Haven't made a lot of progress over the last week or so because of the weather.. got fed up with freezing my nuts off in sub-zero temperatures. Bit of a thaw here today, so I've been cracking on trying to get back to something solid and original to pick up a decent reference point to work from.

Realized I wasn't going to be able to save the jacking points that are on (were on!) the bus as they've been welded in the wrong place with half a kilo of welding wire, so easier to chop them off and start with fresh ones. Got some new ones delivered from JK earlier this week.

Here's a few pics of the progress to date. Don't get too excited as it's still chopping out rather than new metal going in, but once I've got the sills out I can start welding some of the plethora of panels I've been accumulating...

Got the wheel arch off to tackle this mess..
5217927102_af0502c0da_z.jpg


5217927238_6583dfba31_z.jpg


Taking a few patches off, delving deeper, looking for some useful reference points..
5217927358_d37a463a46_z.jpg


Couldn't really find anything that looked right, and there seemed to be a bit of a mucking fuddle going on inside the sills, so I sliced a bit out to have a look...
5231320773_6ba5461998_z.jpg


Aha! That's right - original rusty sill is inside the bodger's new 'freestyle' sill :roll: . No cutting out and replacing stuff for him - just slap a piece over the top and the job's a good 'un.

So, after attacking it with the grinder (getting fed up with hot sparks dropping in my ears - I'll have to dig out the ear defenders I know I've got stashed somewhere), we have from left to right: Bodged inner sill / Rusty remains of original Inner Sill / Rusty remains of Strengthener / Original outer sill / Bodge outer sill. You'll also notice in this pic that this rear jacking point is actually a front one - as the sill bodge took the level of the sill about 2 inches lower than the line of the original sill, PO needed to bodge the jacking point too, so a front one was the order of the day :lol:
5231911618_370353d2ed_z.jpg


Got the original outer sill sliced off..
5231321545_0bbe91a57f_z.jpg

Not actually 'original' as it was a replacement from sometime in the past. However, that one was put on after taking the old one out!

Not the clearest of pics, but this is the taken looking at the front end of the n/s sill where it meets the front wheel arch. You can just about make out the line of the original B-post. Compared with PO's freestyle bodge up, it's easy to see why the wheel arch left such a gap between the doors.
5231912484_cc2dc8fbe9_z.jpg


Hopefully tomorrow I should have the strenthener, inner sill and inner-inner sill out so I can start to fit up the new sills.

With hindsight, I think I'd have been better starting from the middle of the bus - doing the sills first before I tackled the cab floor / wheel arch as I've had to go all the way back to the rear arch to pick up a useful reference point to start rebuilding from! :evil:
 
Good progress you are making there, watching with interest as i'm working on the sills/outriggersof our bus. whats the upper sections like such as the gutters? the worst part is cutting out the PO's work, i enjoy putting the new metal in.
 
ironage said:
Good progress you are making there, watching with interest as i'm working on the sills/outriggersof our bus. whats the upper sections like such as the gutters? the worst part is cutting out the PO's work, i enjoy putting the new metal in.


Gutters seem to be OK (seem to be! lol!) - I'm concentrating on the lower 6 inches at the moment, but I guess the upper rear corners will need a little work.

I'm looking forward to getting to the stage where I can start letting some new metal in. Much more rewarding than cutting out the old stuff.
 
N/s sills are all out now, just a few small remnants to remove from the ends of the top hats:
5235057678_90b0b5e629_z.jpg


The middle top hats are in pretty good nick. The very front one is almost non-existant, and the rearmost one that has the outrigger attached is very crusty:
5234464675_0ba1c23b12_z.jpg


Had a poke around on the n/s chassis rail and a big dollop of fibreglass / filler dropped out. Probably some corrosion under the remains of the front jacking point, but I'll tackle all that once the sills are on so they provide a reference point for the repairs.
5234464985_1465bd6591_z.jpg


I'm building up a nice pile of debris under the bus now... :lol:
5234465307_b19e4e772c_z.jpg


For a bus that had had "all the welding done, and just needs blasting with waxoyl", there's quite a lot of welding to do! Here's a list of the panels I've bought so far (none of which has yet found it's way on to the bus yet):

- Front valance
- Front Crossmember
- Steel to repair front chassis legs
- N/S cab floor
- O/S cab floor
- N/s front seatpan / wheelarch
- O/s front seatpan / wheelarch
- N/s Wheelarch closing panel
- O/s Wheelarch closing panel
- N/s inner, middle and outer sills
- O/s inner, middle and outer sills
- 4 x chassis repair sections (under floor)
- Universal floor panel to repair rear floor.
- N/s B-post inner
- N/s B-post finisher
- O/s B-post inner
- O/s B-post finisher
- battery tray

I'm also going to need a couple of top-hat sections, and probably rear wheel arches and lower rear corners before I'm done. :roll:
 
Darren,

I am amazed at what you are finding, Big respect for the work you are doing.

I really hope the PO who did the work can sleep at night....... :evil:

God help any conservatory's he's fitted :shock:
 
Great Work Darren

Unbelievable how someone can be that bad at everything he did on the bus! The interior work was shocking, as is the welding work! Must be satisfying to know that once all the hard work is done you will have a solid cracking bus 8)

Keep up the good work, and keep the pics coming.

Just
 
unbelievable amount of work on this, how can you get filler so thick? i have a feeling my front panel is very similar to this but maybe not as bad, but i'll leave mine for another day

i'd be tempted to send the previous owner a few pictures on the three year old welding with a thank you note.

the interior is something else too.

good job on the resto so far bud
 
Bloody Hell only just seen this thread, I've seen some bodges but this really is bad and the description defies believe, I certainly couldn't sell a bus on if it had filler in it like that.

If its a 71 as you say then the Burgundy colour is likely to be Chianti Red which is a really good colour.

Best of luck with the project and if you need any spares let me know, we have a few bits lying around :mrgreen: :mrgreen:
 
Gents,

Thanks for all your words of encouragement - it certainly helps keep the enthusiasm up!

With regards to the comment about the conservatories this guy builds... my thoughts exactly! :msn4:

Gotta admire the guy's ability with the filler though. Must have had years of practice to be able to get it on that thick.

I'm certainly going to need a few bits and pieces Graham, so I'll give you a shout when I know what I'm missing. As for the colour, yes I think it is Chianti... think we've made a decision to go orange up to the gutter line and off-white roof. Will be a little while til she's ready for paint though, so that could change.

Although Christmas, New Year, weather, etc has slowed progress lately I have now got to the stage of starting to let a few new bits in. Will post some pics up later, but the rear top-hat is in, and the n/s sill strenthener is tacked in (JK 'zig-zag' type, but I've cut the zig-zag out and will make up a section with the correct curve).
 
A few pics of the progress....

Patch in rear n/s corner being removed:
5320934885_903283281a_z.jpg


... to reveal this:
5321538706_b7e94ba92c_z.jpg


A similar story in the other corner:
5320936189_768d9e7dae_z.jpg


Sliced out a section of the floor, and out with the rear top hat:
5321539084_98532a5f0e_z.jpg


Had to laugh at the standard of welding that attached the jacking point here... Think this was done using the 'close eyes, pull trigger, wave torch around and hope' method of MIG welding :lol:
5320936639_84f0ced758_z.jpg


Finally got the first piece of new metal in.. rear top hat plug welded to the outrigger (which is solid so being kept).
5321539300_c8d882a094_z.jpg


Feel that I'm starting to make some progress now ;)
 
Time for a quick update.... Finally getting some new metal in instead of just cutting grotty stuff out. Seems I'm not progressing as quickly as some of the other restos on here, so I'll have to get my finger out!

Sliding door track put in, making up my own 'S' shaped curve instead of the 'Z' shaped section of the repair panel.
5324929846_fb32890699_z.jpg


Also had to make up forward section of the track to follow the curve
5345670142_a109c88b42_z.jpg


5345059221_b23015ed5d_z.jpg


Then there was the rotted out Chassis Rail that needed some attention before I could fit the jacking point. Rather than replace the whole rail, I cut out the bottom couple of inches and grafted in a new section. The section under the jacking point tie was also repaired.
5345059497_cc37316b8c_z.jpg


New inner sill plug welded, and jacking point welded in to tie it all together. At last I have a solid reference point for this corner that will enable me to get the B-post, bulkhead, top hat, wheel arch, cab floor and everything else back in! :lol:
5350416060_3eac8319a7_z.jpg

5350415862_f585892eb7_z.jpg


Now need to replace the front crossmember. Old one has been mostly cut out now, just a small piece where the brake pipe and wiring loom run left to remove. The sheathing pipe that carries the loom has rotted out, so that will have to be replaced with something - maybe a plastic pipe?
5350416226_b02cd7d7f0_z.jpg

5349804395_6e18fabca9_z.jpg


Evidence of previous owner's 'repair'... big dollops of filler and a strip of thin sheet tack-welded on. Yep, I'm sure the MOT man would have been happy with that :roll:
5350416720_b6049d5b0e_z.jpg
 

Latest posts

Top