- Joined
- May 22, 2009
- Messages
- 519
- Reaction score
- 2
Hi all, I lurk on here from time to time but don't post too much. All that is about to change, my Crossover has been in need of bodywork for a few years and this year its starting in earnest.
When I bought her about 5-6 years ago she looked mint, no surprise to find she has been well and truly bodged, lots of filler, wire mesh, fibreglass and dodgy patches, the usual story.
Last year whilst out of work I made a bit of a start, I've never welded outside of a college evening class and bodywork has been limited to filler and a respray on another car. I got a used MIG and attacked the drivers door, ending up re-skinning and replacing the bottom 3rd inner thanks to the help of Mark Paxtons hot to restore a VW bus. the drivers door got replaced as I don't think you can get the panels and a lick of red oxide to keep it going. All good so far and I was impressed with the re-skin, you would never have known.
This year I needed to start on the bottom 6 inches, all the typical places. I made a start on the N/S arch but as I cut more away I was getting a little worried I was losing reference points, I decided to rope a friend in who is a god at car modifying/resto work. He's out of work at the mo' so I paid for a days work with him and I think I'll be employing him a lot more as he makes light work and knows what he's doing where I keep getting scared about what I'm cutting off!
I'm limited to weekends as I don't get home early enough in the week and the driveway so I think she's off the road for maybe 2 years. I'm not looking for show winning, just solid and clean, peace of mind. I miss camping in her already
So, here's the first weekends work, expect not very regular updates, but I want to keep a diary of the work.
Do any of you manage to rent space to store and work on you bus? I don't know where to start looking? I'd love to be able to store the bus in a farm building or something and go work there at weekends, it would save my neighbors hating me and have to worry less about noise/mess etc.
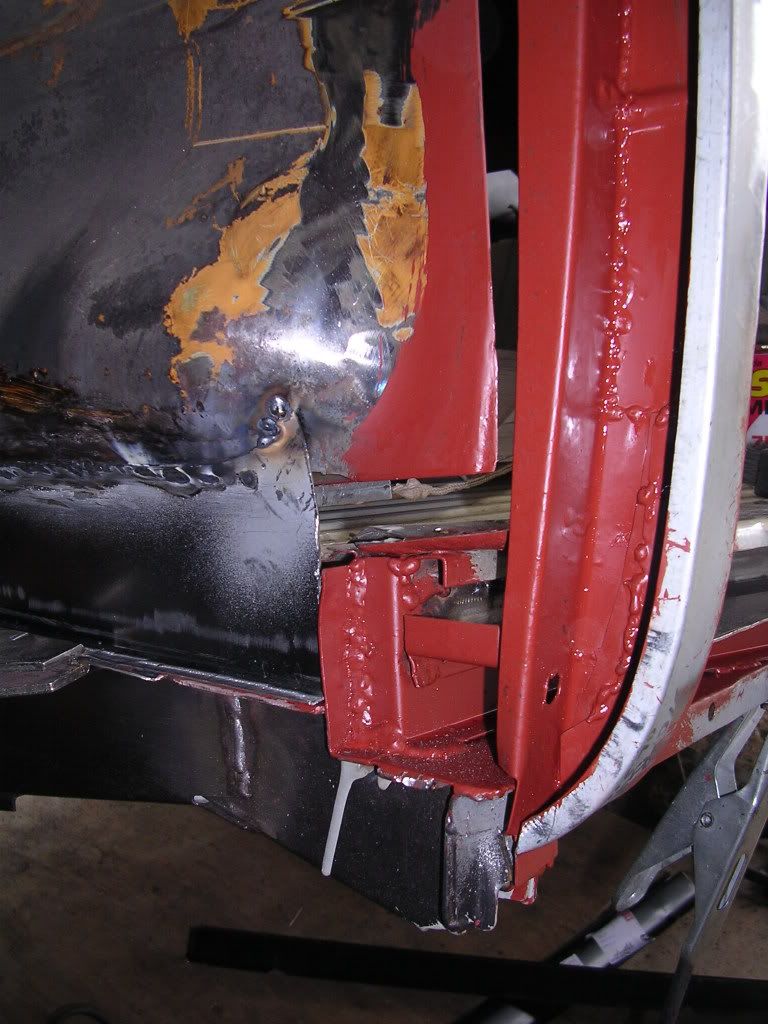
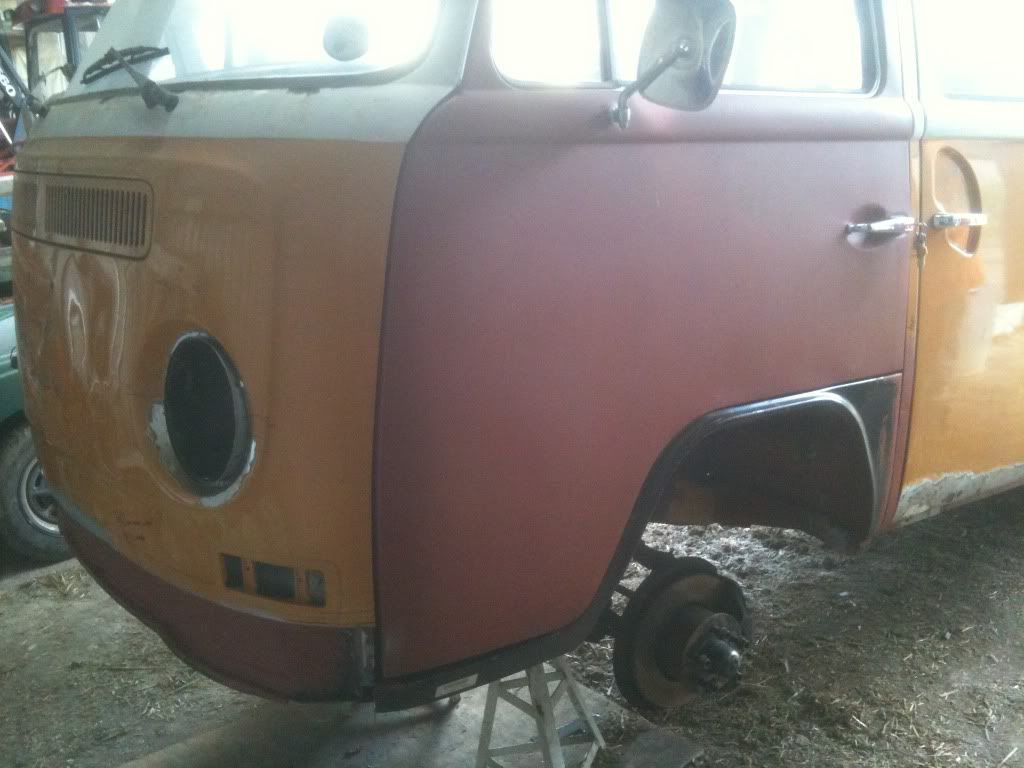
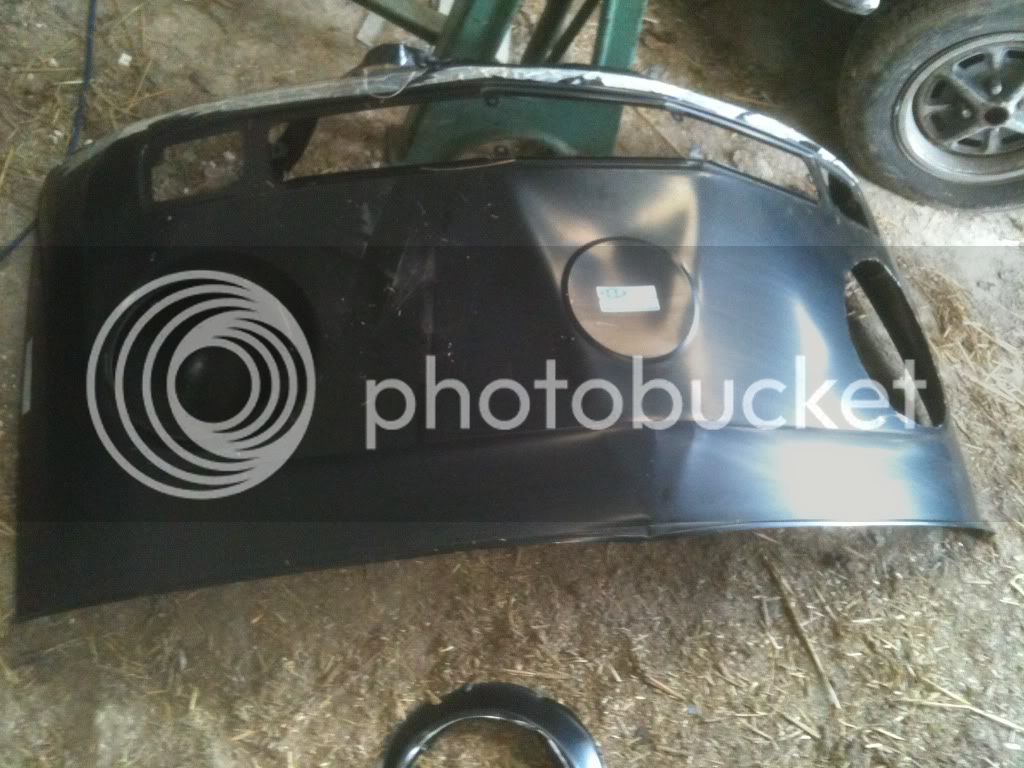
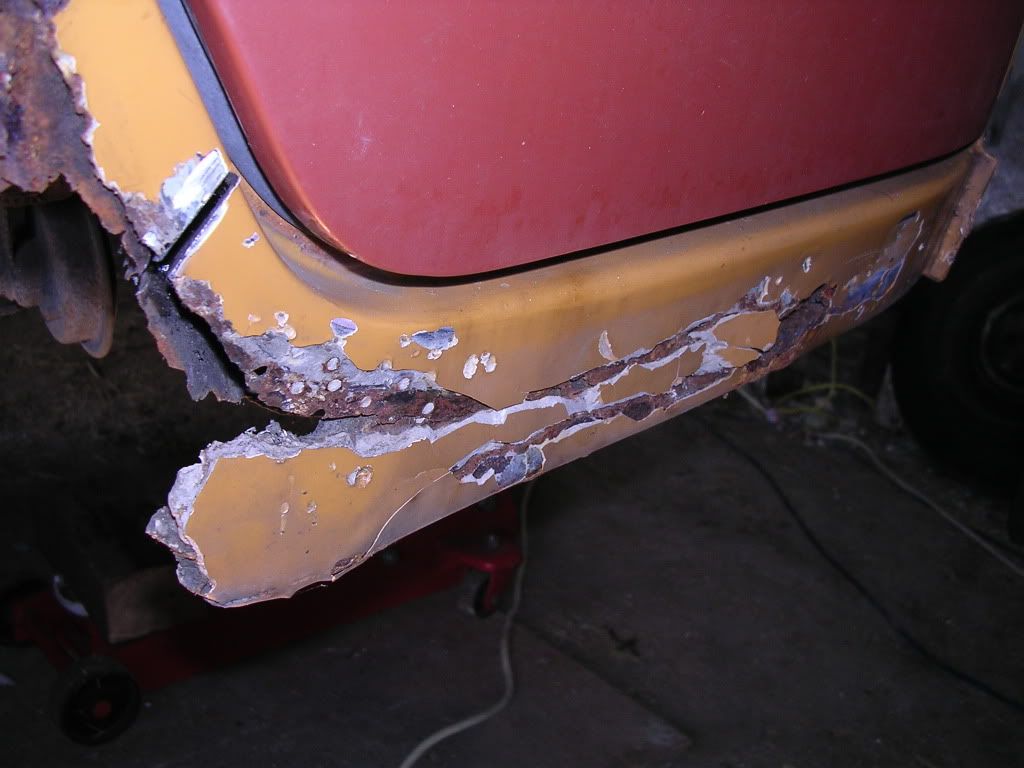
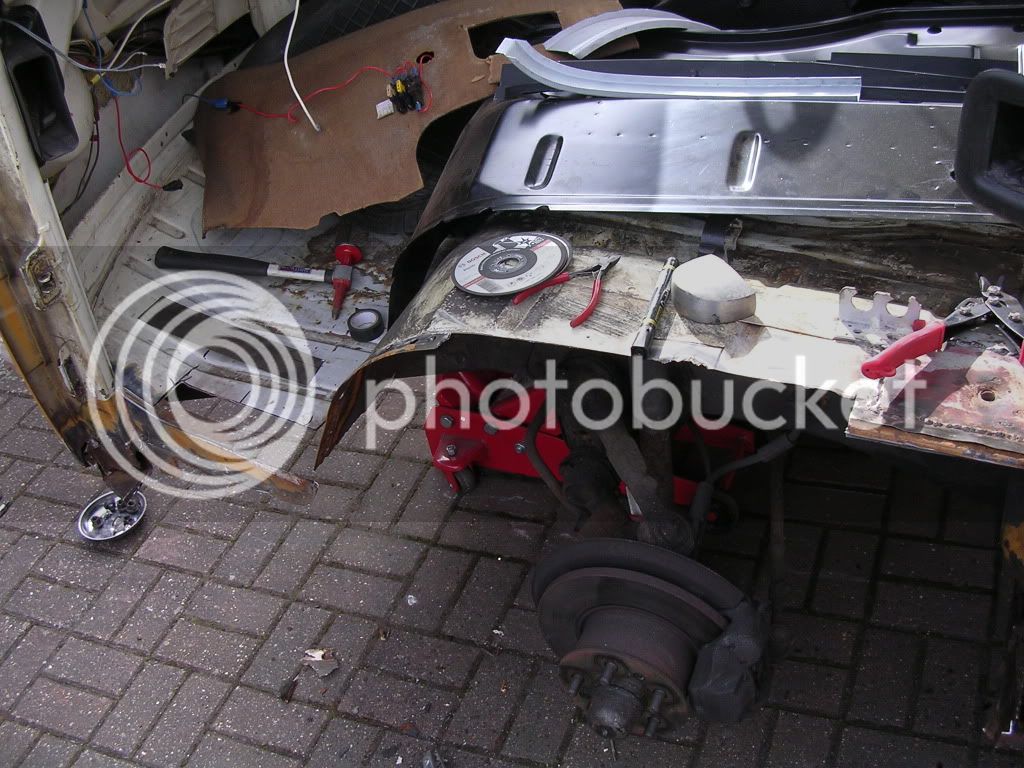
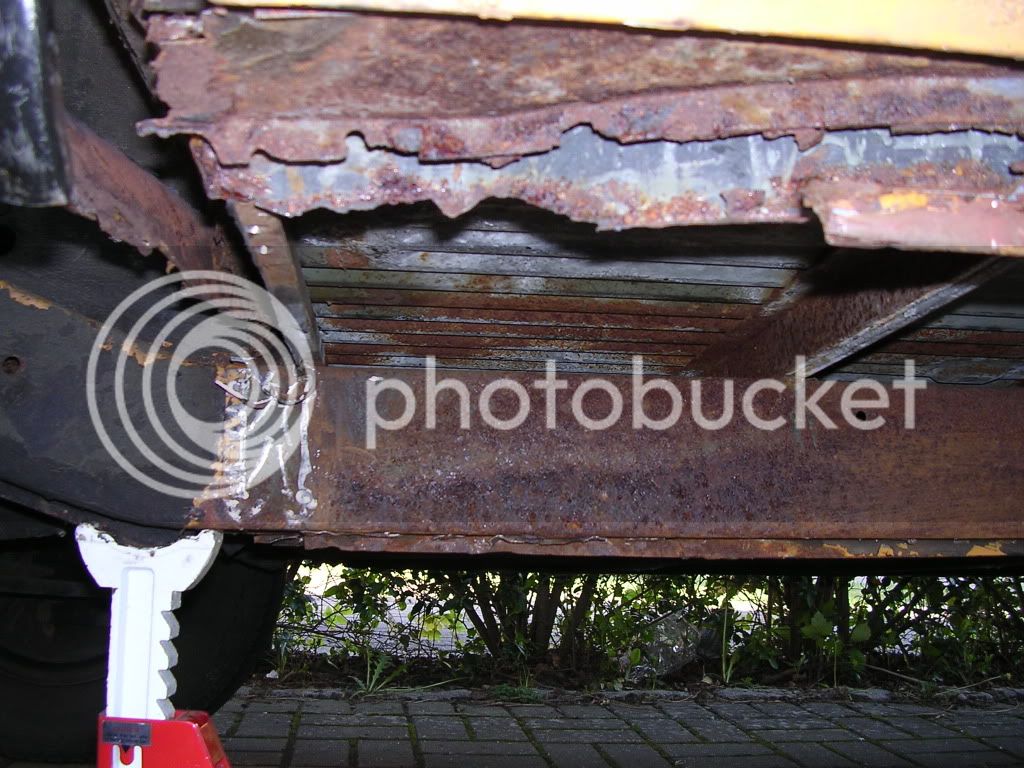
Here we go...... (note the nice door)
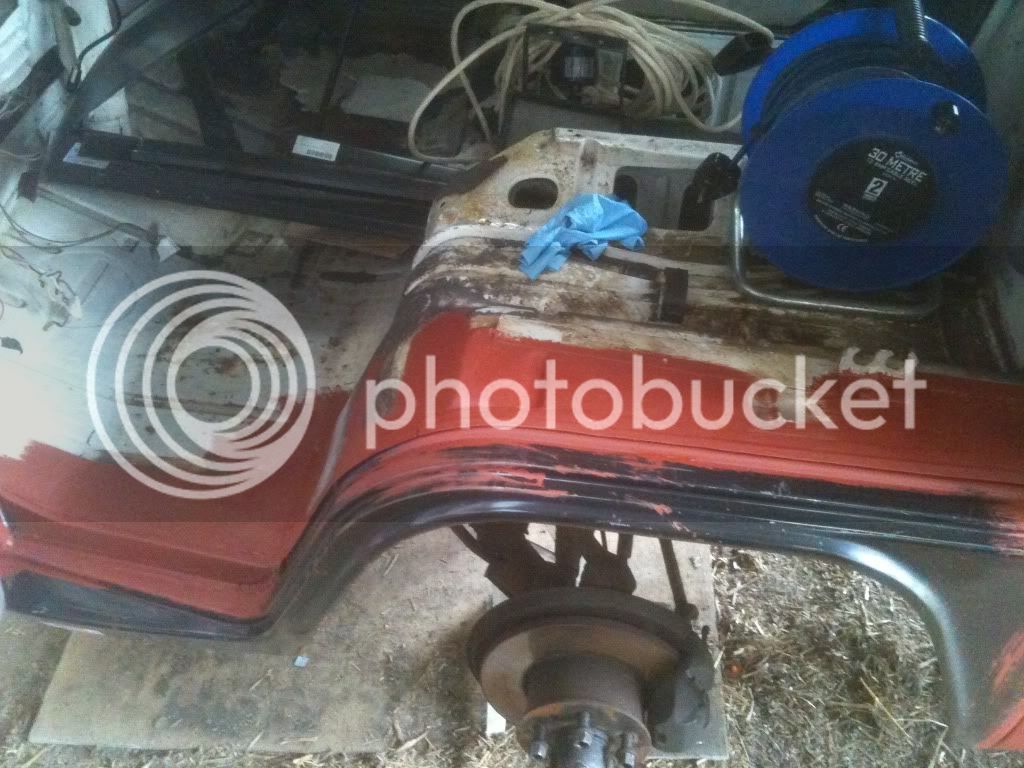
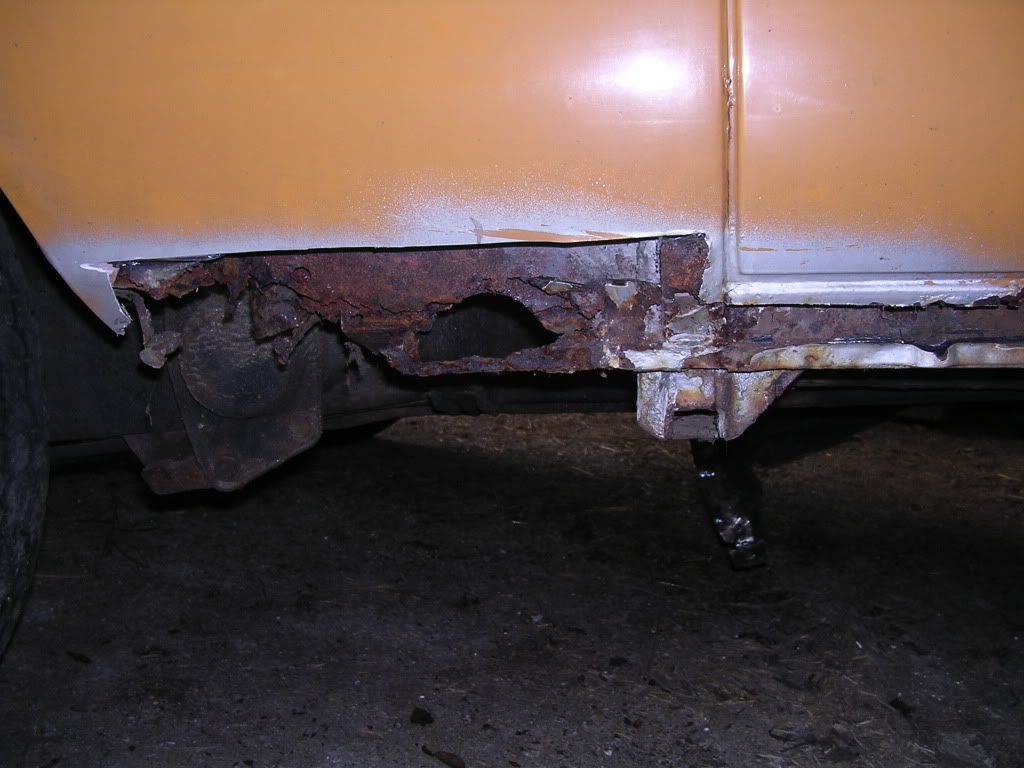
Arch gets attacked
Look familiar?
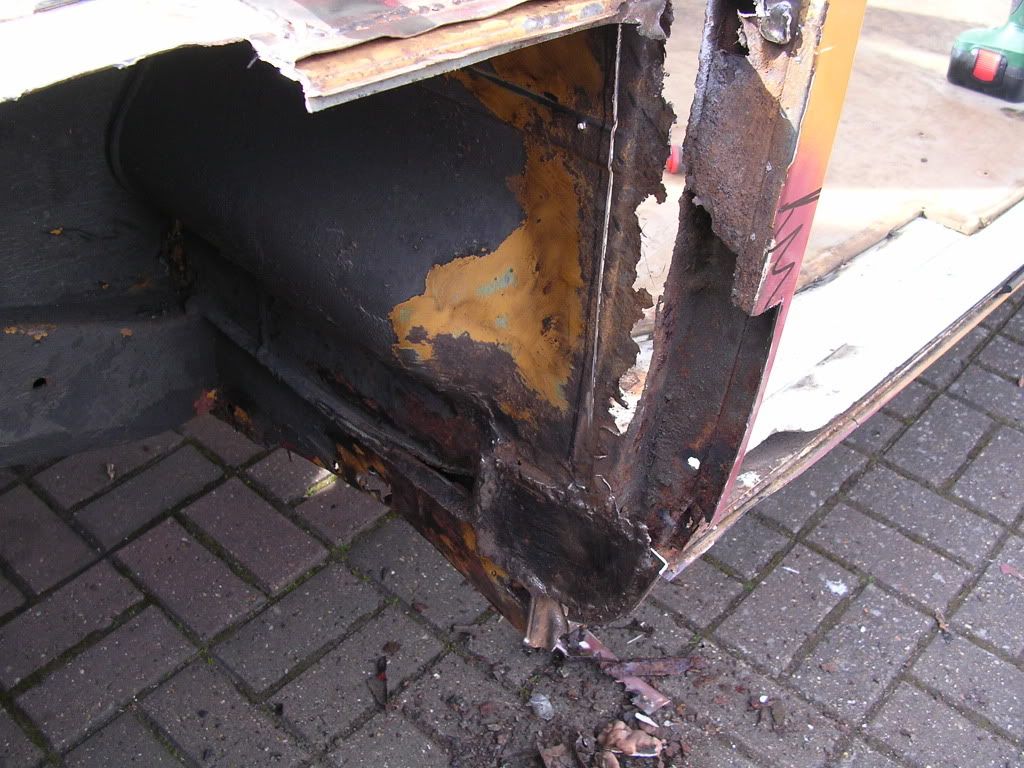
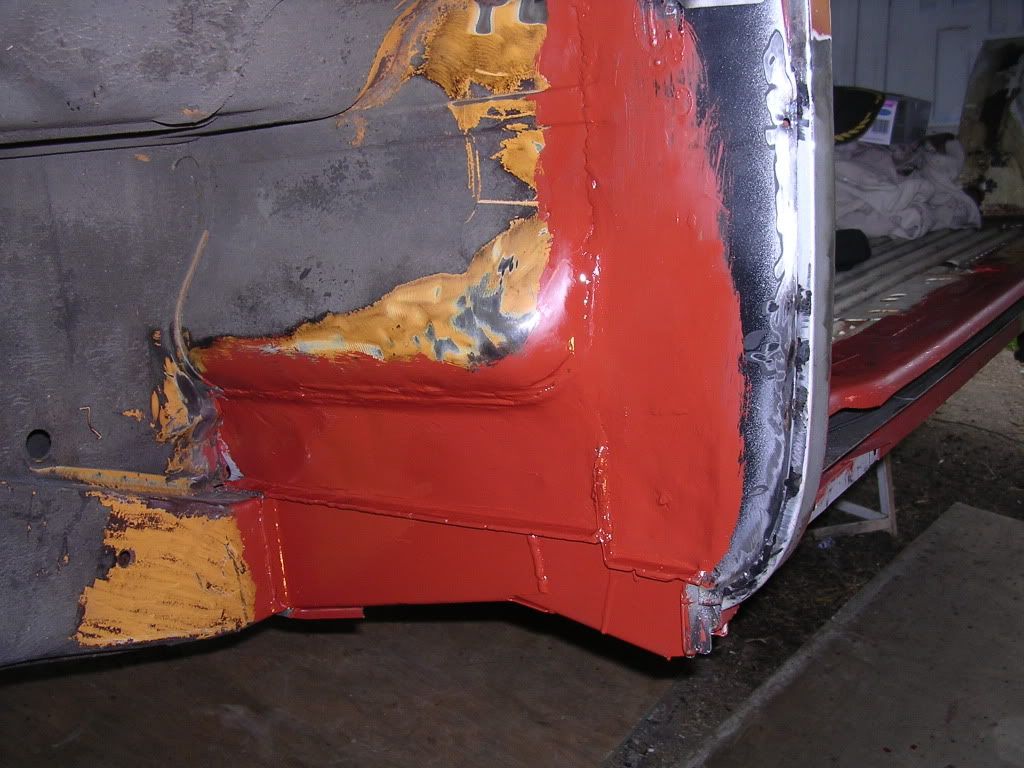
Patches on the arch
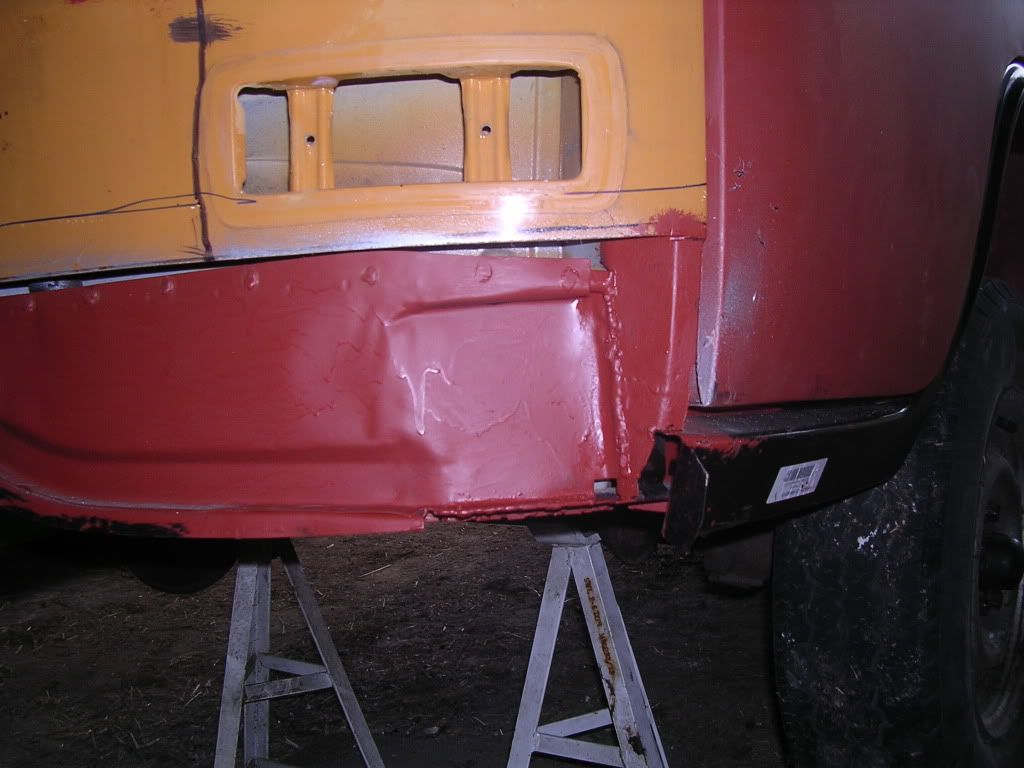
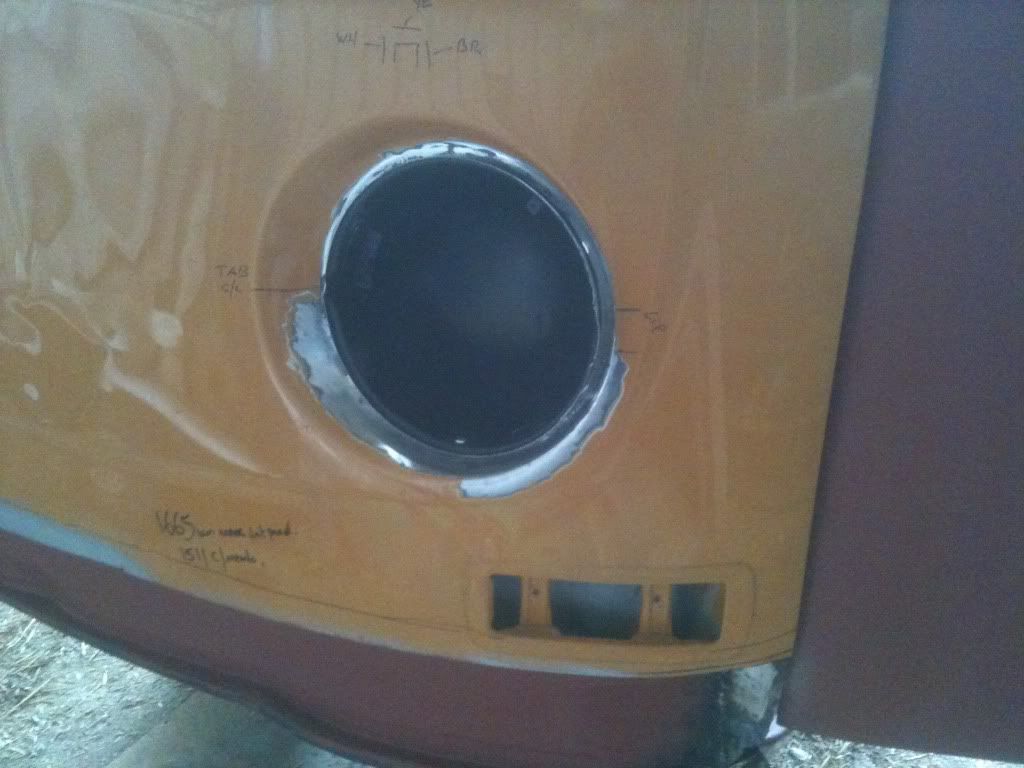
Moving round to the front panel, decided to keep the existing and patch as the majority is OK, lower part is sliced out to make way for a new inner and bottom repair section
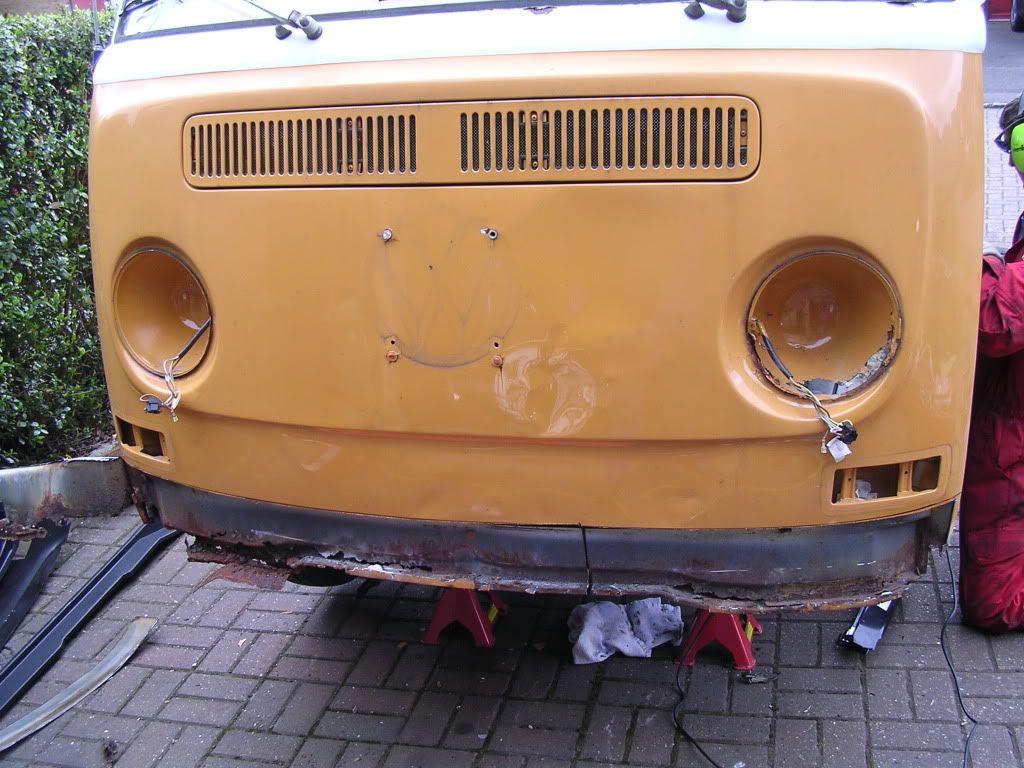
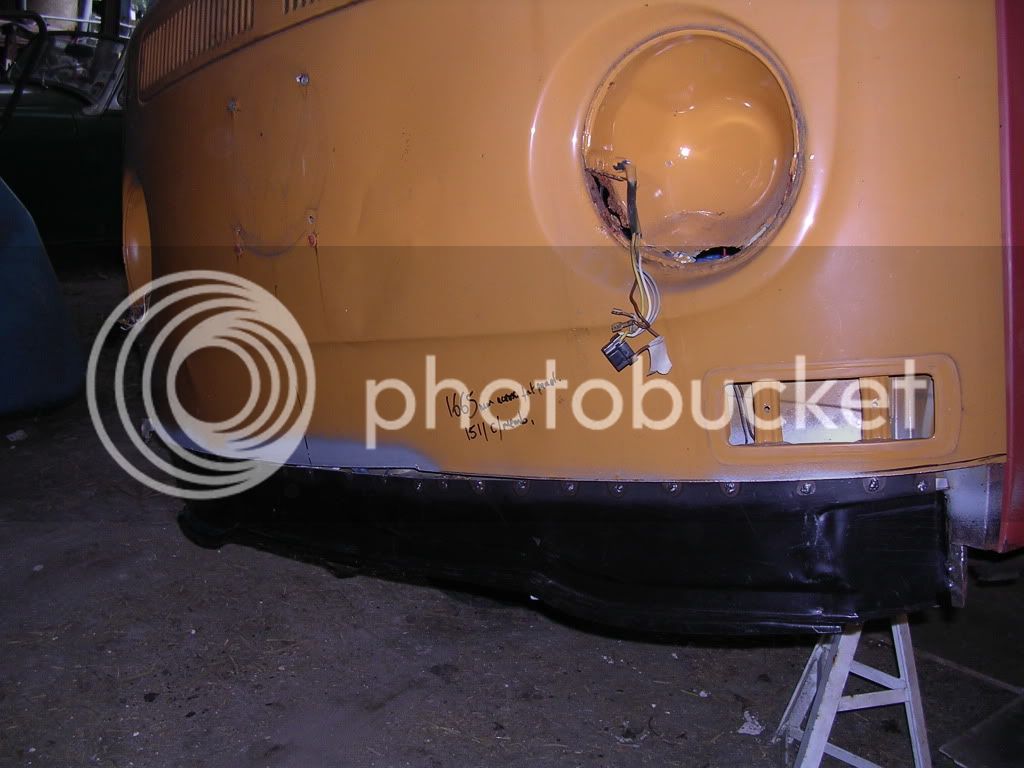
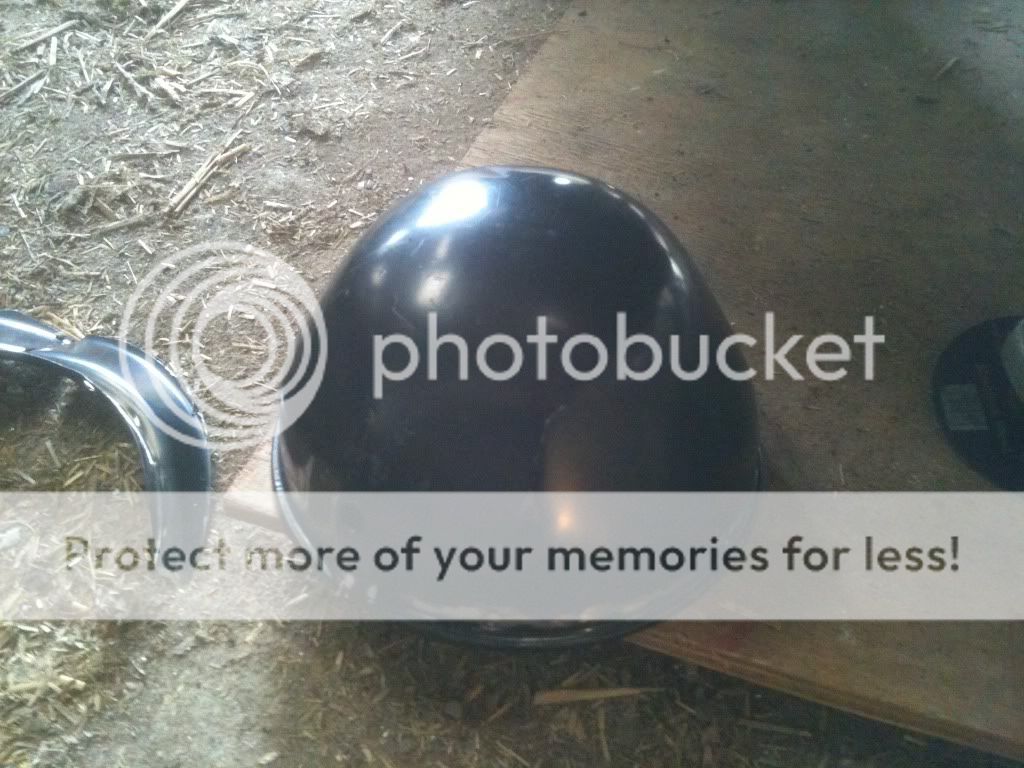
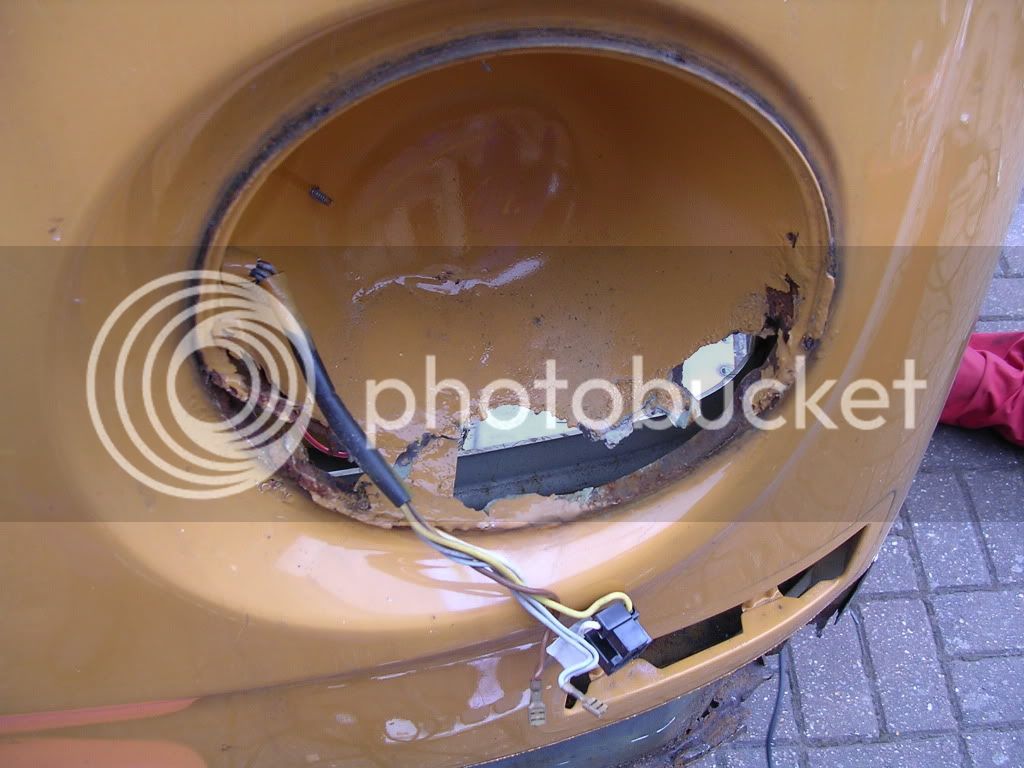
Headlamp bowl is toast, any suggestions on how to replace/where to source?
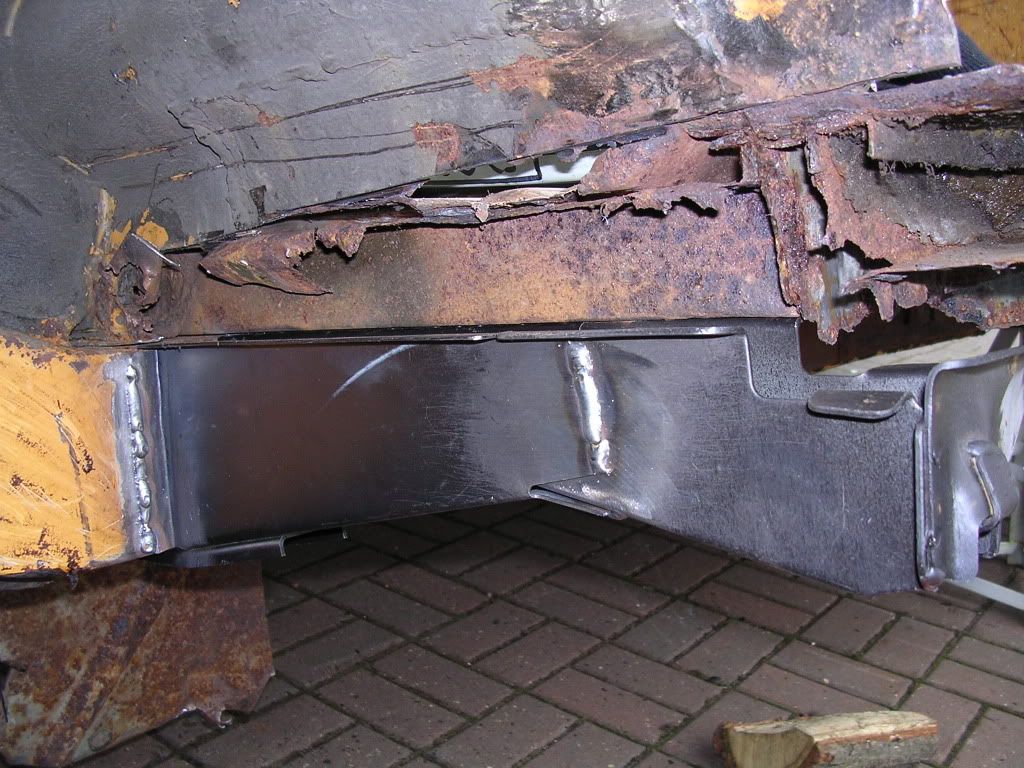
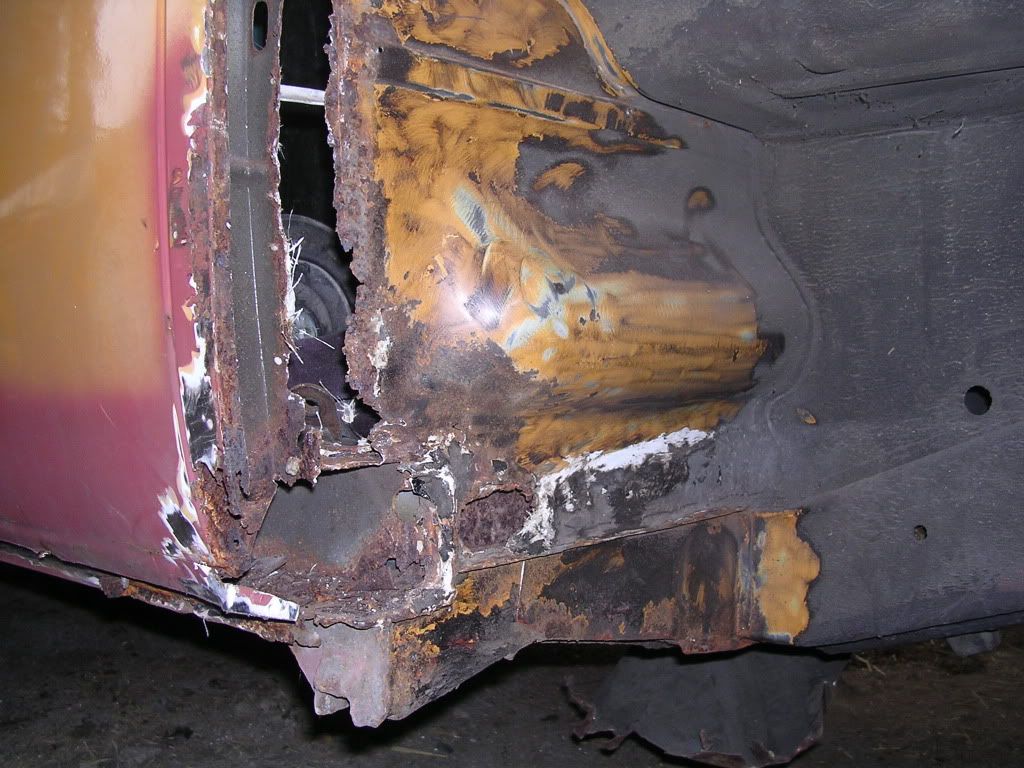
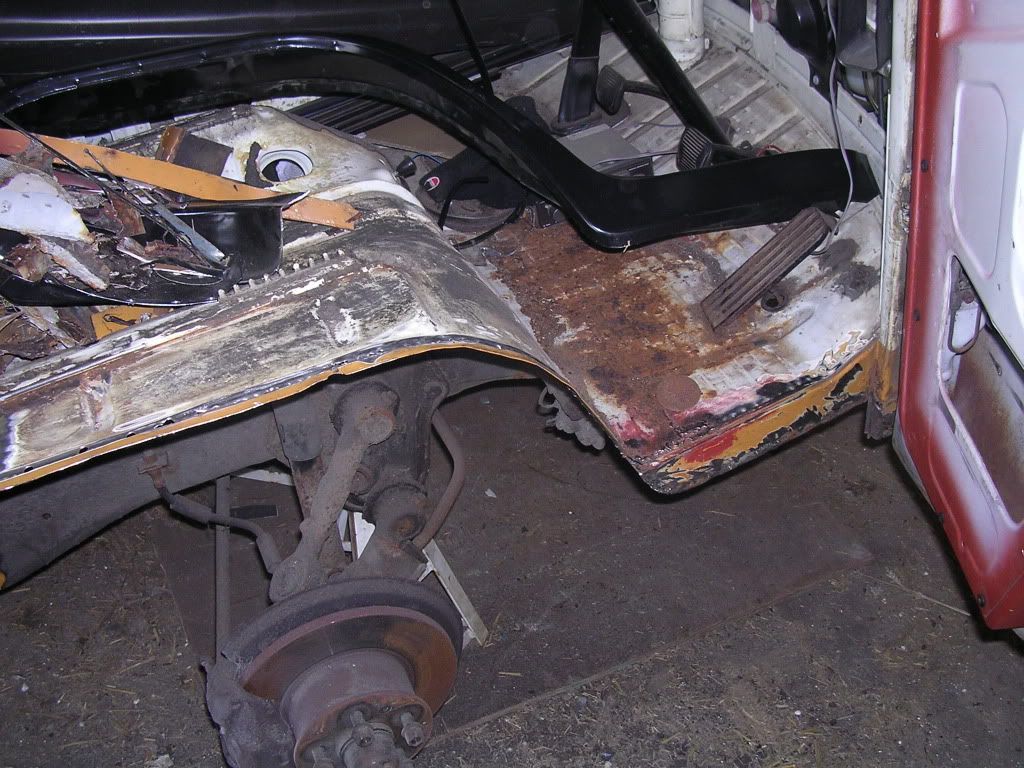
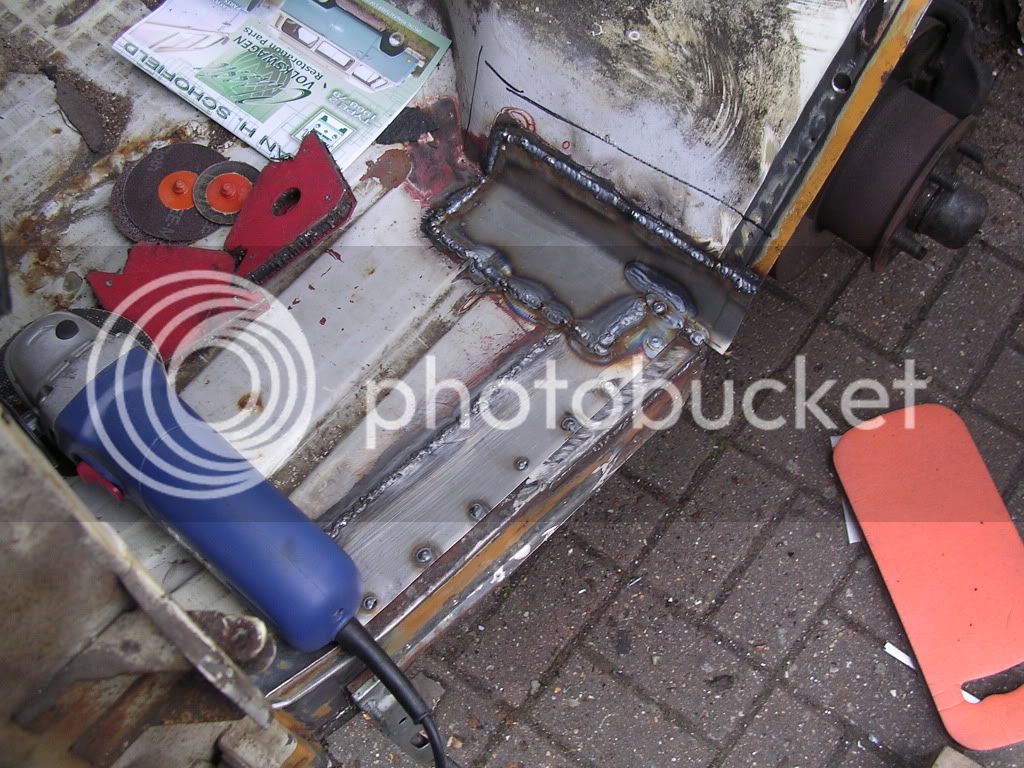
Front inner off, making good the chassis ends
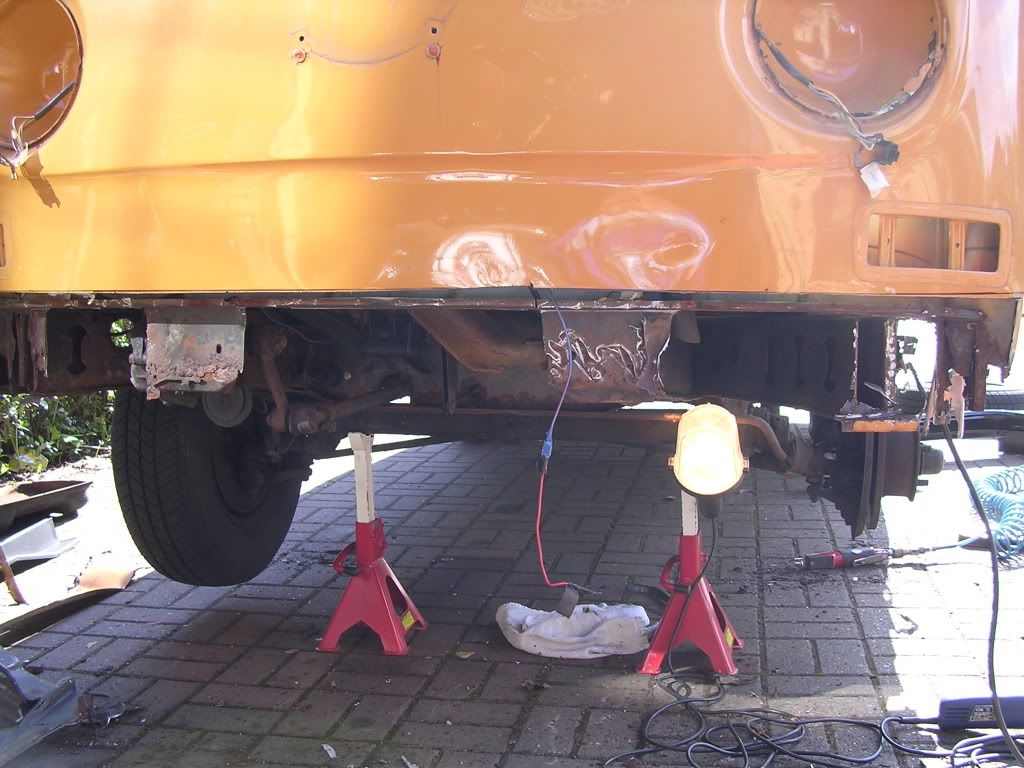
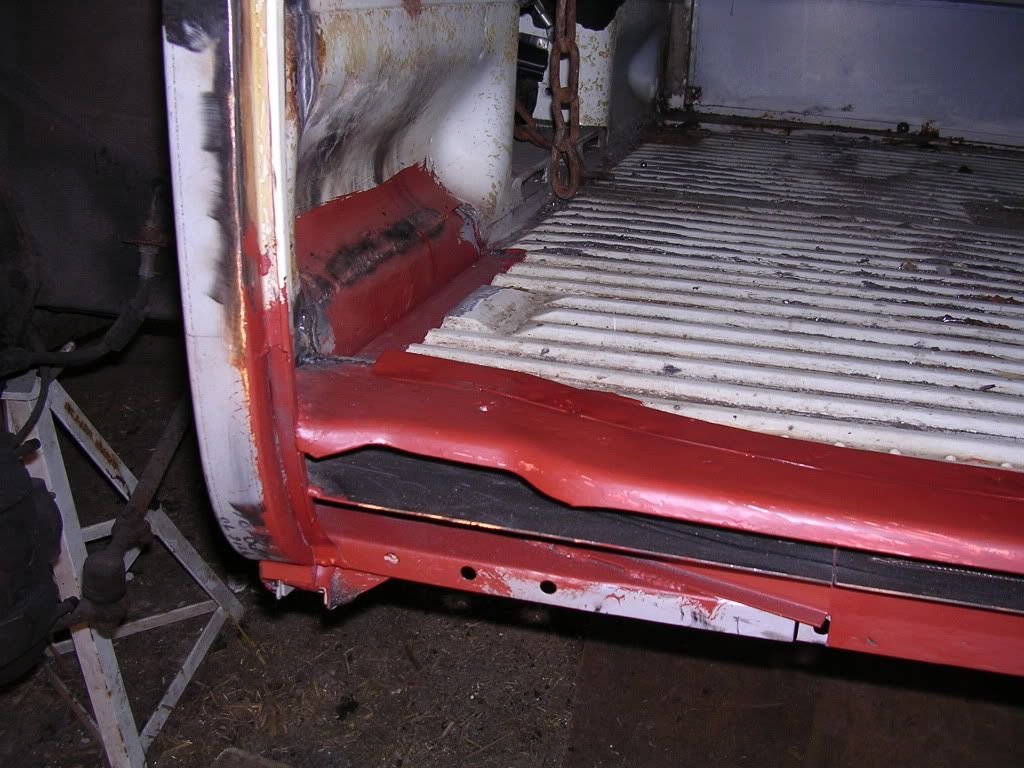
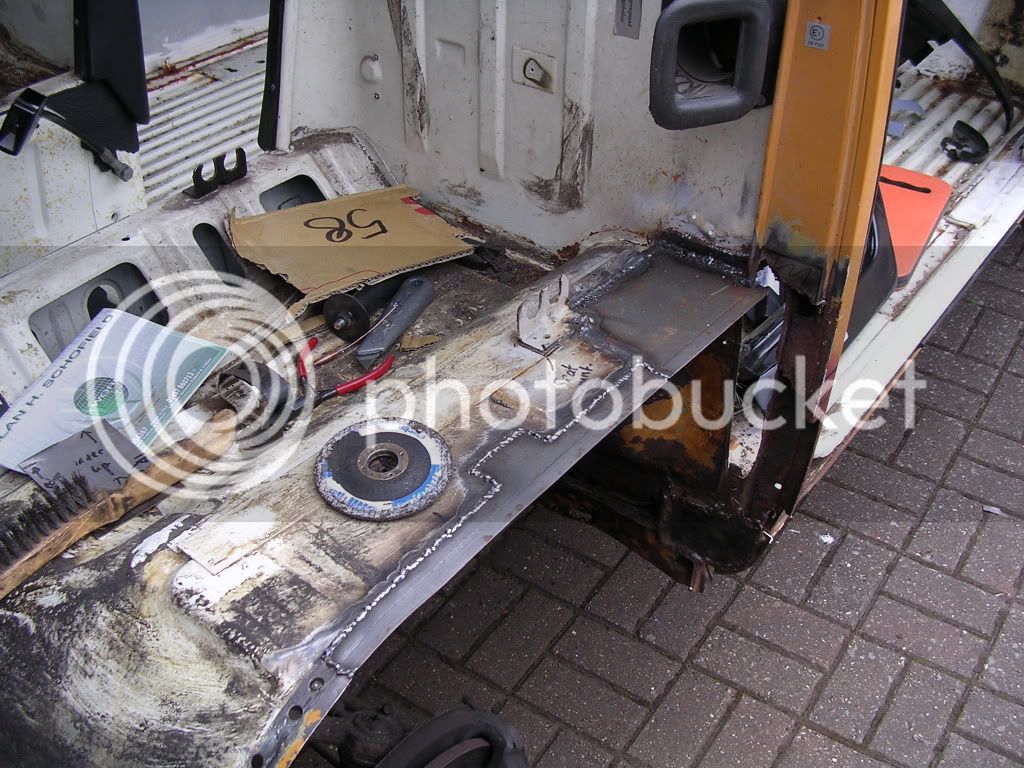
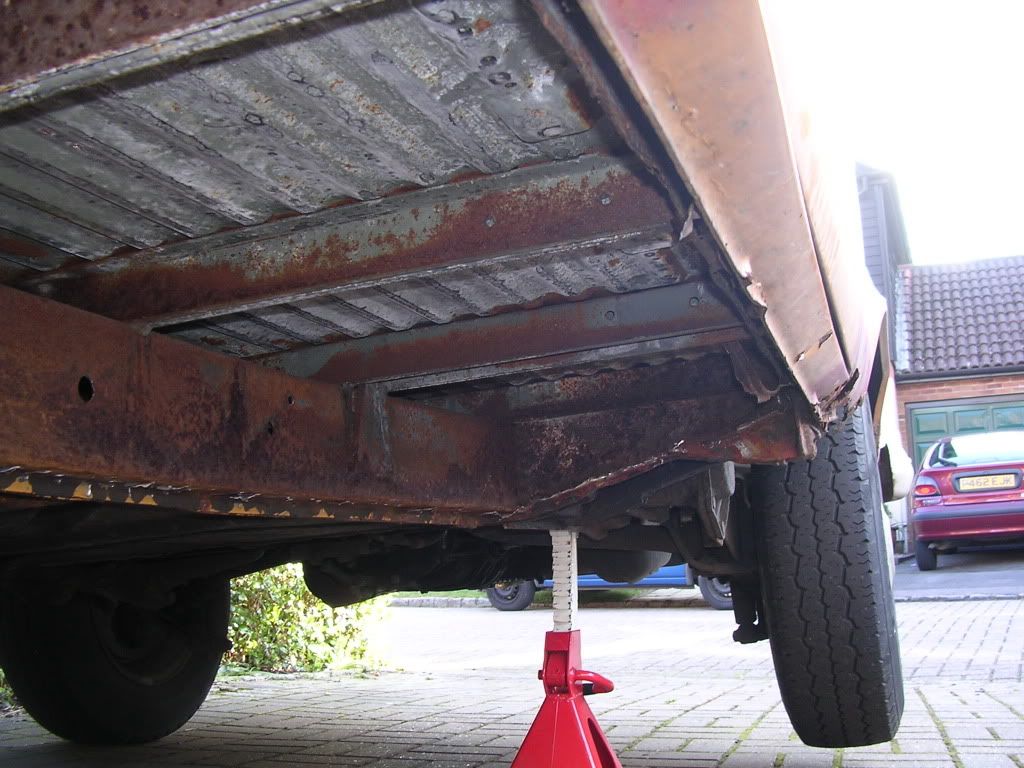
Belly pan off the N/S, not as bad as it could be, at least the floor can be saved, outrigger and jack point also removed
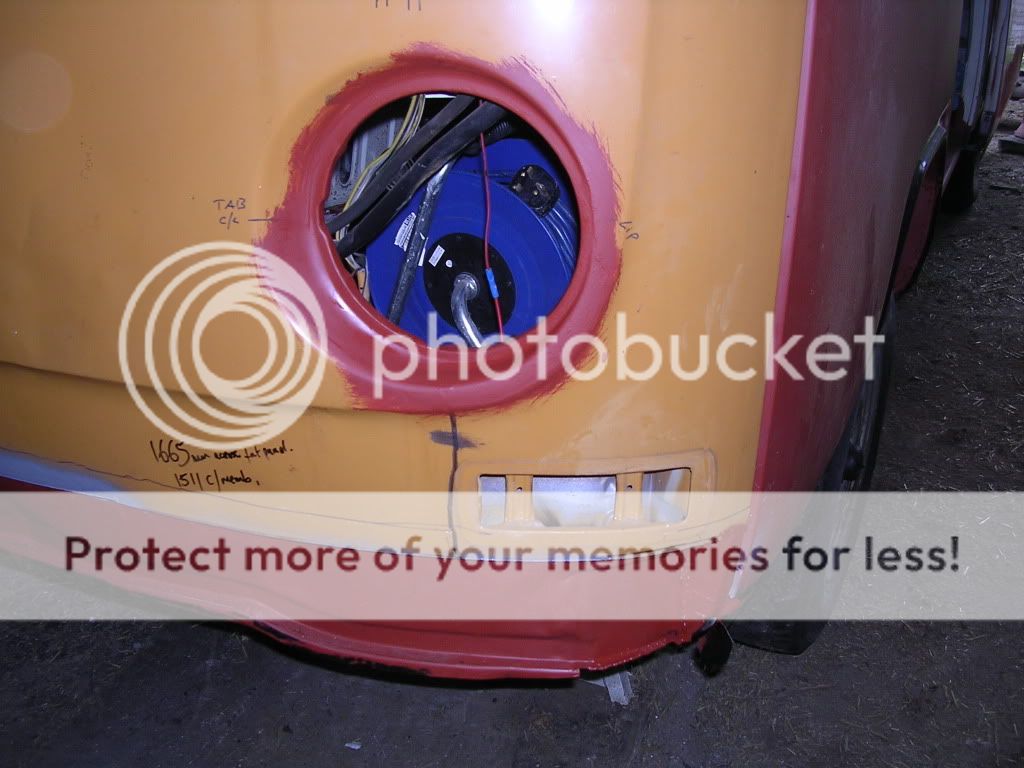
Finally for today, I think this must be an original mod by Danbury, its where the table mounting screws to behind the side panel, looks to be 2 old scraps bits of bodywork, bizarre

So that's me done for the weekend, I caught man flu and struggled to get out there too much in between rain storms. Still feeling terrible today.
I've ordered a few panels, need to start cleaning up where they will be attached.
How the f*** am I going to clean up all the underside? there's a limit to what I can get to with the wirecup in the angle grinder and the hand held wirebrush isn't all that great (as I'm a weed) I was looking at the sand/grit blasters in MachineMart but I only have a little compressor and they have huge CFM demands, are they worth using out in the open upside down like this? I'd like a bigger compressor anyway as I'm finding the air tools much better to work with.
Mags
When I bought her about 5-6 years ago she looked mint, no surprise to find she has been well and truly bodged, lots of filler, wire mesh, fibreglass and dodgy patches, the usual story.
Last year whilst out of work I made a bit of a start, I've never welded outside of a college evening class and bodywork has been limited to filler and a respray on another car. I got a used MIG and attacked the drivers door, ending up re-skinning and replacing the bottom 3rd inner thanks to the help of Mark Paxtons hot to restore a VW bus. the drivers door got replaced as I don't think you can get the panels and a lick of red oxide to keep it going. All good so far and I was impressed with the re-skin, you would never have known.
This year I needed to start on the bottom 6 inches, all the typical places. I made a start on the N/S arch but as I cut more away I was getting a little worried I was losing reference points, I decided to rope a friend in who is a god at car modifying/resto work. He's out of work at the mo' so I paid for a days work with him and I think I'll be employing him a lot more as he makes light work and knows what he's doing where I keep getting scared about what I'm cutting off!
I'm limited to weekends as I don't get home early enough in the week and the driveway so I think she's off the road for maybe 2 years. I'm not looking for show winning, just solid and clean, peace of mind. I miss camping in her already
So, here's the first weekends work, expect not very regular updates, but I want to keep a diary of the work.
Do any of you manage to rent space to store and work on you bus? I don't know where to start looking? I'd love to be able to store the bus in a farm building or something and go work there at weekends, it would save my neighbors hating me and have to worry less about noise/mess etc.
Here we go...... (note the nice door
)
Arch gets attacked
Look familiar?
Patches on the arch
Moving round to the front panel, decided to keep the existing and patch as the majority is OK, lower part is sliced out to make way for a new inner and bottom repair section
Headlamp bowl is toast, any suggestions on how to replace/where to source?
Front inner off, making good the chassis ends
Belly pan off the N/S, not as bad as it could be, at least the floor can be saved, outrigger and jack point also removed
Finally for today, I think this must be an original mod by Danbury, its where the table mounting screws to behind the side panel, looks to be 2 old scraps bits of bodywork, bizarre
So that's me done for the weekend, I caught man flu and struggled to get out there too much in between rain storms. Still feeling terrible today.
I've ordered a few panels, need to start cleaning up where they will be attached.
How the f*** am I going to clean up all the underside? there's a limit to what I can get to with the wirecup in the angle grinder and the hand held wirebrush isn't all that great (as I'm a weed) I was looking at the sand/grit blasters in MachineMart but I only have a little compressor and they have huge CFM demands, are they worth using out in the open upside down like this? I'd like a bigger compressor anyway as I'm finding the air tools much better to work with.
Mags