

Anyone who has got one of these guys to fit may appreciate that the supplied instructions could perhaps be clearer. It isn't a massively complicated thing to fit, but hell - a picture speaks a thousand words, so here are mine. Not saying this is the best place to fit, or the best way - but it is the way I did mine ")
Location:
Most people fit their Propex here, on the rear bulkhead, usually within a rear seat/under the rock n' roll bed.

I decided on a slightly different position. The main reason was that I don't like the way that putting the heater here takes up a lot of under-seat storage space, especially as it is best to keep some space around the heater.
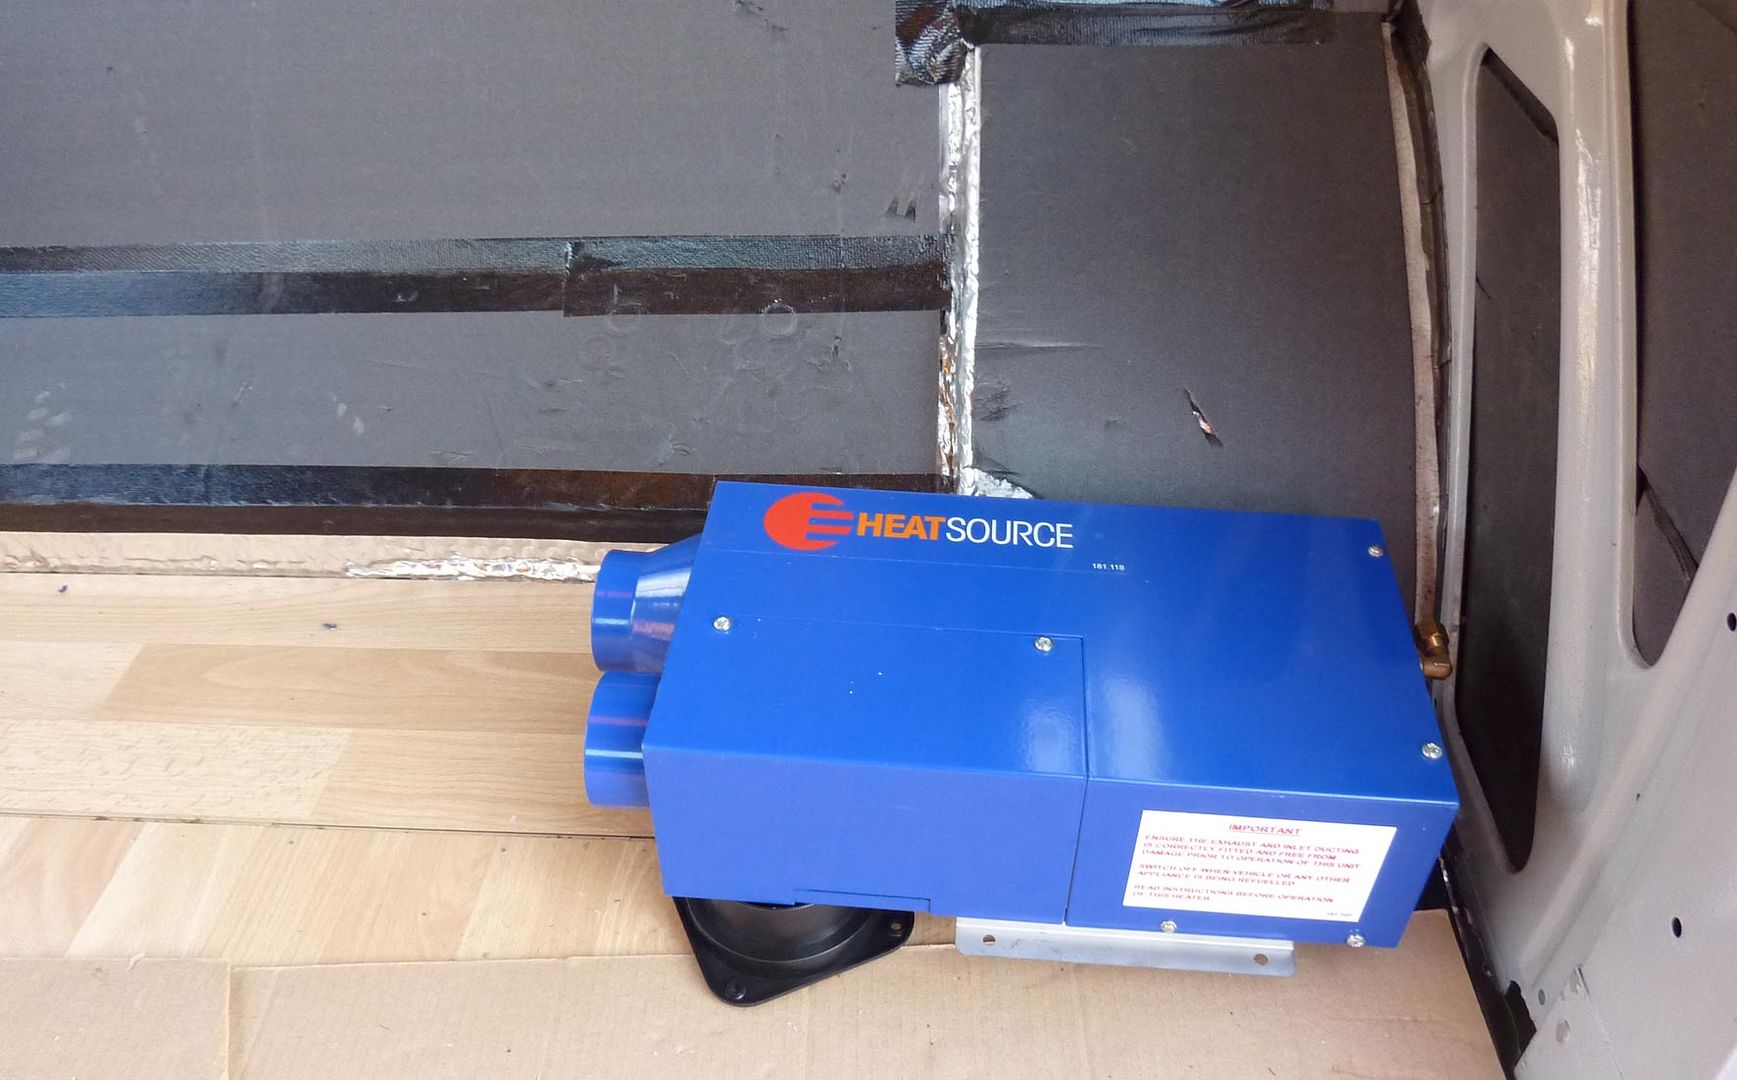
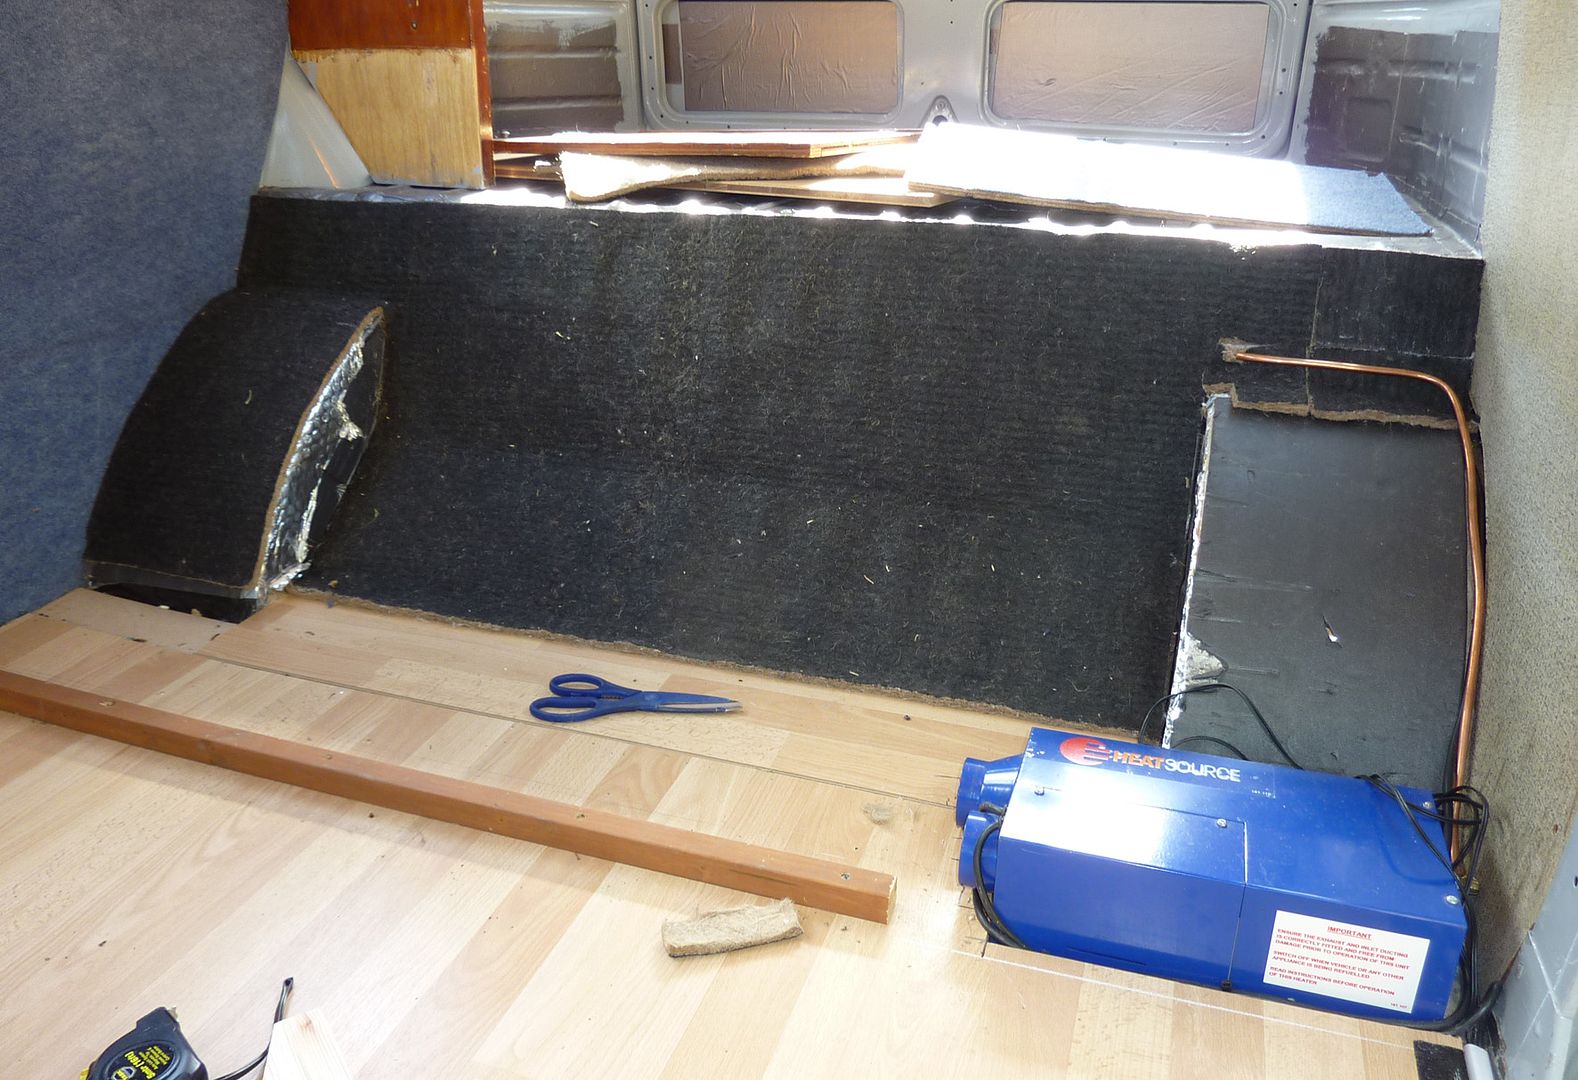
I toyed with positioning it behind the drivers seat, in a storage unit I have there, but for the same reasons of taking storage space, I avoided that. Instead, I have elected to position mine under the unit I have just inside the sliding door....about here:
It does make it a little more awkward, but this means my under-seat storage remains open and clear. The only thing I really had to watch out for was where the pipes would exit the van through the floor. Having just fixed belly pans underneath, I had limited access to the underfloor/chassis (another reason for avoiding the location behind the drivers seat. In positioning I also had to consider where the hot air outlet would go (and the inlet) and in this case I have followed the majority in fixing these into the front wall of the rear seat/storage unit.
I was making my side unit narrower than it had been before, so the heater unit would indeed extend into the under-seat space a little bit after all, but not be nearly as obtrusive as the alternative position.
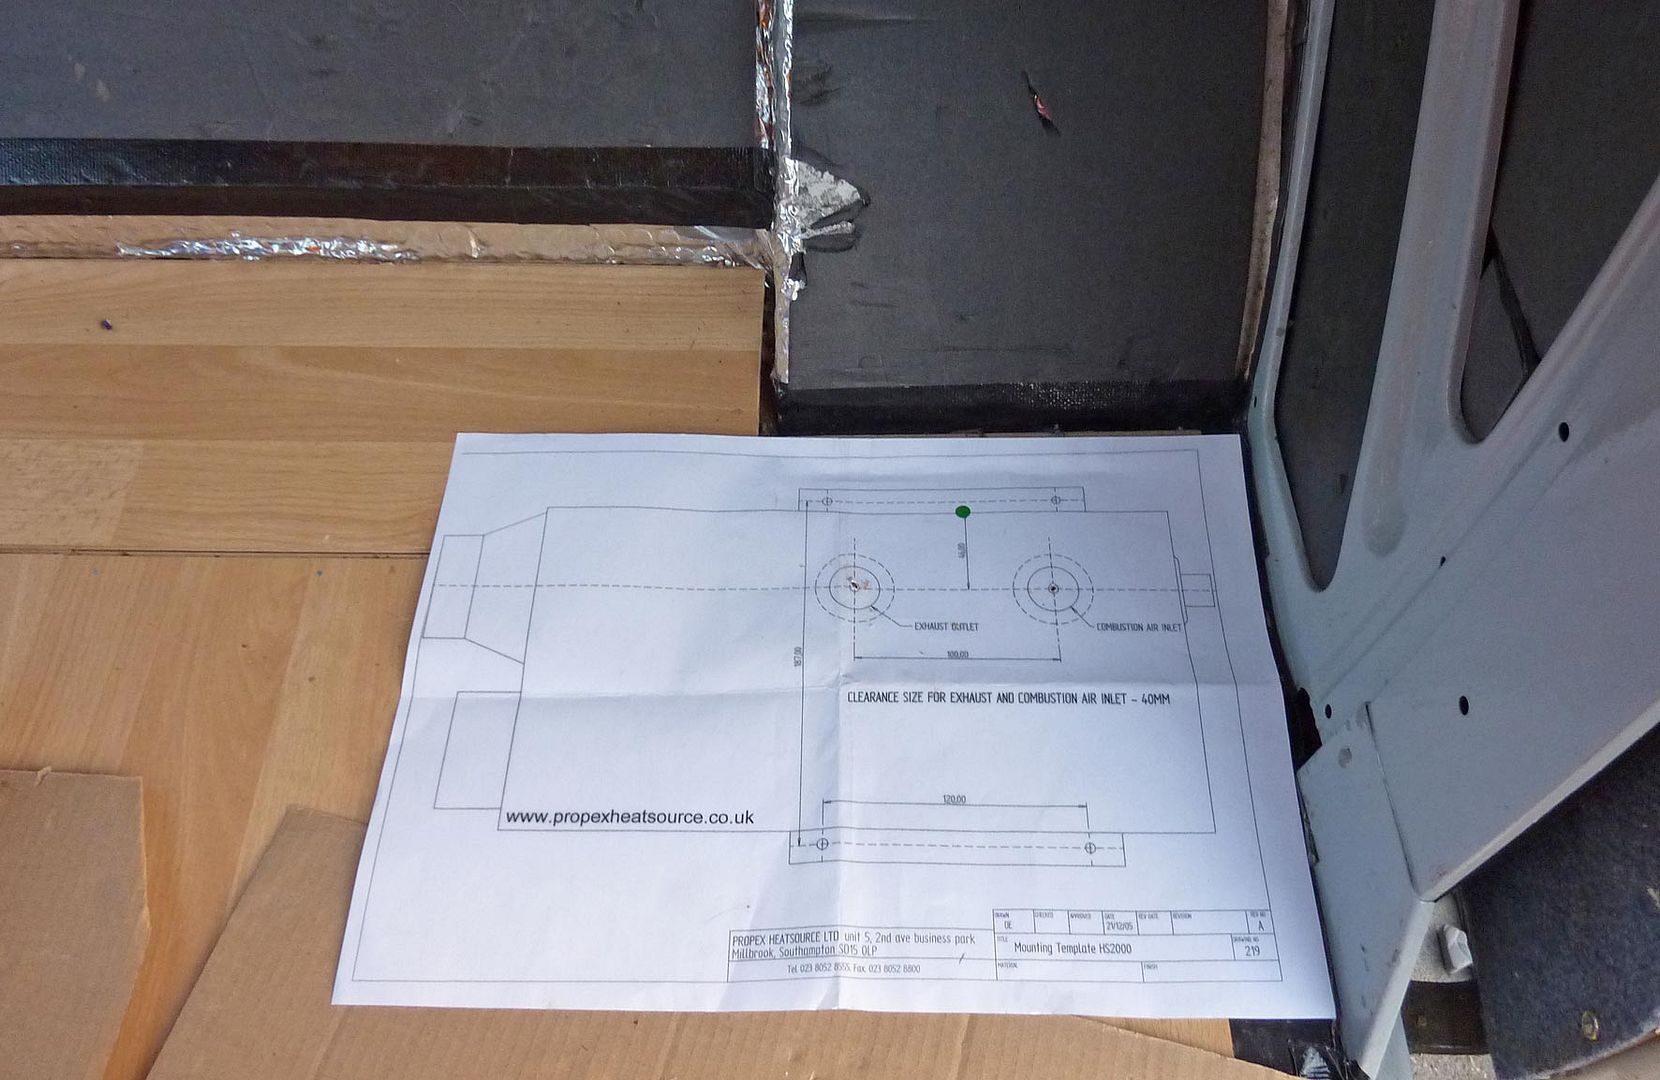
First thing was to use the provided scale map to mark the holes into the floor, and then drill:
Now, ideally I might have fitted all this before fitting things like belly pans, and wooden floor. However, I had been waiting to see what the JK Propex heater kit was going to be like. Back in January, this was mentioned by staff online as 'coming soon' and a kit that allowed one to plum the propex into the vans heater tubes and use both etc etc - great, I thought. Well, it is almost the end of summer and as far as I know they still haven't launched it. I got on with everything else in the mean time, then gave up waiting. I understand delays, but don't say 'coming this month' if it isn't.... :roll:
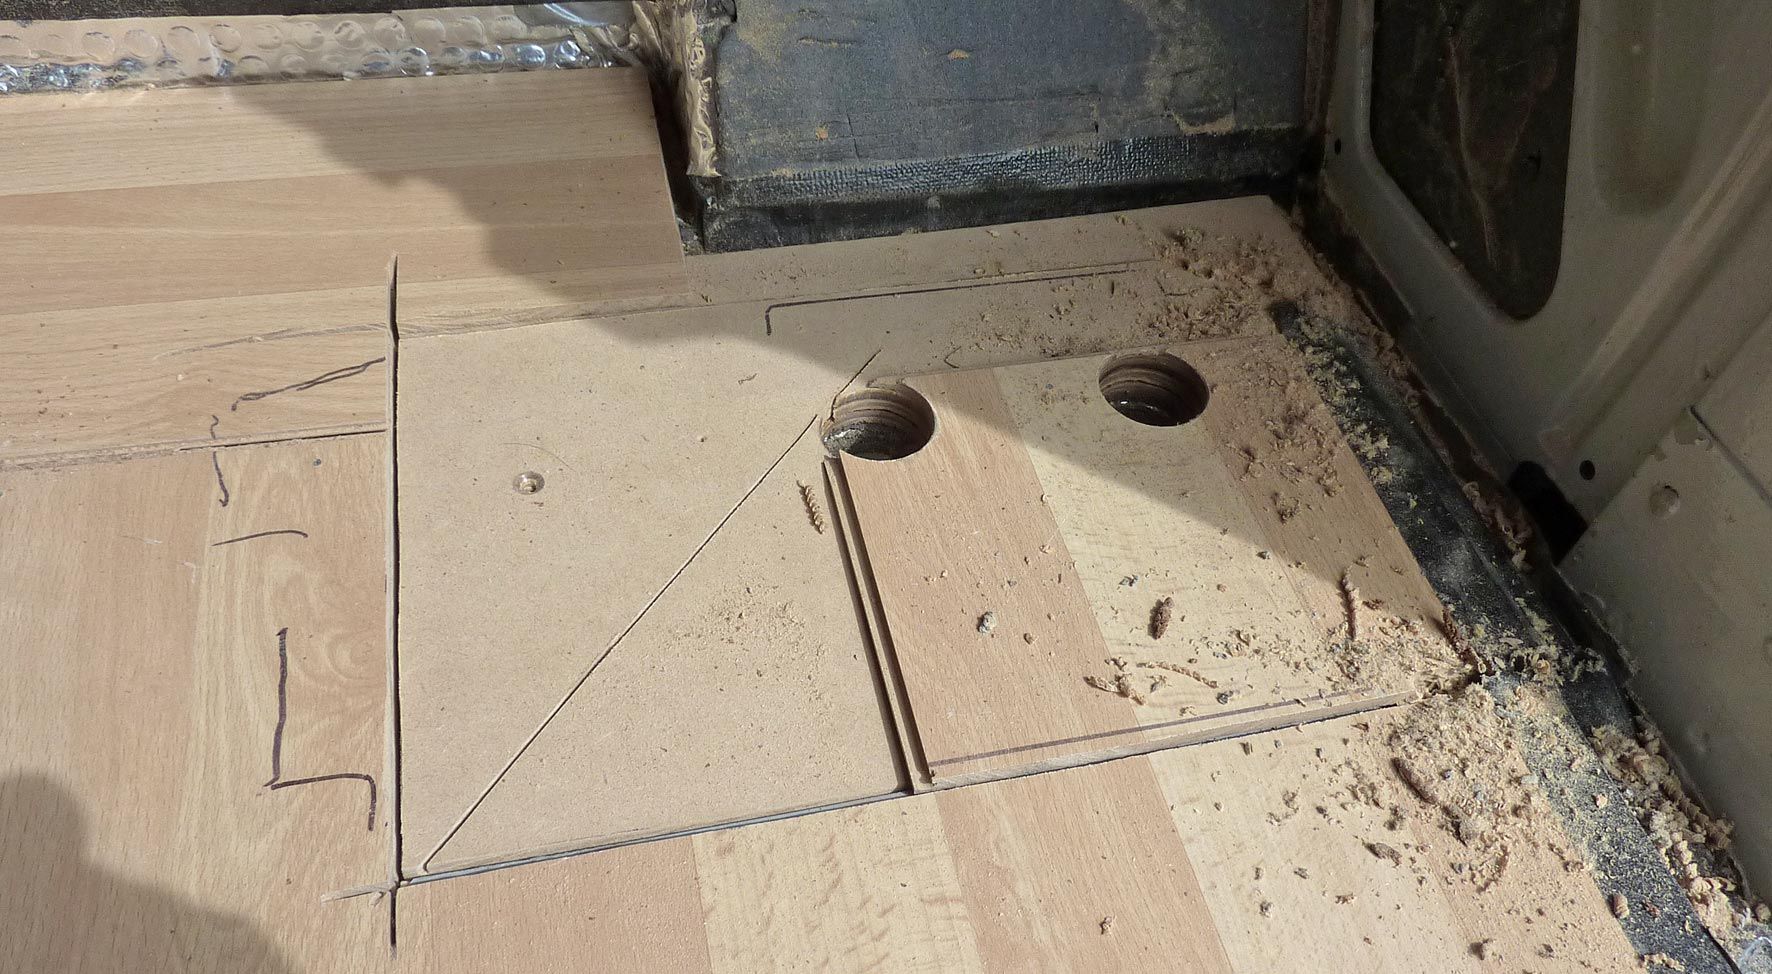
So, I had to whittle the floor somewhat.
These are the brackets that bolt to the underside of the unit and hold it of the floor:
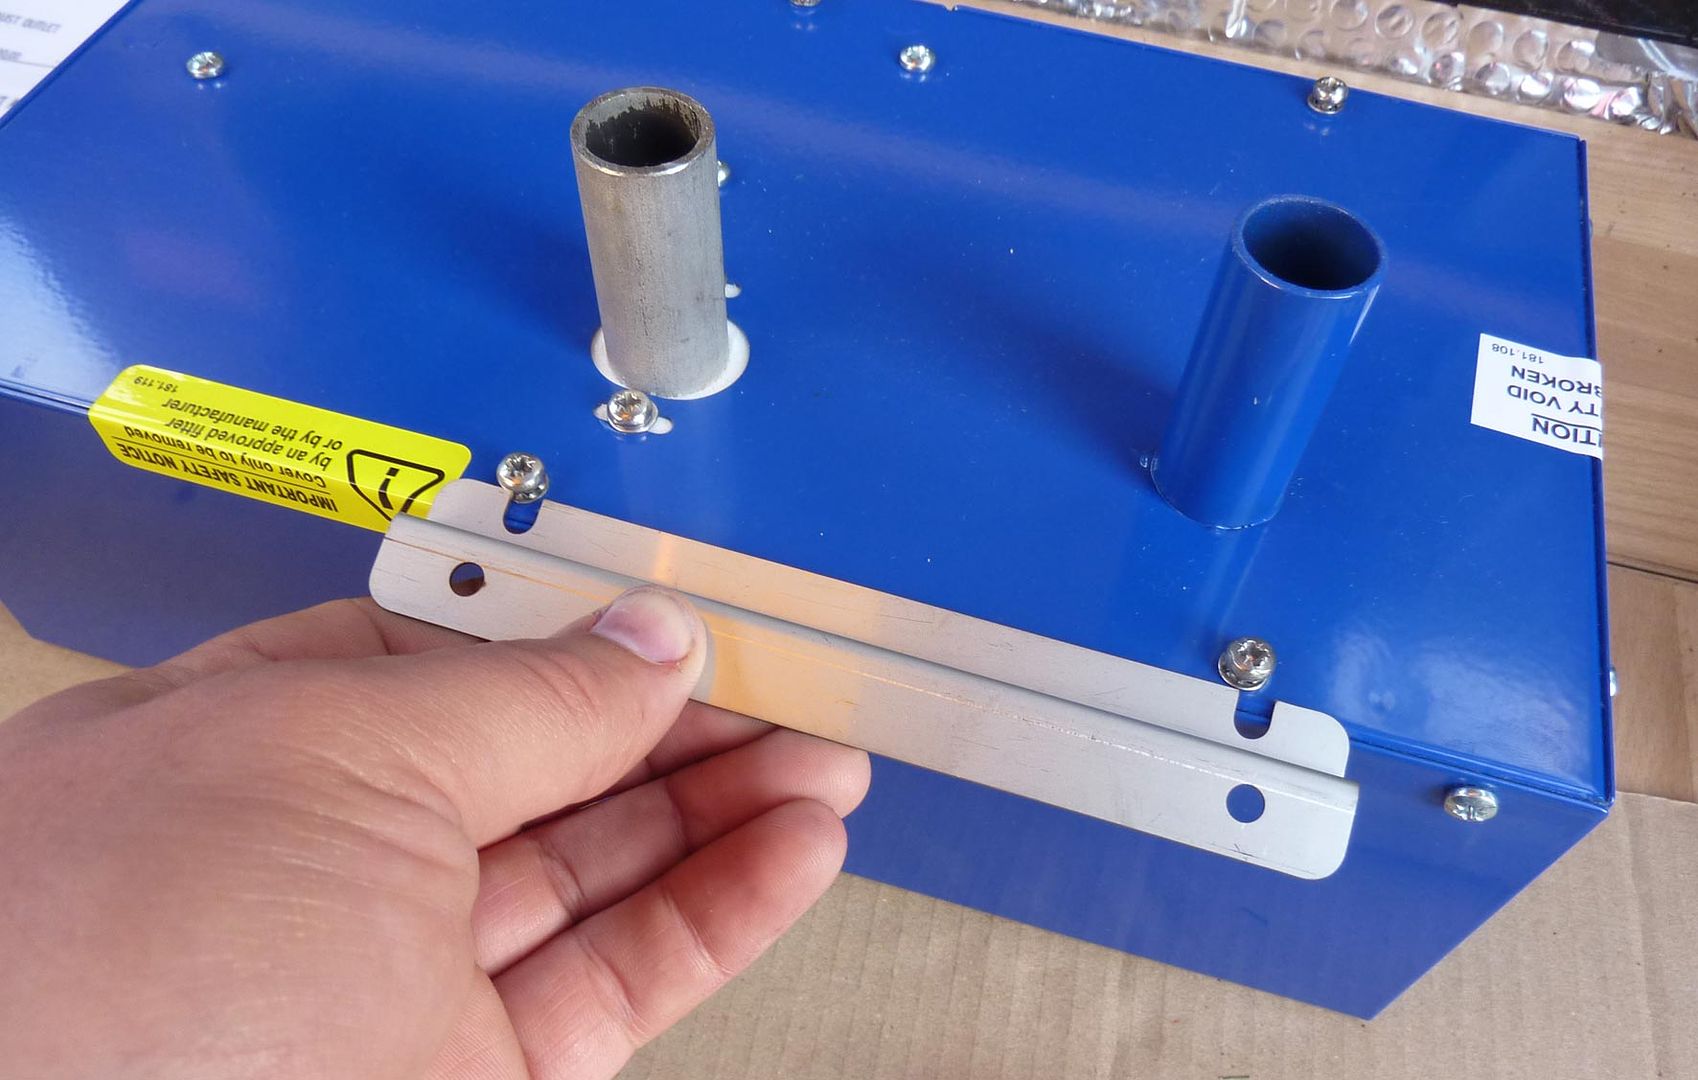
This is the underside of the unit. The thicker, silver pipe is the exhaust - this will get pretty hot! The other blue pipe is the inlet for the combustion air. That is air that is burned by the gas unit, which then gets sent out through the exhaust. This is NOT air which is drawn in and used to heat the van - the air for that is circulated inside the van - ie: it is a separate circuit - again, if that makes sense!
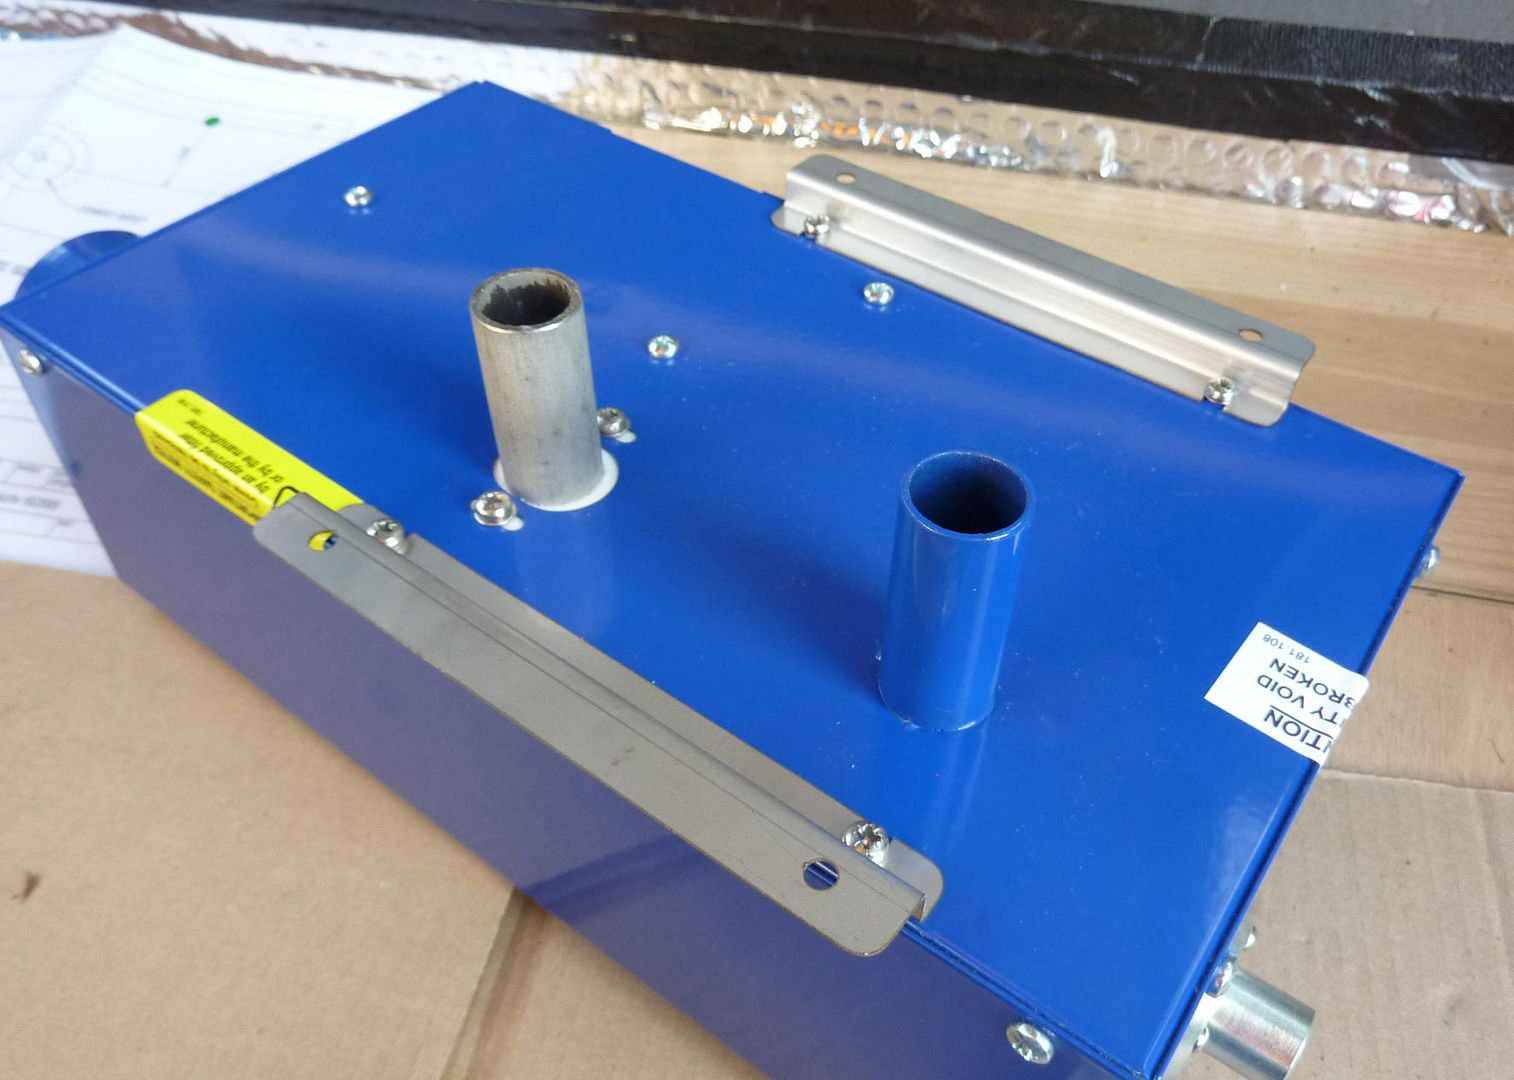
You the use these to screw the unit down - pretty straight forward.
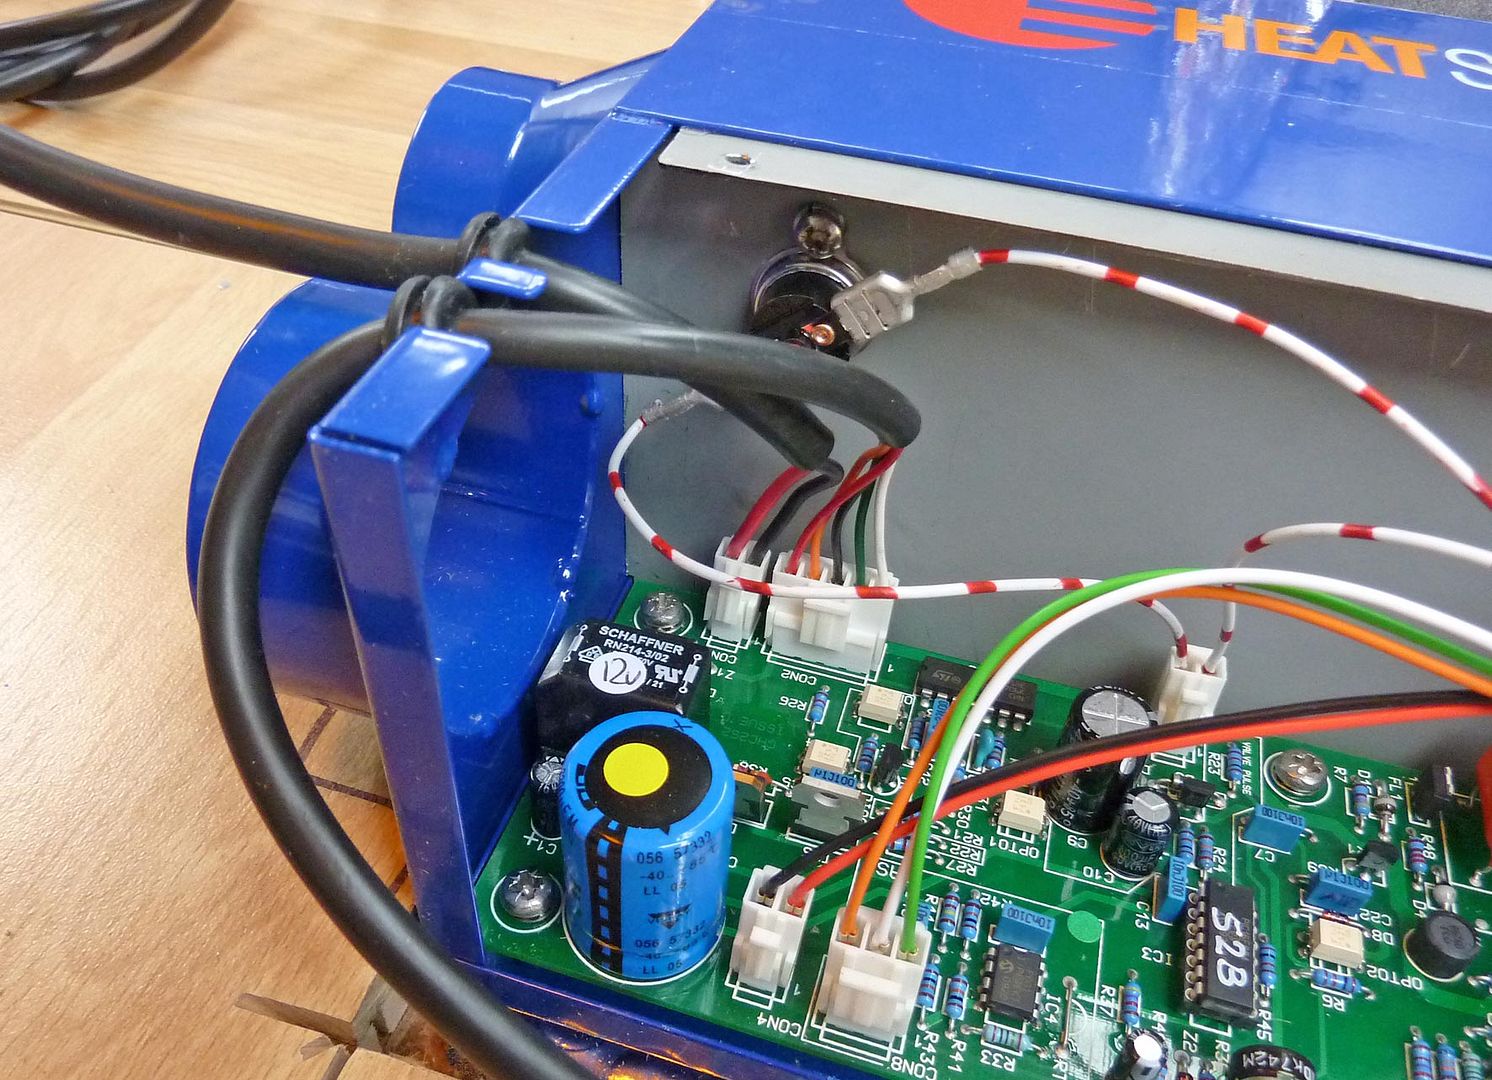
A small cover unscrews to give access to the electronics inside the unit. You need to do this to plug the control wires in:
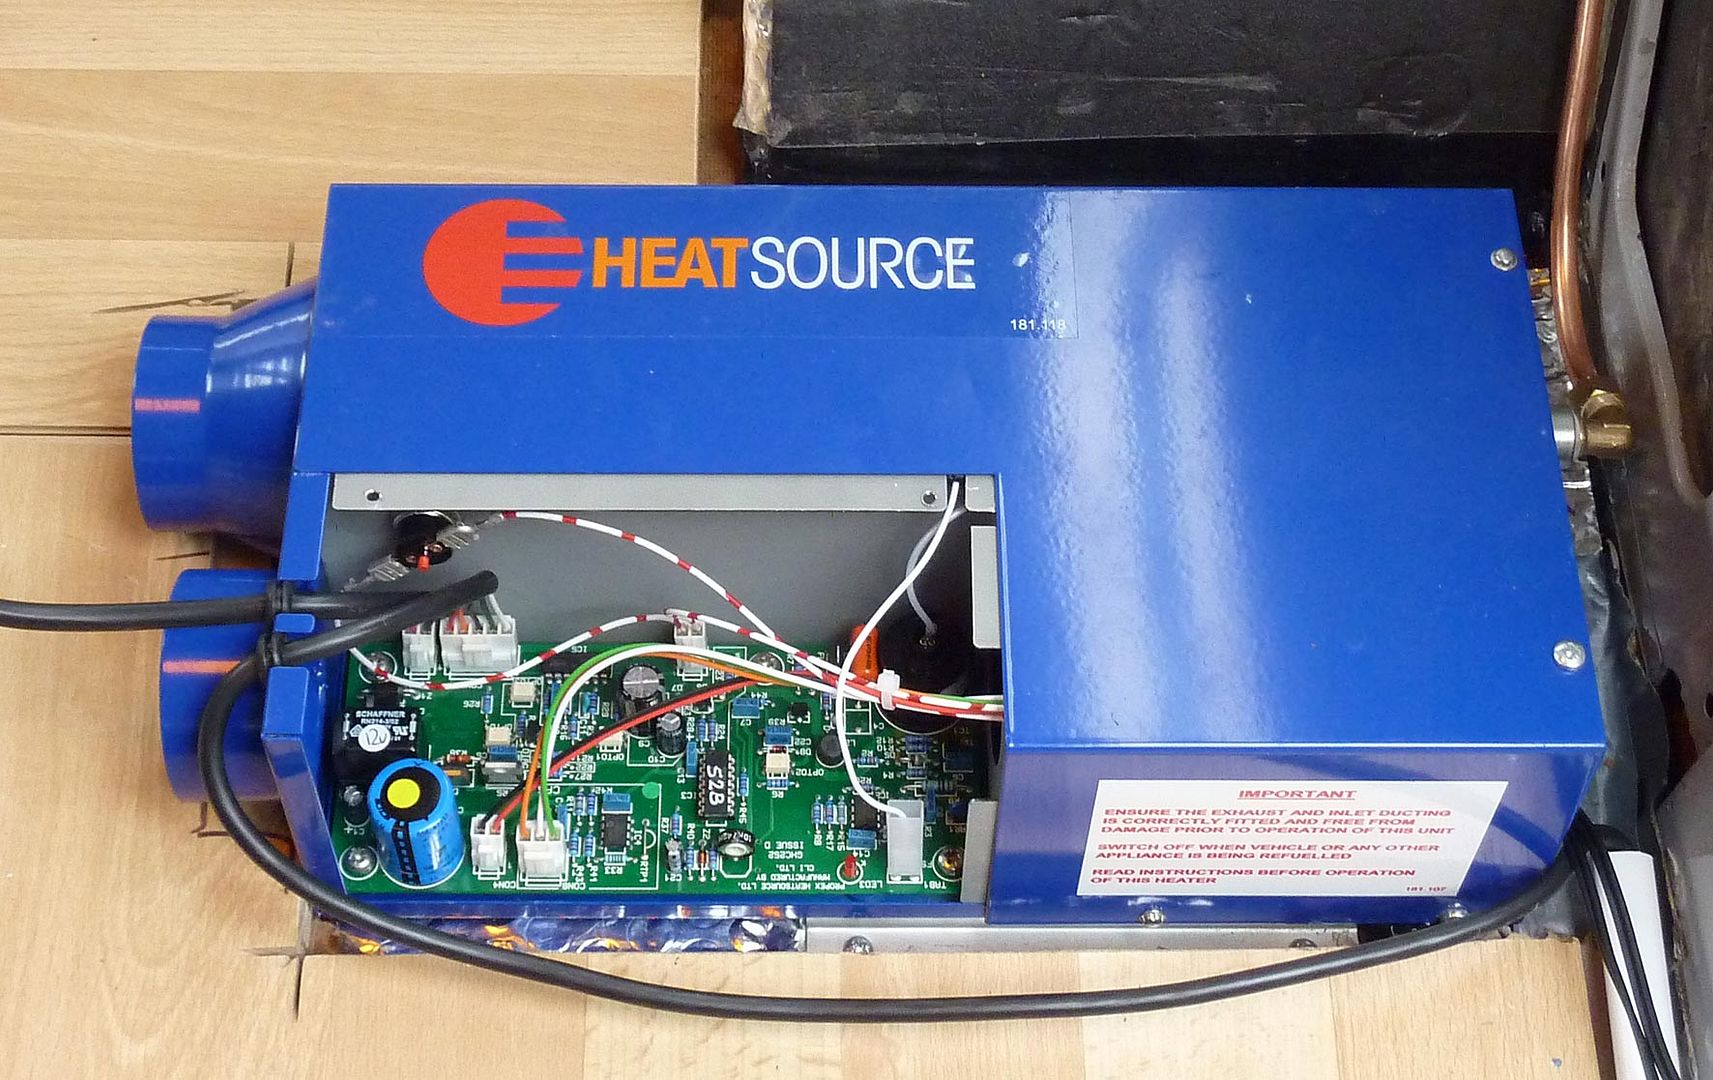
Hard to get wrong, the plugs are already wired in - you just need to plug them in and thread the wire out of the unit, using the rubber grommets provided:
When you bolt the cover back on, the wires/grommets are held in position.
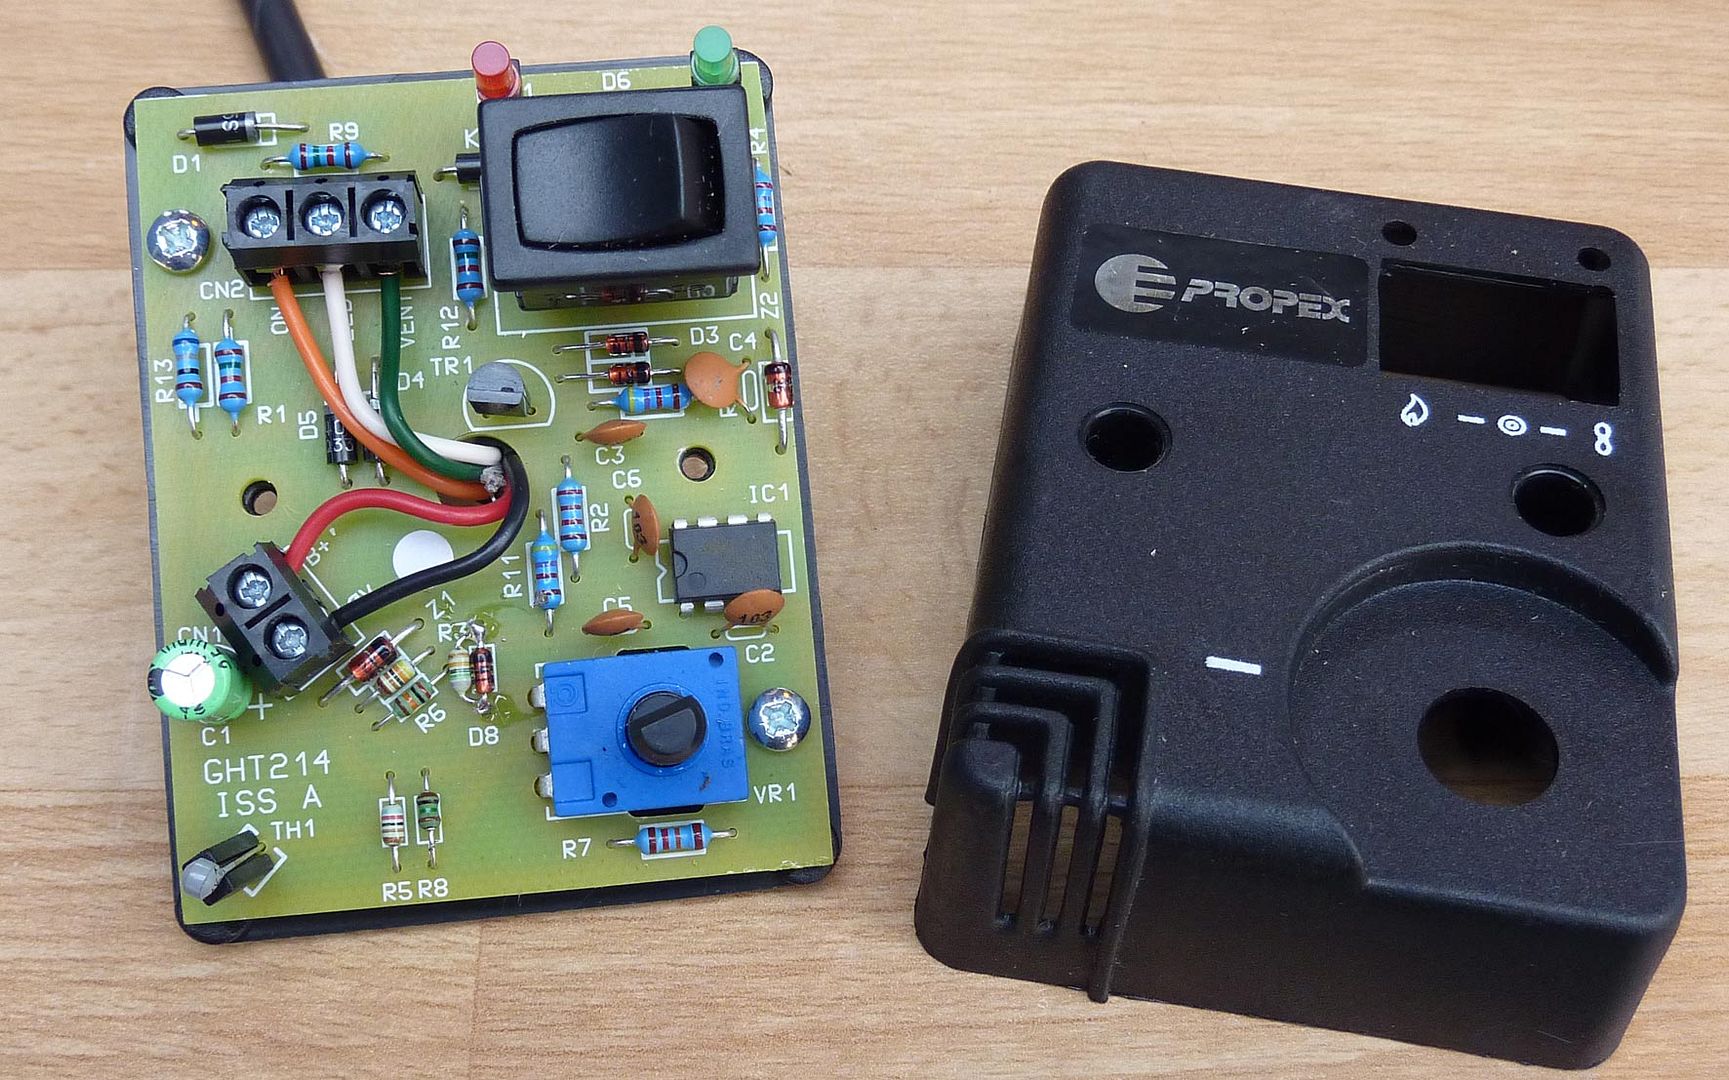
At the other end of the wires is a control box - you need to take this apart and fix the wires into this - again, pretty straight forward and colour coded:
The power wires also feed out and in my case were simply directed through the rear bulkhead and into the engine bay, where I wired them directly to the battery using the supplied inline fuse.
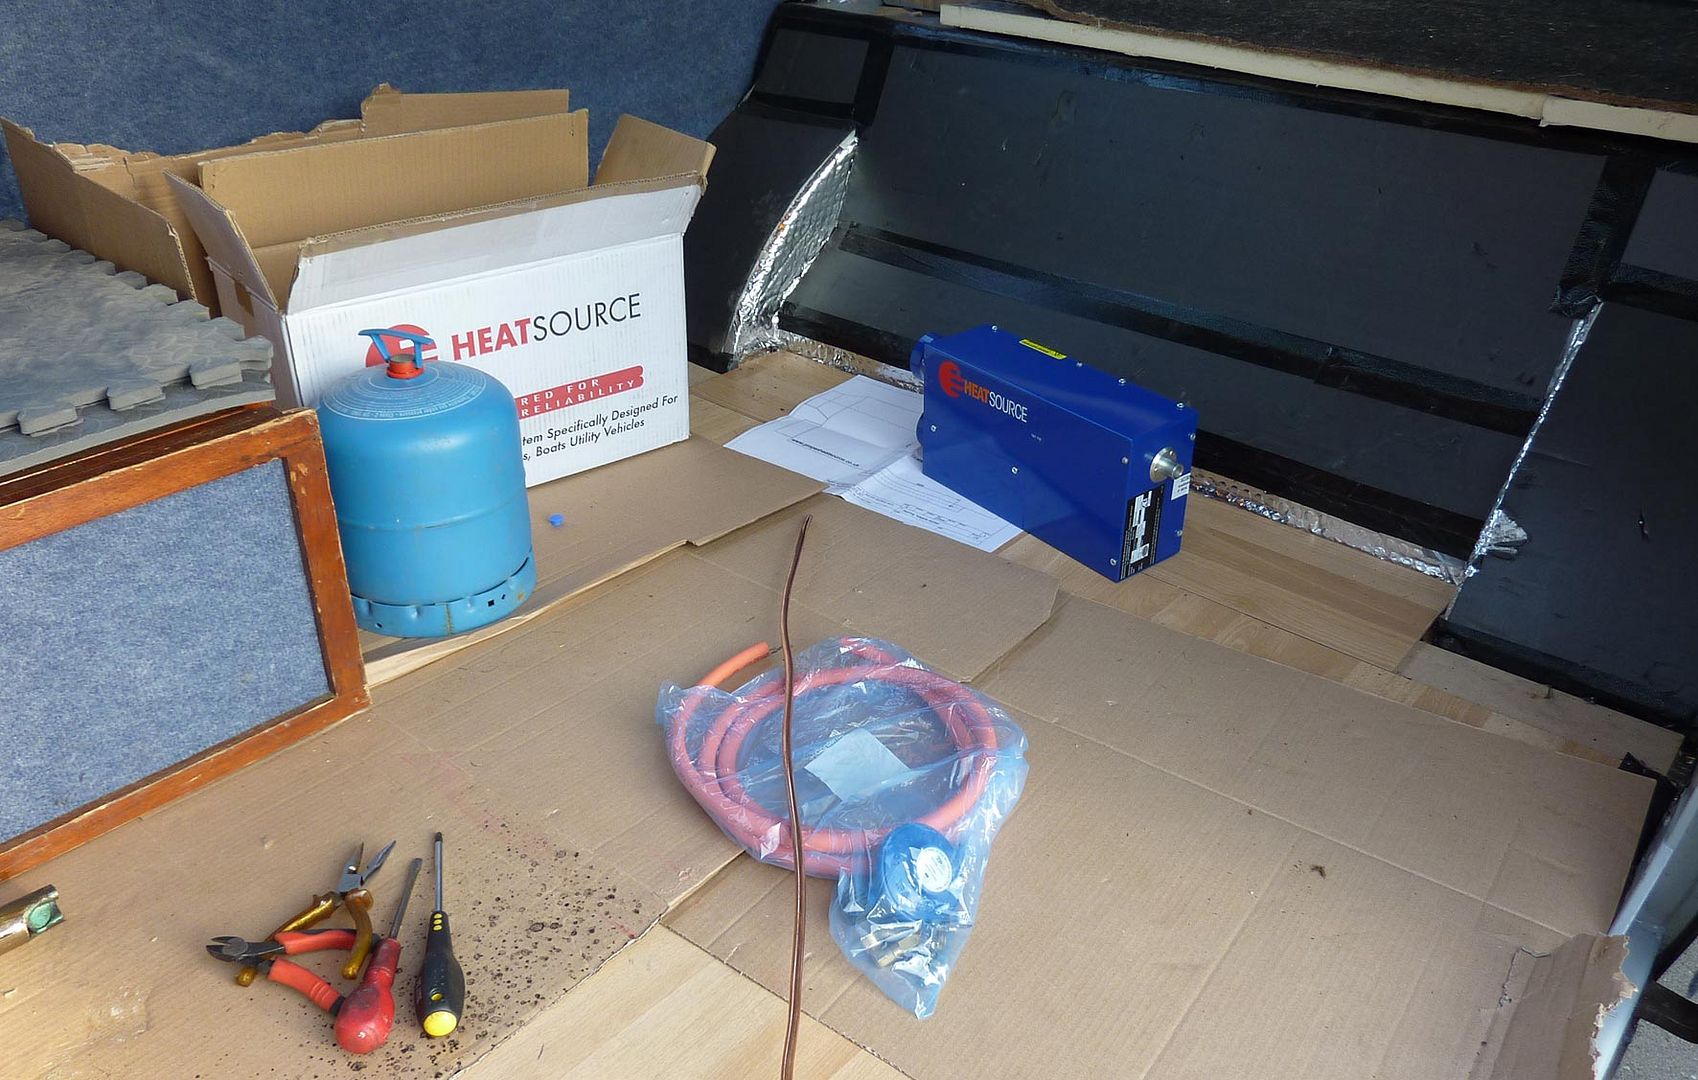
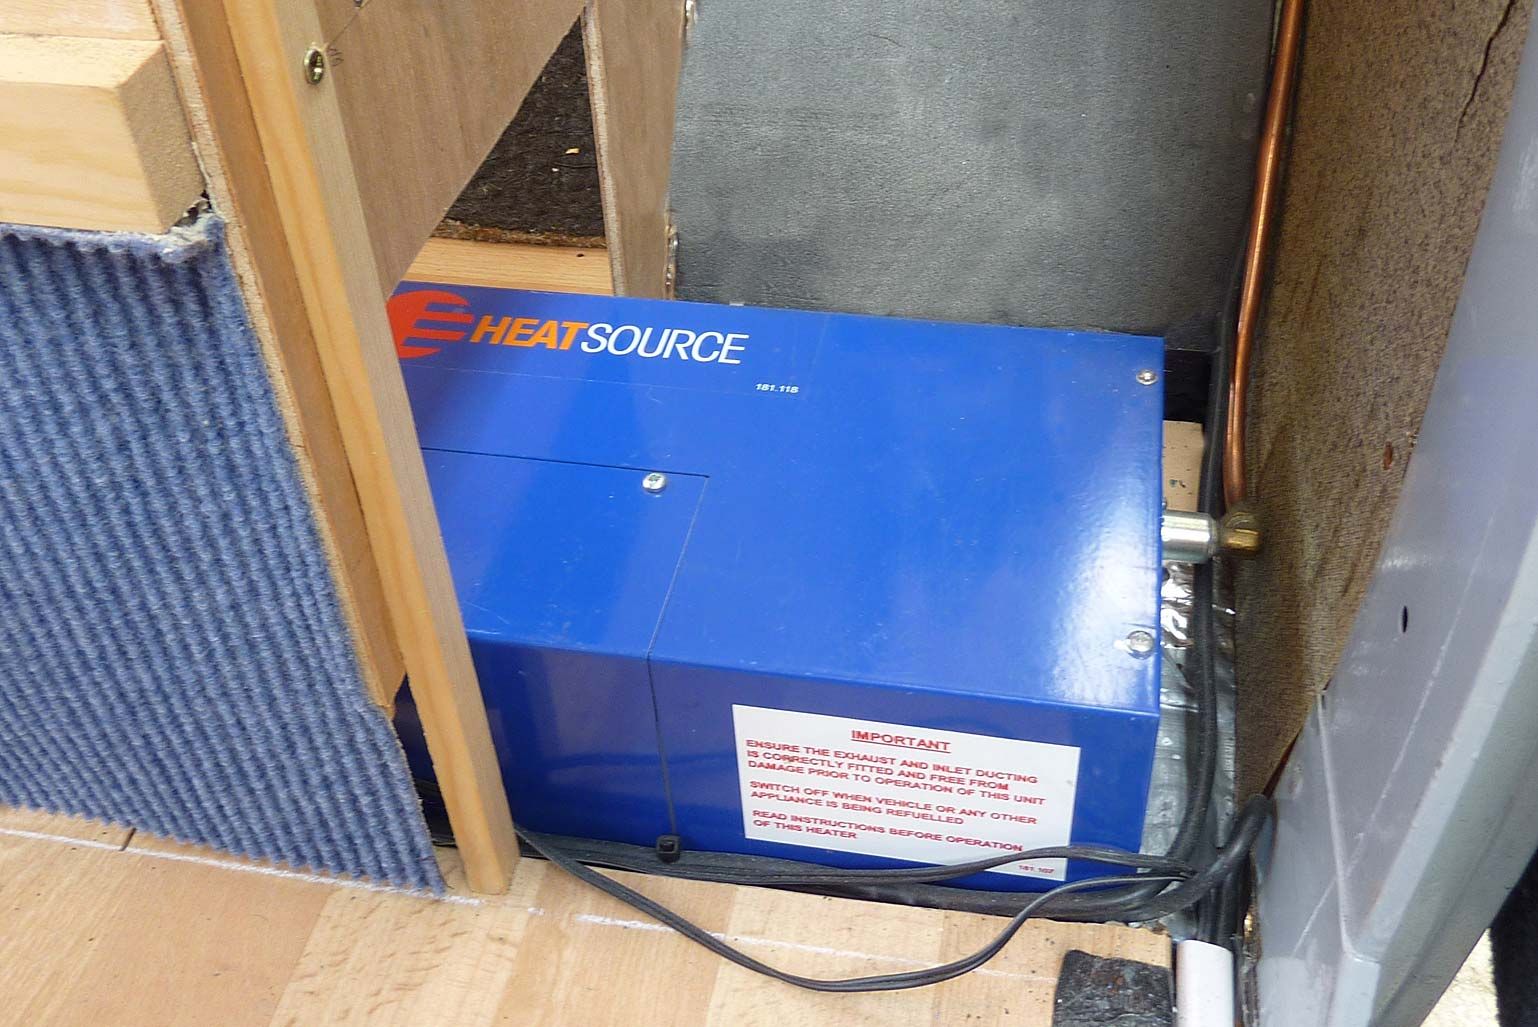
The gas supply is fed to the heater via a copper pipe. I bought this from a local 'Calor Gas' supplier, where I also got the gas bottle and valve which you can see in the first picture. I fed this pipe into the engine bay as well. At the moment I have the gas bottle in the engine bay - I may change this.
You can see the copper tube.
This is how it looks with the interior in:
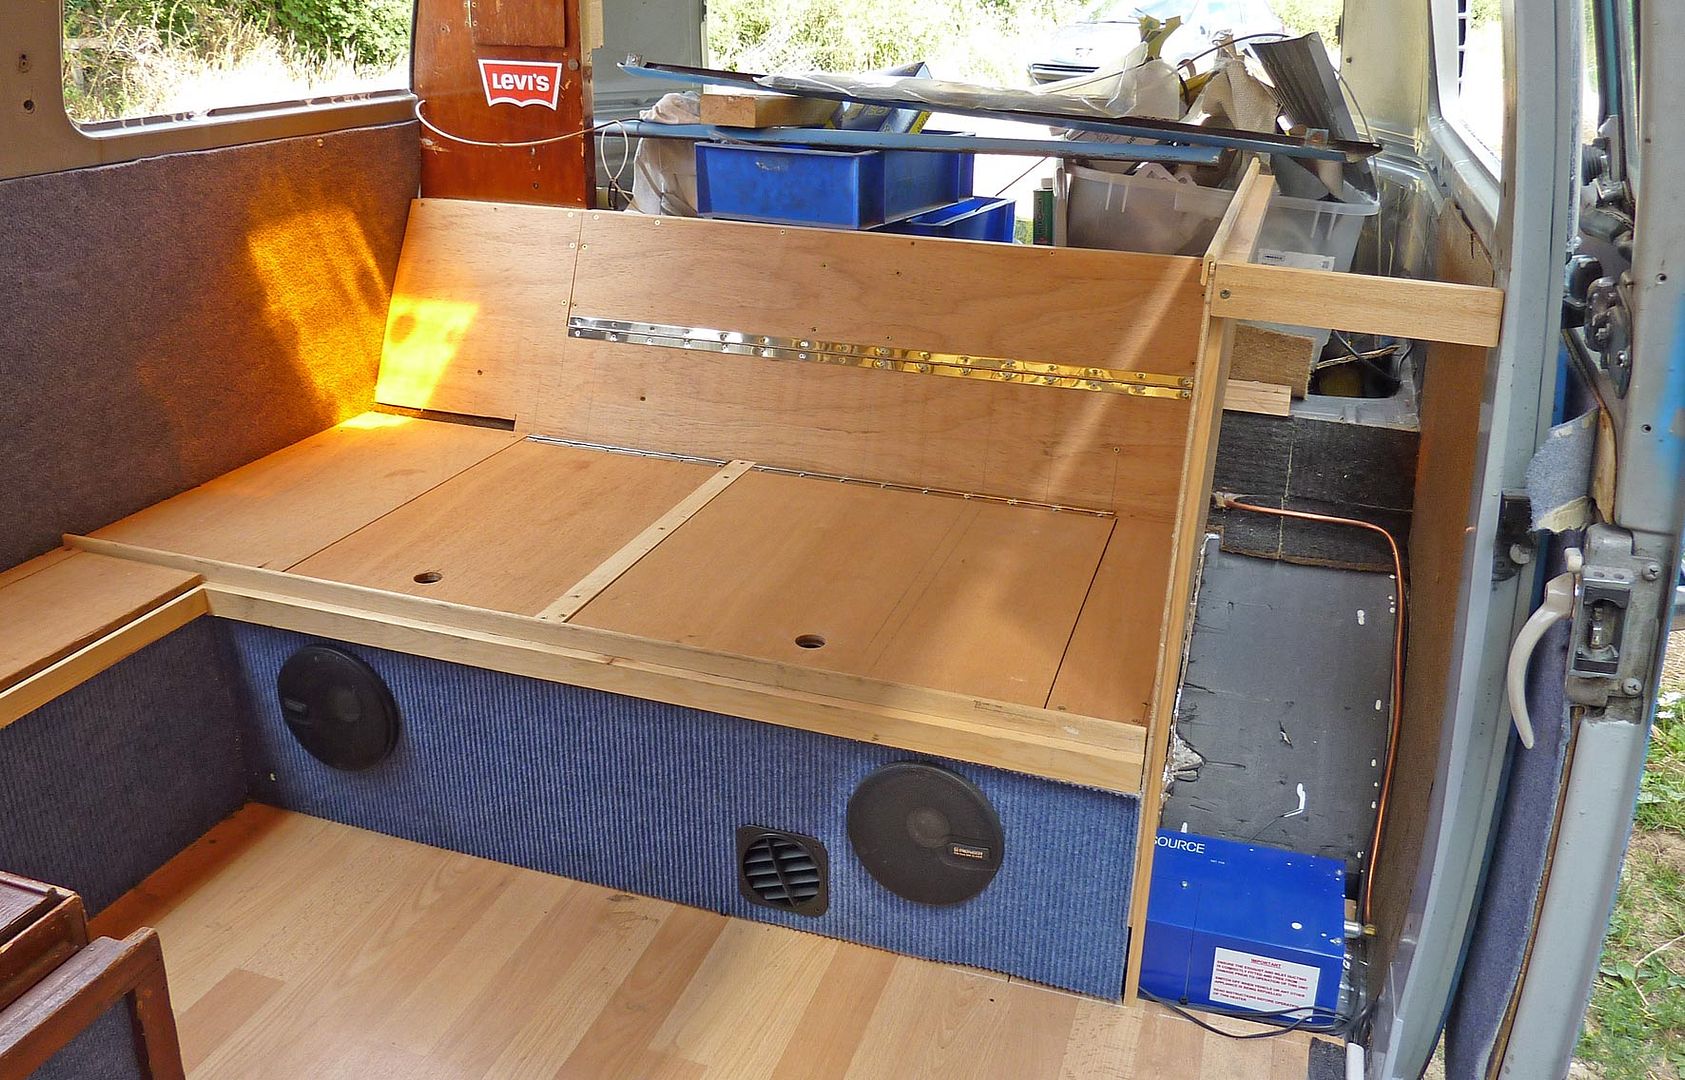
When complete, the heater will be under a box/shelf and hidden, but accessible.
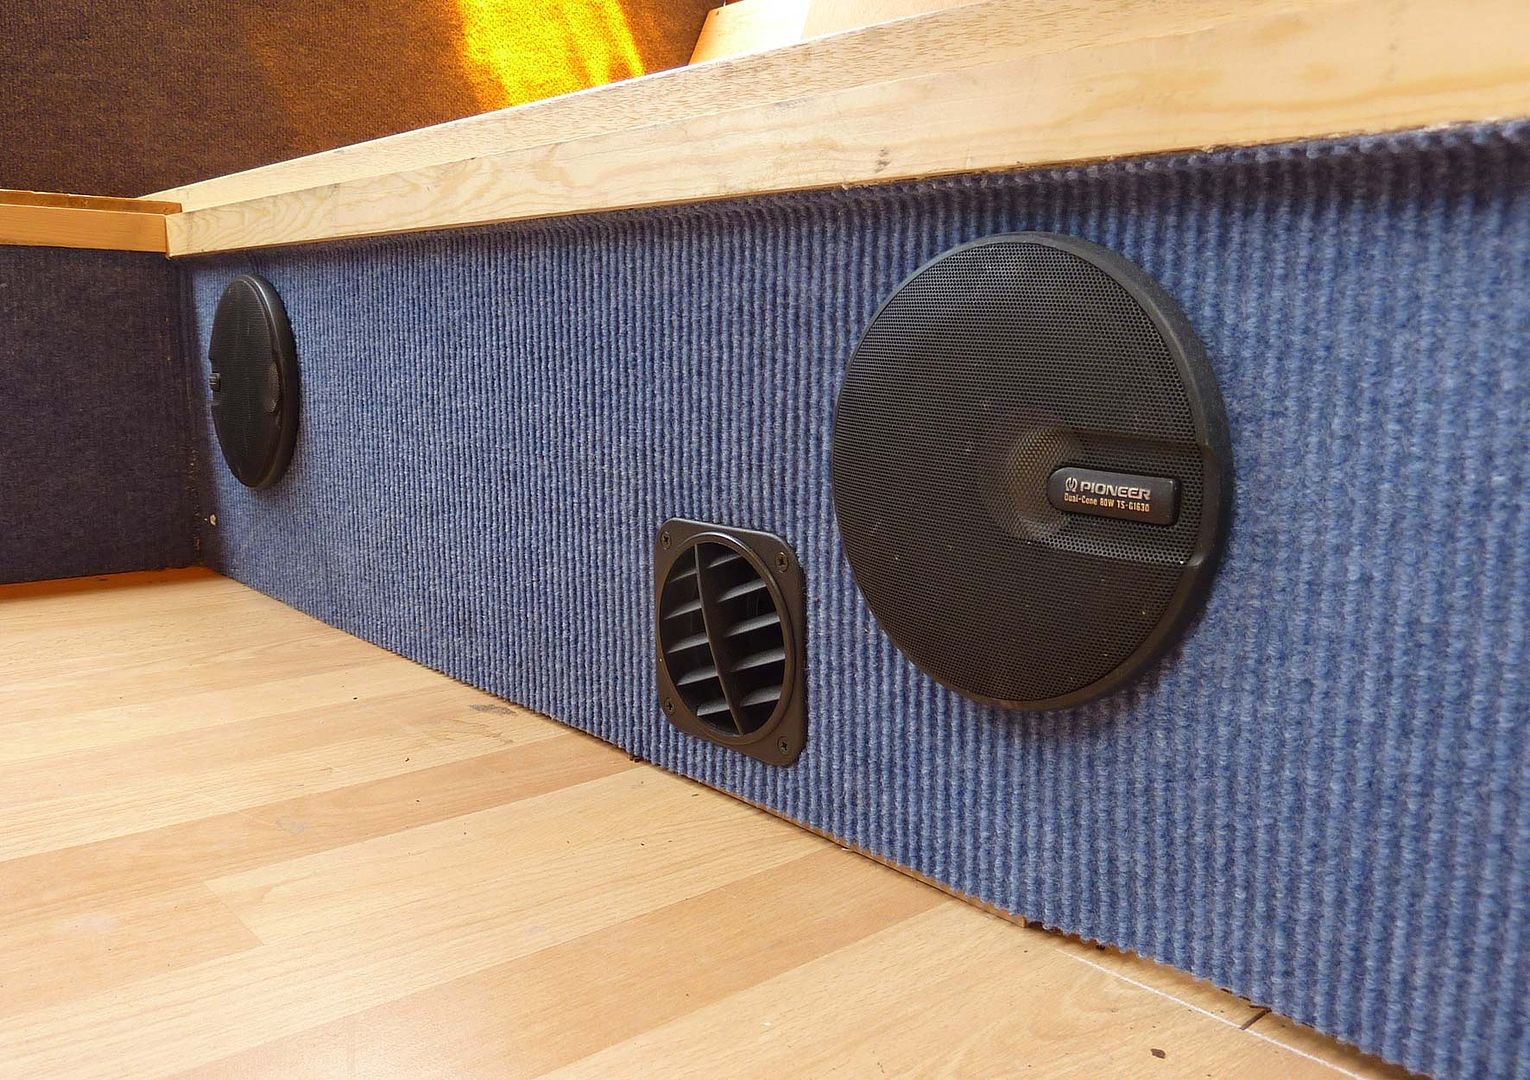
You can see where I placed my hot air outlet:
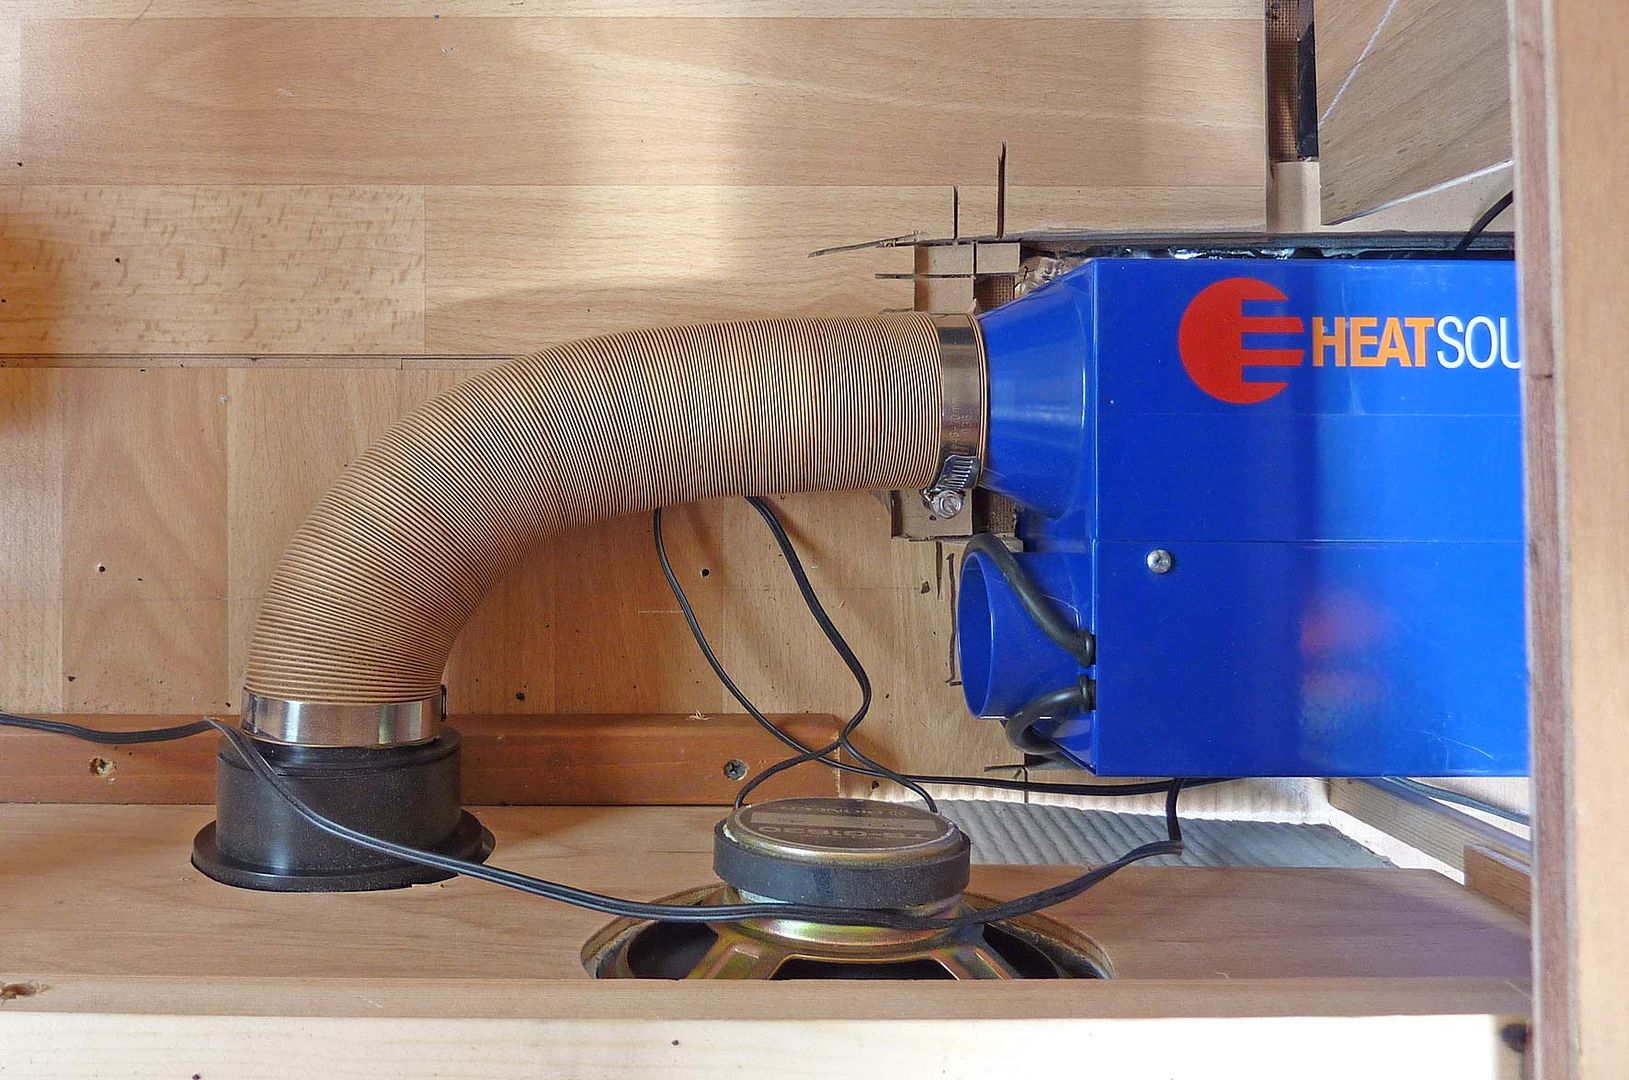
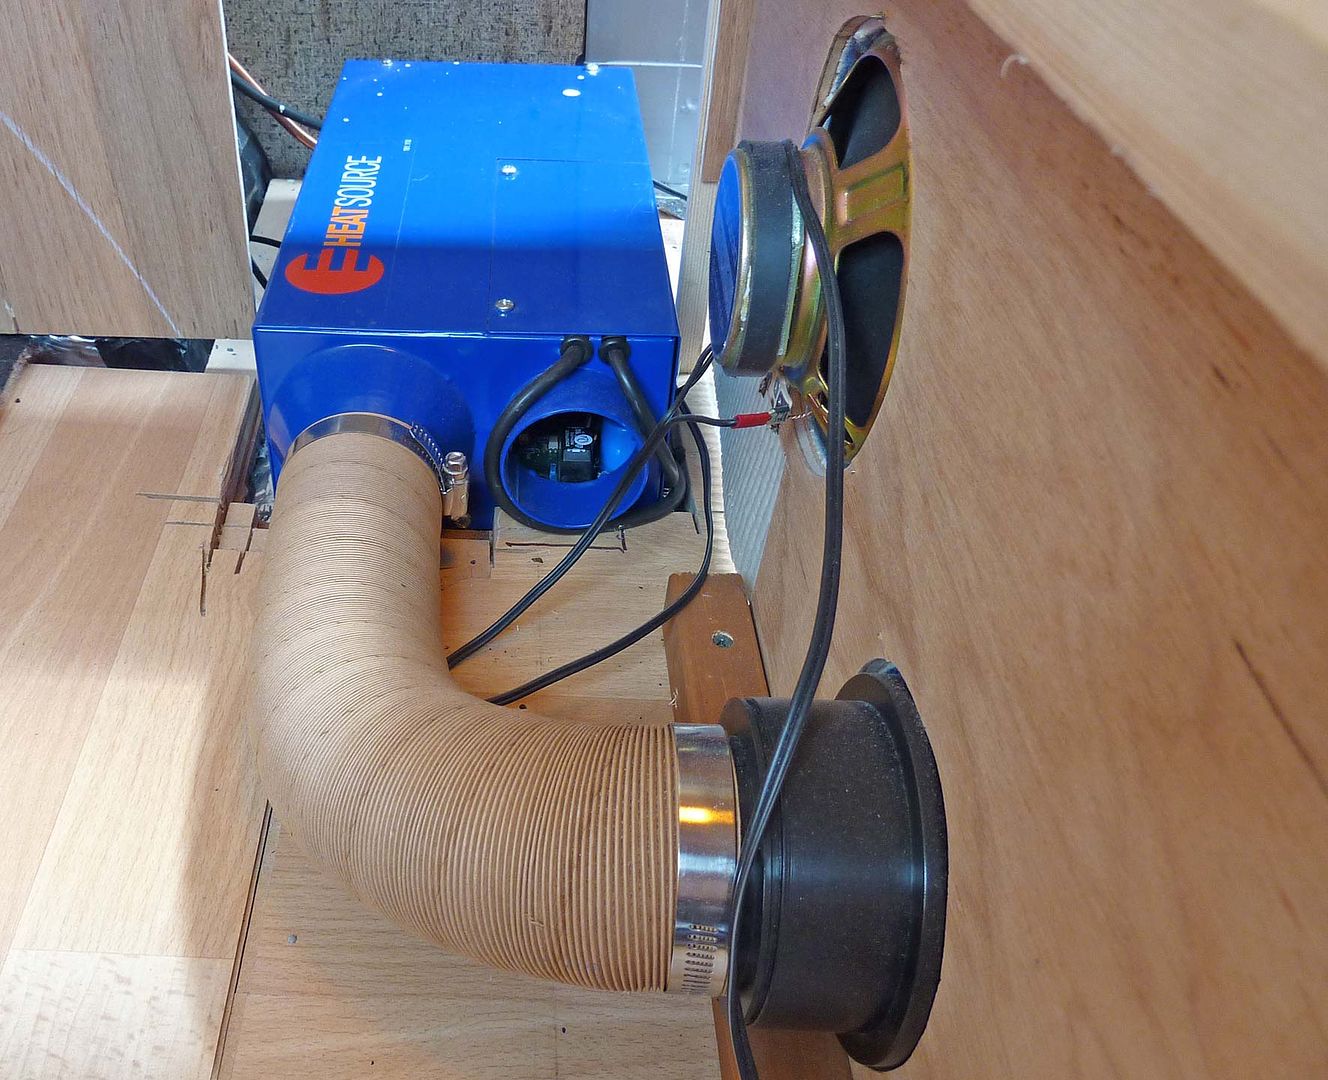
Inside the seat unit I have fixed the hot air pipe, connecting the heater to the outlet:
I'll box this in (not tightly) later. I expect the air inlet to be taken from the side unit rather than from inside the under-seat storage. I may duct this slightly to help. I want to avoid the heater sucking in the hot air it has just heater (if you see what I mean!)
I also wanted the hot air to be sent out from under the bed when it is set up, rather than just heating the space under, which is why the outlet is slightly off-centre.
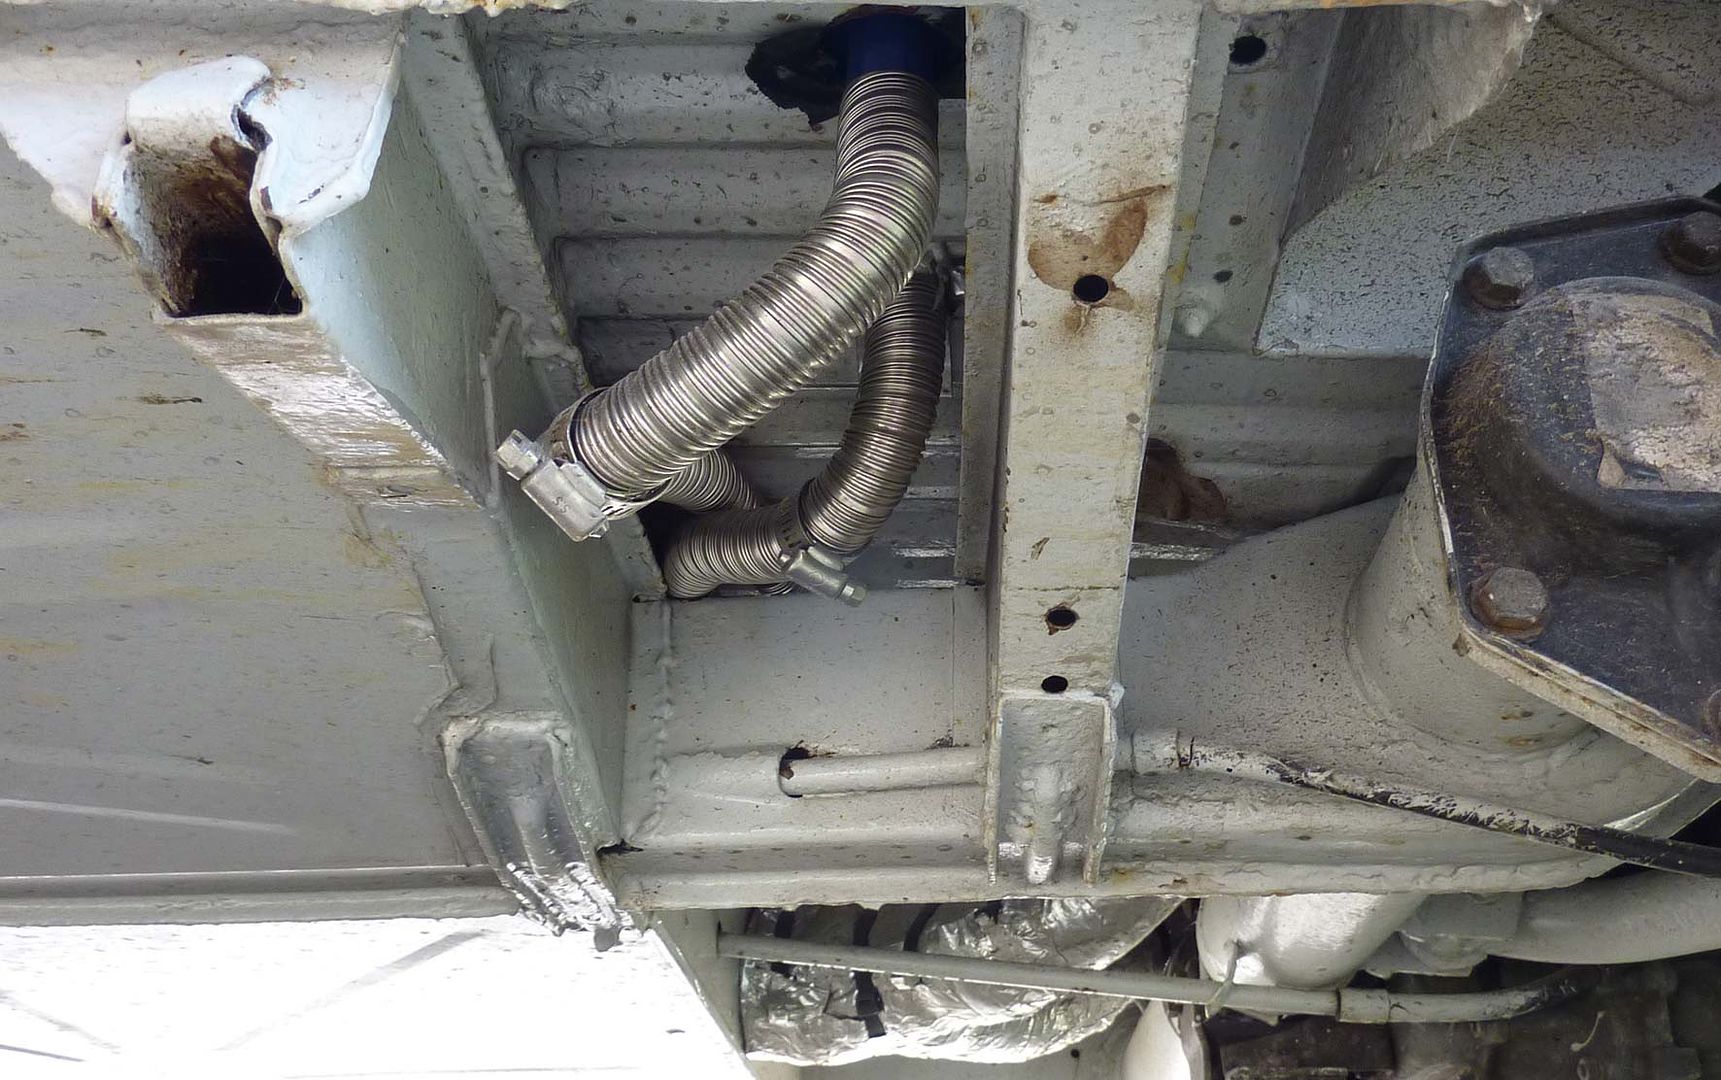
Under the van, the intake and exhaust exit through the floor, behind where the belly pans stop:
I haven't fixed these properly yet, so will need to update pictures later - this was a quick fix for our 24 MTB event, where the heater performed perfectly!

...so the floating jubilee clips will eventually hold the pipes properly.
At the moment the pipes are being fed into the centre of the van away from the edges, and also ensuring that the intake is not close to the exhaust:
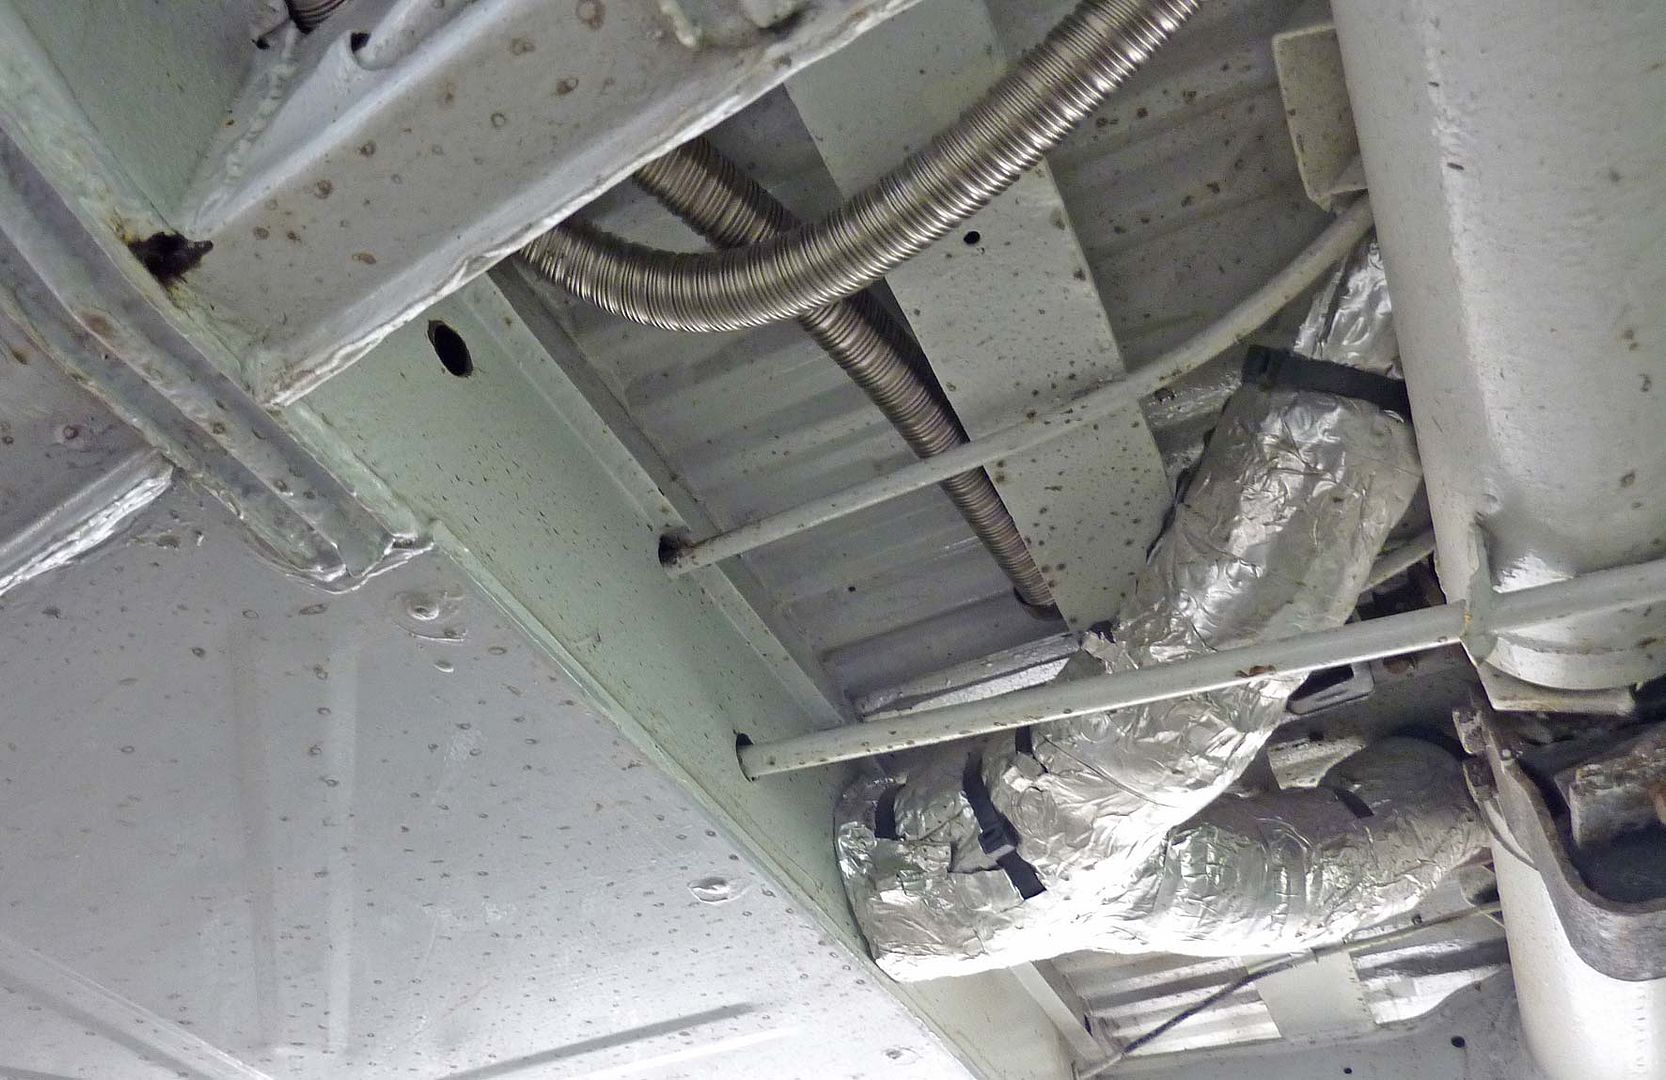
You can't see from these pictures, but I did make sure the exhaust has enough clearance around it where it exits the van - it does get very hot. I even used some heat-shield fabric, just in case.
When I finish the interior I will mount the control box - which also contains the thermostat - near the front of the van. I intend to use this heater when driving, not just when camping, so I want the control box to be easily accessible from the drivers seat.
So far so good - the heater works well and certainly pumps out the heat. The air flow is enough to circulate around the currently empty-ish interior really well, and it was very effective during our 24hr bike event. Yet to test properly when driving as it has been too hot!
Hope this helps a little - I'll add a few more detail pictures when I get a chance, or when I finish the interior!
cheers.
Location:
Most people fit their Propex here, on the rear bulkhead, usually within a rear seat/under the rock n' roll bed.
I decided on a slightly different position. The main reason was that I don't like the way that putting the heater here takes up a lot of under-seat storage space, especially as it is best to keep some space around the heater.
I toyed with positioning it behind the drivers seat, in a storage unit I have there, but for the same reasons of taking storage space, I avoided that. Instead, I have elected to position mine under the unit I have just inside the sliding door....about here:
It does make it a little more awkward, but this means my under-seat storage remains open and clear. The only thing I really had to watch out for was where the pipes would exit the van through the floor. Having just fixed belly pans underneath, I had limited access to the underfloor/chassis (another reason for avoiding the location behind the drivers seat. In positioning I also had to consider where the hot air outlet would go (and the inlet) and in this case I have followed the majority in fixing these into the front wall of the rear seat/storage unit.
I was making my side unit narrower than it had been before, so the heater unit would indeed extend into the under-seat space a little bit after all, but not be nearly as obtrusive as the alternative position.
First thing was to use the provided scale map to mark the holes into the floor, and then drill:
Now, ideally I might have fitted all this before fitting things like belly pans, and wooden floor. However, I had been waiting to see what the JK Propex heater kit was going to be like. Back in January, this was mentioned by staff online as 'coming soon' and a kit that allowed one to plum the propex into the vans heater tubes and use both etc etc - great, I thought. Well, it is almost the end of summer and as far as I know they still haven't launched it. I got on with everything else in the mean time, then gave up waiting. I understand delays, but don't say 'coming this month' if it isn't.... :roll:
So, I had to whittle the floor somewhat.
These are the brackets that bolt to the underside of the unit and hold it of the floor:
This is the underside of the unit. The thicker, silver pipe is the exhaust - this will get pretty hot! The other blue pipe is the inlet for the combustion air. That is air that is burned by the gas unit, which then gets sent out through the exhaust. This is NOT air which is drawn in and used to heat the van - the air for that is circulated inside the van - ie: it is a separate circuit - again, if that makes sense!
You the use these to screw the unit down - pretty straight forward.
A small cover unscrews to give access to the electronics inside the unit. You need to do this to plug the control wires in:
Hard to get wrong, the plugs are already wired in - you just need to plug them in and thread the wire out of the unit, using the rubber grommets provided:
When you bolt the cover back on, the wires/grommets are held in position.
At the other end of the wires is a control box - you need to take this apart and fix the wires into this - again, pretty straight forward and colour coded:
The power wires also feed out and in my case were simply directed through the rear bulkhead and into the engine bay, where I wired them directly to the battery using the supplied inline fuse.
The gas supply is fed to the heater via a copper pipe. I bought this from a local 'Calor Gas' supplier, where I also got the gas bottle and valve which you can see in the first picture. I fed this pipe into the engine bay as well. At the moment I have the gas bottle in the engine bay - I may change this.
You can see the copper tube.
This is how it looks with the interior in:
When complete, the heater will be under a box/shelf and hidden, but accessible.
You can see where I placed my hot air outlet:
Inside the seat unit I have fixed the hot air pipe, connecting the heater to the outlet:
I'll box this in (not tightly) later. I expect the air inlet to be taken from the side unit rather than from inside the under-seat storage. I may duct this slightly to help. I want to avoid the heater sucking in the hot air it has just heater (if you see what I mean!)
I also wanted the hot air to be sent out from under the bed when it is set up, rather than just heating the space under, which is why the outlet is slightly off-centre.
Under the van, the intake and exhaust exit through the floor, behind where the belly pans stop:
I haven't fixed these properly yet, so will need to update pictures later - this was a quick fix for our 24 MTB event, where the heater performed perfectly!
...so the floating jubilee clips will eventually hold the pipes properly.
At the moment the pipes are being fed into the centre of the van away from the edges, and also ensuring that the intake is not close to the exhaust:
You can't see from these pictures, but I did make sure the exhaust has enough clearance around it where it exits the van - it does get very hot. I even used some heat-shield fabric, just in case.
When I finish the interior I will mount the control box - which also contains the thermostat - near the front of the van. I intend to use this heater when driving, not just when camping, so I want the control box to be easily accessible from the drivers seat.
So far so good - the heater works well and certainly pumps out the heat. The air flow is enough to circulate around the currently empty-ish interior really well, and it was very effective during our 24hr bike event. Yet to test properly when driving as it has been too hot!
Hope this helps a little - I'll add a few more detail pictures when I get a chance, or when I finish the interior!
cheers.