Plea for help - Control tube locations

Early Bay Forum

Help Support Early Bay Forum:

This site may earn a commission from merchant affiliate links, including eBay, Amazon, and others.

Bay_Buster

Well-known member
Joined
Mar 9, 2013
Messages
84
Reaction score
3
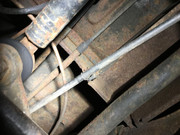
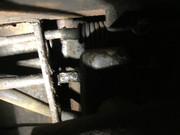
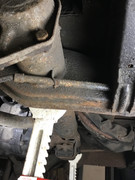
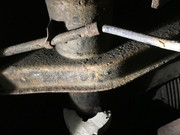
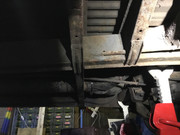
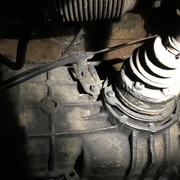
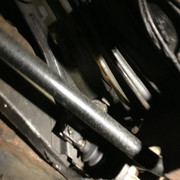
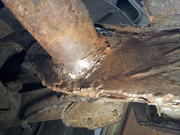
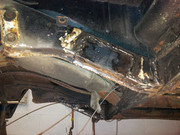
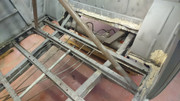
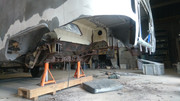
Hi everybody, I'm finally at the stage of sorting all the 'fiddly little stuff' rather than welding in big new panels and suchwhat. Tomorrow I'm collecting new control tubes from Schofields:

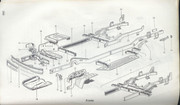
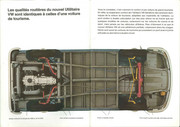
Gear shift rod tube, accelerator cable tube, clutch cable tube, handbrake cable tubes and heater cable tubes

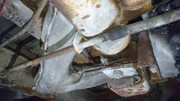
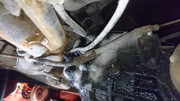
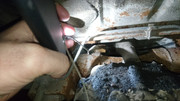
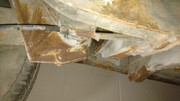
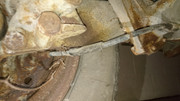
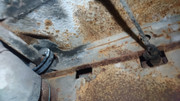
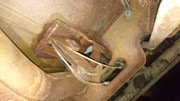
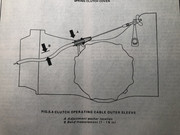
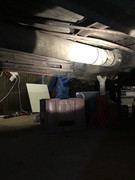
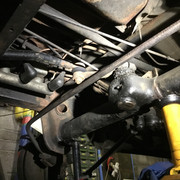
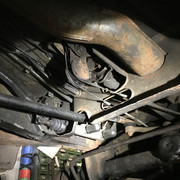
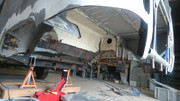
Unfortunately my old rusted ones disappeared a long time ago, and having trawled back through my collection of photos it appears I didn't take sufficient pics to help me correctly locate and affix the new tubes. The various books I own also lack information on these. Below are some of the only pics I took, and a few somewhat useful bits I've managed to scour off the net. But still, insufficient material for me to get all the tubes in the right places :?

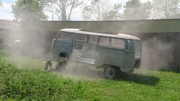
This is where I ask for help - mine's a RHD '69, originally a panel van. If you're a RHD early bay owner in the vicinity of Dronfield/Chesterfield/Mansfield/Nottingham and wouldn't mind me crawling under your vehicle to take some reference photos that would be a huge huge help. Alternatively if you plan on doing some crawling about yourself and wouldn't mind taking some pics of any of the above tube routings and posting up that works too, but I feel that's asking a little much if you don't plan on being underneath doing stuff already.


https://web.archive.org/web/20190429075331/http://www.specialpatrolgroup.co.uk/spooky/conduits/conduits.html
 
Super fast and helpful gvee, thank you! I'm presuming that is correct for a RHD '69? It looks right to me, but I'm an amateur!
 
Good question, and not one I know the answer to I'm afraid.
FYI the bus in that link is a '72
 
Now I think about it I seem to remember the handbrake being different, with the two wires actually running onto the bottom of the lever on my '69 instead of being joined/merged into one before reaching the lever. I could easily be wrong though! Good to know those pictures are from a '72.

I guess my original plea still stands at the moment then! I would hate to get to the full reassembly stage after the paint is on and then find out I've put things in wrong :shock:
 
So I've quickly looked into the different replacement cables available (from Schofields) for different dates and found out the parts differ as follows:

Accelerator Cable RHD
08-1967 - 07/1969 = 3462mm
08/1969 - 07/1972 = 3410mm
08/1972 - 02/1976 = 3620mm

Clutch Cable RHD
08/1967 - 07/1969 = 3245mm
08/1969 - 07/1971 = 3254mm
1971 - 1979 = 3215mm

Handbrake Cables
1967 - 1968
03/1968 - 07/1971
08/1971 - 1979

Heater Cables - also follow a similar date pattern, but I got fed up of writing ;)

I'm presuming the differences in cable lengths also means a difference in the housing tubes/conduits lengths and/or starting and finishing positions.
My van is a '69 model, estimated production date according to the M-Plate data is 11/11/1968. So I *think* looking at an 08/1968 to 07/1969 van/bus should have most things the same? I seem to remember most manufacturing changes came in after the annual July factory holiday.

I should have taken more bloomin pictures :cry: . This is a nightmare. If anybody can help please let me know!
 
I’ll be under mine on the weekend for any specifics, the weekend for me is Friday Saturday. Mines RHD a 1970 and was also a panel originally. From memory, the only snippet that springs to mind is that both my handbrake cables run from the handbrake lever with their own separate adjusters right through to where they go through the back plate. I’ll have a look but I don’t believe that they assist each other or are linked at all, but I’ll double check on the weekend. What sort of time are you in on Friday? What I’m thinking is specifics and you can talk me through exactly what measurements you need. At present I’ve got the rear on axle stands as I’ve just fannied about with raising my suspension and now I’m having a bit of a pig getting it back in one piece and bleeding the brakes. All my tools are toooo old, this van is toooo old and yes I’m way way way toooooo old :lol:

Ozziedog,,,,,,,,,,, my eezibleed ain’t so easy no more. :mrgreen:
 
Morning Ozziedog! Thanks for confirming my fuzzy memory of the handbrake cables running straight up onto the lever. I'm gonna have to dig that out and refit it for sure to get the angles to line up right. If you're happy taking some pictures with a ruler stuck in for reference that would be brill. I can be with the van anytime on Friday, but I don't have reliable internet in the unit there (sometimes no phone signal at all, often weak 2G).

My other slim hope is that maybe there will be a friendly early bay present at Schofield's when I call in today. Long shot but we'll see, I shall report back later.
 
Ok, I’m messing about with it on Friday and I’ll see if we can’t get specific measurements too certain points.

Ozziedog,,,,,,,good luck at Schofields :mrgreen:
 
So I had some luck at Schofield's earlier - there was a 1970 bus for me to poke about and take pictures of, but it was a LHD so different at the front end. I am fairly happy now with where most things terminate at the rear though...

Clutch cable tube terminates under the rear torsion tube:


I'm told you need at least 1" spacing from the height of the kink in the bowden tube to the imaginary straight line between it's ends, so I'll have to have the transmission in and rig it all up with my shiny new bowden tube and cable to make sure it's set right (pain, but better than regrets later).

The end of the accelerator cable tube seems to just float around almost level with the 'flat' end of the transmission:


Handbrake cable tube ends just shy of the rear 'end' of the torsion tube with the flexy cable pushed on the end:


Similar to the clutch bowden tube this flexy tube apparently needs a generous amount of slack to accommodate for suspension movement and avoid problems, so again a full fitting test will be needed here with the new cable to avoid future problems.

Gear shift tube finishes in line with the edge of the last tophat section:

You can also see the accelerator tube tacked on here.

Skipping to the front end here you can see the start of the gear shift tube and the start of one of the handbrake cable tubes:

For reference this is the first crossmember, further forward the main chassis rails arch up and over where the front beam is fitted.
 
So I'm confident I can get the gear shift tube and both the handbrake cable tubes fitted in correct and working positions now.

Ozziedog if you (or anybody else) could help with any of the following that would be terrific:

1) Start, mid-routing and finish of the heater cable tubes (seems I missed picturing those buggers in the engine bay :roll: )
2) Start and mid-routing of the accelerator cable tube (and finish in the engine bay too if you can see and it's not too much trouble - two references are better than one)
3) Start and mid-routing of the clutch cable tube

Oh and for anyone wondering what me and Ozziedog were on about with the handbrake lever here's a pic:

Both individual handbrake cables should be wrapped around the bottom of the lever, but you can see one has fallen off. I guess this bit got improved sometime in '71, hence the later models having slightly shorter handbrake cables
 
Cheers sparkywig :D I have clocked that one in Haynes already though (I'm not entirely useless all the time). Shame there's not a similar drawing for the handbrake cable flexes (or if there is, I've missed it thus far). Will just have to eyeball those as best I can I think and take the 'you can always cut more off later' approach for the tube ends.
 
Last for now.


From heat exchanger ends to tube ends is 90mm if they were on the same plane.
Tother end was 25mm pokin* out as in pic, one with sleeve on and one without but only just visible.

Ozziedog,,,,,,,,,next to impossible to position light, hold tape, and crack off a decent pic :mrgreen:
 
Sterling effort there, thank you! Been a very long day today so I will study all the pics more tomorrow. Got a bit sidetracked from the tubes with other snagging - boss man wants to get some primer on the underside asap, so been prepping for some sand blasting while the front beam and heater pipework is out. Another long day tomorr... today! :shock: I'll get some pics up of the progress over the weekend.
 
No, I didn't get the tubes in last weekend. But we made the most of the sunshine and got a lot of stuff blasted up and tickled the underneath clean again...


Hopefully get back on track with the mission this weekend, thanks again for everybodys help 8)
 

Latest posts

Top