westfalia owners - a questions re the rear luggage rack bit

Early Bay Forum

Help Support Early Bay Forum:

This site may earn a commission from merchant affiliate links, including eBay, Amazon, and others.

dubdubz

Well-known member
Joined
Jul 10, 2007
Messages
2,549
Reaction score
5
Location
Peterborough mainly never Cornwall
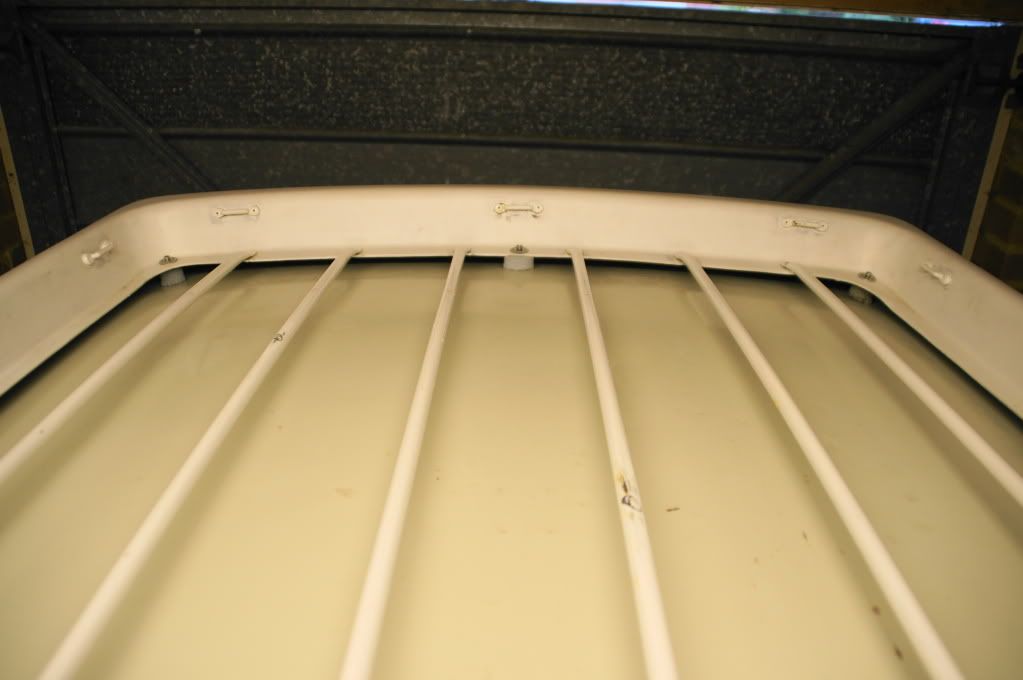
Basically how is yours fitted?

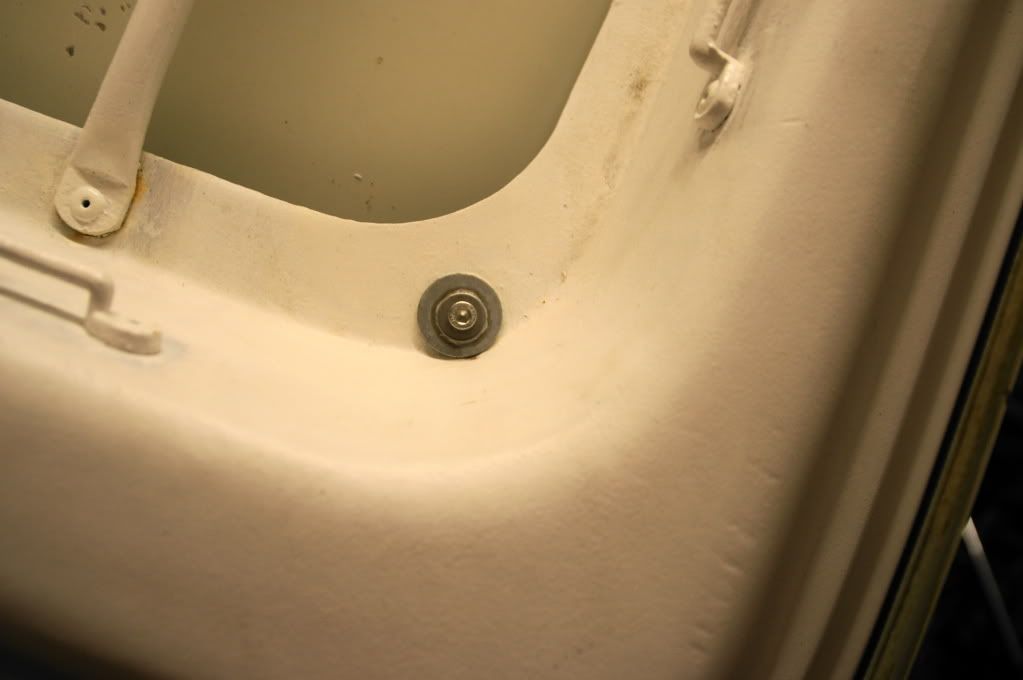
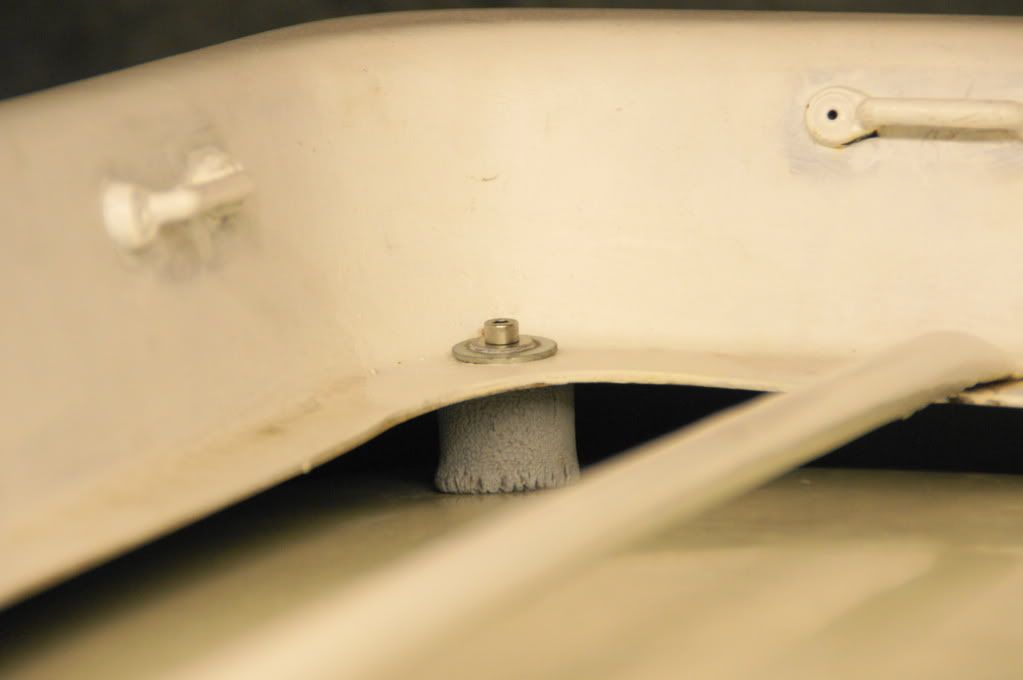
mine had what can only be described as roofing material screws/bolts, and a large spacer washer under each of the front holes....

my questions

a- is this right a self tapping roof type bolt with a rubber washer affair both on the shoulder of the fixing and underneath on the front lip......
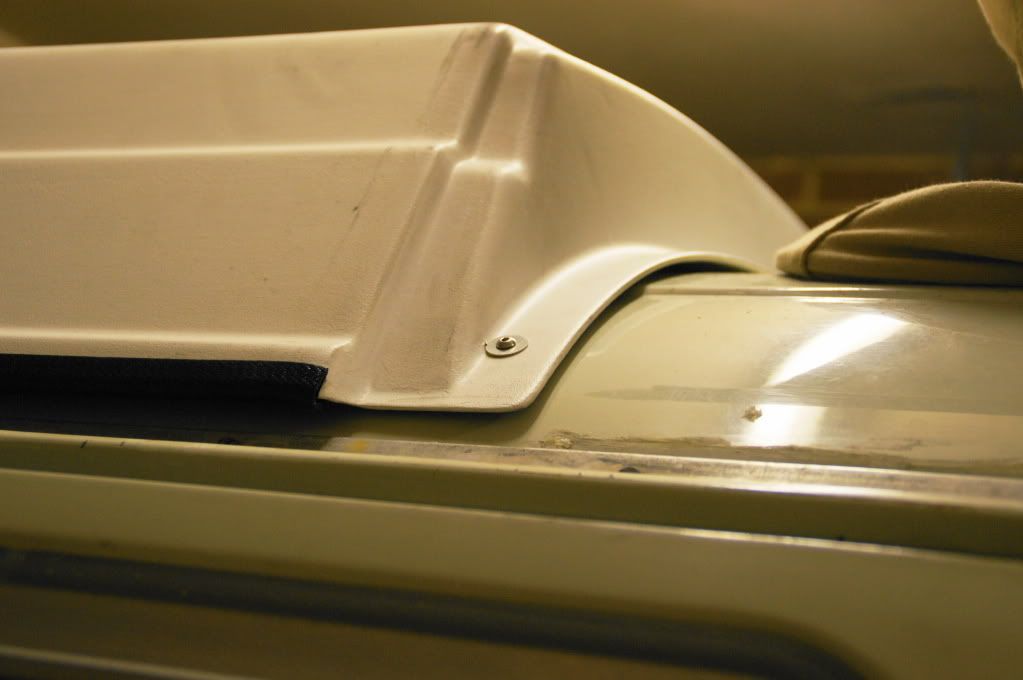
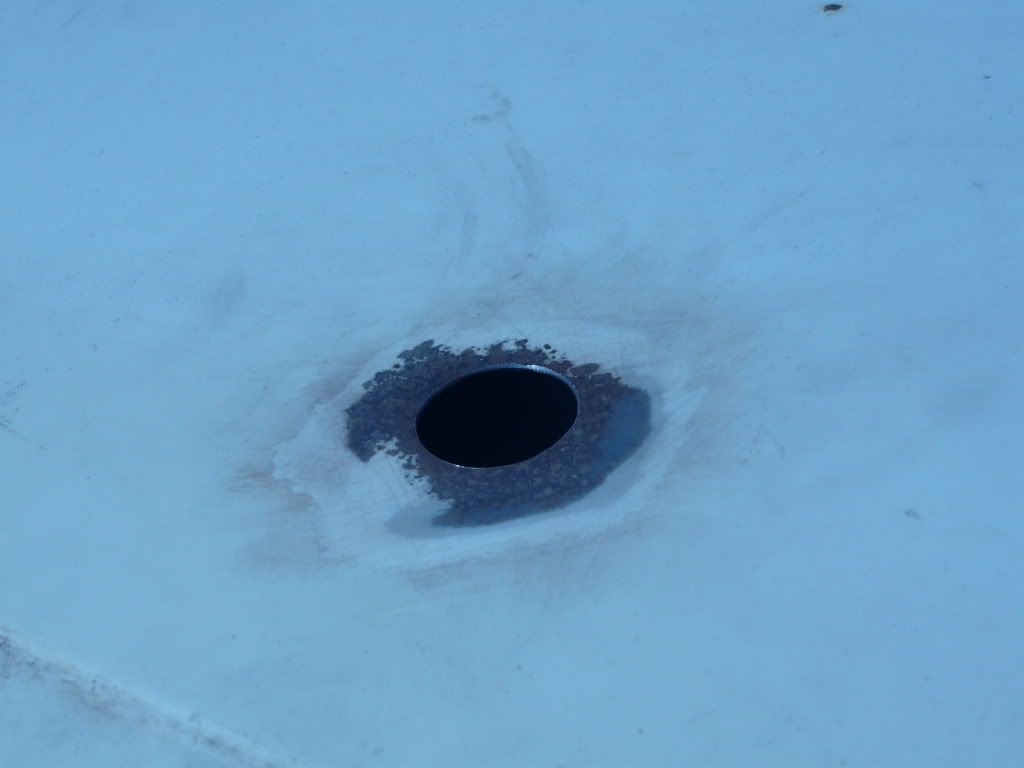
b-how is the back fixed and kept water tight, now the seal is on there is a gap between the fixing flat lip section and the roof....is there supposed to be more rubber washers? it looks like they would need to be thicker than the front ones?


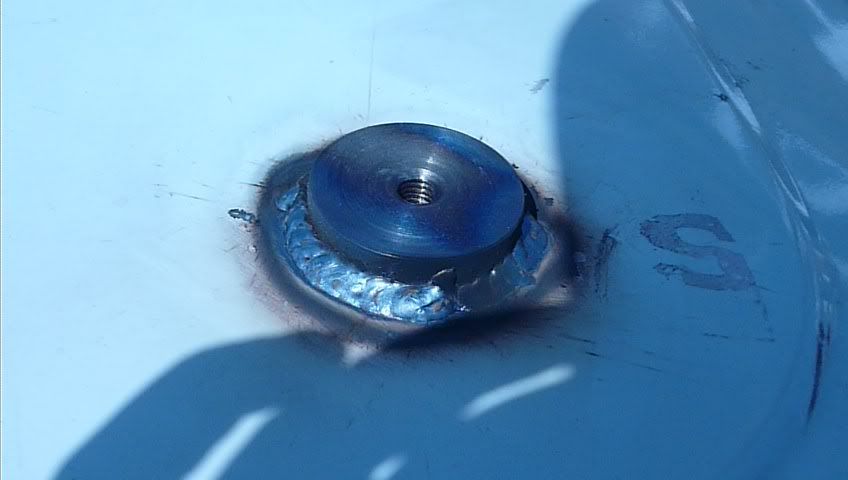
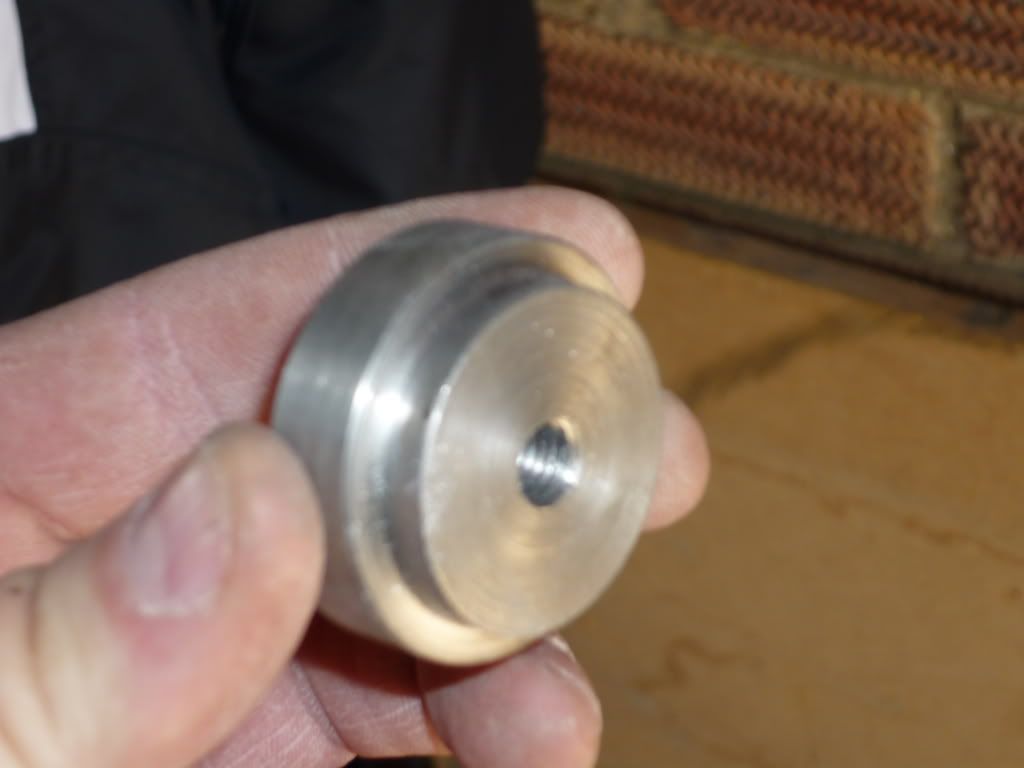
I wanted to bolt and nut using appropriate rubber washers to keep out the water, but getting to the rear fixing is a pain I think unless I've missed something?

And finally [might as well keep it all in one thread] how are the roof bars fixed? nut and bolt? rivett? there doesn't look to be much room there.


thanks in advance

Darren
 
Yes ... its rubbish :mrgreen:

The rear are three long self tappers, the rubber bungs between rack and roof should stop water ingress, but Ive always worried about it. Part of my winter project is to re-do all this. My self tapper holes are worn, so I will either weld captive nuts in place, as Ive seen someone else do, or weld/rivet small plates in place to create 'new' self tapp holes. Ill fix the bungs all in place with good sealant too.

The nuts/bolts that hold the rack bars in place have to be almost flush to clear the roof.
 
Was wondering if any else thought the original fixings were crap!!
they are supposed to be just self tappers - 3 along the back and 1 each side at the front with 2 bolts through the sunroof opening at the front.

What I did was drill the holes out to 10mm and fit some metal cavity fixings (like the cavity wall ones but bigger and stronger - umbrella type)
you basically set them with a bolt to lock em in place and then I used some stainless hex head screws through the old rubber bungs.
I used slightly smaller 8mm hole size fixings either side at the front, but to be honest I was happier with the bigger ones at the back.

I didnt really like the idea of drilling the holes in the roof (10mm seems quite big) but the old self tappers had pulled through in the past and it was a right old mess.

oh and before I screwed it down I put some clear silicon over the fixings.

I will try and take a pic of a spare fixing I have - local decent nut and bolt dist. should do em. If you have the tool you could use special captive rivnut type fixings as well.
 
Clem said:
Yes ... its rubbish :mrgreen:

The rear are three long self tappers, the rubber bungs between rack and roof should stop water ingress, but Ive always worried about it. Part of my winter project is to re-do all this. My self tapper holes are worn, so I will either weld captive nuts in place, as Ive seen someone else do, or weld/rivet small plates in place to create 'new' self tapp holes. Ill fix the bungs all in place with good sealant too.

The nuts/bolts that hold the rack bars in place have to be almost flush to clear the roof.

It took some searching to find these things - mine are long gone it appears and I had no idea that there was such rubber spacers.....I don't suppose it's possible to get an approx size?
I have around 4-5 fixing on the front lip, and there is a thick tap washer underneath the fibreglass, presumably to stop the rack wearing through the paint?

the rear fixing holes are quite large as PO's have gone up a screwsize each time, oddly the Samba suggests these rear fixings come into the sunroof void, mine don't they actually come out inline with the rearmost strengthening section??

I have a plan which if it works and is not some abortion of a bodge I'll post pics of - it'll be simple

R73 pics would be awesome - please post away..........
 
similar problem as others, I used threaded inserts, tool below, you can get them a lot cheaper than this.
http://www.tools-supplies.co.uk/eclipse-spiralux-threaded-insert-kit-1375-p.asp" onclick="window.open(this.href);return false;

Also for the cotton reel type rubbers on the back brought some rubber doors stops from the DIY
 
ianscooby said:
similar problem as others, I used threaded inserts, tool below, you can get them a lot cheaper than this.
http://www.tools-supplies.co.uk/eclipse-spiralux-threaded-insert-kit-1375-p.asp" onclick="window.open(this.href);return false;

Also for the cotton reel type rubbers on the back brought some rubber doors stops from the DIY


cool - see above for DIY fail so far...

what size did you cut them down to, the middle is smaller than the sides of course.........
 
dubdubz said:
ianscooby said:
similar problem as others, I used threaded inserts, tool below, you can get them a lot cheaper than this.
http://www.tools-supplies.co.uk/eclipse-spiralux-threaded-insert-kit-1375-p.asp" onclick="window.open(this.href);return false;

Also for the cotton reel type rubbers on the back brought some rubber doors stops from the DIY


cool - see above for DIY fail so far...

what size did you cut them down to, the middle is smaller than the sides of course.........
I didn't just squashed the centre one a bit, they are a soft rubber so have a fair bit of give, inserts work well though a lot tidier and then used a stainless steel allen counter sunks with a washer to bolt it all down
 
ianscooby said:
I didn't just squashed the centre one a bit, they are a soft rubber so have a fair bit of give, inserts work well though a lot tidier and then used a stainless steel allen counter sunks with a washer to bolt it all down

the door rubber I saw were almost solid so wouldn't squash - they also weren't big enough....

I found this

rubbergrommets.jpg


and my thread on the samba has suggestions on rubber bung [ like test tubes ones ]
 
DSC03073.jpg

DSC03072.jpg

When they are new they would have been supple!
DSC03069.jpg

DSC03059.jpg

Rear corner
DSC03063.jpg

Front corner
DSC03061.jpg

DSC03065.jpg

Tap type washers under front of roof to adjust height to elevating section - rear rubber spacers and the long hollow profile is bonded to each side of the luggage rack.

This is local to me - they are awesome - its where I got the Fixings from.
They are called JackNuts I used M4's at the front and M5's at the back.
http://www.margnor.co.uk/" onclick="window.open(this.href);return false;

Hope it helps :mrgreen:
 
r73 said:
This is local to me - they are awesome - its where I got the Fixings from.
They are called JackNuts I used M4's at the front and M5's at the back.
http://www.margnor.co.uk/" onclick="window.open(this.href);return false;

Hope it helps :mrgreen:

thanks it does help no end...apart from the new bit that's missing query - the hollow section tube thing...where does that fit in the whole luggage rack fixing equation??

also jacknuts are not on the link - unless I'm searching incorrectly??

I have ordered demi john bungs as they look to be the right size - possibly either adding a rubber washer to the outers or slicing the middle one down a bit.

I really love this place - thanks so much for the pics..............
 
the hollow section is glued to the luggage rack half way along the sides along the bottom edge (1 each side). I really dont thing it matters if there not fitted - they are only there to stop the luggage rack rubbing on the paintwork. You could easily bond a piece of old door seal or similar??

Yeah the jacknuts are bot listed on their website for some reason?? I checked the receipt and I think its what there called.
You could either call them and order. Or if you do a google search you should find some examples.
 
Hi!

As for the roof bungs, get down your local brewing shop, and purchase a quantity of Demijohn red rubber bungs, the ones with the hole through the middle. They are more or less the correct size, you will need to trim the shorter ones are some of the Westy ones are shorter than a standard bung.
Plenty of sealent around the bungs on the base, and on top where the screw fits. Most important, you would have though that screwing the bungs down tight would stop water getting in - but after a raining V Fest 2008 with wet curtains and pillows, the answer is no, so make sure it;s all sealed up top and bottom of the bungs. You may need to renew the screws with new ones, mine seem to have wood screws in, they just screw directly into the metal roof.

Cheers!

Alistair
 
i used the same fixings as ianscooby those clinch nut type things , have to be quite acurate but used m6 ones and they worked great , you just have to be careful they don`t spin
 
Picture010-1.jpg


Picture015-1.jpg


Picture012-1.jpg


hi mate this was my solution bit over the top but i am happy with it, the screws dont seem strong enought for me :D
 
Hey guy's old post I know but does anyone have any approximate dimensions for the spacers, I'll have a have a go at turning some out of ptfe

Thanks Dan
 
I just brought some off of eBay. Away at mo but could check when I'm home. Not sure if they are any good yet as I haven't fitted yet. The rubbers were rock hard!
 

Latest posts

Top