1971 Deluxe Import - A blank canvas

Early Bay Forum

Help Support Early Bay Forum:

This site may earn a commission from merchant affiliate links, including eBay, Amazon, and others.
Well, not really had much time on the bus over the last week or so.

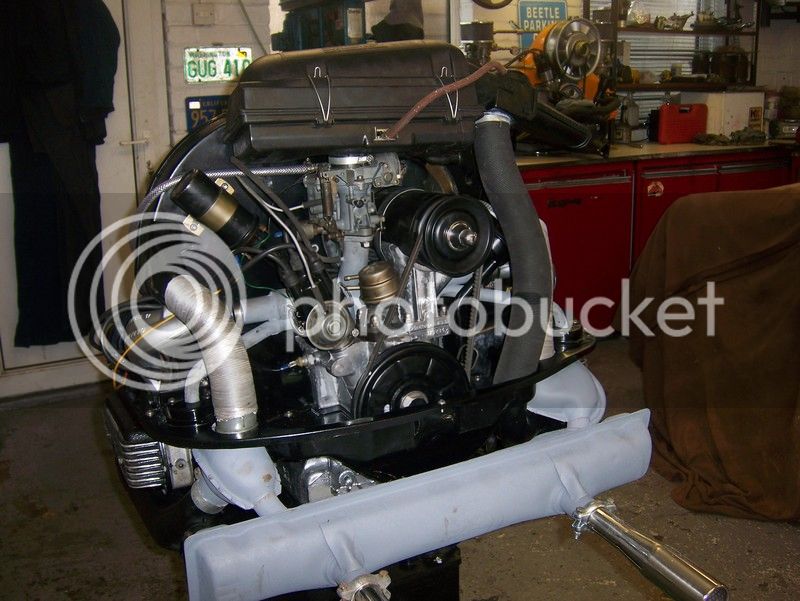
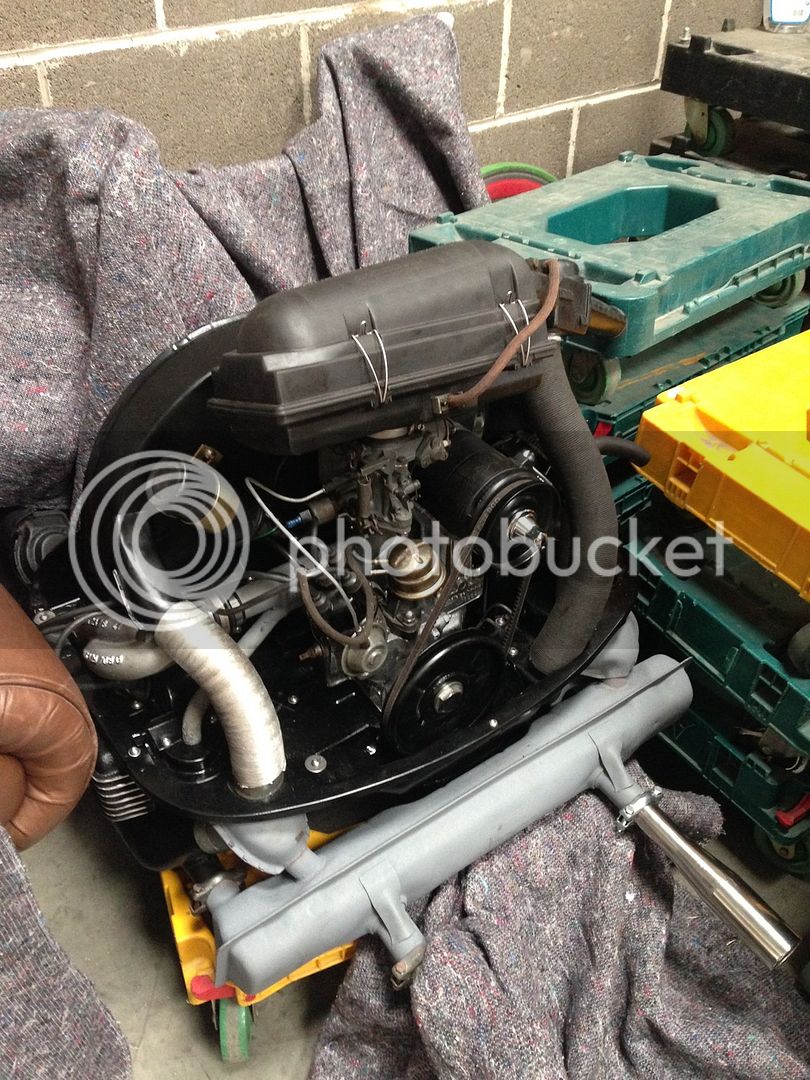
Managed to sort a recon engine after I managed to get mine running, it seemed to have an almighty knock so think it will require rebuild - I may keep and rebuild as a learning experience.

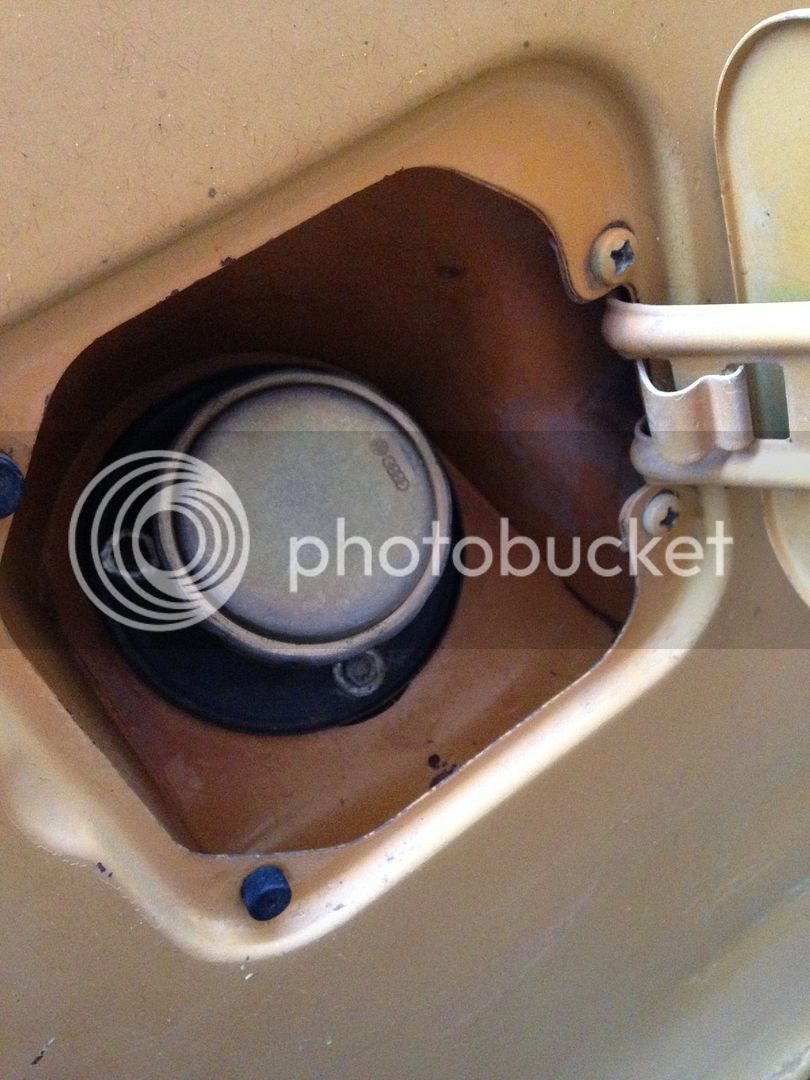
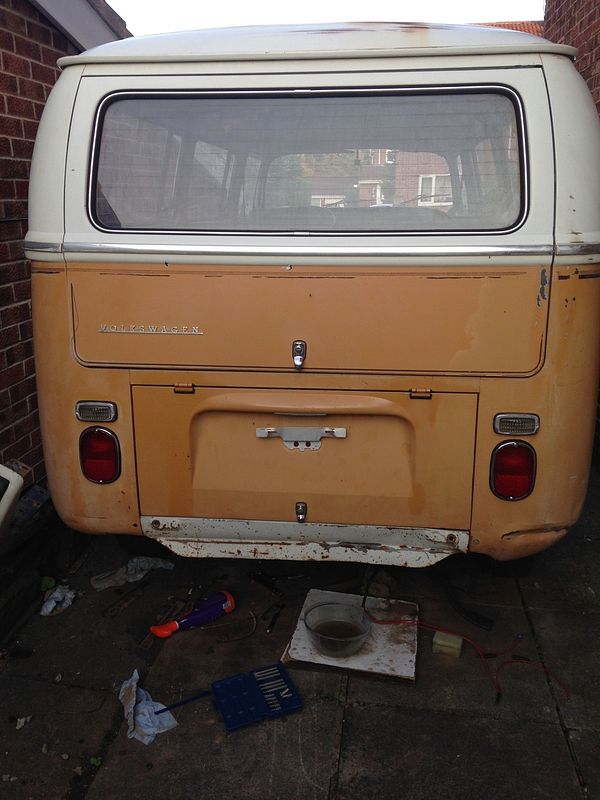
Cleaned the fuel filler flap + neck as it was out while the tank was out.

4E3F820E-2F8B-4495-AC3C-A262FBA3652B_zpswpaee6dl.jpg


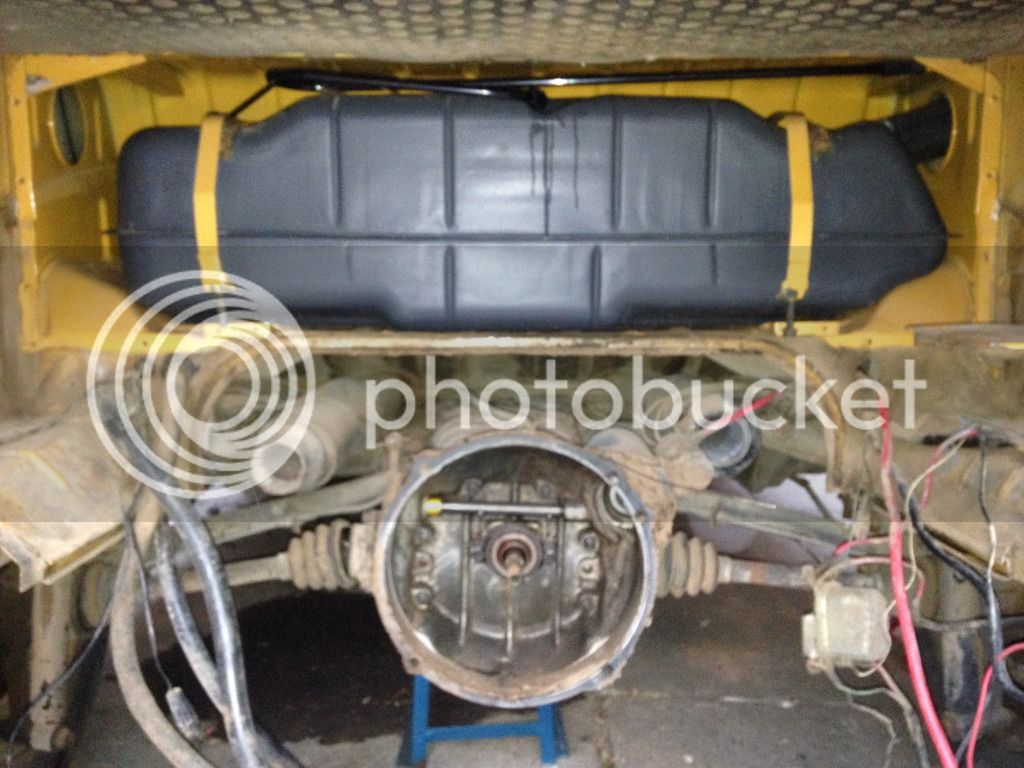
Tank came out and was cleaned inside and out, new fuel sender (shocking quality cheap one but seems to give the right resistance values so sticking with it for now!)

Put the tank back in place but yet to bolt it in, going to clean the underside of the tank area first to dislodge all the crud before I stick the straps down and bolt it in place.

AC0DCCB2-84D9-4956-B7BA-9D262802F5A0_zpsnqcwinbt.jpg


Hopefully have that sorted by the end of the weekend ready to pop the engine in next week.

The engine was destined for a beetle so will need to change the tinware and exhaust for my existing unit but that shouldn't be a problem.

28B27AD7-DA6D-4E73-B02F-020632C9AD5D_zpsozjxnipg.jpg
 
Picked up the engine today - a turnkey designed for a beetle so will swap the necessary bits and get it in the bus ASAP!
As soon as it's running I'm going to take it for an MOT and get a 'to do' list!
 
Got hold of a rear valance today, not the straightest or the right colour but it's solid as a rock. Off a US import from Restore and More up in Durham. Top service as usual.

Stuck it in the right place so I could see it fits, needs a little knock with a hammer to get the end straight but looks right to me.

C060C613-F1F9-40A7-8B8E-9BA79CD470E2_zps5x1we5so.jpg


Stressed out today so wanted to do something that had visible results without scraping my knuckles or picking mud out of dirty CV joint bolts -

Cracked the polish out and had a go at the back to see how the OG paint comes up. Showed up a repair to the right hand side but I like it, adds to the character!

99558A07-644F-4852-94B9-67CA3D6137FE_zpsnau4vlb5.jpg


D4B760FE-FA2C-449F-8EF1-C51314409CD2_zpsxktphi4c.jpg


I have literally no clue what I'm doing where polishing is concerned. I have a rotary polisher and some Farecla G10 that I got when a local bodyshop went bust owing me a shit load of money and that's all I got! Putting it to good use at least...

Needs some more polish and maybe some wax and a wash? I'm considering lacquering the roof and bumpers to preserve them as they are... Any advice?
 
Not sure about lacquer but I know a lot of 'patina' people use Collinite 476

collinite-476s-super-doublecoat-wax-9oz-170-p.jpg


Its basically a super hard wax that doesn't let anything through. (Keeps it looking the same as well, unlike a shiny lacquer overcoat)

Its far cheaper than branded ratwaxs

Word of warning however, if you plan to paint anything you cover with it, it can be a sod to get off.

DONT use ankor wax, its a horrible sticky stuff that people used to use, dirt and everything sticks to it.

Some paint expert might be able to help with the lacquer advice?

Also if you want to brighten old paint, ive used this stuff with great success.

G17216_UltimateCompound.jpg


G3 etc is great but if you just want a light brightening up, this stuff is less abrasive making it harder to accidently burn the paint if using a cheapo machine polisher (aldi £15 type)

If it needs a major brightening up however, the Farcia G3/10 products are still the dogs knackers!, there Paste Wax is good too
 
Cheers mate some proper sound advice there, the G10 seems to be doing the job, though it's taking some proper graft to get it to shine up - I think G3 would have been better suited. It's absolutely knackered, paint is super old and faded but seems to be coming up OK.

I might go through the whole bus with the G10 then apply the wax all over, lacquer is adding more paint and I'd like to avoid it, there are some rubs on the roof that are through to bare metal so will give them a wax and see how they hold up.
 
Proper smart looking bus this mate, looking forward to seeing it in the flesh. Fwiw after a lot of research I used the Collinite on mine before leaving on the Spain trip.
 
Cheers mate. Looks like your paint is similar to mine too.

Looking forward to it! Hopefully this will have the engine in and be driving by the time you pop over!
 
Arms are aching to hell ...

Polished the whole back and one side of the bus, used Farecla G10 and just had a pop at it. Total amateur and made some mistakes but got it looking OK I think! There's a couple of layers of paint, it's the original colour but some definite repairs, looks as though the whole side of the bus has been blown over at some point maybe 20 years ago - the paint has cracked and dissapeared in parts - the arch seems to have had a repair at some point and will need doing again as its quite crusty with a little bit of bondo hanging off it.

A44951DB-50D2-4DFE-8A71-FB6A2F90F9AB_zps0deo95ft.jpg


Everything rubber on the van is pretty well ruined from the dry heat in New Mexico - I've got to get the driveshafts off but most of the bolts are so caked in mud you can't even see them, it's very very slow going trying to clean them out to take them out.

The only one with clean bolts -

E640112C-F41A-44F5-9896-5BCE6520A06B_zpsihb1zftg.jpg


D1FCE96A-4281-4AC4-9527-954E0B8023BB_zps5psojkij.jpg
 
What a nightmare driveshafts are...

Had one done this morning, not too much of a job, CV's tight on the splines but went on OK. cleaned up and re-greased with new boots.

Second driveshaft was a bit of a state, splines were a bit mullered and I don't think my overzealous hammering helped.

Luckily, I'd kept hold of a latebay gearbox with driveshafts so nicked one of those and cleaned that up instead - yet to fit the second one but hopefully done tomorrow! Just need the correct spline tool to torque them up.

1AD7DE77-A6DB-4263-85C9-2D56B218ED55_zpsowtnwzce.jpg


A3B7D8A2-BADF-4E2D-B0AB-3613BF63A9AF_zpstxv2oelk.jpg
 
Second driveshaft on - Need the spline tool to torque them up as they're only finger tight for now

If I never see another CV joint it'll be too soon.

F9DE2596-711F-4F66-AFA8-C3DA8E2AC3C8_zpsresugqmj.jpg


Next job was my broken middle roller on the sliding door, it's caused damage to the door aperture that will need a little repair and a new seal from where the door has been diving to shut a little early and the lock catches the body frame.

0E060F9A-1F70-4227-93EA-904A445AE45A_zpsld34vdw7.jpg


FB0FFE9A-12FB-4FB0-9E57-E0CC8C2E7D62_zpsflckjglj.jpg


A couple more jobs ticked off the list - getting there slowly but surely...
 
Well done bud!

Looking forward to seeing the fruit of all that polishing next time I am down your way 8)
 
gvee said:
Well done bud!

Looking forward to seeing the fruit of all that polishing next time I am down your way 8)

Looking forward to getting a hand sticking the engine in next time you're down my way too!! :D Beers are on me this time... and veggie pizza!
 
Just as you get going.... Something always happens!

Middle runner assembly ate itself last night, I think the bottom roller is worn and the extra stress on the middle bracket finished it off, though looking at pictures I had of it there is some damage that will have weakened it.

Managed to find a reasonable one on The Samba so just waiting for a shipping quote for that and a lower roller and hopefully get it all back together in a week or so - it can wait for now anyway.

Will have lots of middle roller spare parts if anyone needs any!
 
georgeyv said:
Looking forward to getting a hand sticking the engine in next time you're down my way too!! :D Beers are on me this time... and veggie pizza!
Beer and pizza is the magic combination... you're on!
 
Well, slow few days because works been absolutely mental and had loads of stuff going on.

Managed to get a westy interior from a lad over in Norfolk for a good price, it's not in the best condition and the buddy seat is missing but it's perfect for what I need. Something ready to fit and ready to use.

Managed to get some of it trial fitted and it's looking pretty good so far, all needs recovering, couple of new handles on the unit and probably needs some woodwork when I can be bothered. It'll wait though...

58B8C5F8-3A26-45ED-9653-AA86FB817EDC_zpslfukighx.jpg


Then I got a nice shiny butty's bits delivery and quickly bashed that on - it took me about 20 minutes as I had the bellypan to take off, it was a doddle to fit, I couldn't see anywhere good to hook the return spring so drilled a little hole to bang it through and it's all looking swell!

54A810FE-BE3E-4C03-84B5-3DA5C95C6F07_zpsvrf8cswf.jpg
 
Looking good, nice one with the westy interior. Put the butty's throttle linkage on my last two buses, makes a well big difference.
 
Work has slowed a little in the last few weeks - much to my frustration! I had a week away on holiday and work has been crazy.

I'm waiting on the heat exchangers, engine mounting bar and a couple of other bits to come back from blasting/coating and then I'll get the engine built up and *hopefully* fitted sometime soon.

I've had a couple of sessions of polishing the van, using G3 and a rotary polisher, with no skill and just having a crack at it. Comes up nicely, though it shows off the horrendous front panel respray that's obviously been done a lot of years ago and is cracked like hell. Once I've polished the whole thing and washed it then it should look a little better.

011EF872-915D-4DCF-A340-951B4B58E913_zpsxrbn5hxf.jpg


It's pretty obvious here how different it comes up after a polish!

3807DBFC-2E1F-4088-813E-1942E9D4410E_zpsaduo1h0o.jpg
 
You have to leave the badge on and have the colour contrast visible ;)

I'm going to have to borrow that polisher at some point (for the daily)!
 

Latest posts

Top