You are using an out of date browser. It may not display this or other websites correctly.
You should upgrade or use an alternative browser.
You should upgrade or use an alternative browser.
Front door waterproof membrane
- Thread starter AGPlant
- Start date

Help Support Early Bay Forum:
This site may earn a commission from merchant affiliate
links, including eBay, Amazon, and others.
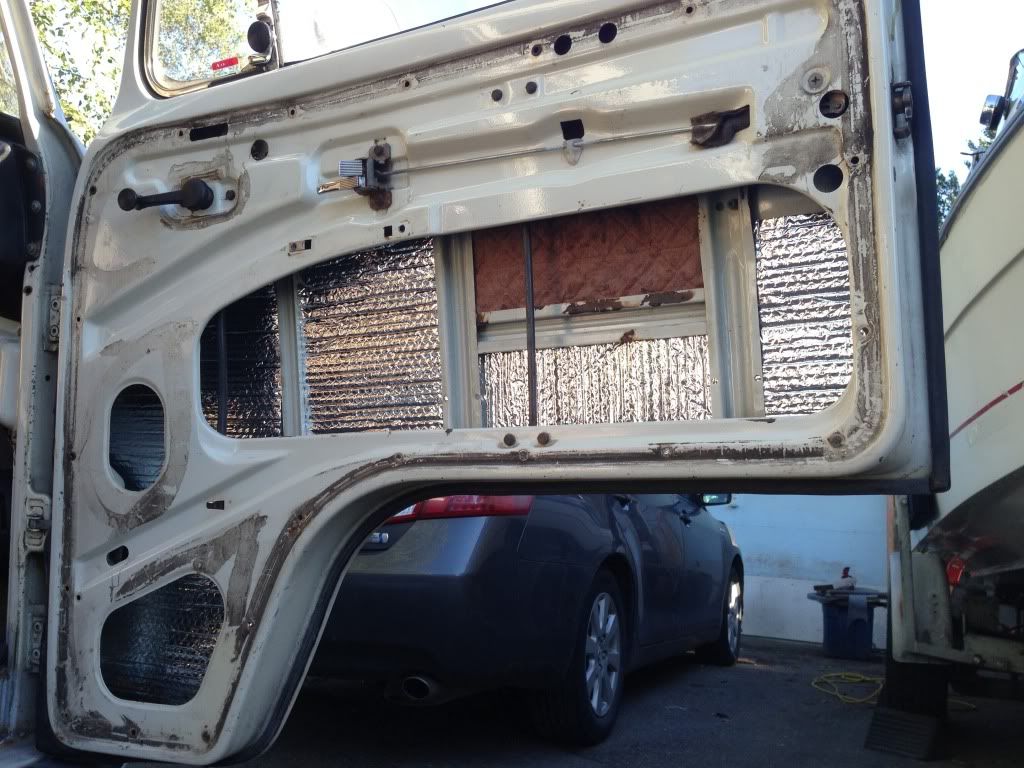
It needs to tuck into the bottom of the door, otherwise the water runs between the door and card.
If you was useing breathable or plastic, I guess you could use both and have one flapped into the door and one running straight down then you got the best of both worlds. And check your weep holes while you is there :mrgreen:
Ozziedog,,,,,,,,,,,, Another thing on my list of to do`s :mrgreen: :lol: :mrgreen:
Ozziedog,,,,,,,,,,,, Another thing on my list of to do`s :mrgreen: :lol: :mrgreen:
bluenose
Well-known member
I brought a role of butyl tape off ebay to stick mine on.
It's the same stuff they use on modern cars for fitting the plastic sheets
It's the same stuff they use on modern cars for fitting the plastic sheets
Magiceddie88
Well-known member
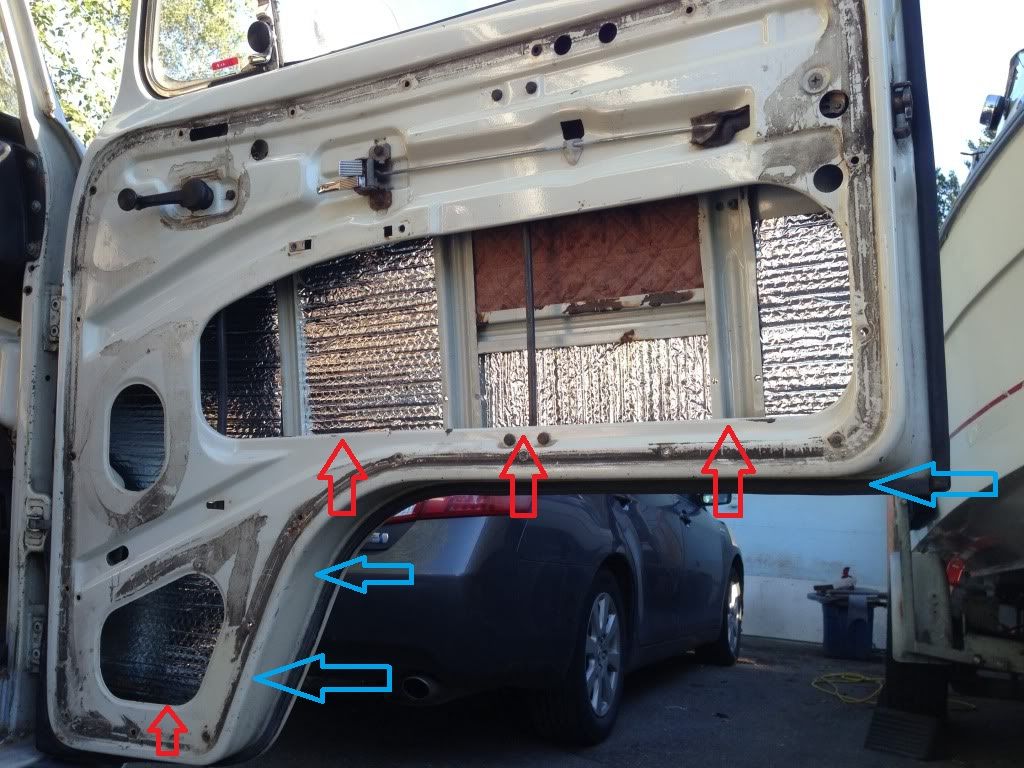
This sounds really daft, but where does it need to be "tucked" into? Looking at it I though it was either glued to the back of the metal door frame with the door card screwed on top of this - forgive me if this sounds stupid but I can't quite see where it gets tucked in! It's a job looming for me so advice would be much appreciated!
- Joined
- Jun 11, 2013
- Messages
- 636
- Reaction score
- 4
- Location
- Leeds
- Year of Your Van(s)
- 1971
- Van Type
- Microbus
- M-codes
- 095 508 697 A01
Tuck it in all around the lower edges to make the water run back into the door and not onto the door card or floor of the bus.
- Joined
- Jun 11, 2013
- Messages
- 636
- Reaction score
- 4
- Location
- Leeds
- Year of Your Van(s)
- 1971
- Van Type
- Microbus
- M-codes
- 095 508 697 A01
Red arrows mate 
Magiceddie88
Well-known member
If you look closely, you can see where The sheet was cemented in originally from the factory it dirty this was before I had completely cleaned it up. With the new barrier, the flap faces inside the door, you'll need a small split cut in the plastic where your window post runs (the second arrow drawn. The flap will sit just inside of this hole. The whole idea behind the weather barrier/platic skin is when it rains some water will ride down your window past the rubber esp. If your rubber is 40plus years old and isn't as tight as it used to be. This keeps water on the inside and the doors were built to dispel any excess water that might find itself inside of the door itself.
Also protects the new door 'card' from getting wet and Disintegrating.
Notes after doing this myself.
Keep as much of the original hardware from the old door card as possible the new chromey door card clips are next to garbage.
The rubber sert' the clips go into- suck and are a waste of money. Take your time amd it will last, my cards ended up not easily getting fitted with the cheap clips and I ended up breaking my door card on a couple attachment points, as well as a couple corners.
Thats all I can think of now I hope this helps ya out!
-Eddie
Magiceddie88
Well-known member
Also VW originally had some light foam around the window crank see picture and a piece of felt that went around the lock mech. To avoid any odd rattles from the road see picture I used a chunk of black leather and some odd foam laying around.
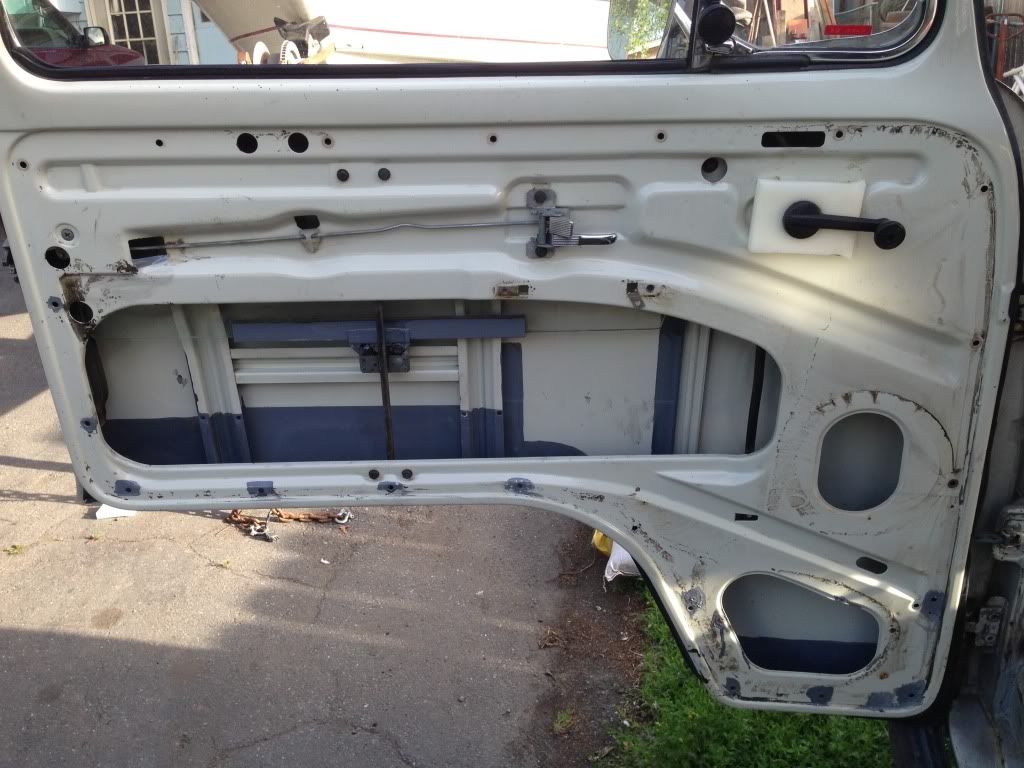
And
I think it was about midnight when I took this shot,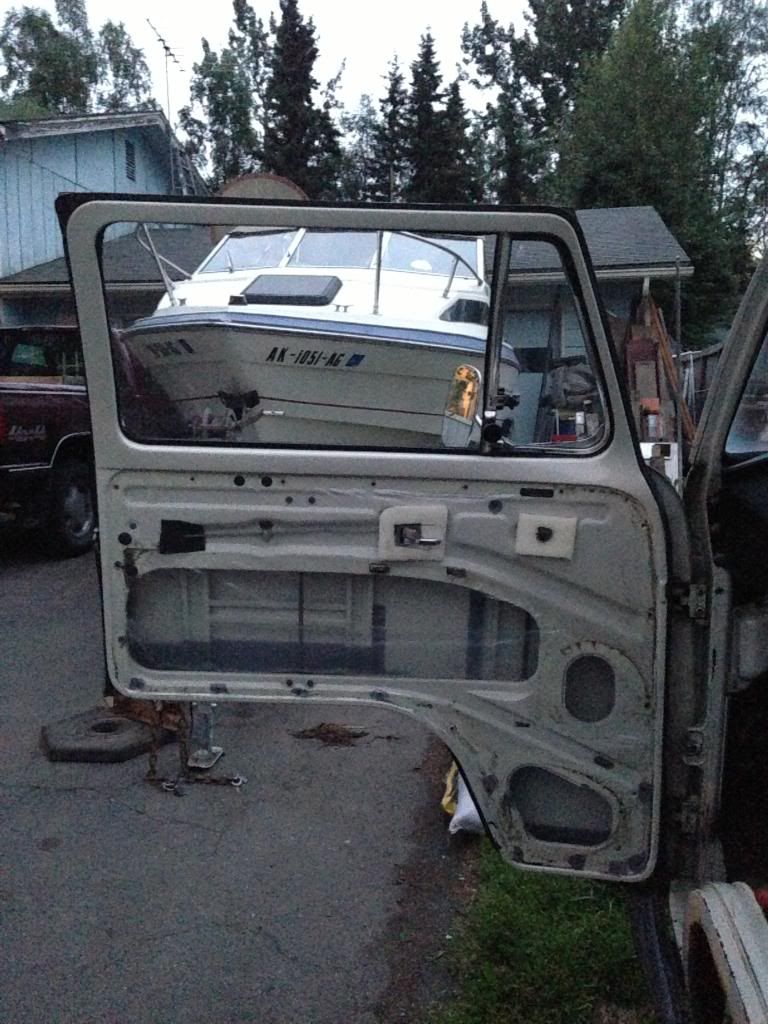
You can see the plastic attached, and the foam padding to buffer the points on the door/ that seal/buffered wind/heat and vibration too.
Hope this helps! Make sure to clean your drain hoses as mentioned prior as they do get clogged with misl. Junk over the years.

And
I think it was about midnight when I took this shot,

You can see the plastic attached, and the foam padding to buffer the points on the door/ that seal/buffered wind/heat and vibration too.
Hope this helps! Make sure to clean your drain hoses as mentioned prior as they do get clogged with misl. Junk over the years.
M.O.I.
Member
For my door card, i've done this:


That's just a transparent sticker!
Do not need any specific tools exept your fingers! :mrgreen: I've done this by myself without anyone. Your door need to be very clean, totaly dry-cleaned.
Easy to fit, and it looks like OG...
I have few set in stock if you want...


That's just a transparent sticker!
Do not need any specific tools exept your fingers! :mrgreen: I've done this by myself without anyone. Your door need to be very clean, totaly dry-cleaned.
Easy to fit, and it looks like OG...
I have few set in stock if you want...
Similar threads
Vehicle For Sale
For Sale 1971 VW Dormobile - UPDATED
- Replies
- 0
- Views
- 433


