Installing Dellorto 36 DRLA/VS Exhaust *Build Thread* Day 2

Early Bay Forum

Help Support Early Bay Forum:

This site may earn a commission from merchant affiliate links, including eBay, Amazon, and others.

Supertramp

Well-known member
Joined
Aug 25, 2011
Messages
1,012
Reaction score
0
Location
Manchester
Today began the start of my upgrade to twin Dellorto 36 DRLA carbs and a Vintage Speed exhaust. I was focusing on removing the stock exhaust, carb, manifolds and anything else that would no longer be required.
I started with this:
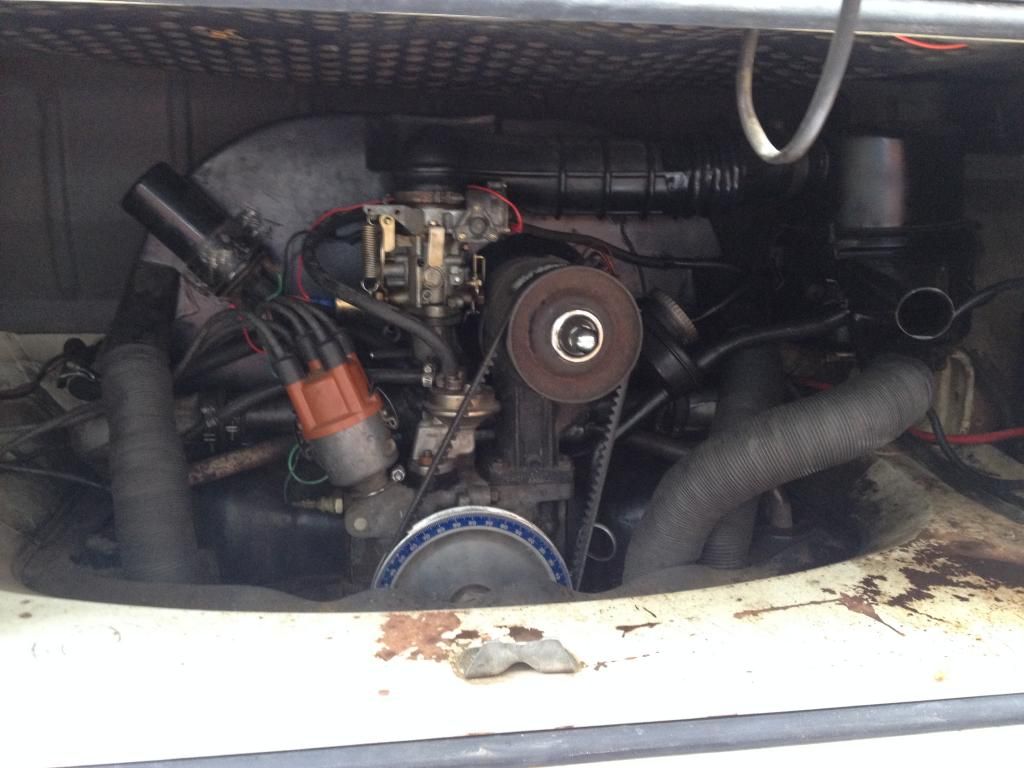
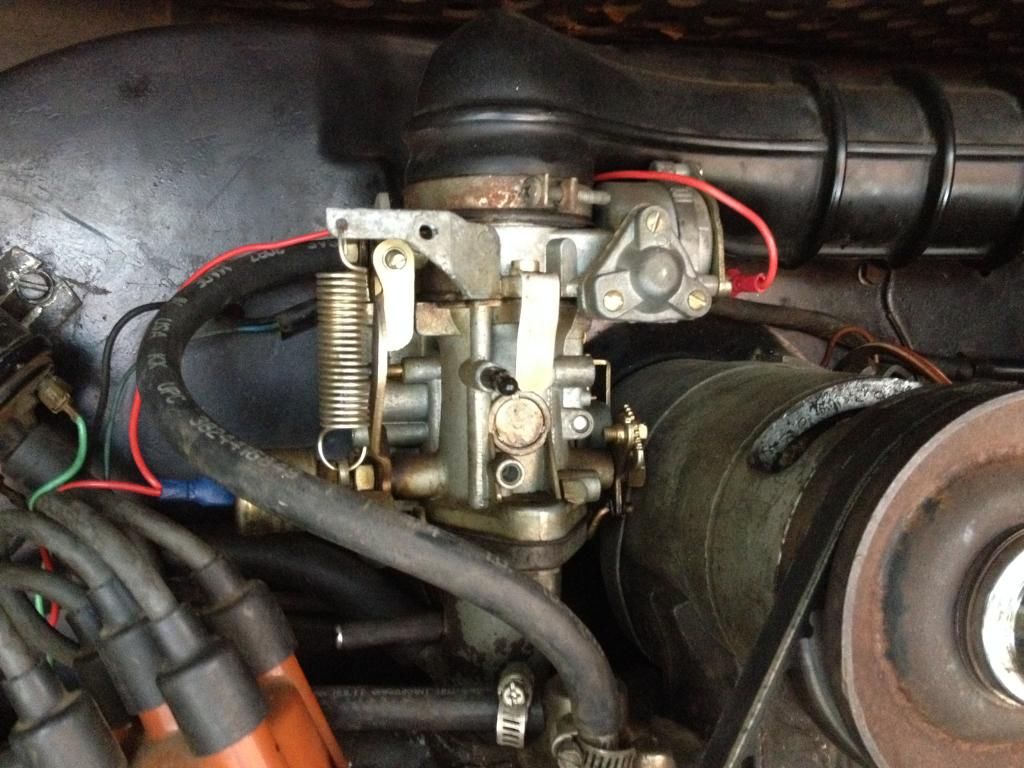
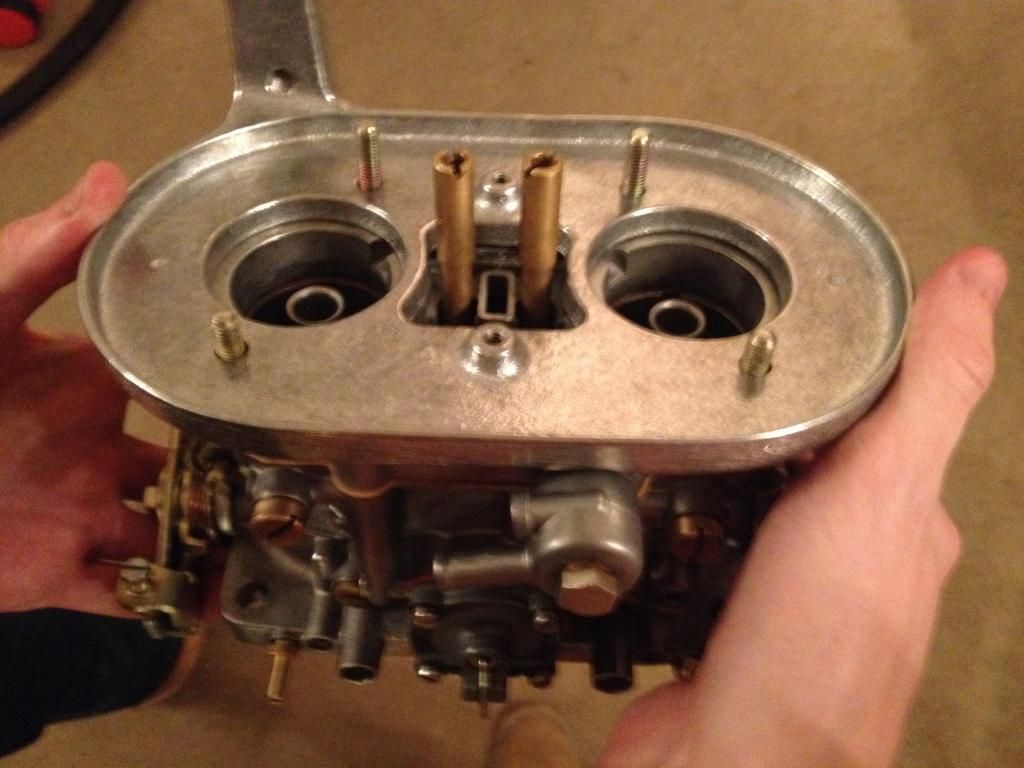
photo1-3.jpg


photo2-2.jpg


Current Bocar carb
photo3-3.jpg


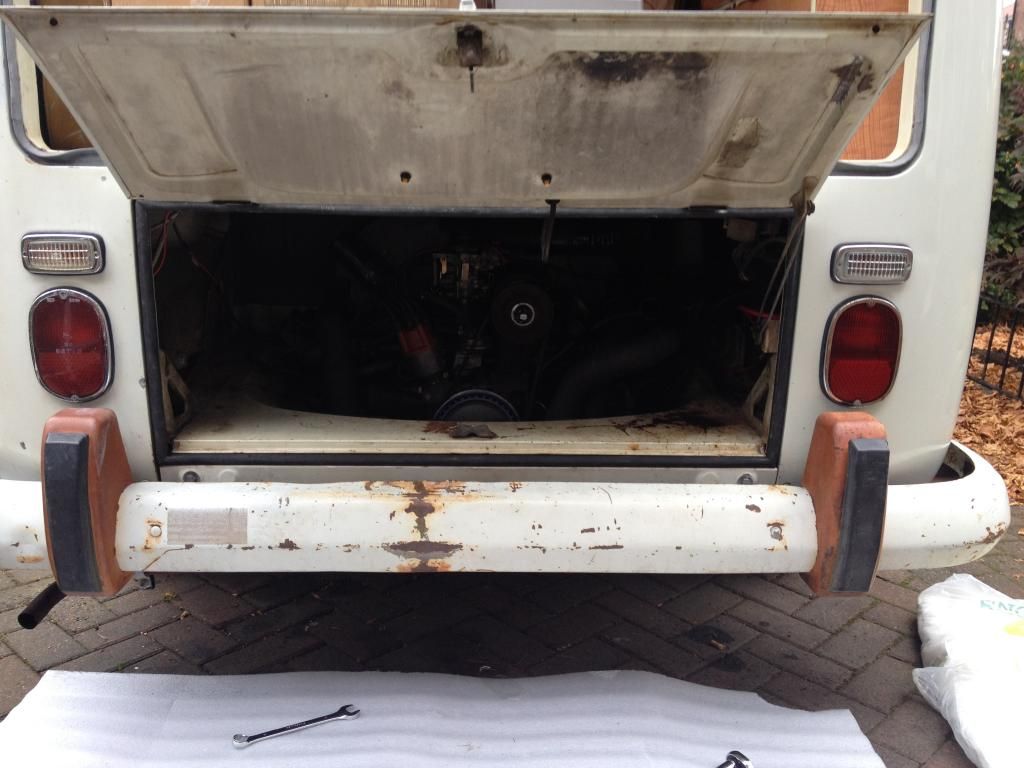
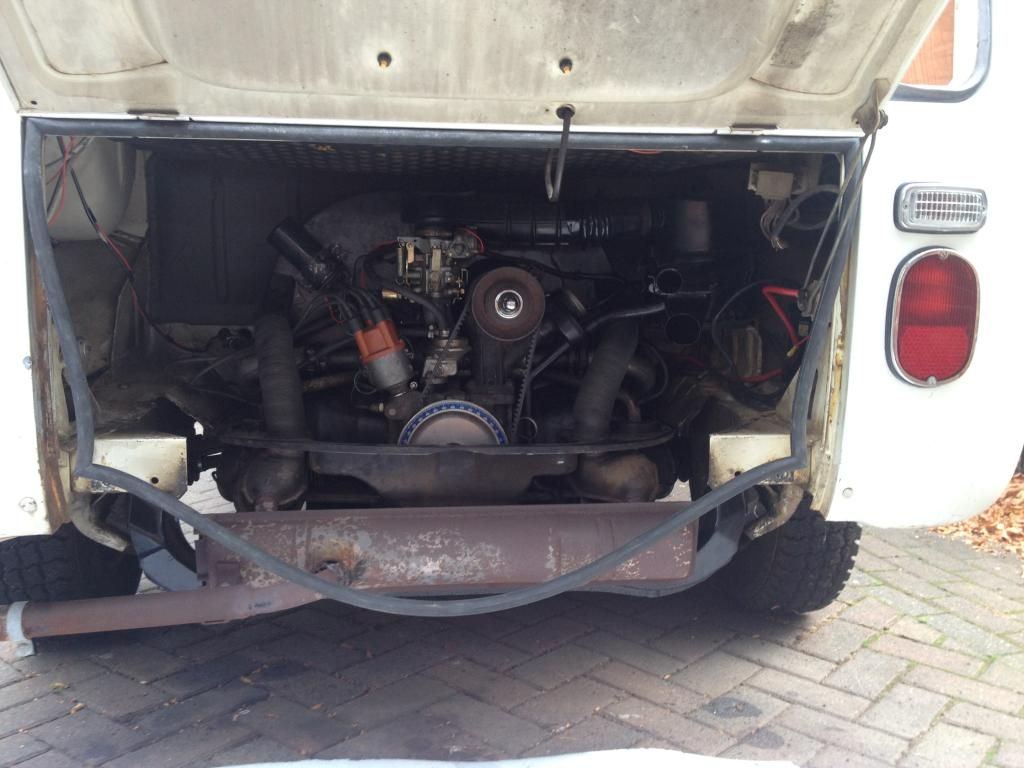
Bumper and valance off
photo2-3.jpg


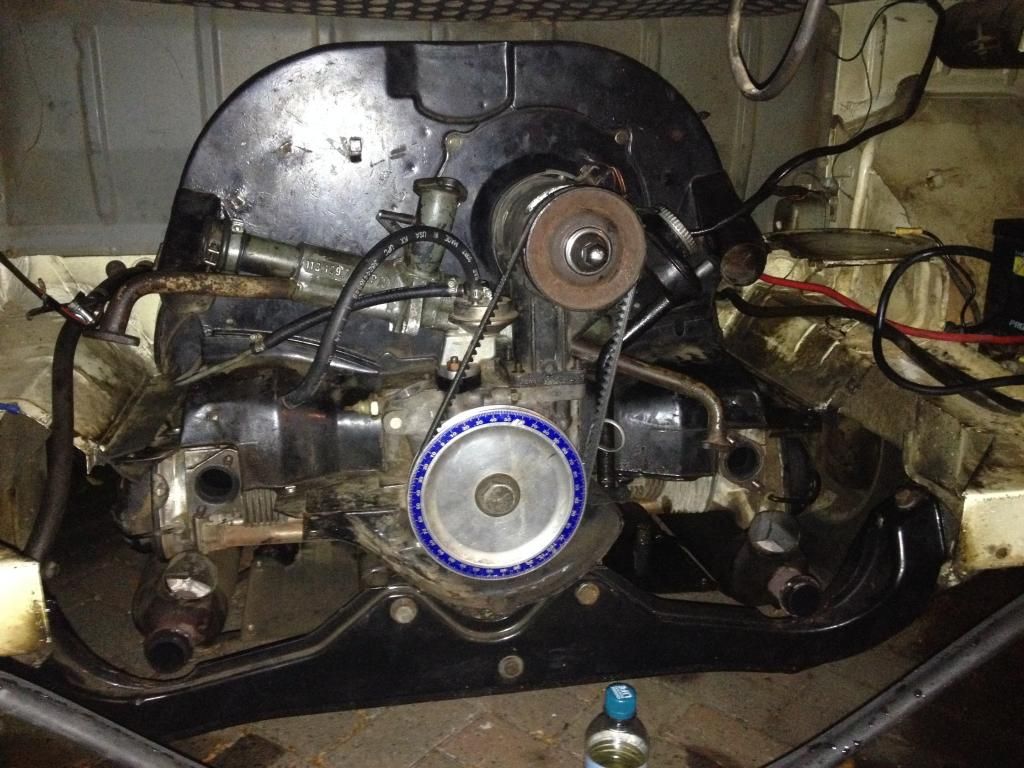
Mostly stripped. Need to take the Dynamo stand off to get the inlet manifold out.
photo1-2.jpg


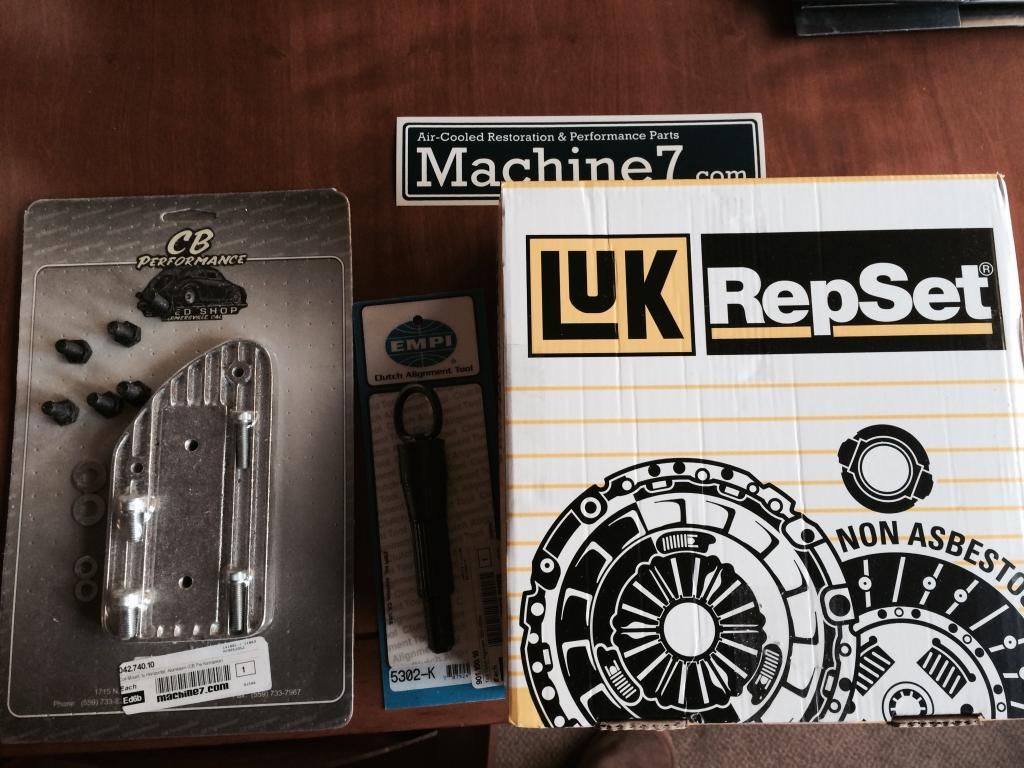
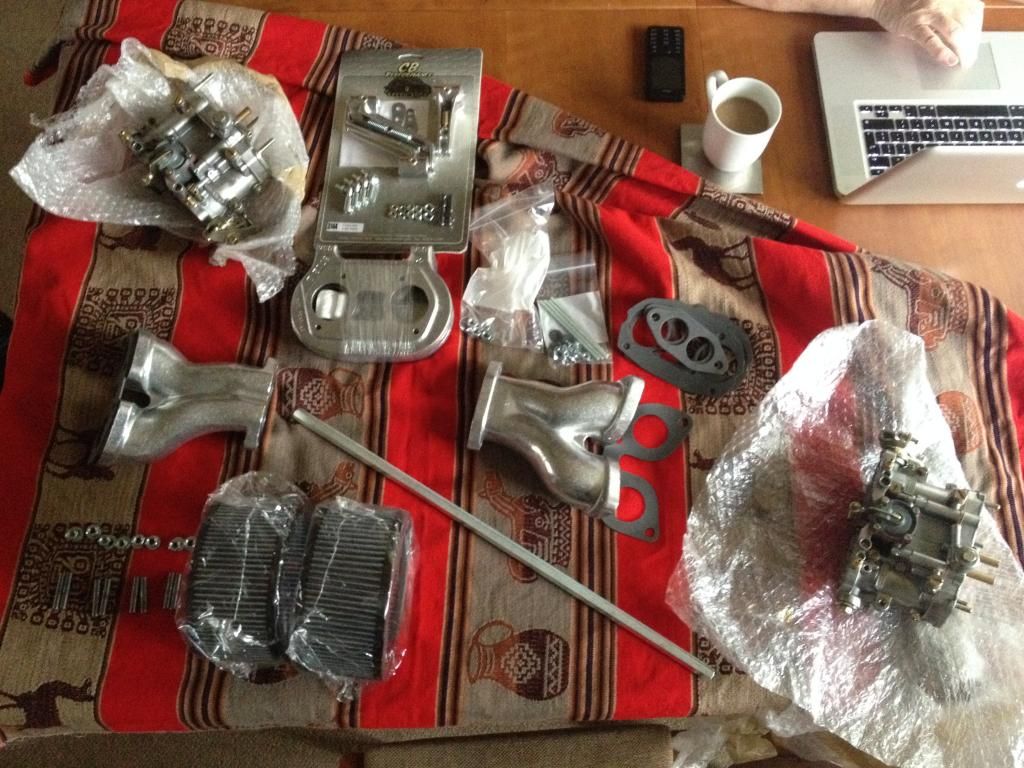
CB Performance linkage kit and manifolds arrived today, so here it is alongside the carbs
photo1-4.jpg


It then started raining so I moved onto building the linkage, easier said than done...
And so begins the questions:
How does the air filter connect to the carb? The four screws go up into the air filter but I don't see any bolts that holds it on?
photo1-6.jpg


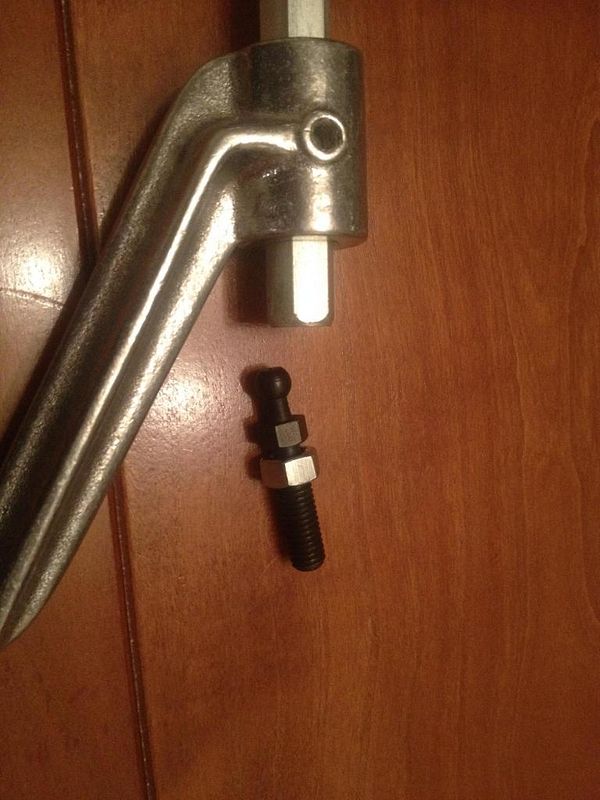
Secondly, how does this black balljoint type screw go into the hex bar? It just slides out??
photo2-4.jpg


Thank you and many more questions to come!
 
The filters are held on just by the top plates, the should have 2 long studs per carb with wing nuts on top.
The ball screws on the picture fit into the filter base plates and are to adjust the he's linkage position. There should be a small spring you place inside the end of the hex bar.


Sent from my GX64 SatCom phone using Tapatalk
 
jonboylaw said:
The filters are held on just by the top plates, the should have 2 long studs per carb with wing nuts on top.
The ball screws on the picture fit into the filter base plates and are to adjust the he's linkage position. There should be a small spring you place inside the end of the hex bar.


Sent from my GX64 SatCom phone using Tapatalk

Cheers Jon.
I've got the two long studs with wing nuts for each carb, but these don't hold the air filter to the carb, if I turn them upside down the air filters would come off. They hold the top plate of the air filter to the bottom, is this all they need to do or does the filter need to be secured to the carb?
And thanks on the second point.
 
The filter bases are held down by the four studs on each carb top, you need eight nuts 10mm spanner size.
The studs and wing nuts then hold the tops to the bases as said.
:)
 
Dave.P said:
The filter bases are held down by the four studs on each carb top, you need eight nuts 10mm spanner size.
The studs and wing nuts then hold the tops to the bases as said.
:)

Cheers Dave. I thought that might be the case, I wonder why they aren't included in the pack?
 
And make sure you use lock nuts for the base plates. I fitted a set of velocity stacks as well, these use the studs that hold the base plate down, although I needed to get longer studs to fit. These were loctight'd in.


Sent from my GX64 SatCom phone using Tapatalk
 
jonboylaw said:
And make sure you use lock nuts for the base plates. I fitted a set of velocity stacks as well, these use the studs that hold the base plate down, although I needed to get longer studs to fit. These were loctight'd in.


Sent from my GX64 SatCom phone using Tapatalk

Cheers Jon, just picked up some locking nuts.


I've decided to drop the engine. For the effort it's taken to remove everything, I can't imagine how difficult it will be to put it all back in with the engine insitu. Any tips for removing the engine?
I've got my mechanic on hand so if getting everything on becomes insurmountable I can take it to his garage and we'll do it together, at least I can still see how it all works.
 
Mine was fully built with 36 Dells and went back in without dismantling, it's tight but it goes. Don't forget to remove or cut and bend your original oil bath filter stand!
 
And get a set if stubby spanners for the manifolds incase you need to remove them in the future. Also use the CSP manifold nuts as they are either 10 or 11mm flat to flat to give more spanner room.


Sent from my GX64 SatCom phone using Tapatalk
 
I would also say install the manifolds first then put the carbs on because it's tight up against the fan housing and it might stop you getting the manifolds down nice and tight.
 
Thought I would update this. Bus is going to a local mechanic on Thursday but I'll be going down and helping with the work.
Just ordered;
New clutch kit
Gearshift bushes/coupling
Huco Fuel pump
Connectors/hoses and t piece.

All ready for next week.
 
jonboylaw said:
Don't forget the inertia cut off switch ;)


Sent from my GX64 SatCom phone using Tapatalk

Sorted cheers Jon.

My list of jobs that need doing on Thursday/Friday is growing exponentially. I've now decided to upgrade to an alternator while I'm at it.
So that's:
- Drop engine
- Install twin carbs
- Install VS Exhaust
- Replace clutch
- Replace gearbox bushes
- Upgrade to alternator
- Replace fuel sender

Not much then :shock: :roll:
 
is the flywheel oil seal OK?

if it was me whilst the engine was out I'd be inclined to change it - Unless it is NOT leaking at all - then I'd leave it....getting the fly wheel off is a pain without the right tool.
 
dubdubz said:
is the flywheel oil seal OK?

if it was me whilst the engine was out I'd be inclined to change it - Unless it is NOT leaking at all - then I'd leave it....getting the fly wheel off is a pain without the right tool.

I'm not too sure, nothing is leaking onto my drive, is it worth getting it anyway incase it is leaking when I take the engine out?
 
Supertramp said:
dubdubz said:
is the flywheel oil seal OK?

if it was me whilst the engine was out I'd be inclined to change it - Unless it is NOT leaking at all - then I'd leave it....getting the fly wheel off is a pain without the right tool.

I'm not too sure, nothing is leaking onto my drive, is it worth getting it anyway incase it is leaking when I take the engine out?

If its not weeping and wrecking your clutch then I'd leave alone... I have a tool to get the flywheel but off, torque Meister or something, its basically a multiplier and helps shift it, people have broken scaffold tubes!

If its very slightly damp then make a note that it'll need checking again in 3-6 months....
 

Latest posts

Top