JoshB
Active member
After lurking on these forums for some time and soaking up the knowledge I felt it was time to show you what I am up to in Australia - hope no-one is upset by all the pics in the first post but at least it gets it all out there!!
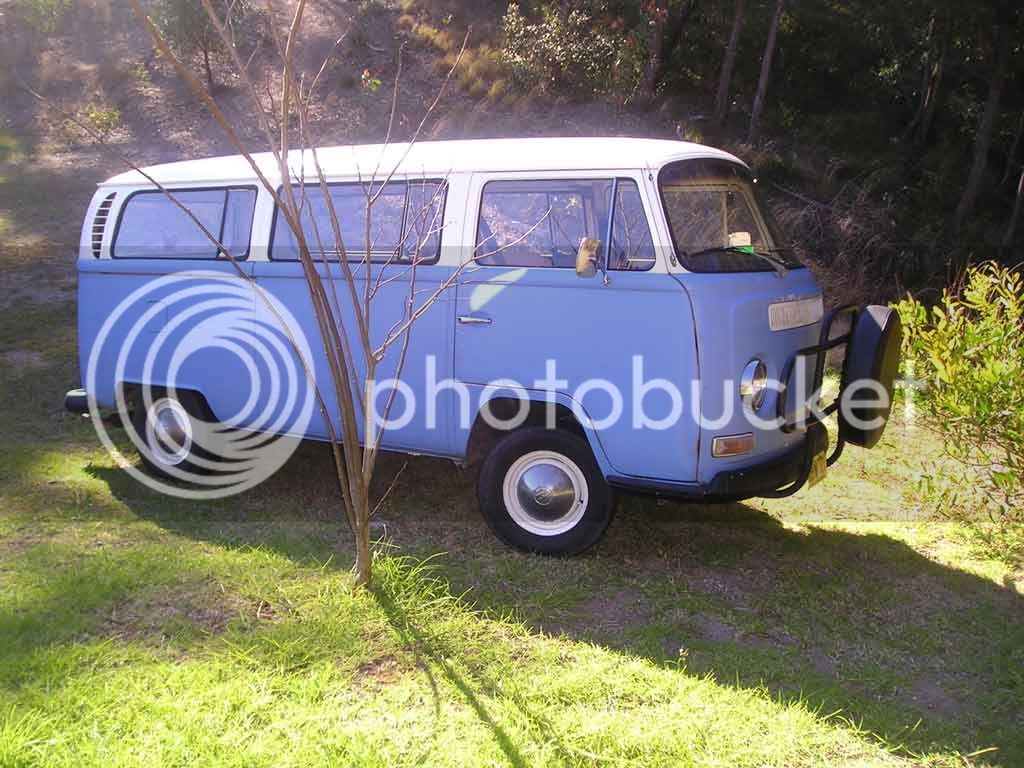
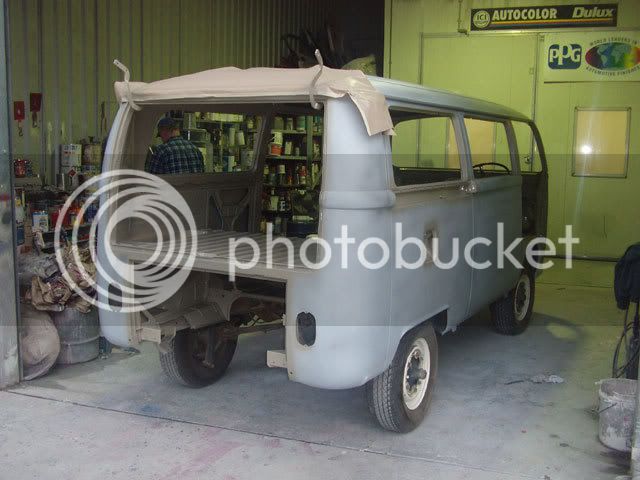
And here it is - a 1969 Microbus with 1600 SP engine and hand-brushed paintjob - currently in the midst of a long term resto - this pic was about 3 years ago
The following posts are essentially a summary of my progress to date, cut and pasted from the Aussie Forums I use.
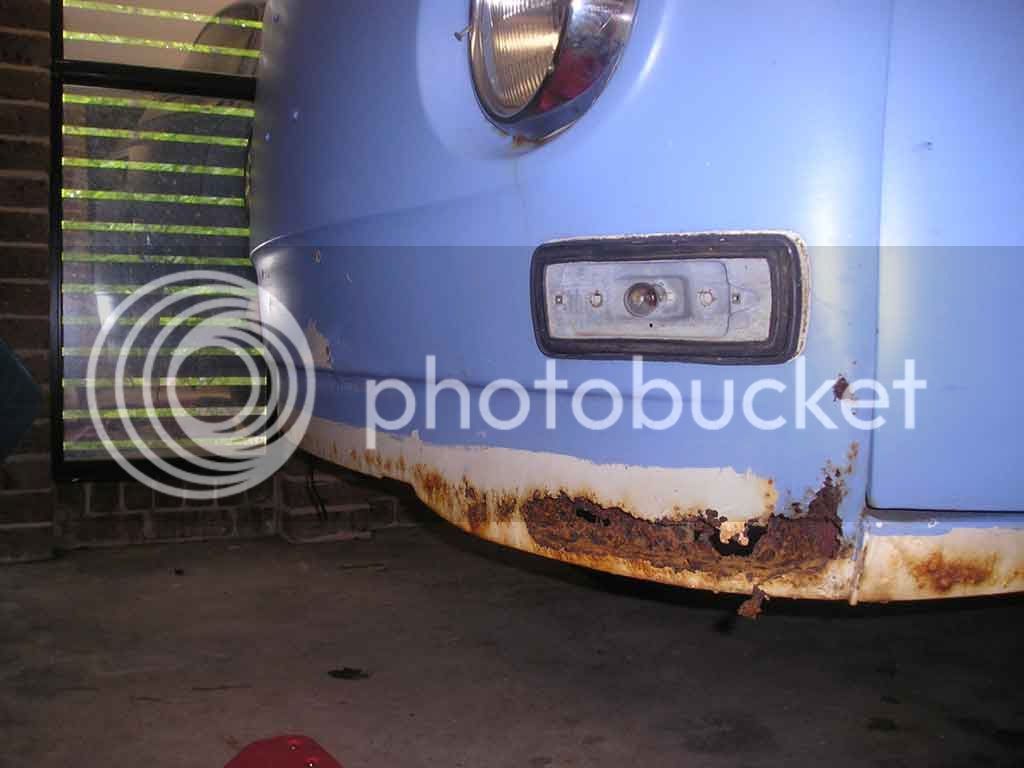
First up, there was lots of rust easily visible in a few places
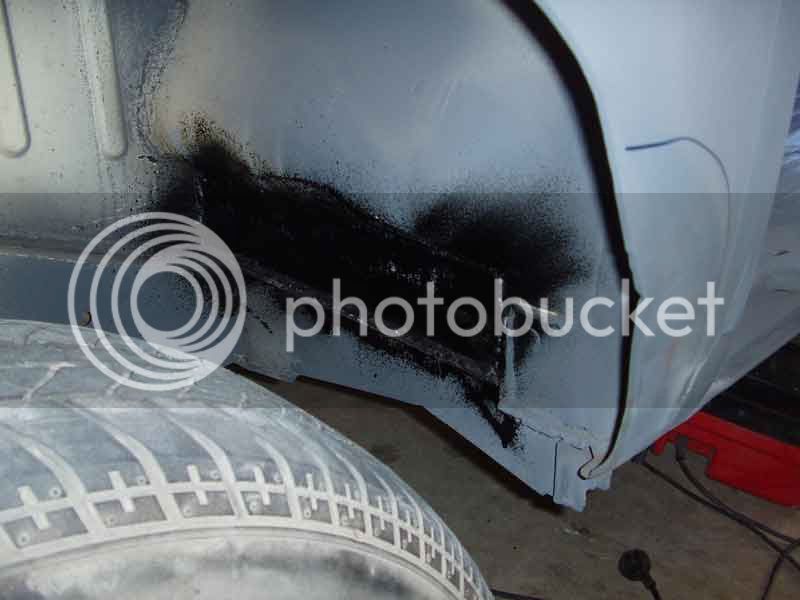
Behind the bumper
Under the window seal
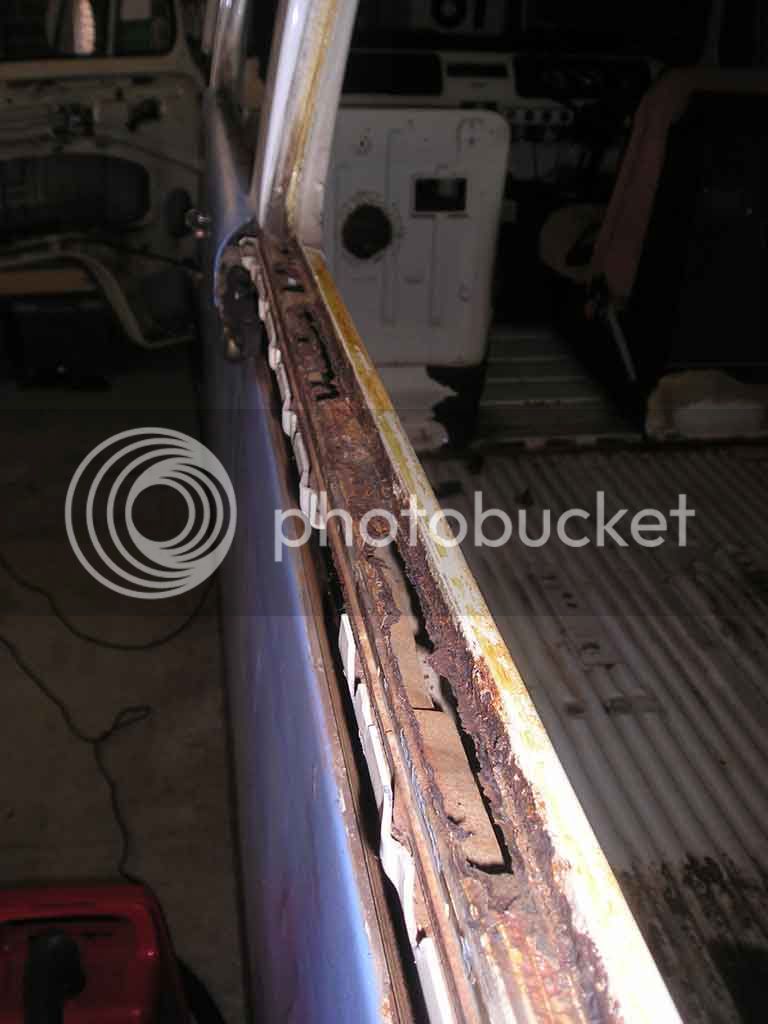
I guess I sort of expected to find this so was not really worried- and these were the worst two bits - everything else was pretty solid – or so I thought
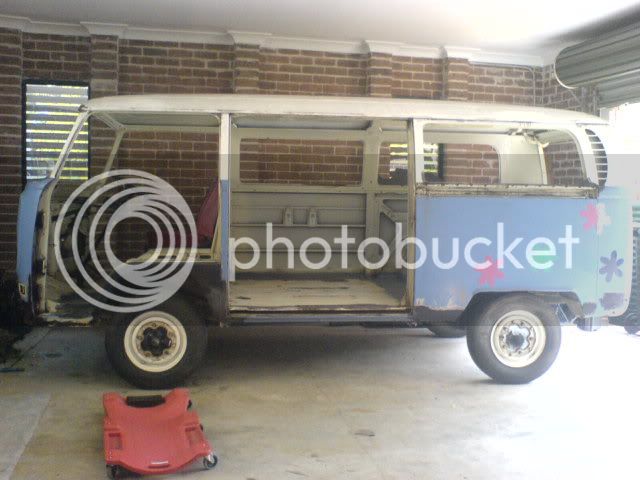
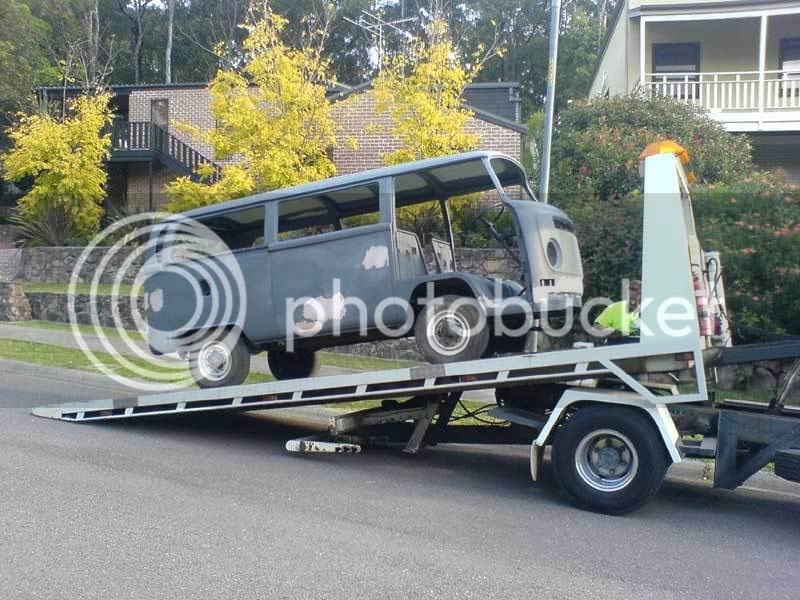
Stripped at home and ready for blasters
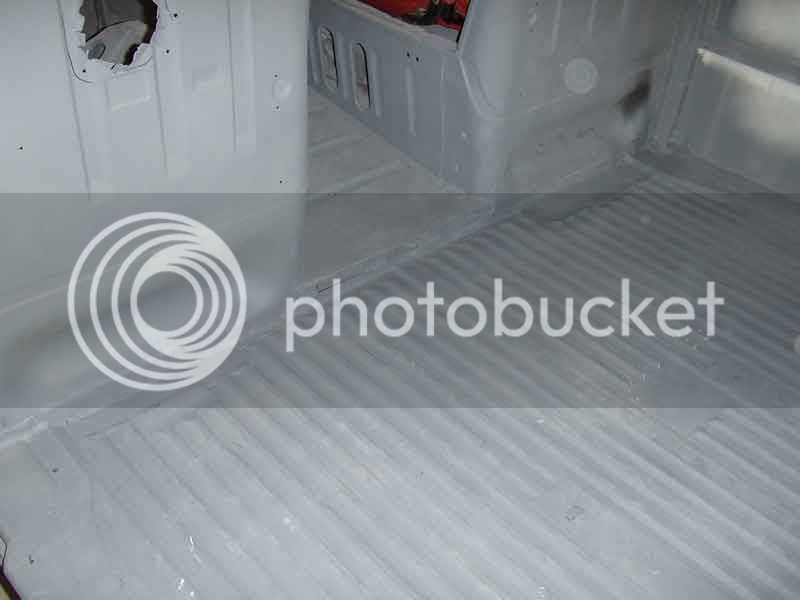
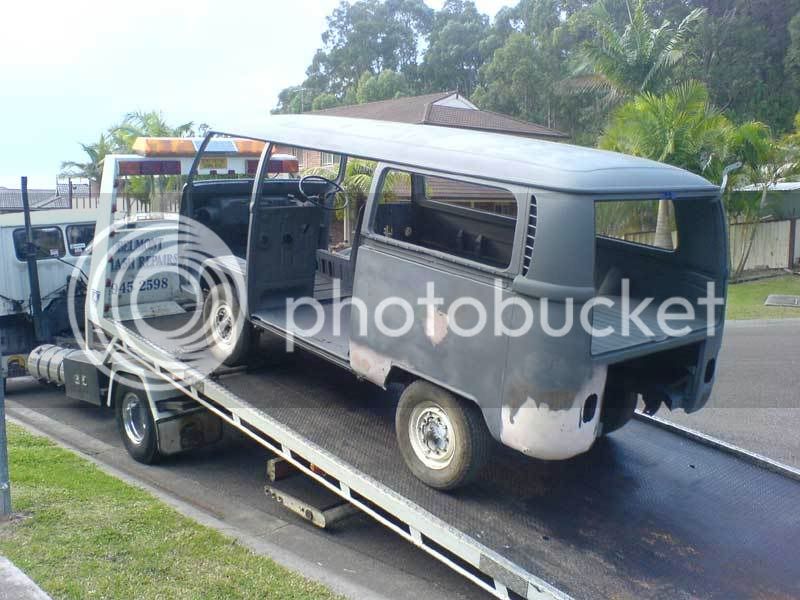
And here she is after blasting and priming
A bit more rust was then uncovered so off to the panel beaters after ordering some AH Schofield panels from a local source.
New Lower front and steps in place
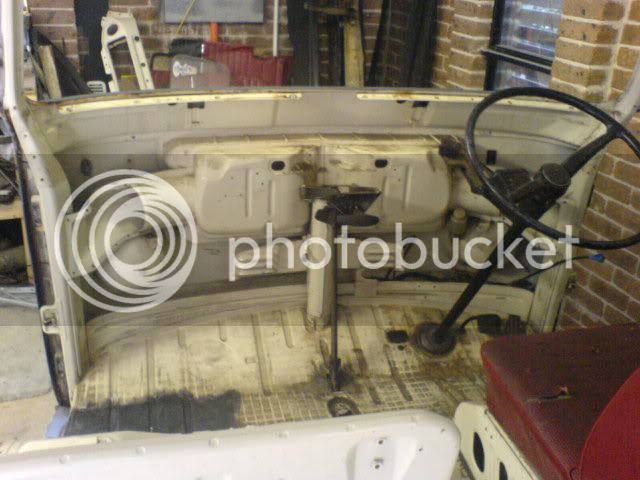
Plus a new passenger floor
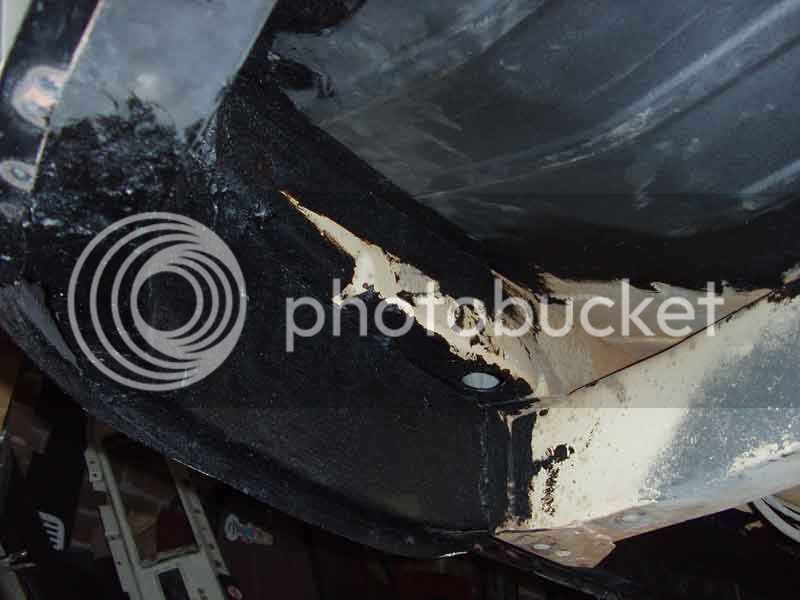
And from underneath - I needed new inner panel too
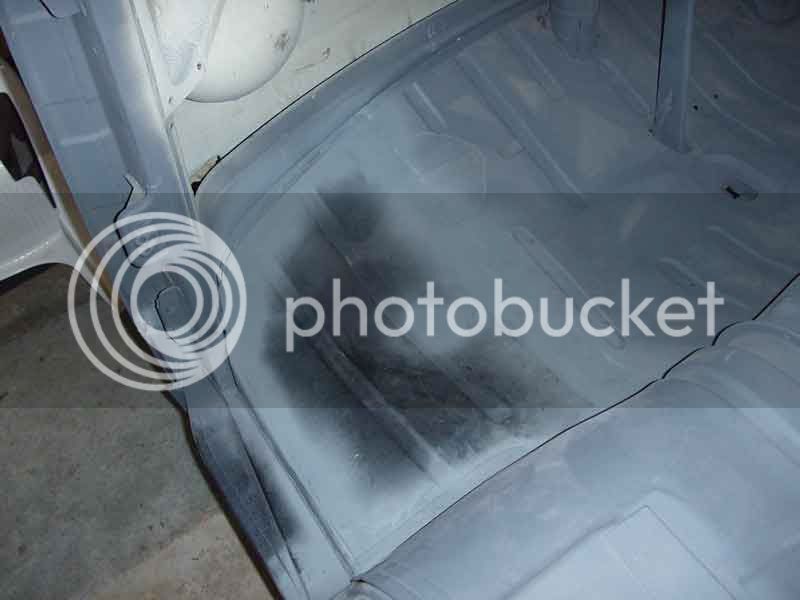
Repair to floor at back of seats
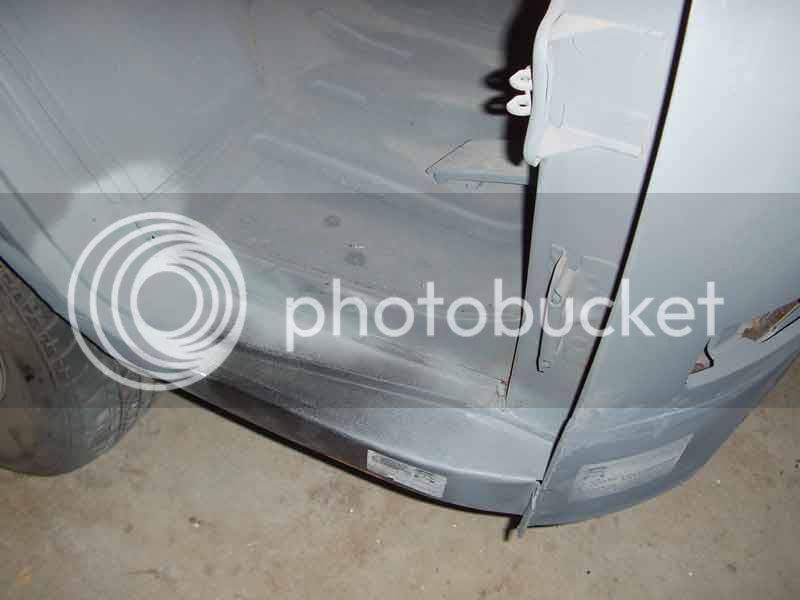
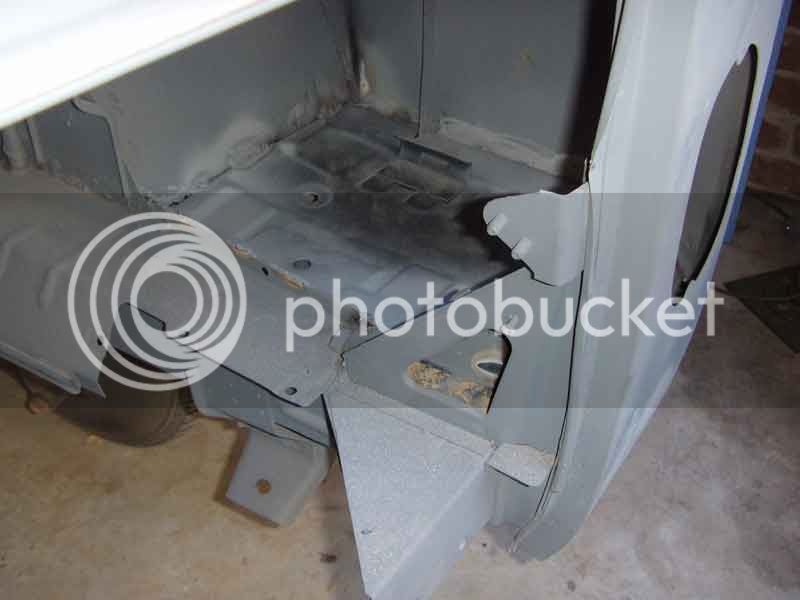
And at the front of the passenger wheel arch
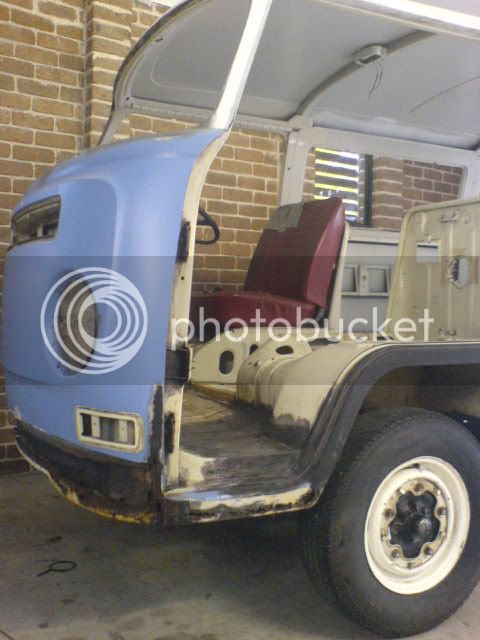
New battery tray, plus a view from the rear of the outside
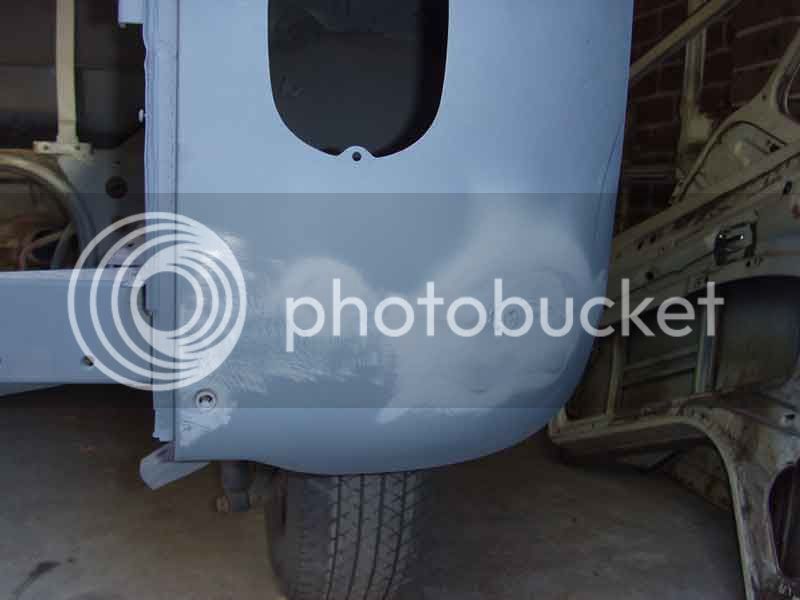
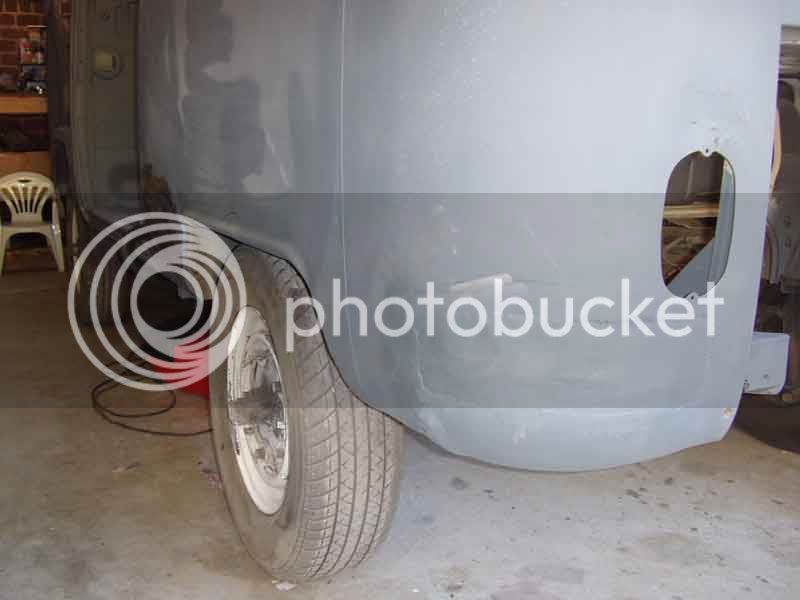
Plus the other rear side - repair of some rusty accident damage - bit of filler needed here!
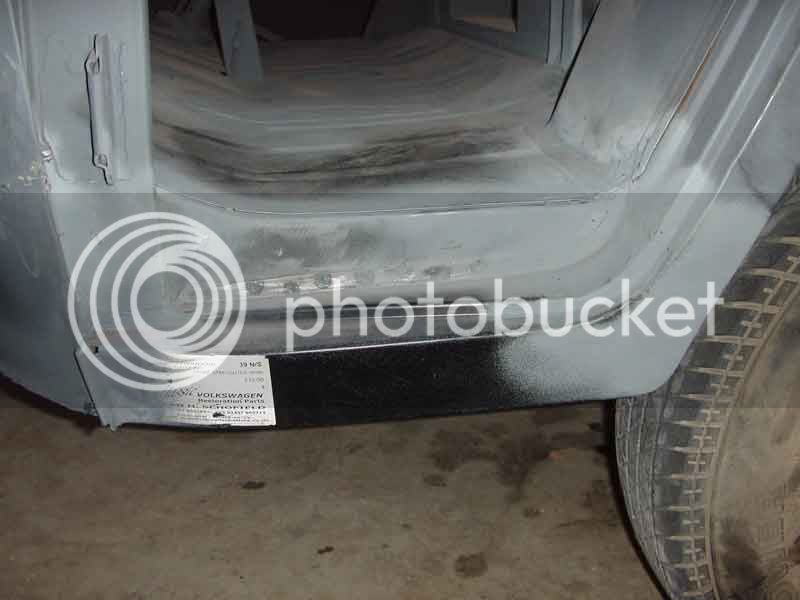
How does that window sill look now(check back to a previous pic for rust damage)

And side view showing bumper damage area just aft of sliding door cut out
I stripped roof myself in the garage – what a long day – decided it needed it as the painter said there were humidity blisters in the old paint, which otherwise looked OK
The back off to panel shop for straightening and painting
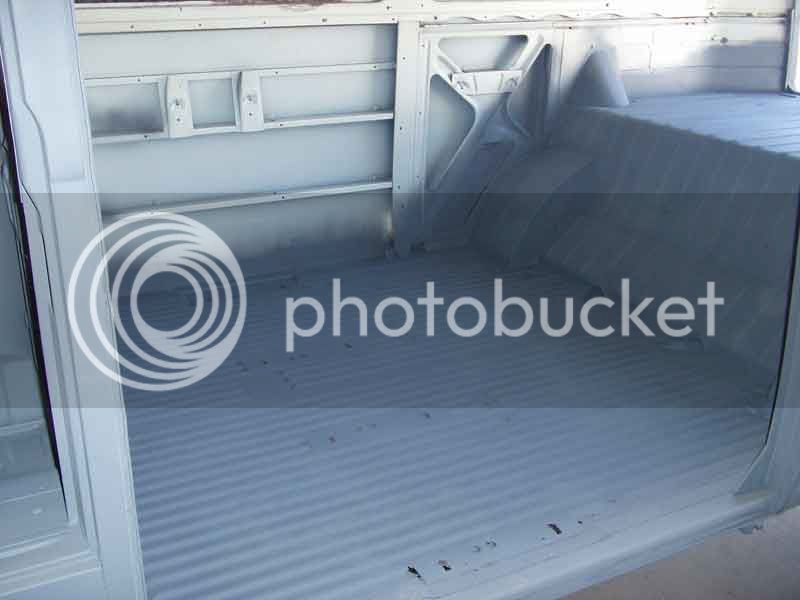
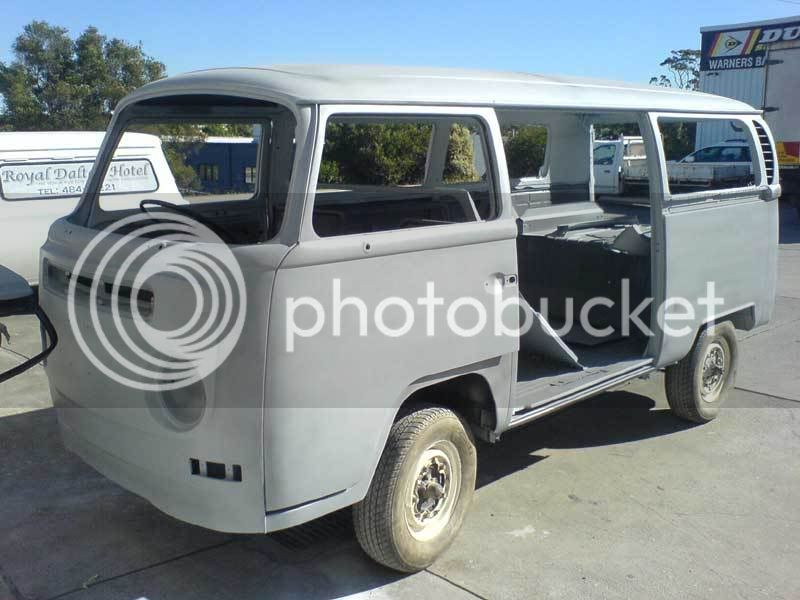
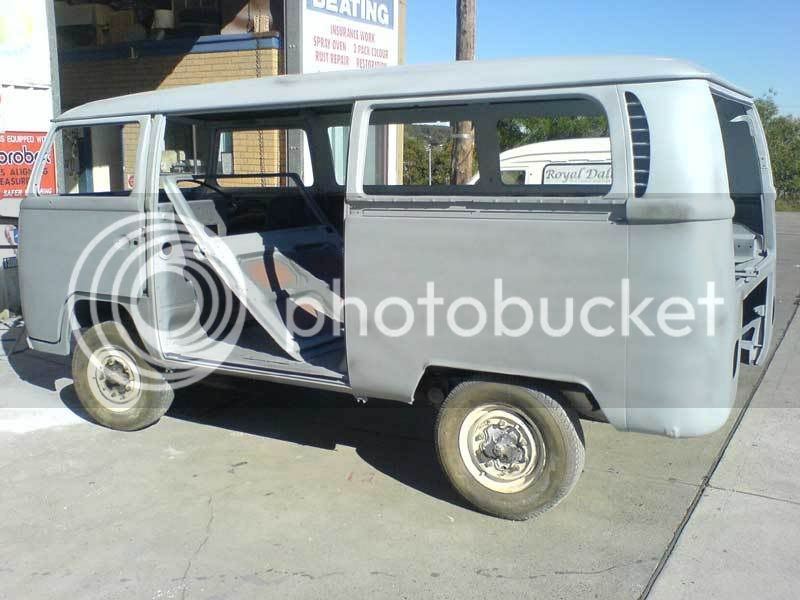
Here she is primed
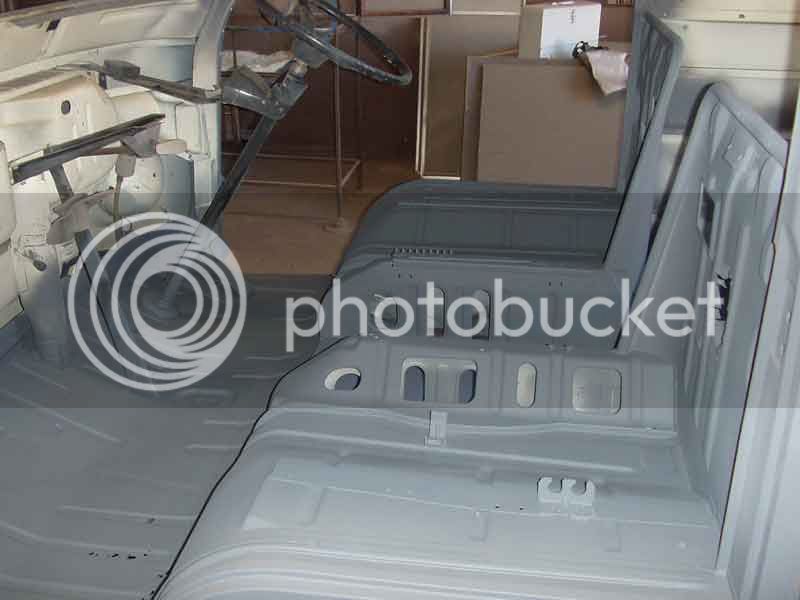
And now the interior is painted SAVANNAH BEIGE! Yeah, I know – another SB, but there are not many of them out here (only know of 1 other at the moment and it’s a late one) and I love the period colours

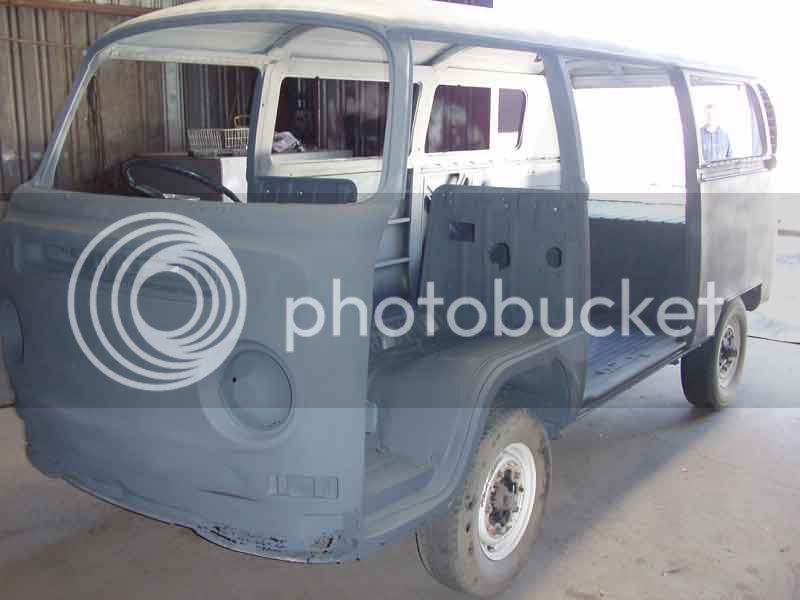
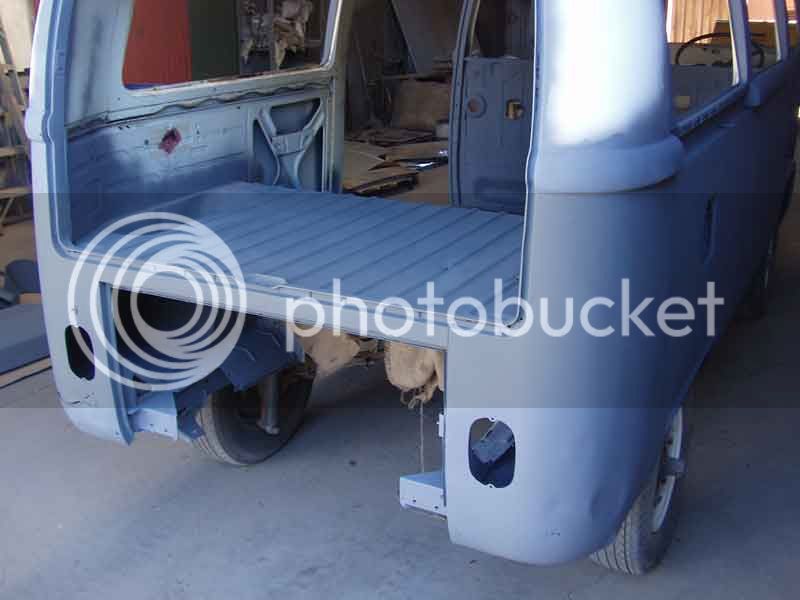
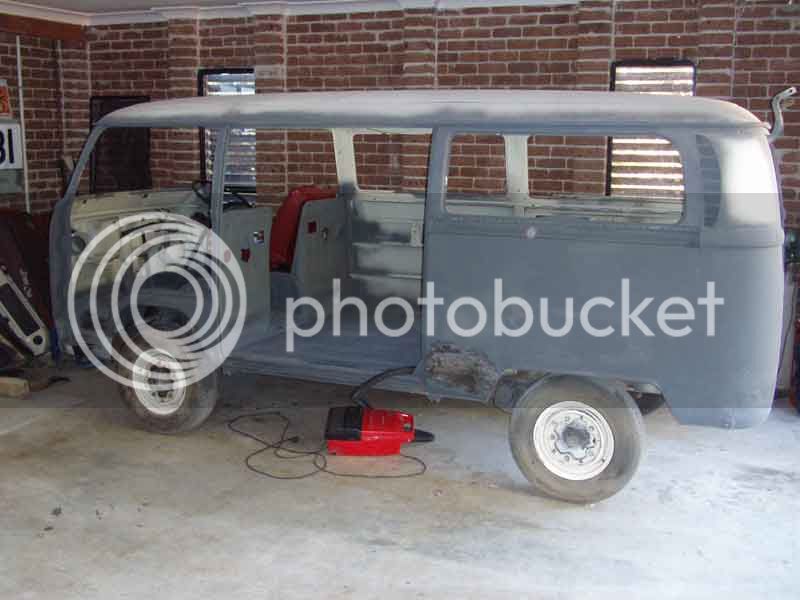
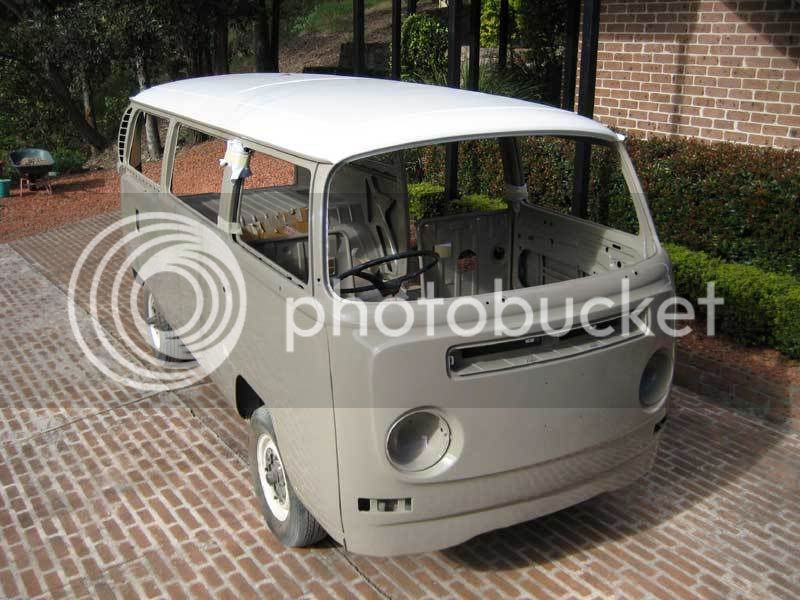
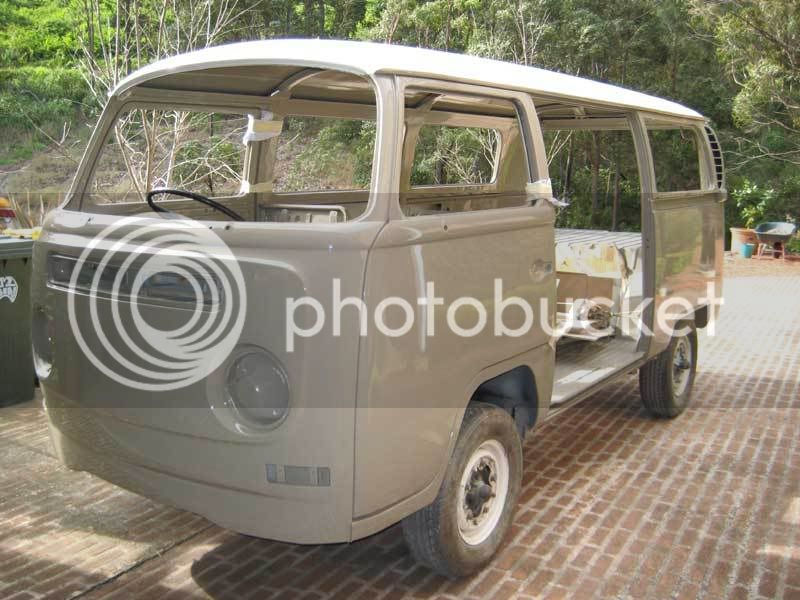
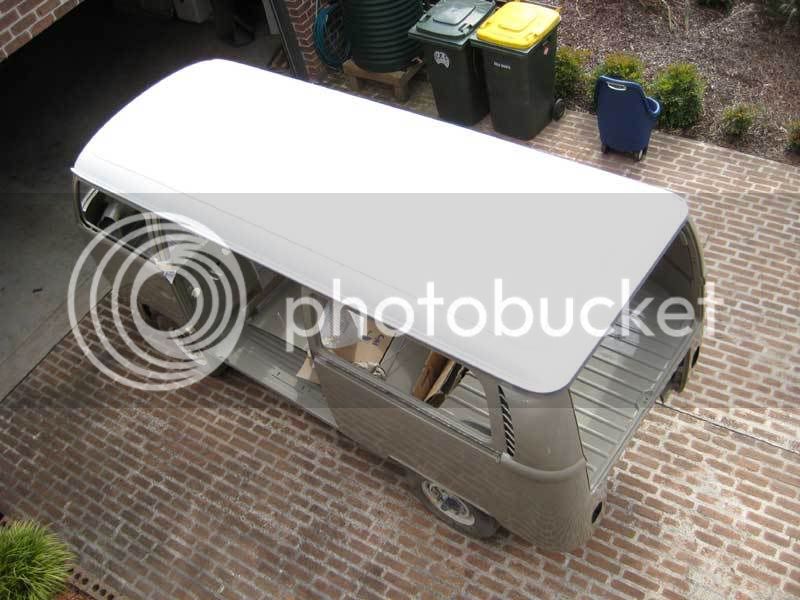
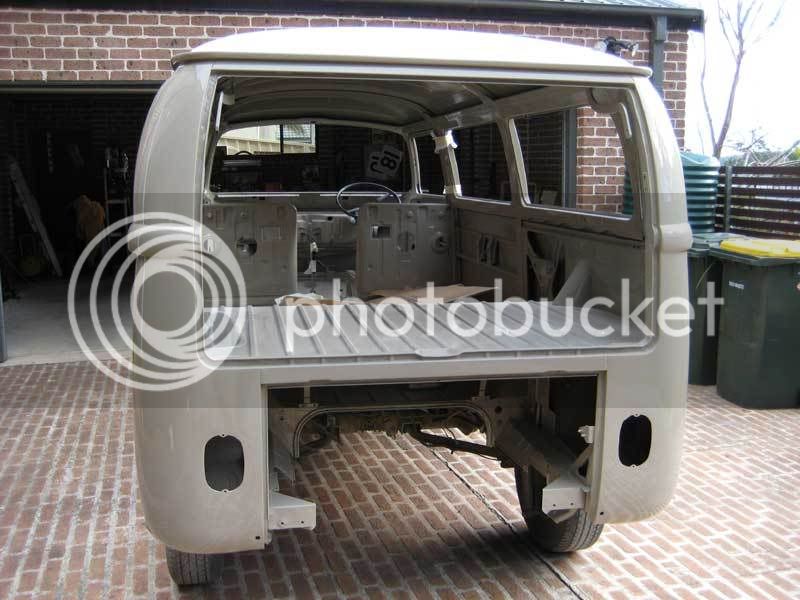
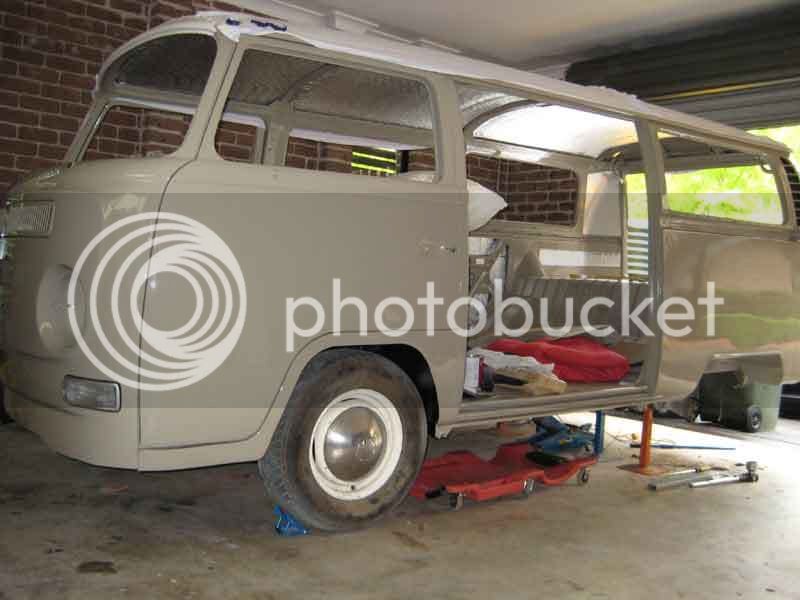
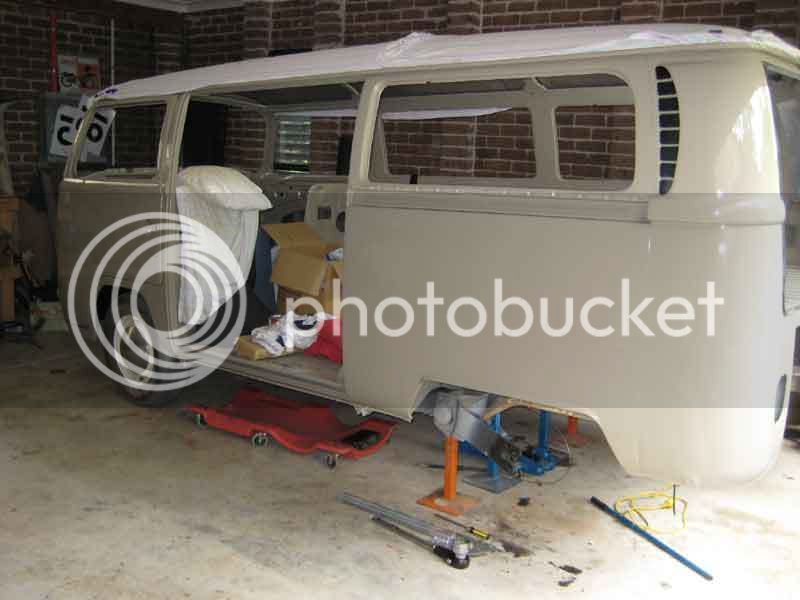
And then it came home - all painted! I am really pleased with the colour – makes me look forward to getting things put back into / on it
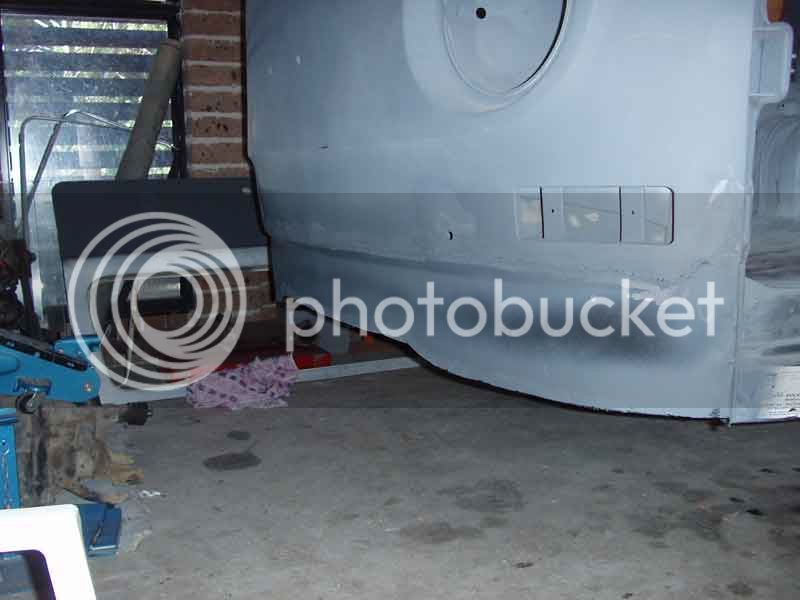
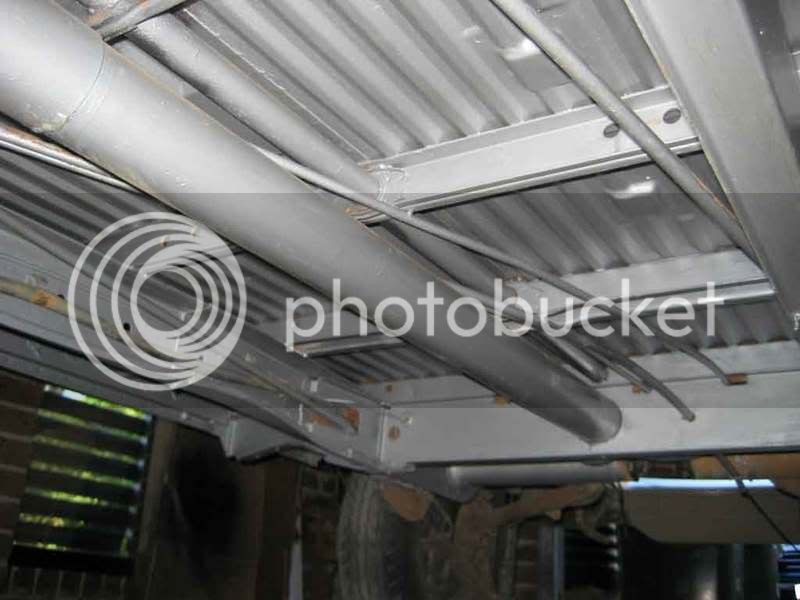
Next step was to work on the underside and the mechanicals
Spent several long and painful days of wirebrushing and cleaning the van, lying on my back on a mechanics trolley as the van was still at floor level, then painting with Rust Bullet
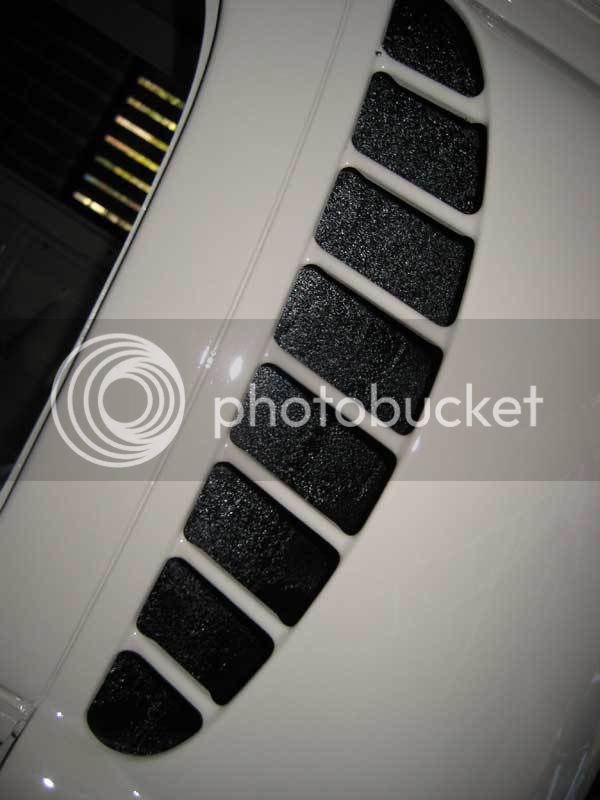
I painted the Air intakes in crinkle finish black
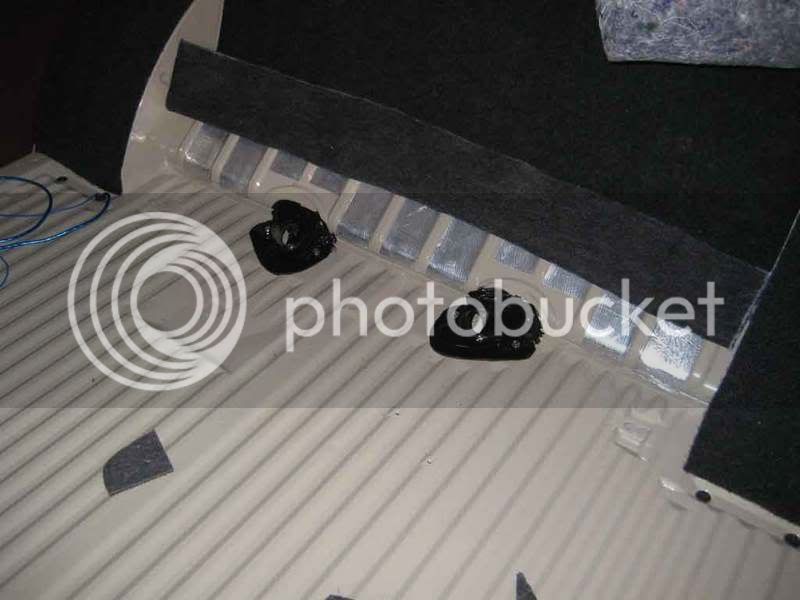
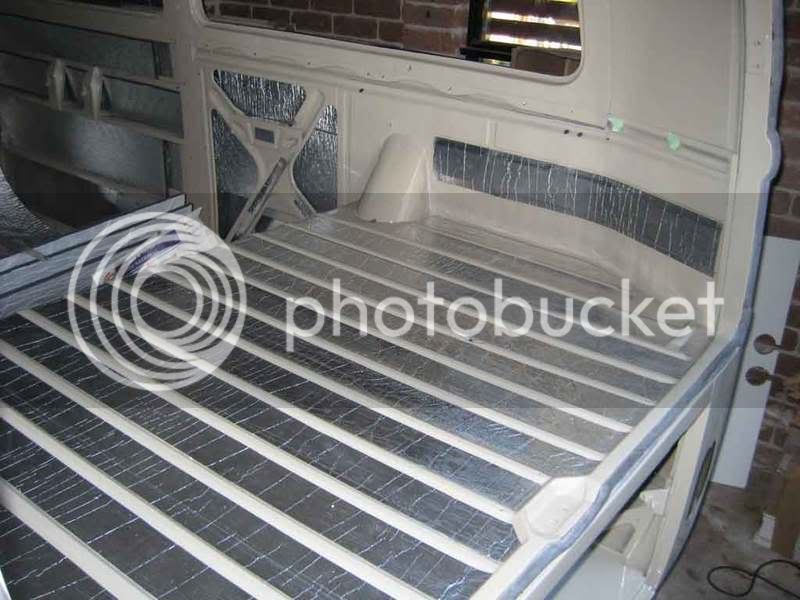
Started to soundproof the interior with a product called Soundpad - weighs about 2kg/m2 and dampens panel vibration - 1mm thick - think Dynamat but cheaper
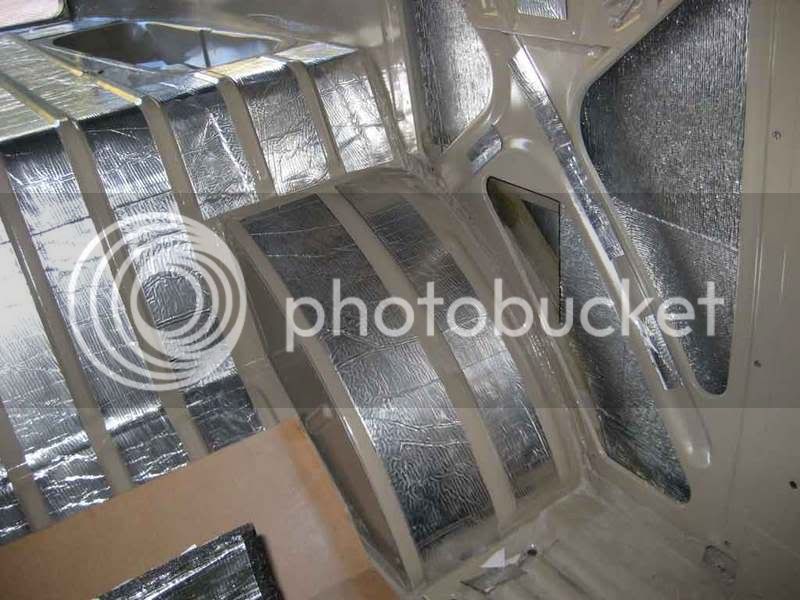
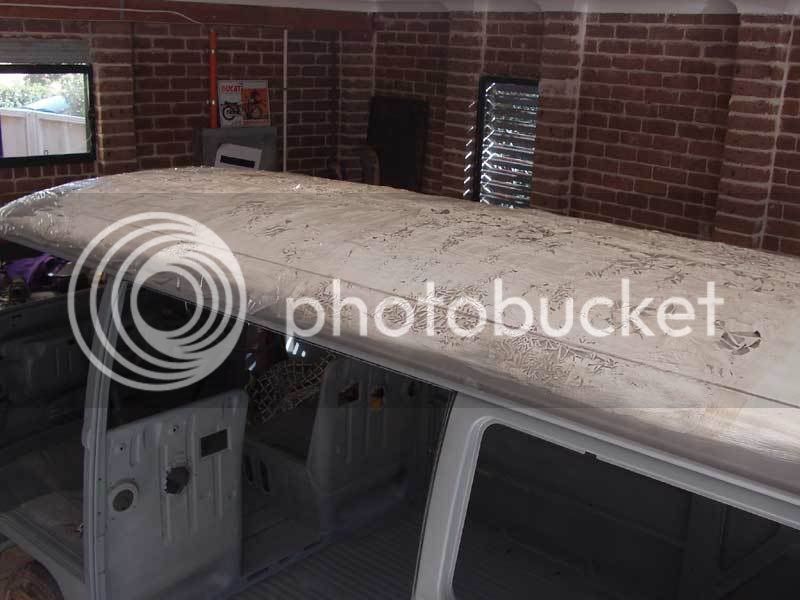
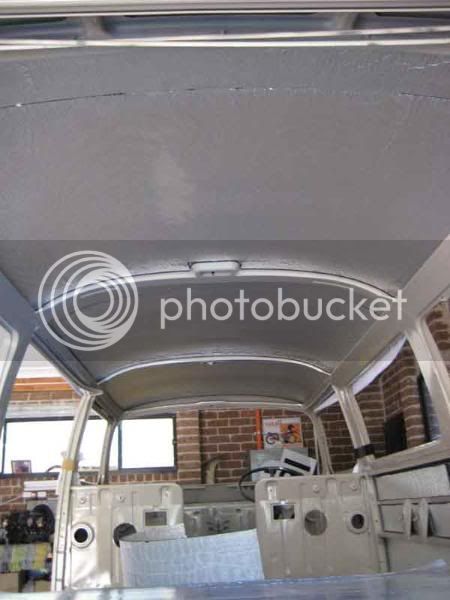
Also did the roof with strips of soundpad (see front) and then a closed cell foam with foil facing - about 1 cm thick for insulation
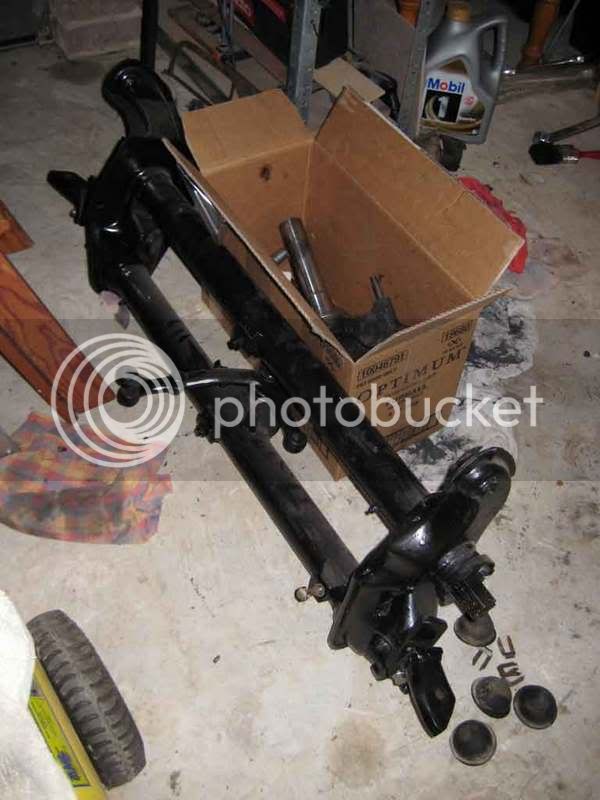
Here is my 'new' adjustable beam waiting to be put back in – at this time I was waiting for new ball joints to be pressed into the arms
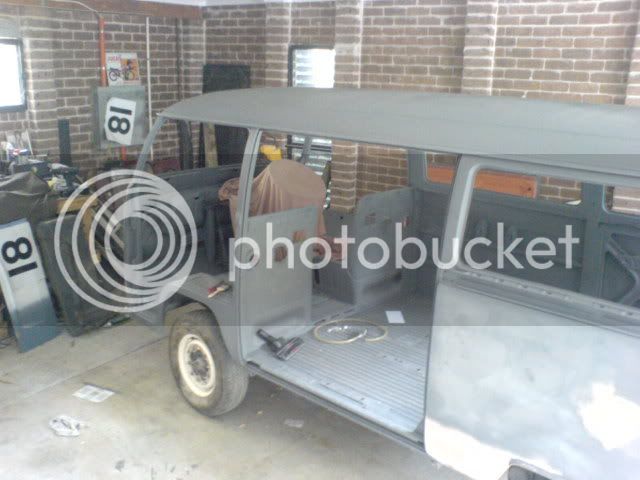
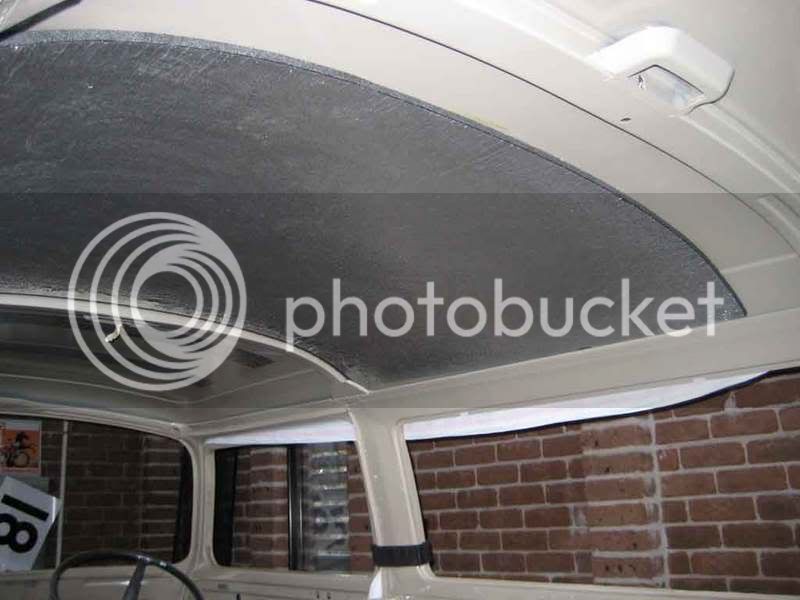
Here's a pic of the finished roof sound-proofing
I am presently waiting for the headlining to be finished in an original style material
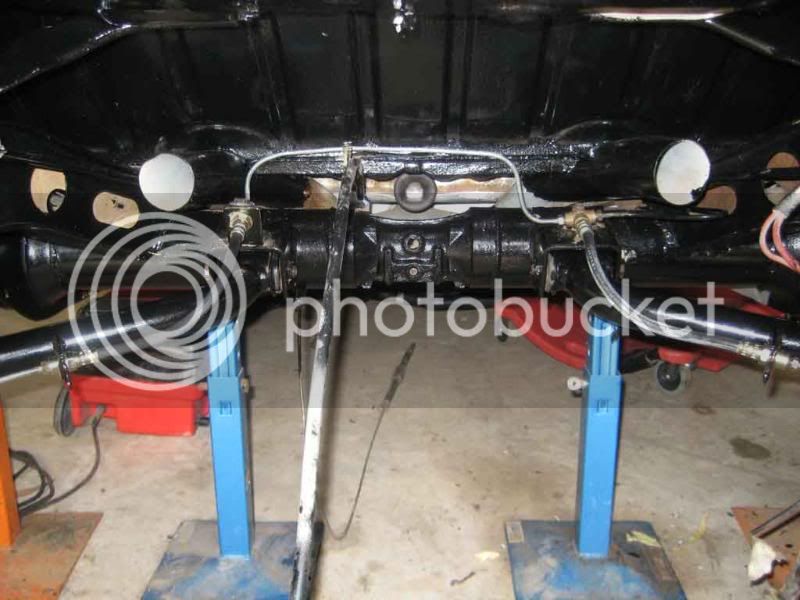
Here's the dropped front end
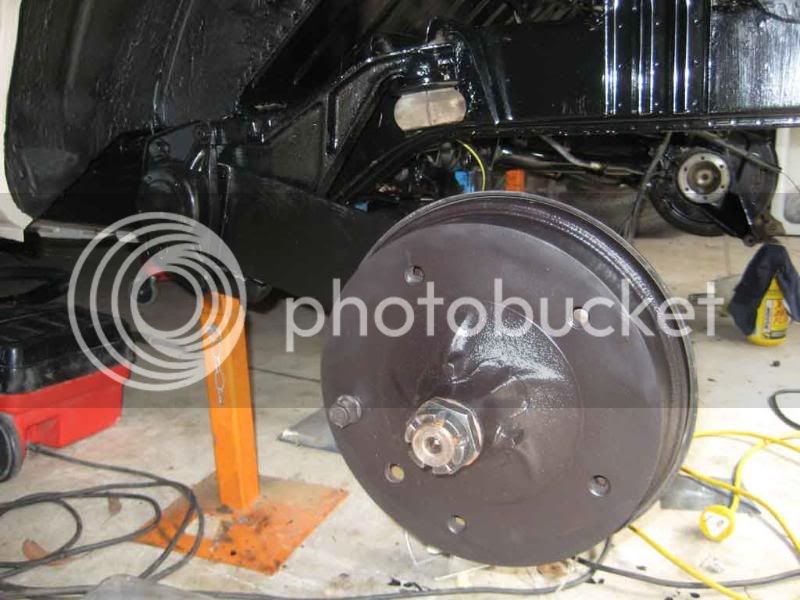
and the rear end taken apart for new wheel bearings and a rebuild of the brakes, plus lowering 1 outer spline
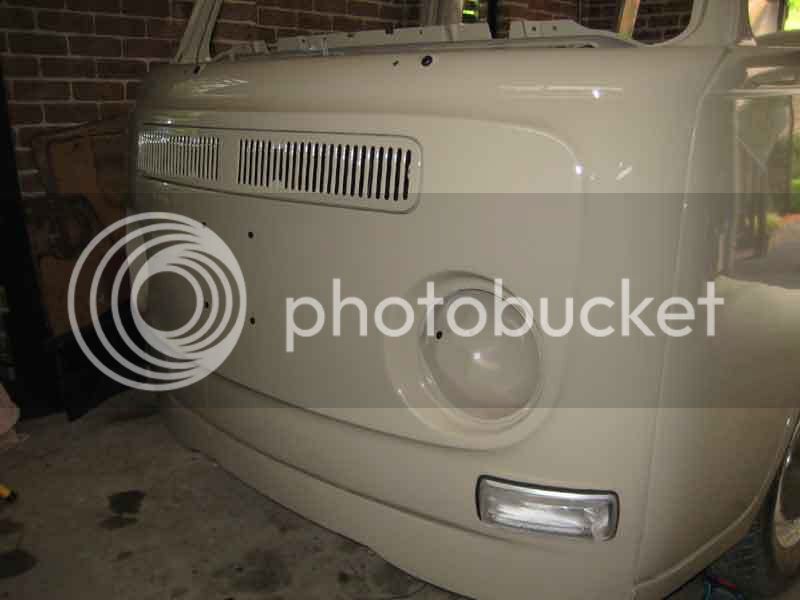
and the front with fresh air vents and grill back in and one indicator
finished rebuilding the rear end - new wheel cylinders and brakes lines, and bearings too - also lowered one outer spline and painted in rust proof paint and body deadener - that all took a while!!
Rebuilt the handbrake - new cables and handle and fresh coat of paint
Plus managed to source a pedal box so that got a clean and paint with Killrust
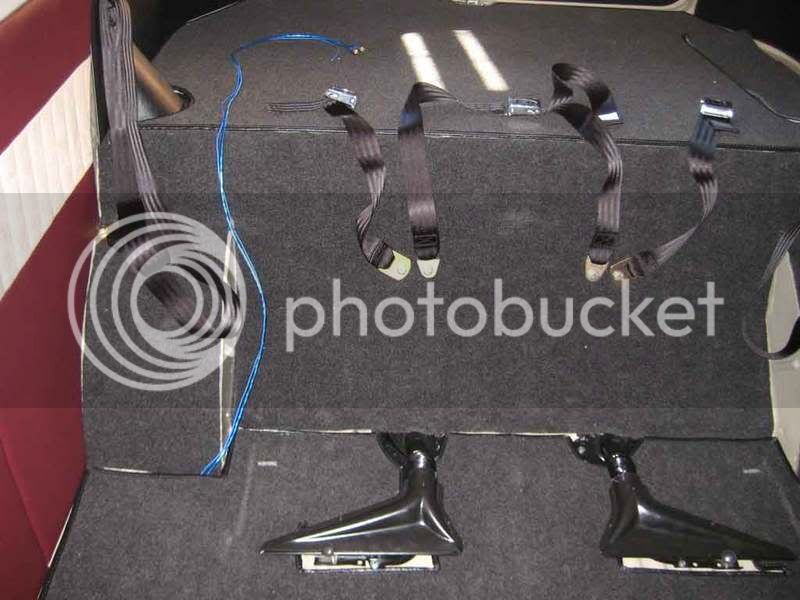
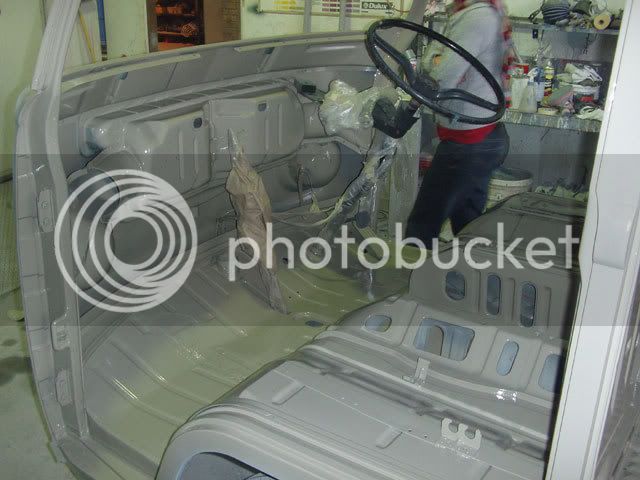
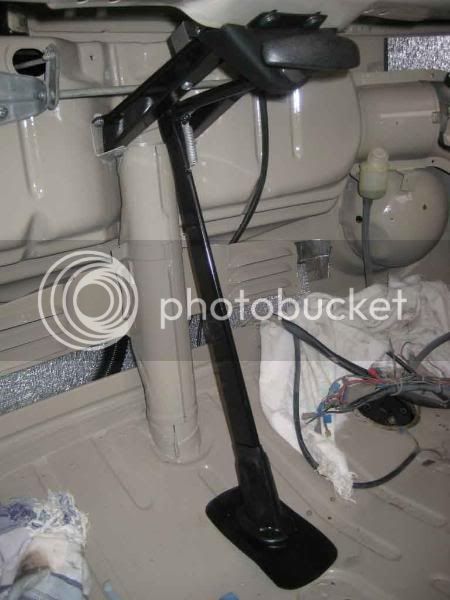
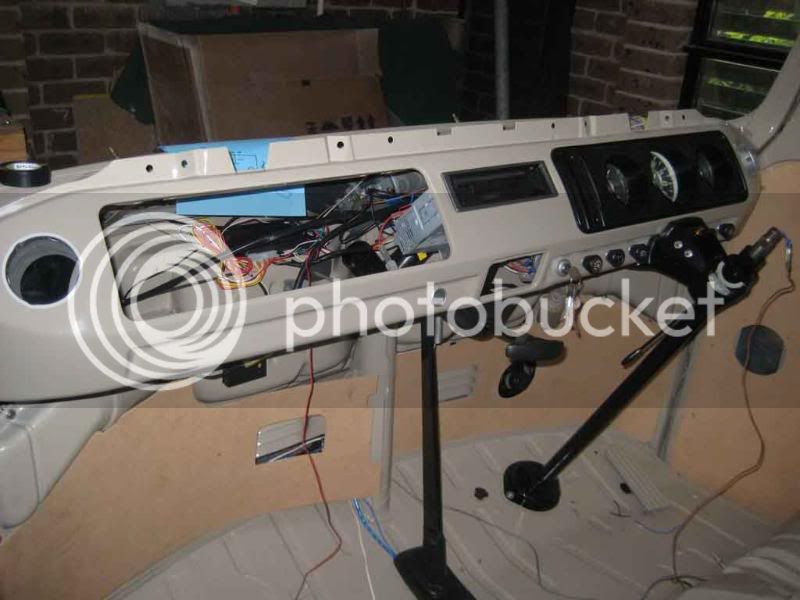
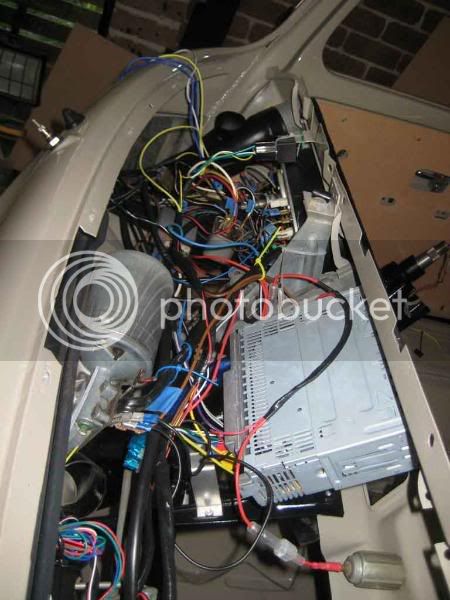
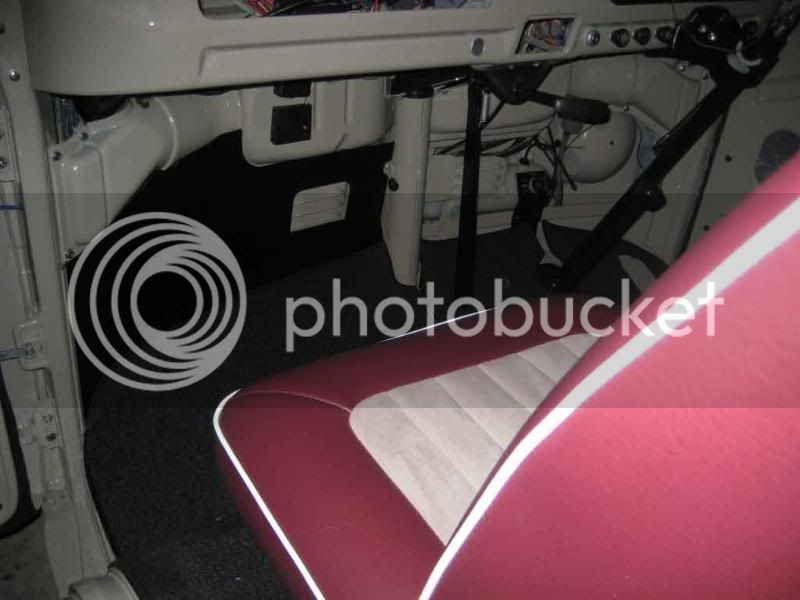
Next I turned my hand to the interior - first up some wiring - what a nightmare - made a hell of a lot easier by good labelling when pulling apart - still a bit of a mess but need to test it out before wrapping things up in tape etc - installed new cd player and alarm, plus got the dash bits back together - installed ambulance fans, new pipe for the washers, clean and polish things up - you get the drift
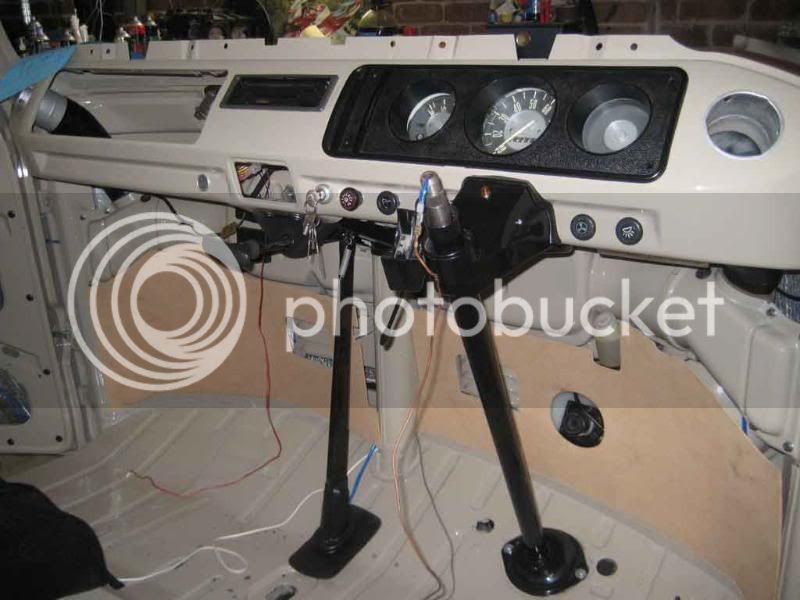
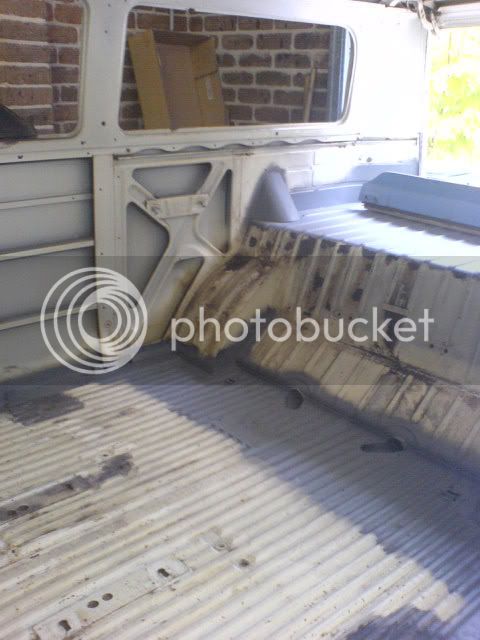
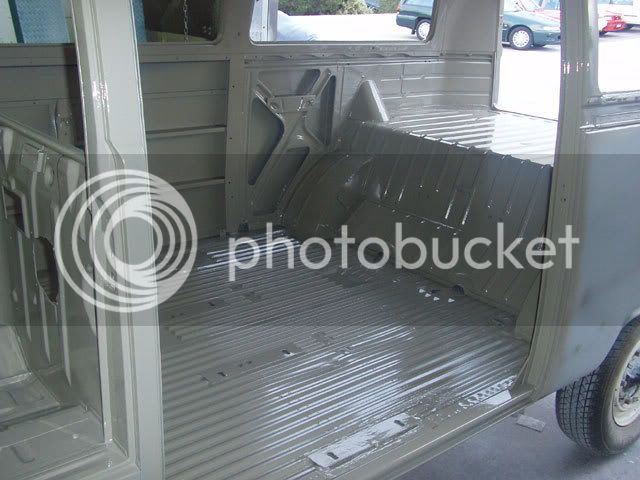
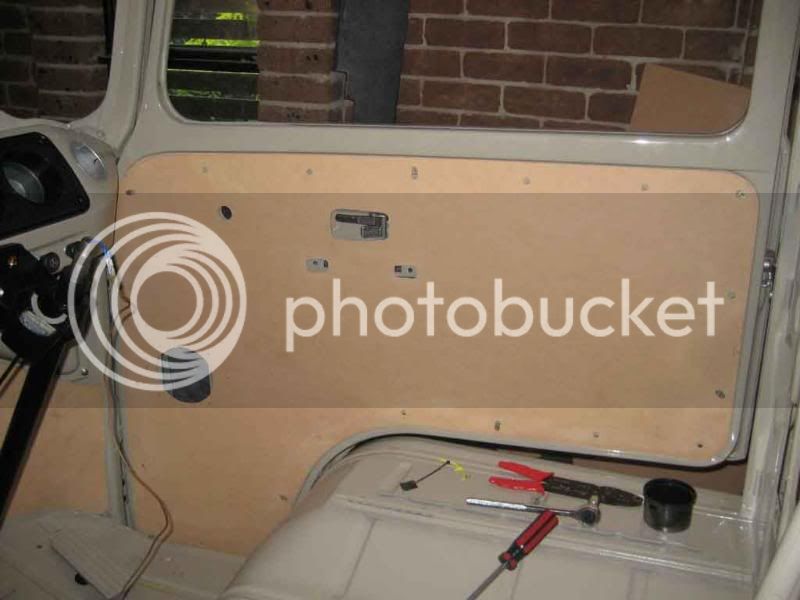
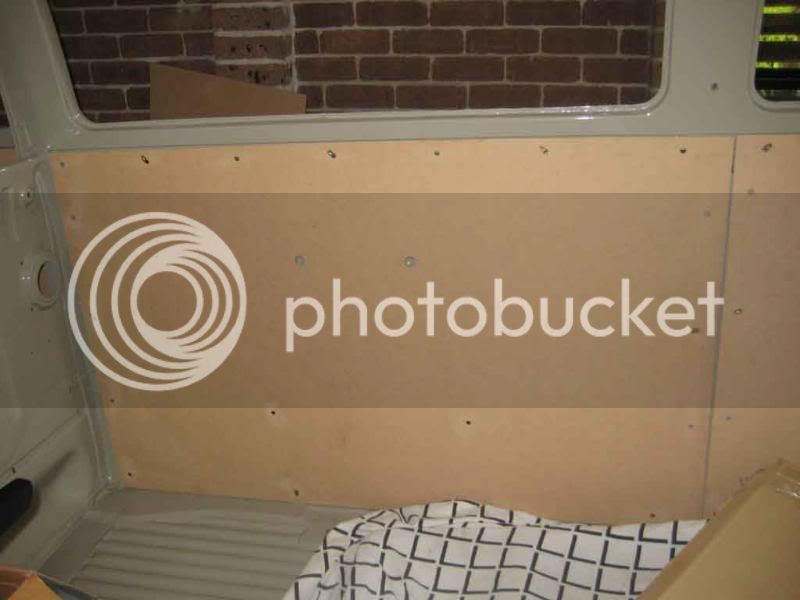
And started to cut out the interior panels (you can see some under the dash above also), which are now all finished and waiting for covers when I have some cash
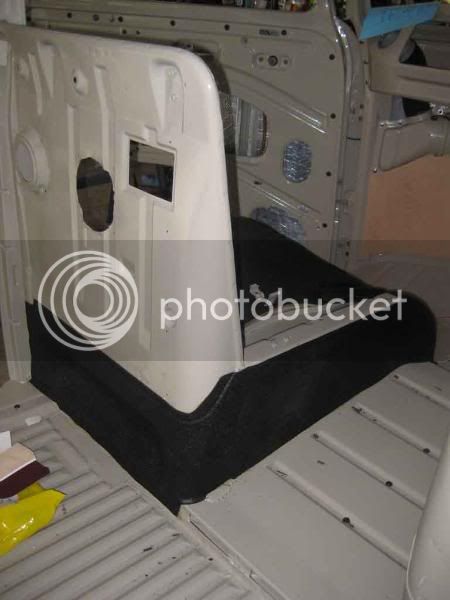
Original style Rubber mats around seat base
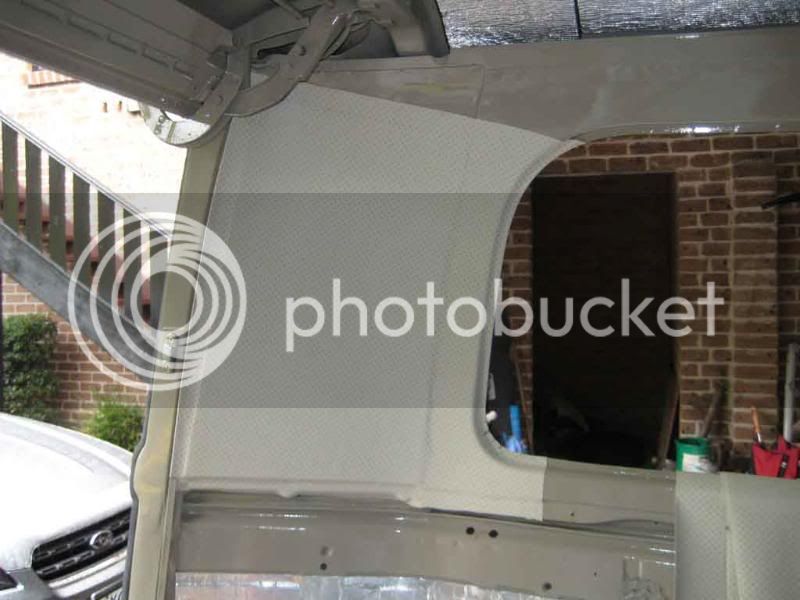
Started to do a bit of the headlining - hear is the first bit done – as I said, I am waiting for the trimmer to come in and glue the main bit up
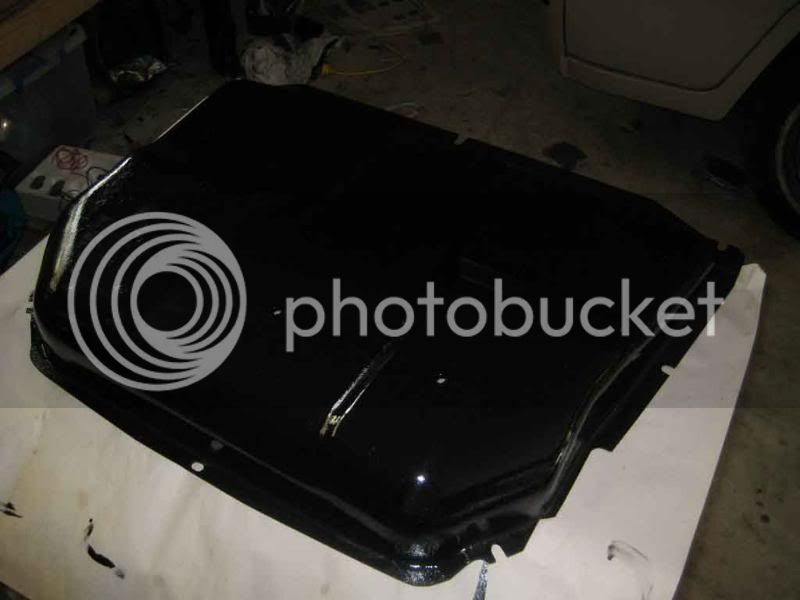
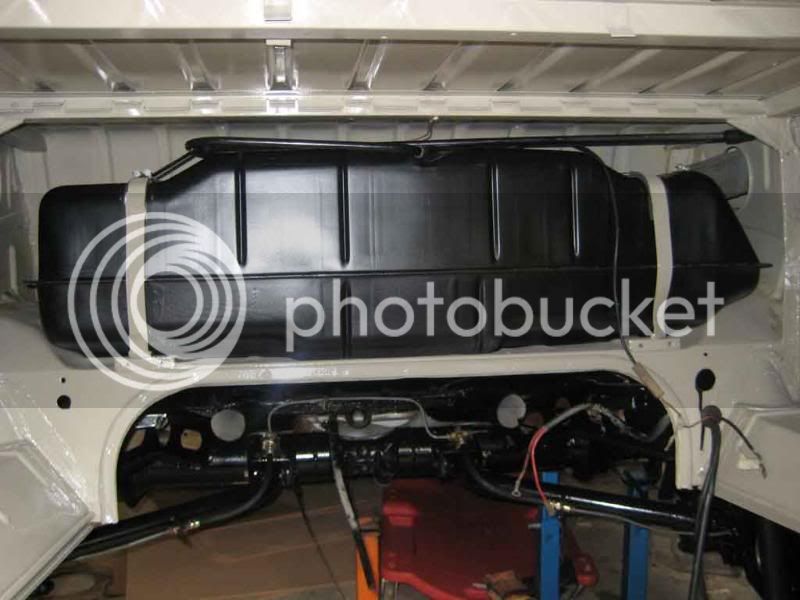
reinstalled the fuel tank after POR15 interior treatment and a coat of Killrust on the outside - new rubber for protection around strap and new breather pipe - next up is the bulkhead cover to hide the nice paintwork - sometimes I winder why I bother doing certain things to the degree I have - but at least I know it is done properly
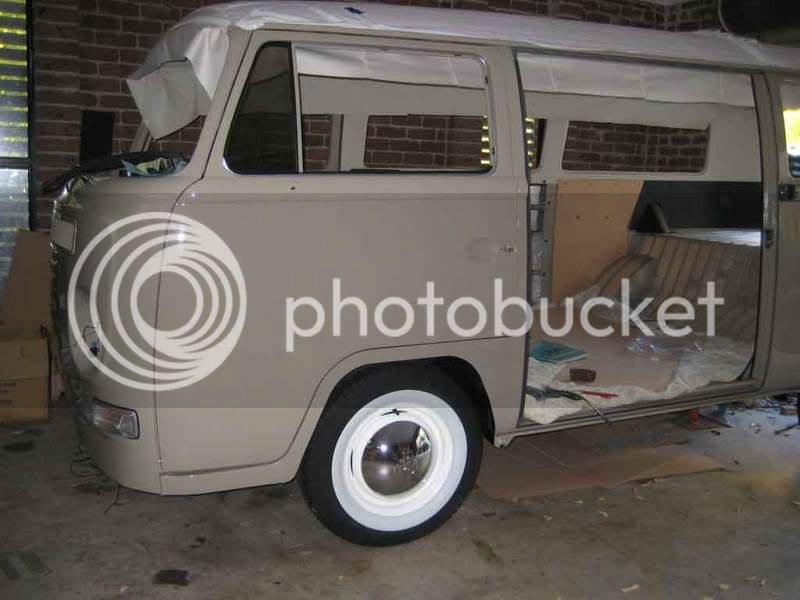
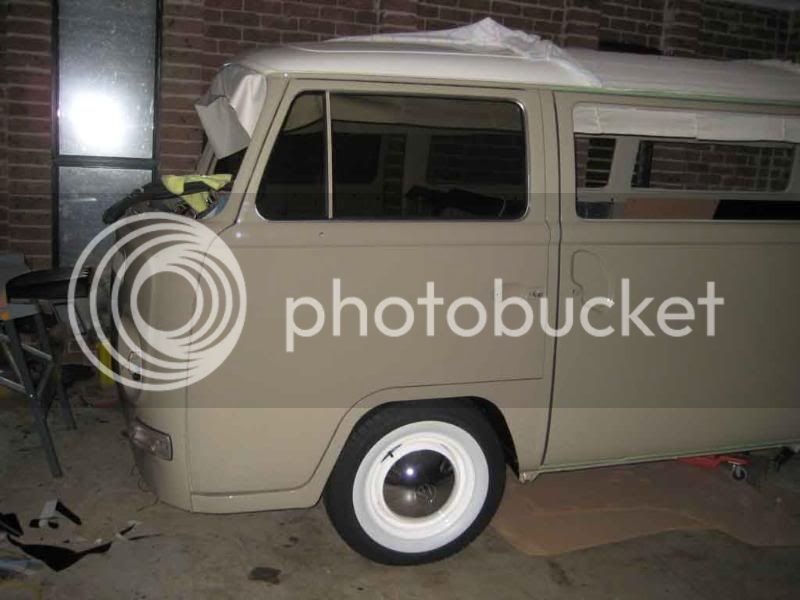
And now I have the wheels back with tyres and whitewalls - really pleased with the way they turned out - still need the trim rings and for the van to settle a bit when the gearbox and engine goes in
In the second pic you can see that the headlining is up and ready for sticking down
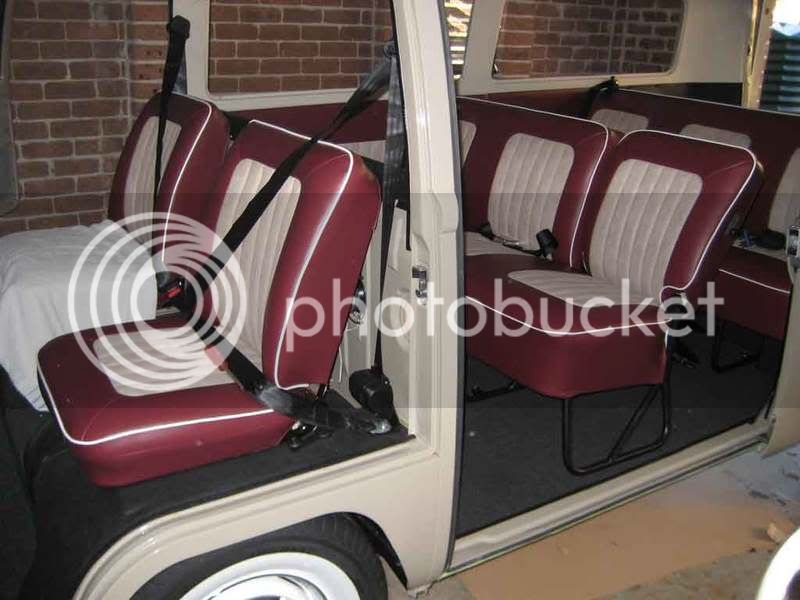
Got some more trim in place around the seats - the old stuff came up great with a bit of a clean and some vinyl treatment -

plus put some rubber tubing around the speaker holes the PO put in - edges were a bit sharp and untidy - just used some old flyscreen rubber and a bit of superglue - makes it look a lot neater

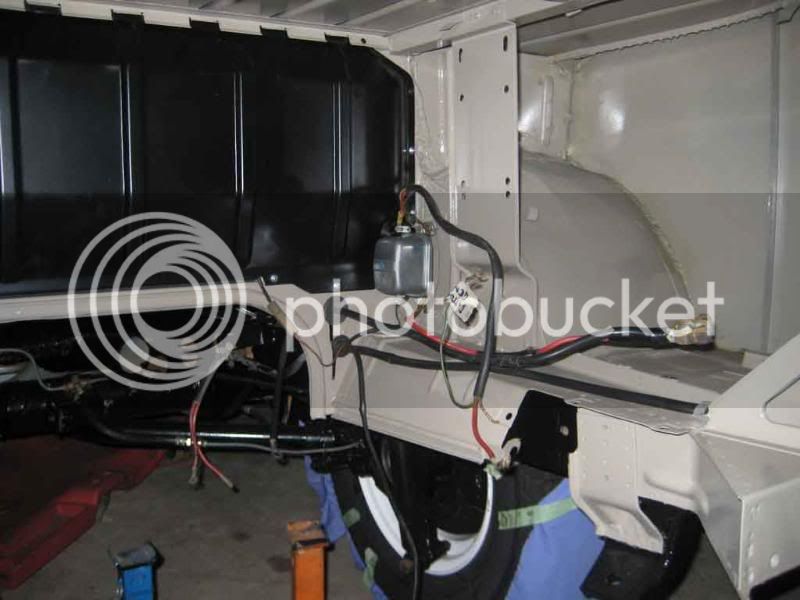
And got the wiring sorted in the engine bay - just cleaned it up a bit
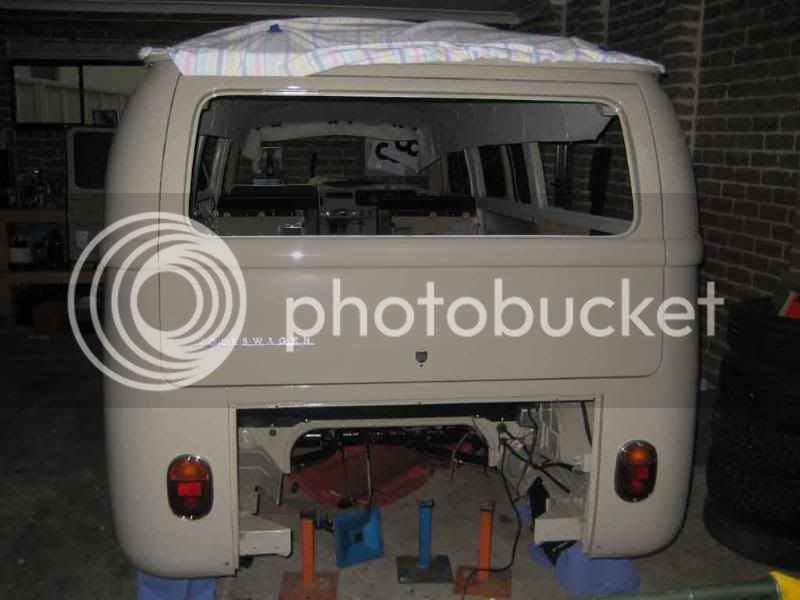
Got the back door on - waiting for the locks to be rekeyed before I can shut it properly - badge temp in place - plus some lovely new replacement tail-lights
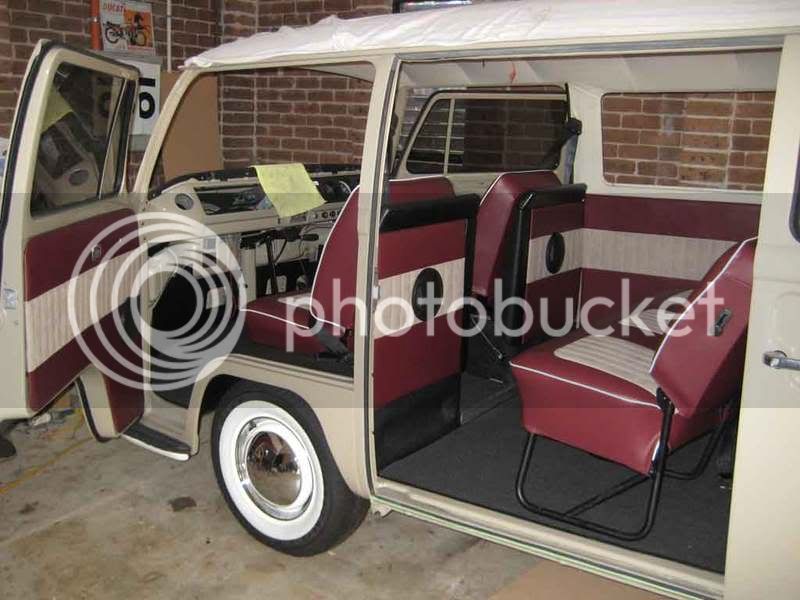
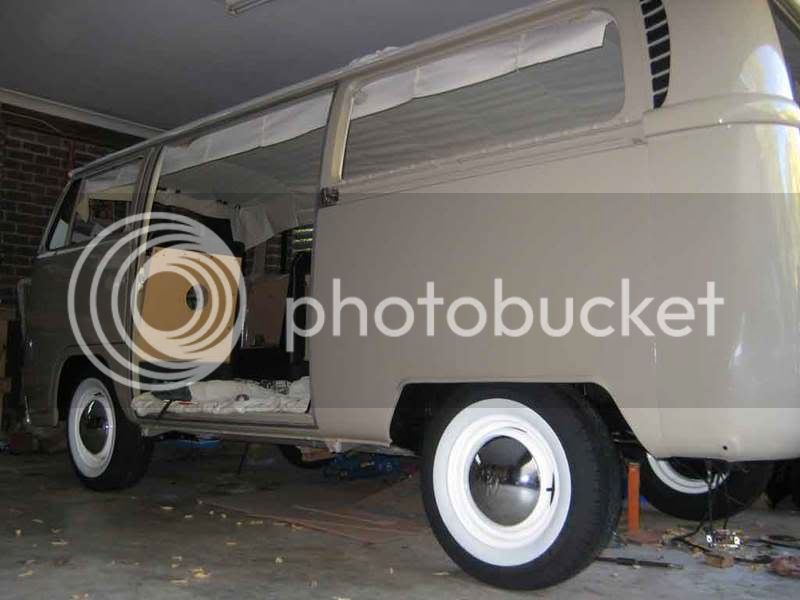
And the sliding door too - although it needs a bit of adjusting still - and fitted the front windows (including my own tinting in a charcoal colour) - that was a bit of a task to get all the seals in without scratching paintwork or tint, but the windows do wind up and down perfectly
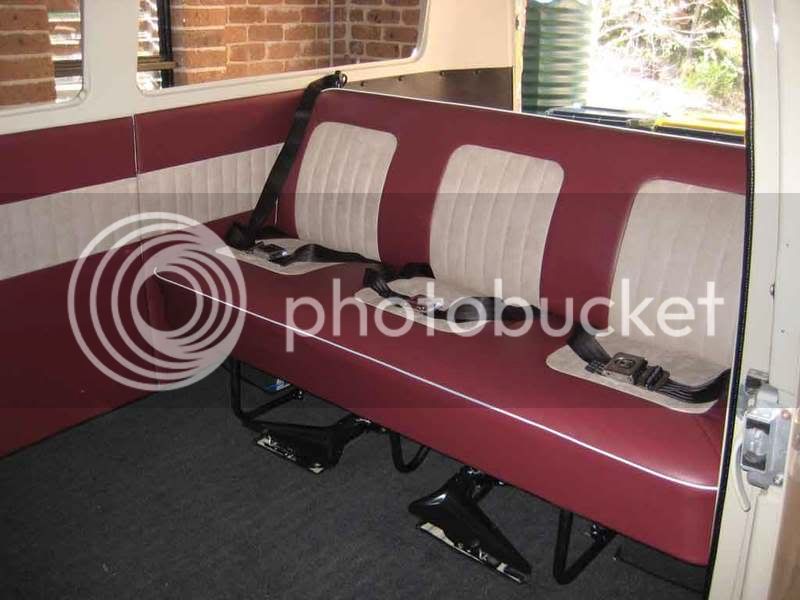
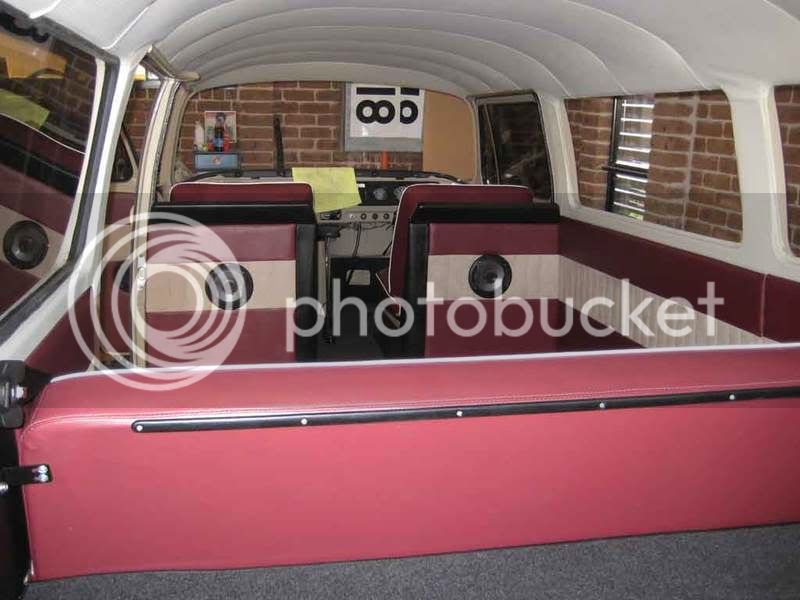
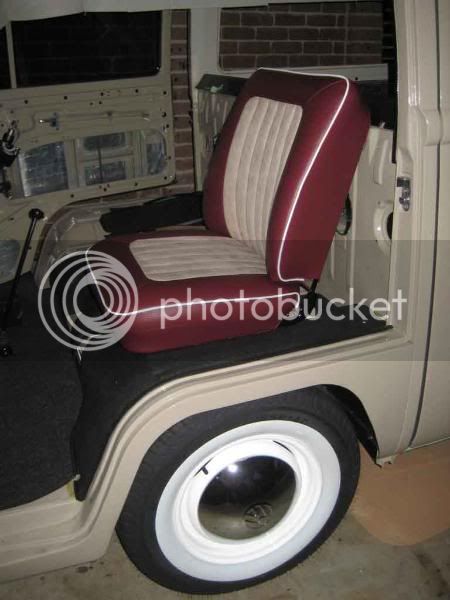
Here is a pic of the interior colours I have chosen - painted the viewable bits of the seat frame - something I assumed the trimmer would have done but hadn't - the colours are going to suit the van perfectly - interior trim will match too - hope to have this done soon
And I started to trim the 'easier' trim panels myself, plus bought some front carpet
As i said all locks are away being keyed the same, and I am in the process of rebuilding the 1/4 windows - full frame pull apart and repaint then refit with new seals - this is a real bitch of a job - probably the hardest thing about the resto so far - the new seals seem good but are not quite 100% correct so it is a struggle to get the frames back together - anyway I am 2/3 there!
I have just bought some carpet to cut to size before getting the trimmer to edge, plus sanded back the primed bumpers which will head back to the painter this week for painting in white. That’s it for now – love the other resto’s happening in the UK – good inspiration - JOSH
And here it is - a 1969 Microbus with 1600 SP engine and hand-brushed paintjob - currently in the midst of a long term resto - this pic was about 3 years ago
The following posts are essentially a summary of my progress to date, cut and pasted from the Aussie Forums I use.
First up, there was lots of rust easily visible in a few places
Behind the bumper
Under the window seal
I guess I sort of expected to find this so was not really worried- and these were the worst two bits - everything else was pretty solid – or so I thought
Stripped at home and ready for blasters
And here she is after blasting and priming
A bit more rust was then uncovered so off to the panel beaters after ordering some AH Schofield panels from a local source.
New Lower front and steps in place
Plus a new passenger floor
And from underneath - I needed new inner panel too
Repair to floor at back of seats
And at the front of the passenger wheel arch
New battery tray, plus a view from the rear of the outside
Plus the other rear side - repair of some rusty accident damage - bit of filler needed here!
How does that window sill look now(check back to a previous pic for rust damage)
And side view showing bumper damage area just aft of sliding door cut out
I stripped roof myself in the garage – what a long day – decided it needed it as the painter said there were humidity blisters in the old paint, which otherwise looked OK
The back off to panel shop for straightening and painting
Here she is primed
And now the interior is painted SAVANNAH BEIGE! Yeah, I know – another SB, but there are not many of them out here (only know of 1 other at the moment and it’s a late one) and I love the period colours
And then it came home - all painted! I am really pleased with the colour – makes me look forward to getting things put back into / on it
Next step was to work on the underside and the mechanicals
Spent several long and painful days of wirebrushing and cleaning the van, lying on my back on a mechanics trolley as the van was still at floor level, then painting with Rust Bullet
I painted the Air intakes in crinkle finish black
Started to soundproof the interior with a product called Soundpad - weighs about 2kg/m2 and dampens panel vibration - 1mm thick - think Dynamat but cheaper
Also did the roof with strips of soundpad (see front) and then a closed cell foam with foil facing - about 1 cm thick for insulation
Here is my 'new' adjustable beam waiting to be put back in – at this time I was waiting for new ball joints to be pressed into the arms
Here's a pic of the finished roof sound-proofing
I am presently waiting for the headlining to be finished in an original style material
Here's the dropped front end
and the rear end taken apart for new wheel bearings and a rebuild of the brakes, plus lowering 1 outer spline
and the front with fresh air vents and grill back in and one indicator
finished rebuilding the rear end - new wheel cylinders and brakes lines, and bearings too - also lowered one outer spline and painted in rust proof paint and body deadener - that all took a while!!
Rebuilt the handbrake - new cables and handle and fresh coat of paint
Plus managed to source a pedal box so that got a clean and paint with Killrust
Next I turned my hand to the interior - first up some wiring - what a nightmare - made a hell of a lot easier by good labelling when pulling apart - still a bit of a mess but need to test it out before wrapping things up in tape etc - installed new cd player and alarm, plus got the dash bits back together - installed ambulance fans, new pipe for the washers, clean and polish things up - you get the drift
And started to cut out the interior panels (you can see some under the dash above also), which are now all finished and waiting for covers when I have some cash
Original style Rubber mats around seat base
Started to do a bit of the headlining - hear is the first bit done – as I said, I am waiting for the trimmer to come in and glue the main bit up
reinstalled the fuel tank after POR15 interior treatment and a coat of Killrust on the outside - new rubber for protection around strap and new breather pipe - next up is the bulkhead cover to hide the nice paintwork - sometimes I winder why I bother doing certain things to the degree I have - but at least I know it is done properly
And now I have the wheels back with tyres and whitewalls - really pleased with the way they turned out - still need the trim rings and for the van to settle a bit when the gearbox and engine goes in
In the second pic you can see that the headlining is up and ready for sticking down
Got some more trim in place around the seats - the old stuff came up great with a bit of a clean and some vinyl treatment -
plus put some rubber tubing around the speaker holes the PO put in - edges were a bit sharp and untidy - just used some old flyscreen rubber and a bit of superglue - makes it look a lot neater
And got the wiring sorted in the engine bay - just cleaned it up a bit
Got the back door on - waiting for the locks to be rekeyed before I can shut it properly - badge temp in place - plus some lovely new replacement tail-lights
And the sliding door too - although it needs a bit of adjusting still - and fitted the front windows (including my own tinting in a charcoal colour) - that was a bit of a task to get all the seals in without scratching paintwork or tint, but the windows do wind up and down perfectly
Here is a pic of the interior colours I have chosen - painted the viewable bits of the seat frame - something I assumed the trimmer would have done but hadn't - the colours are going to suit the van perfectly - interior trim will match too - hope to have this done soon
And I started to trim the 'easier' trim panels myself, plus bought some front carpet
As i said all locks are away being keyed the same, and I am in the process of rebuilding the 1/4 windows - full frame pull apart and repaint then refit with new seals - this is a real bitch of a job - probably the hardest thing about the resto so far - the new seals seem good but are not quite 100% correct so it is a struggle to get the frames back together - anyway I am 2/3 there!
I have just bought some carpet to cut to size before getting the trimmer to edge, plus sanded back the primed bumpers which will head back to the painter this week for painting in white. That’s it for now – love the other resto’s happening in the UK – good inspiration - JOSH
")