My 69 Westfalia - Oxyboxer engine

Early Bay Forum

Help Support Early Bay Forum:

This site may earn a commission from merchant affiliate links, including eBay, Amazon, and others.
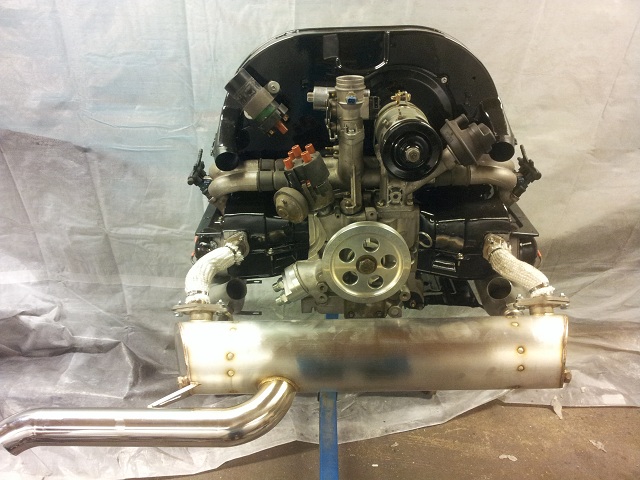
I got the Vintage Speed exhaust now, but it is a standard one, without customization for my wider engine.
Anyway there are enough adjustments to munt the exhaust; I will just try to port a bit of the flanges to get as smooth connection as possible.
1331849906_9_FT817_justerbareksos.jpg


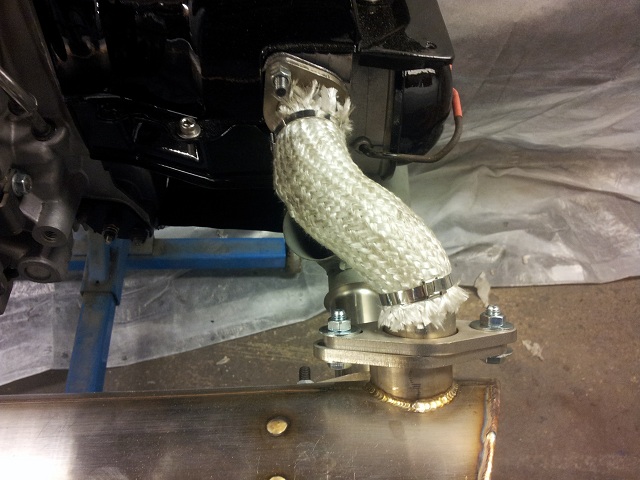
I cut the flanges of the Bugpack heater boxes and will veld the tube/flange delivered with the exhaust from Vintage Speed
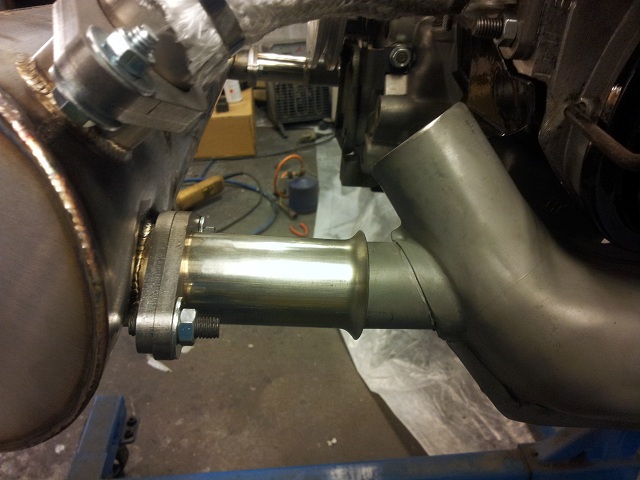
The heater box tubing and the small tube from Vingage Speed is the same size. Normally the small tubing should fit over the heater box tube.
1331849906_9_FT817_eksos_varmeboks.jpg


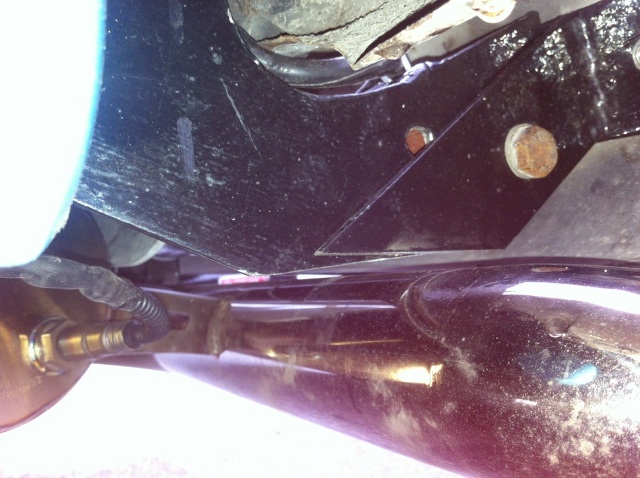
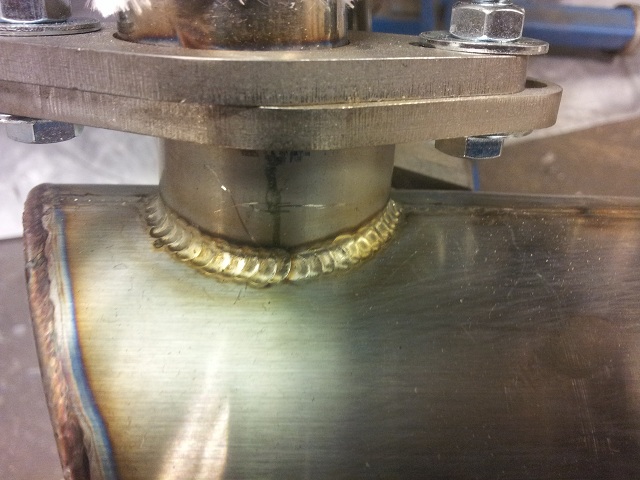
Look at those welds! Nice!
The quality of the exhaust seems to be really god
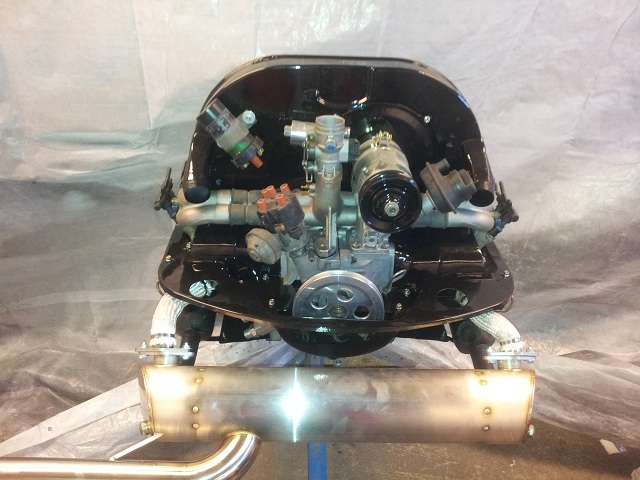
1331849906_9_FT817_eksos_sveiser.jpg
 
All parts painted. Building the wiring loom now and got all the fuel and oil hoses ready

1333442494_9_FT817_klar_til_ledningsnett.jpg


I plan to use Audi A4 VR sensor behind the modified pulley, but this sensor was to long. A new Mazda Miata sensor is in the mail. This is shorter and the cable output is on the "correct side". I will use the HAL sensor in the distributor for now, but will install and connect the VR sensor when building the wiring loom for future use.

1332112303_9_FT817_mazda2.5v6vrsensor_.jpg
 
Distributor modification:

Disassembled, weights and springs removed.
Some threadlocker is applied to the two "tabs" on the upper shaft then "stamp marked" holes for drilling
1334938102_9_FT817_img_2052.jpg


Holes carefully drilled
1334938102_9_FT817_img_2053.jpg


Upper shaft is now locked to the lower shaft by the two tabs in the drilled holes.
The distributor is now temporarly assembled and mounted in the engine. The distributor is then adjusted and fixed with the rotor pointing at plug 1 with engine at 20 BTDC. The engne is then turned to 5 BTDC and the HAL sensor adjusted so that the metal teeth is goig either in or out of the HAL sensor. This is adjusted by turning the upper plate normally controlled by the vacuum. Now the HAL Sensor is locked in place by drilling a new hole trough the two plates and fixed with a popnit
1334938102_9_FT817_imag0003.jpg


The wiring loom is finished and wrapped with tar tapes to get a vintage look.
Oil is filled and the engine is ready for camshaft break-in. Just need to borrow a friends modified engine stand with cluch house
Hopefully break-in will be done this weekend
 
I started the engine yesterday. Modified the engine stand width a clutch housing from a T3/T25 transporter. Oil idiot light, ignition and start switch and some gauges added...Oil tenp, oil presure and fuel pressure.

1336913884_9_FT817_oppstartbenk.jpg


I got issues with a leaking fuel pressure regulator (tiny little hole I was not able to see before fuel pressure was on). This was a used WBX regulator, and I replaced it with an old T-4 EFI regulator for startup. There was also an issue with the HAL sensor in the distributor, about 25% of the pulses was missing. I therefore ended up firing the engine with a modified point’s distributor.

That's how it is with used parts.. Saves you some money but creates a lot of frustration!
 
Thanks!
The sound of the Vintage Speed exhaust is a bit louder than what I expected on idle. The sound is deep though, and the sound changes when the engine revs up. The deep tones are more or less removed on higher revs. I am really happy with the exhaust

My camera is not able to record the sound correctly :oops:
 
The old engine is now out and the fuel tank has been removed for internal cleaning

The 228mm flywheel / cluch was assembled, then thread on to the axle and rotated in the bellhousing.
Picture of the bellhosing before modification. Scratches in paint shows where material needs to be removed
1338998810_9_FT817_bell_before.jpg


Picture of the bellhousing after modifications. I could probably stopped 2mm before to avoid the 3 small holes, bot I have cleaned the outside and will use epoxy to fill the holes.
1338998810_9_FT817_bell_now.jpg


I also need to find a solution for the return line from the fuel pressure regulator.
I have tried to order one of these, but I got no answer on my e-mails
1298591190.jpg


I am not sure if I want to weld a return adapter in my used thank..

Others running EFI in their early bays? How do you connect the return line?
 
I finished the engine installation last week, just in time for the yearly VW meeting we arrange.
Fuel pump and filter is mounted over the gearbox, and the return from fuel pressure regulator enters a tee connector under the tank. It took some time to get air out of the system, but now it is working fine.

The engine was idling while I was filling the bus with what was needed for the meeting..
Then.. the sound of vales.. Not good when there are hydraulic lifters installed.
Oil pressure light on and about 2 liter of oil on the floor...
The oil cooler was leaking. And I pressure tested it to 8 bar (air) before installation. One of my friends think it was some weakness and it blow when hot oil was pressed trough the cooler. I was lucky it blows when the car was still in the garage.

I cleaned up the oil spill and bypassed the oil cooler, installed oil pressure and oil temp gauge and headed for the VW meeting. The oil temperature was not getting higher than 85C the about 25km trip.

I have now ordered a new external oil cooler with thermostat and electric fan to be mounted under the bus. I do not want to pull the engine just to replace the T4 oil cooler in the doghouse
 
Today I start tuning the engine. The Innovate LC1 WB sensor was giving either rich or lean on the trip to the VW meeting last weekend. Calibration did not help, and the Innovate motorsport forum is not working at the moment. After some googling I fond a new firmware, 1.2RC4 (beta), I upgraded and now the readings are stable.

Here are my map's. Feel free to comment

Fuel map
1340486489_9_FT817_ve_map_oxy.jpg

1340486489_9_FT817_ve_map_oxy_3d.jpg


Ignintion map
1340492583_9_FT817_spark_map_oxy.jpg
 
New oil cooler with fan installed under the car.
The fan is controlled by temperature switch in addition to a oil thermostat/bypass mounted

1341682475_9_FT817_oilcooler_fan.jpg


Warm-up time is fine, and the temperature is stable between 92 and 95C.
The fan has not started yet, so there should be a nice buffer for the hills :)
 
The tow bar needed some modifications to fit together with the vintage speed exhaust.
The second bolt hole for the bumper bracket had to be cut away. I will add a M8 bolt later.
1341684631_9_FT817_towbar_modified.jpg


There is a tight fit between the bumper and the exhaust pipe, about 5mm I think but as long as it does not hit the bumper I'm happy with it.
1341684604_9_FT817_exhaust.jpg
 

Latest posts

Top