1776 Build with an Auto Linea case

Early Bay Forum

Help Support Early Bay Forum:

This site may earn a commission from merchant affiliate links, including eBay, Amazon, and others.

Zcat7

Well-known member
Joined
Apr 12, 2010
Messages
662
Reaction score
3
Location
Oxfordshire
Year of Your Van(s)
1972
Van Type
Crossover
I was asked to post a few piccies of my 1776 build. I went down this road after my low mileage 1641 SSP engine, with Brailian AS41 case, cracked around the oil cooler pedestal. I'm using a new Auto Linea case, bored for 90mm barrels and pistons, an Engle 100 cam and all other standard parts from the original engine.

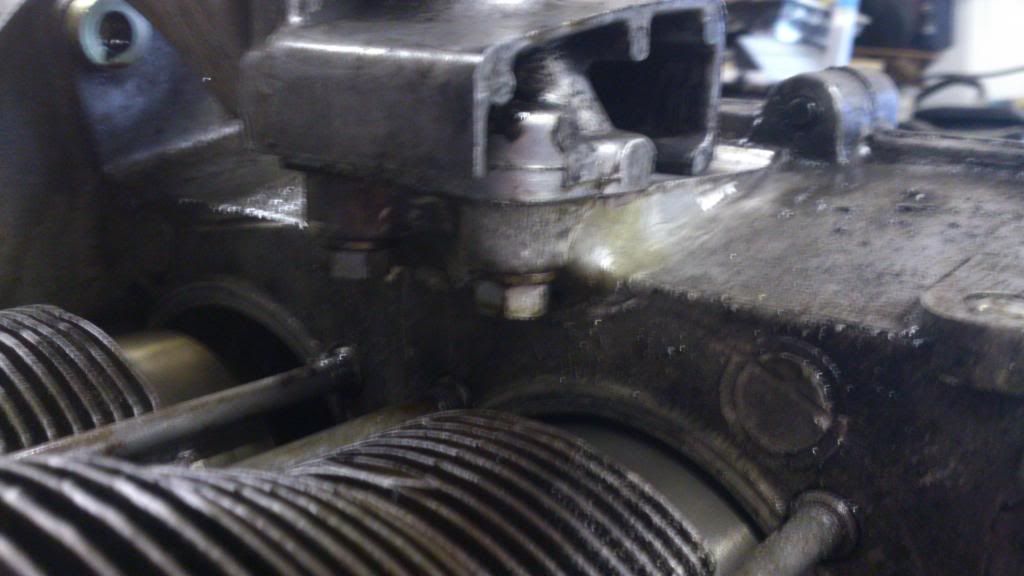
AS41 block complete with crack. You can see where I tried to fix it with a JB weld. I think I know why this failed but more on that later...


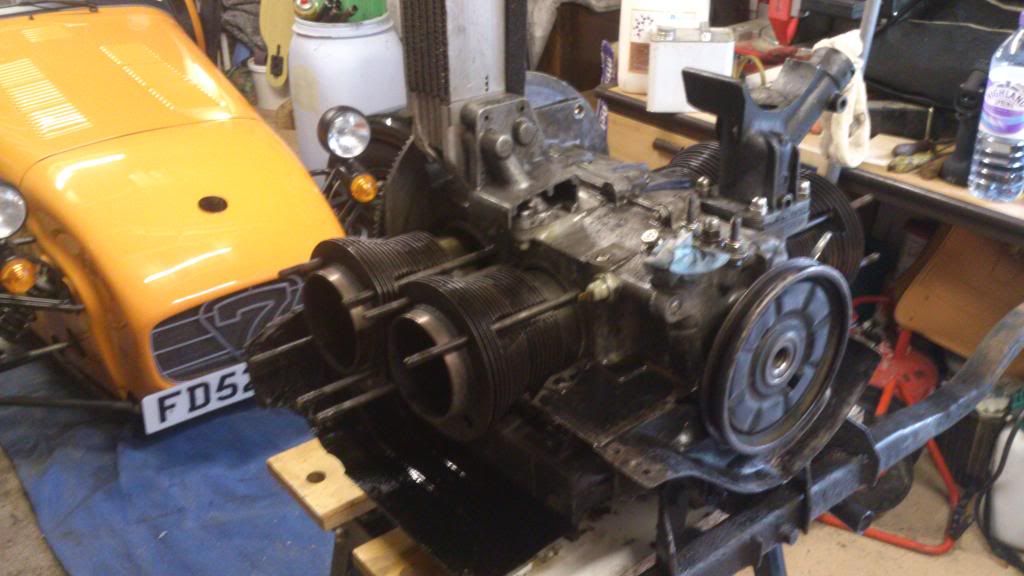
Engine mid stripdown
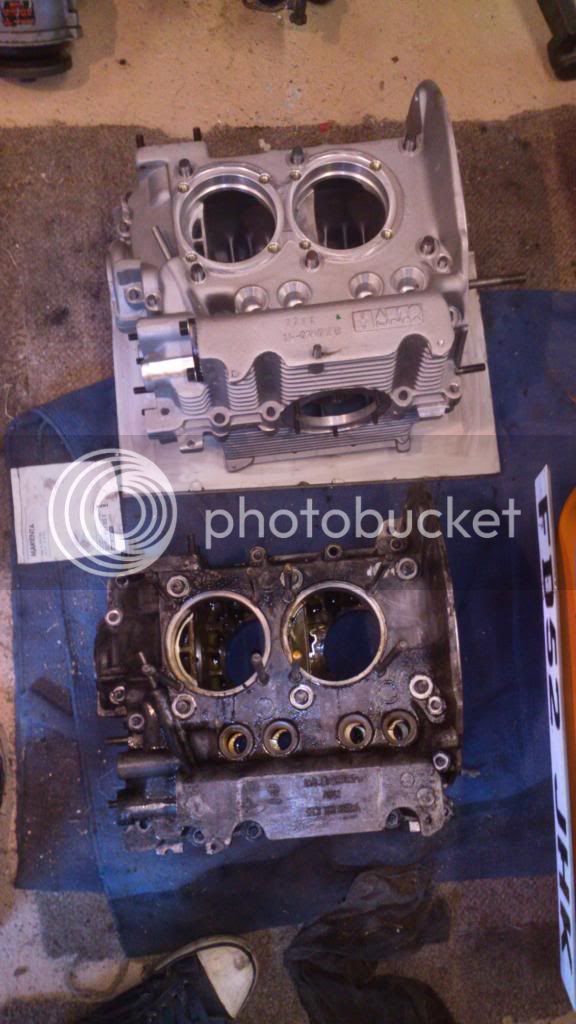


Old and new cases


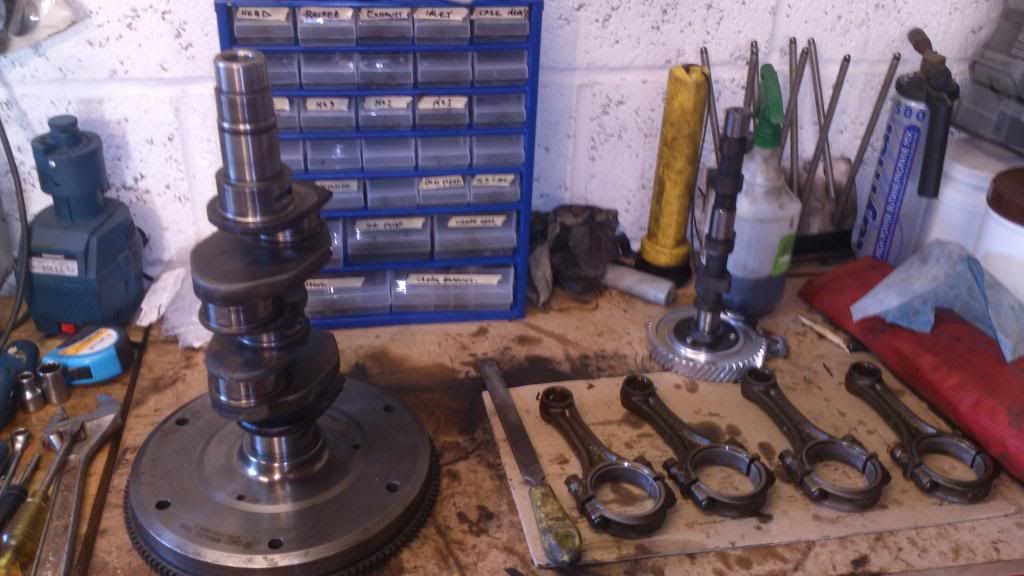
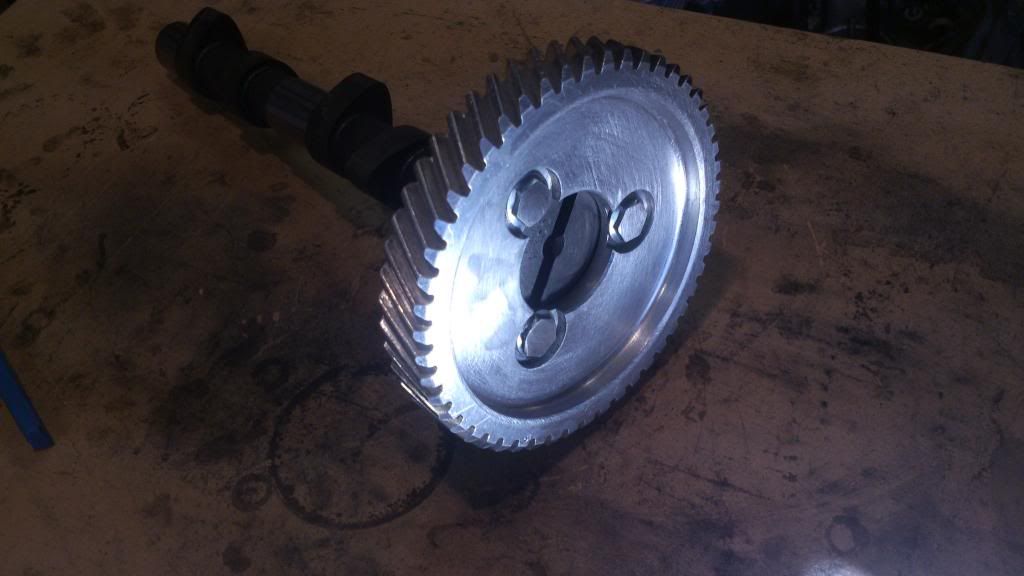
Crankshaft out and stripped. Engle cam mated to it's drive gear.


Engle 100 Cam assembled and clearanced (requires old style oil pump and bolt heads grinding down to clear)


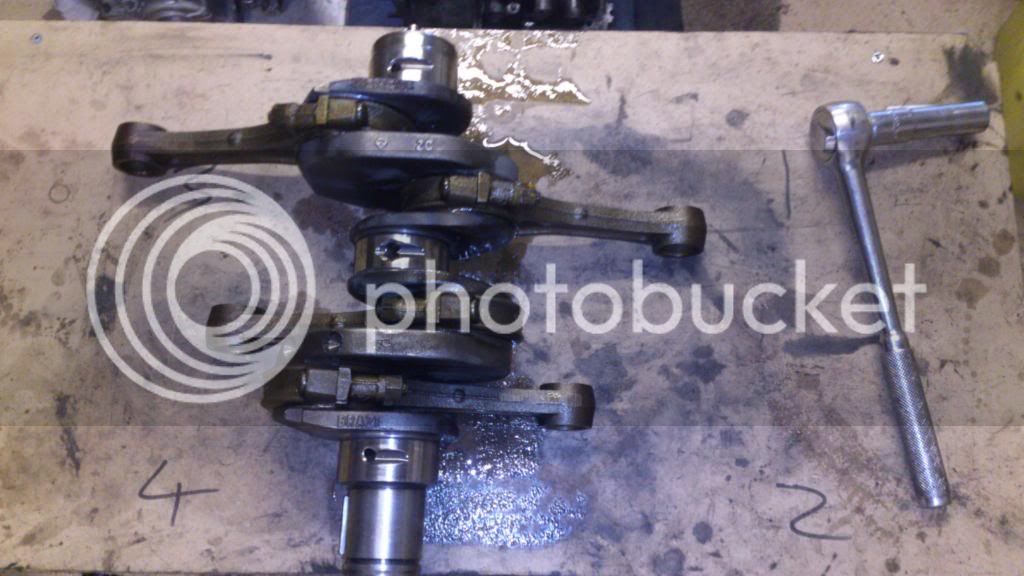
Journals polished with 800 and 1000 grit and conrods installed


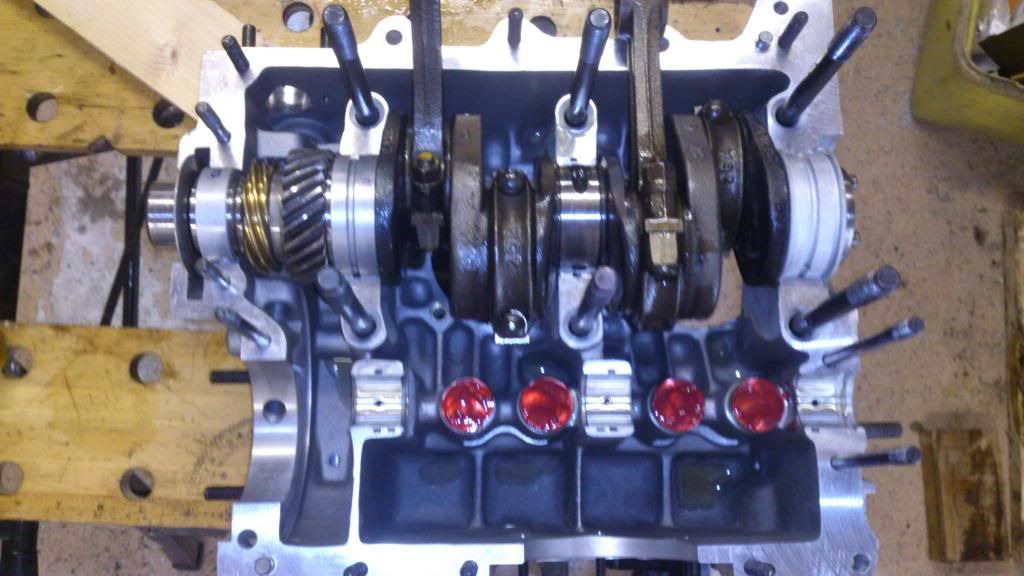
Fully loaded crank installed into case. New lifters awaiting camshaft


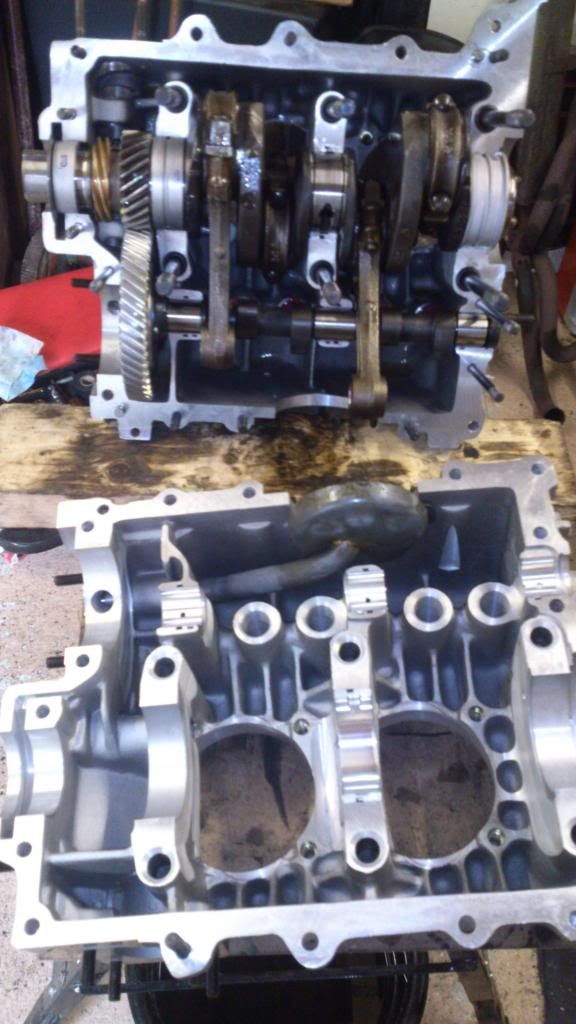
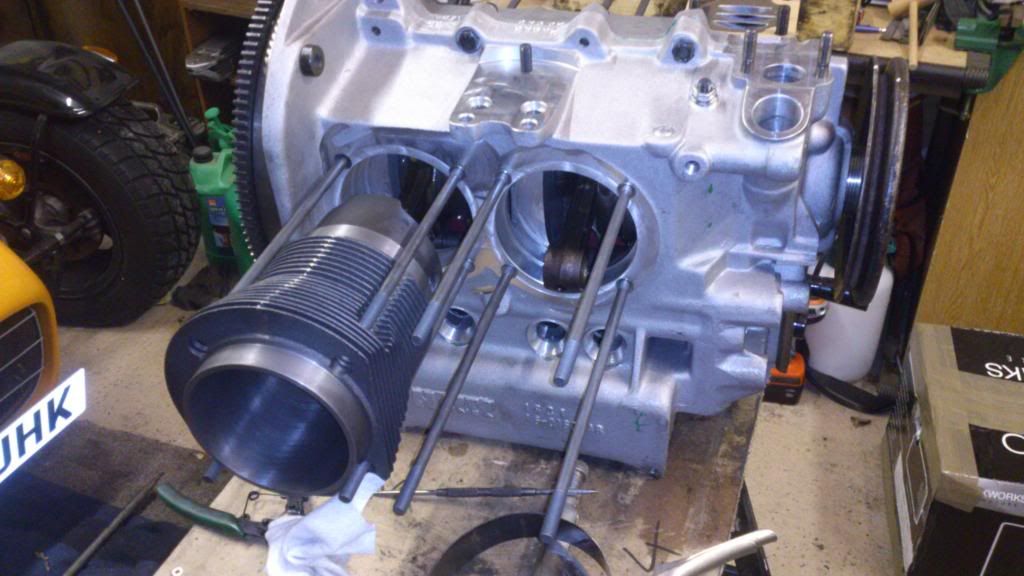
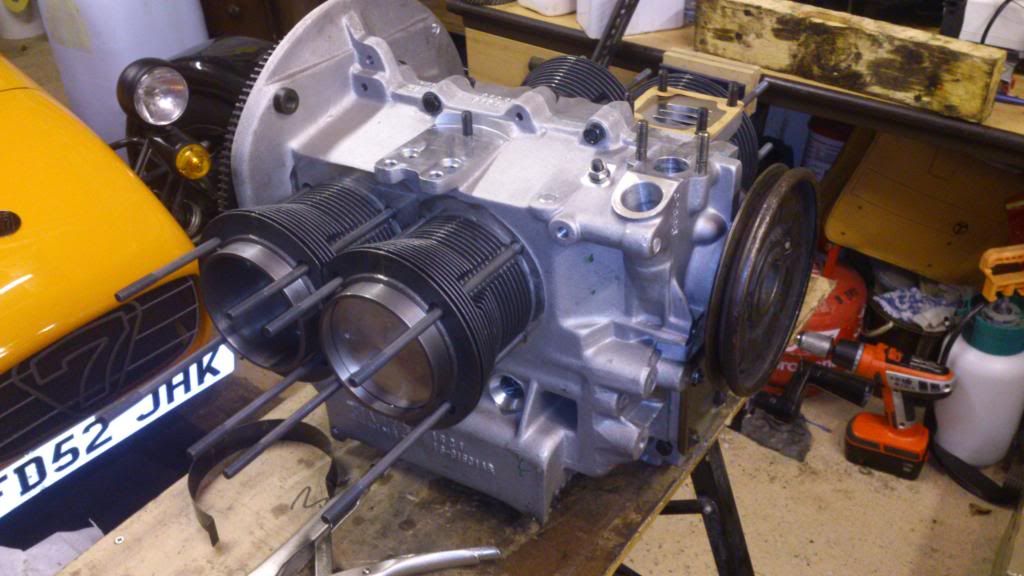
2 halves almost ready to be assembled


All bolted up


The casting has a nice finish and the milled surfaces are polished really nicely. For those eagle eyed among you, the engine has been turned since the dizzy drive was installed!


New barrels and pistons, I went for cast as I don't plan on a turbo! :)


Shiney and new...


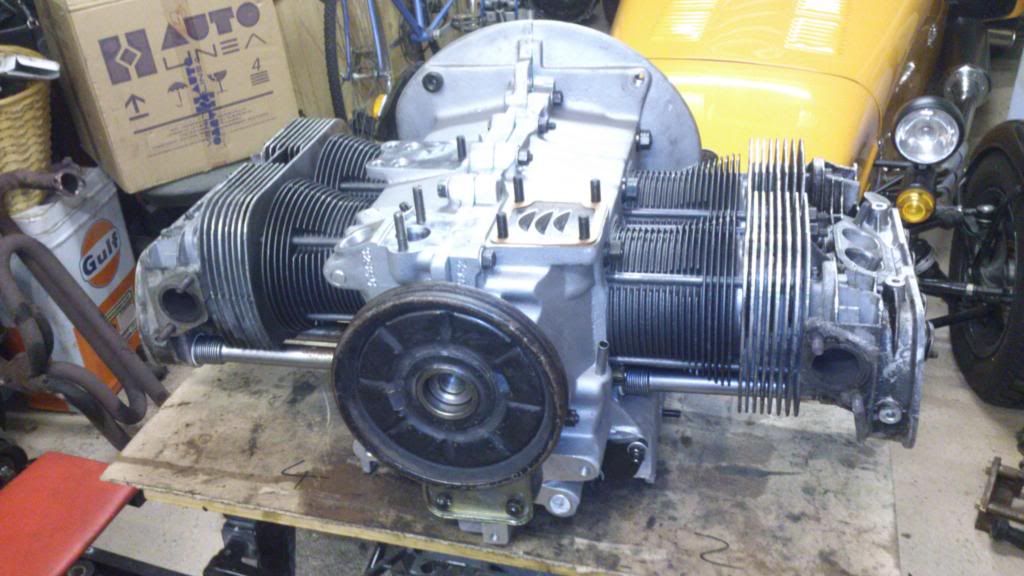
First piston/barrel goes on...


Followed by the other 3!


Heads bored out for the larger barrels and given a light de-coke (there wasn't much in there)


Heads installed! But not for long... I forgot to clip in the 2 small pieces of tinware that go under the barrels so off they came again... :(


The dreaded oil cooler installed. If I had a pound... ;)


And that's it for now. More to follow soon...

Neil
 
Good thread :)

The case looks pretty good to me and the extra strength should be significant. The non cantering oil pickup pipe you mentioned is a common problem and is down to the new pipes since I have had exactly the same problem on an AS41 case so don't blame the case for it.

As for the oil pump, they can vary a little in AS41 cases too. Not sure if its the case or the pumps Tbh.

The build is looking good, looking forward to the next instalment :)
 
Tristan, yes this is the final assembly (hopefully!) :)

Trikky. That's interesting about the pickup pipe, I hadn't realised that it was general new stock causing the issue. Think I'll keep the old one from the original case (assuming it comes out ok).

Neil
 
Apart fom fitting fitting a couple of ancilliaries I've only got around to setting the valve clearances and end float at the moment. So I thought I'd share a few pictures of some of the things that helped me with the build:

This is how I polished the crank journals. First, got some 15mm copper tube, a small length of rubber hose and an arbor to make this drive spindle for my drill


Then I cut some wet and dry into strips the same width as a roll of insulating tape. I then stuck it all together to make a sanding belt.


Using a long socket to demonstrate, this is how I polished the journals. I managed to apply a little oil and still get traction on the belt. I then simply moved at a continuous steady pace around the journals with the drill running in the direction of bearing rotation (reverse on the drill) They came up lovely. I used 800 and 1000 grit.


If you're going to strip an engine, get organised! I used this new multi drawer stack to store nuts, bolts, gudgeon pins, oil pump parts, releif valves etc. All by category and all immediately to hand for the rebuild. Geeky I know but it helps avoid mistakes.


A simple parts washer. Cut up an old Halfords Classic Oil tin, fold back the edges and fill with degreaser. fetch the bits out with a magnet is my other recommendation to save your hands... (the degreaser I'm using dissolves latex gloves in seconds!)


Thats about it from the Blue Peter guide to engine building! Thought it might be useful.

Neil
 
The following are pictures of what I suspect may have contributed to my case failure, which split around the rear facing angle and lower edge of the oil cooler pedestal.

This is the JB weld I put in place to try to fix the crack (which I saw open up when I started the engine with the fan shroud off).
Before, with area rough ground to accept the putty...


...and after with the putty in place


Initial running up seemed to indicate that the leak had stopped but after one long run the oil was pouring out again.
And so I started this rebuild, at which point I got around to turning the fan shroud upside down to clean inside it. As I was cleaning I noticed some deformation (damage) to the seating area where the shroud meets the Hoover piece, which is of course bolted to the oil cooler. I went ahead and beat the deformation out before photographing it but I've roughly drawn in what I found, which was that what should be a straight edge was bent back into almost an "M" profile:


Shroud beaten back into shape


And with the Hoover bit laying in place


This deformation would have meant that the fan shroud was pushing down on the oil cooler via the Hoover bit, pulling it over to one side and accentuating the line of the case fracture. Thinking back I had noticed that the shroud almost seemed too rock left and right instead of seating nicely on the occasions that I had refitted it. It was hard to imagine at the time however, that it was anything other than the odd shape of the whole tinware set that was causing this.

I will see how it all fits when I come to reassemble it and report back.
 
Does anyone grind there new barrls to the head any more or do you just bolt on the heads ?
 
ronnie12342003 said:
Does anyone grind there new barrls to the head any more or do you just bolt on the heads ?

I did with the one I'm building now but only because after stripping the engine I found that some head studs had been loose one side (ebay engine :cry: ) and it had been clearly leaking from one of the cylinders.

The head had obviously been bouncing and had marks in the chambers, so I ground the cylinders to hopefully eliminate this. (Haven't run it yet)

^^ I'm surprised you haven't cc'd the headsvand done deck height etc for your compression ratios.

Loving the crank grinder! 8)
 
I bet you pick washers up in the street and save them in a special street washer box :lol:
 
I did consider grinding the heads to barrels but as I was dealing with new barrels and freshly cut head faces I thought it unecessary. I'm sure a compression check will show if that was a wrong decision!

89Rallye - I took the decision to build a "factory tolerance" engine from the outset so setting deck heights and adjusting/balancing compression was never in the plan. The idea was to get back on the road in good time but with the best, most cost effective solution. To that end a 1776 setup in a new ally case was going to work out the same as my current 1641 setup rebuilt into a new magnesium AS41 case.

Jonboylaw - yes I am on Blatchat :) Good spot! I don't get to use my Caterham much either, its my old racecar from my days competing in the various Roadsports championships and since getting it road legal I have only used it a handful of times. Won't be parting with it though :D

Ronnie - only if I can pick them up with my magnet... :p
 
Zcat7 said:
I did consider grinding the heads to barrels but as I was dealing with new barrels and freshly cut head faces I thought it unecessary. I'm sure a compression check will show if that was a wrong decision!

89Rallye - I took the decision to build a "factory tolerance" engine from the outset so setting deck heights and adjusting/balancing compression was never in the plan. The idea was to get back on the road in good time but with the best, most cost effective solution. To that end a 1776 setup in a new ally case was going to work out the same as my current 1641 setup rebuilt into a new magnesium AS41 case.

Jonboylaw - yes I am on Blatchat :) Good spot! I don't get to use my Caterham much either, its my old racecar from my days competing in the various Roadsports championships and since getting it road legal I have only used it a handful of times. Won't be parting with it though :D

Ronnie - only if I can pick them up with my magnet... :p
:lol:
 
Went a few hard fought rounds with the tinware the other day. The old tin is less than pretty and some bits didn't fit particularly well from the outset but this new case is shaped differentlly in places requiring the tin to be trimmed up a bit.

The lower "sled" tin was the worst and having been repaired a few times by POs the right sled tin (left in the picture) only attached to the block by the rearmost screw. So I set to it with a hammer and vice and beat it into a shape that now now allows it to screw on in all 4 places (6 if you include the heat exchangers). Not sure if its the shape its supposed to be... By the way, that isn't caked on grease and crap on the lower tin, it's actually the shape of it!


A couple of the holes were so elongated and butchered that they were secured with a nut and bolt. I found it frustrating when removing the tin that you have to reach under and over the back of the bus with a spanner and a socket so I fitted these basic thread inserts, which allow original tin screws to be used.


The front pulley tin needed some adjustment. The case is a different shape on the left side. This is the original case, which has a 90 degree recess


The new case is set at 45 degrees


So the tin needed cutting back here


Like this


On the other side the casing is the same shape but the tin did need to be filed back a bit as it was a couple of mm too deep


Another place the casing is different/beefier is around the oil cooler pedestal Hopefully it is stronger all round here! :)


This meant that the tin fouled on the case so needed to be cut back a bit to allow it to sit right down. Viewed from the front of the engine (fan opening side)


So that's the tin in place.


The tin took a lot more time than I'd bargained on but it wasn't difficult, just time lots of trial fitting to make it neat. It's not the prettiest engine and I know I didn't take the time to repaint the tin but you can't polish a turd as my old Nan used to say and at the end of the day chrome won't get you home! I will however look into getting some new tin at some point, especially the lower sleds; recommendations and advice anyone?

All I need to do now is fit the throttle linkage, oil filler/crankcase breather, fan belt and exhaust and I'll rig it up to the gearbox and try to start it... Oh and put some oil in it...!
 
So the build has been completed!

Fitted the last few bits and filled her up with oil... old school style :)


I started her up and after a little fettling got her ticking over nicely. I took this video. Its ticking over deliberately fast so as to run the new cam in.


Next I stripped a carb down to see what jets and venturis I had fitted. Here it is partially dismantled along with a washer I found in the street... ;)


Close ups...


Finally I reassembled the carb, got the engine running again and balanced/set the carbs.


I'll have to go through the carb setup cycle a few more times yet as I have some new venturis, idle and main jets coming from Kaddie Shack in the next couple of weeks. I also have new fuel lines and an oil temp guage to install then I'll reset the tappets, put in some fresh oil and put it back in the bus.

Not sure what's left to post picture-wise really! Hopefully this has been of some use. If anyone wants any close-ups of anything posted then let me know ASAP before I plop the engine back in (unless its from the front of course)
 

Latest posts

Top