You are using an out of date browser. It may not display this or other websites correctly.
You should upgrade or use an alternative browser.
You should upgrade or use an alternative browser.
Andyo11's 1969 Kombi - Shortys Old Bus
- Thread starter Shorty
- Start date


Help Support Early Bay Forum:
This site may earn a commission from merchant affiliate
links, including eBay, Amazon, and others.
Shorty
Well-known member
StuF said:Big like - Looks awesome!
Yours doesn't look half bad either dude! Good write up in C&B dude...
Harry UK
Well-known member
Good mate, bus failed MOT so busy few weeks coming up to changeout front beam .. I love a project ")
Shorty
Well-known member
Harry UK said:Good mate, bus failed MOT so busy few weeks coming up to changeout front beam .. I love a project
Oh no! What are you going to fit?
Harry UK
Well-known member
Going for the quick and easy option of imported stock beam and CE adjusters. And lots of tubes of grease
Means that I will then be able to lower splitty myself aswell (with a little help with wheel alignment), I might have had it on the road this summer , deffo by Xmas 14 !!
Means that I will then be able to lower splitty myself aswell (with a little help with wheel alignment), I might have had it on the road this summer , deffo by Xmas 14 !!
Shorty
Well-known member
Harry UK said:Going for the quick and easy option of imported stock beam and CE adjusters. And lots of tubes of grease
Means that I will then be able to lower splitty myself aswell (with a little help with wheel alignment), I might have had it on the road this summer , deffo by Xmas 14 !!


$27.95 ($13.98 / Count)
Marketplace Auto Parts Window Crank Handle Set of 2 - Chrome with Black Knob - Compatible with 1968-1978 Volkswagen Beetle
Parts Geek LLC

$42.47
Tamiya 51616 VW Bus Type 2 (T1) Remote Control Car Accessory Body RC Model Making
Hobby Etc | Authorized ✅

$21.60
$29.91
ハセガワ Hasegawa HMCC11 1:24 Scale VW Type 2 Pick-Up Truck Model Building Kits
Amazon Japan


drew n steph
Well-known member
Looks great. I have another list of things to do now mind... lol
Shorty
Well-known member
Truth be told, I've not done much to the bus in recent months. My new job sees me spending much of the week away from home, meaning weekends are spent catching up with all those jobs that need doing at home and interacting with the wife and children...
Not sure where we got to, but, over the summer I did go to a couple of shows and would have seen some of you there...
I went to Aircooled14 at Stratford Racecourse and the air-cooled only Old Friends Show in Bristol (spot a trend!) both were excellent, the vibe especially at old friends was on the button..


Just after Old Friends I sent my bus back to Bromsgrove Auto Trimmers to have the lower half of the headlining fitted.. I originally opted not to have this done, but I soon started to think this was a mistake that needed rectifying:
Before: (you'll be able to see the 'After' in other pictures later on in this post...

Once back, I put it in the garage and didn't touch it at all until last saturday when I got some time to tinker.
I started off, after shifting all the crap I was storing in there out of the bus, by priming the engine cover and floor area. Both had areas of bare metal that had been treated with rust converter, so nothing was going to happen to them, but I thought, before I fit the sound deadening, I'll give them a quick spray over as extra protection..
Primer:

Top Coat (engine bay refurb left overs)

I then fitted some sound deadening and installed some trimmed panels I bought 2nd hand from another earlybay friend:


Lastly, I laid some insulation down on the floor (more like thermal than sound, but anything is better than nothing right!) and finished off my relaying the ply floor...

Still got the door panels and off side panels to do, but for an afternoons work I was pretty pleased with that!
Not sure where we got to, but, over the summer I did go to a couple of shows and would have seen some of you there...
I went to Aircooled14 at Stratford Racecourse and the air-cooled only Old Friends Show in Bristol (spot a trend!) both were excellent, the vibe especially at old friends was on the button..
Just after Old Friends I sent my bus back to Bromsgrove Auto Trimmers to have the lower half of the headlining fitted.. I originally opted not to have this done, but I soon started to think this was a mistake that needed rectifying:
Before: (you'll be able to see the 'After' in other pictures later on in this post...
Once back, I put it in the garage and didn't touch it at all until last saturday when I got some time to tinker.
I started off, after shifting all the crap I was storing in there out of the bus, by priming the engine cover and floor area. Both had areas of bare metal that had been treated with rust converter, so nothing was going to happen to them, but I thought, before I fit the sound deadening, I'll give them a quick spray over as extra protection..
Primer:
Top Coat (engine bay refurb left overs)
I then fitted some sound deadening and installed some trimmed panels I bought 2nd hand from another earlybay friend:
Lastly, I laid some insulation down on the floor (more like thermal than sound, but anything is better than nothing right!) and finished off my relaying the ply floor...
Still got the door panels and off side panels to do, but for an afternoons work I was pretty pleased with that!
Shorty
Well-known member
After spending most of yesterday assembling my new tool box and lining up my spanners, I figured today I had better justify their existence and actually do something!
A few months ago I removed the rear seat belts to make room for the sound deadening installation... at the time I got a decent whiff of petrol fumes come through from the fuel tank area...
I have since whipped the engine out in order to get to the firewall and fuel tank area but till today had not progressed this task..
Today I removed the firewall, and had a good look around.. apart from a couple of semi-perished rubber pipes joining the metallic tubes, all seemed well, I replaced the rubber pipes, checked the filler pipe and had a good look around for any leakages - all is dry and sound - so I put it all back together.
I then had time enough to crack on with another job - installing rear shock absorbers that I've had for well over 6 months now! The old ones were utterly f**ked, they would expand and contract under their own weight....!
I have now fitted KYB Gas Adjust shocks on the rear to match those previously fitted on the front.
Sorry for the lack of pictures
Hi all, I'd like to introduce myself as the new owner of Carl Shorty's bus, I've had it a few months now and absolutely stoked to own it. Carl has put a lot of hard work and cash into it and it's a credit to him. It's now down to me to bring it on even further. BTW I used to own this little beauty, I never posted anything about though whilst i owned it.
Thanks
Andy
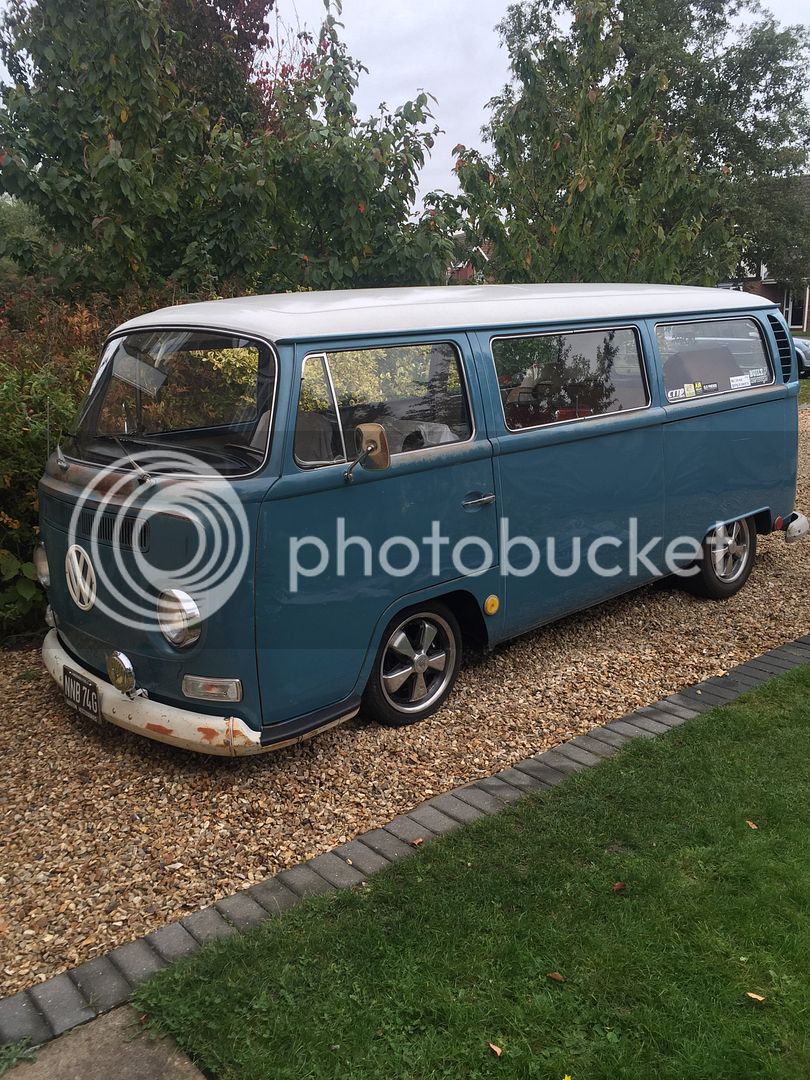
Right down to business, first job was to remove the 14" steels that were on the bus and replace with my old Flat Four Fuchs, that involved a fair bit of work which included fitting Porsche Turbo brake kit up front and modified Creative Engineering rear drum kit.
Front setup proved to be relatively easy apart from fitting new wheels studs. Rear was a pain in the arse as I had to change everything on the rear including the rear axles. I used some narrowed axles from Transporterhaus, later backplates. Had to machine the Creative hubs down as well to make sure the centre caps would fit properly.
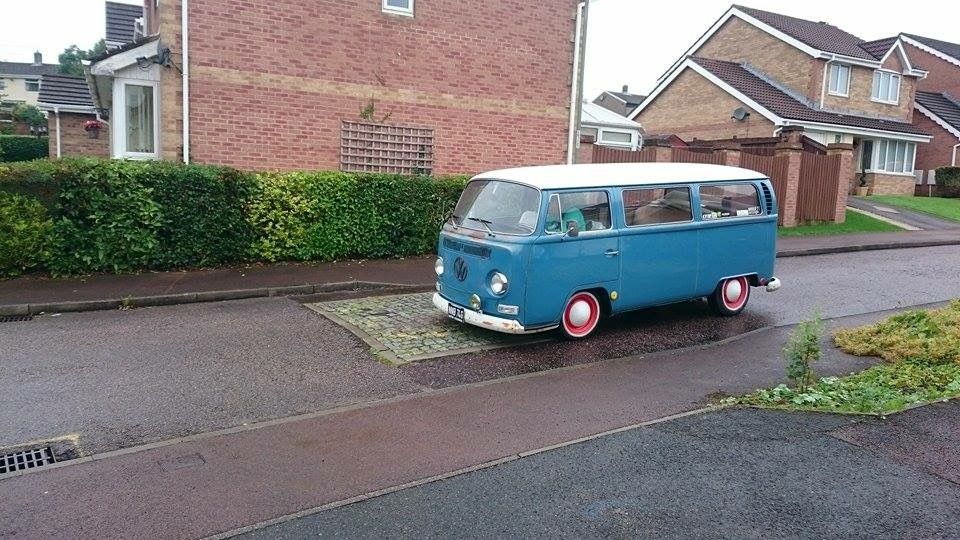
pic of the bus when I picked it up.
Bus with Fuchs fitted, needs further mods to get that back end down.
To do list -
Fit some Westy windows to replace the solid ones.
Sort interior out
Fit a nice big motor ;-)

Thanks
Andy
Right down to business, first job was to remove the 14" steels that were on the bus and replace with my old Flat Four Fuchs, that involved a fair bit of work which included fitting Porsche Turbo brake kit up front and modified Creative Engineering rear drum kit.
Front setup proved to be relatively easy apart from fitting new wheels studs. Rear was a pain in the arse as I had to change everything on the rear including the rear axles. I used some narrowed axles from Transporterhaus, later backplates. Had to machine the Creative hubs down as well to make sure the centre caps would fit properly.
pic of the bus when I picked it up.

Bus with Fuchs fitted, needs further mods to get that back end down.

To do list -
Fit some Westy windows to replace the solid ones.
Sort interior out
Fit a nice big motor ;-)


squareweave
Well-known member
Congrats, killer bus!! Where the red 14" wheels on there as a joke? The bus looked great on the SA Sprints but looks awesome on the Flat 4's
Can't wait to follow this.
Can't wait to follow this.


Similar threads
Vehicle For Sale
Early Bay Deluxe 1971
- Replies
- 5
- Views
- 2K
Vehicle For Sale
1969 T2 Early Bay RHD Dormobile Camper in Velvet Green
- Replies
- 5
- Views
- 3K