Danbury interior templates needed.

Early Bay Forum

Help Support Early Bay Forum:

This site may earn a commission from merchant affiliate links, including eBay, Amazon, and others.

andys

Well-known member
Joined
Oct 27, 2006
Messages
188
Reaction score
0
Location
North Wales
Would anybody have or know where to get templates for a full Danbury interior ?
or just the 2 front seats that were on runners, I would like to try and put the interior back to how it was..

Andy
 
Hi

I scanned my 1971 Danbury interior plan here : http://barbarathevwbus.blogspot.co.uk/2012/03/ancient-bus-manuscripts.html

Doesnt have dimensions however

I am actually thinking of ditching my old interior Danbury for the respray but will definitely keep it!

I wrote about my dilema in getting rid of the Interior on here : http://forum.earlybay.com/viewtopic.php?f=1&t=56748" onclick="window.open(this.href);return false;

My '71 Danbury early bay is now undergoing major structural work in preparation for respray, and the original very tired and battered Danbury interior has been ripped out and is now in the allotment shed quietly rotting away and growing mushrooms. Do i do the 'sensitive' approach and stick with the original vintage that i painstakingly restore, or stick in the new RnR bed i grabbed on ebay and add some folding buddy seats? Lets face it the 1970's Danbury interior aint exactly well designed and i am sick of collapsing through the table that 'support' your body between the bench and buddy seats. I'm thinking i don't need the sink/cooker and always use the awning for cooking and washing up anyway.

Even if do keep some of it, i am still fitting the RnR bed. Its the Just Kampers bed that can be extended to any length up to full width. Mine has already been cut down to 3/4 size but i now realise i am probably going to want to extend it too full length if i am ditching the Danbury sink and cupboard unit in the corner. How can i now extend the RnR bed? Can i find new replacement central supports of the bed? weld an extension into the existing shortened support bars?

I reckon you would probably be in the keep the Danbury camp!
 
No fella, it's a case of I like it and can not afford a RnR bed . I Just like the set up and I'm thinking of doing the buddy seats in a similar way to the Danbury . I sold the ones that came with the van and made it as two bench seats .
I'll be interested in seeing how yours turns out .
Thanks for the plans [SMILING FACE WITH OPEN MOUTH]

Andy
 
Are you in a hurry? I'm in the process of taking my seats apart to refurbish them so I can take measurements as I go. Problem is I have two girls under 3 so the chances for me to get much time in the garage are sod all and bugger all at the moment!!
 
No hurry at all mate [SMILING FACE WITH OPEN MOUTH]
When you have them and get the time to post them is fine .

Thanks Andy
 
Hi,
Don't know if this is hijacking but I have a similar problem. I have most of Danbury interior in a 72 tin top. The back of bench seat is missing and would be really happy if you could let me have the details of material, dimension and fixing.

Thanks very much for posting the layouts. I didn't realise the table was part of the bed! We've been sleeping on the T pieces!

MacKenzie
 
If anyone has both the filler pieces. Labeled as 6 and 7 in the layout paperwork from the the link above,could they possibly email me the dimensions?
I'm missing one of them,not sure which one and need to find or make one
Thanks
Matt
 
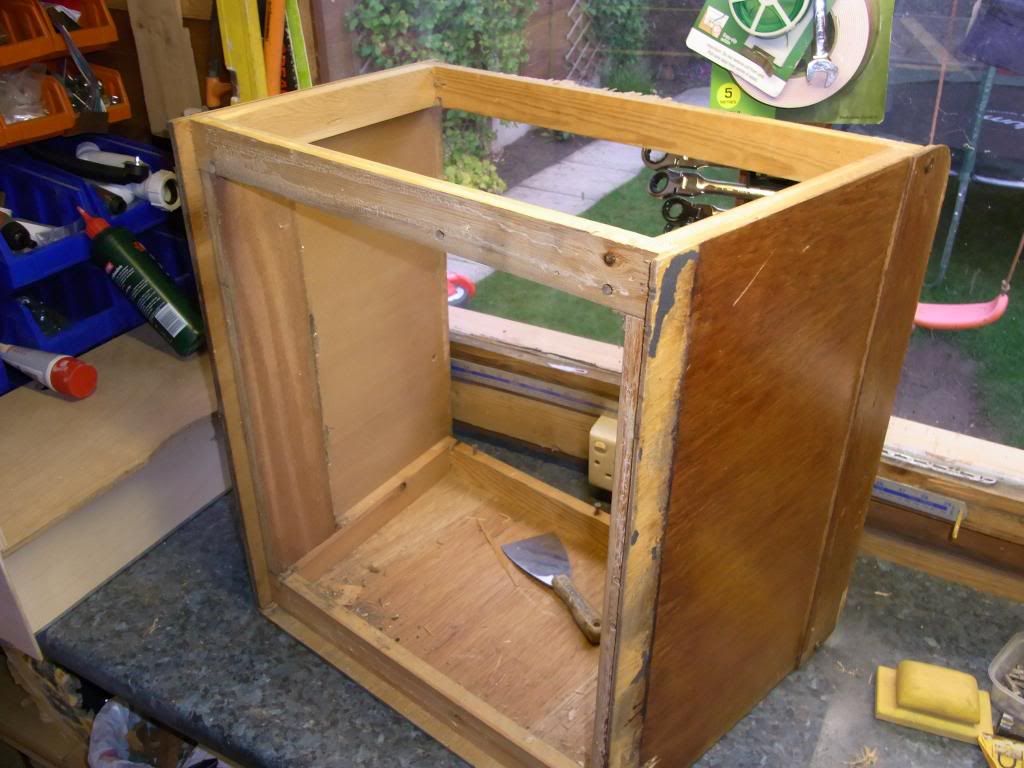
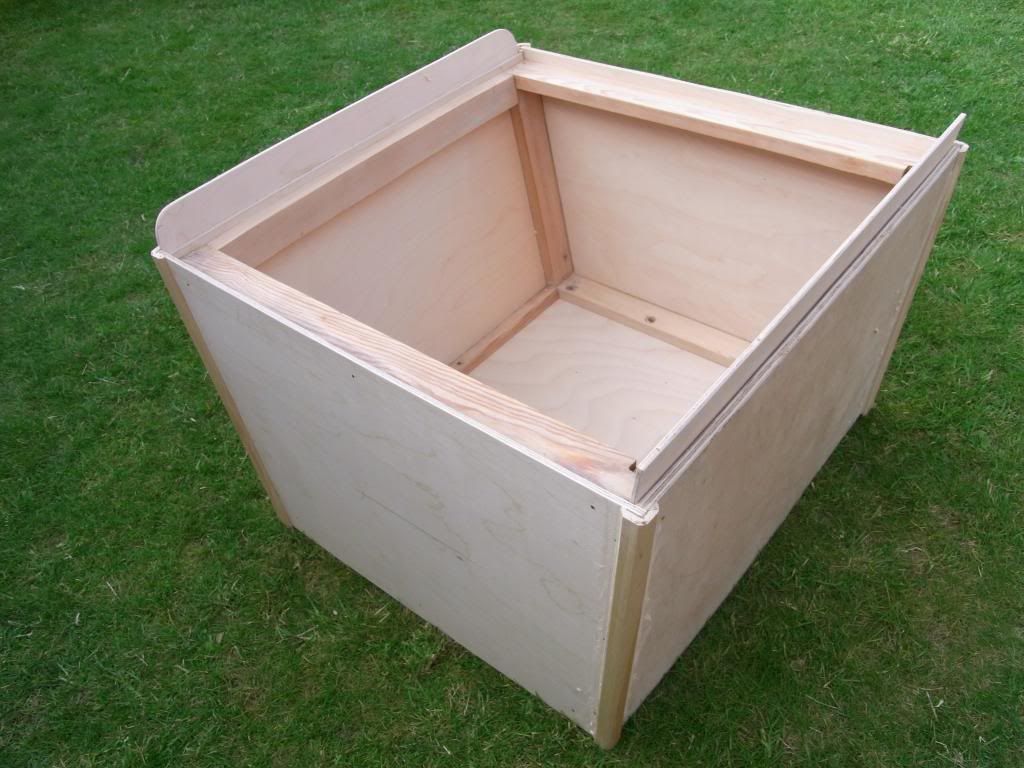
I had a Danbury Interior from my first bus (72 RHD Crossover0. When i got my current bus 71 LHD Deluxe I wanted a period interior that was also functional with two kids 7 and 5, so decided to rebuild my Danbury Buddy deat and rear seat. I only did one buddy last year and still have the cooker one to do this year, currently all sitting flat packed, so may be able to help with the measurements:

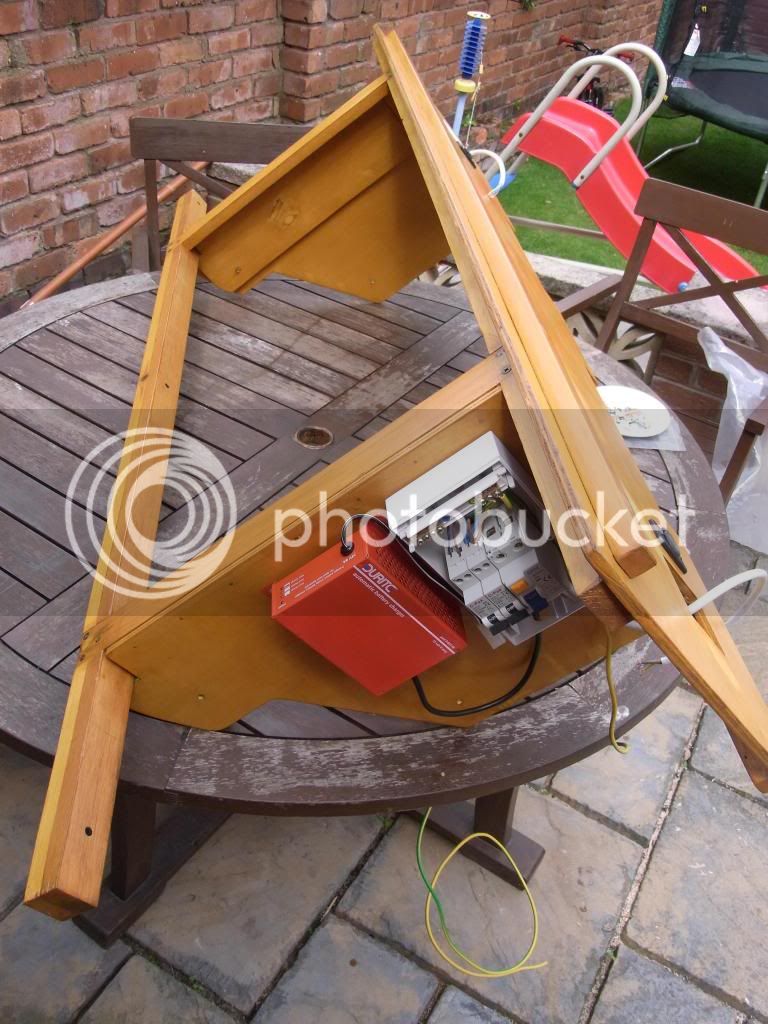
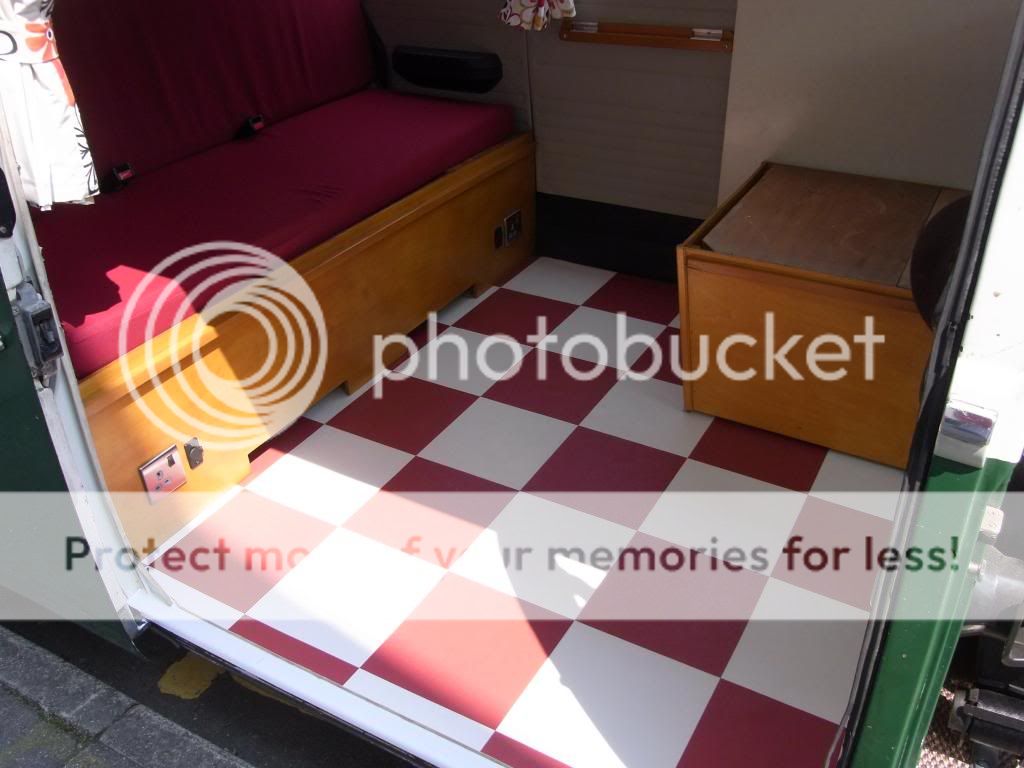
I did however have to reverse the ledges on the buddy seats in order for the filler panels to all go in and make up the necessary arrangements. Also so the cooker unit goes nearest the sliding door still. Whilst doing it i also installed 240v and additional 12v electrics.

Its a great interior for every day use, although I wouldnt want to try to make up the beds in the pitch black after a few jars :D


In this state it managed to get us through Camperjam and 1600 miles round France, taking in Euro Disney and Normandy albeit with a simple 4 man tent too.
 
I for one would love to have the measurements for both buddy seat and bench Nugsy as I am looking to replicate it for my microbus interior. We had a crossover Danbury too and loved the simplicity of it. Cheers marco
 
MATTT said:
If anyone has both the filler pieces. Labeled as 6 and 7 in the layout paperwork from the the link above,could they possibly email me the dimensions?
I'm missing one of them,not sure which one and need to find or make one
Thanks
Matt

Hi, the dimensions of mine are 340 x 660 mm and 340 x 546 mm.

Hope that helps.

MacKenzie
 
No trouble.

Have you got complete bench sat in yours? I need a back for the bench and don't know the dimensions, what it's made of or how it's fixed.

Can you help with that?

MacKenzie
 
Hi there
I do have the original rear seat
Did you want measurements or just some photos
 
Both would be fantastic. I have no real idea what it was like but imagine it was a piece of removable ply fixed somehow?
I have a couple of small shaped blocks of wood that might have been part of it.
Thanks for anything you can give me
MacKenzie
 
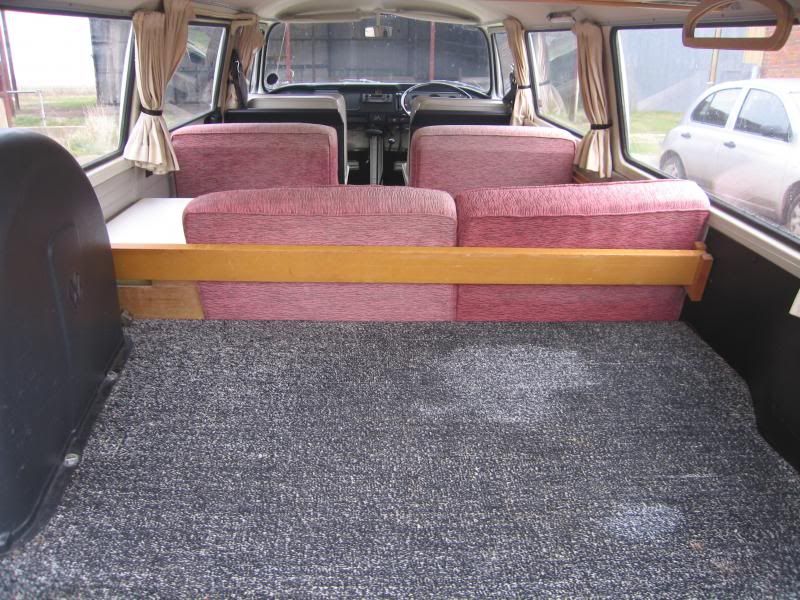
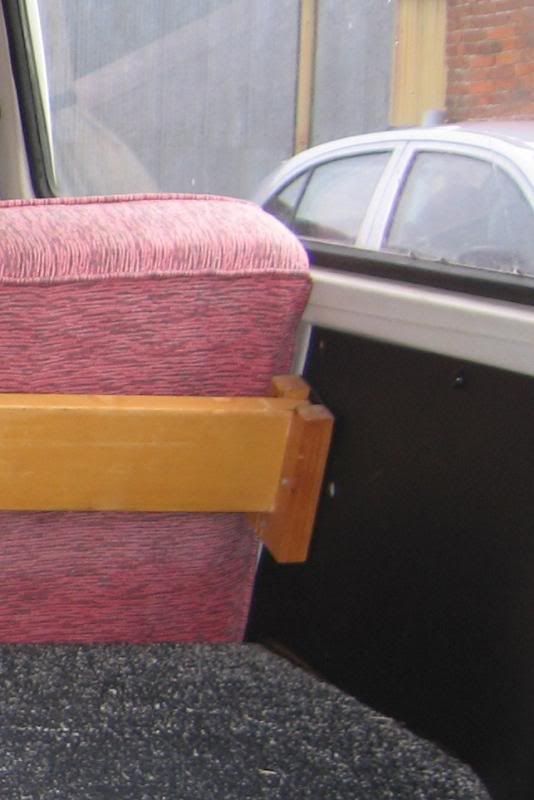
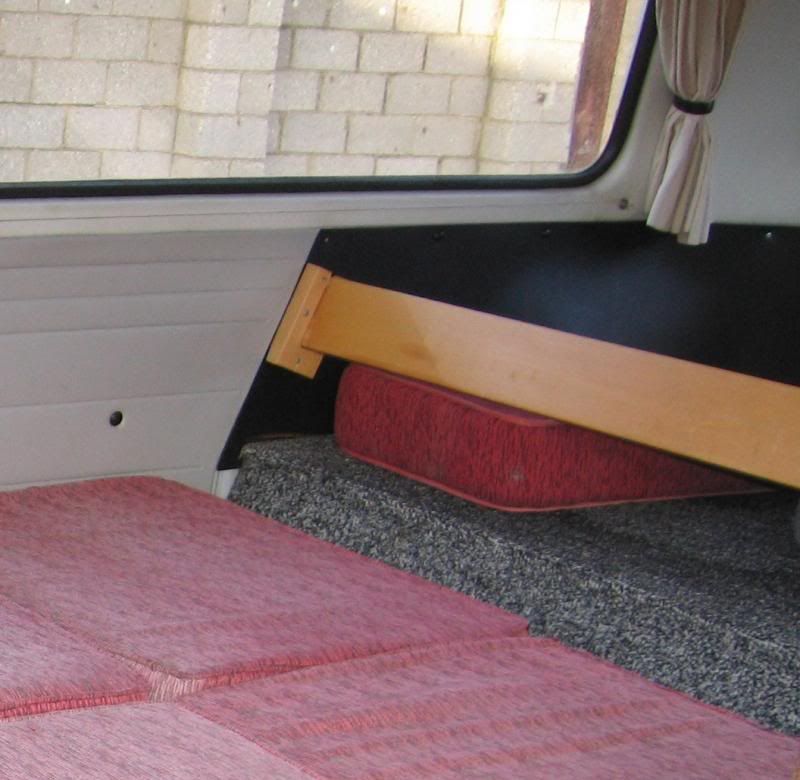
If the small shaped blocks are sort of 'u' shaped (from memory), then yes these fix to the sides through some cards to the rear, and a piece of varnished wood (only) about 100x25mm roughly slots in to these. That's it (again from Memory). Very basic set up and not one i trusted tbh for my 3 kids so swapped to a RNR bed.
 
Yup then I've got the U shape bits. Just need to find where they go and get an idea what goes into them.
I like the basic set up so I pulled out a poorly fitted R and R bed (Westphalia) which is soon to be in the for sale section.
MacK
 
I can show you pics (as correctly described by matt-me), but my bus doesn't live at home, so isn't handy for measurements. I guess from the pics and what you have, you probably can manage without anyway.
The interior of my bus is 100% original (even down to the threadbare curtains and rippled lino on the floor :lol: ), so what you see is exactly as Danbury made it. :)

I have various other pics of the seat and bed layout etc, which I can also put up, if need be.

Doug


Thanks Doug. That makes perfect sense now. I have the slots for the board across the back. I guess the board wasn't spotted as part of the original van when the bits were moved about.
That's great. I'm really grateful.
Mine is fairly original but I am replacing the curtains and seats cushions as both have holes in them and the cushions are a bit soft for sitting on.
MacKenzie
 
Hey Doug, don't suppose you know where the live feed for the interior strip light is (the one above the offside side windows)? Mine has no power to it and has a single white wire to it. It seems to be running towards the back through the headlining but I can't find the other end in the engine bay.
MacKenzie
 

Latest posts

Top