Getting on in years I was starting to have problems with pushing up the poptop and my head was getting flatter lowering it.
My partner was unable to do either without assistance. I had checked this and other forums to see if there were any suggestions, couldn't find any so last year decided to sort it.
Sourced some struts and fixings from SGS engineering and fitted them. Brilliant result, my partner is now quite happy to raise and lower on her own. I have not experienced any problems at all ( must have raised and lowered at least 50 times now).
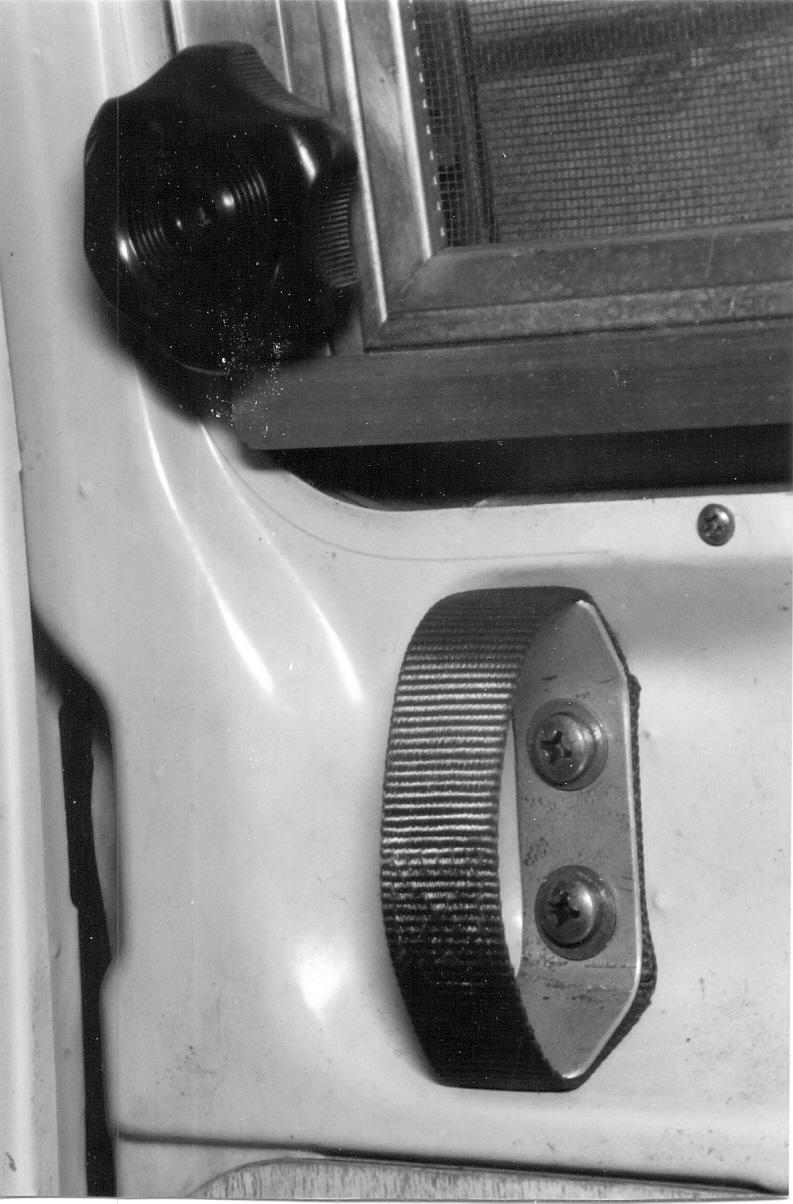
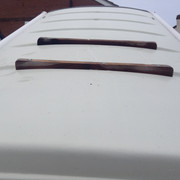
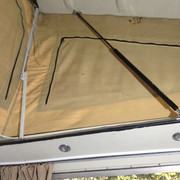
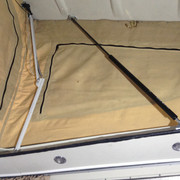
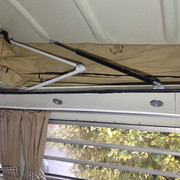
I have retained in situ the original braces which I lock into place when it is fully up. I then release the braces before lowering, the roof stays up and then with a gentle pull it lowers itself in a nice effortless descent.
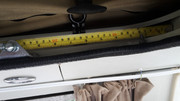
I have attached some photos.
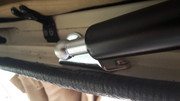
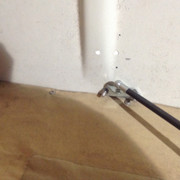
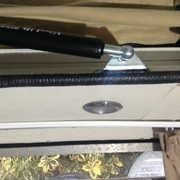
So far as the struts are concerned they align really nicely on raising and lowering with the original brace so no problems.
Just a few pointers....SGS ...I hate their website, it shows a photo of a nice green Westy but when I contacted their pretty unhelpful tech dept they were unable to give me any details about measurements etc. I was told that their strut was a replacement for the original. They were pretty nonplussed when I said there was no original strut fitted.
Anyway I ordered The 2 struts and asked for advice on the ball stud brackets ,they said ordinary 10mm would do.
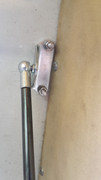
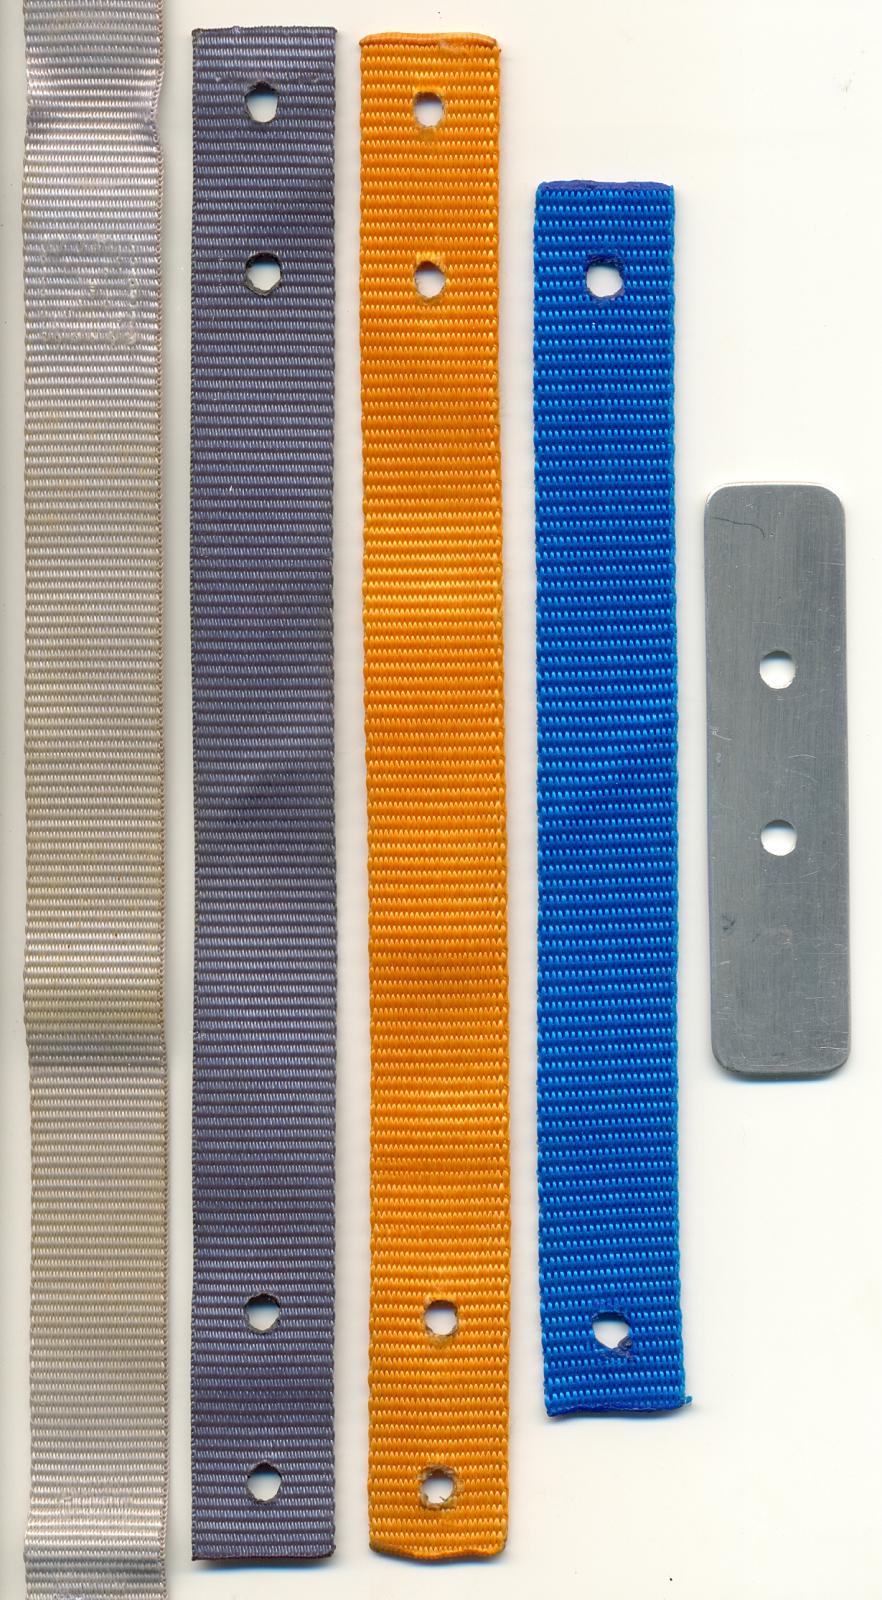
On my first fitting which was done on a sliding track as I had no measurements the stud fittings bent on both sides. I contacted SGS sent them photos and was told that I should have asked for the heavier gauge ones. After a discussion they realised that it was their fault and they sent me replacements. So if you go ahead then make sure you get the heavier duty 10 mm 90 degree ones. ( the lighter ones have slots for the bolts and take 250 newtons the heavier ones have holes and are rated at 700 newtons.
The struts are nitro lift part no GSC2426. I think the brackets were part no. K9 but please check.
Struts are about £28 each and the ball studs ( need 4 ) about £5 each.
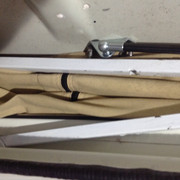
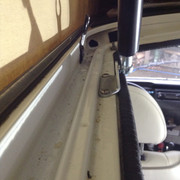
All very easy to fit with ( I think M4 or M5 bolts washer and Spring washer ) on the roof spread the load outside with a s/s penny washer and dab of silicone. The ball studs fit very neatly in to the Channel as per photos.
Happy to help with any further enquiries .So far as operation is concerned when you raise it it requires a small effort for the first 10 inches and then goes up on its own. On lowering it needs a small tug on the roof handle then lowers really nice. I have my spare wheel mounted on a cradle at the front so my roof is even heavier than most.....no problems at all.

My partner was unable to do either without assistance. I had checked this and other forums to see if there were any suggestions, couldn't find any so last year decided to sort it.
Sourced some struts and fixings from SGS engineering and fitted them. Brilliant result, my partner is now quite happy to raise and lower on her own. I have not experienced any problems at all ( must have raised and lowered at least 50 times now).
I have retained in situ the original braces which I lock into place when it is fully up. I then release the braces before lowering, the roof stays up and then with a gentle pull it lowers itself in a nice effortless descent.
I have attached some photos.
So far as the struts are concerned they align really nicely on raising and lowering with the original brace so no problems.
Just a few pointers....SGS ...I hate their website, it shows a photo of a nice green Westy but when I contacted their pretty unhelpful tech dept they were unable to give me any details about measurements etc. I was told that their strut was a replacement for the original. They were pretty nonplussed when I said there was no original strut fitted.
Anyway I ordered The 2 struts and asked for advice on the ball stud brackets ,they said ordinary 10mm would do.
On my first fitting which was done on a sliding track as I had no measurements the stud fittings bent on both sides. I contacted SGS sent them photos and was told that I should have asked for the heavier gauge ones. After a discussion they realised that it was their fault and they sent me replacements. So if you go ahead then make sure you get the heavier duty 10 mm 90 degree ones. ( the lighter ones have slots for the bolts and take 250 newtons the heavier ones have holes and are rated at 700 newtons.
The struts are nitro lift part no GSC2426. I think the brackets were part no. K9 but please check.
Struts are about £28 each and the ball studs ( need 4 ) about £5 each.
All very easy to fit with ( I think M4 or M5 bolts washer and Spring washer ) on the roof spread the load outside with a s/s penny washer and dab of silicone. The ball studs fit very neatly in to the Channel as per photos.
Happy to help with any further enquiries .So far as operation is concerned when you raise it it requires a small effort for the first 10 inches and then goes up on its own. On lowering it needs a small tug on the roof handle then lowers really nice. I have my spare wheel mounted on a cradle at the front so my roof is even heavier than most.....no problems at all.