My 72 Danbury

Early Bay Forum

Help Support Early Bay Forum:

This site may earn a commission from merchant affiliate links, including eBay, Amazon, and others.
Hi All,

Managed to get all the interior completely stripped out today, as well as a few exterior parts such as removing the front/rear bumpers and front grille.

IMAG0002.jpg


Didn't really encounter any major problems, although I did find some further rot that I hadn't previously accounted for in the rear bulk head around the top of the 2 inlets for the heater pipe, You can just see it in the picture, it's more obvious on the right one..... need to inspect this further from underneath when at the barn?

Also, took a closer look at the previous repairs to the rear inner arches (where the seat belt mounting plates used to be - common rot area apparently) and although a little crudely patched they both seem solid with no re-occurring rot evident there.

Finally, I remembered from a previous time when I had the interior out a few years back that there is an accident/damage repair to the O/S (long panel). Taking a much closer look at it this time from the inside, it would appear that it wasn't beat out too well, and as such I fully expect to find a shed load of filler in that area on the outside. Looks like I'll have my work cut out for me there!

Sorting my tools and equipment tomorrow, ready for moving in to the barn on Monday. I'll get back with a further update soon.
 
Camperdan said:
Bus is now at the barn...... work starts tomorrow evening!

DSCF1240.jpg

Are you sure you couldn't find a bigger barn to work in? Looks a bit cramped to me, I wouldn't want it to hold your resto back so you'd better let me give it a test run for you...

;)
 
wow........that's some barn!!
maybe we should 'drop by' for some remedial work on our vans??
have to say it dosen't look that bad from inside
keep 'em coming
:lol:
 
Go for it!

Like you, we're biting the bullet - our's cost about £250 less but is far grittier and looks a whole lot worse from the outside (and in)! There is however a nice solid chassis and removal of the belly pans has also revealed only superficial rusting (light powdery coating of cak!).

Unlike yours, ours was owned by types who should obviously have known a whole lot better. We'll look after her though;) I'm sure you'll do likewise with yours :)

Raise the goblet of VW and rejoice...
 
Thanks for all the kind words of encouragement..... I need it!

I'm all set up at the barn now, have the van jacked up nice and high and my tools and equipment sorted. I have started removing all the underseal and crap from the O/S/F wheel arch and jacking point area as I have decided that I'll start the repairs there... I will however first cut of the final centre Belly pan this weekend to see what horrors await me there!

I'll take some pictures of the progress over the weekend and post them up as soon as I can.

Cheers all!
 
Nice one dude, give us a shout if you get stuck. 8)
 
Wow a barn find!!!!
It's good to see that you have blown the cobwebs off the angle grinder and the welder.......now lets see pictures of replacement parts that you have fitted!!
 
WOW thats Gorgeous..............
I`ve got a 71 Danbury that will one day be the same colour (Neptune Blue) and seeing yours in all blue with a white pop top has made up my mind.I could`nt decide between blue top and bottom or blue with white above the gutters but seeing yours has settled it.

Very Very COOOOOL.
 
Hi All,

Thanks again for all the great comments.

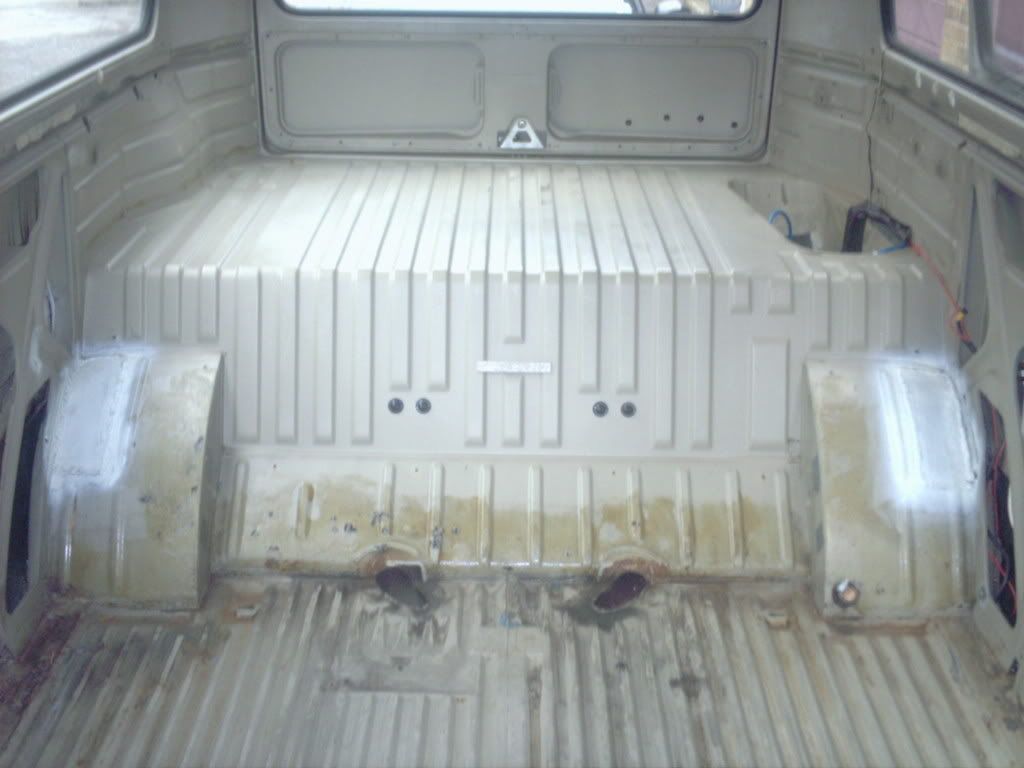
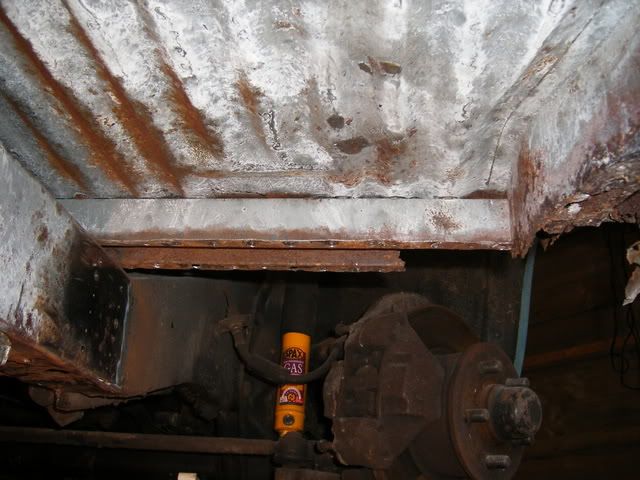
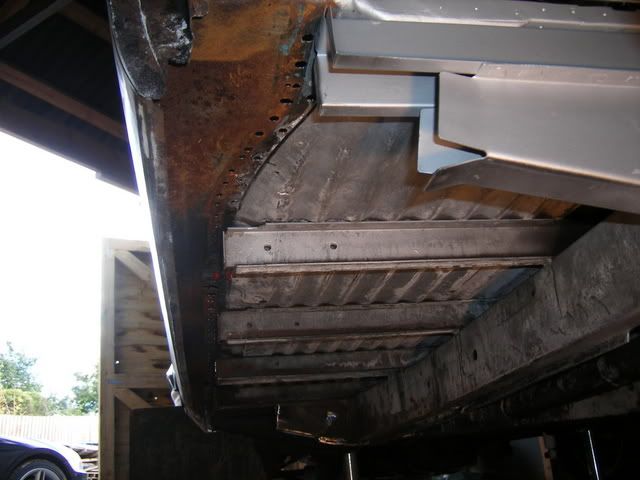
Been pretty busy over the weekend, managed to cut out the centre belly pan and thankfully it was not hiding any major horrors!
Mostly it was just minor patches of surface rust. When I removed the lagging from the centre heater tube I was also pleased to find this intact with some parts of it completely clean bare metal like new. The only area requiring attention here is the metal tube that holds the wiring, this had rusted quite badly towards the front of the van with several parts of it crumbled away. As this is not structural however, and not wanting to remove the whole loom just to replace it, I am most probably just going to cut off the rotten lower half (carefully) at the affected area to neaten it up, before clamping a new shaped piece of metal back over it, as obviously welding would melt the wiring inside.

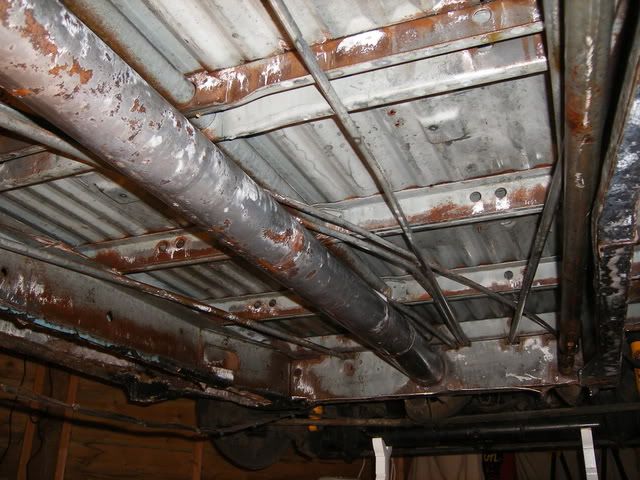
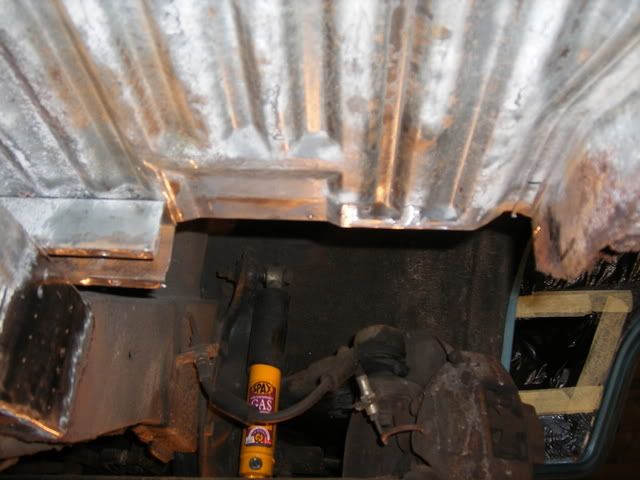
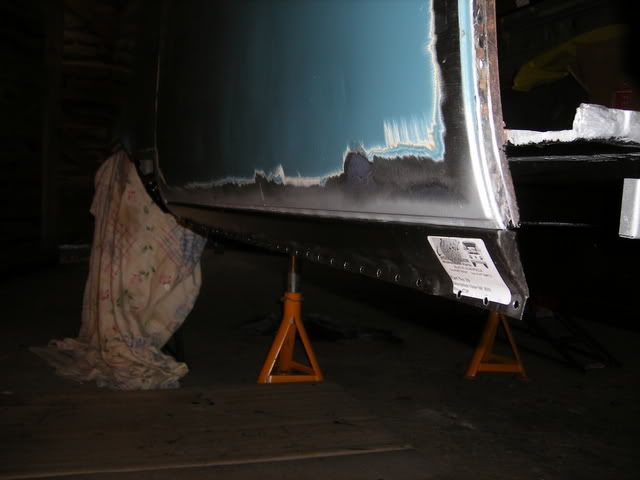
After wire brushing the whole centre chassis section and spraying it with a coat of POR Metal Ready, it was looking like this:
DSCF1283.jpg

The orange remnants of the surface rust should cure black by the time I get back to it..... just in time for a coat of POR 15.

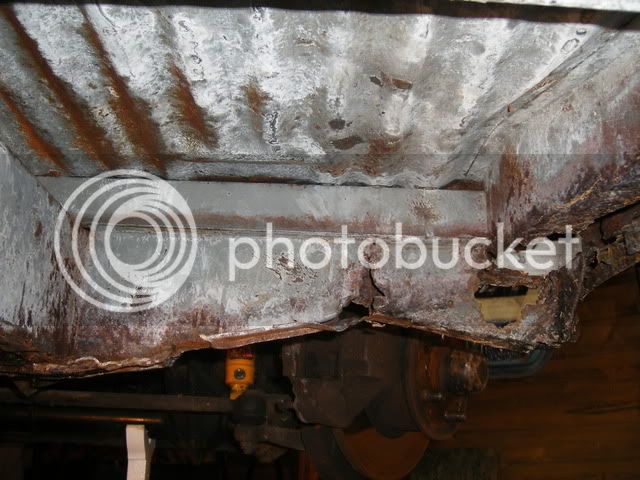
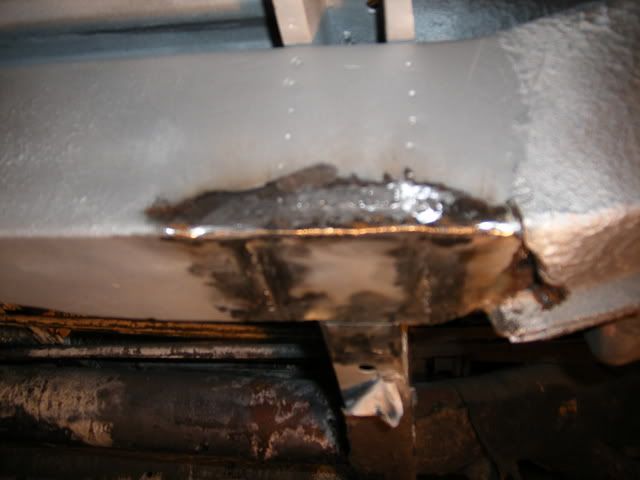
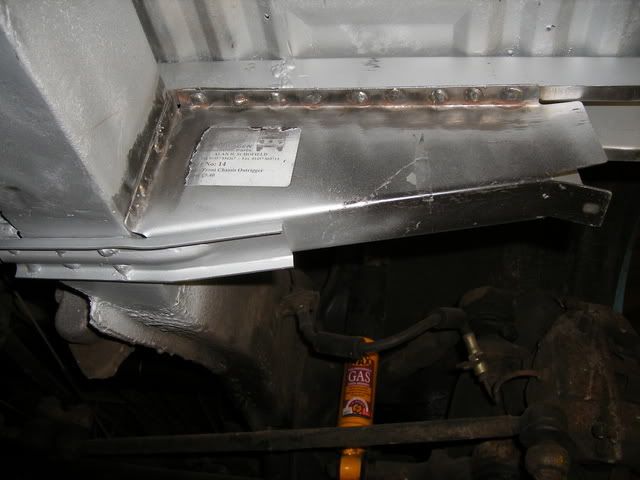
Also started on the O/S/F outrigger and jacking point - to start with it looked like this:
DSCF1265.jpg


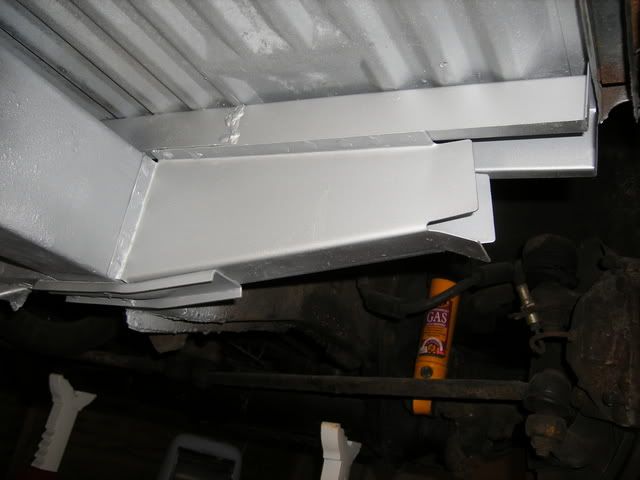
After cutting it looked like this:
DSCF1276.jpg


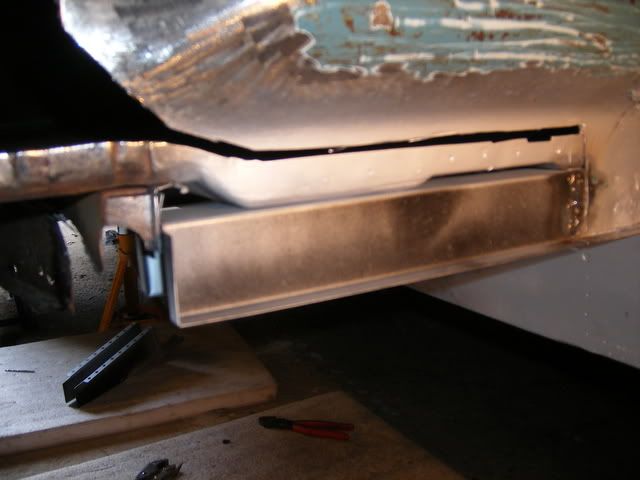
Unfortunately I couldn't get cracking with the welder as I hadn't planned on replacing the top hat too - but as you will see in the picture the front outer end of it was rotten too, so before I can weld on the new out rigger I have to wait for the top hat repair panel to arrive.... the sills will be getting replaced also but I've left those in place for the moment as a reference to ensure that when I put the new top hat in that it is the correct length and in the right place......... more on that next weekend!
 
Hi All,

This weekends update - it doesn't seem a lot looking at it now but as a novice and doing things for the first time I seem to be spending a lot of time measuring and checking things..... twice!

Cut off rotten top hat outer end:
DSCF1291.jpg


Repaired chassis rail by welding in a patch:
DSCF1311.jpg


After cutting to length and flanging the inner end to slot into the original top hat.... plug and seam welded the top hat to the original piece and also the floor ribs:
DSCF1314.jpg


Prepared and then plug welded on the new out-rigger:
DSCF1318.jpg


Neatened up all the plug-welds a bit then gave everything a good thick coating inside and out with zinc paint:
DSCF1321.jpg


Finally, started cutting and drilling off the 3 sills..... more on that next weekend!
 
Nice job it's really coming on well.......maybe i should examine the work over a beer or two soon!
 
Hi All,

Been plodding away some more this weekend with the grinder etc.....

Spent Saturday getting the 3 sills and rear jacking point off, which I found quite tricky as I am retaining all the original floor supports:
DSCF1334.jpg


Then spent all of this morning cleaning and prepping the underside of the floor and outer ends of the floor supports/top hats etc ready for the 3 new sills to go in.

However, when I offered up the new sills I must say that I was very disappointed with the fit! They are from Schofields and I thought that they would be pretty good? The centre and outer ones are not bad but the inner one is terrible! I was hoping to get them all welded in this afternoon but after many hours of fettling I'm still not happy to weld them in place. Think I may cut and add a section to the top of the inner sill as it doesn't even reach the cargo floor in the centre?
Forgot to take my camera today though so don't have any further pics to show at the moment.
Will add some more when I finally get them in... wish me luck!
 
Hi All :lol:

Only managed to get one days work in on the van this week due to work commitments and also coming down with the flu!

So..... feeling a bit better today I headed back over the barn. Trial fitted and, modified and then trial fitted again several times the o/s middle and inner sills until finally happy with the fit.

Perhaps a little unconventional but in order to keep the nice original seams I welded in the outer sill first by welding along its inside edge where it joins the side panel.
DSCF1432.jpg


Once this was on I painted all inside and left it to dry. Plan to get the middle and inner sills welded in one evening this week...... so I'll pop back with some more pictures then.
 

Latest posts

Top