Our 72 Danbury Tin Top– Buying and Rebuild thread (Pic Heavy

Early Bay Forum

Help Support Early Bay Forum:

This site may earn a commission from merchant affiliate links, including eBay, Amazon, and others.

Nugsy

Well-known member
Supporting Member
Joined
Sep 24, 2009
Messages
1,556
Reaction score
65
Location
Warwickshire
Year of Your Van(s)
1970
Van Type
Microbus
Whilst on holiday in Cornwall in the summer of 2009, and after talking to my partner about family camping holidays, the decision was made to fulfil a lifelong love affair with the Volkswagen Transporter. I have always loved cars, and always loved old Volkswagens although have got to the ripe old age of 40 without ever owning one. After getting back from Cornwall the search was on, trawling eBay, buying a few magazines and brushing up on my knowledge so I at least looked like I knew what I was talking about.
After a few close run auctions, I finally found something I couldn’t believe. I was at work and just happened to be browsing eBay, when I spotted a 72 crossover tin top. The auction had both a start price and a buy it now of the same amount £1500 (never have figured that one out). The price was too good an opportunity to miss. I was trying to contact my girlfriend to tell her and constantly refreshing the page. The auction had only been on about 6 minutes and every time I refreshed the page the number of views was increasing rapidly. I bit the bullet and hit buy it now.
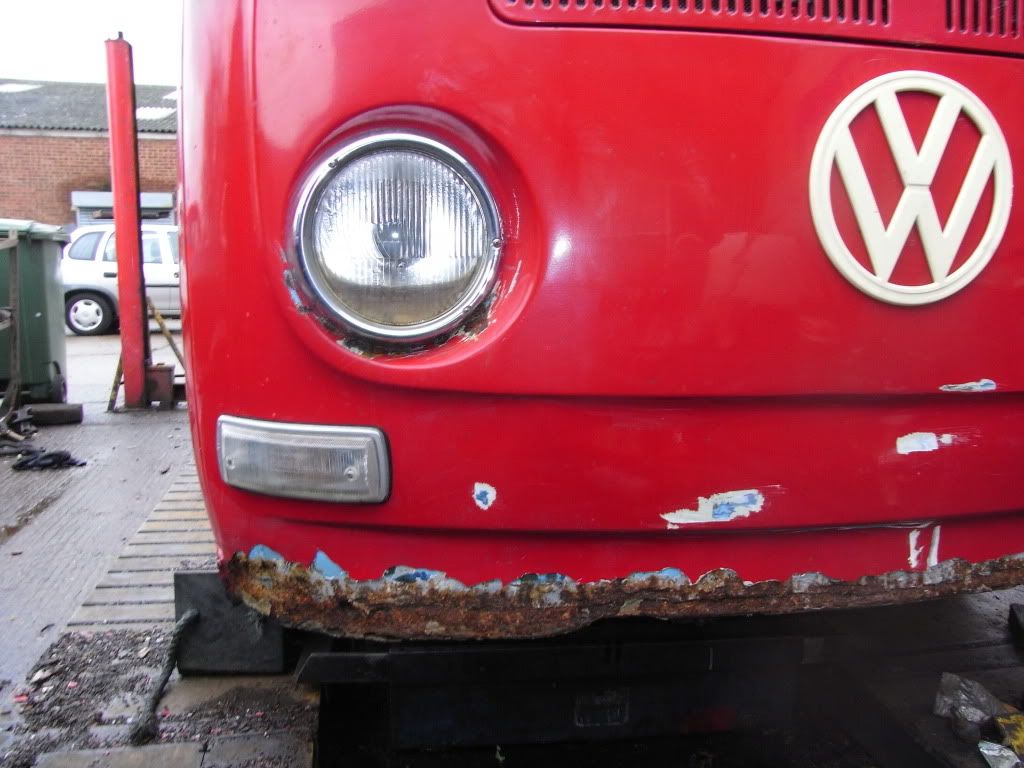
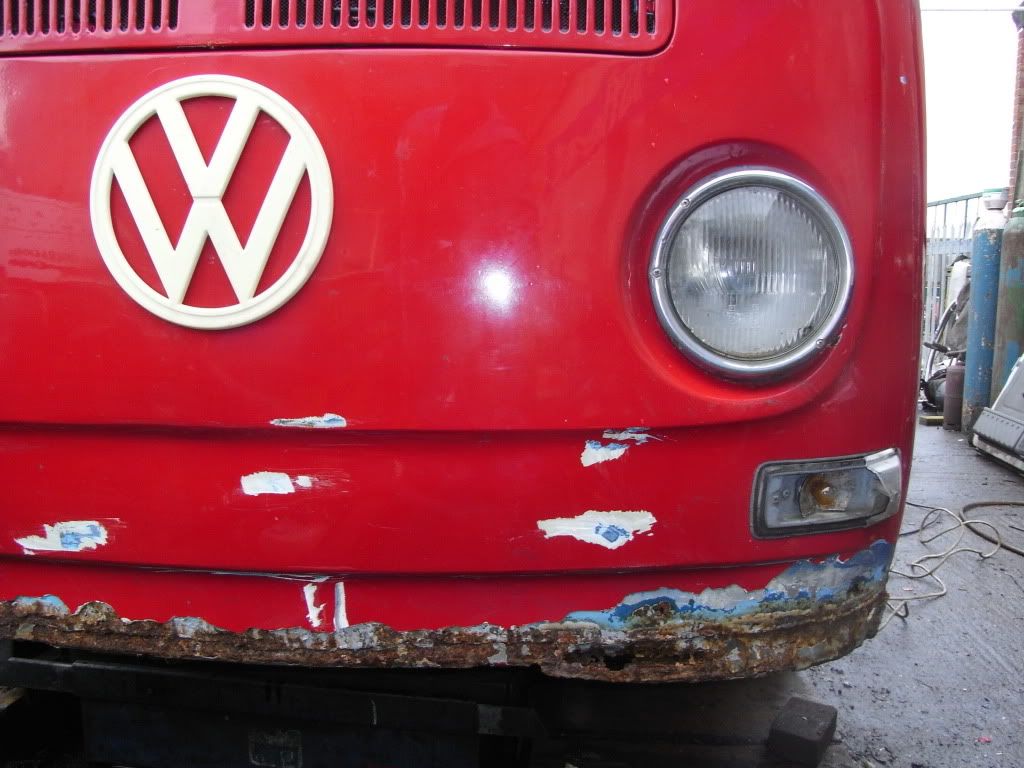
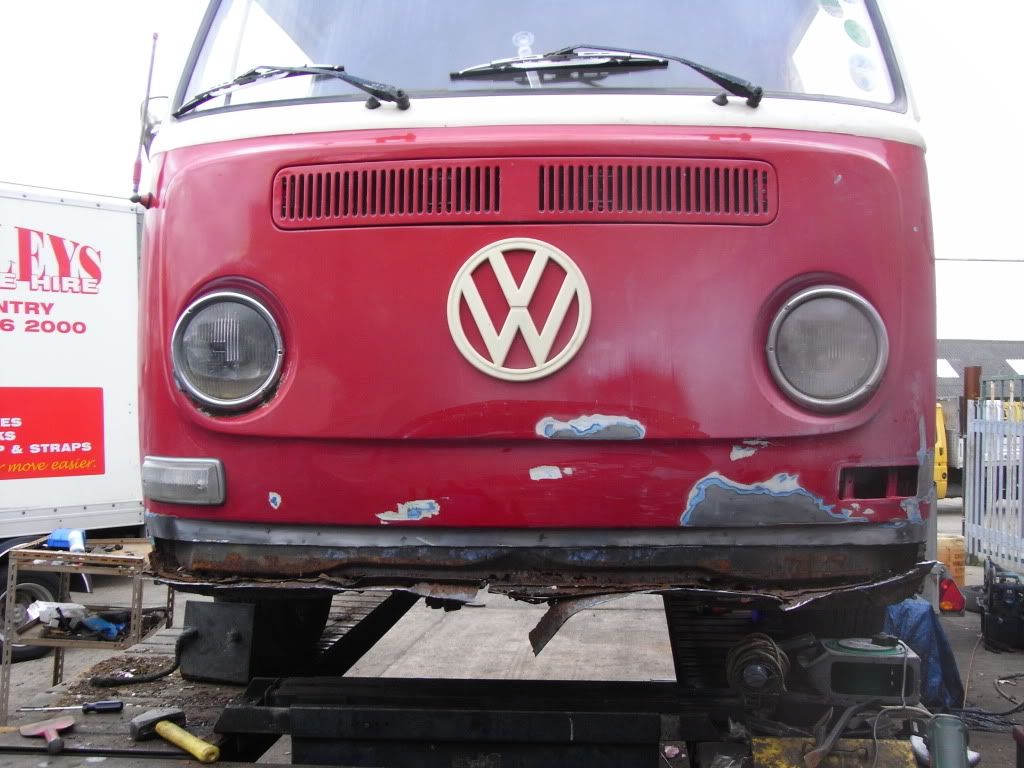
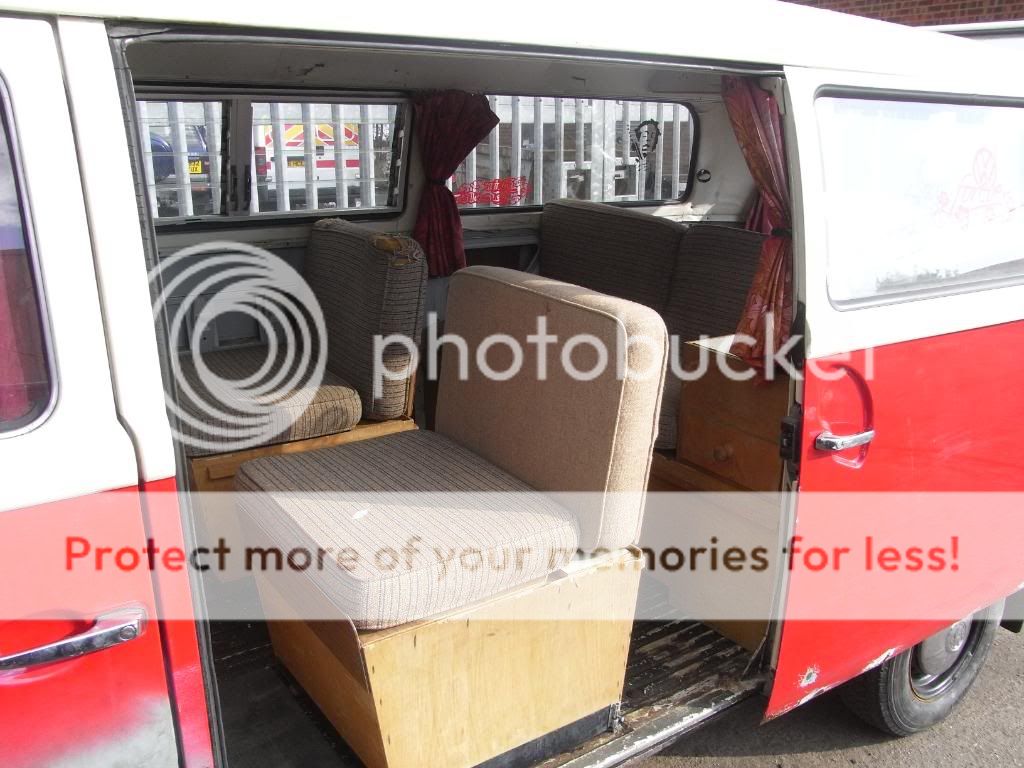
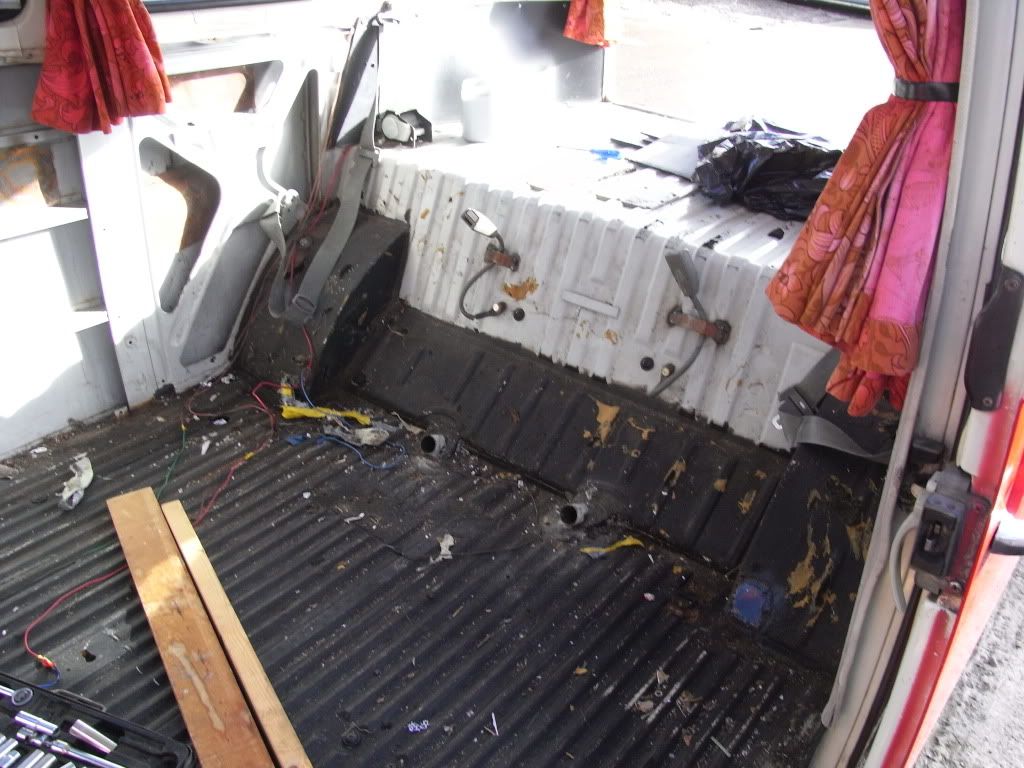
The bus was only about 20 miles away from where we live which was another bonus. We went to pick her up on 19th September and this is how she stood then.

MyType2front.jpg


MyType2side.jpg


MyType2floor.jpg


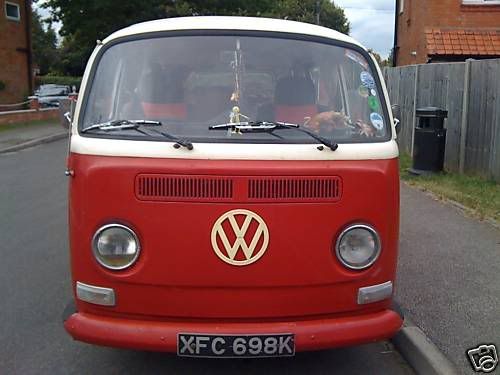
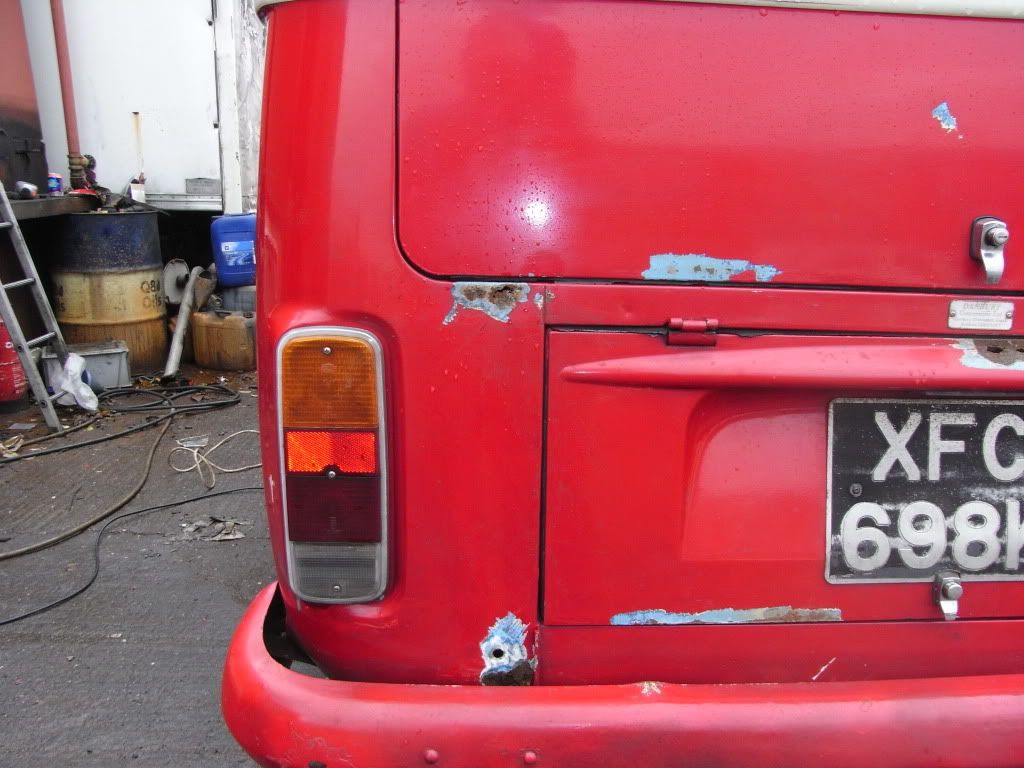
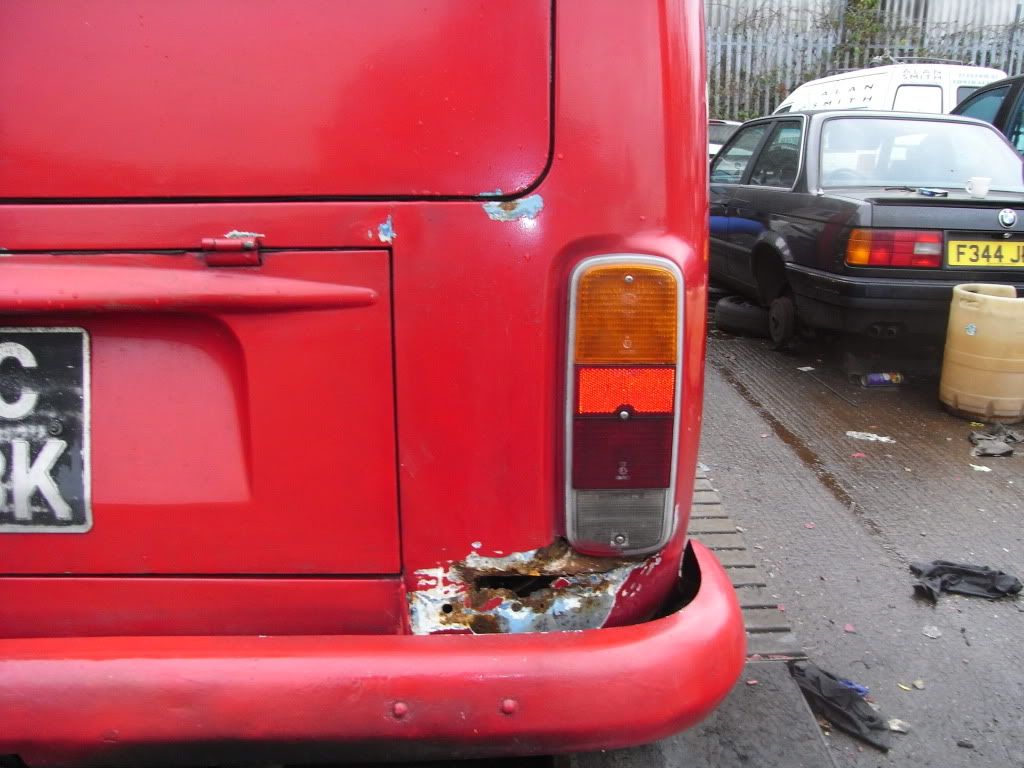
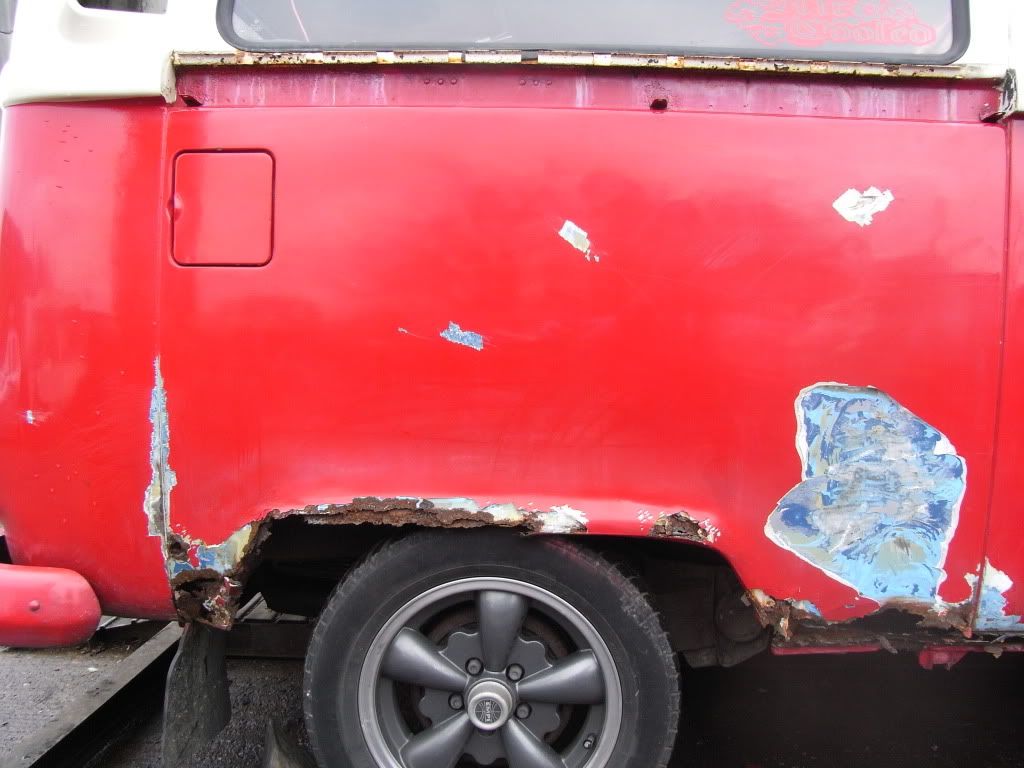
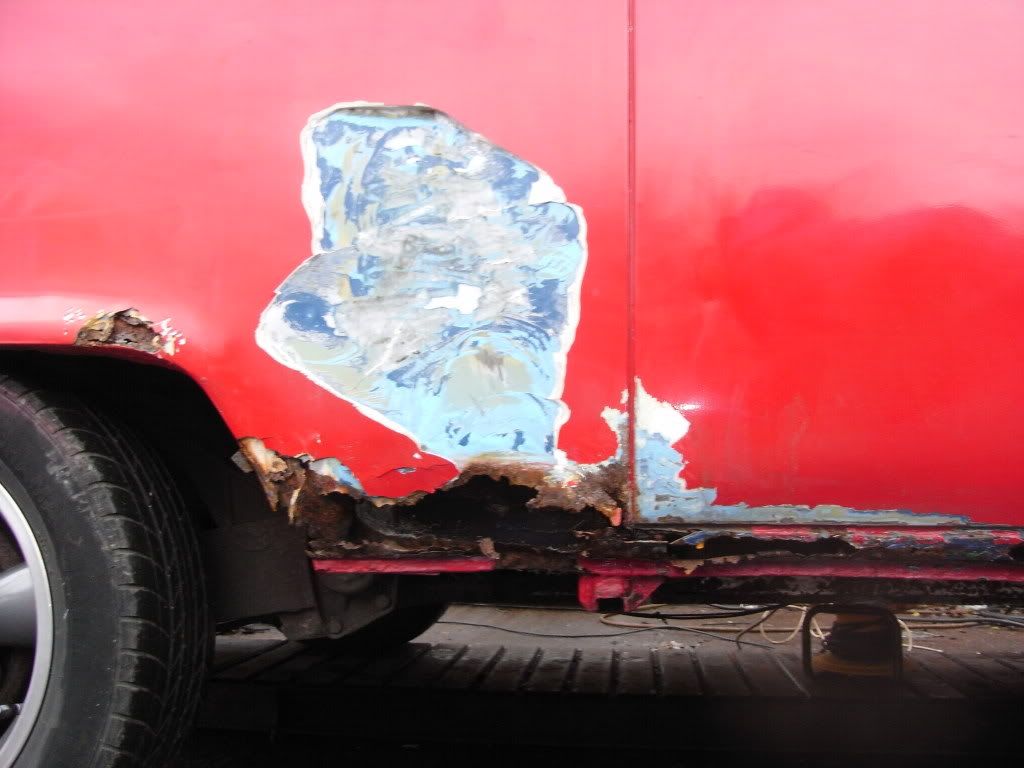
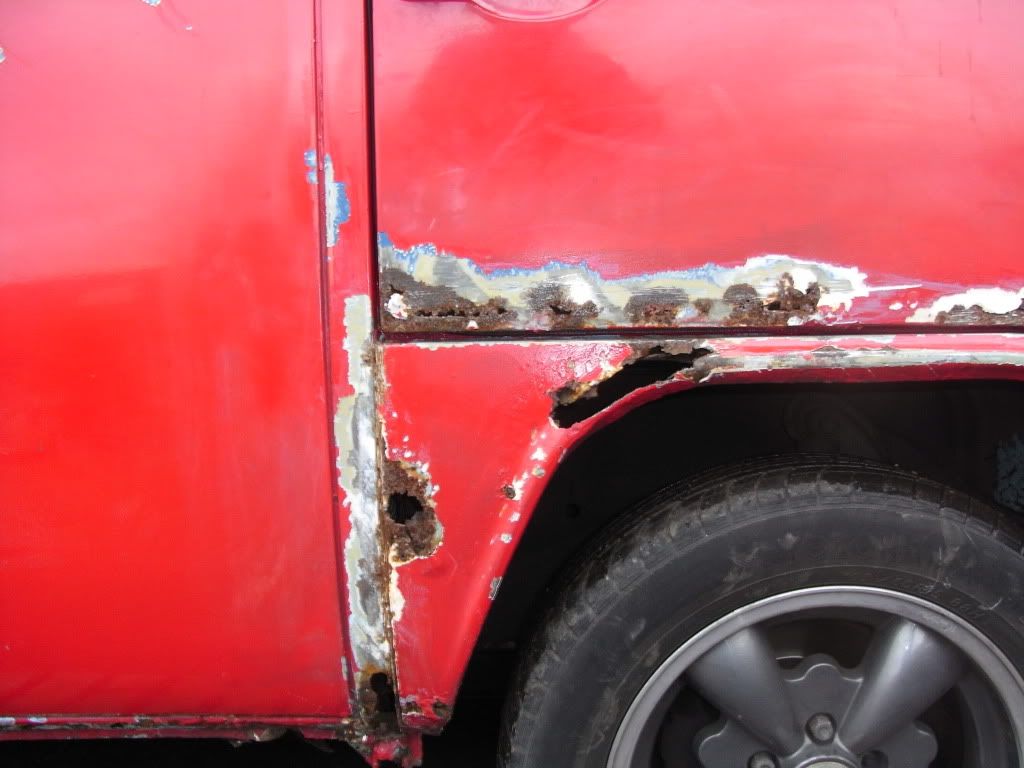
The MOT had run out in May but there didn’t look that much wrong (although I knew how good body shops can make things look nowadays). We took her out for a spin, and the money changed hands.
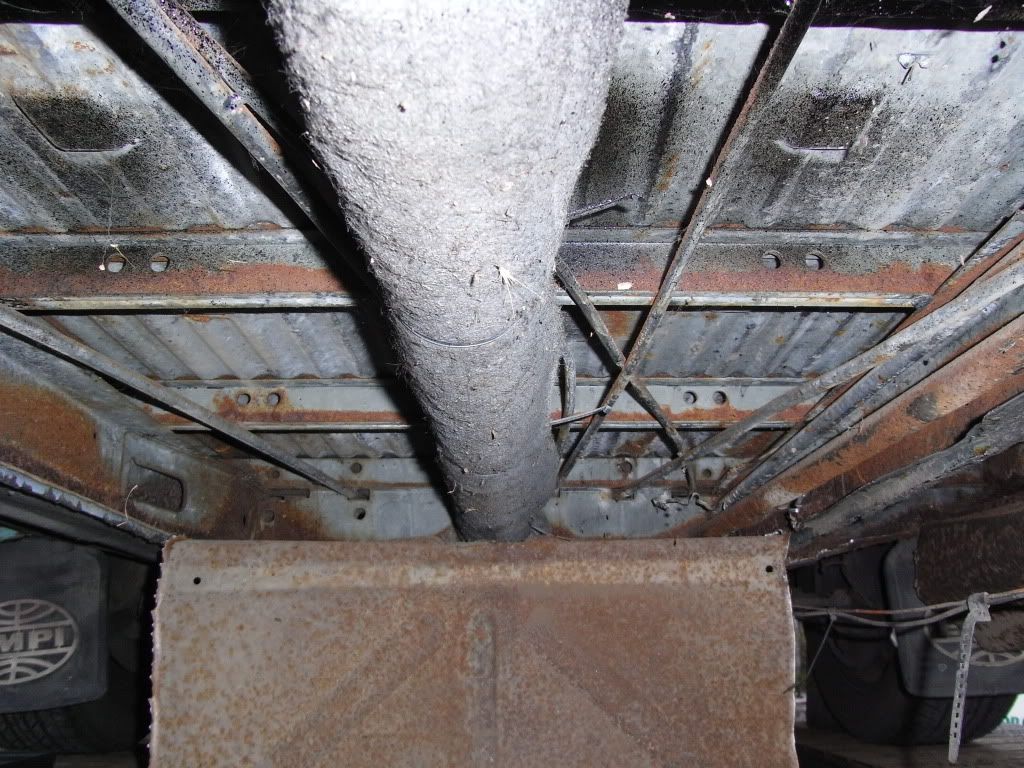
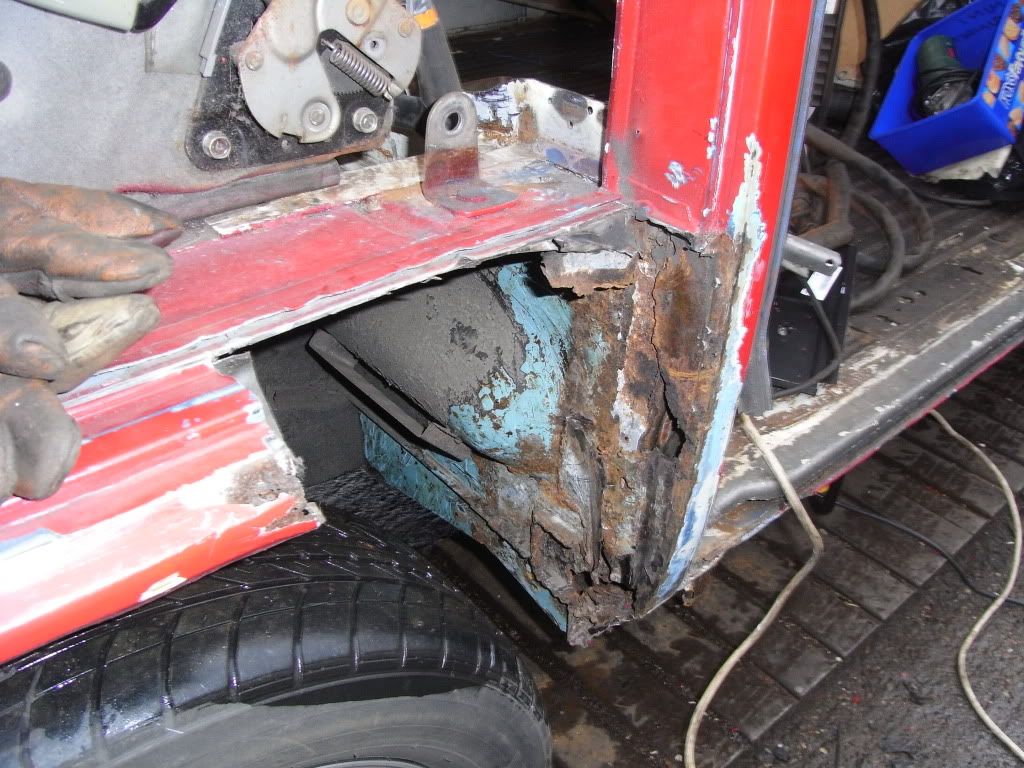
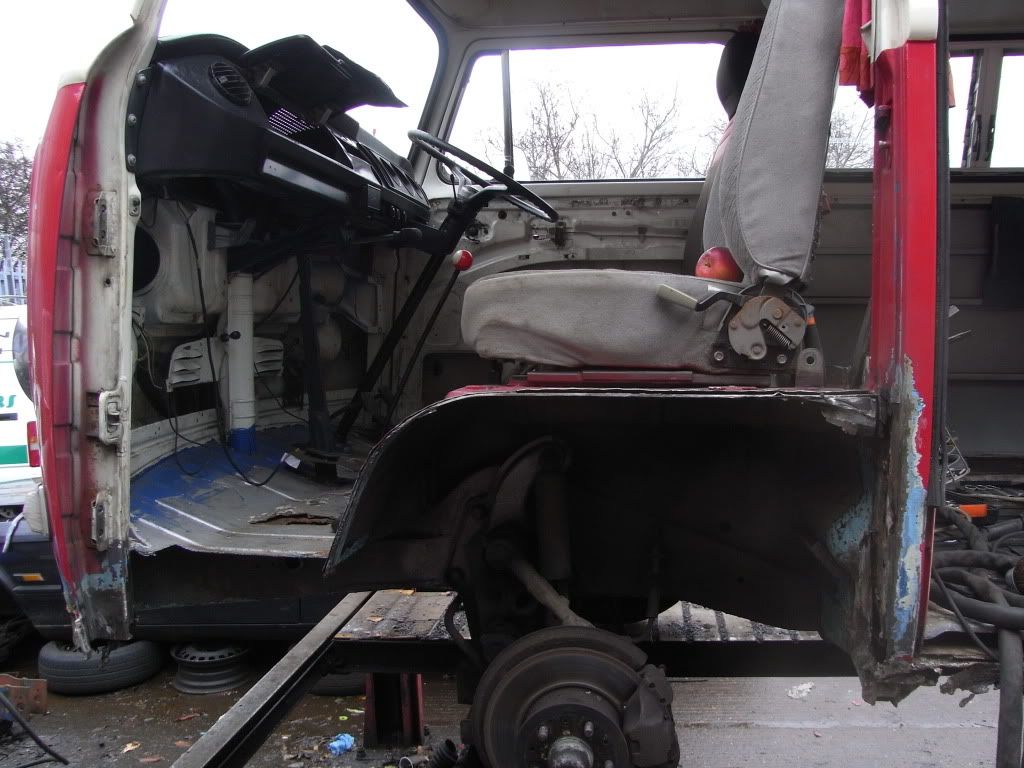
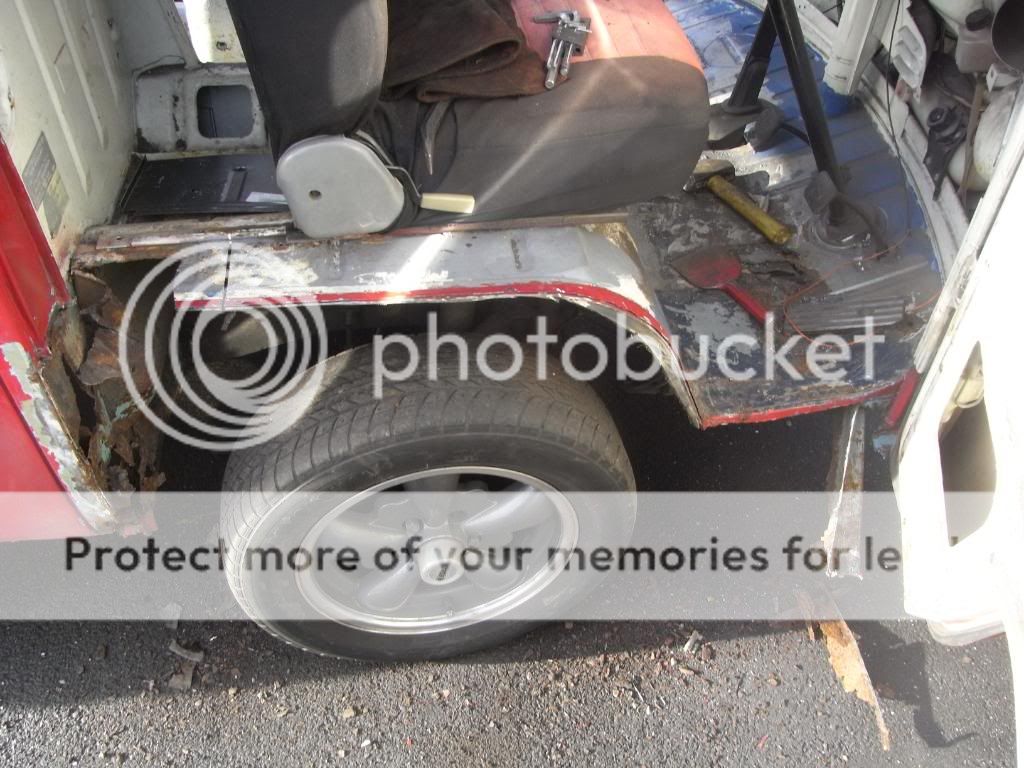
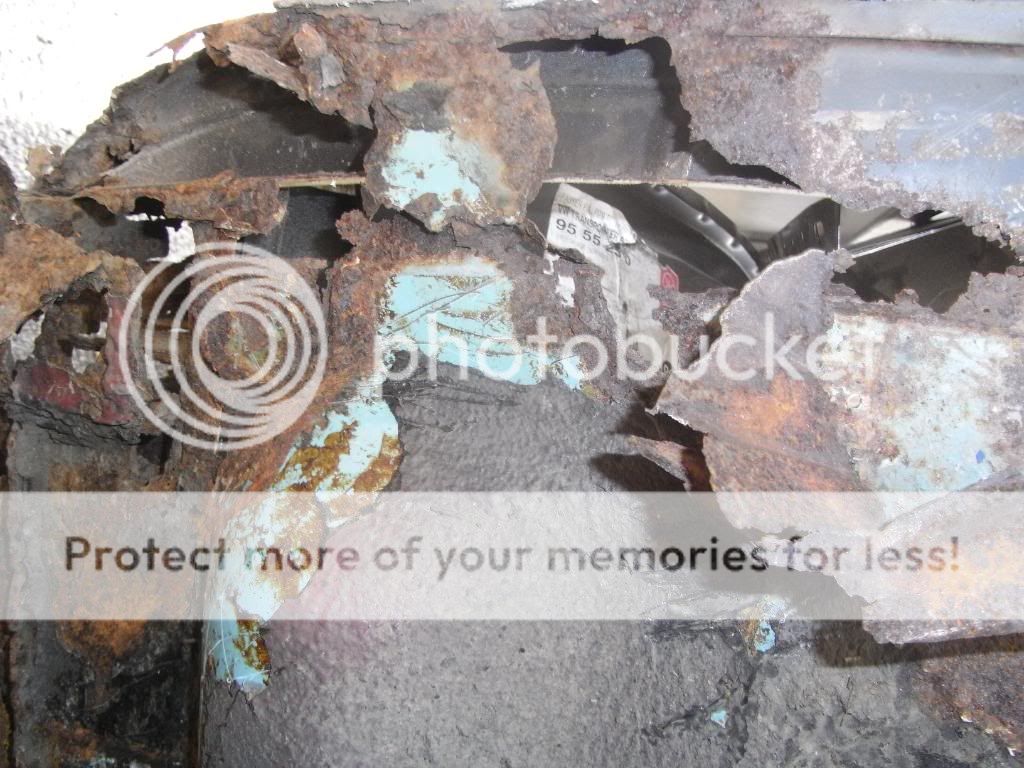
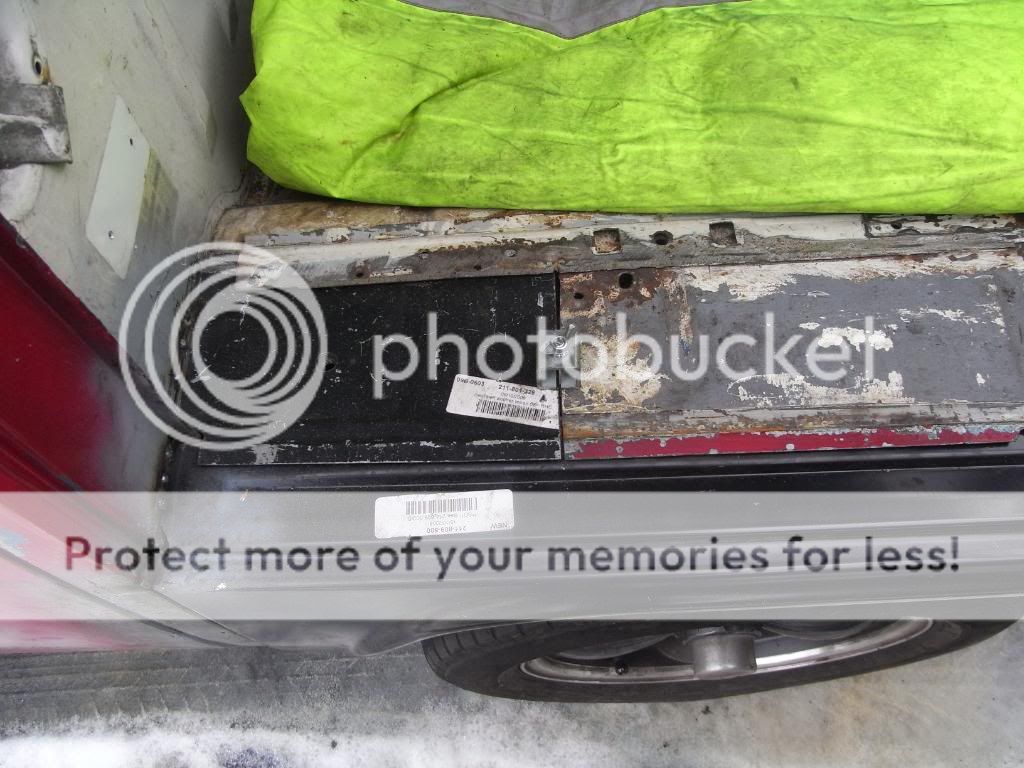
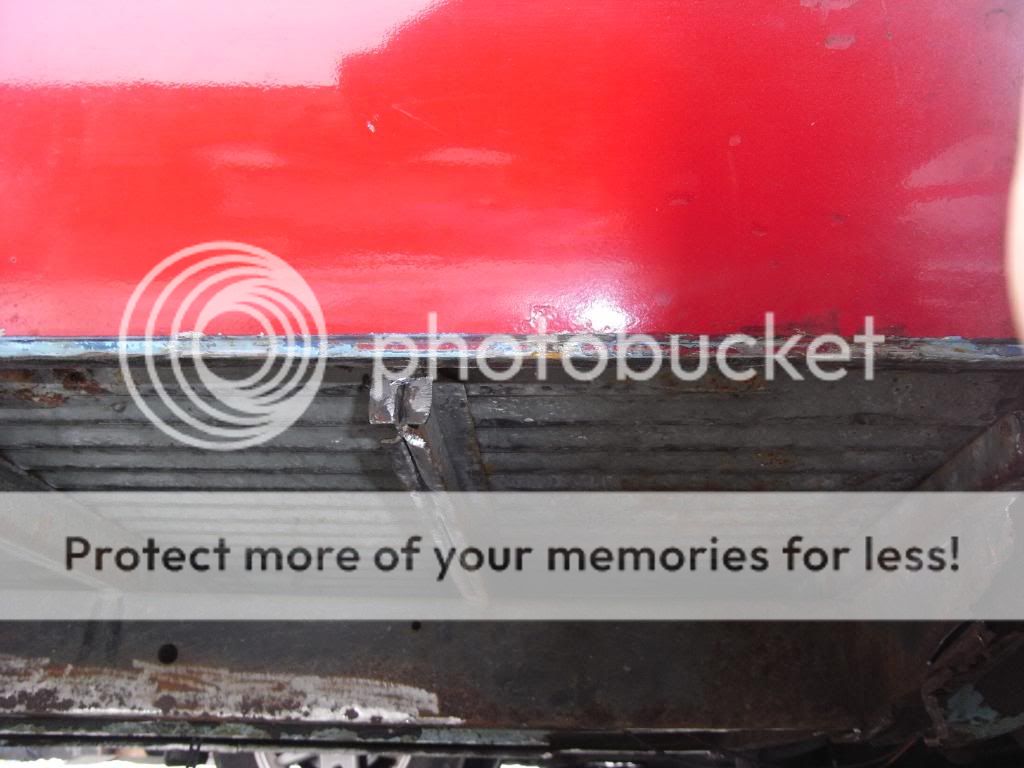
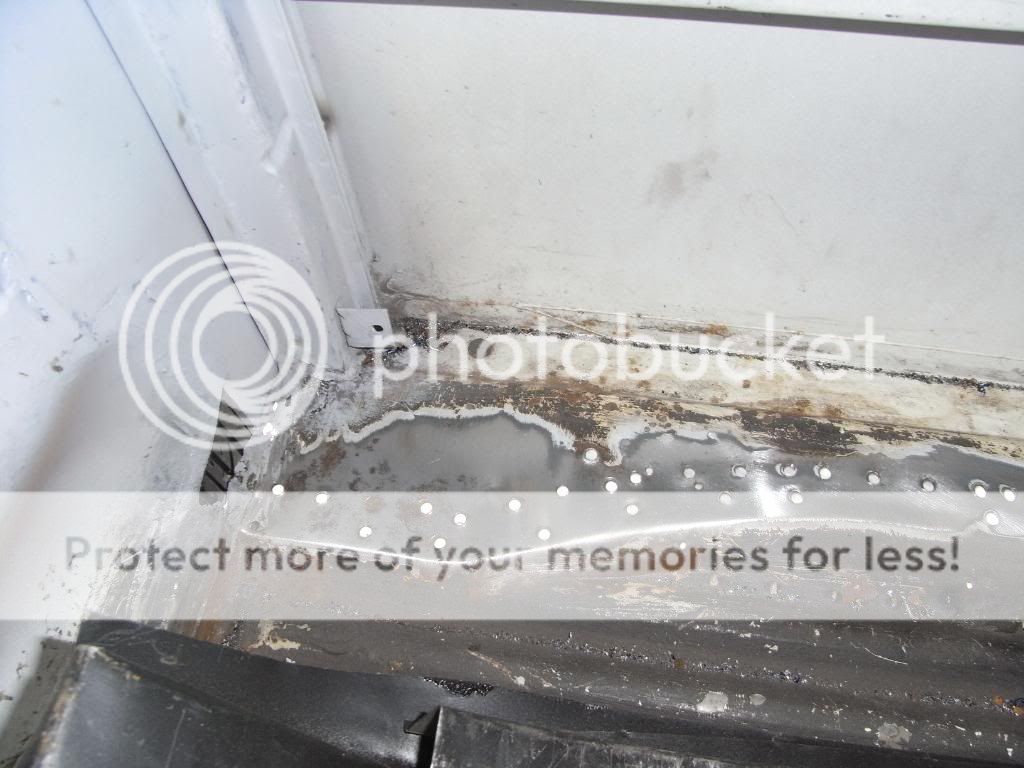
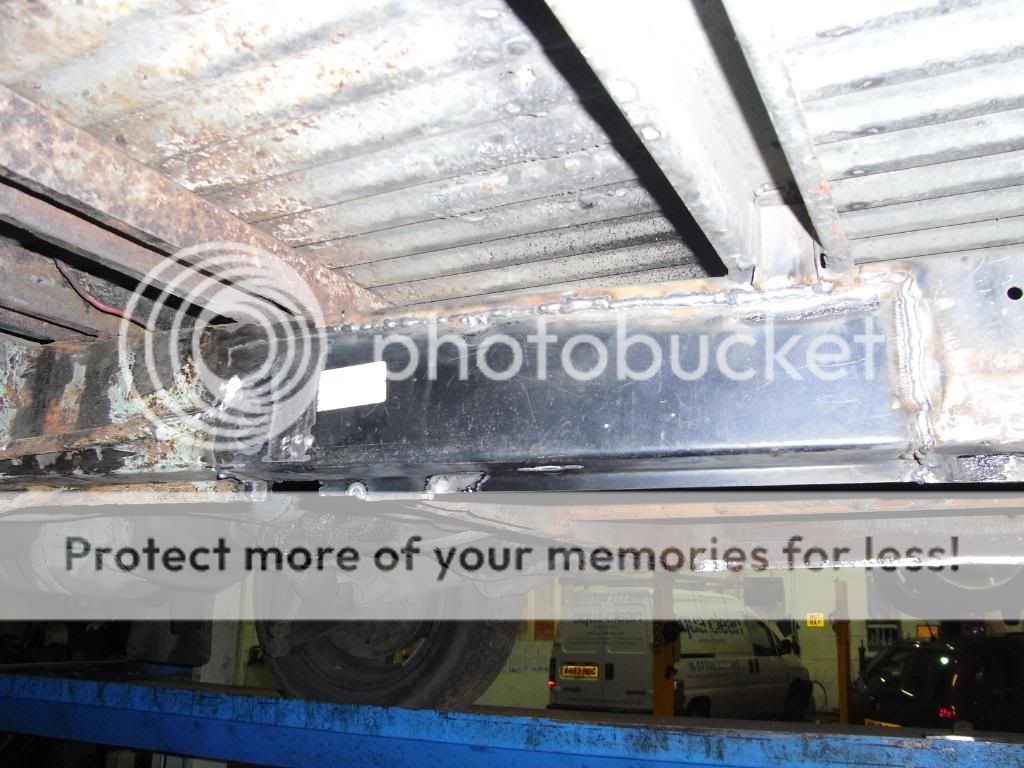
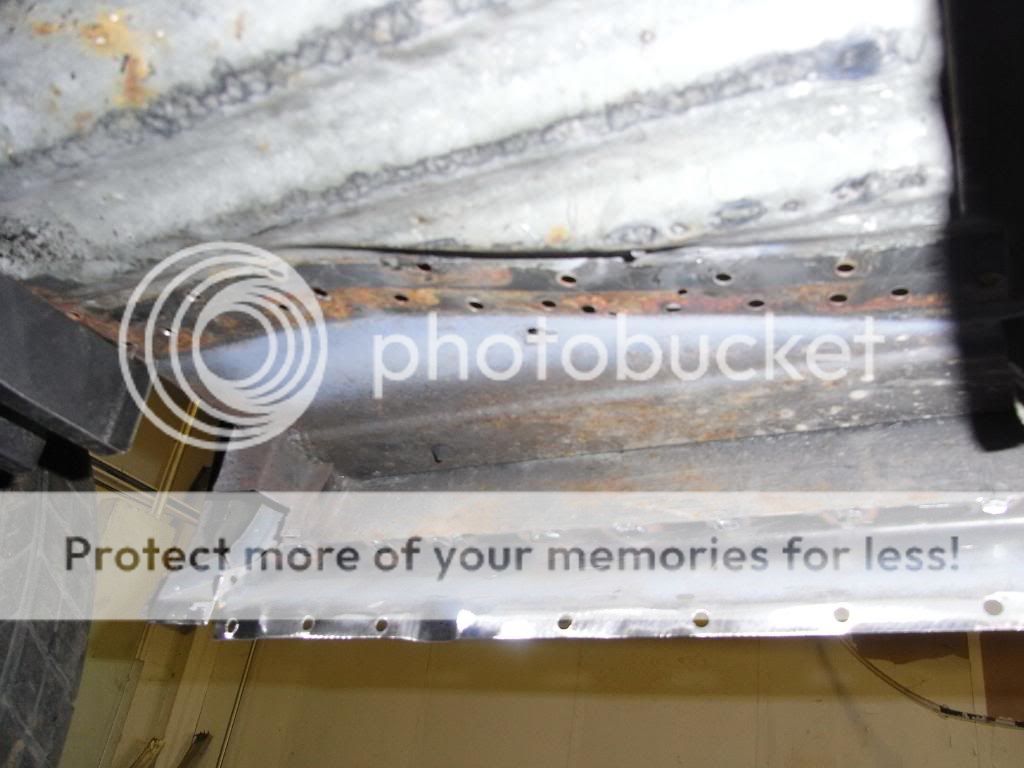
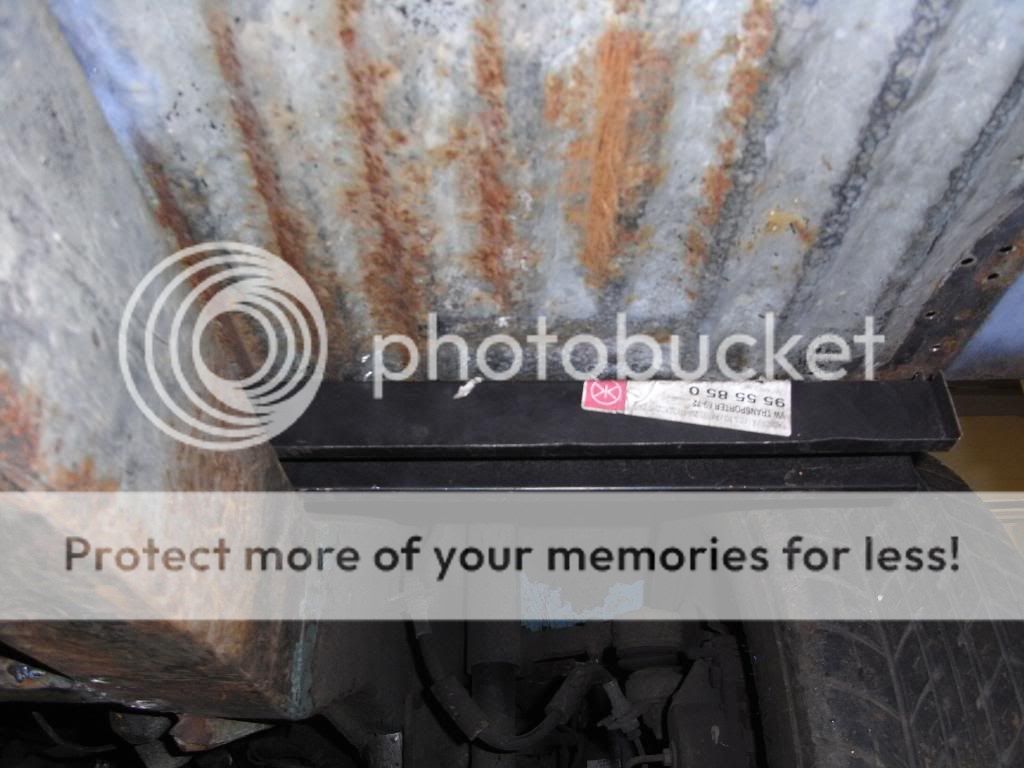
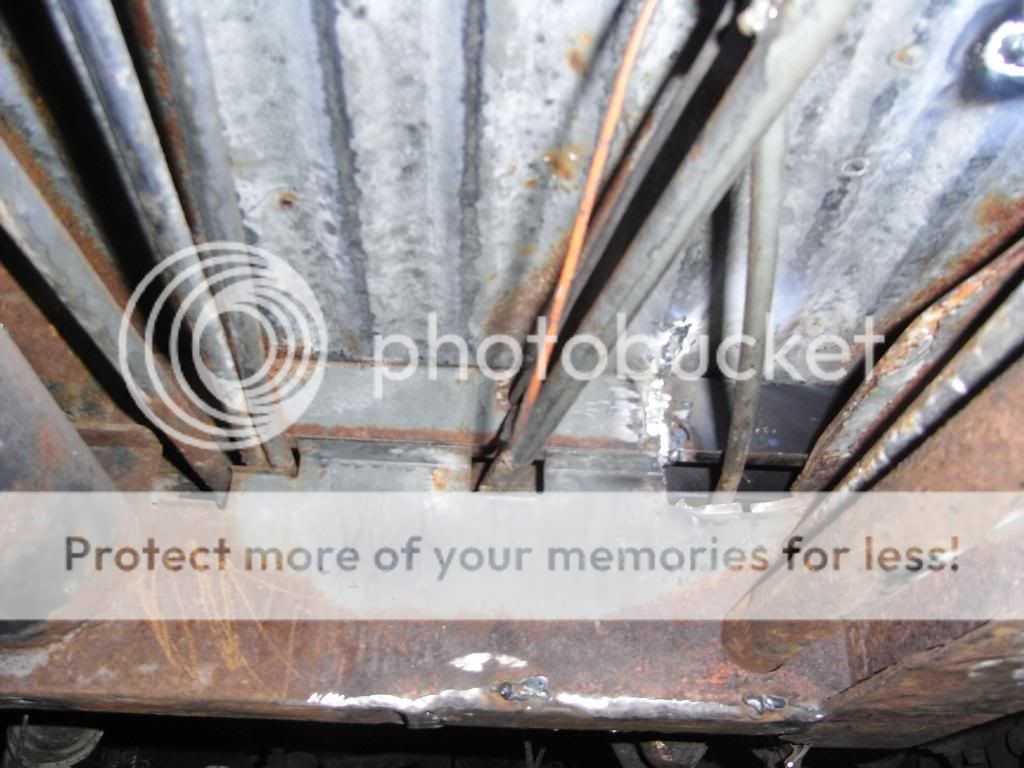
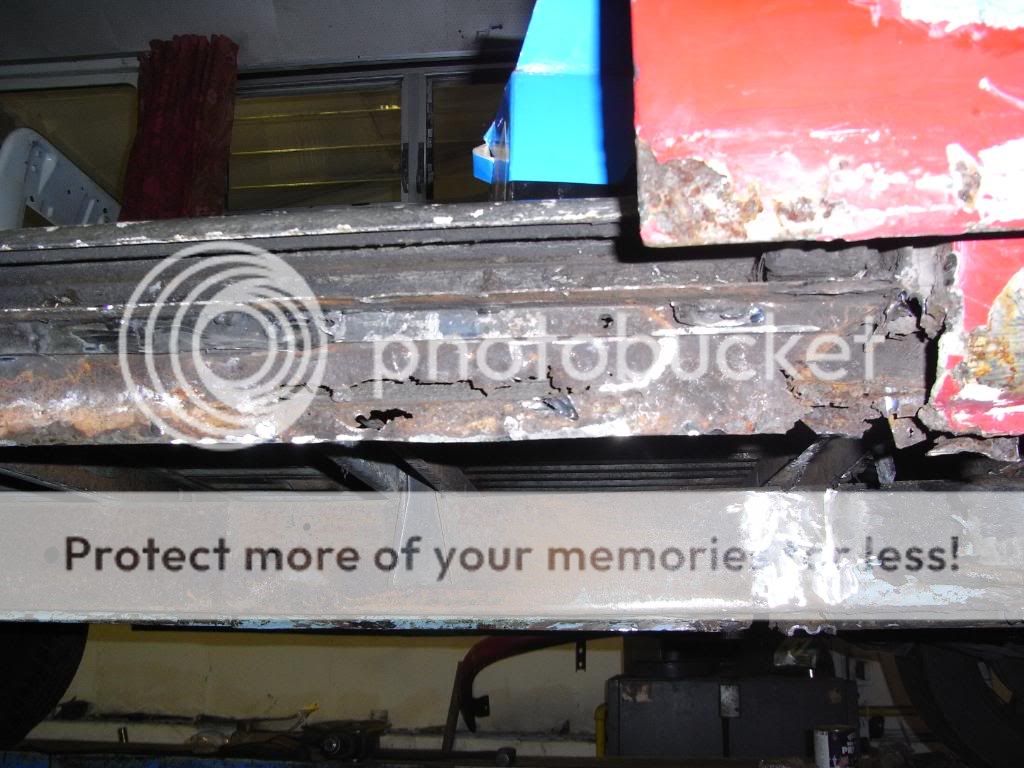
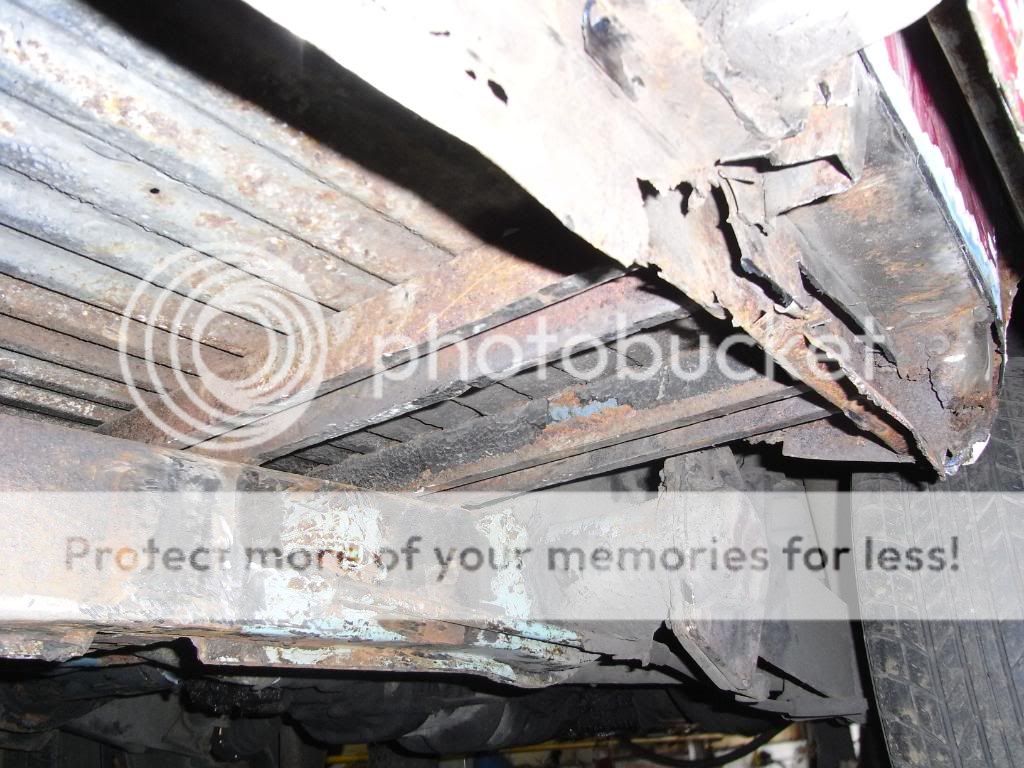
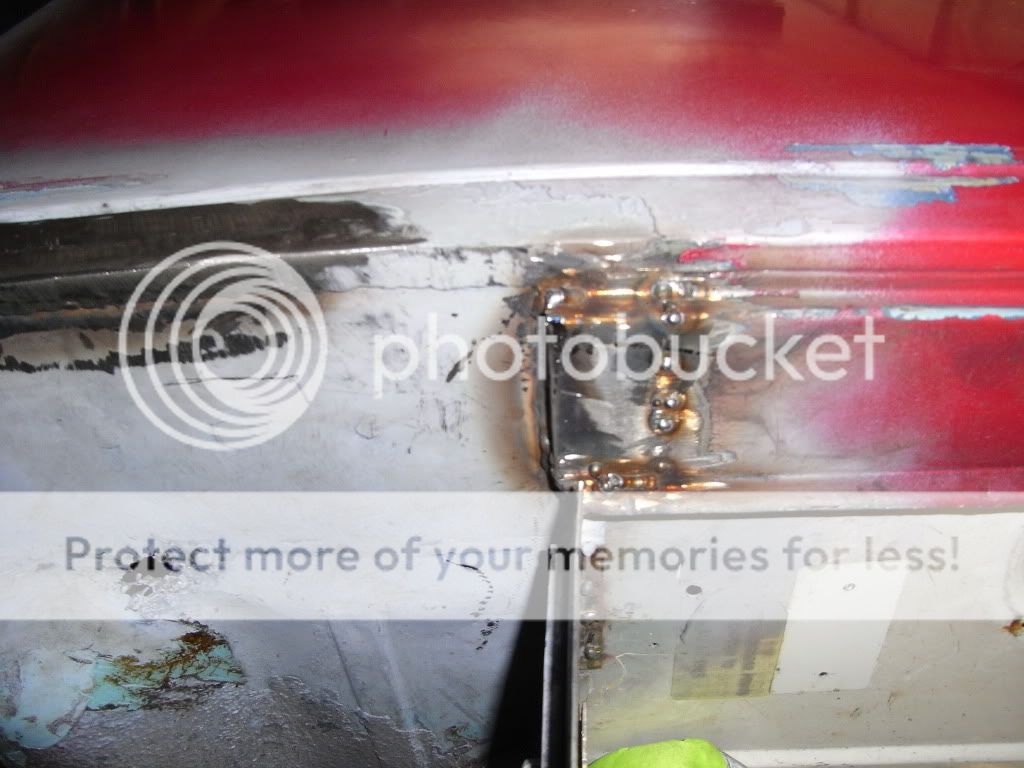
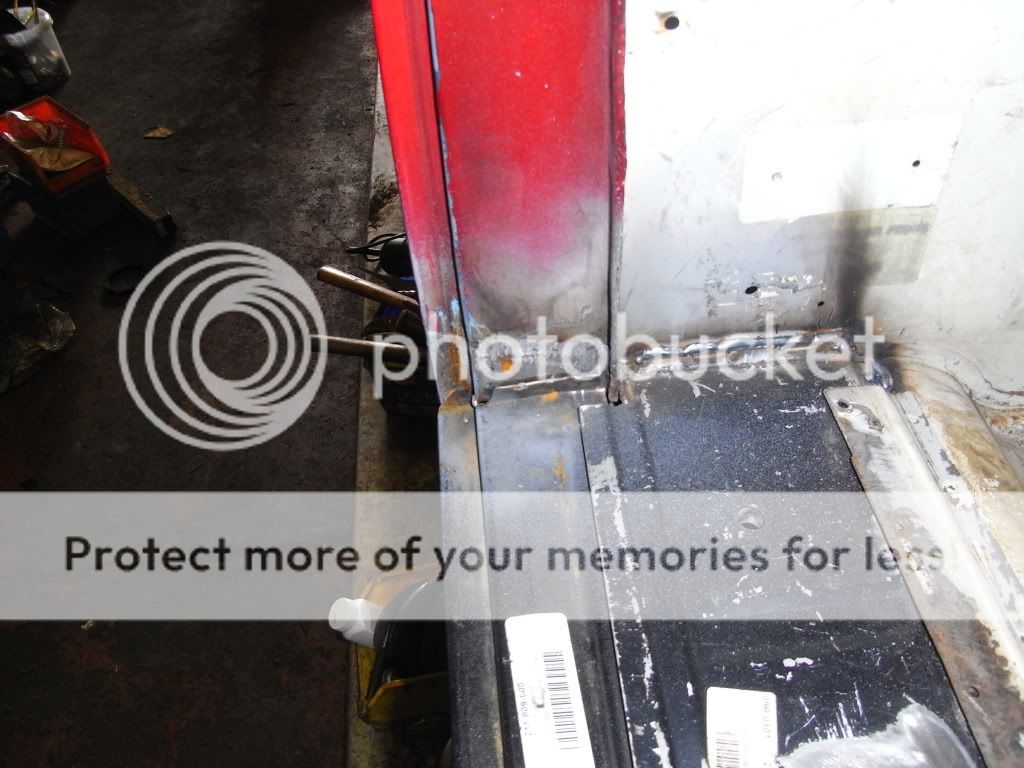
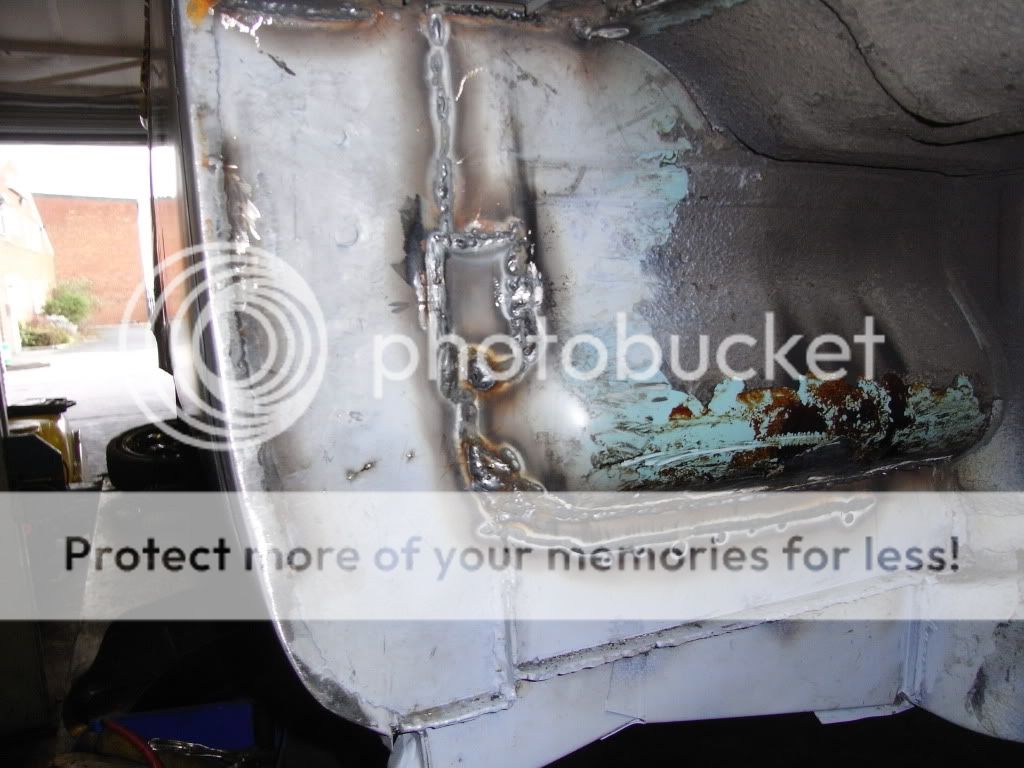
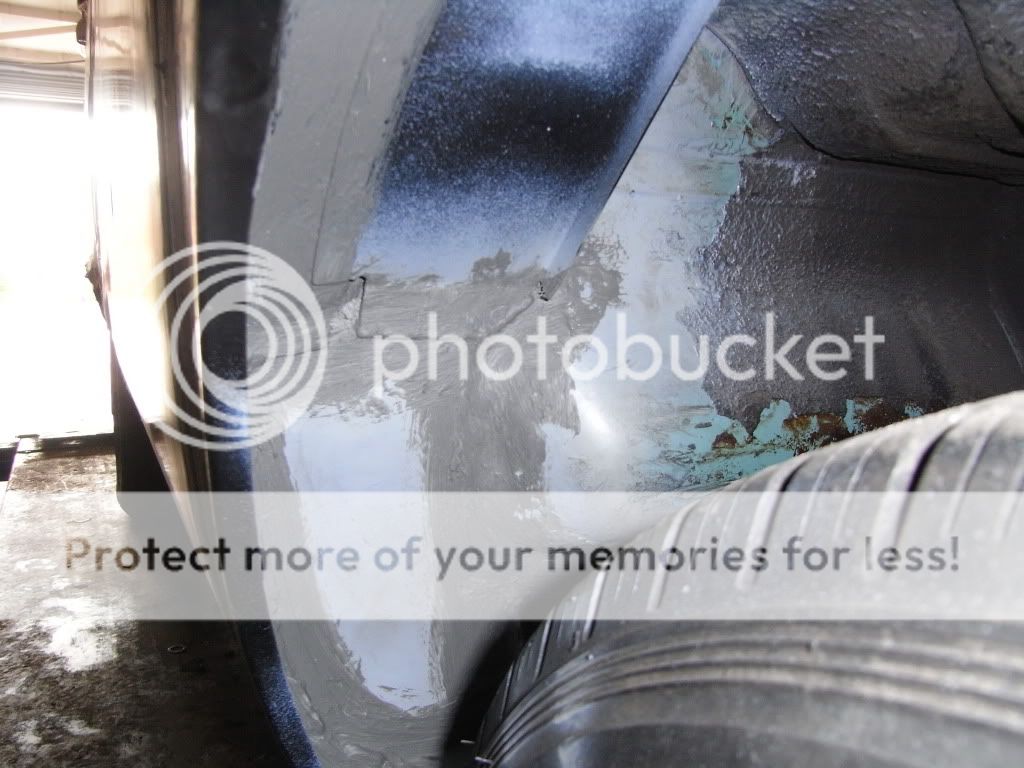
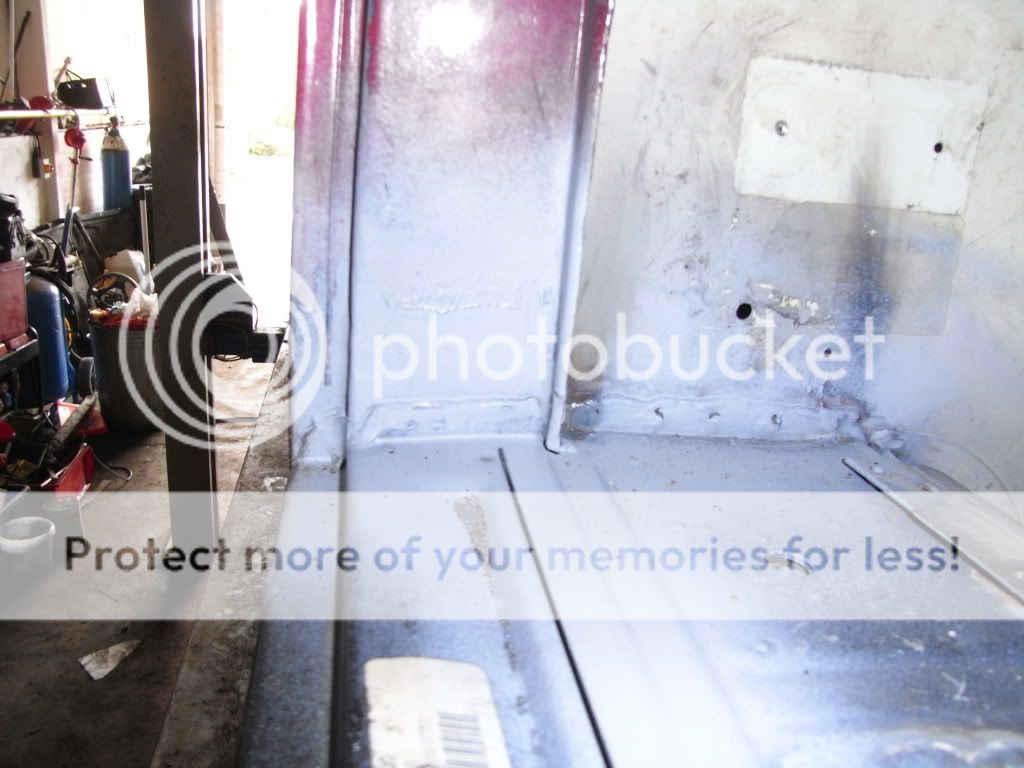
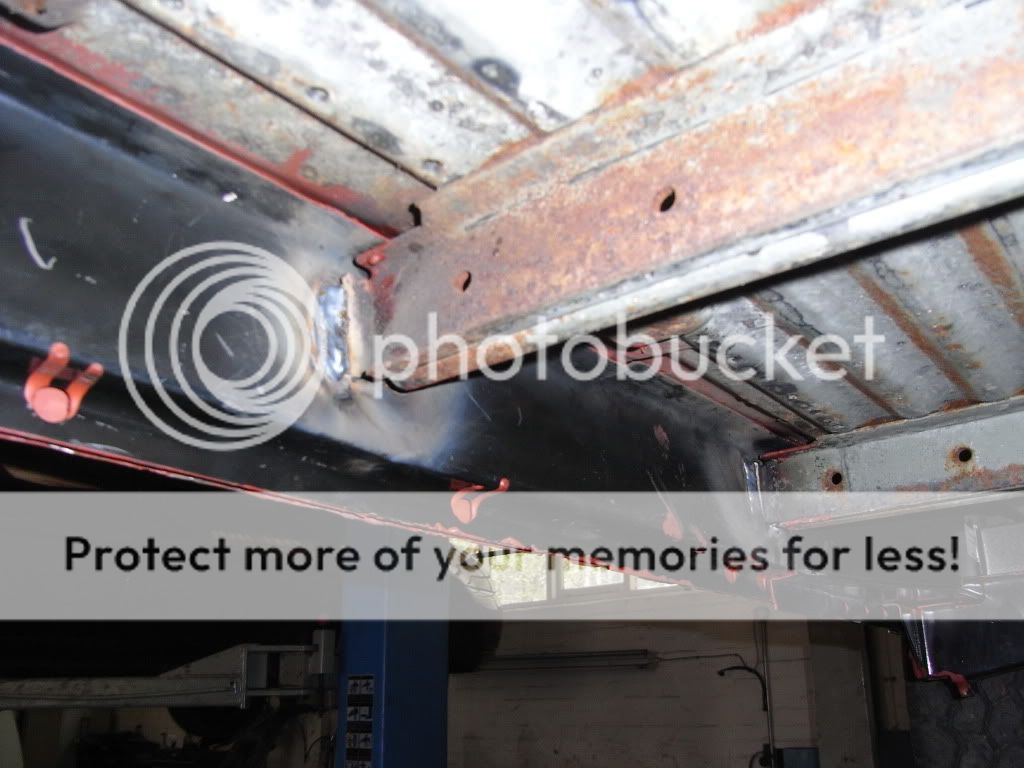
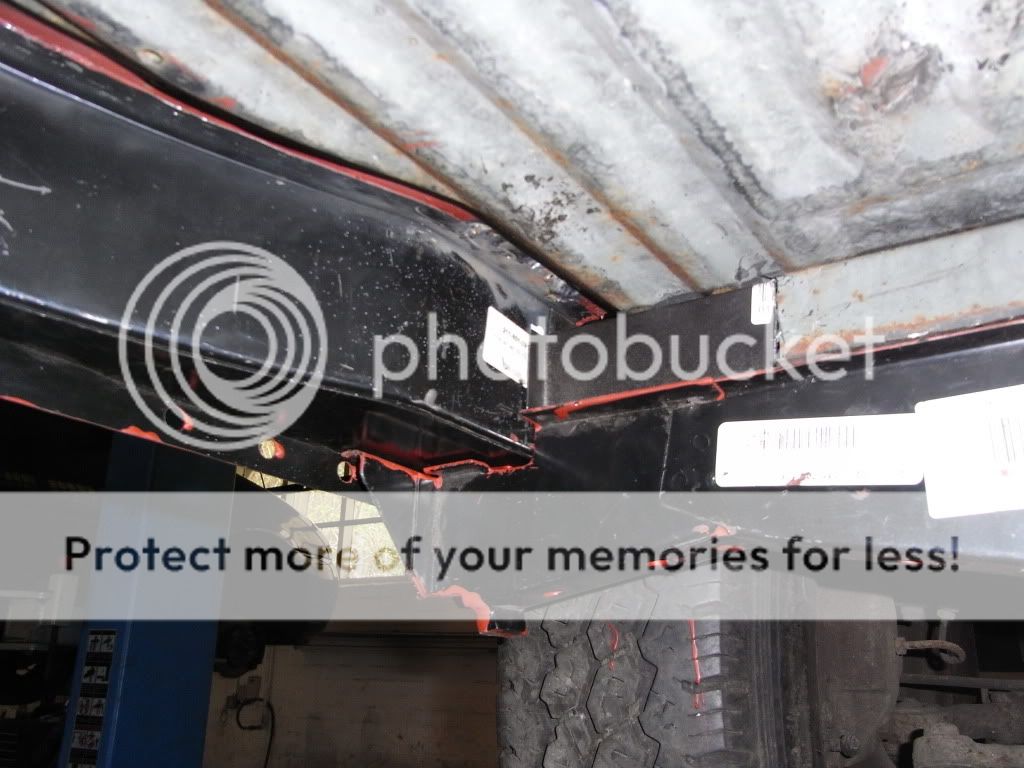
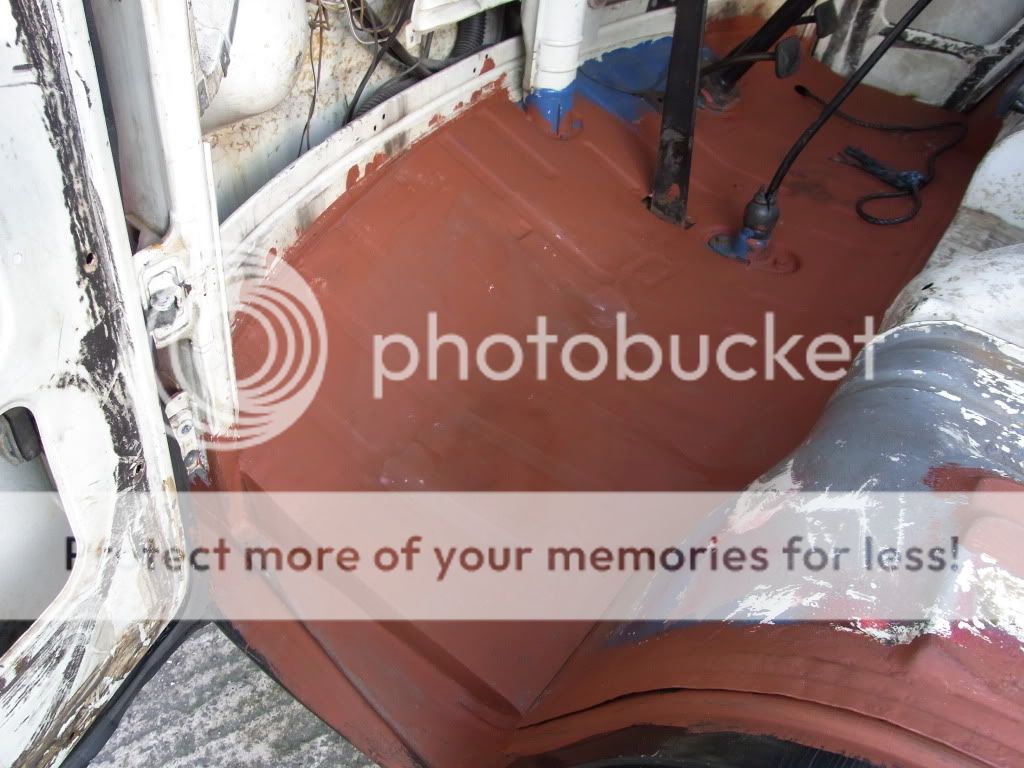
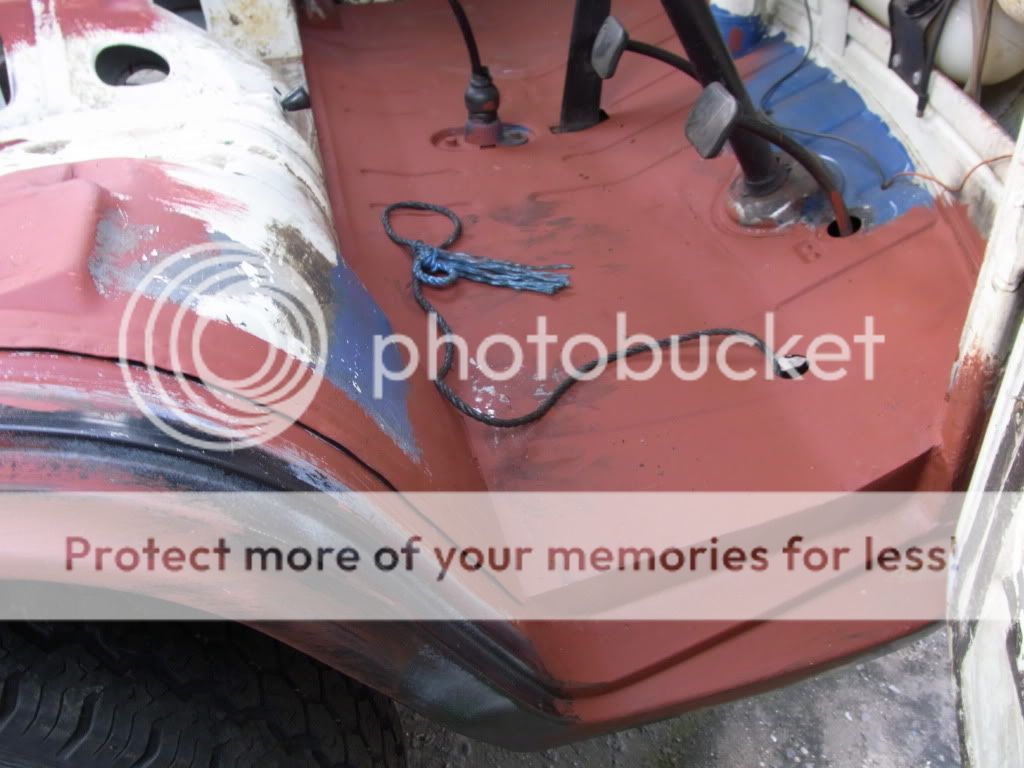
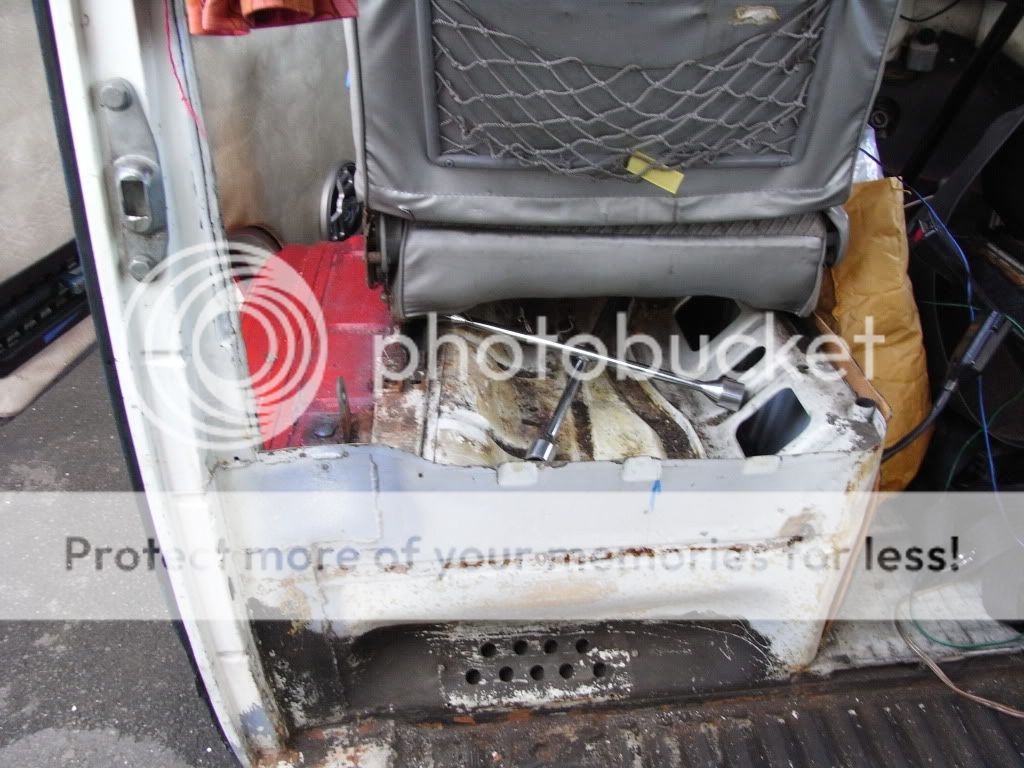
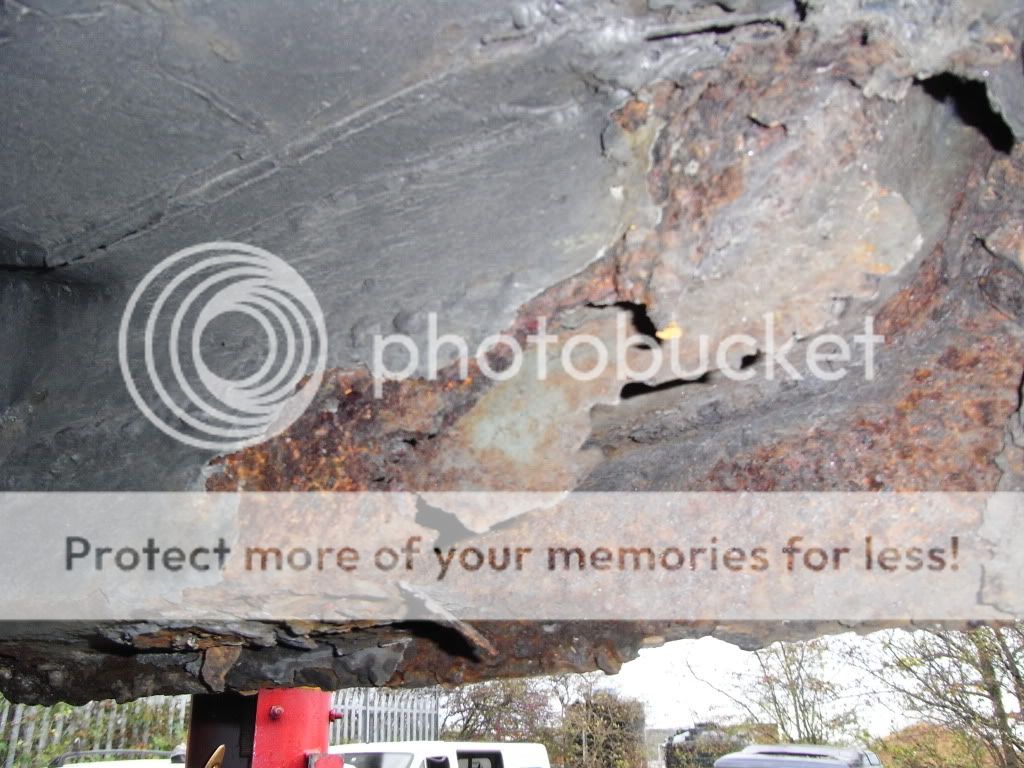
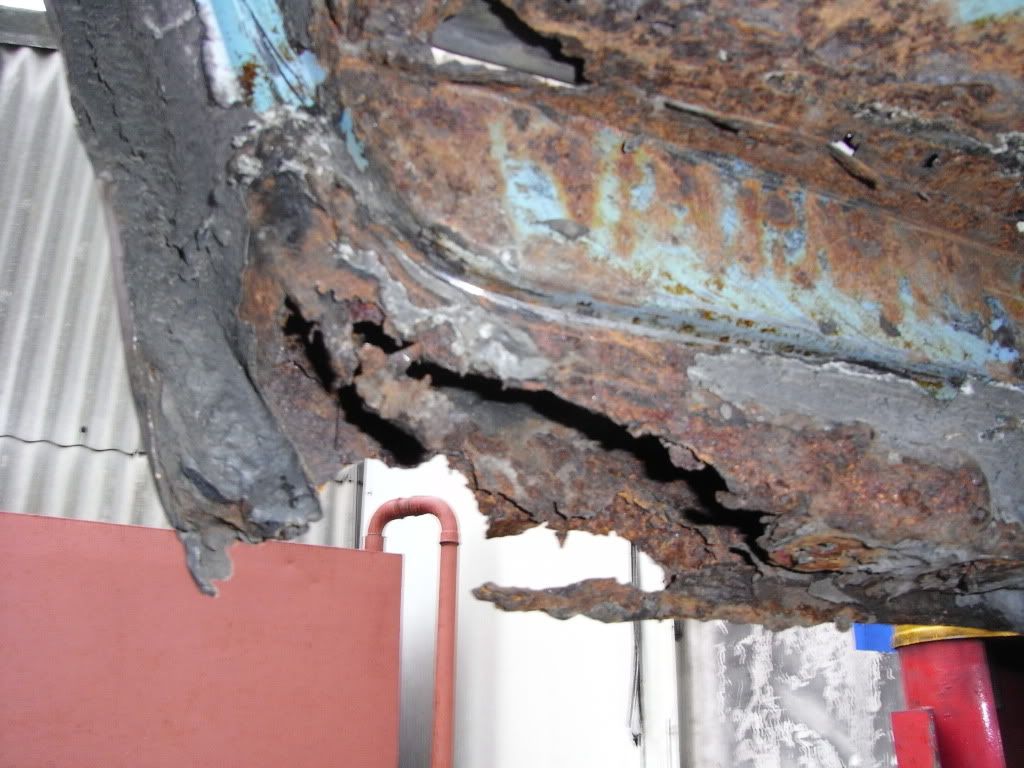
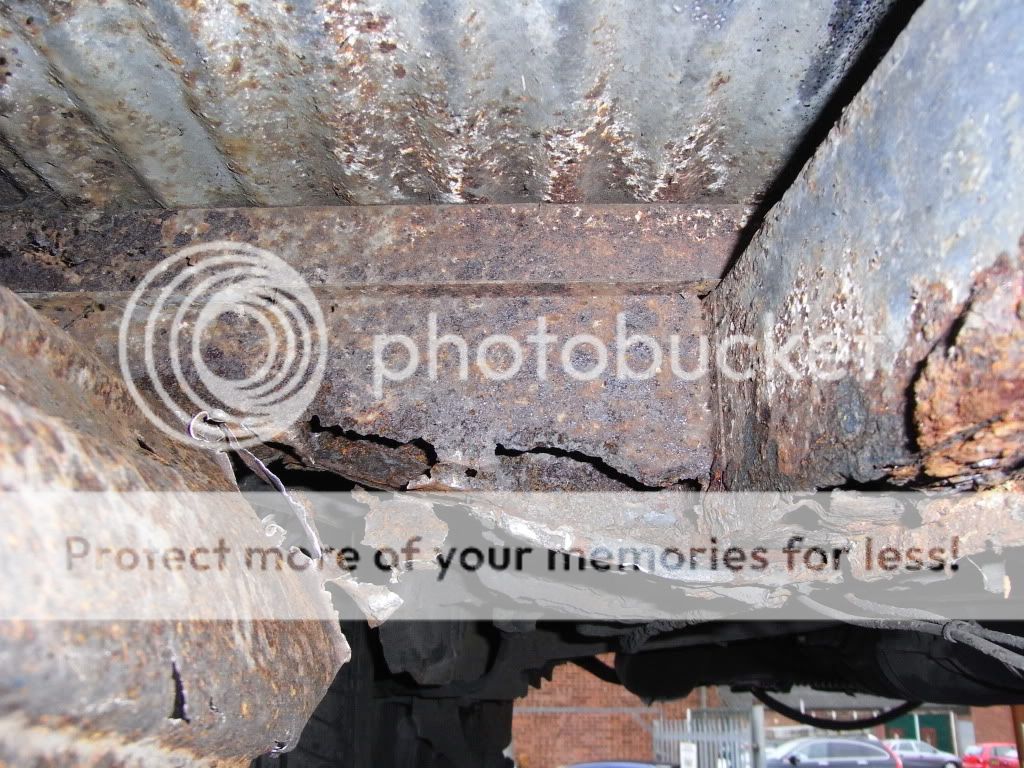
Luckily I have a friend with an MOT garage so I took her to him and got her up in the air for a good look. My mate isn’t a fan of these old things and told me any mates rates were now out the window. He also said ‘just patch it up get it MOT’d’ and ‘buy a proper camper’ if I wanted one. I never took his advice 
Buying the bus happened to coincide with the company I work for losing out on a major government contract. We were being taken over by another IT company so although strange times I found myself with time on my hands. (I ended up being at home for almost 4 months but most of it was spent catching up on household jobs).
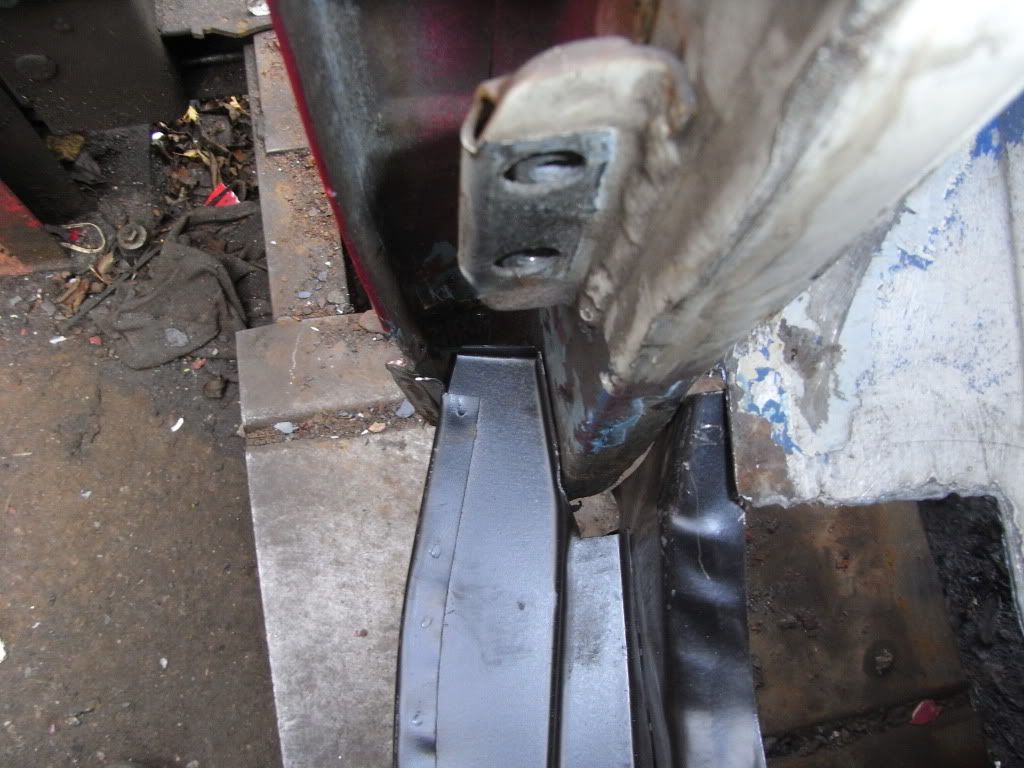
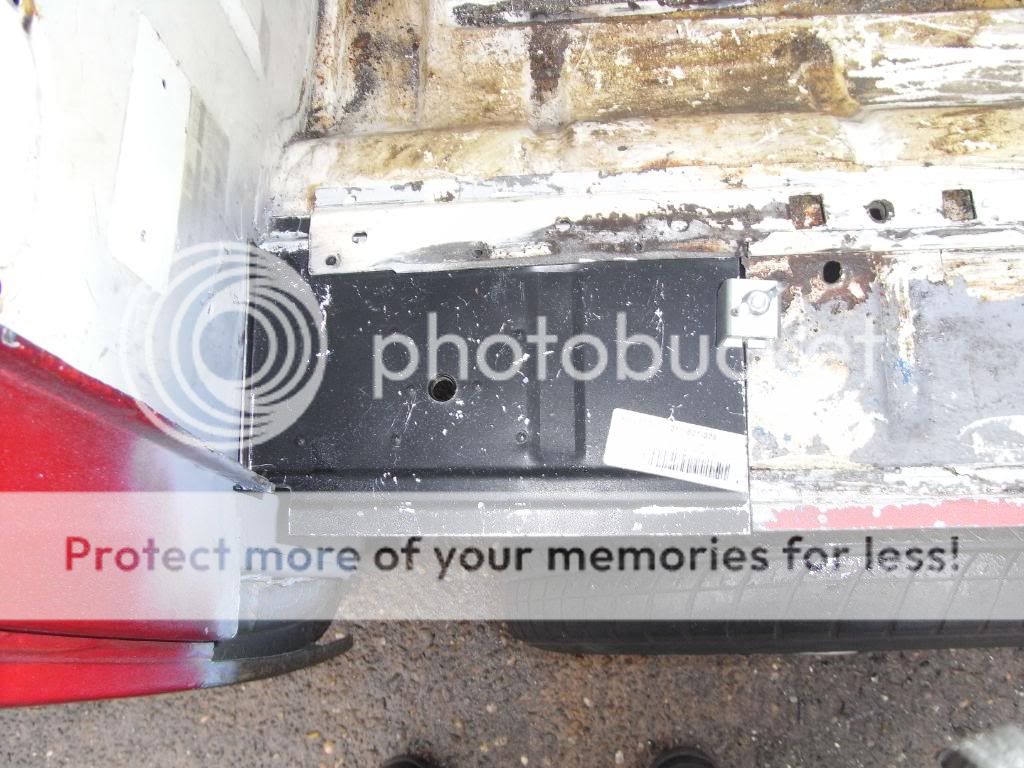
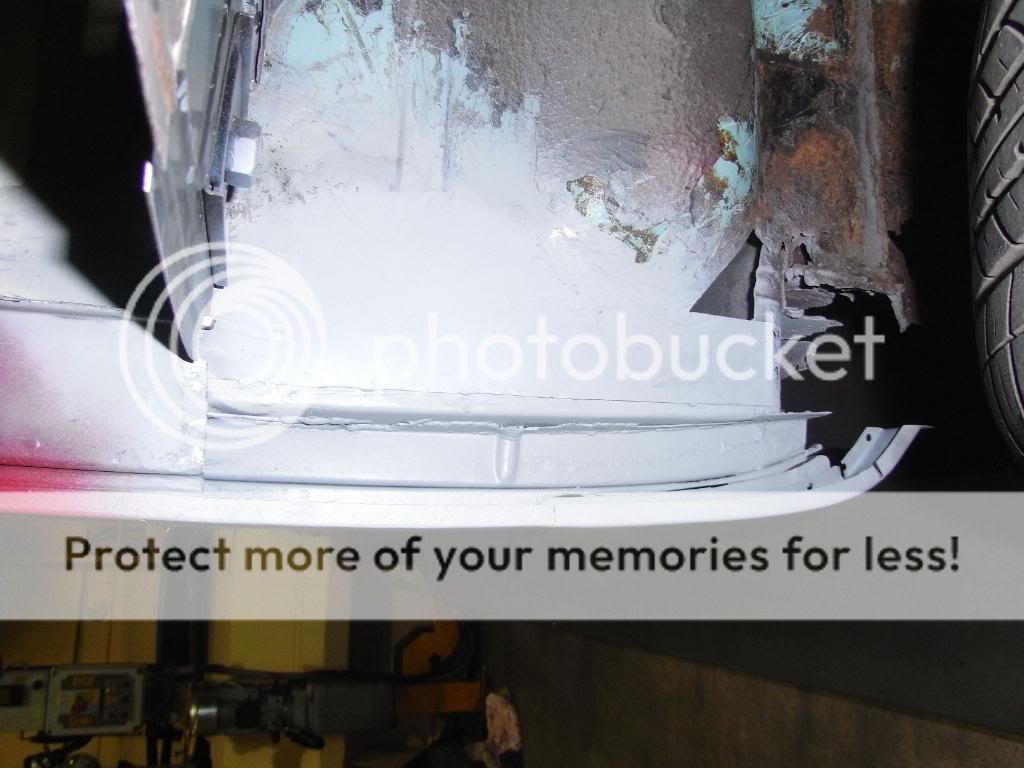
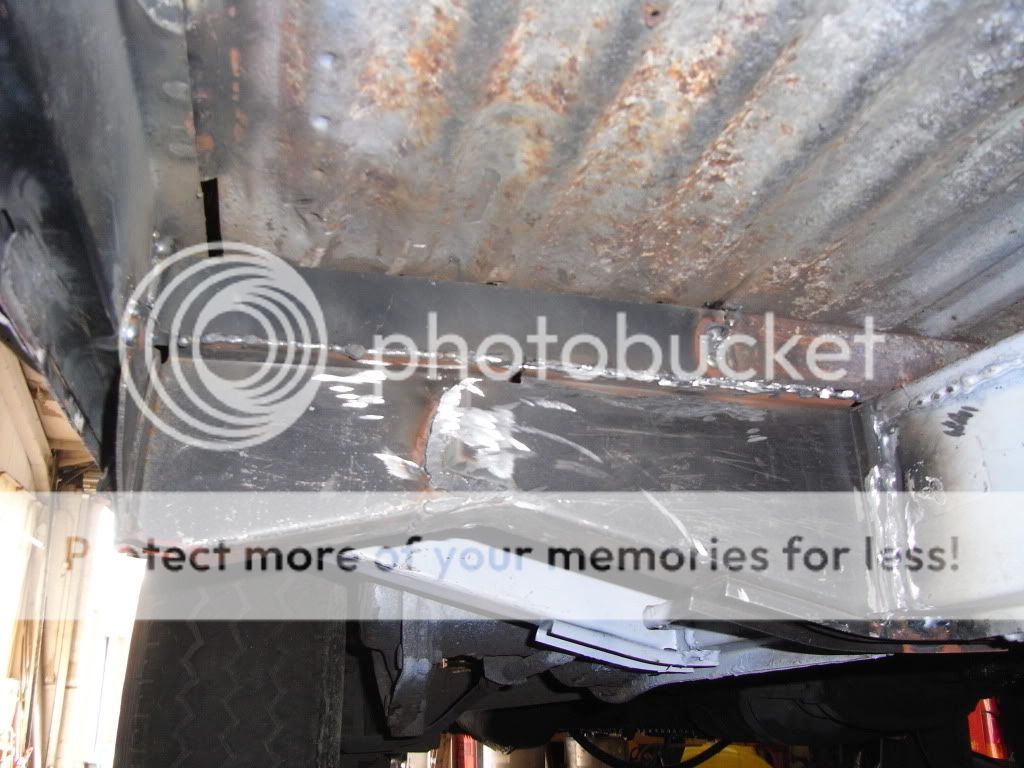
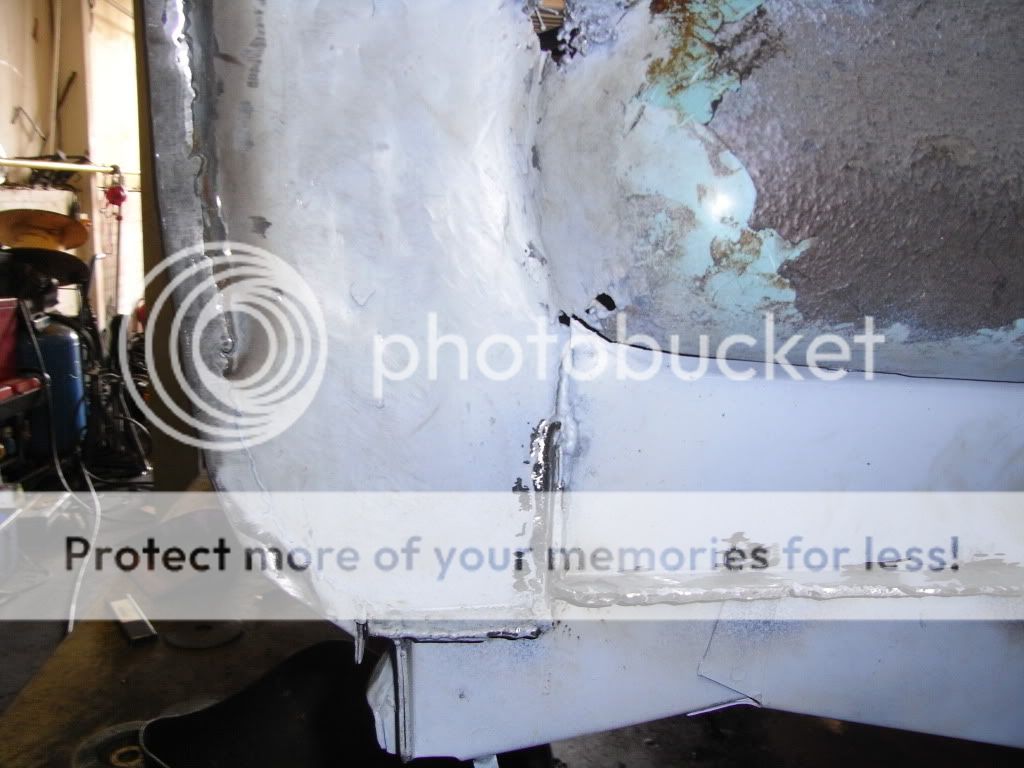
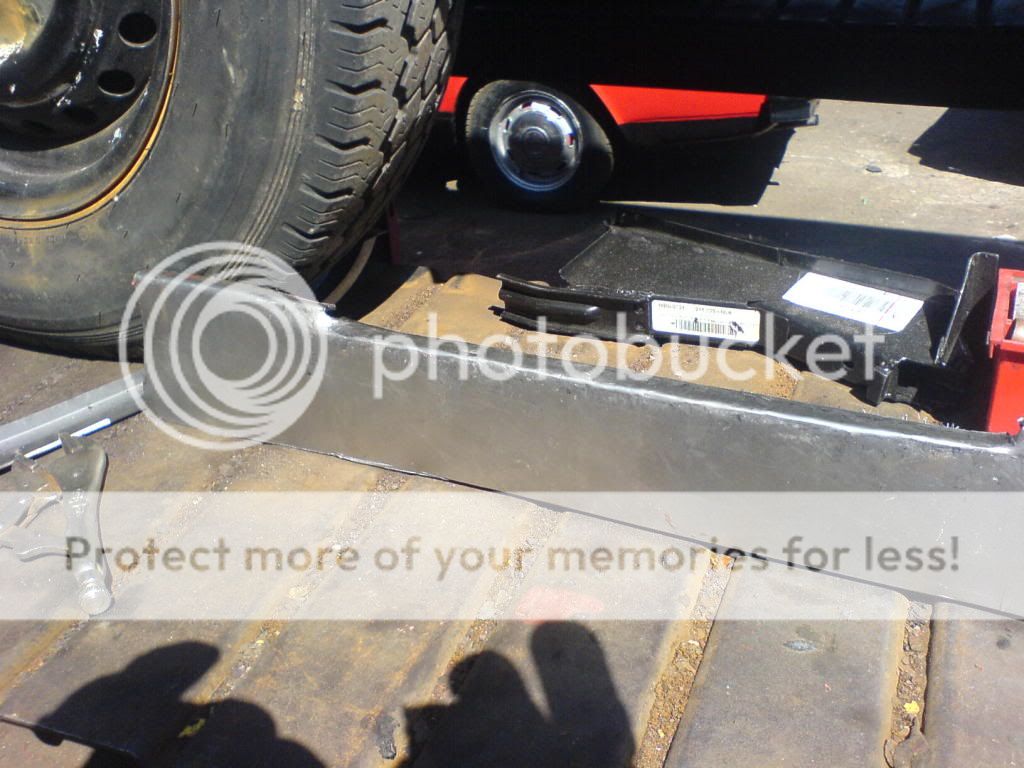
I decided that with the time I had, and having fiddled with cars regularly till my late twenties (Mk1, Mk2 Escorts, Dolly Sprints to name but a few), I would take the time and buy all the bits it needed to do a ‘proper’ job.
As I never got round to writing a rebuild thread I though it time I started.
 
November – Part 1
Fast forward to November and he rebuild began. First off I’d like to thank my mate Gaz for allowing the use of his workshop to get all the work done, as this has made the whole job a lot easier for me

I started out by ripping out the rock n roll bed, and taking up the wooden flooring to see what was lurking behind it all.

Type20008.jpg


I was also faced with fact that someone in its life had cut out the passenger bulkhead, and have never come across the m-plate for it so have no idea of what model/options it had as standard.

Type20012.jpg


I have been told the towbar is a factory option, it also has a few other things on it that i'm unsure whether have been upgrades or factory: opening ¼ lights, 4 heater controls (two blue/two red), black foam rubber seat bulkhead surrounds and others I cant remember now. Also from the things I have read and the fact the badge is still on the back, I know it was a Danbury Conversion
 
November – Part 2
The next thing I did was set about the bus with a crowbar, lump hammer and bolster chisel to see where I stood. Anything that looked suspect got hit till either the filler or rust fell out. It was a bit of a drastic move but let me know exactly what was at stake. Mind you it has also prompted the most common thing I get asked; ‘Blimey you’ve got your work cut out with this one aint you’ :evil:
Heres a few pics of what I found:

Inside Driver and Passenger arch

Type20024.jpg


Type20025.jpg


Drivers side rear outrigger/jacking point once the belly pans were off

Type20029.jpg


Centre section under the bellypans ( My mate told me to leave em in place but I knew it was for the best :D )

Type20032.jpg


Already started to cut the Passenger side arch off, but here is a few pics going round the bus to show how it looked after my attack:

Type20051.jpg


Type20056.jpg


Type20057.jpg


Type20058.jpg


Type20061.jpg


Perhaps the worst area again around the drivers side, rear jacking point/sill area

Type20062.jpg


Type20063.jpg


Type20064.jpg


Type20065.jpg
 
November – Part 2
Right, it was time for the hard work to start. Not sure why but I started with the passenger side arch. The plan being to start with putting the bulkhead back in, to restore a bit of strength and get this area sorted first. As these parts can’t be bought as panels, a body cut was needed to replace the bulkhead.

Type20066.jpg


Not sure if anyone else had these issue, but being a crossover it should have a lipped arch with the external step. I though the easier option was to use earlier arches with ni lip (although my conscience was telling me to use a later arch and cut it back)
This is where I cam across my first issue. The repro front arch was a rally poor fit as can be seen by the gap to the a-post

Type20071.jpg


I sent the arches back and order two genuine VW arches so decided to move further round the front and cut the front panel off to see what was behind the rust. Guess what it was, more rust :lol:

Type20072.jpg


I then got the bulkhead cut, so trimmed it down for what I needed ready to weld in

Type20081.jpg


Having not used a welder in anger for about 15 years it was a slow start. I was also going easy with the cutting disks. Rather than hacking through I was trimming little bits off here and there, a confidence thing I think. Anyways a few tacks later and the bulkhead was in.

Type20088.jpg


Next thing was to patch up the hole left lower down from cutting back the rust. From this

Type20091.jpg


To this

Type20095.jpg


Once ground back it was looking a lot better

Type20096.jpg
 
December – Part 1
Next thing on the list was to replace the lower b-post and to repair the bottom of the post where it meets the top part of the arch. (Although pics are shown here this was all redone later when my confidence with the welder was higher, more in later posts)

Type20100.jpg


Type20101.jpg


With the back end looking better (at the time) it was time to repair the front end, As most of the a-post fell away when the old arch was cut out I didn’t have much to go on, So after making numerous templates and trying different things, we finally got some steel cut and made what we thought were correct repairs to the bottom of the a-post.

Type20104.jpg


Type20105.jpg


At this point some weeks after deciding to go with the original VW arches I was still waiting on the passenger arch but had been supplied with the drivers side arch. So change of plans and now its round to the drivers side :roll:
Drivers side arch cut off now and its time to see what awaits on this side

Type20107.jpg


This photo is from inside the arch looking backwards. Another one of the mysteries of the bus, as the drivers side is far worse than the same bits on the passenger side.

Type20109.jpg


You can just see the plate used to fill in the back of the arch before lining up the new seat belt mount

Type20116.jpg


Bottom b-post cut off and replaced

Type20128.jpg
 
December – Part 2
Drivers side a-post was the next piece that needed to be repaired and again many cereal boxes got cut up before finally bit the bullet and made my repair pieces

Type20131.jpg


As we were getting near to xmas now and the weather was getting colder, decided to take the doors off and go and work inside for a bit. Drivers side again showing worse signs than the passenger side but it’s a common theme.

Type20134.jpg


Type20135.jpg


Type20136.jpg


Cut away the rot and made my repair pieces

Type20139.jpg


The door bottoms were also showing signs of rust, so a bit of digging and a bit of cutting and I ended up with another hole.

Type20141.jpg


Type20142.jpg
 
January – Part 1
After being lazy and having rather a longer xmas break than I should of it was time to get back to the bus before I had to go back to work for real. The drivers side arch was tacked in place before lining up the seat belt mount repair

Type20150.jpg


Type20153.jpg


Work then started on the whole inner/middle/outer sill sections. Cutting the sills off wasn’t such an issue as most of the rust just fell away as it went. The real pain was grinding back the remnants in order to remove every last trace of the spot welds from the original sill,

Type20151.jpg


For the middle and inner sill we drilled through the spot welds in the floor and then just eased it off from underneath with the help of a trusty bolster chisel

Type20156.jpg


the bad bits were cut out and used a repair section to replace it with good steel

Type20165.jpg
 
February – Part 1
After reading a few rebuild posts on here and again re-reading my How to Restore book I decided for the drivers side the best option was to plug weld the out sill to the bottom of the long panel.

Type20169.jpg


We then replaced the top hat section above the front outrigger/jacking point. In order to complete the repair properly we did have to cut a section out of the load floor to get at the area from above in order to clean the whole area of rust

Type20171.jpg


Type20172.jpg


Once all these reference points were in place the next thing to do was line up the middle and inner sill. All was clamped in place and the two parts tacked together. Then took them off and stitch welded them together. Put back in place and seam welded to the top hat and I beams. The rear top hat also needed replacing so this was also done.

Again things hit a snag waiting for some parts to come. First off I was given two left side rear outrigger/jacking points so I couldn’t get these done. I then started cutting the passenger side outriggers and sill area whilst waiting

Type20178.jpg


Type20182.jpg


It was around this time I had to go back to work so had to spend a bit of time away from home so again work was slow this month

What time I did have was mostly spent parts chasing, scouring eBay and here for bargains one of which I was a complete original Danbury interior bought from paulandabbe (thanks) on here. I also got a full black leather SAAB 9-5 interior to name but a few things. I also started sketching some plans of colour schemes, jumping the gun a bit but it kept me going why I was spending time away from the bus.

Type20186.jpg
 
March – Part 1
Work on the van has now gone down to weekends only for me which is a bit of a pain. Got my next parcel full of some of the bits I had been waiting on so got back to it again. Rear outrigger/jacking points in place

Type20210.jpg


Front jacking point in place and closing plate at the rear of the arch

Type20208.jpg


Repaired the mid section of the b-post where the rear of the arch seats, near to the seat belt mount

Type20209.jpg


Drivers side arch tacked in for reference, and then welded in the seat belt mount for good

Type20213.jpg


Then took the arch back of and completed al work for inside the arch. Had to use some copper pipe clamped in place to fill the holes back in, either that or start cutting out the steel to make more patches.

Type20217.jpg


Once all the work was ground back and fettled a bit a quick coat of primer and everything was looking good again

Type20219.jpg
 
April – Part 1
Had a family holiday thanks to The Sun in Exmouth so not much got doe nine April. The drivers side arch was welded on for good, the whole area tidied up and given a coat of primer and seam sealer.

Type20224.jpg


Type20225.jpg


Back end area of the arch near the seat belt mount

Type20226.jpg


Also managed to get the passenger side inner sill welded in place, along with the front outrigger/jacking point..

Type20228.jpg


Type20229.jpg


Not many photos but it seemed like a lot of hard work at the time :lol:
 
May – Part 1
I think I finally got to much grinding debris in my digital camera as it how now decided to give up the ghost. I sent it of for repair so not many photos taken this month. Jobs that got done were the remaining out riggers and jacking points on the passenger side. Made repair pieces for the middle sill and got them in place. The front end of it was all ok so it only needed repair from the middle backwards which with the exception of the load floor indents was quite a simple shape to recreate.

Type20232.jpg


Type20237.jpg


Also got the outer sill welded on, plugged along the bottom and stitched along the top to the sliding door runner

It was around this time that I finally got my passenger side arch and I realised the whole of the repairs done to the lower b-post, middle section where it meets the arch and seat belt mount etc were all in the wrong place (December part 1 post). A new b-post was ordered and welded in place. Also had to grind the weld where the seat belt repair meets the bulkhead and drop it down about an inch at the back
 
June – Part 1
Photos here showing the new b-post back in place

Type20234.jpg


There wasn’t as much rot in the passenger side arch as I had in the driver’s side so repairs to this area were minimal. Just a couple of little patches and again filling in a few blow holes where it went a bit crazy with the power of the welder

Before

Type20235.jpg


After

Type20239.jpg


Spent most the time trying to get the whole area where the b-post and outer sill meet, trying to make the whole area look tidy. No real photos other than the above, but as this is quite a visible area I wanted it to look right (spent far to long messing with it really)

Also made a small repair to the bottom of the passenger arch tub where it meets the cab floor

Type20244.jpg


Type20245.jpg
 
July – Part 1
As I now had to bite the bullet and get the passenger arch on, completed the repair to the seat belt mount underneath, seam welding along where it meets the arch tub and grinding it back.

Type20250.jpg


Not quite sure how but have odd days with the bus where we seemed to have not stopped but then as I’m packing away think ‘what have we actually done today’. Small repair, again in the passenger side arch area. I noticed a slight bubbling in the flat panel, poked it with an air tool and the next thing you know if got a hole that needs a plate over the top of it.

Type20246.jpg


A few more small bits welding in where the middle sill was missing behind the arch panel, where it meets the jacking point

Type20256.jpg


Plate cut and welded in to close the whole area off before the arch can go back on

Type20263.jpg


Quick coat of paint and again the whole area looking a lot better

Type20268.jpg


Also took the time to recreate the middle b-post area where the arch meets the seat belty mount area

Type20269.jpg
 
July – Part 2
I decided to book off the last week of July as my mate had promised me we could use the ramp for a week as he was having a bit of a rejig with his workshop.

Monday was a day of frustration. Lined up the passenger arch and every thing was ok with the exception that the top rear was sitting about 1/4” away from the b-post. A few measurements later and found out that those years with no passenger bulkhead had taken its toll. It wasn’t noticeable but the b post had moved slightly. On closer inspection (something I hadn’t looked at before) the door gap for the slider was not at all right. Spent the day with a Portapower trying to get the post back in the right place.

Tuesday, finally got it where I wanted it and made sure the arch was going nowhere.

Type20275.jpg


Type20281.jpg


Also cut the step off and made my closing plate where it meets the floor

Type20283.jpg


Wednesday we got the closing plate welded in and tidied up. Then cut the floor out to where I wanted it, and welded a new plate in where the two front chassis legs meet

Type20287.jpg


Next thing was to get the floor section welded in, plug welded it to the step section and arch tub, butt welded front to back to the original floor and lap welded around the front edge

Type20292.jpg


All welds ground and it looks a lot better again

Type20293.jpg
 
July – Part 3
Thursday it was time to do the same on the driver’s side. Pedal linkage removed and the whole rotten floor area removed

Type20297.jpg


Again the strengthener was repaired prior to the new floor going in.

Type20299.jpg


Also had to repair the bottom of the arch tub

Type20305.jpg


Type20308.jpg


and cut the step off in line with where the new closing plate was to fit.

Type20306.jpg


Type20310.jpg


Friday got the drivers side floor in and the whole cab area was looking reasonable again

Type20312.jpg


Once all this was back in place I then removed all seat runners/strengtheners ready to measure up for the new SAAB seats to go in.

Type20317.jpg
 
August – Part 1
Nothing done so far this month. Work kind of took off again for the first week, and the second week I’m in Great Yarmouth for a week and have finally took the time to write the rebuild thread I kept promising myself to do. Now its done up till this point in time, it will be easier to keep track of. With the exception of the lower front panel, all repairs to the front 2/3rds of the bus have been completed. The rear 1/3rd is still to do, the outer arches and rear corners/battery trays etc. Hopefully these will be done in the next month or two then its off to the body shop. As I said while doing the work I have been parts hunting for everything I need to get the look I want. A few more things to buy, window rubbers, harness, fuel lines etc but I feel it is slowly coming together. Target is for it all to be ready for the start of next season, but hey if your reading this thread you also know nothing can be rushed with an old bus
 
Went down to the van yesterday just to check on it, and took a couple of photos of how the cab floor ended up so its fully up to speed

Type20320.jpg


Type20326.jpg
 
Thanks Nick for the support, sometimes it feels like ive been on it forever :lol:

Cheers Barkafer, the pictures make it look a lot better as does a grinder and a coat of paint. And don’t give up even when it fees like you should, it all comes together in the end, a year or two af hard work now for a lifetime of memories is how I see it :D
 

Latest posts

Top