1968 camper resto “Sebby”

Early Bay Forum

Help Support Early Bay Forum:

This site may earn a commission from merchant affiliate links, including eBay, Amazon, and others.
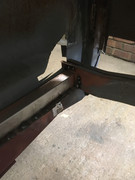
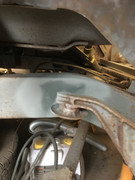
I have replaced the jacking points at the front
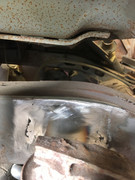
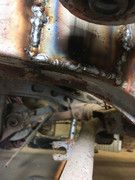
Just need to fit the rear then can look at repairing the floor pans and re fitting them
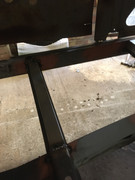
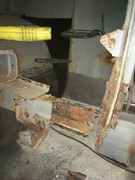
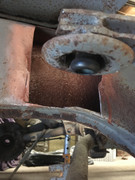
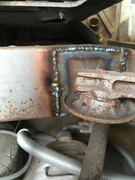
I have repaired the I beams and replaced the front cross member half section till I get the other side


Some of these are in the wrong order lol I’m sure you can figure it out

How do get pictures to show larger I have tried re sizing but it Dosent seem to change anything
 
Below is the advice I was given by Mike, it works for me.

Using Postimage site.

You need to create a free account on the Postimage site, and then upload your pictures on it.

Then select your pic that you want to post on the forum.

Look for the 'share' button and choose 'hotlink for forums' option. This is the last but one choice.

Click on the clipboard symbol on the right to copy the link.

In your post, paste the link. I use this on my lap top. That's how I do it anyway. :)

If you just use the 'add image to post' with the 'p' in the blue box beneath the 'post a reply' window, you only seem to get a small image in your post.

On Ipad or mobile phone, I would imagine it's the same, but I'm using the Tapatalk app. So I simply use that application, and you just select large, medium or small size pic when posting from this.
 
Cheers guys I have been reading through your thread bluesman it's very i.impressive you have done a good job there

Thanks for the pic advice up look into opening an account with image host to try and sort the pics out
 
Hi guys I haven’t been on here for quite a while I have been only pottering around on the bus due to very busy home life, my partners mother moved in with us two years ago with dementia and Parkinson’s and has needed round the clock care which I have helped with, anyway things have eased a bit now so have started again in the bus.
I have done quite a lot some with pictures some not
I’ve just started to work on the passenger side inner sill and associated metal of which there is very little left
I have put a section of chassis in the near side as it was just too bad to try and repair and have got the front crossmember half way in now too
The other pics are of the inner sill area
 

Attachments

  • IMG_6803.jpeg
    IMG_6803.jpeg
    1.7 MB · Views: 0
  • IMG_6806.jpeg
    IMG_6806.jpeg
    1.7 MB · Views: 0
  • IMG_6805.jpeg
    IMG_6805.jpeg
    2 MB · Views: 0
  • IMG_6804.jpeg
    IMG_6804.jpeg
    2.4 MB · Views: 0
I have started priming and sealing some area now as I go along and have fitted drivers side door skin and finished the centre section and rear quarter panel
 

Attachments

  • IMG_6811.jpeg
    IMG_6811.jpeg
    1.5 MB · Views: 0
  • IMG_6810.jpeg
    IMG_6810.jpeg
    1.9 MB · Views: 0
  • IMG_6812.jpeg
    IMG_6812.jpeg
    1.9 MB · Views: 0
  • IMG_6813.jpeg
    IMG_6813.jpeg
    1.6 MB · Views: 0
  • IMG_6814.jpeg
    IMG_6814.jpeg
    1.8 MB · Views: 0
  • IMG_6809.jpeg
    IMG_6809.jpeg
    1.7 MB · Views: 0
I git hold of a Subaru ej20 engine and loom set of a supposed specialist breaker
The engine is fine but he sent a me a loom that didn’t match the Ecu he sent and wrong for the engine so I’ve got a loom on order of Nick which should be her soon
I’ve spruced the engine up and got an RJES bellhousing kit, just waiting on a gasket to put the bellhousing on then can get the engine offers up to make the engine mounts
 

Attachments

  • IMG_6807.jpeg
    IMG_6807.jpeg
    2.5 MB · Views: 0
  • IMG_6808.jpeg
    IMG_6808.jpeg
    2.3 MB · Views: 0

Latest posts

Top