You are using an out of date browser. It may not display this or other websites correctly.
You should upgrade or use an alternative browser.
You should upgrade or use an alternative browser.
1971 Deluxe Import - A blank canvas
- Thread starter georgeyv
- Start date


Help Support Early Bay Forum:
This site may earn a commission from merchant affiliate
links, including eBay, Amazon, and others.
DubBGood2Me
Well-known member
georgeyv said:DubBGood2Me said:Any progress is worthy progress")
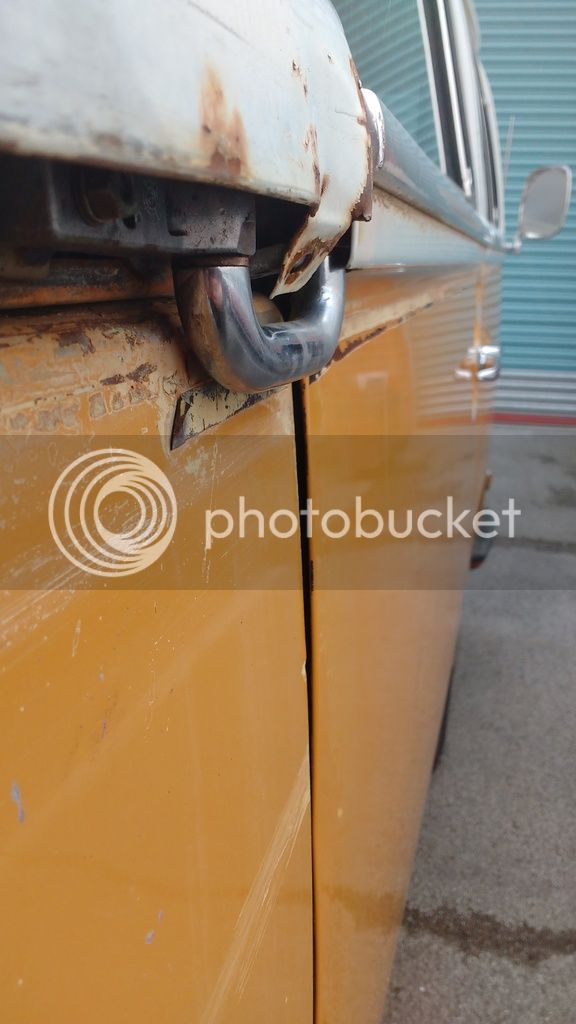
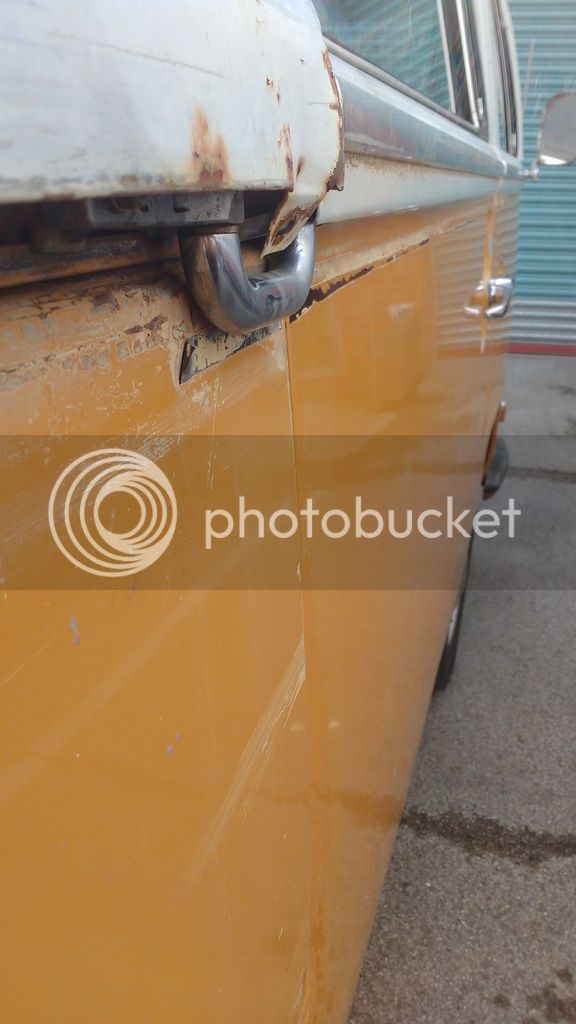
I won't buy anything but the top quality grey door seals. I know they're expensive but the doors shut properly. Had black rubber ones on a previous bus and the same with the sliding door too. Couldn't get them to shut so swapped them out for the soft grey ones. The difference once unbelievable.
Where do you get the grey ones from? I think mine are expensive heritage ones!
Custom and commercial, schofields and like Webbaldo said, I think JK have started to do them.
DubBGood2Me
Well-known member
http://www.customandcommercial.com/vw-baywindow/baywindow_door_tailgate_engine_lid--and--pick_up_parts/baywindow_cab_door_1fslash4_light_parts_door_seals--and--winder_parts/german_quality_oem_cab_door_seal_left_68-79_1012/" onclick="window.open(this.href);return false;
I have no affiliation with C&C, I just like their rubber :lol:
I have no affiliation with C&C, I just like their rubber :lol:
georgeyv
Well-known member
- Joined
- Apr 5, 2015
- Messages
- 495
- Reaction score
- 0
I'll have to have a look - have a passenger side one to fit but might sell them on and replace with the better ones. It's a shame as these are genuinely a great fit, but the rubber may be a bit stiff for immediately decent results. I imagine with a bit of bedding in they'll be OK...
georgeyv
Well-known member
- Joined
- Apr 5, 2015
- Messages
- 495
- Reaction score
- 0
Had a busy day on the bus today, my mrs is due tomorrow so took the bus to work to do a few jobs before the baby arrives and I can't get up to work to do any of the big jobs.
This morning got off to a ropey start as it was snowing like mad and there doesn't seem to be air coming up to the windscreen - will investigate that later but preparing for the worst as I think the main heater pipe up the middle of the bus is rotten. The only real rust on the van too!


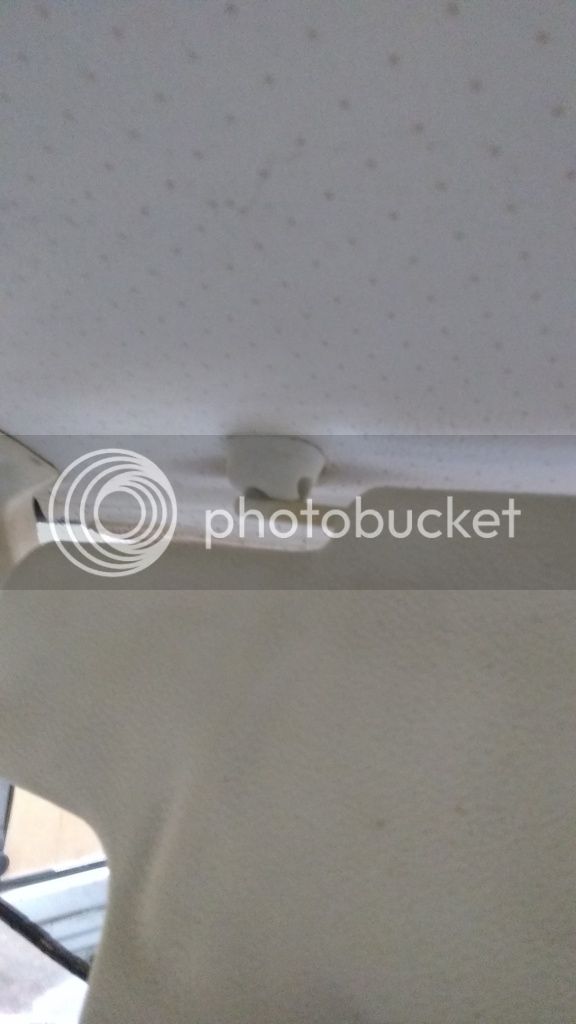
I'd had a few bits delivered a couple of days ago so got them fitted first thing, new sun visors and a new rear view mirror as the visors had been completely toasted and the mirror was gone.
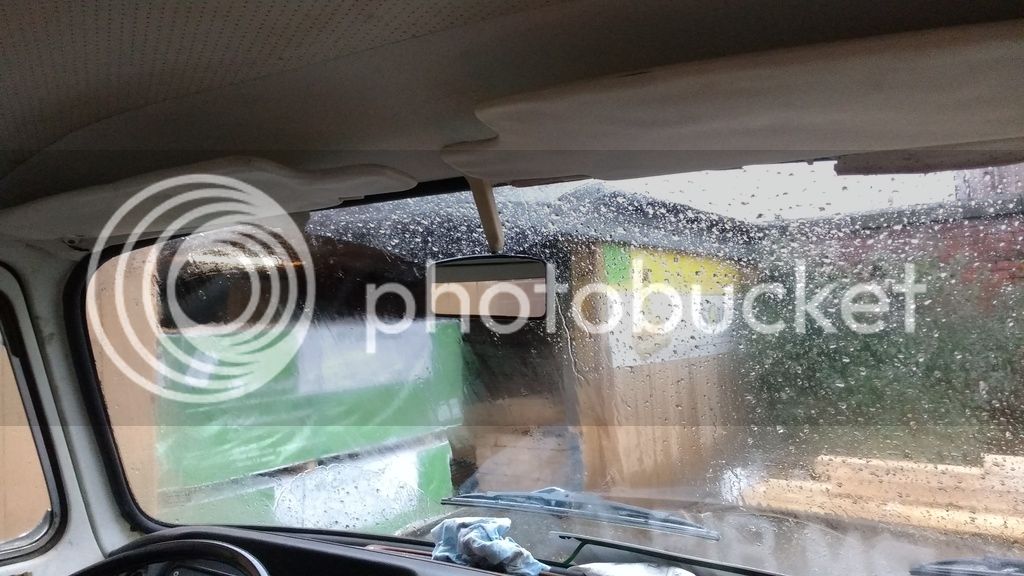
Only slight issue is that the visor seems to be a little long, but I'll whip it off and trim it so it fits - maybe a later visor or something? Only a minor problem...
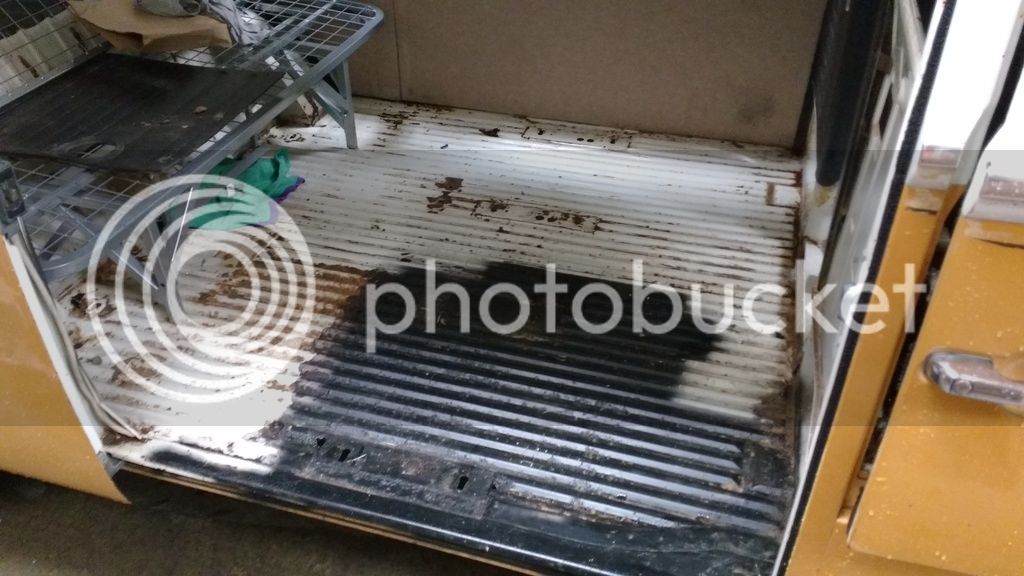
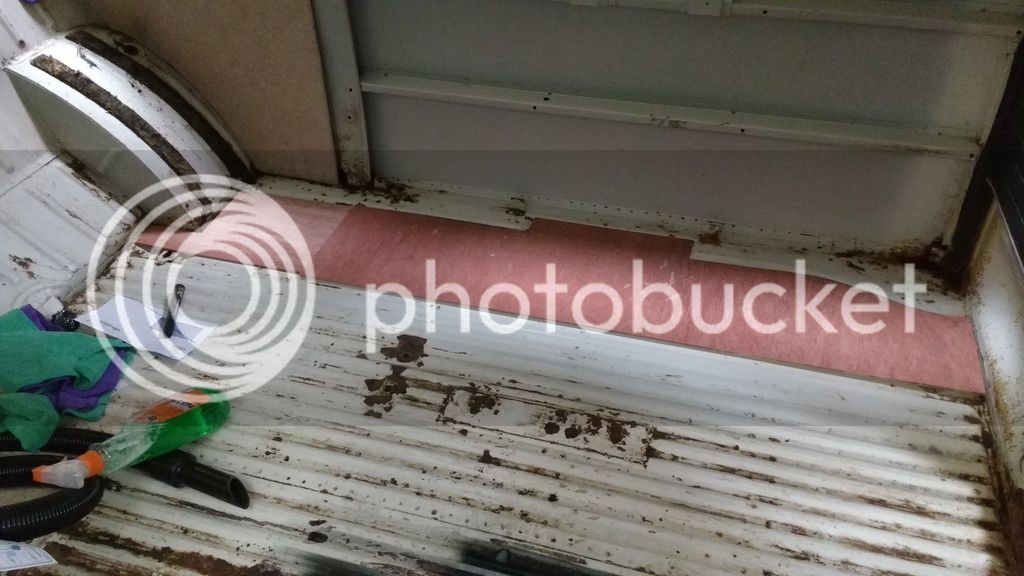
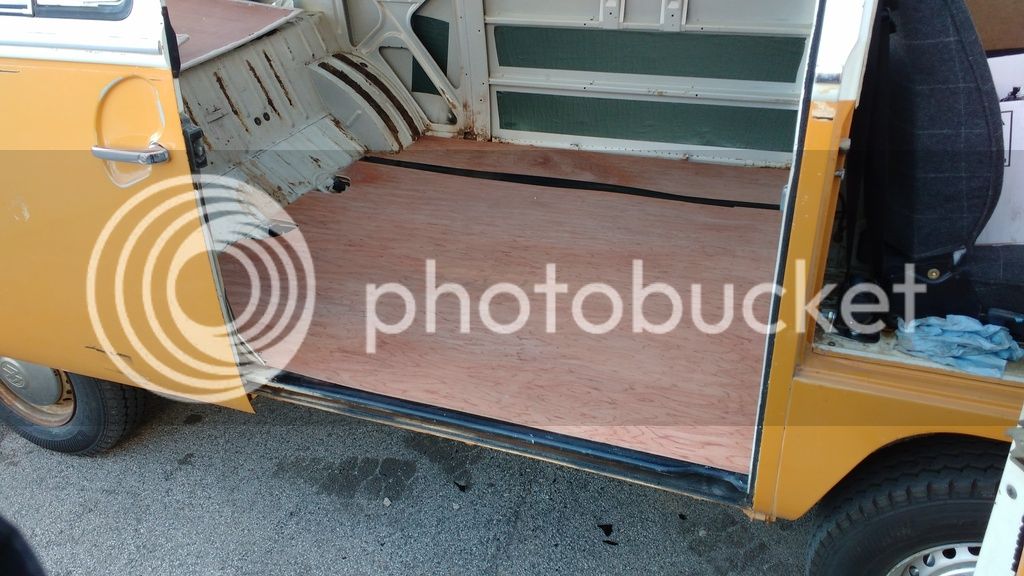
Next job was to clear the back out ready to cut some panels for the floor. I'm using 2 layers of 6mm ply, I know most use 6mm and then 9mm but I think that's a bit overkill for me, I'll be using a heavyish commercial vinyl floor which is well sturdy so that'll keep everything in check once it's all fitted!
Measured up and had some ply cut by a local firm, then I trimmed and cut to shape to fit the floor - a productive couple of hours this morning definitely!
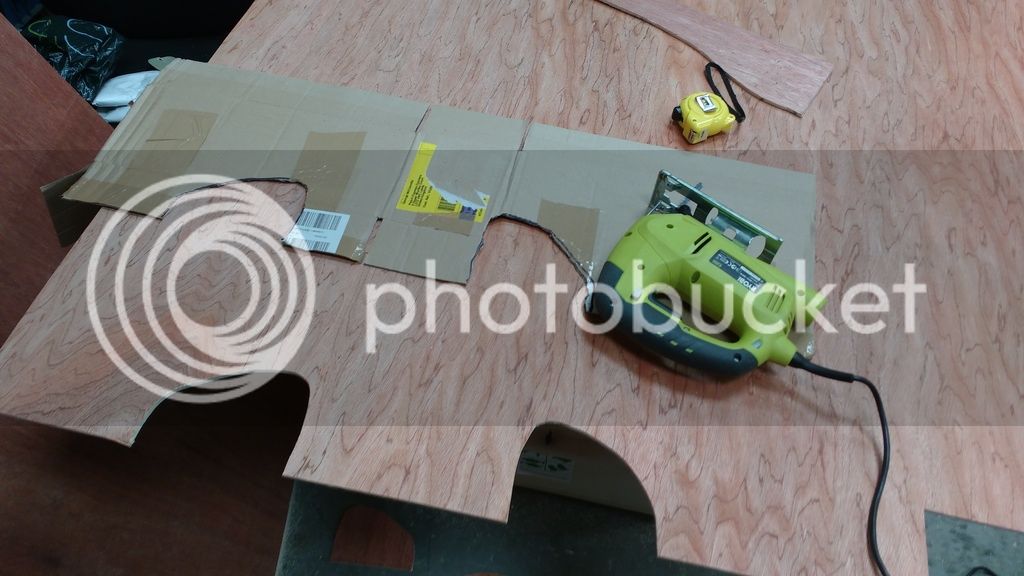
I did get the top layer on too but forgot to take a photo!
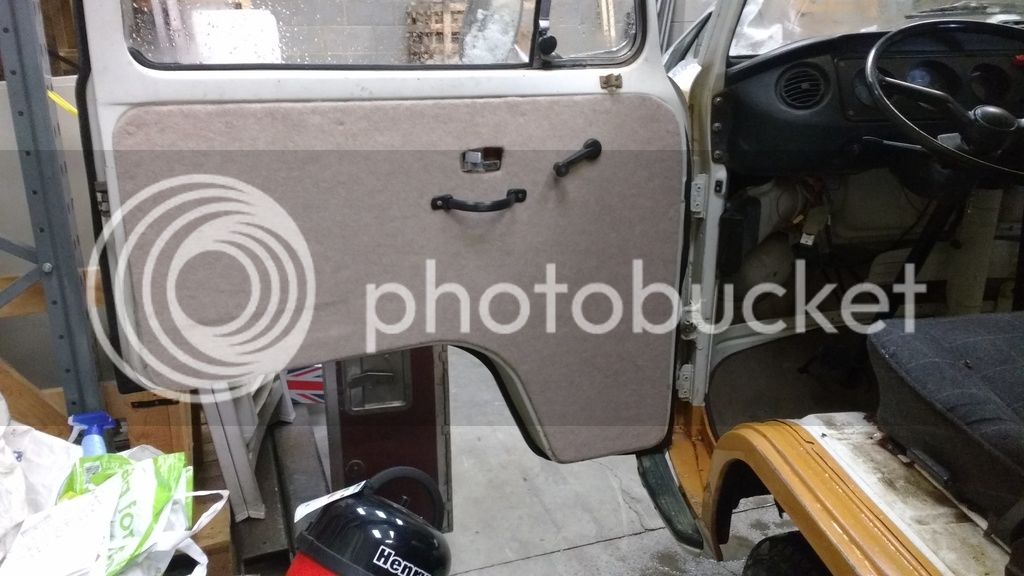
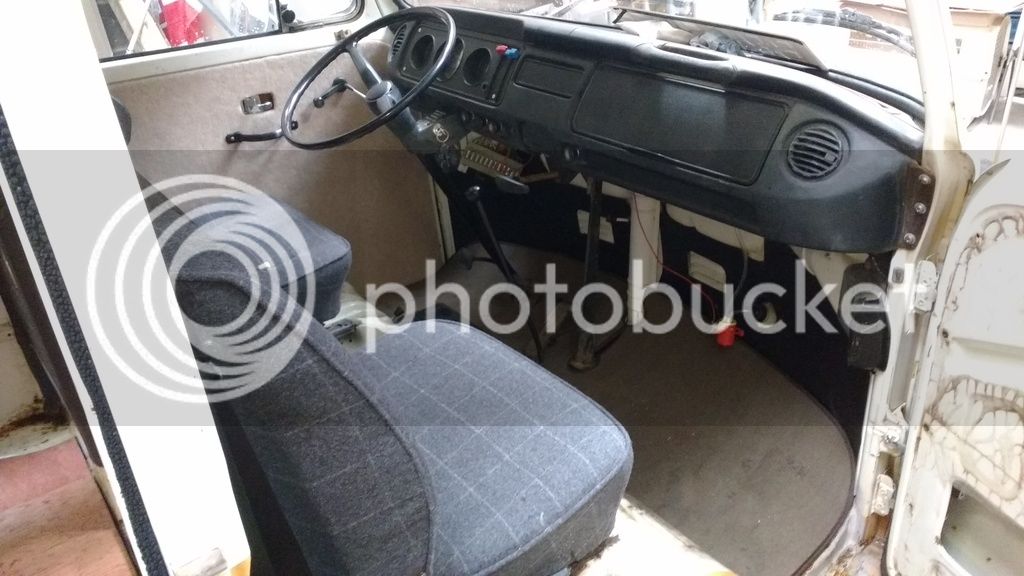
Also had a bit of time to trial fit a door card, they're not perfect but only designed to do the job until I can get a proper set upholstered.
Kick panels in too, need to relocate the washer pump somewhere less intrusive! Only meant to have it there for the MOT but not been bothered to move it!
This morning got off to a ropey start as it was snowing like mad and there doesn't seem to be air coming up to the windscreen - will investigate that later but preparing for the worst as I think the main heater pipe up the middle of the bus is rotten. The only real rust on the van too!
I'd had a few bits delivered a couple of days ago so got them fitted first thing, new sun visors and a new rear view mirror as the visors had been completely toasted and the mirror was gone.
Only slight issue is that the visor seems to be a little long, but I'll whip it off and trim it so it fits - maybe a later visor or something? Only a minor problem...
Next job was to clear the back out ready to cut some panels for the floor. I'm using 2 layers of 6mm ply, I know most use 6mm and then 9mm but I think that's a bit overkill for me, I'll be using a heavyish commercial vinyl floor which is well sturdy so that'll keep everything in check once it's all fitted!
Measured up and had some ply cut by a local firm, then I trimmed and cut to shape to fit the floor - a productive couple of hours this morning definitely!
I did get the top layer on too but forgot to take a photo!
Also had a bit of time to trial fit a door card, they're not perfect but only designed to do the job until I can get a proper set upholstered.
Kick panels in too, need to relocate the washer pump somewhere less intrusive! Only meant to have it there for the MOT but not been bothered to move it!


$21.60
$29.91
ハセガワ Hasegawa HMCC11 1:24 Scale VW Type 2 Pick-Up Truck Model Building Kits
Amazon Japan


$27.95 ($13.98 / Count)
Marketplace Auto Parts Window Crank Handle Set of 2 - Chrome with Black Knob - Compatible with 1968-1978 Volkswagen Beetle
Parts Geek LLC


$42.47
Tamiya 51616 VW Bus Type 2 (T1) Remote Control Car Accessory Body RC Model Making
Hobby Etc | Authorized ✅


bertiethebus
Well-known member
My next challenge! Looking good buddy.
Love where your fuse box is hanging :lol: mine is being a right pig! I took it out the cradle to diddle with and when I put it back, the lights horn washer and wipers stop working... And the indicators :roll: take it back out and bing! Back on..... I hate wiring :evil:
Did you insulate the flooring at all?
georgeyv
Well-known member
- Joined
- Apr 5, 2015
- Messages
- 495
- Reaction score
- 0
The fuse box is a pain in the arse! It won't go back where it's supposed to! Going to get all the little wiring bits sorted that I need to (take a proper fused feed for the washer pump and radio) once I've done that I'll try get it back into place, it just seems to have so much wiring above it that it won't go high enough up to come back into it's little cradle! though I know I can't just have it hanging down by my ankles!!
I've not insulated the floor yet, got a little bit of welding to sort where a seat mount has rotted through and once that's done I'll insulate with the silver bubble foil stuff and then lay the floor on top. Not sure how best to fix it down, I hate the fact that I'll probably have to screw it down, it seems a rough solution and once the vinyl is on top it's a complete bugger to take up if it ever needs to! but we'll see...
I've not insulated the floor yet, got a little bit of welding to sort where a seat mount has rotted through and once that's done I'll insulate with the silver bubble foil stuff and then lay the floor on top. Not sure how best to fix it down, I hate the fact that I'll probably have to screw it down, it seems a rough solution and once the vinyl is on top it's a complete bugger to take up if it ever needs to! but we'll see...
georgeyv
Well-known member
- Joined
- Apr 5, 2015
- Messages
- 495
- Reaction score
- 0
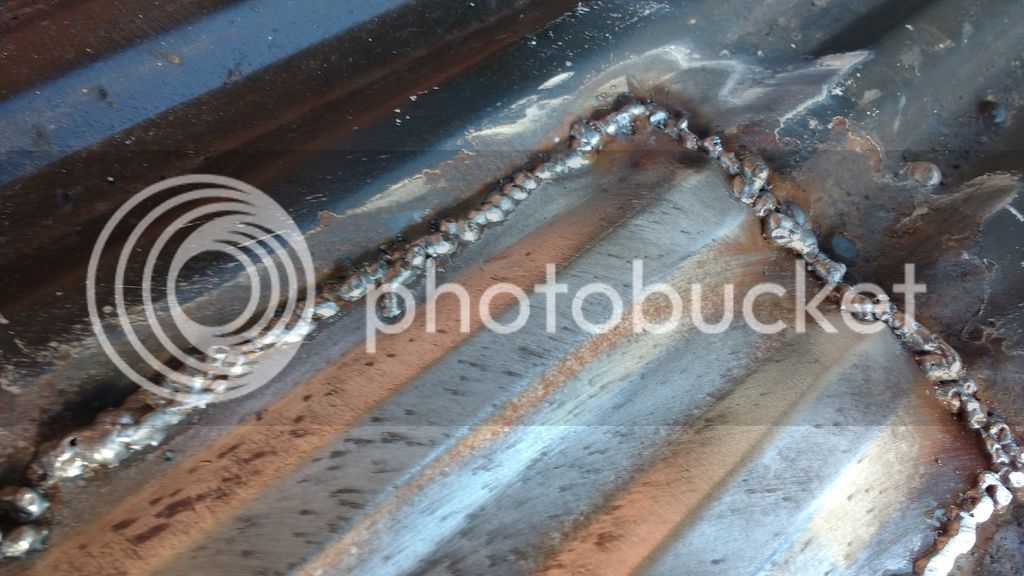
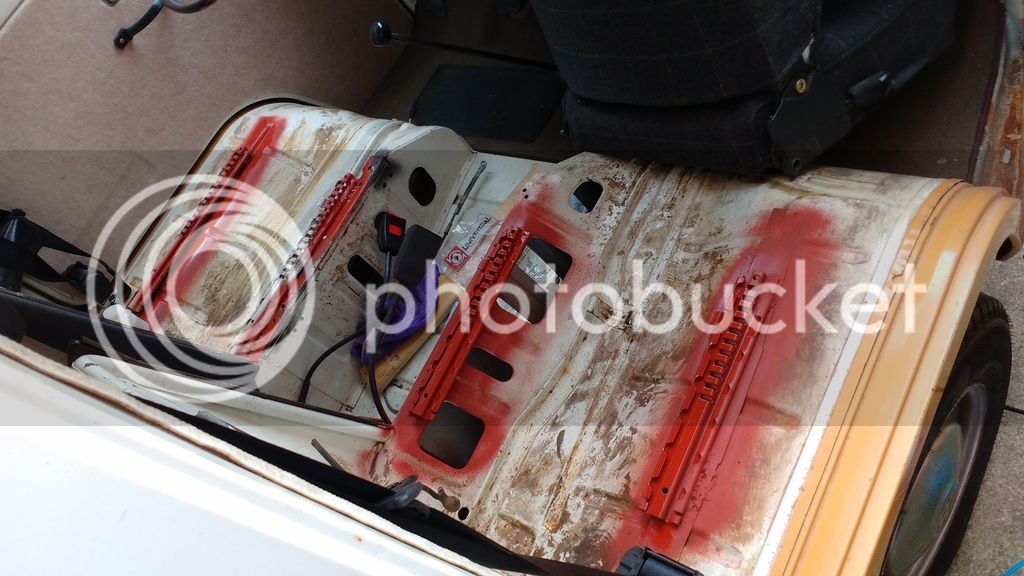
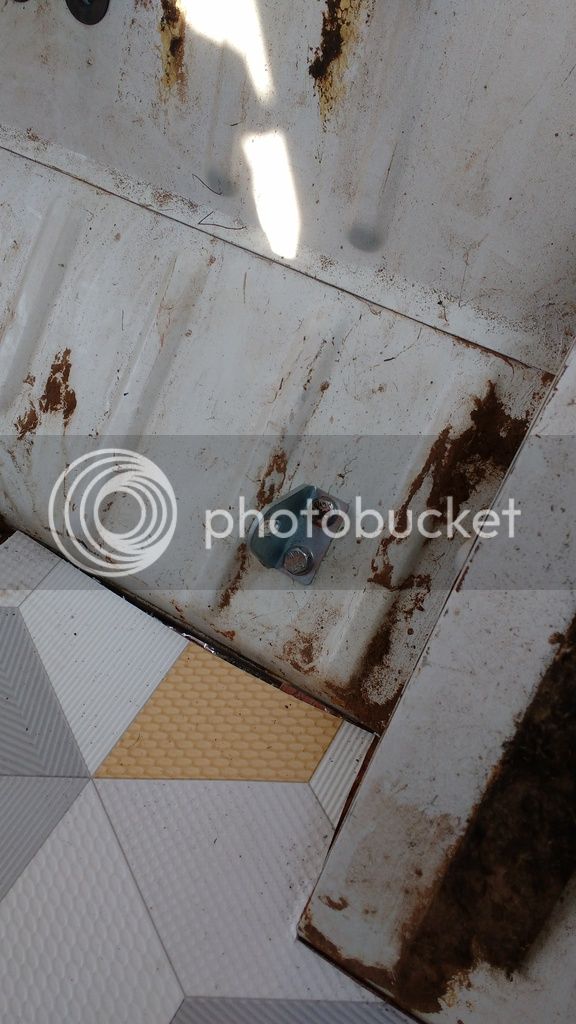
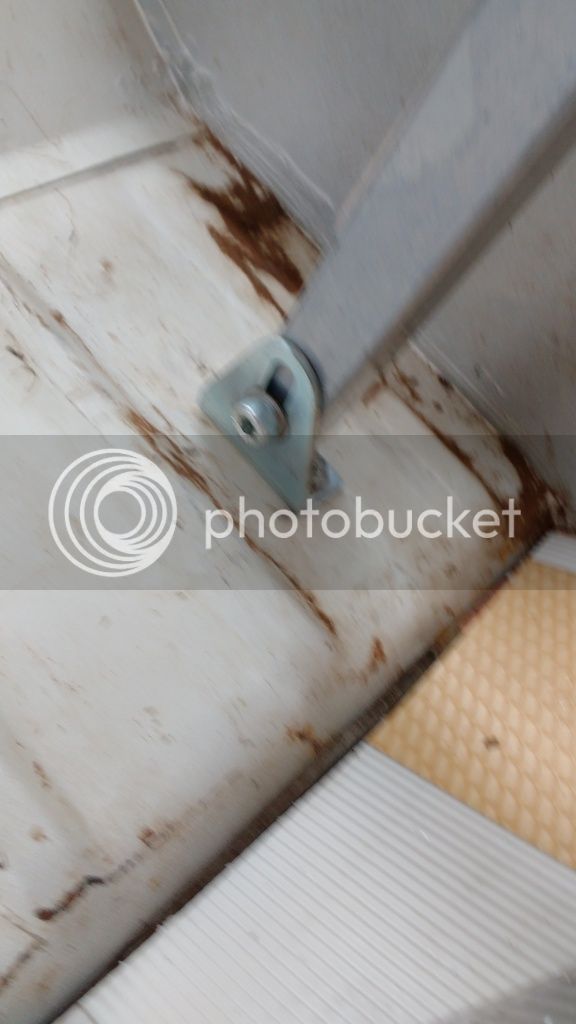
I am shocking at welding, but you've got to start somewhere!
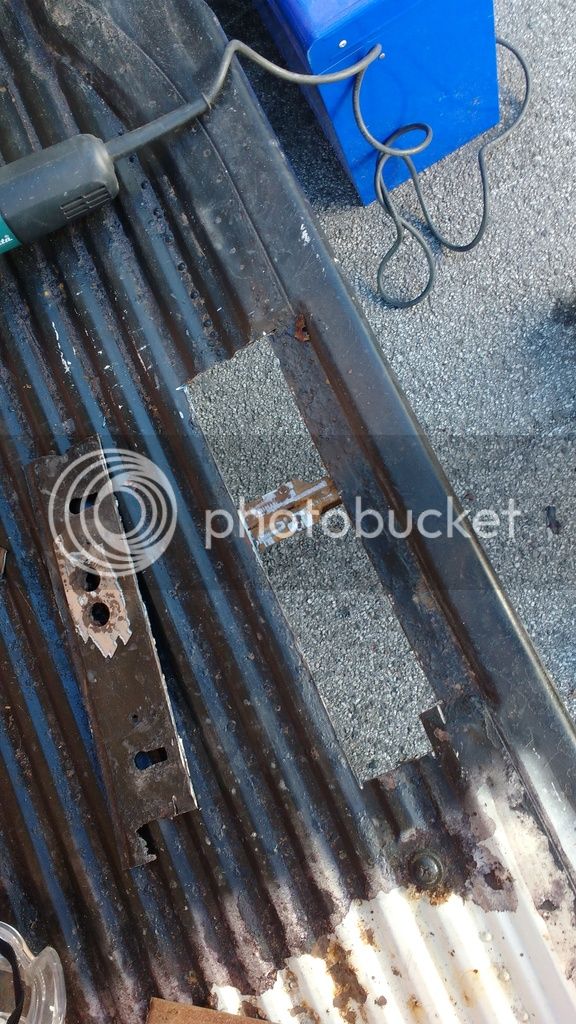
I had a rotten seat mount so cut it out, had a cut of floor that I got from another member (cheers Marshy!) - I cut that to size and butchered it with a welder. It stuck together pretty good and cleaned up OK, I'd rather have a pretty ropey looking bit of solid metal than a pretty rotten looking seat mount any day!
It had obviously had crap sat inside it for years and rotted through, a shame as it's the only actual rotten bit of the bus!
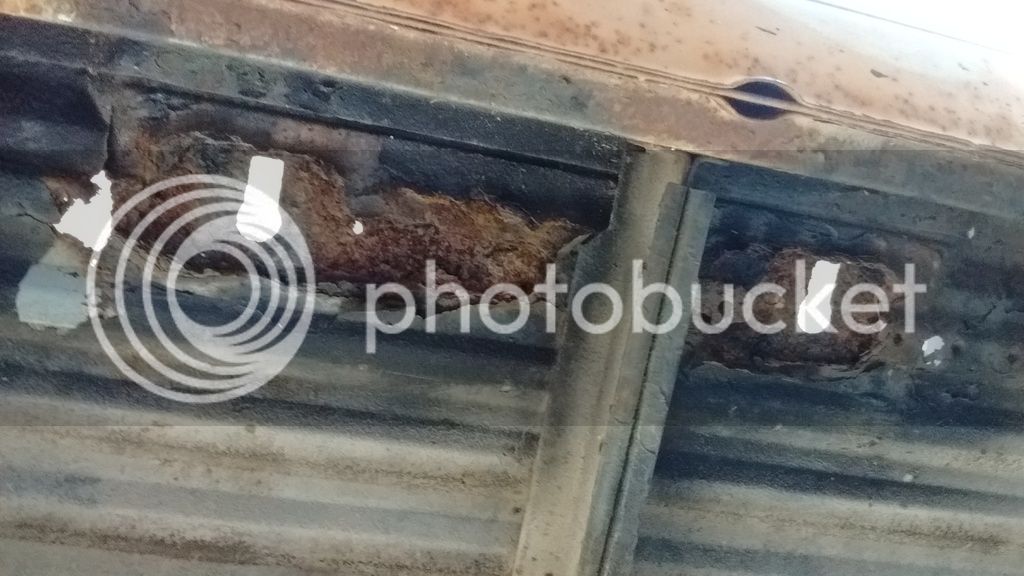
I didn't realise quite how quickly you go through cutting discs, maybe I was being a bit rough...
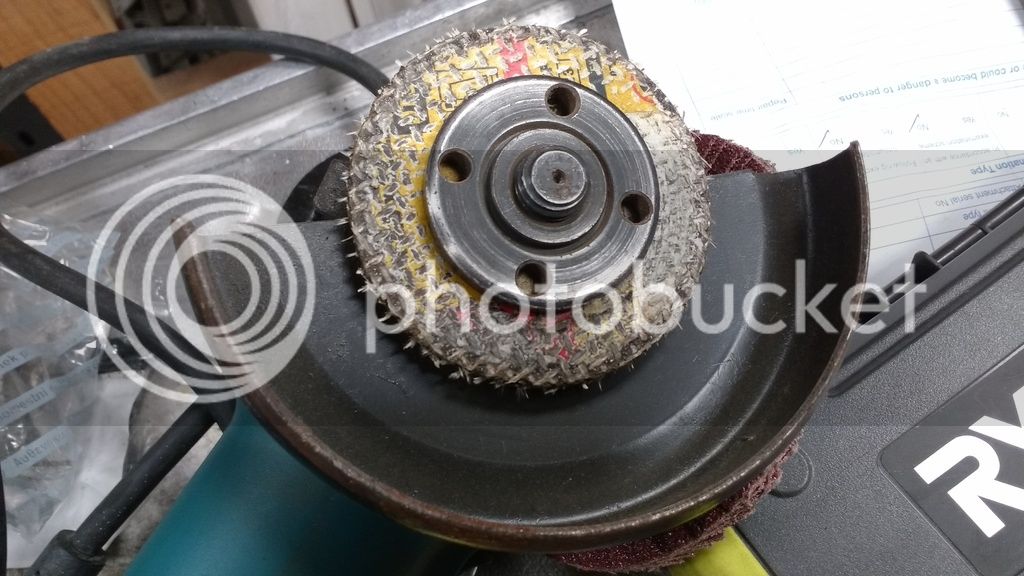
There were a couple of tiny holes I'd missed so when I went over it with a flap disc I filled them in and ground them down again.
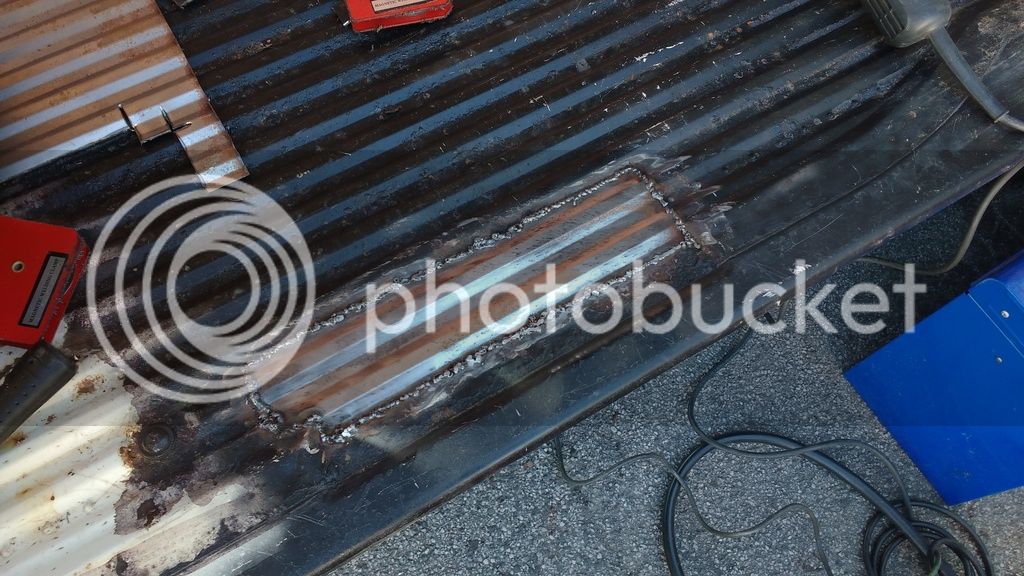
It didn't end up entirely flush, I wasn't too upset as I will be laying the floor over the top, so the important bit was that it is solid and watertight!
It was my first attempt at welding any kind of bodywork, I've only ever tacked stuff together and put big blobs on thick steel before, it was infuriating how easy it was to blow through, I think I ended up with the power backed off a little too much and the penetration wasn't great in spots, but I was fairly pleased with the results after I'd got most of the way round!
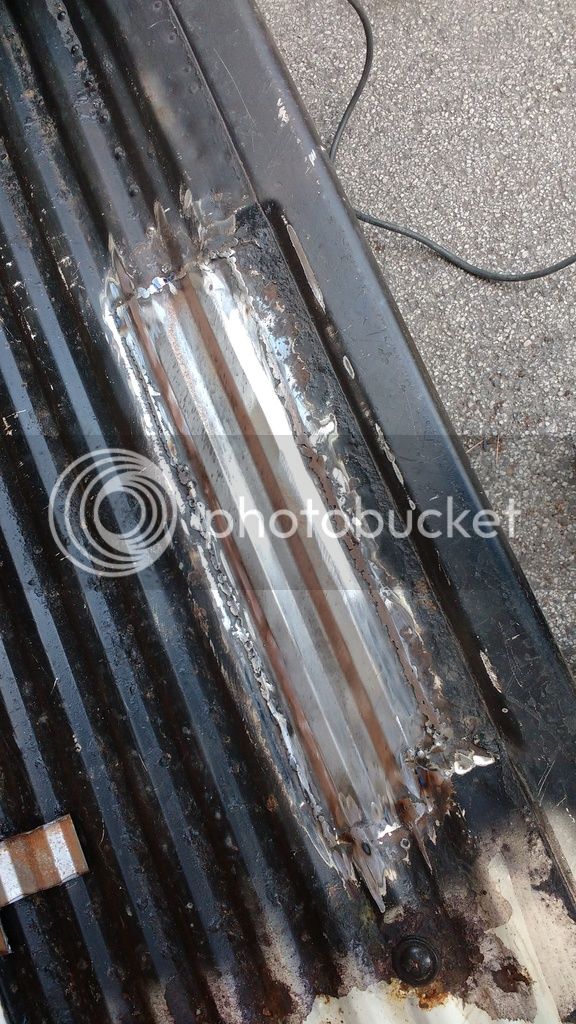
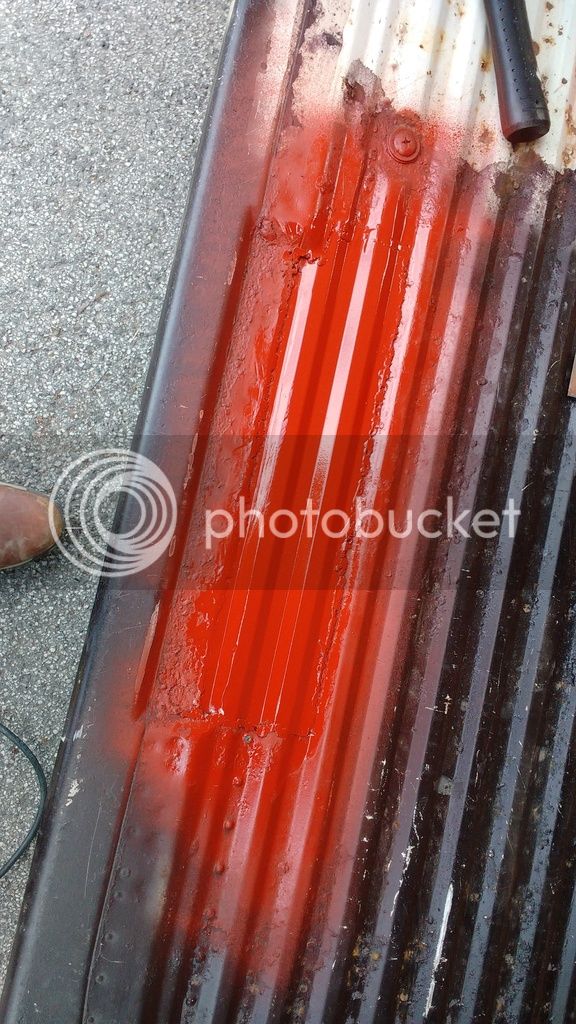
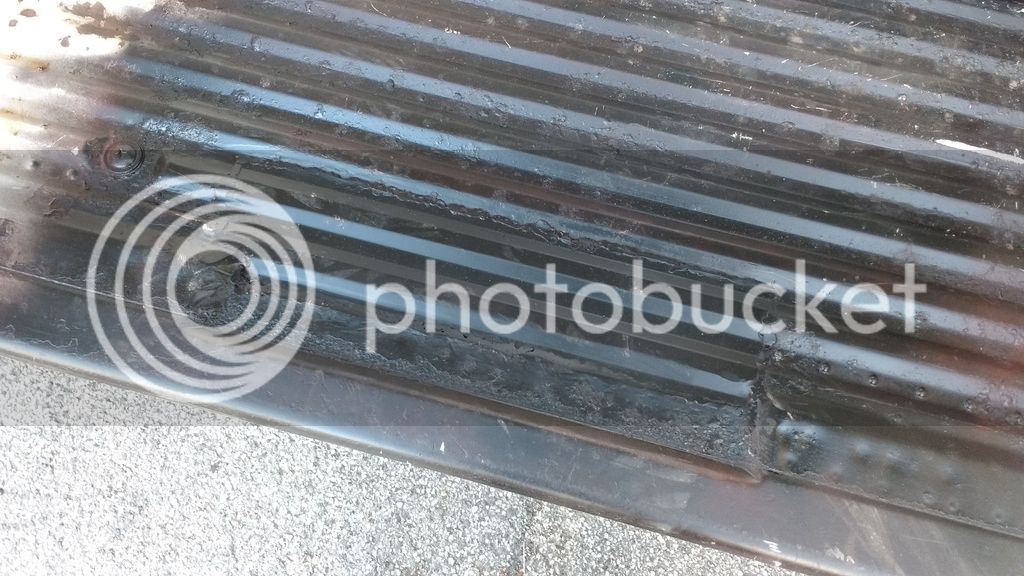
Put some red etch primer on it and let that dry, then stuck some satin black over it.
I'll probably take the interior out next winter and take it into the unit and strip the floor completely back to bare metal and do a proper factory white job on it, but to make it usable this year I left it black.
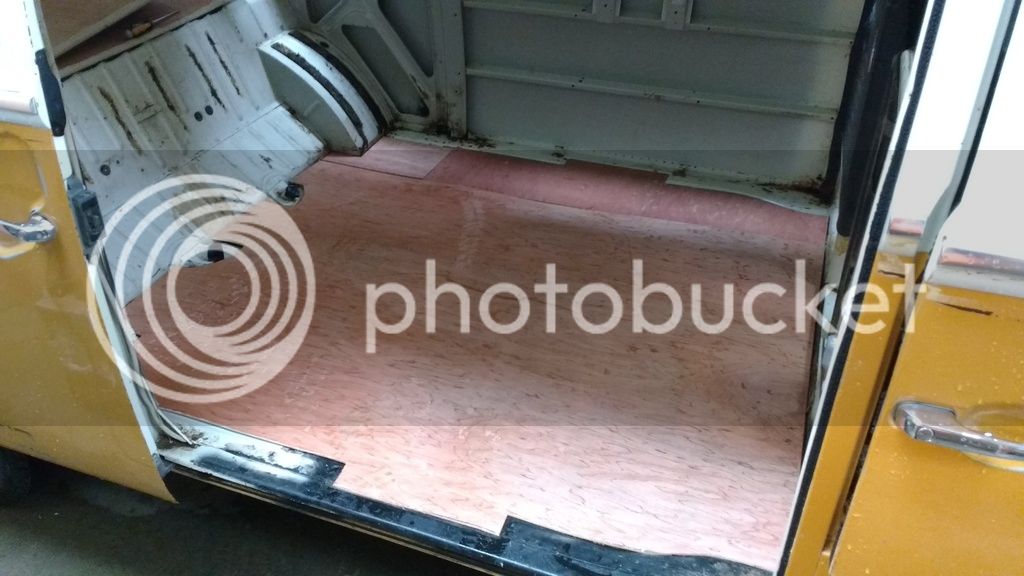
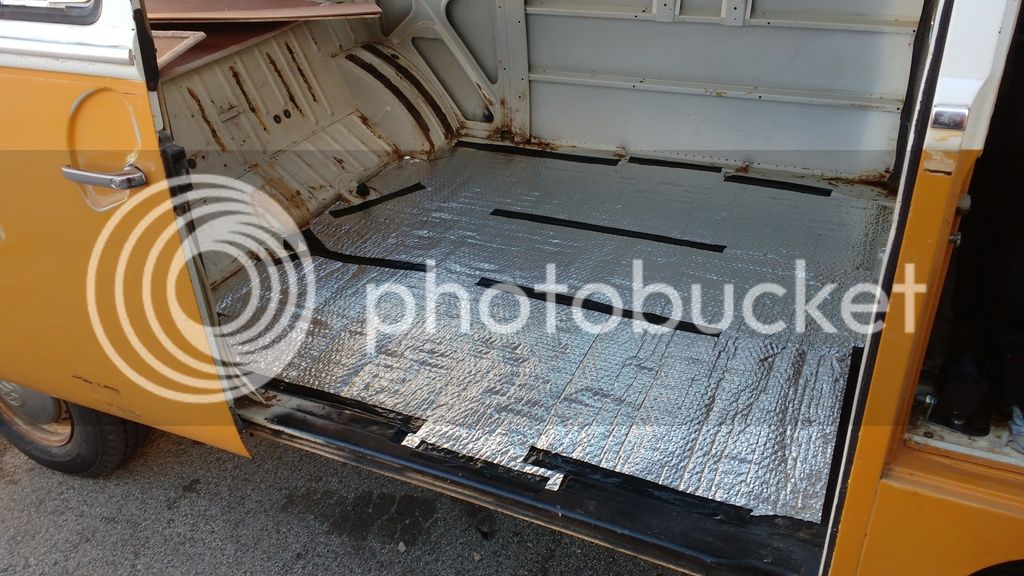
Finally cut some silver bubble insulation (thermawrap, £20 ish from screwfix and enough to do the cargo floor and cab floor. 2 rolls would probably do the whole van, it's not a perfect solution on it's own but will be an improvement over ply straight onto the metal floor!) for the floor and put the ply in ready to be screwed down, I'll do that later this week.
Next is fitting vinyl floor and fitting the bed! Also my Mrs was due 2 days ago so kind of waiting for that to happen too!
I had a rotten seat mount so cut it out, had a cut of floor that I got from another member (cheers Marshy!) - I cut that to size and butchered it with a welder. It stuck together pretty good and cleaned up OK, I'd rather have a pretty ropey looking bit of solid metal than a pretty rotten looking seat mount any day!
It had obviously had crap sat inside it for years and rotted through, a shame as it's the only actual rotten bit of the bus!
I didn't realise quite how quickly you go through cutting discs, maybe I was being a bit rough...
There were a couple of tiny holes I'd missed so when I went over it with a flap disc I filled them in and ground them down again.
It didn't end up entirely flush, I wasn't too upset as I will be laying the floor over the top, so the important bit was that it is solid and watertight!
It was my first attempt at welding any kind of bodywork, I've only ever tacked stuff together and put big blobs on thick steel before, it was infuriating how easy it was to blow through, I think I ended up with the power backed off a little too much and the penetration wasn't great in spots, but I was fairly pleased with the results after I'd got most of the way round!
Put some red etch primer on it and let that dry, then stuck some satin black over it.
I'll probably take the interior out next winter and take it into the unit and strip the floor completely back to bare metal and do a proper factory white job on it, but to make it usable this year I left it black.
Finally cut some silver bubble insulation (thermawrap, £20 ish from screwfix and enough to do the cargo floor and cab floor. 2 rolls would probably do the whole van, it's not a perfect solution on it's own but will be an improvement over ply straight onto the metal floor!) for the floor and put the ply in ready to be screwed down, I'll do that later this week.
Next is fitting vinyl floor and fitting the bed! Also my Mrs was due 2 days ago so kind of waiting for that to happen too!
Hi georgyv, nice to see the donated floor in use lol, looking good. Hope you and family good and the new arrival doesn't give you too many sleepless nights!
Vans looking good, think you may need to give me your overriders tho... Lol
Vans looking good, think you may need to give me your overriders tho... Lol
Lee C
Well-known member
Your welding looks champion man!!!!!
Good luck with the new addition to the family too!!!!
Good luck with the new addition to the family too!!!!
georgeyv
Well-known member
- Joined
- Apr 5, 2015
- Messages
- 495
- Reaction score
- 0
Cleaned up the welds on the seat runners and stuck some red primer on. I'll respray the cab area in summer when I have a free day and some money for the right paint!
Currently sat waiting at home before my Mrs goes and gets induced - making time for a few jobs on the bus while we wait though!
Currently sat waiting at home before my Mrs goes and gets induced - making time for a few jobs on the bus while we wait though!
bertiethebus
Well-known member
Hey bud, what happened to the Westy interior?
georgeyv
Well-known member
- Joined
- Apr 5, 2015
- Messages
- 495
- Reaction score
- 0
bertiethebus said:Hey bud, what happened to the Westy interior?
It's in another bus over the other side of Leeds -
http://forum.earlybay.com/viewtopic.php?f=2&t=68119&start=40
Slammed72/Adam had it when I realised I couldn't really make use of it and we had our little one on the way!
georgeyv
Well-known member
- Joined
- Apr 5, 2015
- Messages
- 495
- Reaction score
- 0
I've put the door seal situation to one side for now and cracked on a bit more with the cargo floor/ a few little jobs.
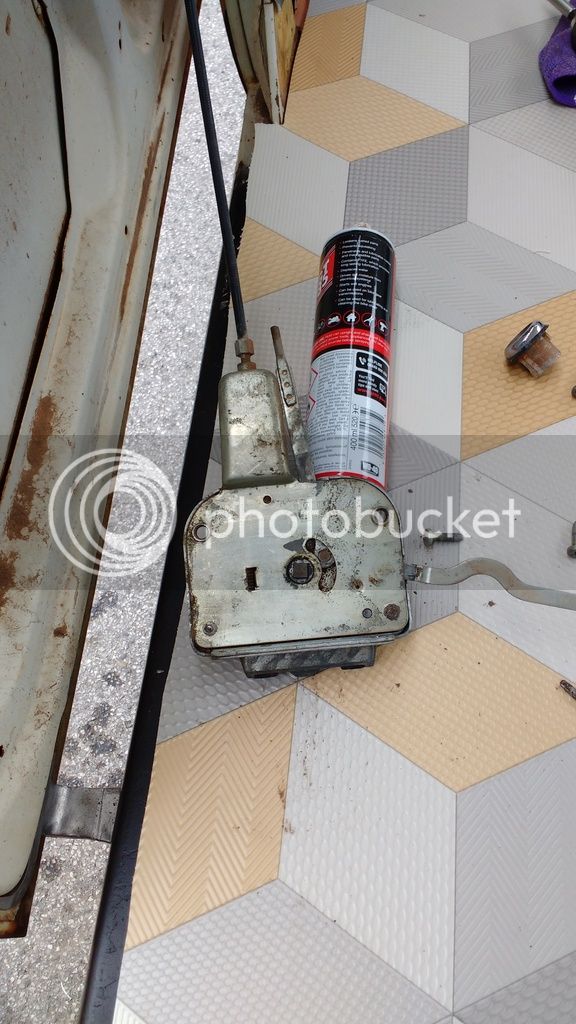
my sliding door wasn't connected up right, the bar that operates the latching mech at the rear of the door was missing so I got a spare from thegatekeeper and got it fitted, cleaned the locks up and now the door shuts properly and latches closed!
I need to fit a new sliding door seal and then I'll fit the track cover properly and hopefully get some deluxe trim on there too.
After the welding got done I insulated it with bubble foil stuff and then filled the recess with 6mm ply, laid 6mm ply on top again and followed that with some regular cushioned vinyl.
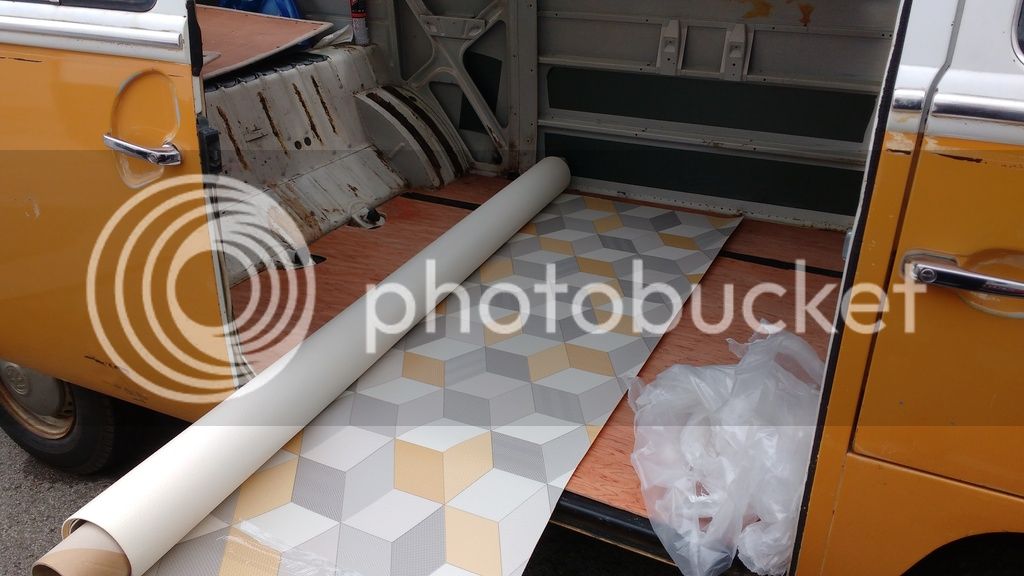
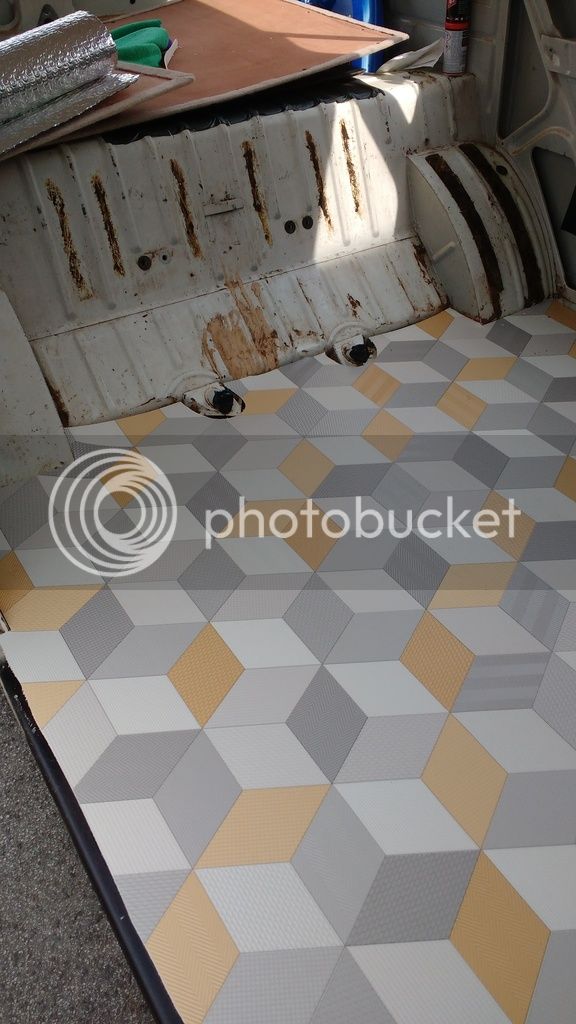
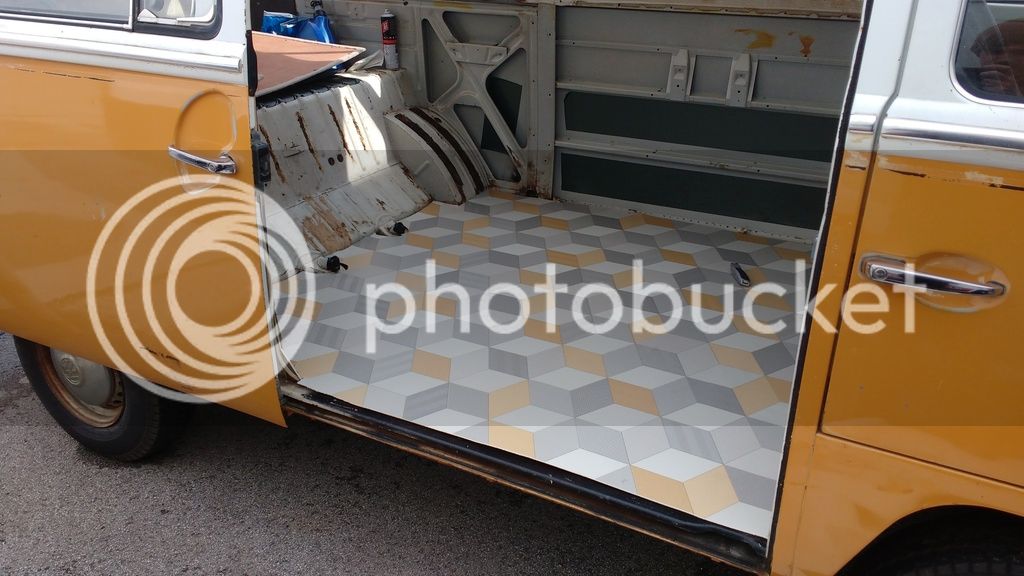
I know alot of people use 6mm/9mm but I felt it was a bit overkill for me. Got to clean up the rear bulkhead bit and probably trim it with some carpet before I fit seatbelts and my full width bed.
my sliding door wasn't connected up right, the bar that operates the latching mech at the rear of the door was missing so I got a spare from thegatekeeper and got it fitted, cleaned the locks up and now the door shuts properly and latches closed!
I need to fit a new sliding door seal and then I'll fit the track cover properly and hopefully get some deluxe trim on there too.
After the welding got done I insulated it with bubble foil stuff and then filled the recess with 6mm ply, laid 6mm ply on top again and followed that with some regular cushioned vinyl.
I know alot of people use 6mm/9mm but I felt it was a bit overkill for me. Got to clean up the rear bulkhead bit and probably trim it with some carpet before I fit seatbelts and my full width bed.
phil_n
Well-known member
That vinyl is really cool. The colours go really well with the bus too.
bertiethebus
Well-known member
Agreed it looks sweet! 8)phil_n said:That vinyl is really cool. The colours go really well with the bus too.
georgeyv
Well-known member
- Joined
- Apr 5, 2015
- Messages
- 495
- Reaction score
- 0
Fitted the bed today, will pull it out to clean and trim the rear section but wanted to get it fitted up.
It's a volkswares bed and had it not been a great deal I'd have gone for a Rusty Lee. I found that fitting wasn't exactly intuitive, I put the brackets on the back the other way round to what I was supposed to so the bolts didn't go through the ribs on the back. The metal here is incredibly thin so will make a strengthening plate for each side when I remove and re-fit.
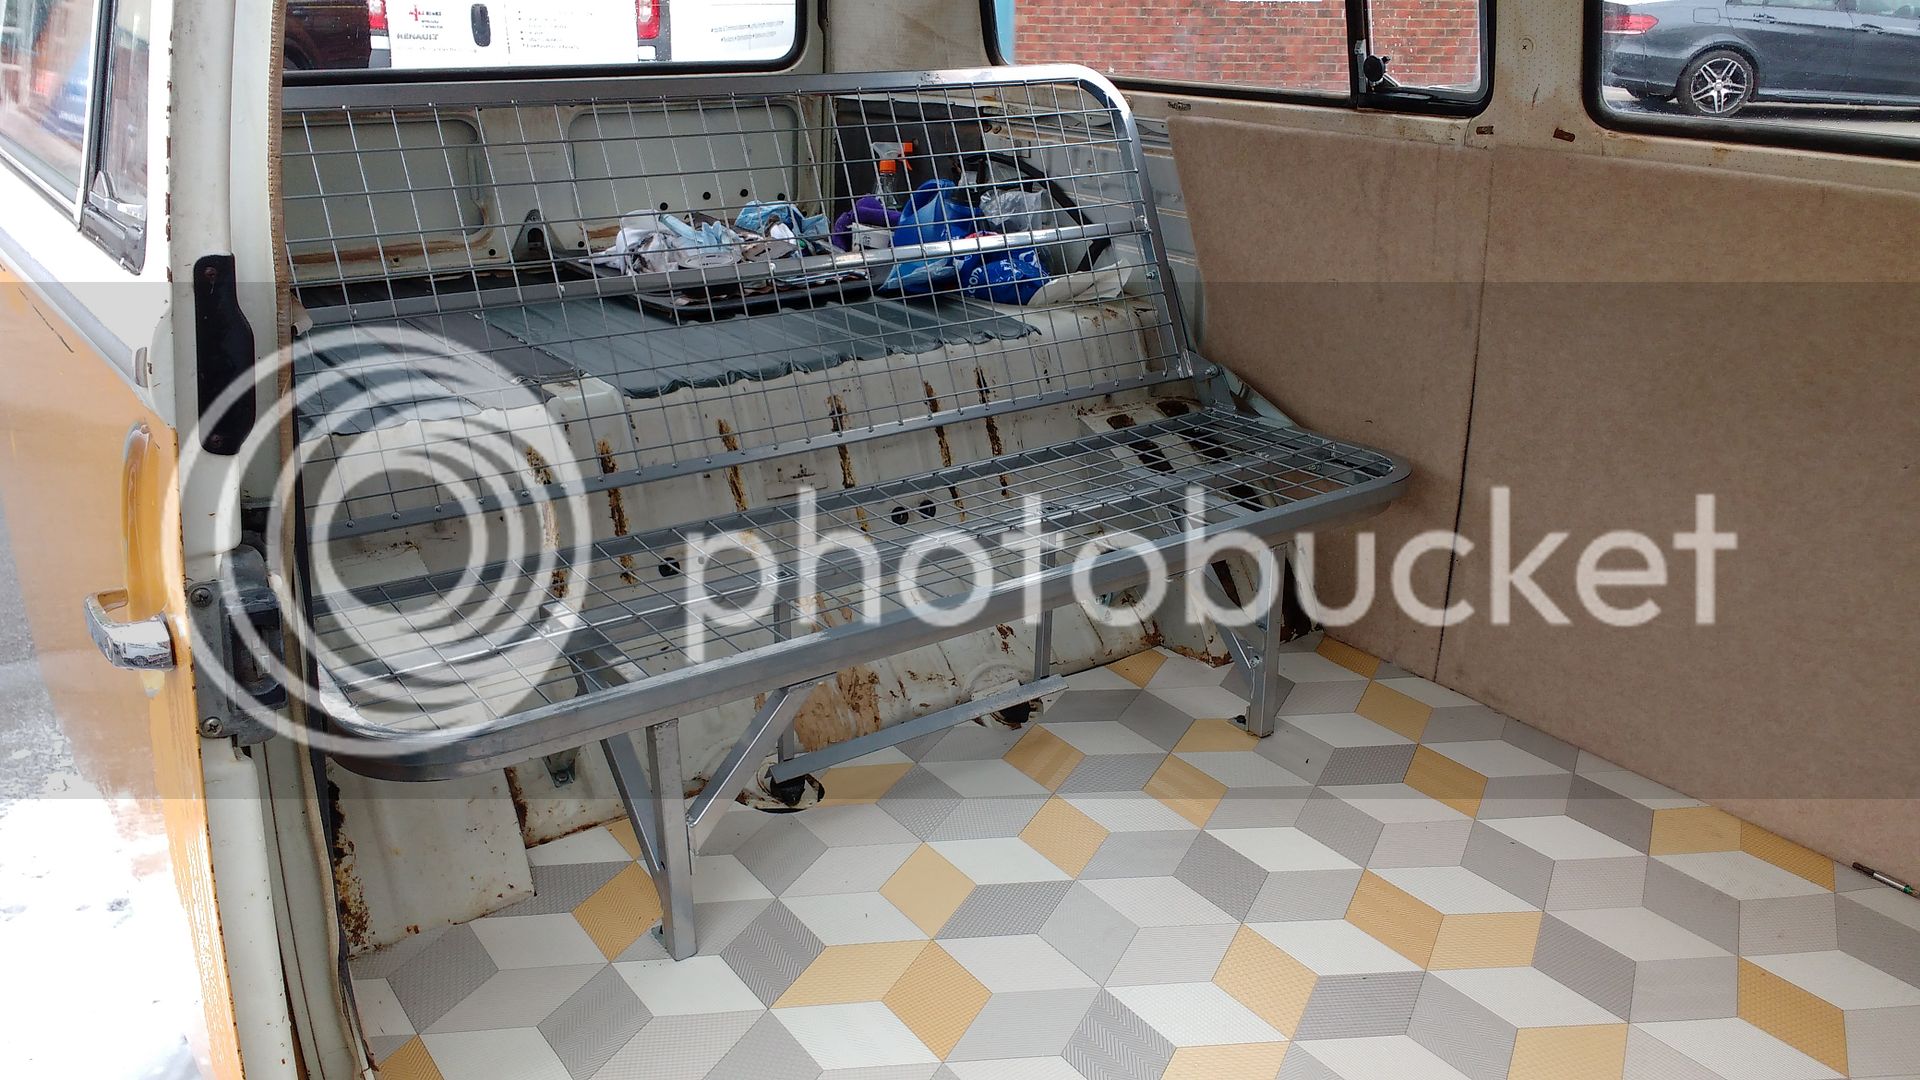
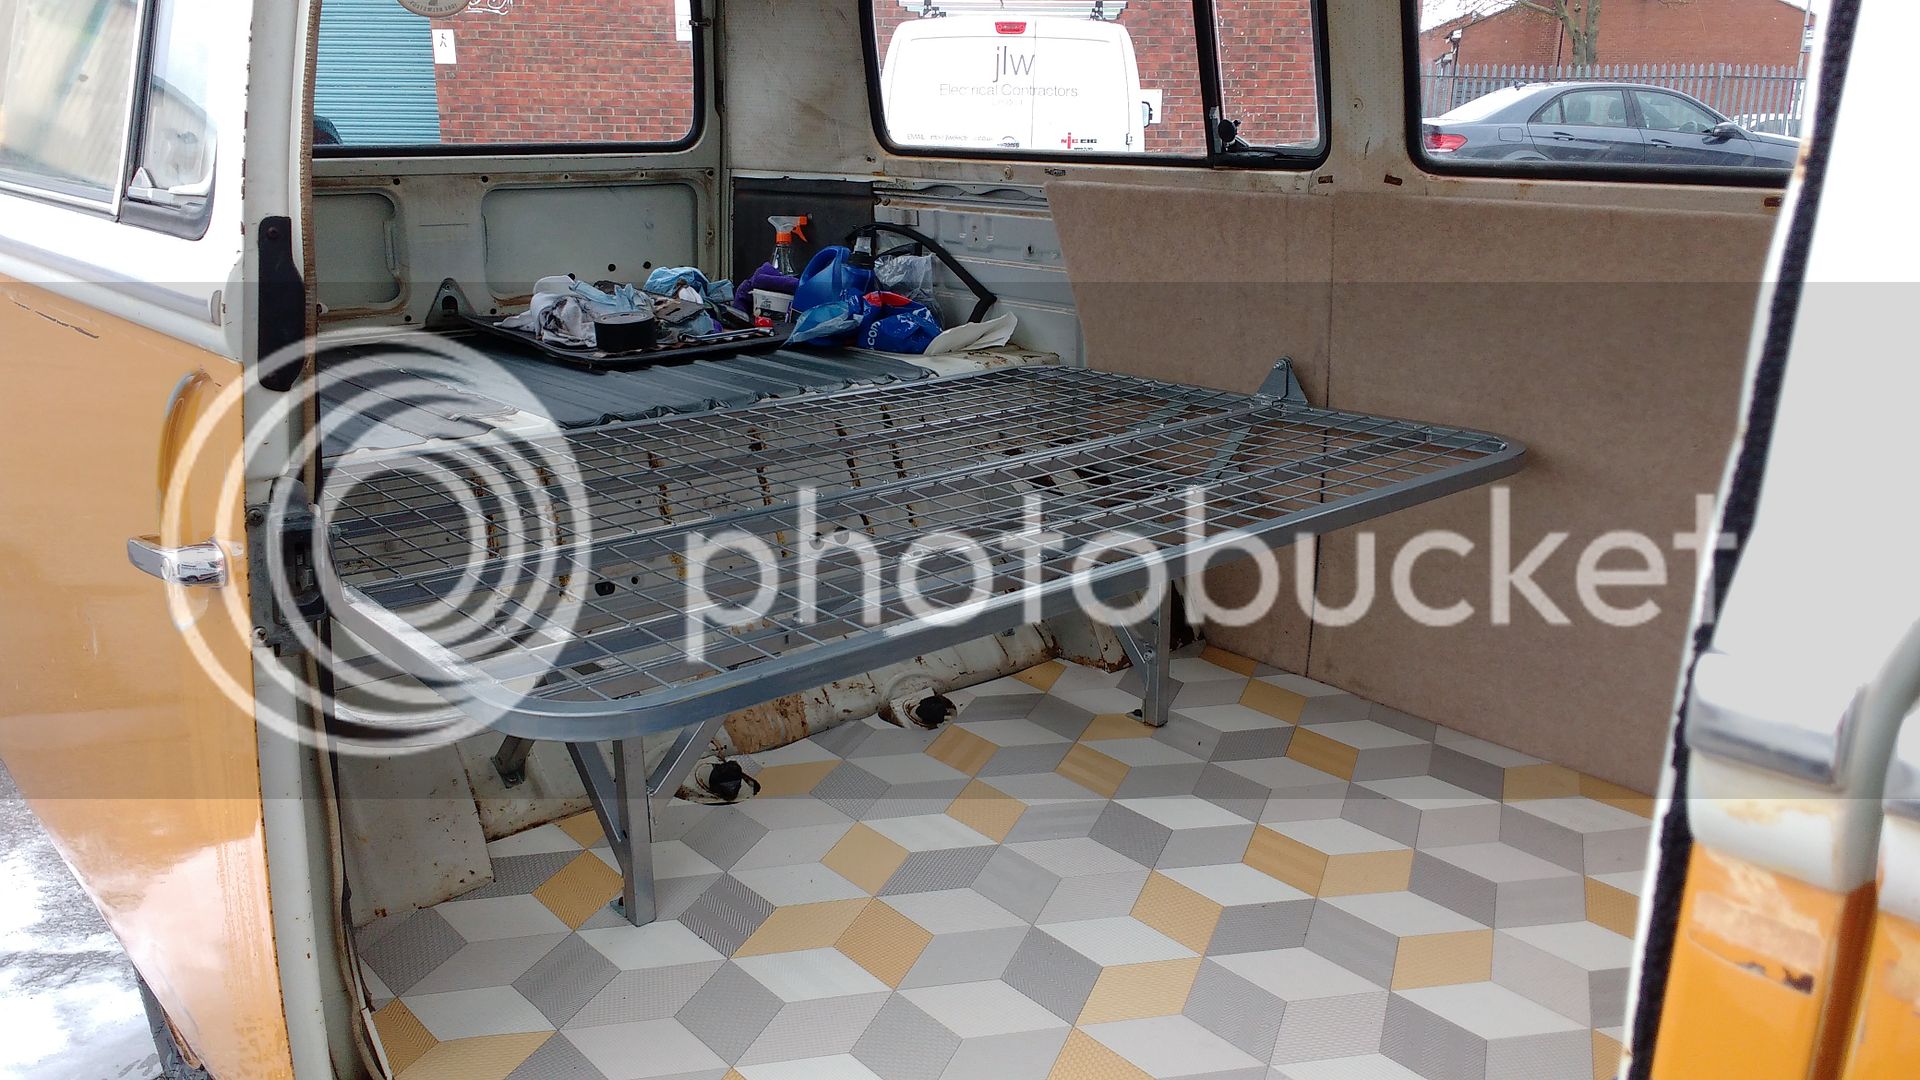
It's a volkswares bed and had it not been a great deal I'd have gone for a Rusty Lee. I found that fitting wasn't exactly intuitive, I put the brackets on the back the other way round to what I was supposed to so the bolts didn't go through the ribs on the back. The metal here is incredibly thin so will make a strengthening plate for each side when I remove and re-fit.
Similar threads
Vehicle For Sale
1968 Bay window T2 Dreamy
- Replies
- 3
- Views
- 304
Vehicle For Sale
1971 Danbury £14,500
- Replies
- 0
- Views
- 413
Vehicle For Sale
Early Bay Deluxe 1971
- Replies
- 5
- Views
- 2K
- Replies
- 0
- Views
- 1K
- Replies
- 1
- Views
- 552