You are using an out of date browser. It may not display this or other websites correctly.
You should upgrade or use an alternative browser.
You should upgrade or use an alternative browser.
1971 Deluxe Import - A blank canvas
- Thread starter georgeyv
- Start date


Help Support Early Bay Forum:
This site may earn a commission from merchant affiliate
links, including eBay, Amazon, and others.
georgeyv
Well-known member
- Joined
- Apr 5, 2015
- Messages
- 495
- Reaction score
- 0
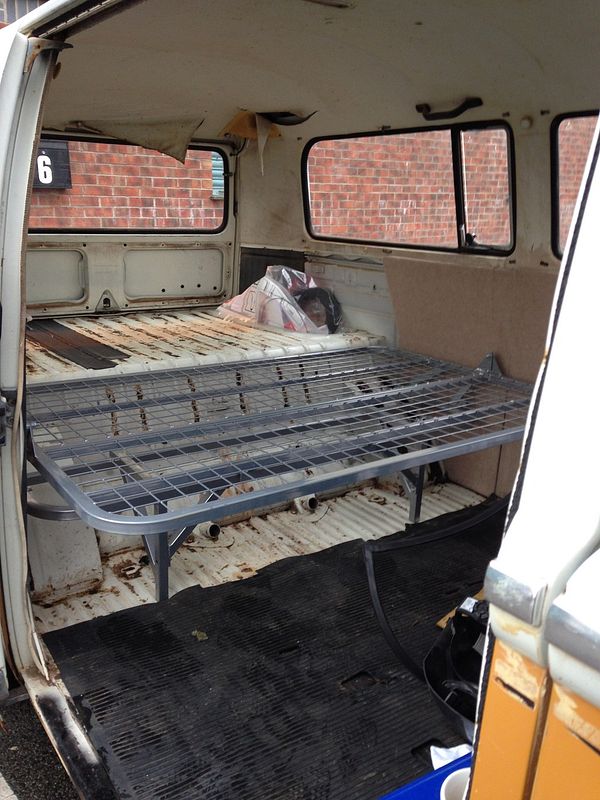
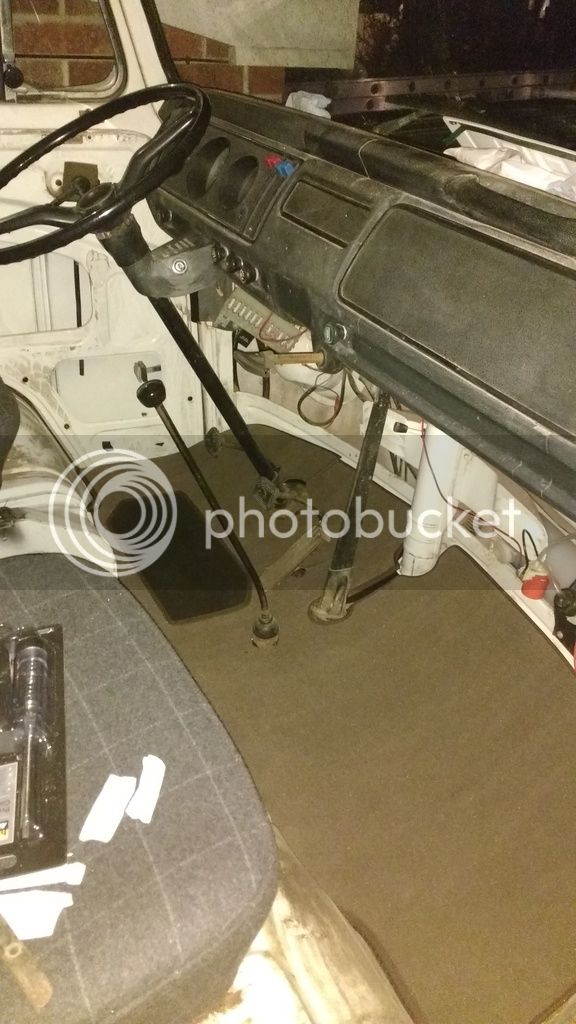
Pulled the van into the unit at work today to get some jobs out of the way. Got the drivers side seatbelt sorted and also removed the interior as the incoming baby has scuppered my plans to have a Campmobile interior. Now going for a full width bed and more of a family day out van than a full blown camper.
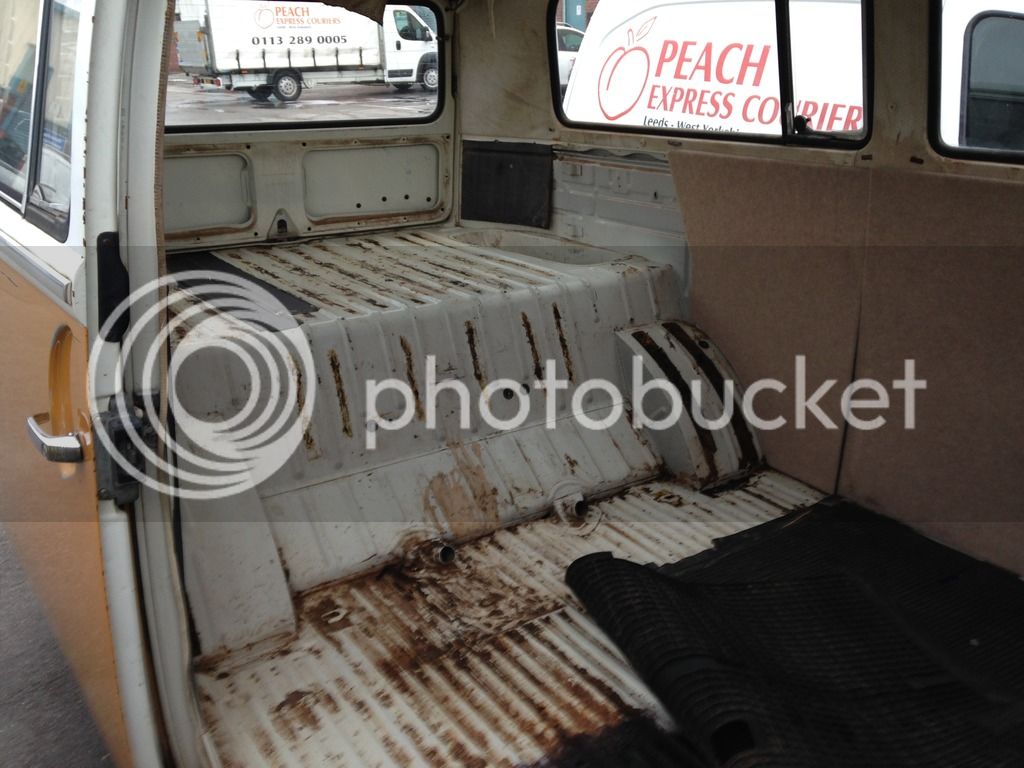
Got a bit of cargo floor welding to sort and alot more cleaning to do before putting anything new in, Even though it's solid I forgot how much of the cargo floor is scabby and in need of a good grind and repaint.
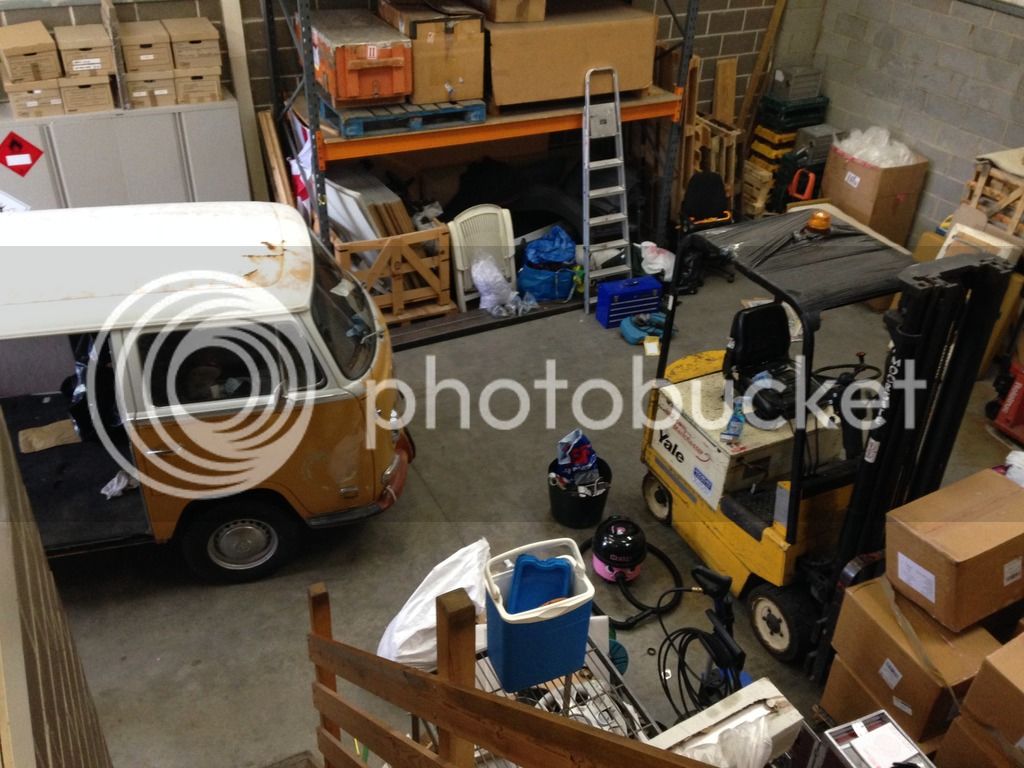
Going to tackle the cargo floor welding myself - I've been screwed over by so many 'professional' welders it's ridiculous. Gveeeeeeee has kindly loaned me his welder (on very short term, about 2 months ago!) which has proved incredibly useful so far. Obviously it'll be returned fully re-gassed and wired! Currently runs on the little disposable bottles so may send it back with a big beer gas bottle if I can find one locally!
Got a bit of cargo floor welding to sort and alot more cleaning to do before putting anything new in, Even though it's solid I forgot how much of the cargo floor is scabby and in need of a good grind and repaint.
Going to tackle the cargo floor welding myself - I've been screwed over by so many 'professional' welders it's ridiculous. Gveeeeeeee has kindly loaned me his welder (on very short term, about 2 months ago!) which has proved incredibly useful so far. Obviously it'll be returned fully re-gassed and wired! Currently runs on the little disposable bottles so may send it back with a big beer gas bottle if I can find one locally!
georgeyv
Well-known member
- Joined
- Apr 5, 2015
- Messages
- 495
- Reaction score
- 0
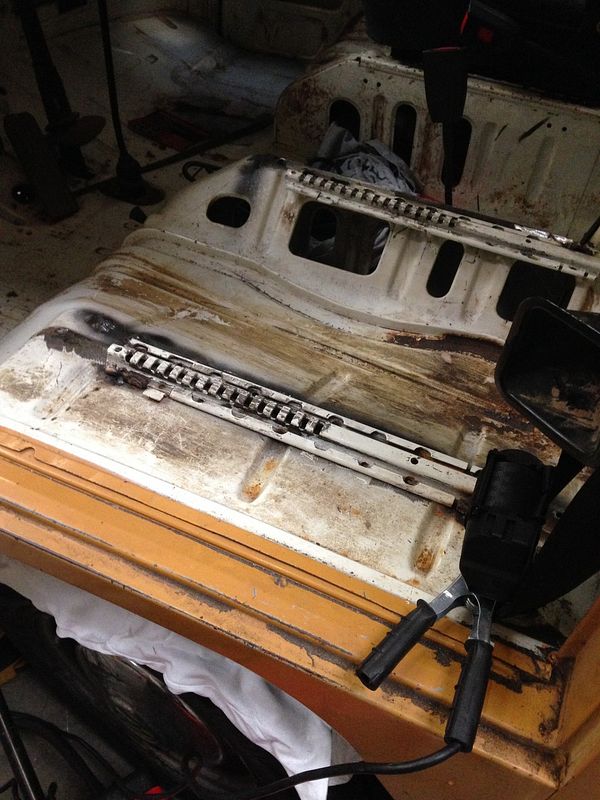
Had some bits to do on the van this weekend, the drivers seat was just tacked into place and realistically needed some proper welding. Also, it was covering up a multitude of sins where I drilled through the seat tub when removing the original seat rails to fit the new ones.
I did a bad job of the drilling, had about 12 holes to fill.
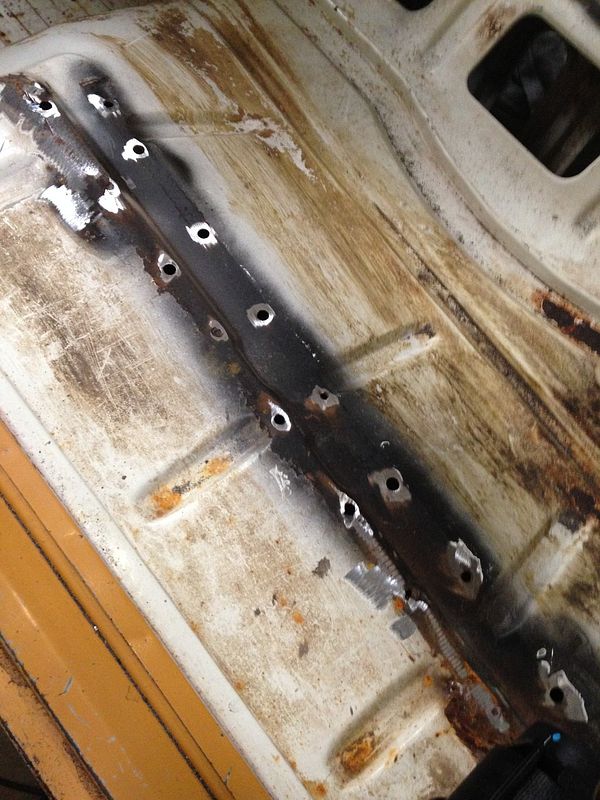
filled them all and ground them flush. I will be painting the cab floor/seat tubs at some point over winter so not too bothered about the finish at this moment in time. Just wanted to get it solid and sorted.
Tacked the new rails into place and added a few inches of seam weld down each side at the front and back and then filled the original plug welds too.
Finally pulled it out of the unit to drive back home, Still need to polish this side of the van, hoping the handprints stay on there from the PO.
Also need to adjust the tailgate, the lock doesnt seem to engage when it shuts so going to remove and clean/rebuild.

I did a bad job of the drilling, had about 12 holes to fill.
filled them all and ground them flush. I will be painting the cab floor/seat tubs at some point over winter so not too bothered about the finish at this moment in time. Just wanted to get it solid and sorted.
Tacked the new rails into place and added a few inches of seam weld down each side at the front and back and then filled the original plug welds too.
Finally pulled it out of the unit to drive back home, Still need to polish this side of the van, hoping the handprints stay on there from the PO.
Also need to adjust the tailgate, the lock doesnt seem to engage when it shuts so going to remove and clean/rebuild.
georgeyv
Well-known member
- Joined
- Apr 5, 2015
- Messages
- 495
- Reaction score
- 0
slammed72 said:Looks great mate ! Floor looks similar to mine hoping it cleans up good.
Good work with the seat rails though !
I haven't taken the grinder to mine to get the surface rust off yet but it seems pretty solid aside from underneath one of the seat mounts which has rotted out, I'll chop that out and replace it soon hopefully!


$27.95 ($13.98 / Count)
Marketplace Auto Parts Window Crank Handle Set of 2 - Chrome with Black Knob - Compatible with 1968-1978 Volkswagen Beetle
Parts Geek LLC


$42.47
Tamiya 51616 VW Bus Type 2 (T1) Remote Control Car Accessory Body RC Model Making
Hobby Etc | Authorized ✅


$21.60
$29.91
ハセガワ Hasegawa HMCC11 1:24 Scale VW Type 2 Pick-Up Truck Model Building Kits
Amazon Japan


georgeyv
Well-known member
- Joined
- Apr 5, 2015
- Messages
- 495
- Reaction score
- 0
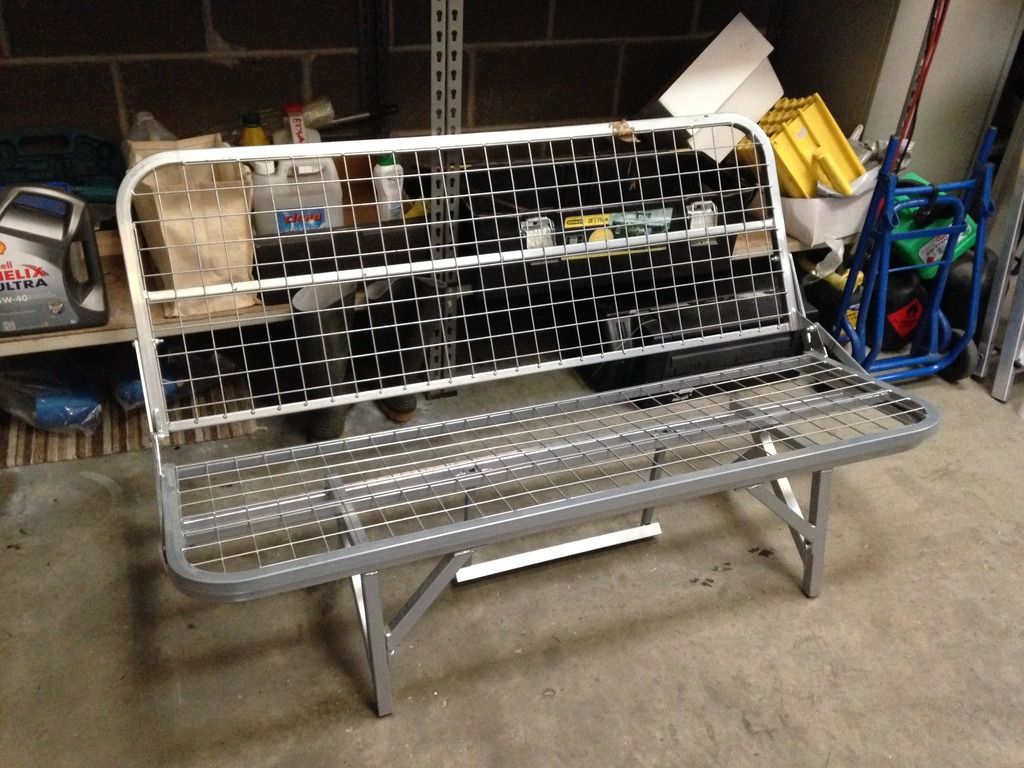
Picked up a full width bed a couple of nights ago. It's a Volkswares bed. Was planning on buying a rusty lee bed but would have swallowed up all of my budget so went for this second hand and then will upholster it myself and see if I can get it to look something other than horrendous...
georgeyv
Well-known member
- Joined
- Apr 5, 2015
- Messages
- 495
- Reaction score
- 0
Had a productive day, got the new seals between the heat exchangers/van fitted - though on doing that discovered what I think is a pretty rotten heater pipe down the middle of the van. I left it as it was for now with the weird insulating cover over it and will inspect further when I get chance.
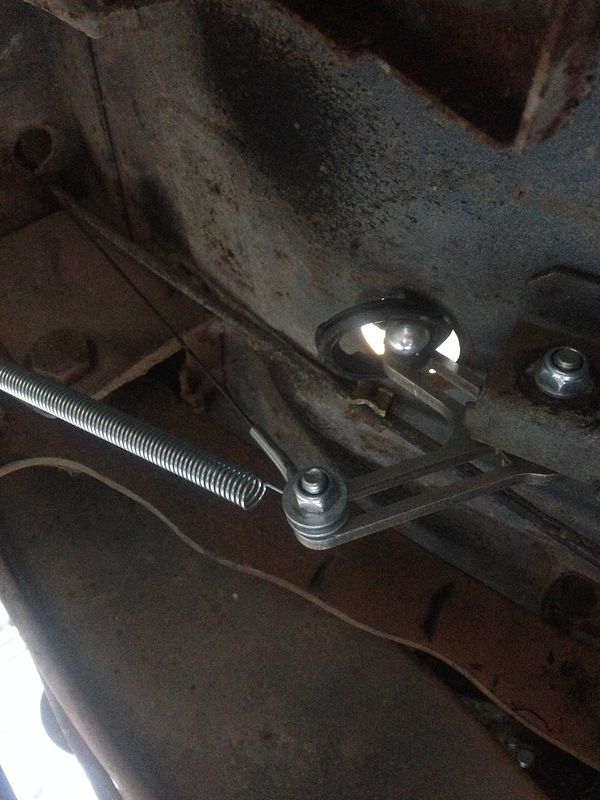
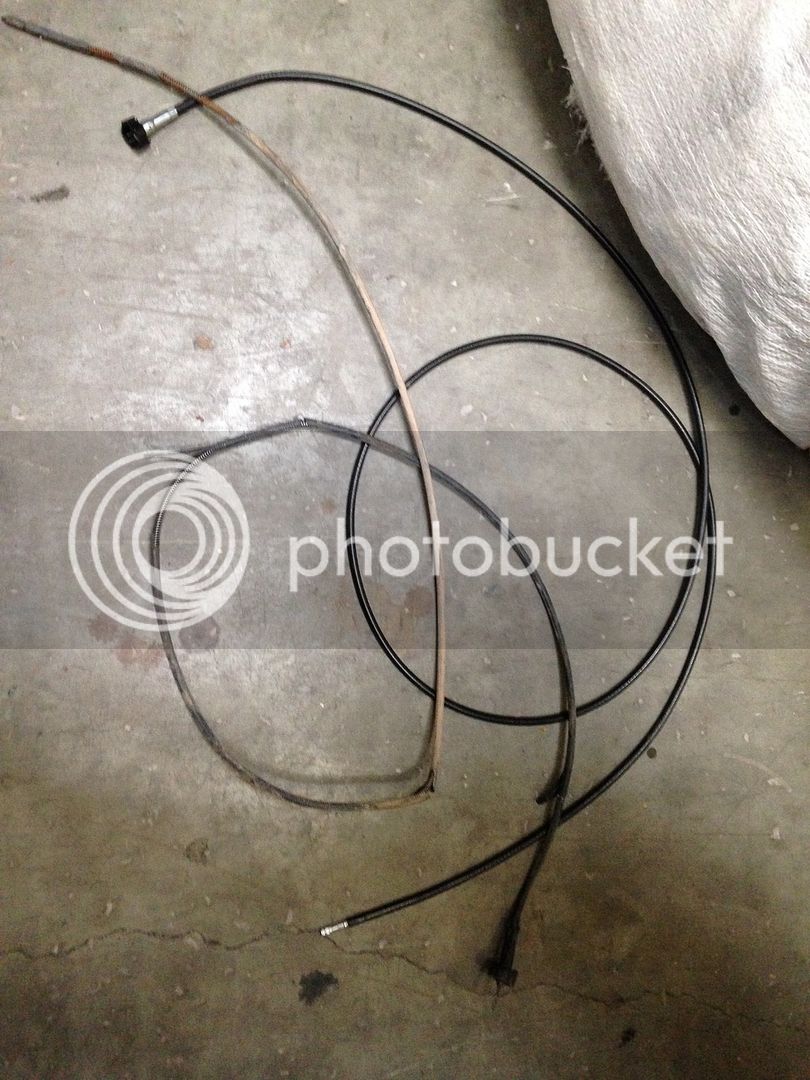
Fitted a new accelerator cable as I had snagged mine between the gearbox and the engine and kinked it - it meant that the throttle didn't return properly and made the van run like a bag of knackers.
Was a bit of a pig, ended up ragging it out and pulling a load of muck and grease with it. Fitted the new one with some really like bike chain oil and pulled it in and out a few times to make sure it had free movement.
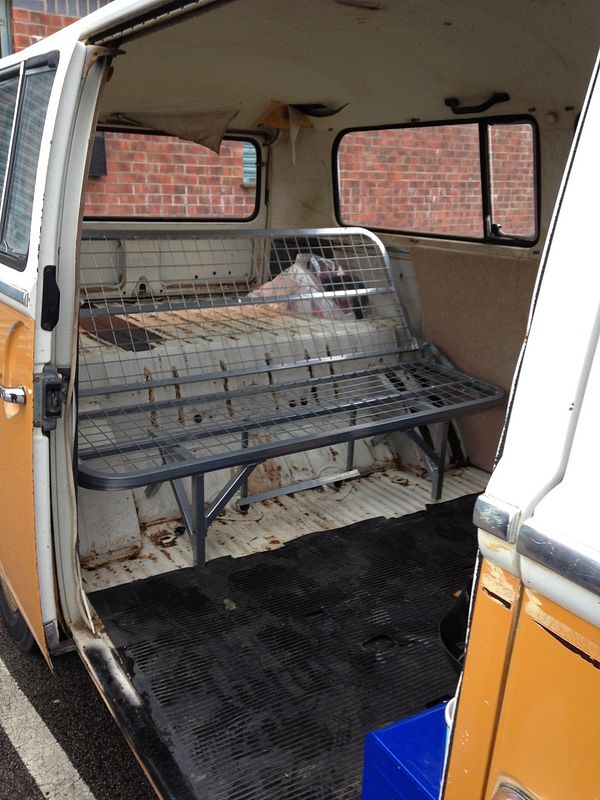
Trial fitted the Volkswares bed, looks pretty good. Wish I had the Rusty Lee one but budget dictated I take what I could get cheap!
Just need foam and covers now...
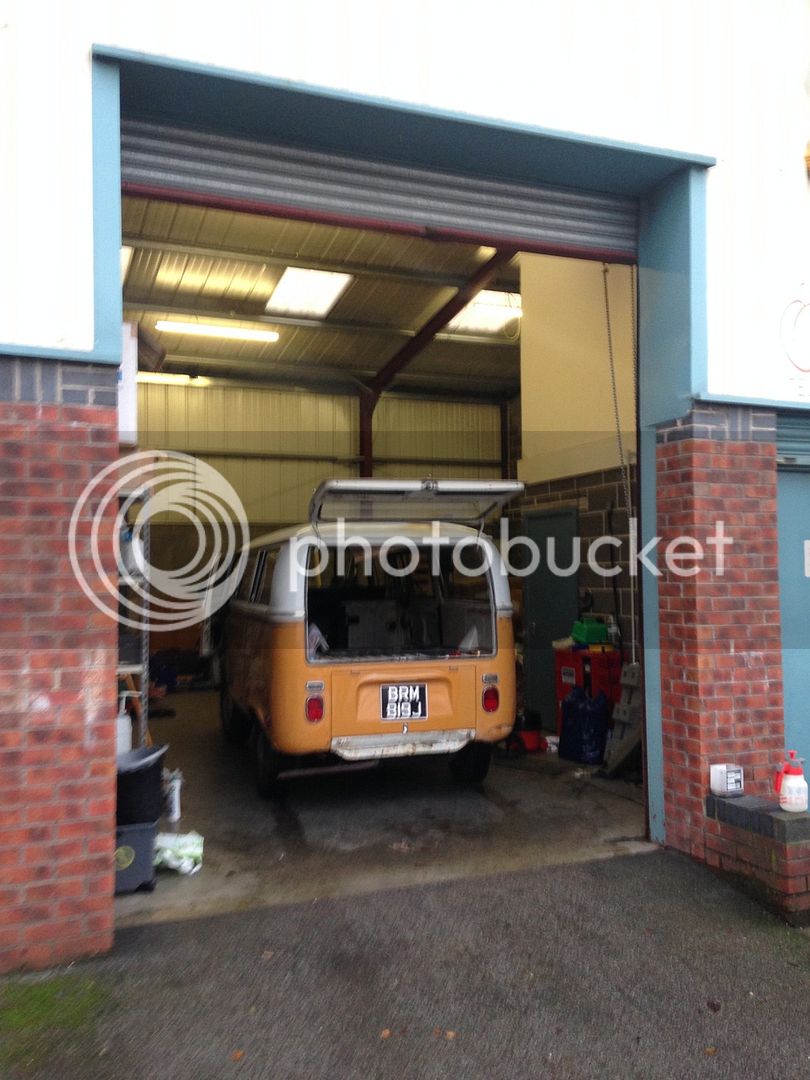
Hopefully get another day's work done on it tomorrow - I'm fortunate to have a dry space at work where I can take it on my days off. Only when my old man isn't around to get a stress on about all the oil on his floor though!!
Fitted a new accelerator cable as I had snagged mine between the gearbox and the engine and kinked it - it meant that the throttle didn't return properly and made the van run like a bag of knackers.
Was a bit of a pig, ended up ragging it out and pulling a load of muck and grease with it. Fitted the new one with some really like bike chain oil and pulled it in and out a few times to make sure it had free movement.
Trial fitted the Volkswares bed, looks pretty good. Wish I had the Rusty Lee one but budget dictated I take what I could get cheap!
Just need foam and covers now...
Hopefully get another day's work done on it tomorrow - I'm fortunate to have a dry space at work where I can take it on my days off. Only when my old man isn't around to get a stress on about all the oil on his floor though!!
georgeyv
Well-known member
- Joined
- Apr 5, 2015
- Messages
- 495
- Reaction score
- 0
Had a few days tinkering here and there recently, not much huge to report!
Myself and George had a morning at my unit so he could get a couple of minor bits looked at on his beetle.
I replaced my speedo cable (as it was totally missing from the hub!) and did some polishing.
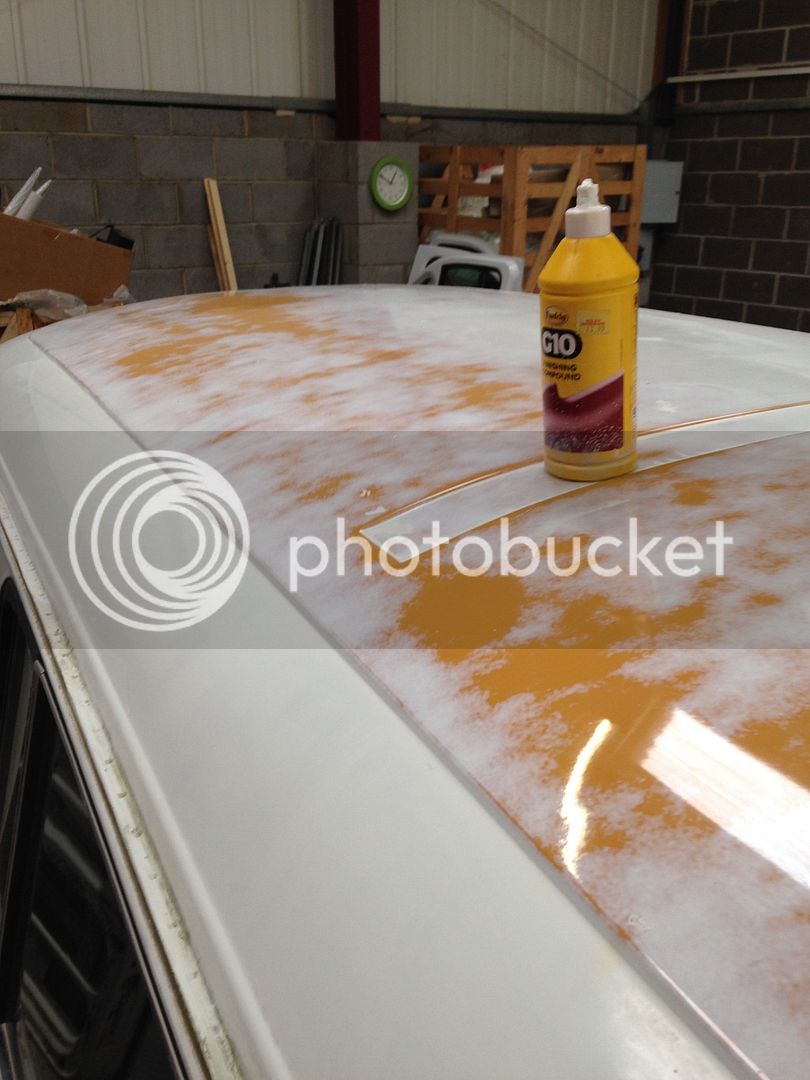
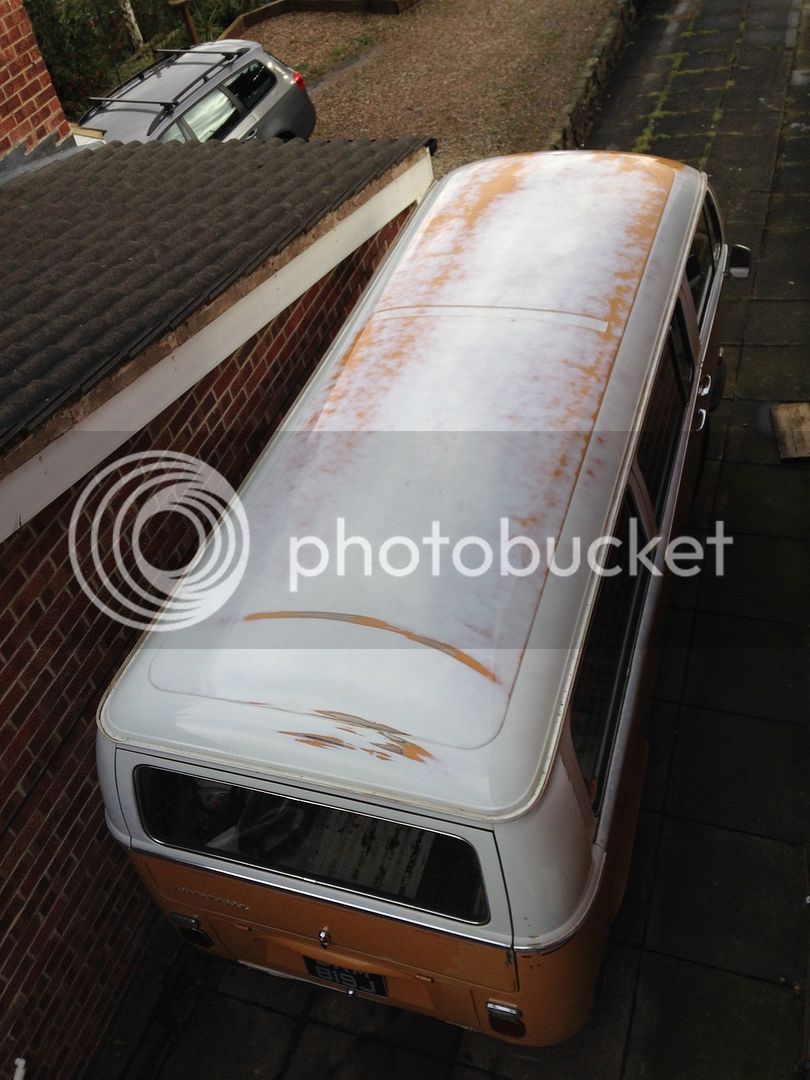
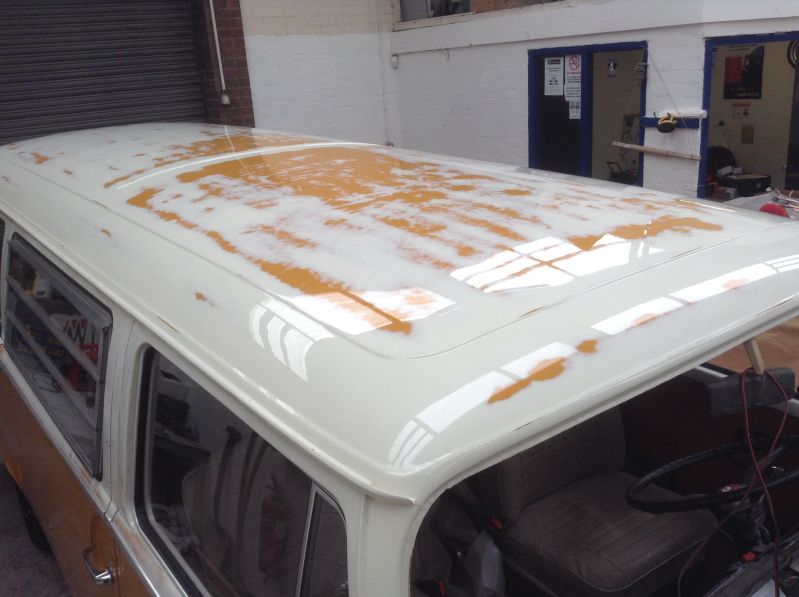
I finished the roof off over a period of a few days as it was doing my back in! With regards to polishing I'm pretty clueless, I use a rotary polisher and farecla G10 after reading a guide online. Seems to go pretty well if you start slow then ramp it up till it's shiny! Need to wax over the top of it to protect it till summer when I can go over the whole thing again and hopefully repair a couple of the shittier bits of paintwork!
Before I took it home I had a bit of an electrical problem so it wouldn't start, turned out to be a simple loose connection but tracking it down was a pain. The wiring diagrams in the bentley manuals were a godsend and made it much less complex. Cheers again George for the lift home!
Old and new cables...
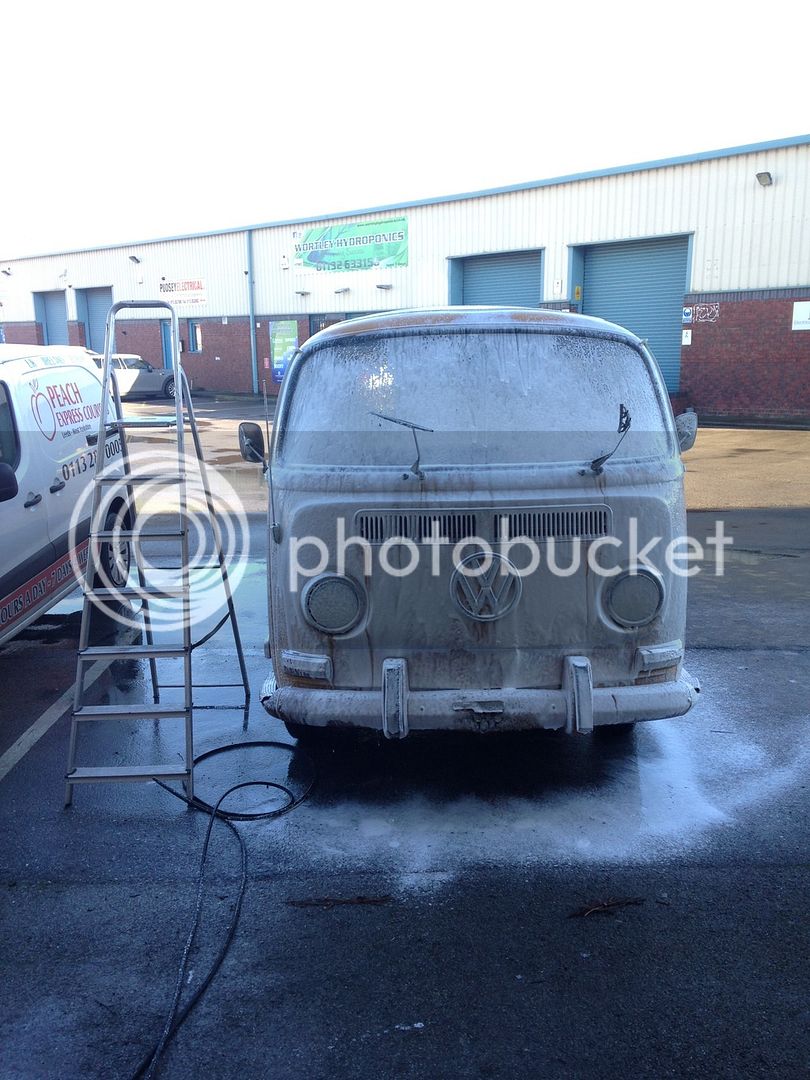
Gave it a wash before my old man turfed me out for making a mess!
Back at home...
Myself and George had a morning at my unit so he could get a couple of minor bits looked at on his beetle.
I replaced my speedo cable (as it was totally missing from the hub!) and did some polishing.
I finished the roof off over a period of a few days as it was doing my back in! With regards to polishing I'm pretty clueless, I use a rotary polisher and farecla G10 after reading a guide online. Seems to go pretty well if you start slow then ramp it up till it's shiny! Need to wax over the top of it to protect it till summer when I can go over the whole thing again and hopefully repair a couple of the shittier bits of paintwork!
Before I took it home I had a bit of an electrical problem so it wouldn't start, turned out to be a simple loose connection but tracking it down was a pain. The wiring diagrams in the bentley manuals were a godsend and made it much less complex. Cheers again George for the lift home!
Old and new cables...
Gave it a wash before my old man turfed me out for making a mess!
Back at home...
Fernando Palmela
Well-known member
 It has been disinfected.............
- Joined
- Oct 26, 2010
- Messages
- 3,247
- Reaction score
- 17
- Location
- Leeds
- Year of Your Van(s)
- 1971
- Van Type
- Panel
Reminded me of another bus... spot the difference
My speedo cable is on the way out on the bug now too. Oh the irony!
My speedo cable is on the way out on the bug now too. Oh the irony!
DubBGood2Me
Well-known member
Some good work there mate.
It's polished up well.
Coolio 8)
It's polished up well.
Coolio 8)
Lee C
Well-known member
gvee said:Reminded me of another bus... spot the difference
My speedo cable is on the way out on the bug now too. Oh the irony!
One is real patina while the other is faked
georgeyv
Well-known member
- Joined
- Apr 5, 2015
- Messages
- 495
- Reaction score
- 0
Still looks mint though! And your windscreen surround is decent! I need to do what you've done to yours, paint the lower windscreen surround and then rub it back to restore the patina, it's a bit too far gone around the bottom. Not rotten but the paints all come off!
georgeyv
Well-known member
- Joined
- Apr 5, 2015
- Messages
- 495
- Reaction score
- 0
Is a new cab mat worthy of a progress report?
Stopped by MegaVanMats today, he's local and has supplied me with mats and carpet kits and basically everything I've needed interior wise, absolutely would advise using his place if you need anything like that. His cab mats are great and does some great interior carpet/electrics/gas stuff.
Fitted it in the dark when I got home so I could at least feel like I'd done something this month!
It's a dark browny/sandy colour. My door cards will be a lighter colour and may change the mat later down the line but was impatient so went for one off the shelf today!
georgeyv
Well-known member
- Joined
- Apr 5, 2015
- Messages
- 495
- Reaction score
- 0
Drove the bus to work yesterday, had a pretty drippy sump plate so cleaned it up with a rag and nipped the bolts up a little, one of them has the stud removed and a bolt put in its place, it doesn't tighten up so imagine the thread is stripped, I'm hoping there's not a captive not inside the case just spinning away... I'll investigate when it's warm out and I can go under the bus without freezing.
Also, realised I need to replace my wheel nut drain plug (which is suprisingly still dry as a bone)
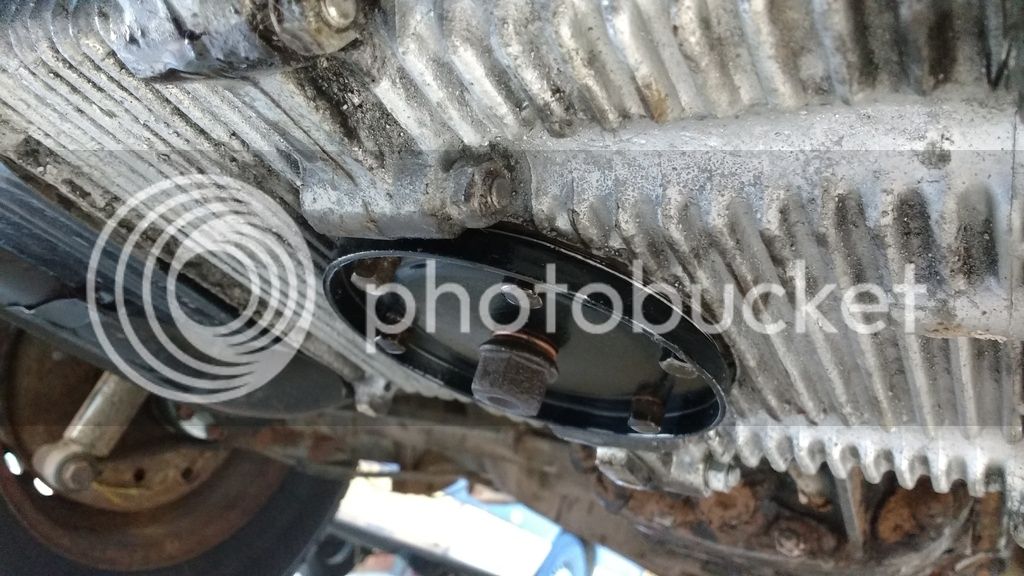
Also, realised I need to replace my wheel nut drain plug (which is suprisingly still dry as a bone)
georgeyv
Well-known member
- Joined
- Apr 5, 2015
- Messages
- 495
- Reaction score
- 0
Cracked on with another couple of small jobs today,
got the new handbrake lever on, after much swearing and messing about with a G clamp trying to push the roll pin out, I just cut a piece of timber to take the flex out of the handbrake and belted it out with a hammer in 30 seconds flat.
The rubber had torn off my old one so it's nice to not cut my hands to shreds every time I use the handbrake!

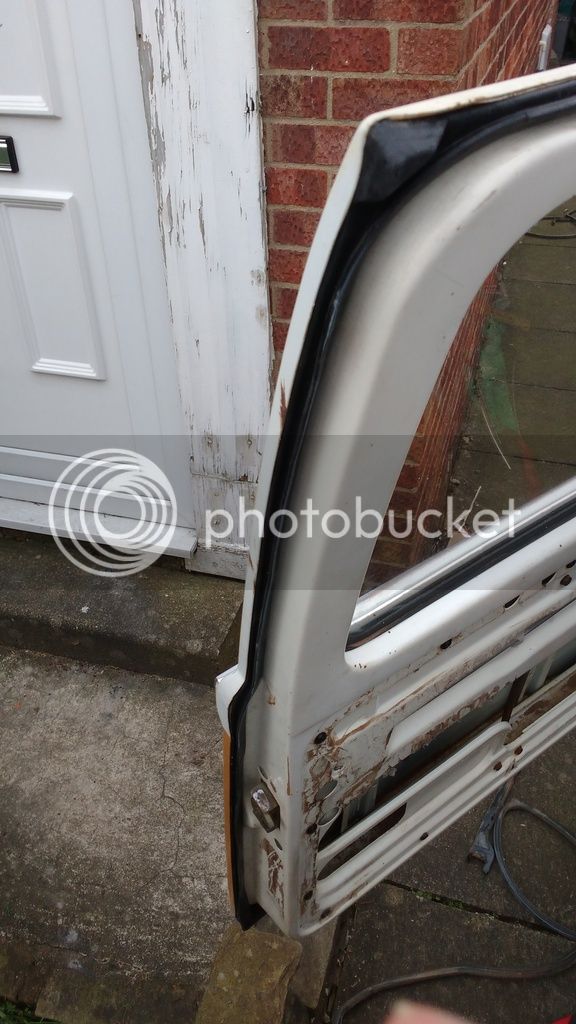
Moved on to the door seals next, did the drivers door with a decent quality seal, but not entirely happy with the fit. It pushes the door out loads, Going to glue the bottom section tomorrow and see if I can get it to fit any better.
got the new handbrake lever on, after much swearing and messing about with a G clamp trying to push the roll pin out, I just cut a piece of timber to take the flex out of the handbrake and belted it out with a hammer in 30 seconds flat.
The rubber had torn off my old one so it's nice to not cut my hands to shreds every time I use the handbrake!
Moved on to the door seals next, did the drivers door with a decent quality seal, but not entirely happy with the fit. It pushes the door out loads, Going to glue the bottom section tomorrow and see if I can get it to fit any better.
DubBGood2Me
Well-known member
Any progress is worthy progress
I won't buy anything but the top quality grey door seals. I know they're expensive but the doors shut properly. Had black rubber ones on a previous bus and the same with the sliding door too. Couldn't get them to shut so swapped them out for the soft grey ones. The difference once unbelievable.
I won't buy anything but the top quality grey door seals. I know they're expensive but the doors shut properly. Had black rubber ones on a previous bus and the same with the sliding door too. Couldn't get them to shut so swapped them out for the soft grey ones. The difference once unbelievable.
georgeyv
Well-known member
- Joined
- Apr 5, 2015
- Messages
- 495
- Reaction score
- 0
DubBGood2Me said:Any progress is worthy progress
I won't buy anything but the top quality grey door seals. I know they're expensive but the doors shut properly. Had black rubber ones on a previous bus and the same with the sliding door too. Couldn't get them to shut so swapped them out for the soft grey ones. The difference once unbelievable.
Where do you get the grey ones from? I think mine are expensive heritage ones!
Similar threads
Vehicle For Sale
1968 Bay window T2 Dreamy
- Replies
- 3
- Views
- 304
Vehicle For Sale
1971 Danbury £14,500
- Replies
- 0
- Views
- 413
Vehicle For Sale
Early Bay Deluxe 1971
- Replies
- 5
- Views
- 2K
- Replies
- 0
- Views
- 1K
- Replies
- 1
- Views
- 552