You are using an out of date browser. It may not display this or other websites correctly.
You should upgrade or use an alternative browser.
You should upgrade or use an alternative browser.
1971 - YRY483J -Restoration
- Thread starter philstar
- Start date


Help Support Early Bay Forum:
This site may earn a commission from merchant affiliate
links, including eBay, Amazon, and others.

philstar
Well-known member
- Joined
- Dec 27, 2011
- Messages
- 222
- Reaction score
- 45
- Location
- Redditch
- Year of Your Van(s)
- 1971
- Van Type
- Panel van
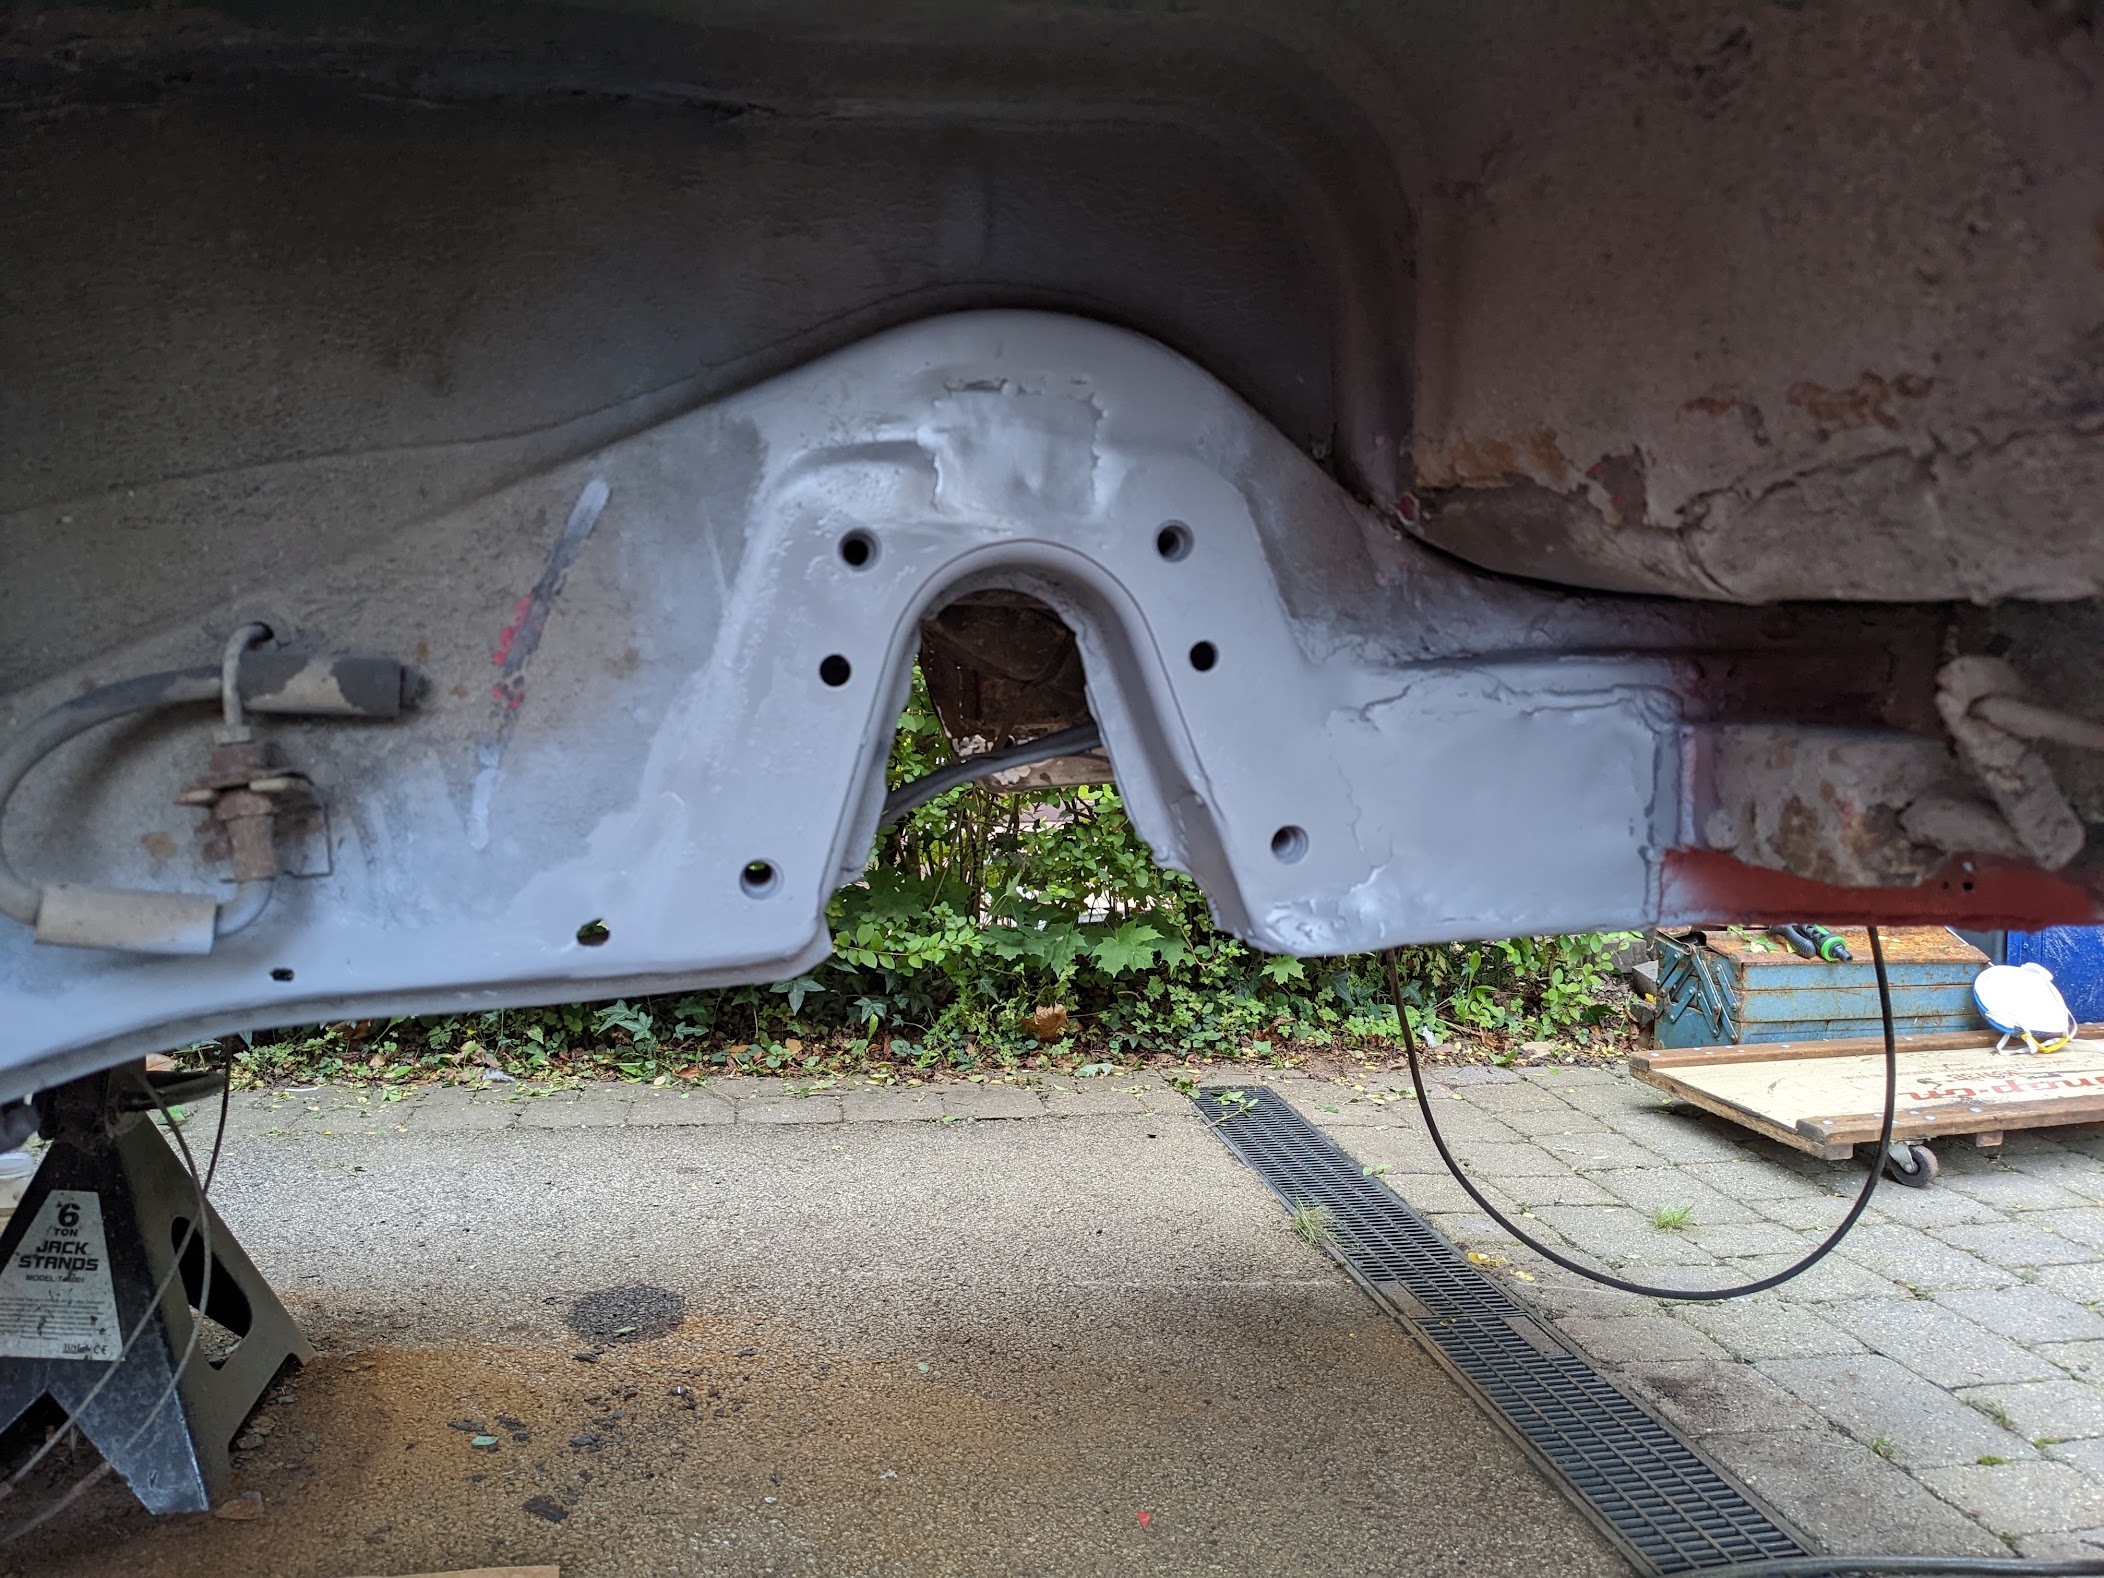
I spent a few days repairing the chassis, but it's always good to do some "pretty" work from time to time that you will see to boost morale—so I'm tackling the side panel. I'm making a new panel from scratch, but I'm unsure where it needs to be welded to:
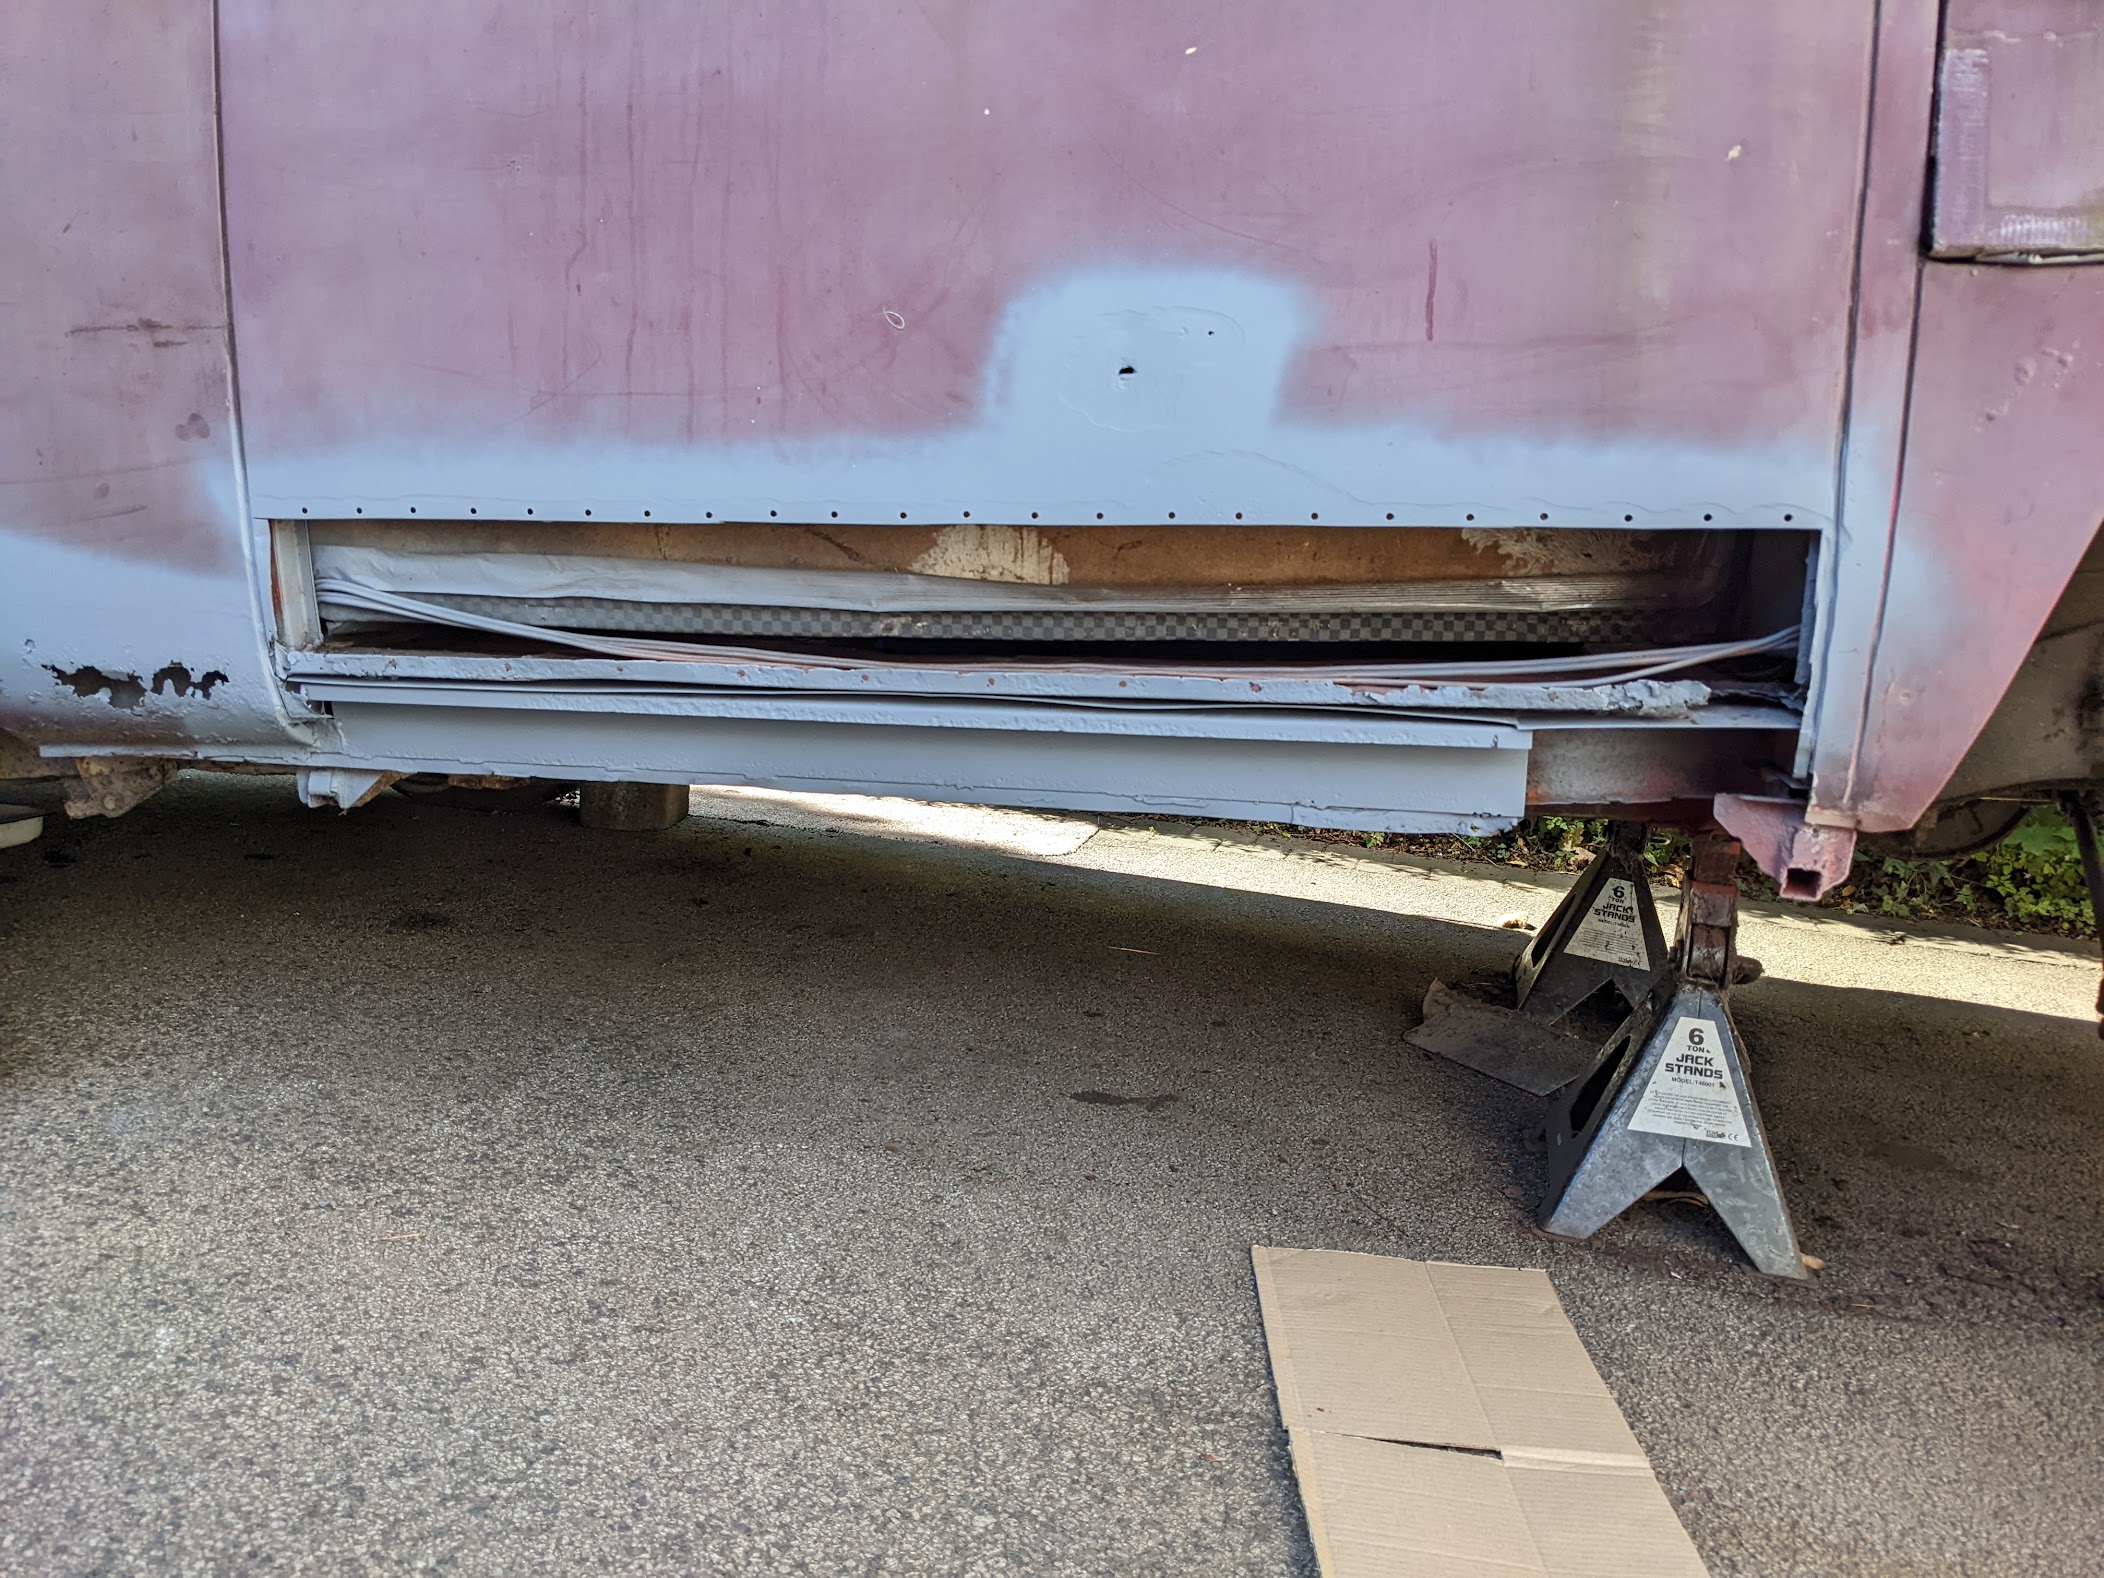
I've not worked on the bus floor before, but it seems to be comprised of a few sections, here is a better angle:
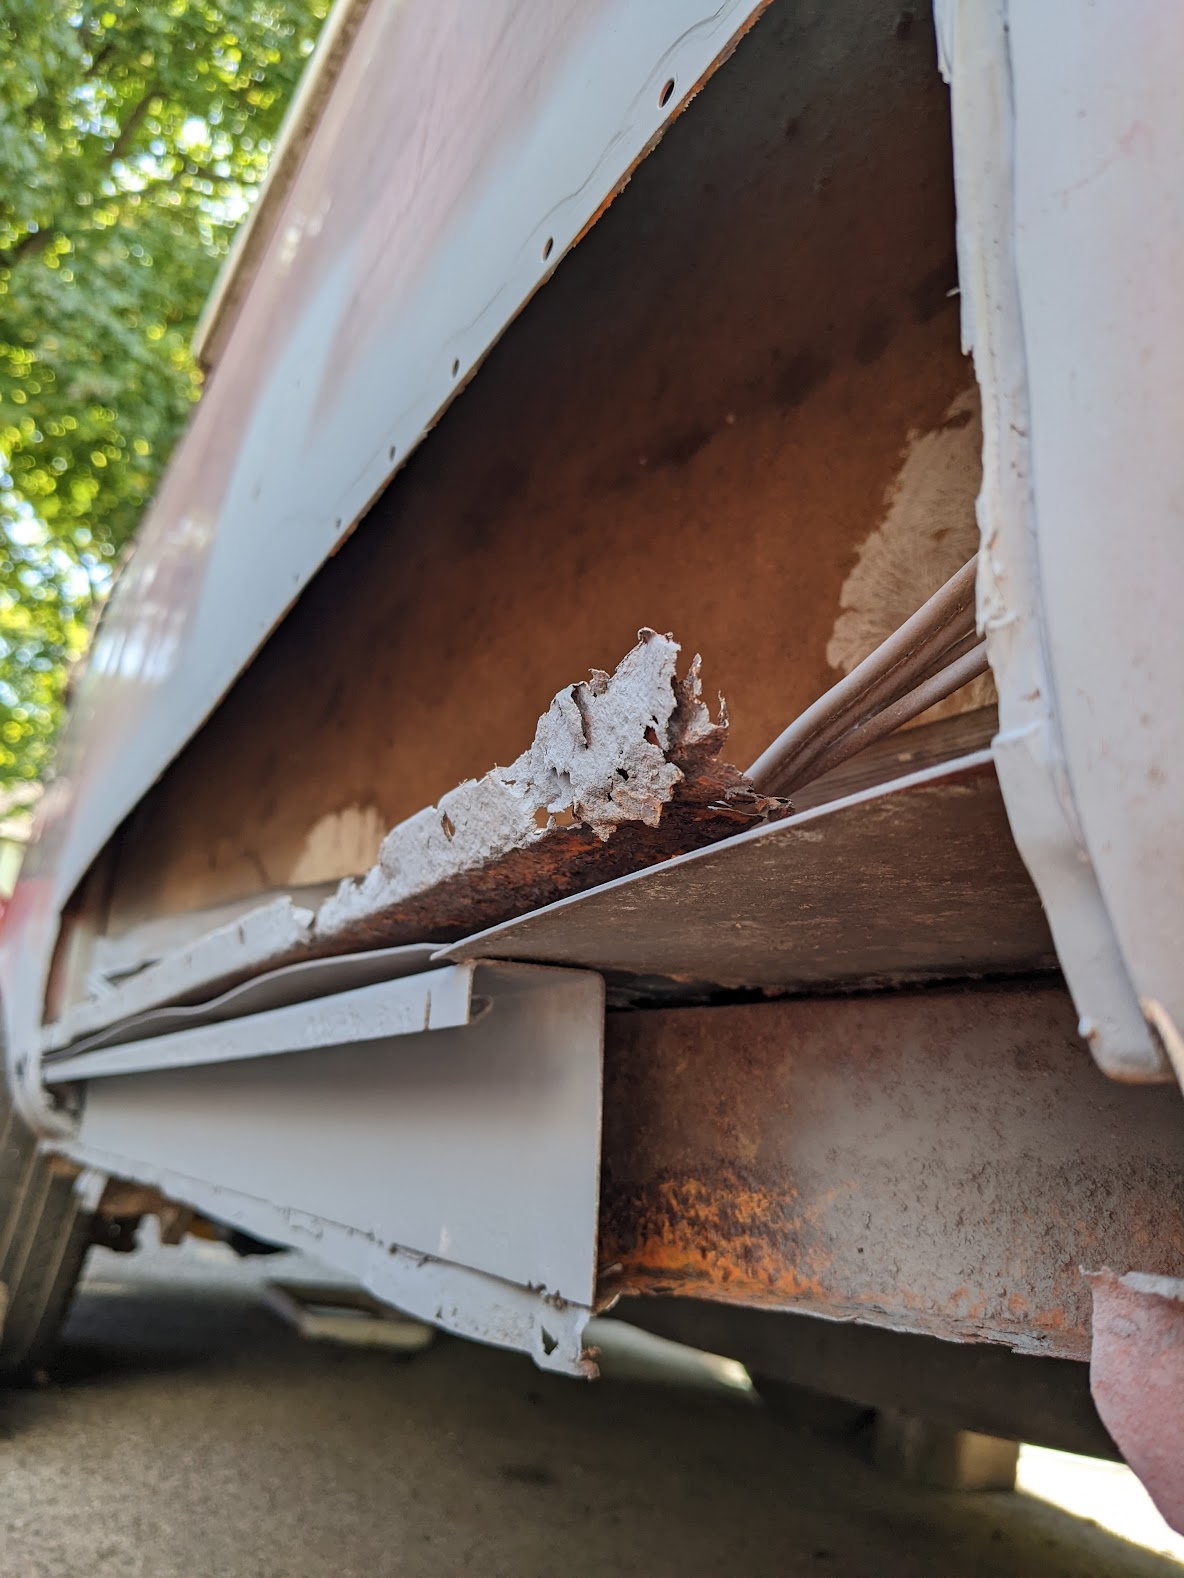
Clearly, the existing floor "top" panel is rusty, but there also seems to be an "interim" panel underneath along with the inner sill section. What do I need to weld the side panel to, other than the bottom lip of the inner sill? There are some dodgy previous repairs here so at some point I will pull out the floor and redo it all—but that won't be until I've been able to enjoy it for a few years first!
On a side note—can anyone recommend a sheet steel supplier in the Midlands? I've used metal supermarket the past couple of times but their prices are killing me, despite my best attempts at negotiating... happy to pay cash")
I've not worked on the bus floor before, but it seems to be comprised of a few sections, here is a better angle:
Clearly, the existing floor "top" panel is rusty, but there also seems to be an "interim" panel underneath along with the inner sill section. What do I need to weld the side panel to, other than the bottom lip of the inner sill? There are some dodgy previous repairs here so at some point I will pull out the floor and redo it all—but that won't be until I've been able to enjoy it for a few years first!
On a side note—can anyone recommend a sheet steel supplier in the Midlands? I've used metal supermarket the past couple of times but their prices are killing me, despite my best attempts at negotiating... happy to pay cash
philstar
Well-known member
- Joined
- Dec 27, 2011
- Messages
- 222
- Reaction score
- 45
- Location
- Redditch
- Year of Your Van(s)
- 1971
- Van Type
- Panel van
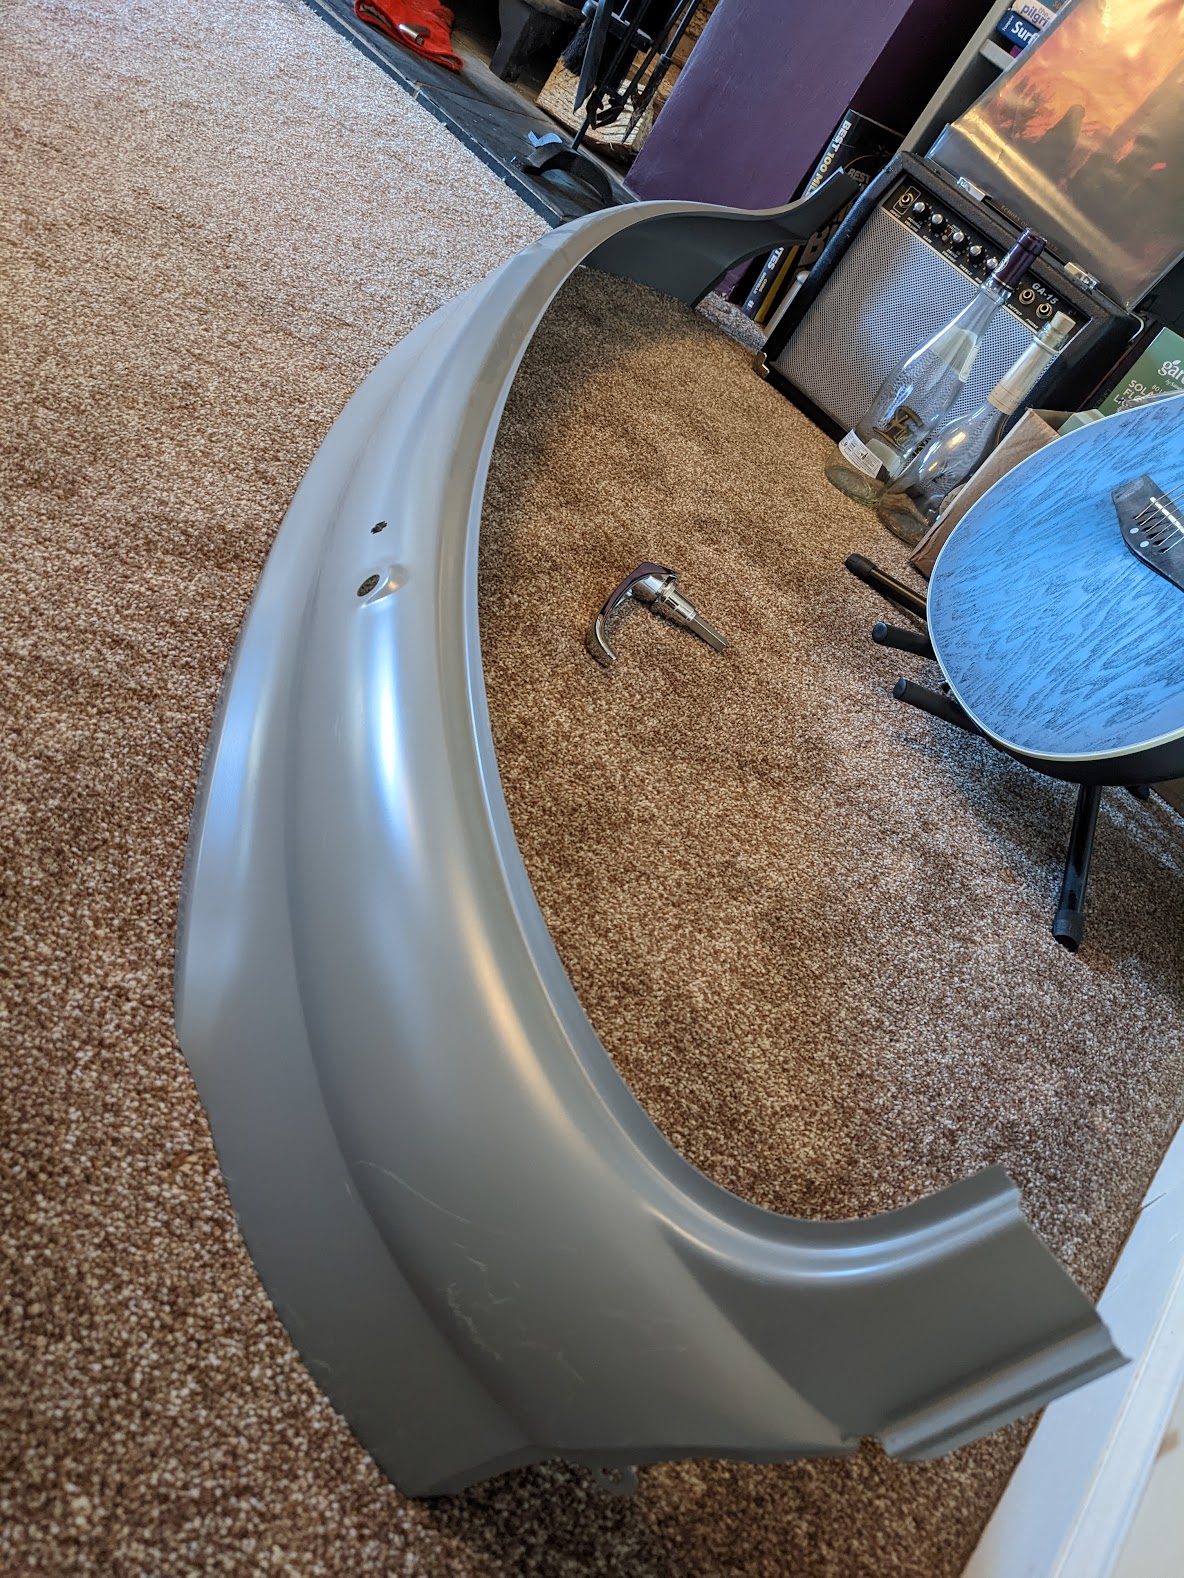
Side panel made! It was a bit tricky without any metal shaping equipment but it will look fine with a bit of filler:
I decided to drop the front beam—the chassis is rusty and I can't leave it. After reading various articles and my Bentley, the instructions say to remove the clutch cable, however, mine seemed to be routed above the beam so this wasn't necessary:
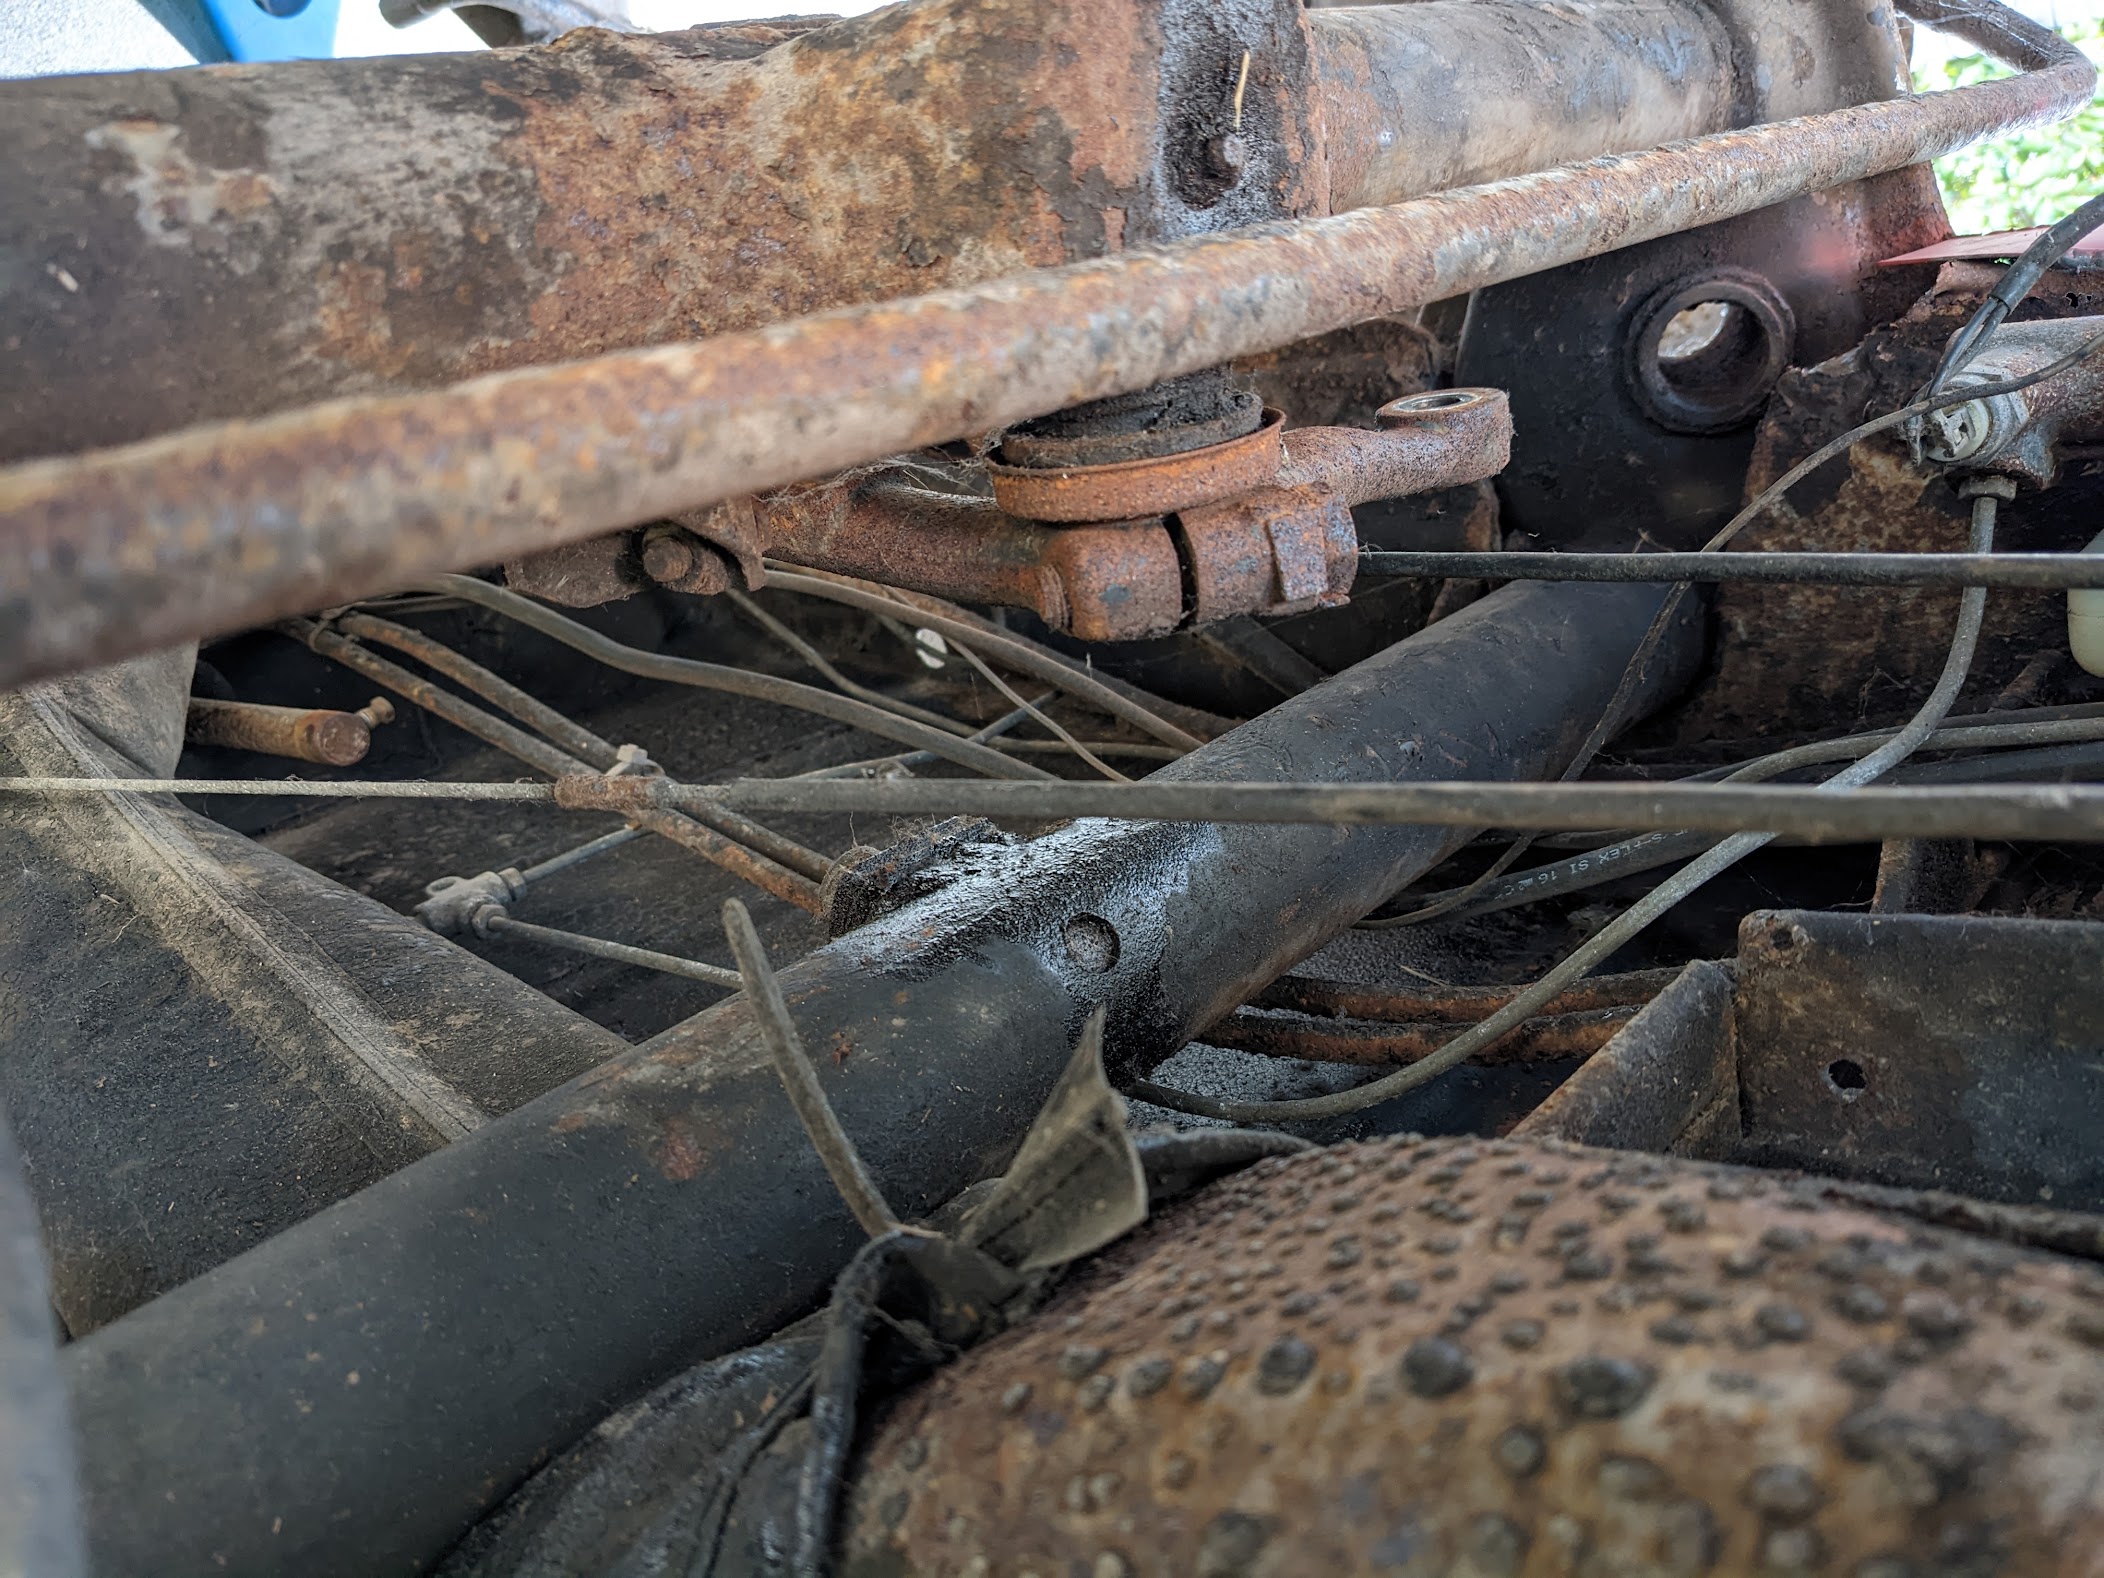
Should the clutch cable run underneath the beam, or can it perform properly routed above it? When I put it back together I want to make sure it's all correct!
Beam doesn't look too bad—I'm not going to renovate it right now, but that can come at a later date. I'll check it for rust and repair any of course:
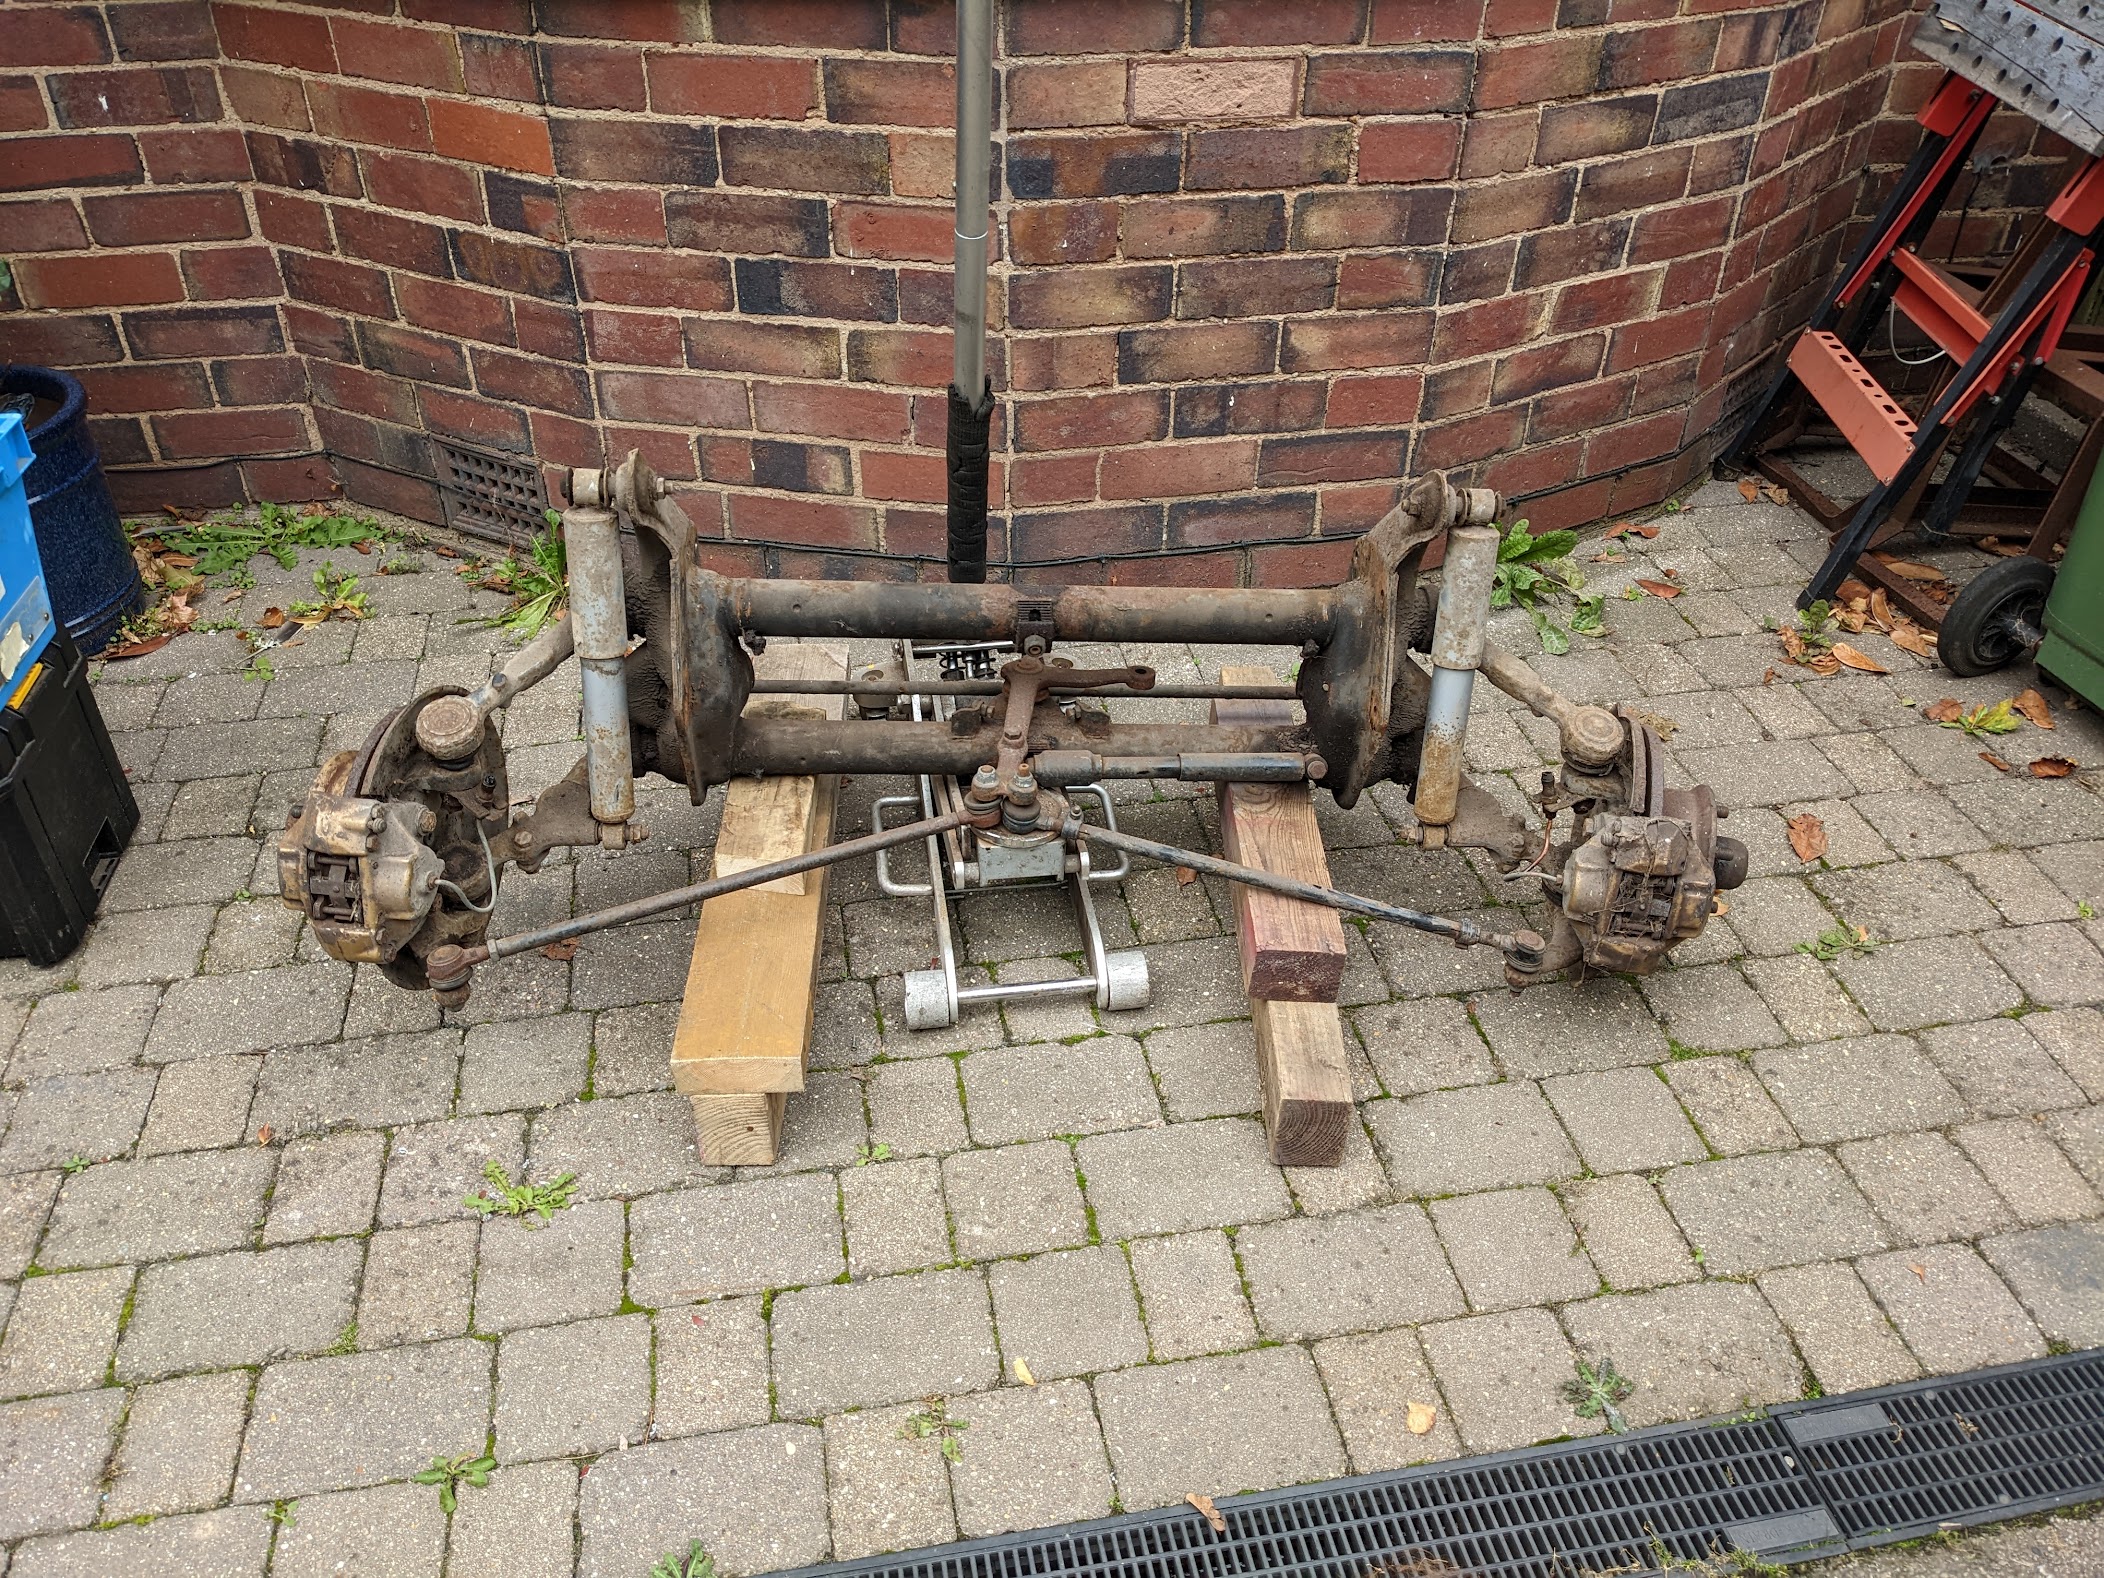
I spent a few weeks feeling anxious about removing the beam but I sat down and wrote out a "launch" plan and now I'm glad I made the jump so I can make the bus safe. It came out very easily, I called a mate round to help keep it balanced on the jack which saved me struggling. I removed it whole, and simply cut the brake hoses because I have a full set of replacements and want to drain the fluid anyway.
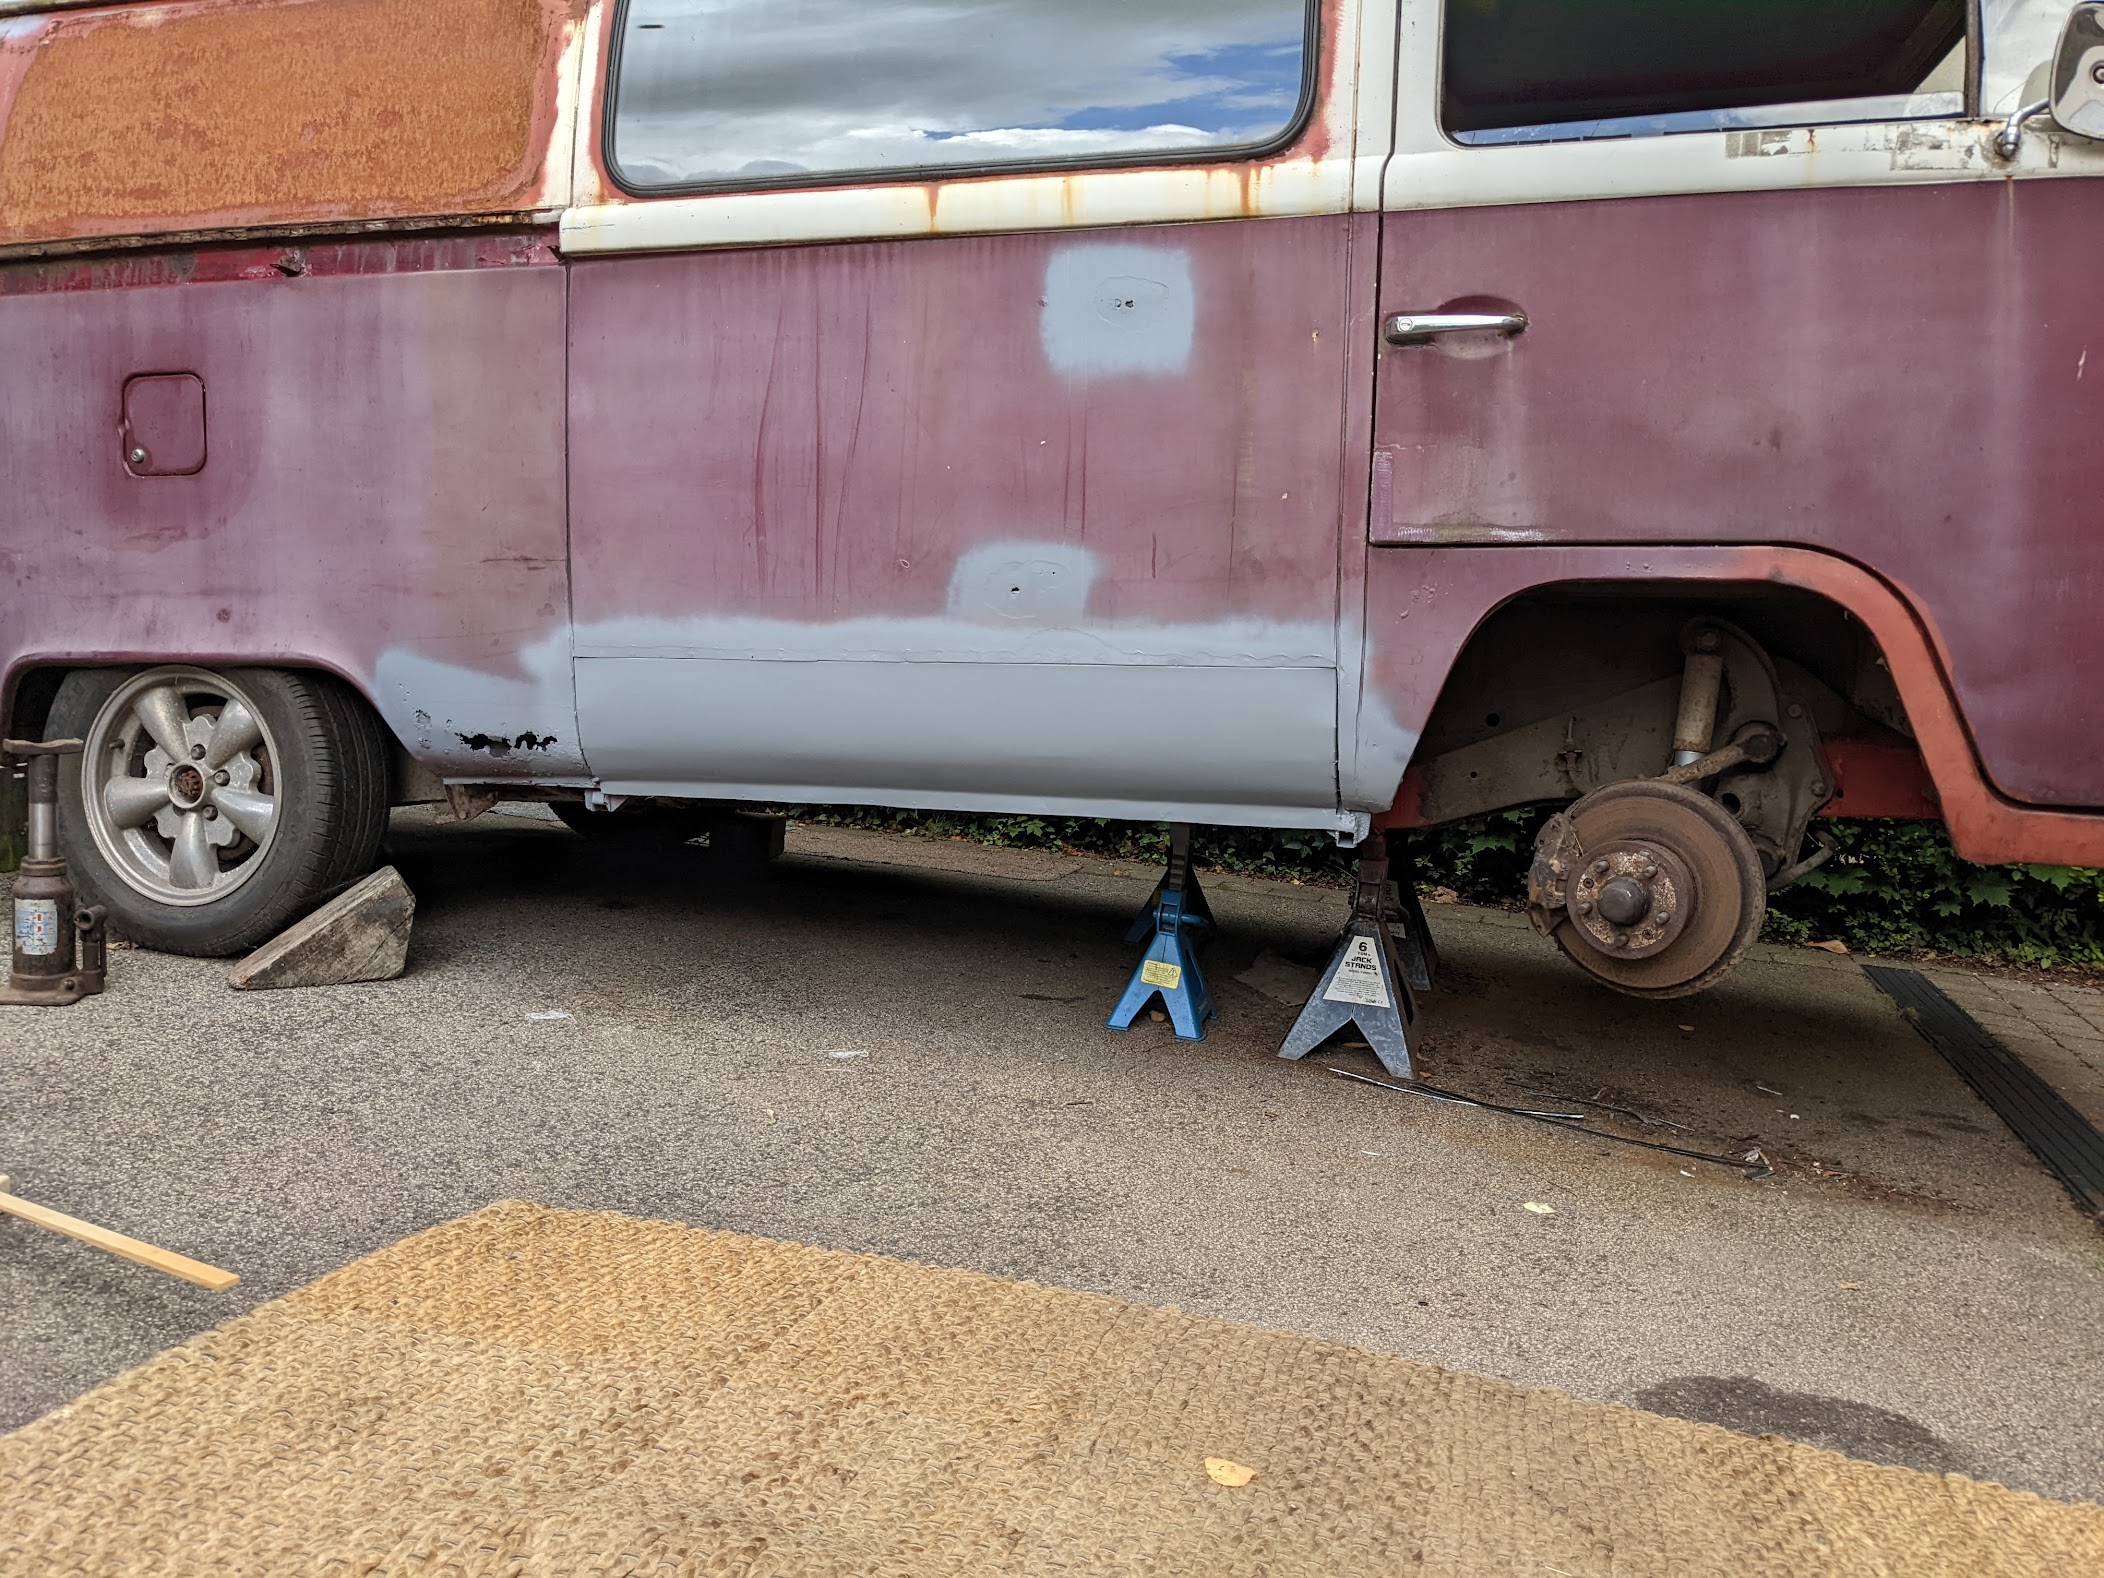
I should have taken a before photo, but I've now nearly completed the repairs on the drivers' side:
I decided to drop the front beam—the chassis is rusty and I can't leave it. After reading various articles and my Bentley, the instructions say to remove the clutch cable, however, mine seemed to be routed above the beam so this wasn't necessary:
Should the clutch cable run underneath the beam, or can it perform properly routed above it? When I put it back together I want to make sure it's all correct!
Beam doesn't look too bad—I'm not going to renovate it right now, but that can come at a later date. I'll check it for rust and repair any of course:
I spent a few weeks feeling anxious about removing the beam but I sat down and wrote out a "launch" plan and now I'm glad I made the jump so I can make the bus safe. It came out very easily, I called a mate round to help keep it balanced on the jack which saved me struggling. I removed it whole, and simply cut the brake hoses because I have a full set of replacements and want to drain the fluid anyway.
I should have taken a before photo, but I've now nearly completed the repairs on the drivers' side:
philstar
Well-known member
- Joined
- Dec 27, 2011
- Messages
- 222
- Reaction score
- 45
- Location
- Redditch
- Year of Your Van(s)
- 1971
- Van Type
- Panel van
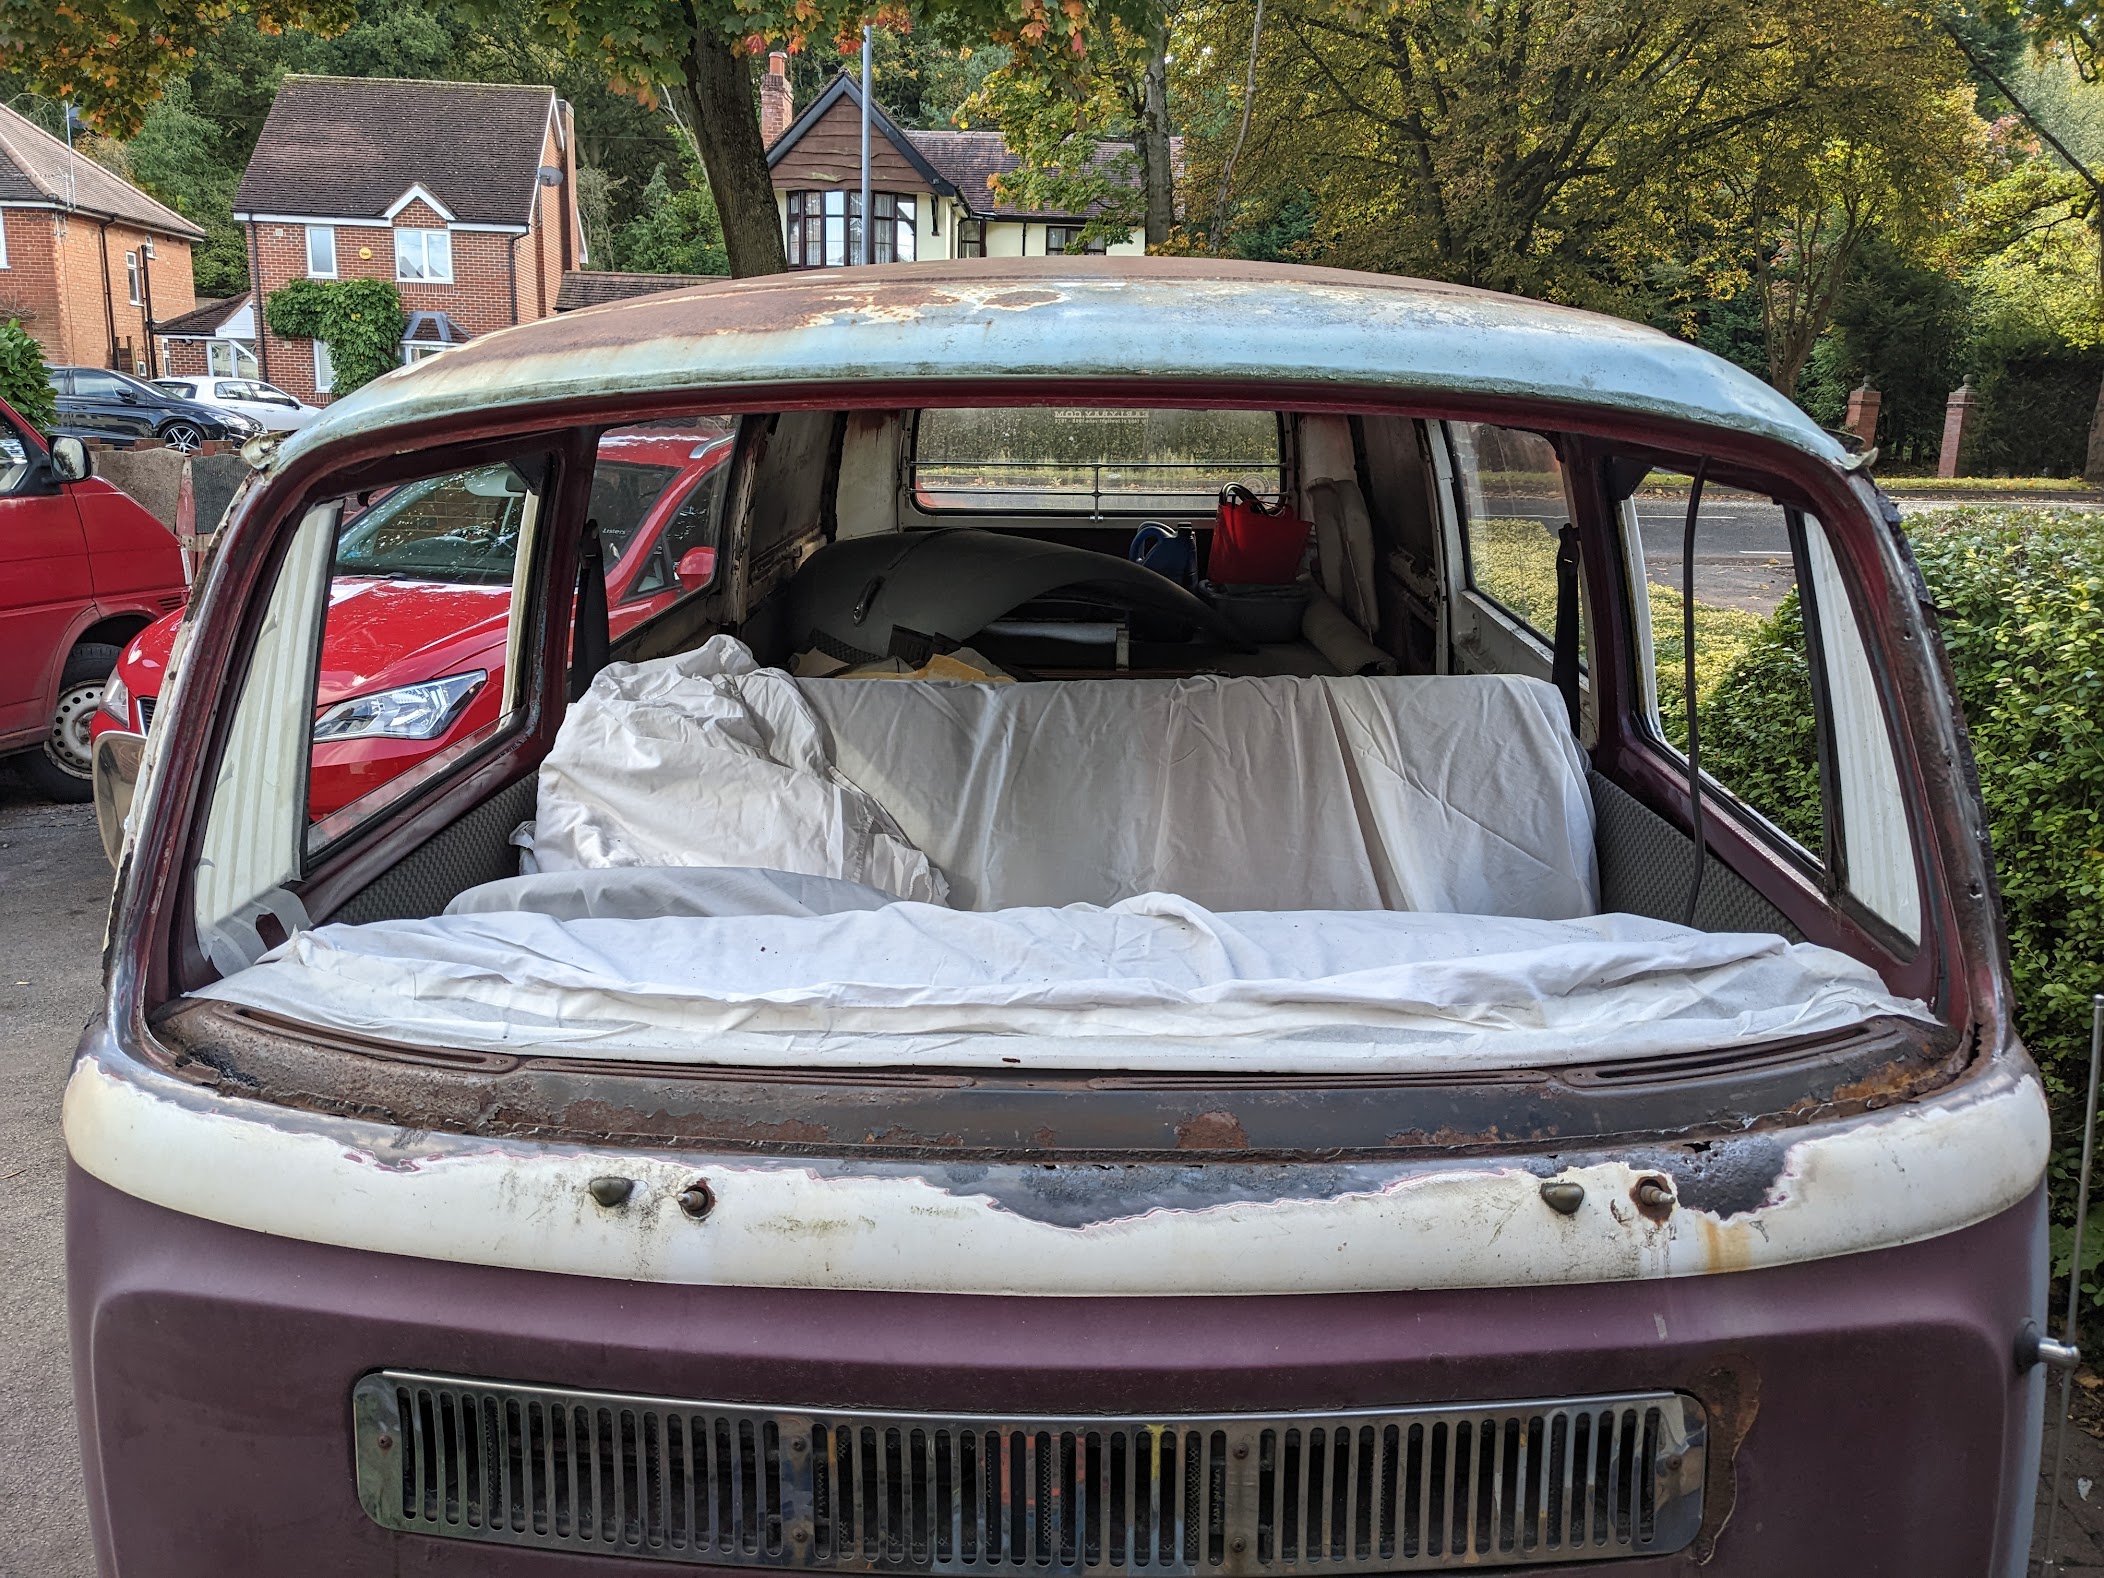
I've finished the chassis repairs for now, so I have moved on to the final *big* job—replacing the windscreen...
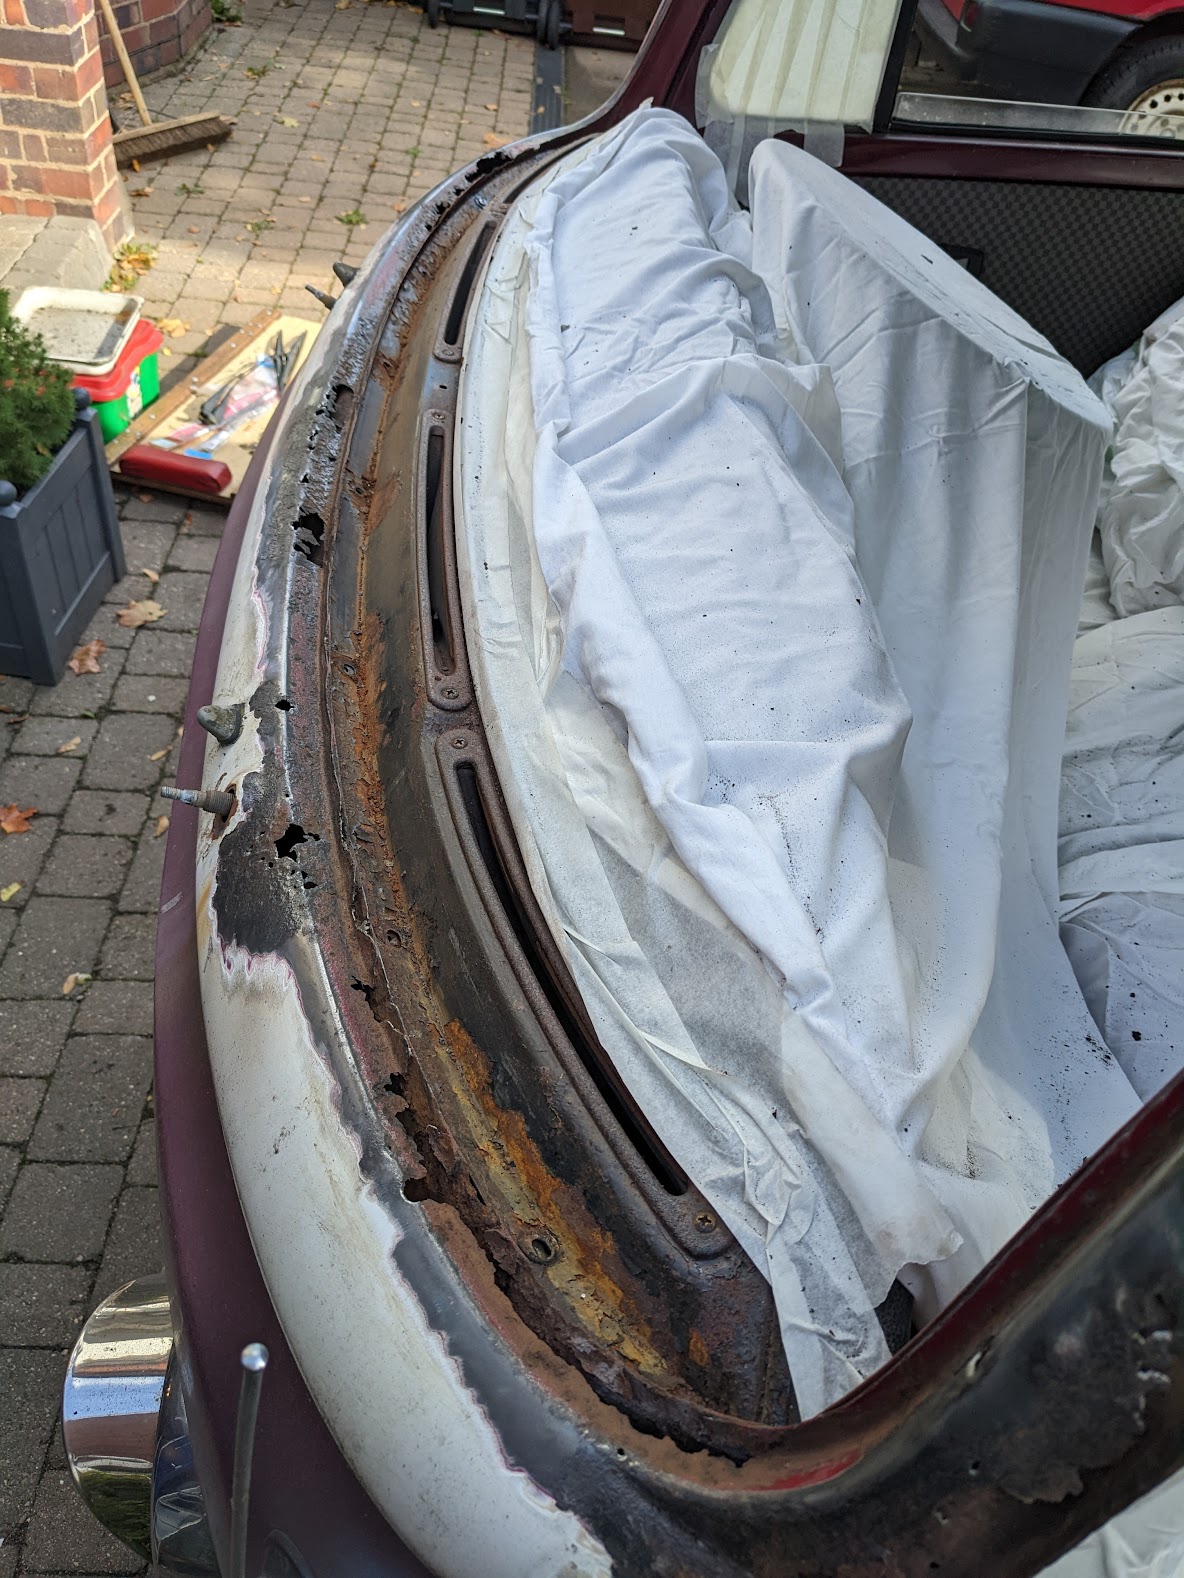

I think it's a wise move to invest in this quality lower repair panel, considering the wiper arm holes are also shot:
Front Panel Upper Windscreen & Bulge Repair Panel, BEST QUALITY 68-72. 211-805-035BQ
However, I can't see any repair panels for the A-pillars—do these exist, or am I going to have to fabricate something myself?
Unfortunately I don't know of any repair sections for the A pillars.
You'll either have to fabricate some or buy a body cut.
You'll either have to fabricate some or buy a body cut.
philstar
Well-known member
- Joined
- Dec 27, 2011
- Messages
- 222
- Reaction score
- 45
- Location
- Redditch
- Year of Your Van(s)
- 1971
- Van Type
- Panel van
Cheers sparkywig, perhaps I can buy a pair of classic mini seam covers and modify them... time to put my thinking cap on!Unfortunately I don't know of any repair sections for the A pillars.
You'll either have to fabricate some or buy a body cut.


There are plenty of scrap cars about. Get a scrap door panel or roof for metal. The panels off a fridge are a lighter gauge but flat. Clean with 40 or 80 grit sanding wheel. Check out this Canadian man on how to make parts with basic tools. https://www.youtube.com/channel/UC6JPmJ_aicru8XPWr3EvJnw
philstar
Well-known member
- Joined
- Dec 27, 2011
- Messages
- 222
- Reaction score
- 45
- Location
- Redditch
- Year of Your Van(s)
- 1971
- Van Type
- Panel van
Cheers Earlybay1, I've got sheet steel but lack any metal folding equipment aside from some dolly hammers and girders to bend the metal around, need to keep the neighbours on board though so trying to minimize the noise where possible... I've also got an old mini I can try the seams from handily!
Either make a bender out of angle iron and stout hinges 9see uTube) or buy one for less than £100. It will save you a lot of time and make nice bends. The Canadian man Fitzee also shows you hoy to make these tools. I made mine with scrap angle iron and some pipe for handles. Look them up on evilbay if you can buy one
- Joined
- Jul 8, 2009
- Messages
- 26
- Reaction score
- 8
- Location
- Taunton, Somerset
- Year of Your Van(s)
- 1971
- Van Type
- Devon
Let me check my 'stock' when home later. I had similar problem and lacked skill to fab so eventually got two pillars from California but in the end only used right side so believe I still have the left somewhere...not going to help with whole front but will hopefully make a bit easier. Incidentally, I believe Schofield's do single outer skin for the pillar area but in flat with profile edge but this too take skill to make fit because of the curves involved.
You could try Mark at MCJ Imports, Graham at FBI VW, or Julian at VW Parts Emporium for a body cut.
philstar
Well-known member
- Joined
- Dec 27, 2011
- Messages
- 222
- Reaction score
- 45
- Location
- Redditch
- Year of Your Van(s)
- 1971
- Van Type
- Panel van
Thanks all! My order from Schofield arrived today, the panel is of excellent quality (also had to order a new sliding door handle after mine completely seized so I cut it off...)
I've decided to trim the new panel along the bottom running parallel with the "bulge" leaving enough to overlap the original skin, which I can joggle to fit behind:
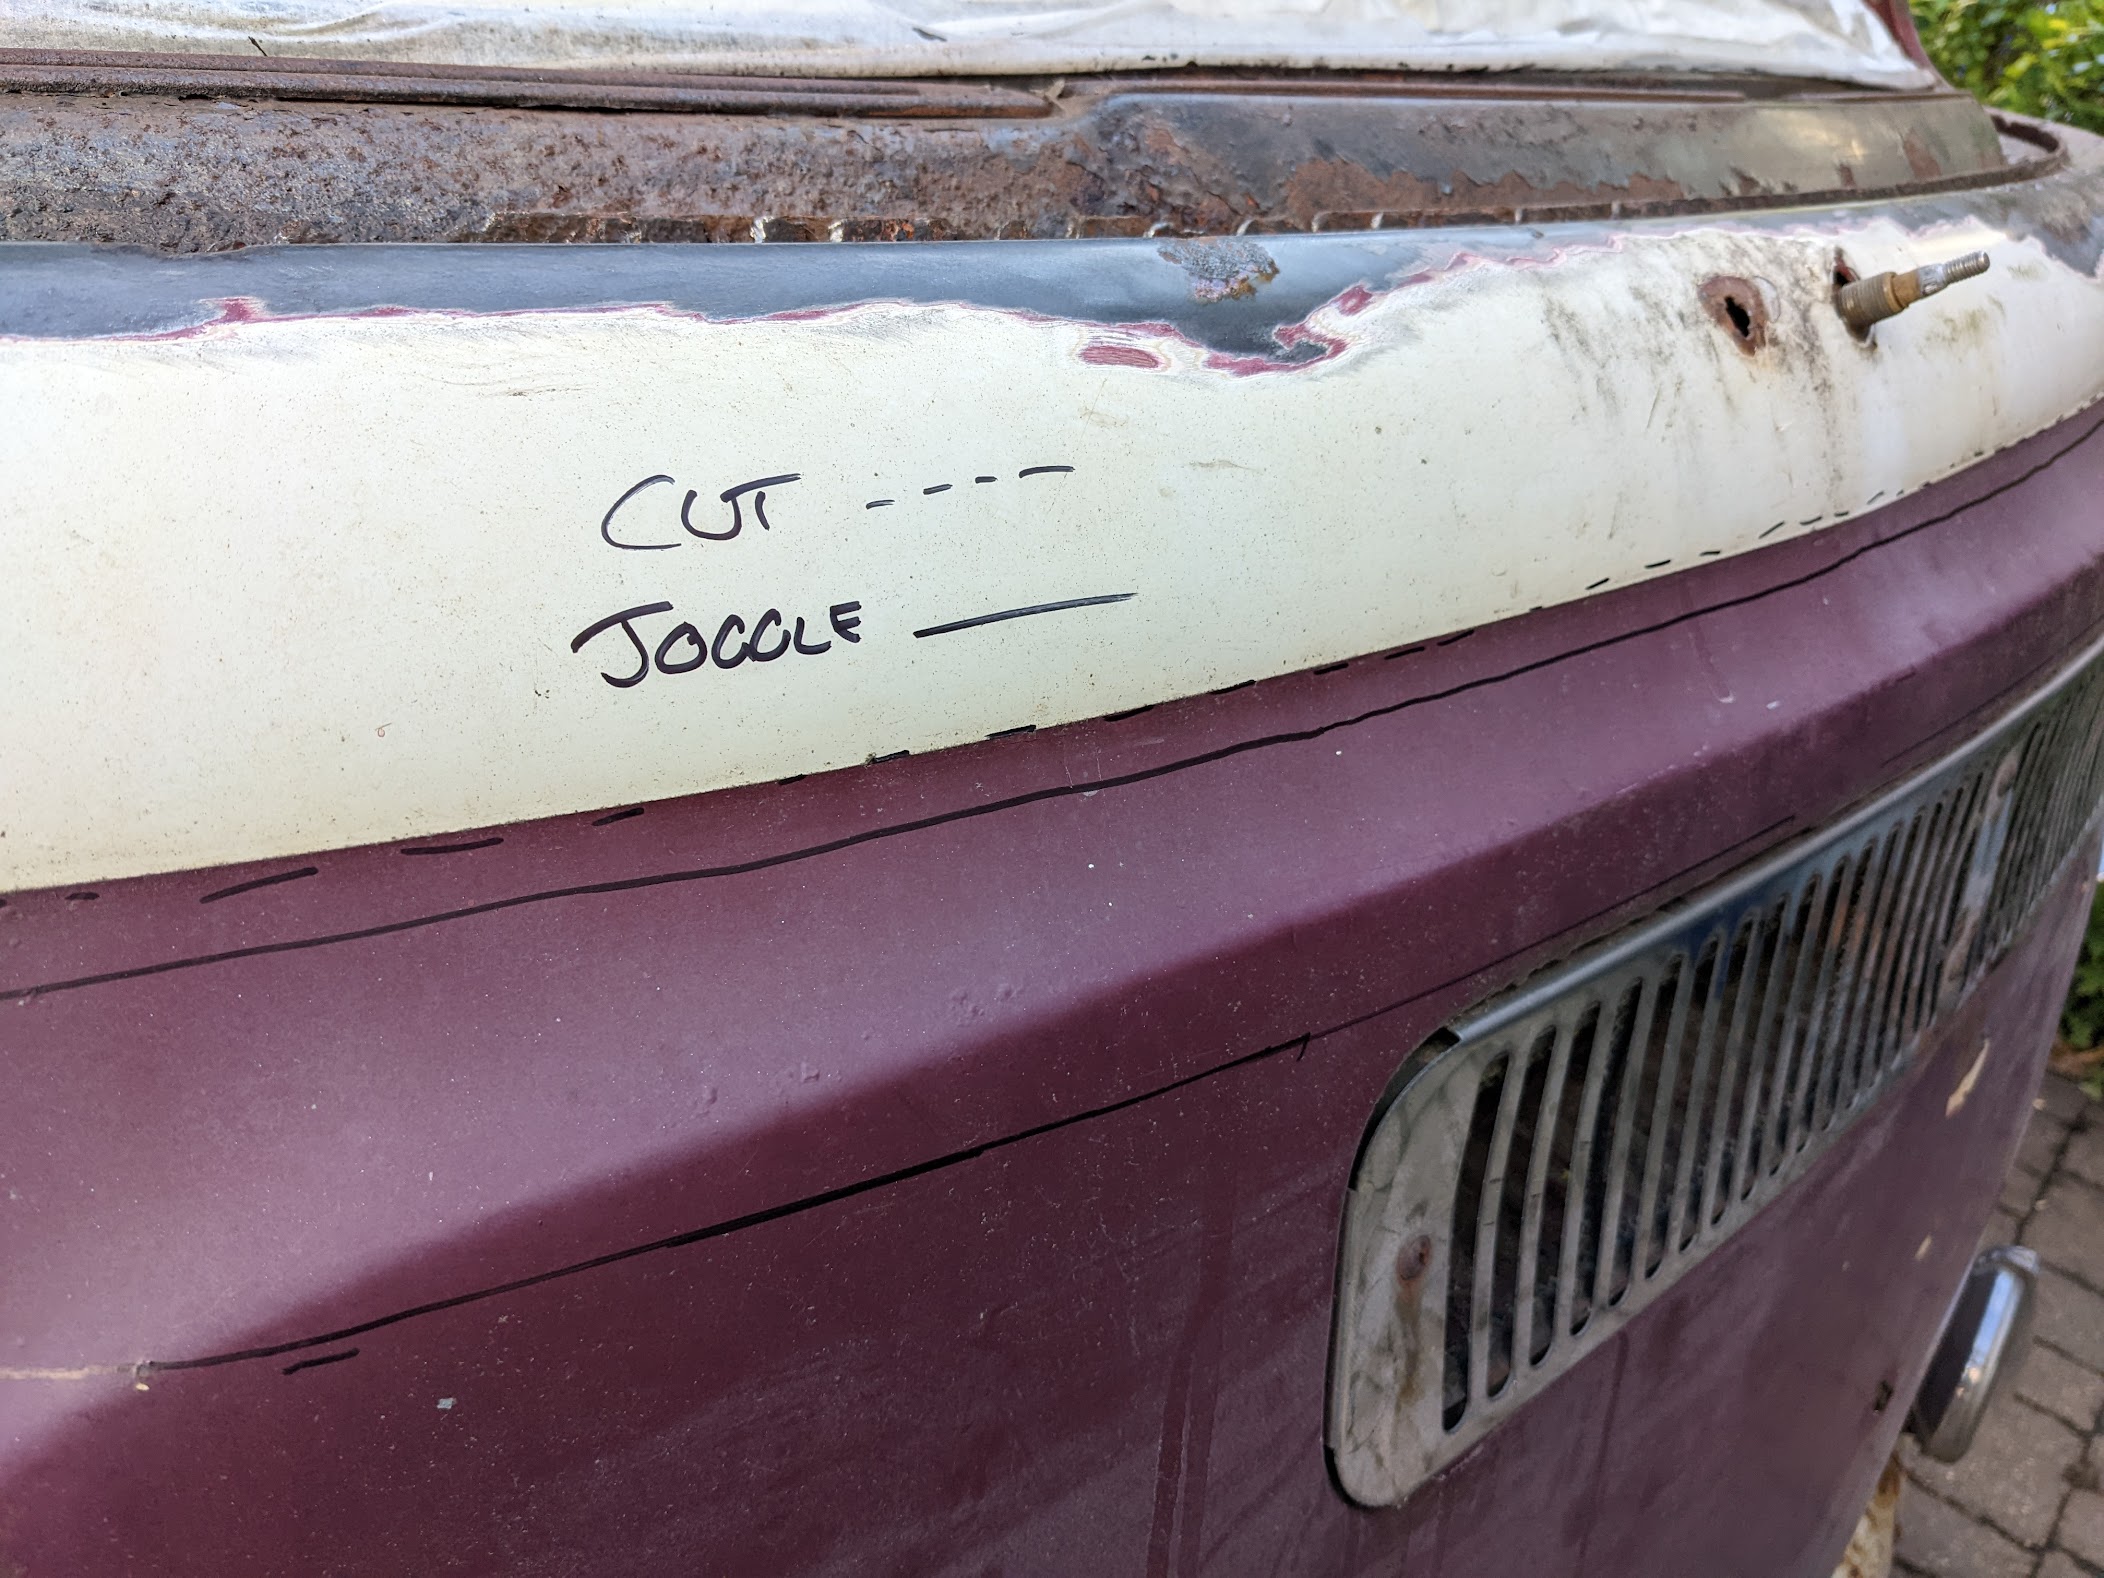
...and I decided to go for it during my lunch break, otherwise, I'd be worried about it for days! So now I'm committed. I've got a fair bit of tidying up and prep to do before it's in any fit state to accept the new panel, but I've taken the most difficult step now
I've decided to trim the new panel along the bottom running parallel with the "bulge" leaving enough to overlap the original skin, which I can joggle to fit behind:
...and I decided to go for it during my lunch break, otherwise, I'd be worried about it for days! So now I'm committed. I've got a fair bit of tidying up and prep to do before it's in any fit state to accept the new panel, but I've taken the most difficult step now
- Joined
- Jul 8, 2009
- Messages
- 26
- Reaction score
- 8
- Location
- Taunton, Somerset
- Year of Your Van(s)
- 1971
- Van Type
- Devon
Found the cut for left windscreen pillar and a leftover bit of the profiled steel i think came from schofields few years back.

Yours for the cost of postage if they will help just drop me PM
Cheers, Andy
Yours for the cost of postage if they will help just drop me PM
Cheers, Andy
Found the cut for left windscreen pillar and a leftover bit of the profiled steel i think came from schofields few years back.
View attachment 3593
Yours for the cost of postage if they will help just drop me PM
Cheers, Andy
well done , top man.
Ozziedog,,,,,,,,or,,,,, top Dude
philstar
Well-known member
- Joined
- Dec 27, 2011
- Messages
- 222
- Reaction score
- 45
- Location
- Redditch
- Year of Your Van(s)
- 1971
- Van Type
- Panel van
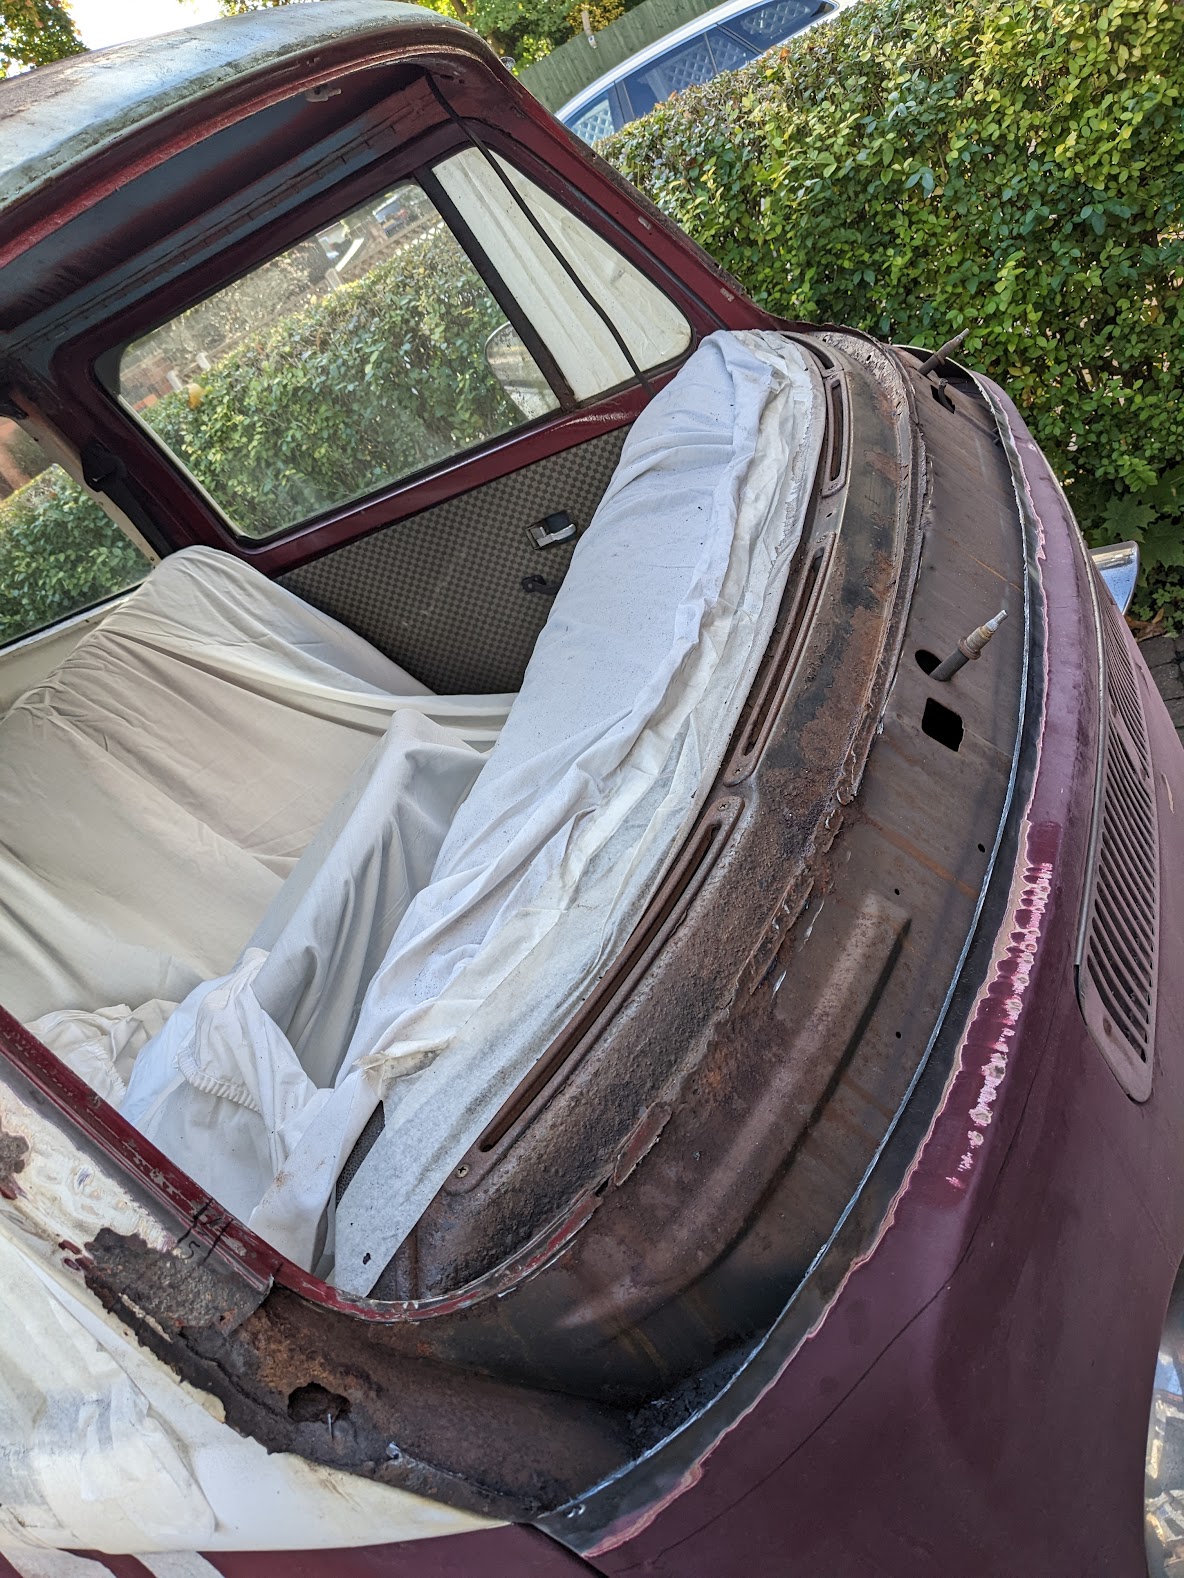
Huge thanks to @dude10028 for the cuts, I have now welded on the front panel and repaired the uprights! My filler work needs a bit of improvement, but I can do some fine detailing once everything else works! All in primer now ready for a blast of white tomorrow then I can finally get the heated screen in! Soon be time for a drive...
philstar
Well-known member
- Joined
- Dec 27, 2011
- Messages
- 222
- Reaction score
- 45
- Location
- Redditch
- Year of Your Van(s)
- 1971
- Van Type
- Panel van
...not bad for a temporary finish! Pleasantly surprised that the WRX 321 Burgundy is quite a close rattle-can match for the original Chianti Red, though the Motip matt white leaves a lot to be desired. I used 3M Scotch blue masking tape to get the colour split. I'll give the dashboard a quick tidy-up in matt black before I move on to fitting the windscreen, but that should be the last of the major jobs before I can take it out on the road!
philstar
Well-known member
- Joined
- Dec 27, 2011
- Messages
- 222
- Reaction score
- 45
- Location
- Redditch
- Year of Your Van(s)
- 1971
- Van Type
- Panel van
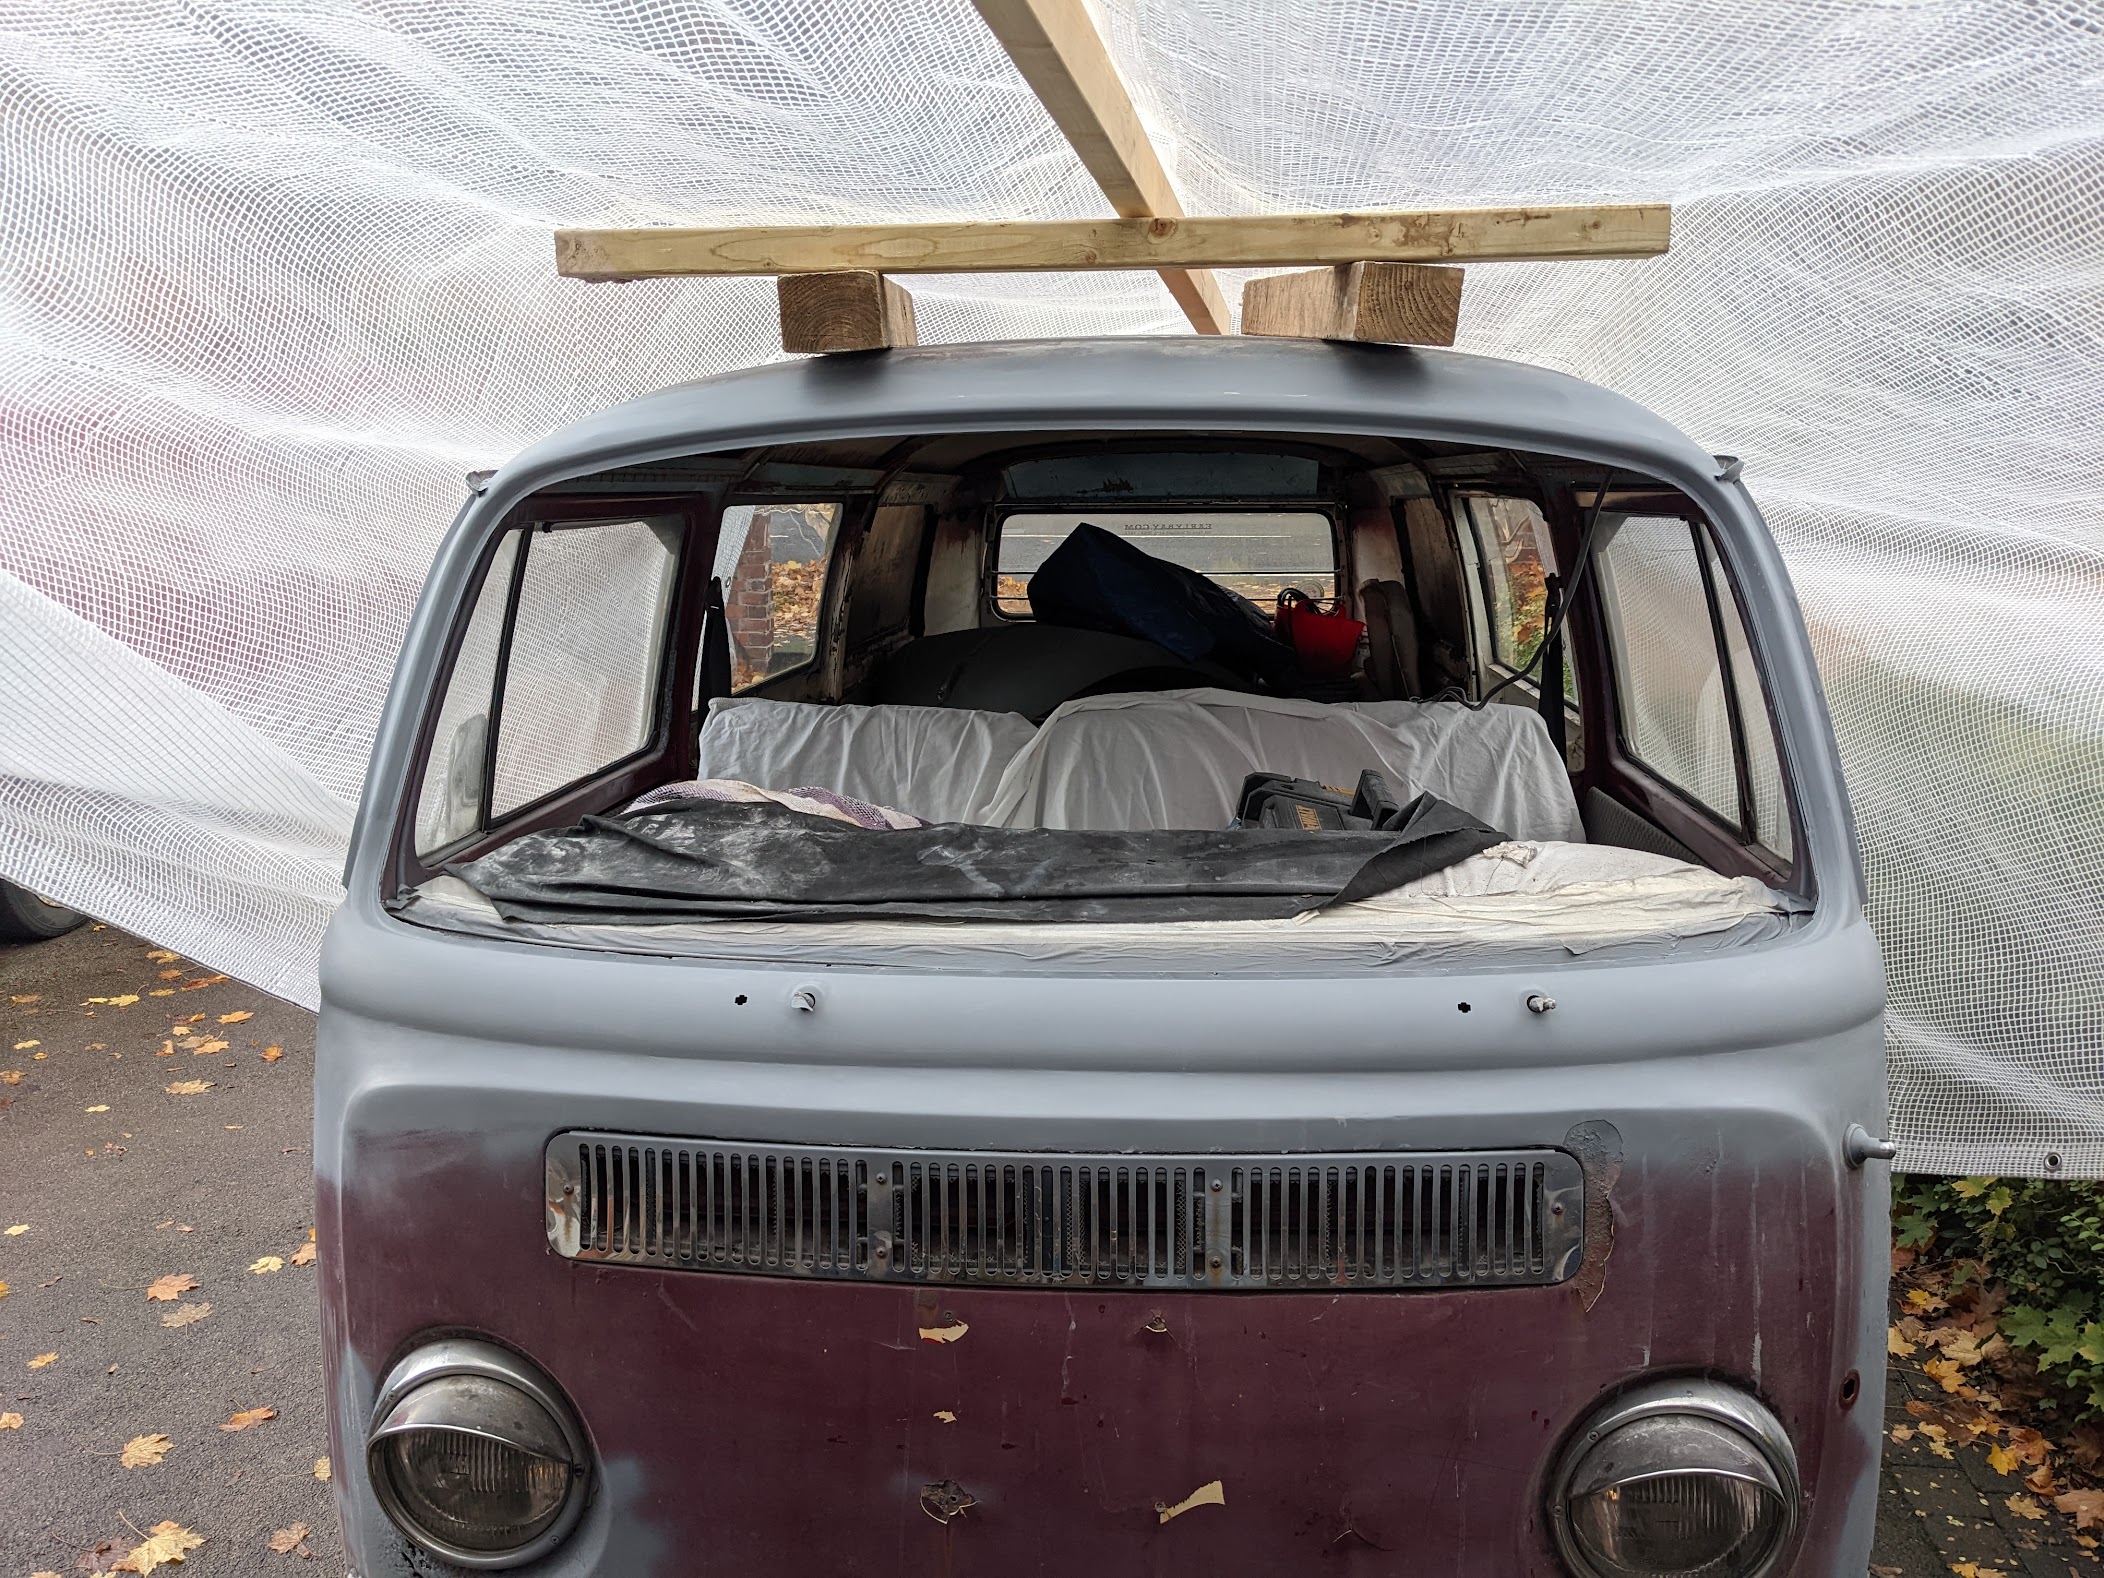
The screen is in!

It took me a full hour of struggling to fit the seal to the screen (the join is at the top center, which I didn't expect). I then foolishly tried to add the windscreen sealant before realising it would be so much easier to do it once I had installed the screen, so I got into a bit of a mess in the spare room.
Fitting the screen itself was fairly easy taking my time using the string method, I feel like the lower drivers' corner could be a bit more snug, but I doubt the panel is 100% square after all these years anyway... I'm sure it will settle down after a few miles. I then squirted in plenty of sealant around the screen/seal join and I'll wire in the heater elements later on.
Next up are four new tyres (eugh) and I may as well get the alloys shot-blasted and powder-coated while I'm at it.
Well done on getting the screen in and fitting ok. After all your metal fabrication it must have been satisfying to get it in. 
naskeet
Well-known member
Huge thanks to @dude10028 for the cuts, I have now welded on the front panel and repaired the uprights! My filler work needs a bit of improvement, but I can do some fine detailing once everything else works! All in primer now ready for a blast of white tomorrow then I can finally get the heated screen in! Soon be time for a drive...
What sort of switching regime are you using for the two-zone electrically-heated windscreen. What information is etched or stickered on your windscreen. At least some of these windscreens seem to have been manufactured in China, with a nominal heating-element resistance of 0.99 ohms.
Similar threads
Vehicle For Sale
1968 Bay window T2 Dreamy
- Replies
- 3
- Views
- 517
- Replies
- 2
- Views
- 756
Vehicle For Sale
1971 westy weekender
- Replies
- 0
- Views
- 433