


currylager
Well-known member
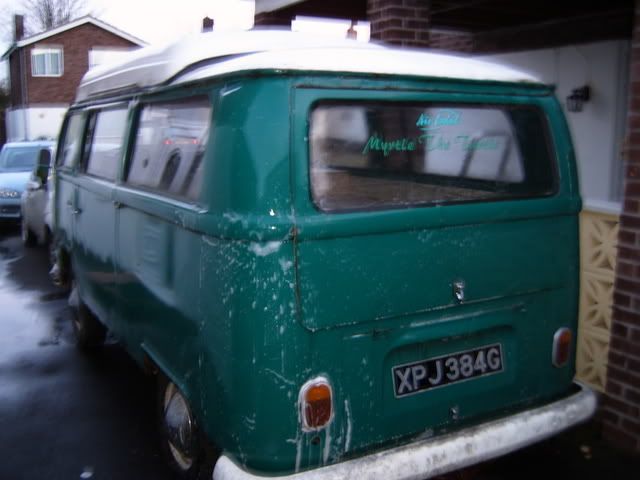
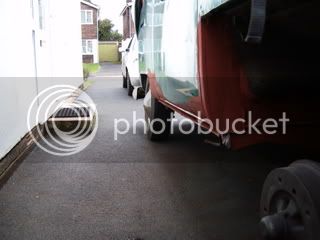
Hello all, finally got round to showing a few pictures of my bus (Myrtle) the incredible hulk, this is probably because i've spent most weekends trying to make a start on the damage, as you can see there is a lot to do.
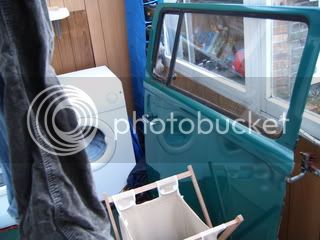
Just giving the bus a wash after i bought it, i borrowed a camper cover off a mate in VW club and didnt want to get it plastered in grime and mildew, and rust of course!!!
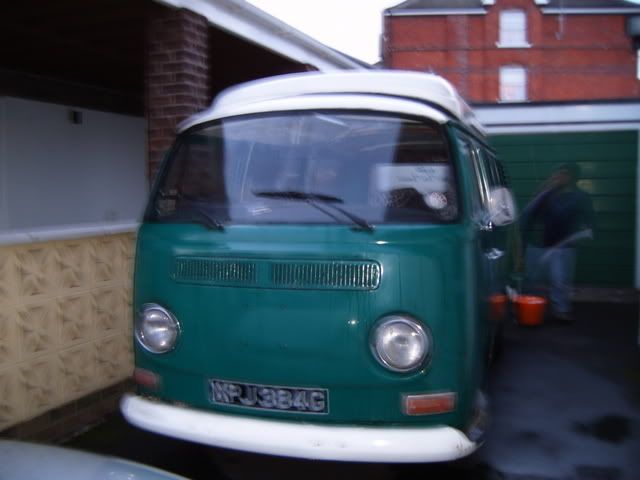
A frontal shot with me (blur) doing my best to clean several years of crap of it.
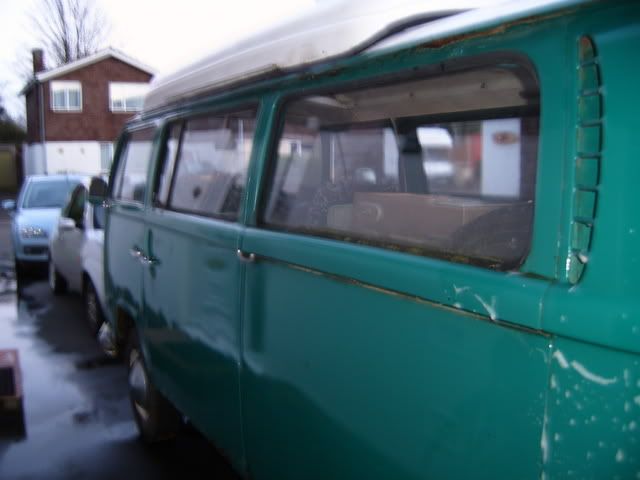
Bus looking much better after a clean!!!
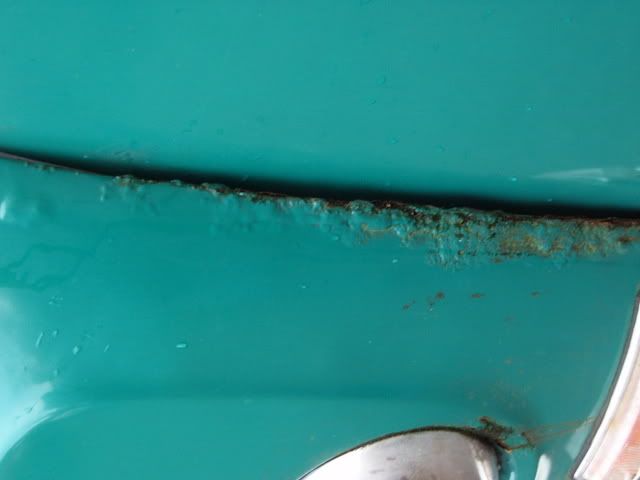
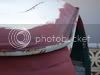
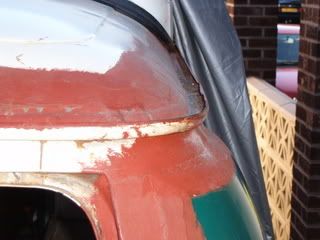
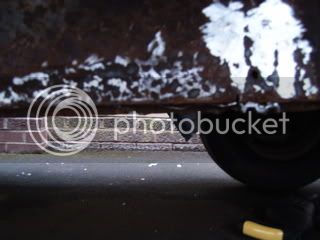
Bus front panel very corroded at the edges, but not MOT failure, so i may leave this until i finish more urgent issues and hopefully get it on the road.
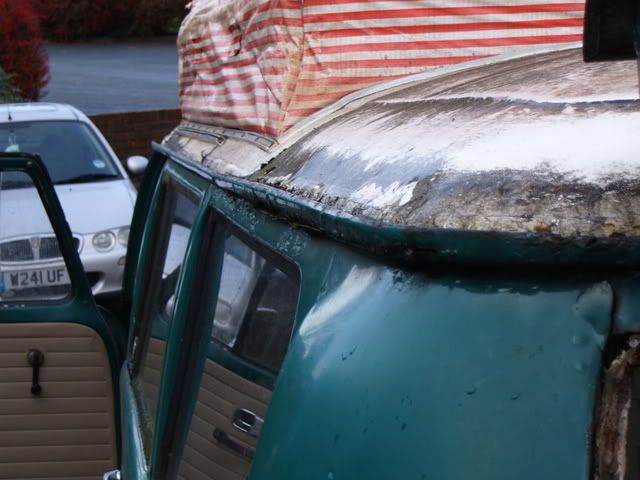
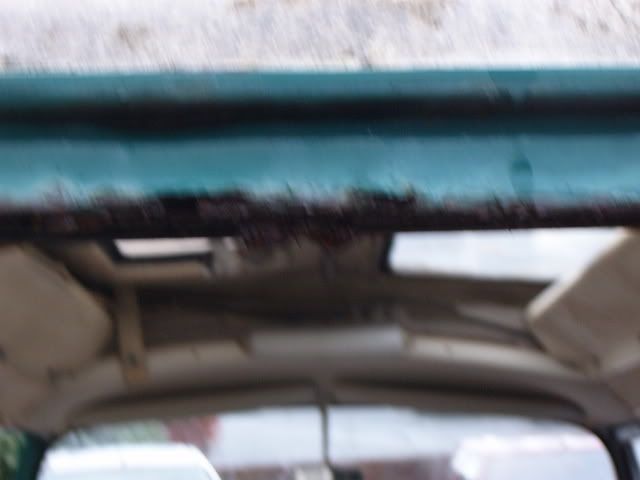
As you can see the roof is totally shot, most of the gutters are actually filler, there have been several times when i have wondered if it is actually possible to repair corrosion this bad.
Just the same on the other side, see what i mean, dont know how people can let things get this bad.
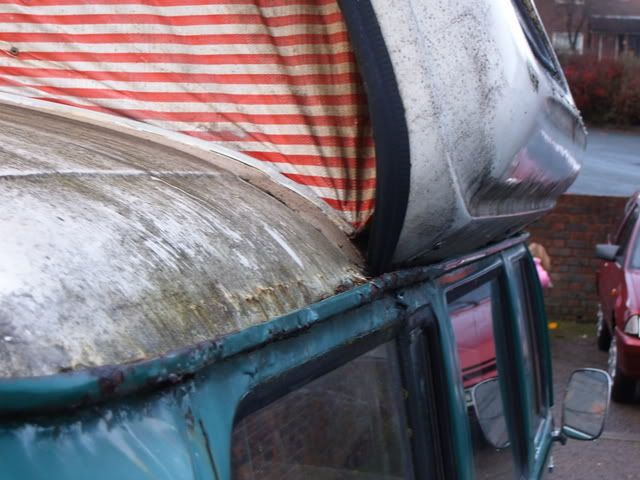
Gutters have rotted through and leaked water into interior roof structure and rotted this badly too, replacement roof was only option.
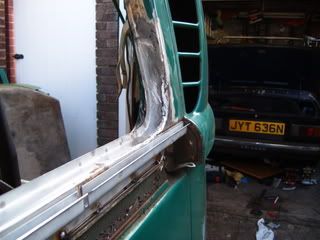
Close up shot of gutters, this lot literally fell out when i removed the window. Dormobile pop tops allow all the crap to get trapped in the gutters and do a lot of damage.
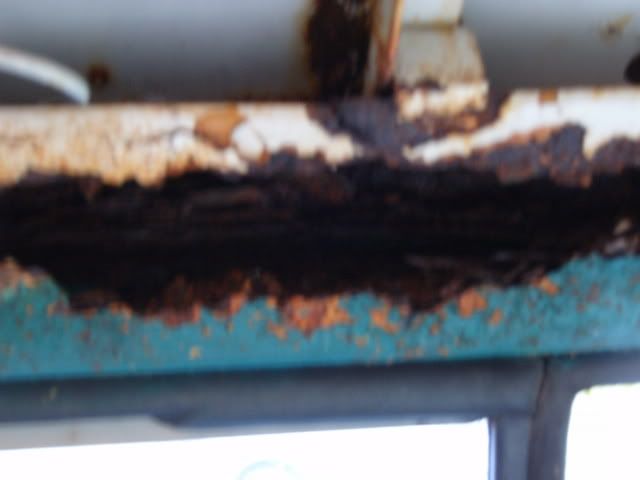
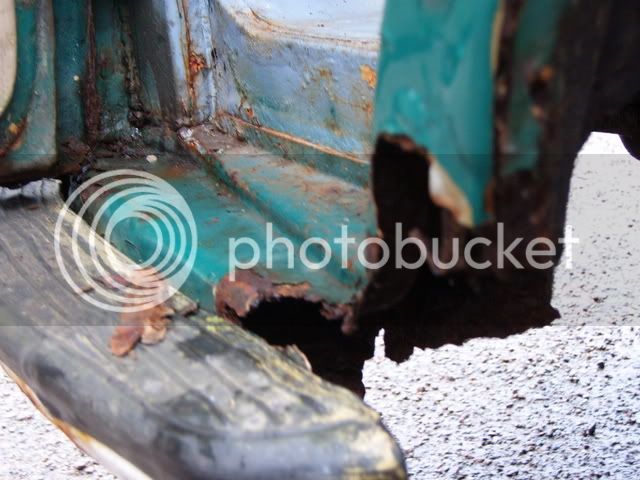
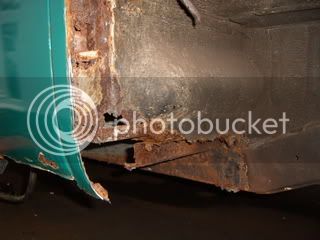
The section of steel between the gutter and top of tailgate is non existent!, this would be an MOT failure because of the exhaust fumes being sucked in - worse than dodgy heat exchangers!!!
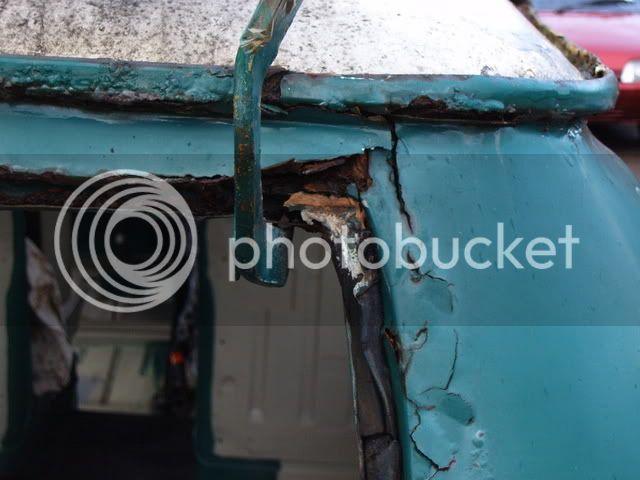
The tailgate area at its worst, this bus was on Ebay and never got one bid, wonder why???
I bought this bus in November 06 and have completed the roof repair to a reasonable standard which makes the bus a more viable project.
 [/img]
this is the picture after the roof has been replaced with one off a bus with a completely rotten bottom end.
More pics of roof repair.
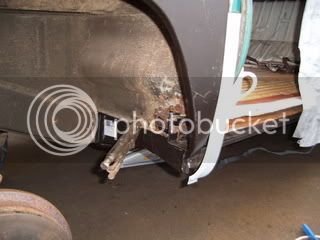
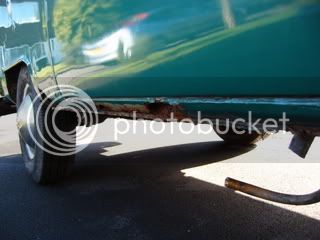
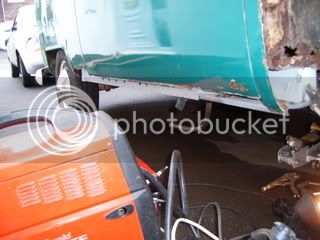
Front steps and arches are required on both sides.
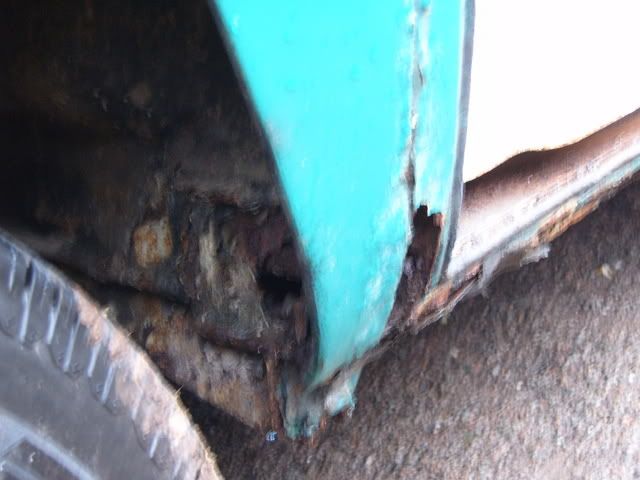
Sills and outriggers required on both sides, but i decided to tackle the roof first, if the repairs were not successful- the bus is scrap!!.
]
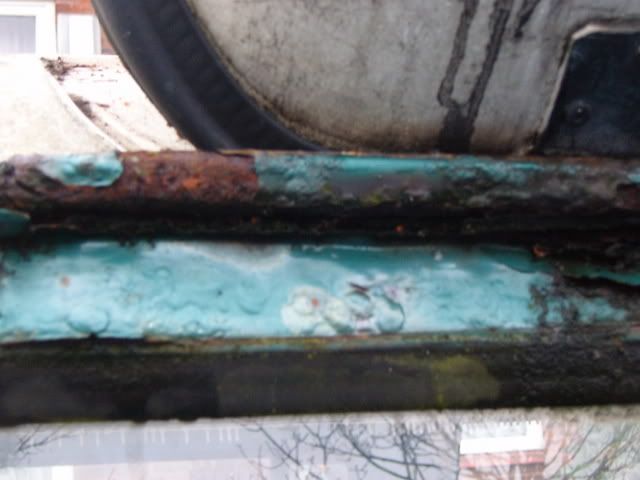
More sill shots, this bus spent a fair bit of its life in Morecambe Bay, was no holiday tho!!, salt air has worked wonders with the tinworm.
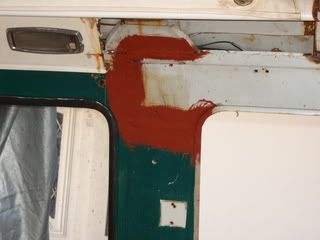
A picture of where the replacement roof is welded in. This white section has replaced that rather rotten innner section shown above.
Rather than replace the entire roof i opted for cutting out the gutters and roof structure and mating them with the good window posts and top roof skin.
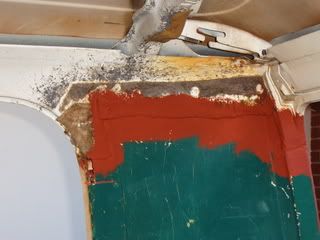
A picture of replacement roof corner joint on other side.
An external roof joint at window post, not bad!
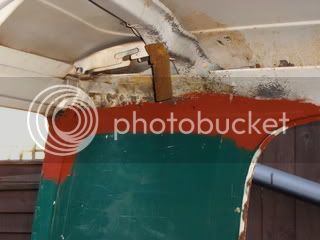
The external roof corner joint, the donor roof was not perfect, but a lot better than the pile of filler that was there before. Some fine cosmetic attention will be needed at a later date, perhaps on a sunny day when the van is actually on the road!!!.
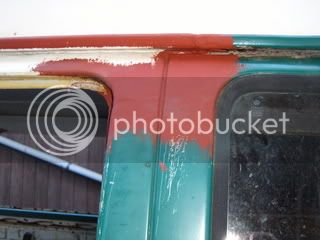
Note the roof joint above the gutter along the rear roof edge, low enough to be discreet, but hope to do fine cosmetic detail at some point.

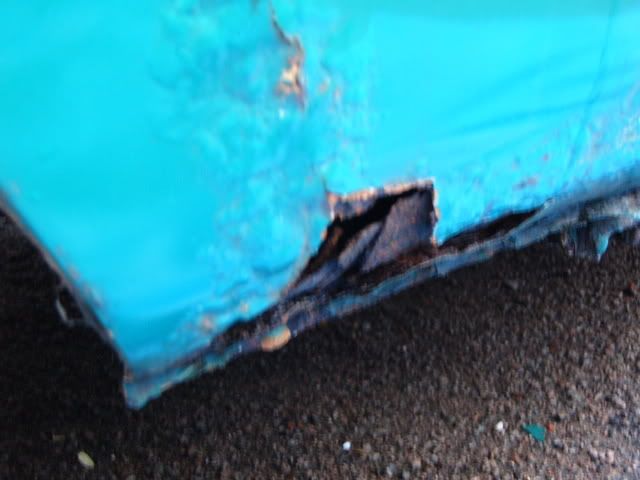
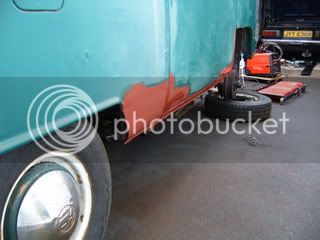
The lower window recesses were found to be well rotten so replacement panels welded in, i chose the £35 ones because the metal behind the outer skirts was also thin.
Same repair carried out on other side, welding the window corner sections in and getting them right took time and patience.
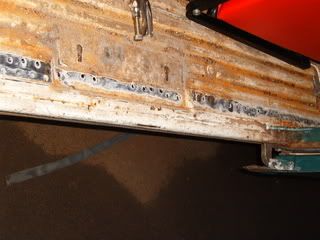
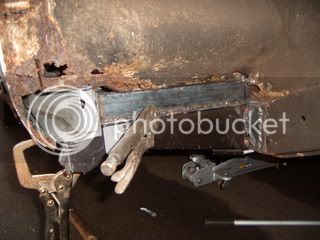
The inner sill was rotten, so all the spot welds drilled out and sill removed.
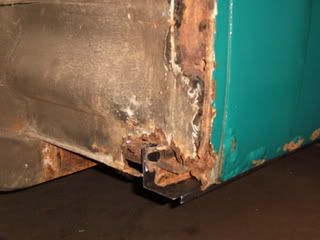
Note front outrigger removed and inner sill in position, still a lot of work to do in this area.
New outrigger offered into place, trying to check all panels fit properly before the welding begins.
Front wheelarch and step offered into place and secured temporarily with self tappers to ensure panels fit in all places. Ran out of welding gas this weekend and supplier was closed, so doing what i can for the time being.
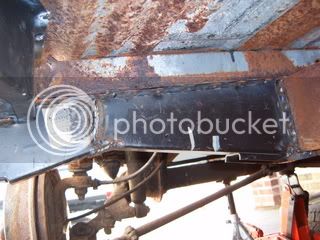
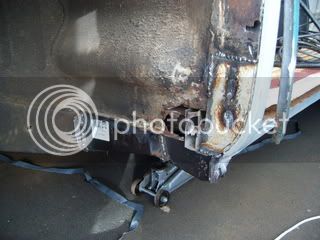
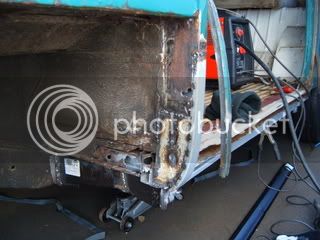
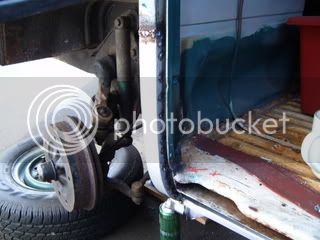
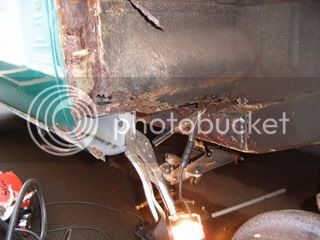
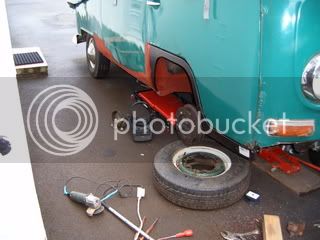
Front lower valance of van literally fell off with front bumper note how really early bays dont have the addtional chassis sections, only the 2 main rails. Main chassis rail ends both crusty, new metal welded in including new end plates cut into shape with help of jigsaw. 50 ton puller required to remove arm off steering box allowing it to be removed to repair chassis.
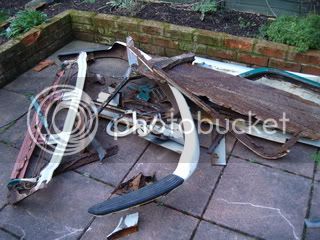
Having a winter project is a good idea, garden is being used as scrap metal/rust store , can you recognise the parts??.
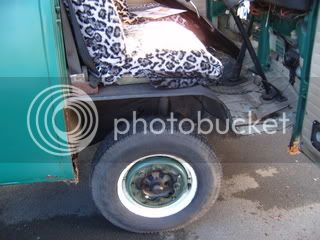
Do you ever get the impression this project might be taking over my life, Sliding door is stored indoors while i repair wheel arch sill section behind sliding door.
Front outrigger now plug welded in, luckily the rear ones were ok and passed the hammer test.

View of inner sill welded in.
I used cardboard templates to fabricate the curved steel sections for the lower B post side sections. The metal was donated from the heap of scrap in my back garden (VW roof).
The outer section could then be welded to the curved post section (courtesy of schofields).
Curved section from another angle.
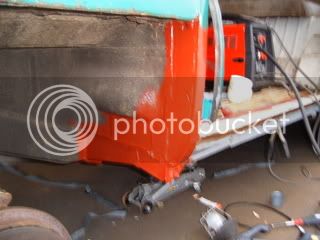
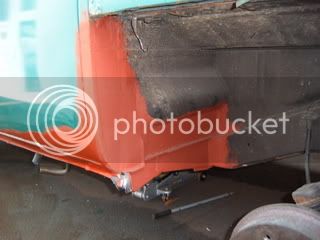
The remainder of wheel arch bulkhead plated and painted.
The outer sill was surprisingly easy to weld in and was completed in under an hour, i sprayed the internals with weld through zinc primer, hopefully this will help keep the rust away a bit longer, i wouldnt want to do another bus as bad as this again!!!.
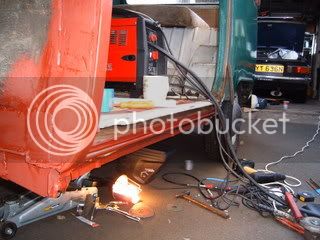
I managed to weld the rear section between the sill and rear wheelarch in after work this afternoon. All i need to do now is close up the wheel rear arch to box the sill section off and i will be able to refit the sliding door.
http://i123.photobucket.com/albums/o303/currylager/myrtle5009.jpg[/IMG
Time to start side B, this side was much worse, i dont know why though.
[img]http://i123.photobucket.com/albums/o303/currylager/myrtle5005.jpg
Rear short sill also required.
Front wheel arch cut out.
The chassis was also peppered by the front outrigger, so a plate is needed .
All 3 sills totally shot and need replacing.

Sills removed, both rear outriggers ok and useable.
Front outrigger and upper cross member totally rotten, so cut them out to replace.
Inner sill and strengthener welded in. Note nice big juicy plate welded to chassis, outrigger will fit nicely over this, should be well strong.
Outrigger and upper crossmember section welded in.
Outer sill clamped and welded in.
Rear short sill fitted.
Looking a bit better now.
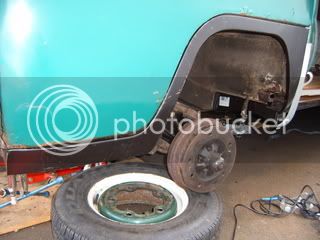
Front wheel arch and step fitted.
Just giving the bus a wash after i bought it, i borrowed a camper cover off a mate in VW club and didnt want to get it plastered in grime and mildew, and rust of course!!!
A frontal shot with me (blur) doing my best to clean several years of crap of it.
Bus looking much better after a clean!!!
Bus front panel very corroded at the edges, but not MOT failure, so i may leave this until i finish more urgent issues and hopefully get it on the road.
As you can see the roof is totally shot, most of the gutters are actually filler, there have been several times when i have wondered if it is actually possible to repair corrosion this bad.
Just the same on the other side, see what i mean, dont know how people can let things get this bad.
Gutters have rotted through and leaked water into interior roof structure and rotted this badly too, replacement roof was only option.
Close up shot of gutters, this lot literally fell out when i removed the window. Dormobile pop tops allow all the crap to get trapped in the gutters and do a lot of damage.
The section of steel between the gutter and top of tailgate is non existent!, this would be an MOT failure because of the exhaust fumes being sucked in - worse than dodgy heat exchangers!!!
The tailgate area at its worst, this bus was on Ebay and never got one bid, wonder why???
I bought this bus in November 06 and have completed the roof repair to a reasonable standard which makes the bus a more viable project.
this is the picture after the roof has been replaced with one off a bus with a completely rotten bottom end.
More pics of roof repair.
Front steps and arches are required on both sides.
Sills and outriggers required on both sides, but i decided to tackle the roof first, if the repairs were not successful- the bus is scrap!!.
]
More sill shots, this bus spent a fair bit of its life in Morecambe Bay, was no holiday tho!!, salt air has worked wonders with the tinworm.
A picture of where the replacement roof is welded in. This white section has replaced that rather rotten innner section shown above.
Rather than replace the entire roof i opted for cutting out the gutters and roof structure and mating them with the good window posts and top roof skin.
A picture of replacement roof corner joint on other side.
An external roof joint at window post, not bad!
The external roof corner joint, the donor roof was not perfect, but a lot better than the pile of filler that was there before. Some fine cosmetic attention will be needed at a later date, perhaps on a sunny day when the van is actually on the road!!!.
Note the roof joint above the gutter along the rear roof edge, low enough to be discreet, but hope to do fine cosmetic detail at some point.
The lower window recesses were found to be well rotten so replacement panels welded in, i chose the £35 ones because the metal behind the outer skirts was also thin.
Same repair carried out on other side, welding the window corner sections in and getting them right took time and patience.
The inner sill was rotten, so all the spot welds drilled out and sill removed.
Note front outrigger removed and inner sill in position, still a lot of work to do in this area.
New outrigger offered into place, trying to check all panels fit properly before the welding begins.
Front wheelarch and step offered into place and secured temporarily with self tappers to ensure panels fit in all places. Ran out of welding gas this weekend and supplier was closed, so doing what i can for the time being.
Front lower valance of van literally fell off with front bumper note how really early bays dont have the addtional chassis sections, only the 2 main rails. Main chassis rail ends both crusty, new metal welded in including new end plates cut into shape with help of jigsaw. 50 ton puller required to remove arm off steering box allowing it to be removed to repair chassis.
Having a winter project is a good idea, garden is being used as scrap metal/rust store , can you recognise the parts??.
Do you ever get the impression this project might be taking over my life, Sliding door is stored indoors while i repair wheel arch sill section behind sliding door.
Front outrigger now plug welded in, luckily the rear ones were ok and passed the hammer test.
View of inner sill welded in.
I used cardboard templates to fabricate the curved steel sections for the lower B post side sections. The metal was donated from the heap of scrap in my back garden (VW roof).
The outer section could then be welded to the curved post section (courtesy of schofields).
Curved section from another angle.
The remainder of wheel arch bulkhead plated and painted.
The outer sill was surprisingly easy to weld in and was completed in under an hour, i sprayed the internals with weld through zinc primer, hopefully this will help keep the rust away a bit longer, i wouldnt want to do another bus as bad as this again!!!.
I managed to weld the rear section between the sill and rear wheelarch in after work this afternoon. All i need to do now is close up the wheel rear arch to box the sill section off and i will be able to refit the sliding door.
http://i123.photobucket.com/albums/o303/currylager/myrtle5009.jpg[/IMG
Time to start side B, this side was much worse, i dont know why though.
[img]http://i123.photobucket.com/albums/o303/currylager/myrtle5005.jpg
Rear short sill also required.
Front wheel arch cut out.
The chassis was also peppered by the front outrigger, so a plate is needed .
All 3 sills totally shot and need replacing.
Sills removed, both rear outriggers ok and useable.
Front outrigger and upper cross member totally rotten, so cut them out to replace.
Inner sill and strengthener welded in. Note nice big juicy plate welded to chassis, outrigger will fit nicely over this, should be well strong.
Outrigger and upper crossmember section welded in.
Outer sill clamped and welded in.
Rear short sill fitted.
Looking a bit better now.
Front wheel arch and step fitted.