

G
Guest
Guest
This is just a quick guide on servo replacement if your servo has failed and you have to stand on the brakes to get your bus to stop.
A German replacement is over 300 notes so I've opted for a Brazilian one at less than half the price but as you will see its need some drilling as the stud holes for the mounting bracket are different. This was how i did it on my 71. You will notice your engine running rough as well as the vacuum leak will kill your idle. I temporarily blocked the no return valve until the parts arrive to fix it.
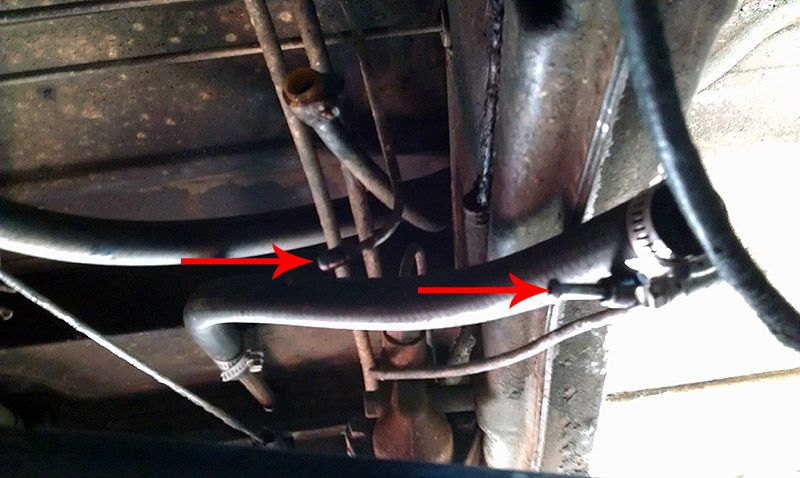
Remove the Leaky servo by bleeding the brakes first then give the nipples a good squirt of WD40, you don't want to twist the hard line as it is a pain to replace. Pull the nipples free of the master cylinder. Loosen both vacuum hose jubilee clamps and remove the hoses, one front and one on the disc of the servo. Undo the pedal linkage and gently pull it free from the nose of the servo. You will need to loosen the upper reservoir [behind the driver/passenger seat] hose from the reservoir on top of the master cylinder.
Undo the four nuts on the servo mounting bracket and pull the whole assembly away from the beam. It might be a bit tight so you can remove the master cylinder first [two nuts] if you need to then pull the servo clear of the van. Installation is just the opposite. I found installing the servo first then the master cylinder much easier separately.
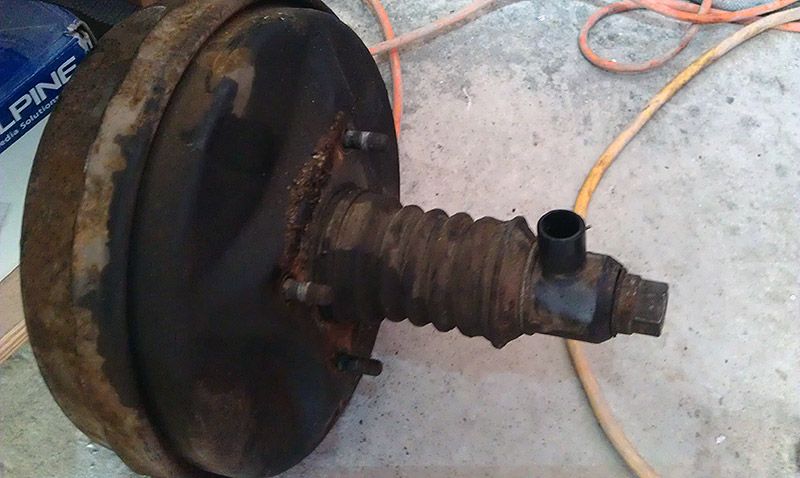
the old leaky 43 year old servo.
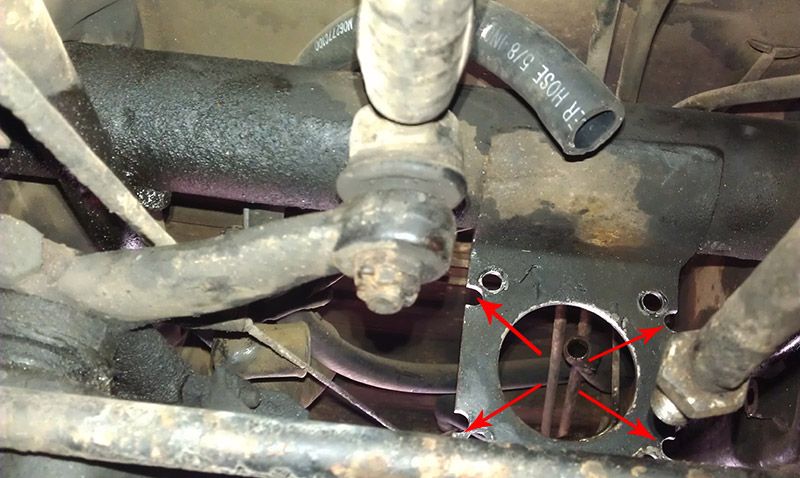
The new holes for the brazilian servo don't look too safe but when tightened down its going no where so don't worry. I used the metal gasket that came with the new servo to mark the mounting bracket holes
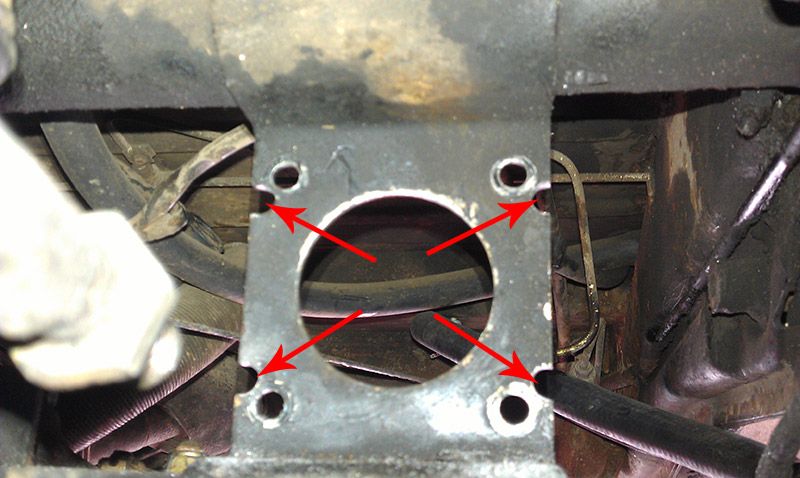
The holes again
Here you can see the front vacuum takeoff and the pedal linkage. If you find as i did that the pedal goes down quite some distance before biting you can adjust this linkage where it attaches to the front of the new servo nose.
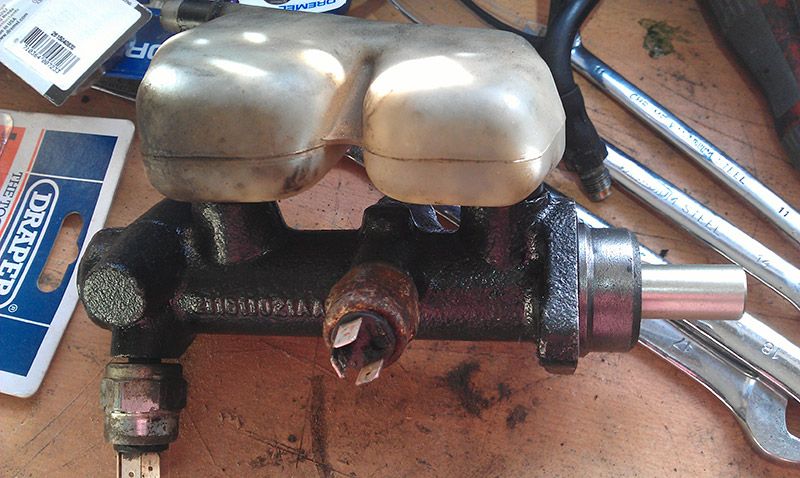
Hard lines carefully removed from the master cylinder.
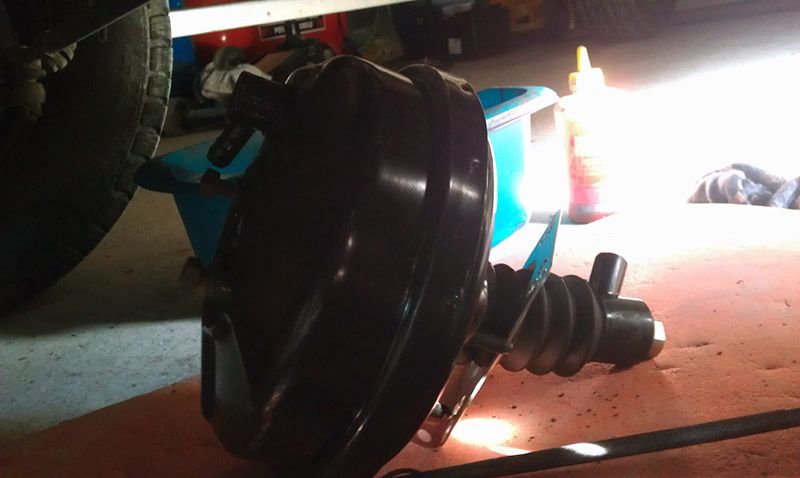
The new Brazilian Servo and metal gasket that holds the rubber boot in place.
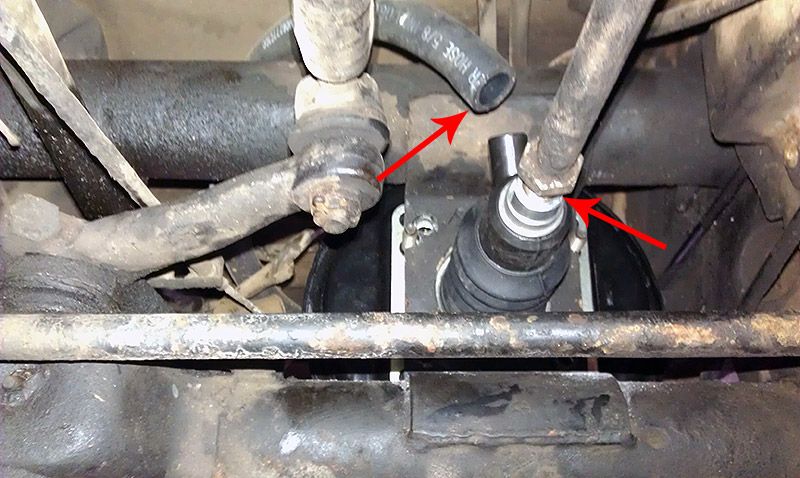
The 'to atmosphere' hose attached to the front of the servo nose and the pedal linkage back in place.
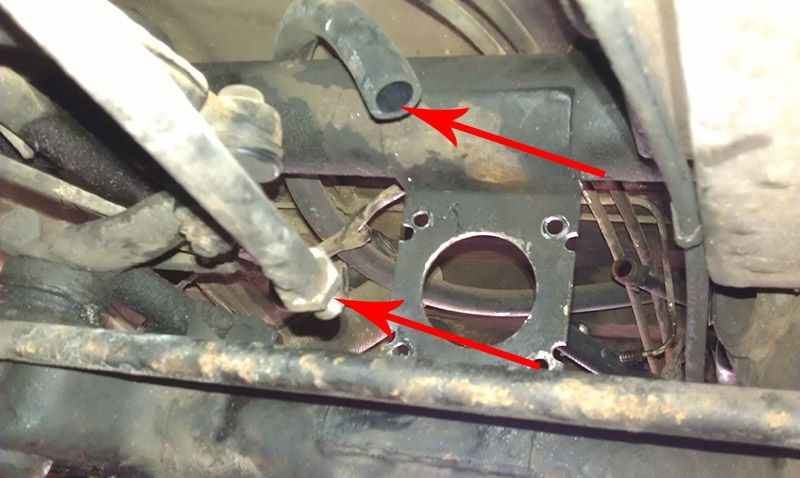
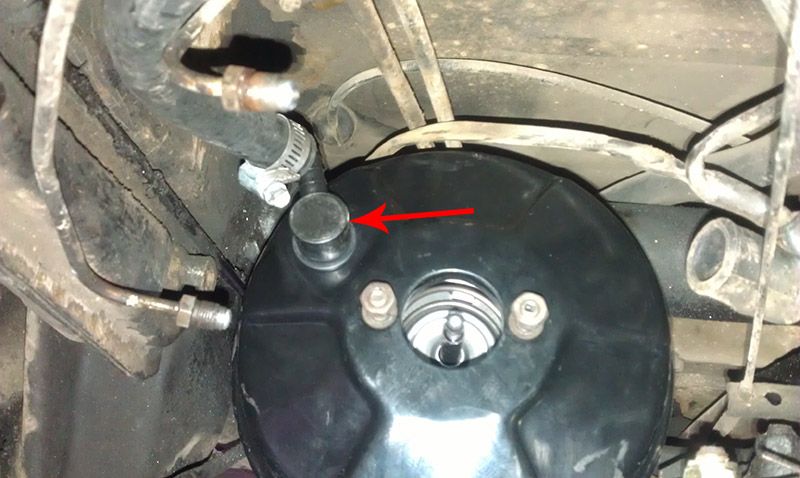
The vacuum takeoff from the back of the servo is in a slightly different location, i had enough hose to stretch to meet it, yours should be the same.
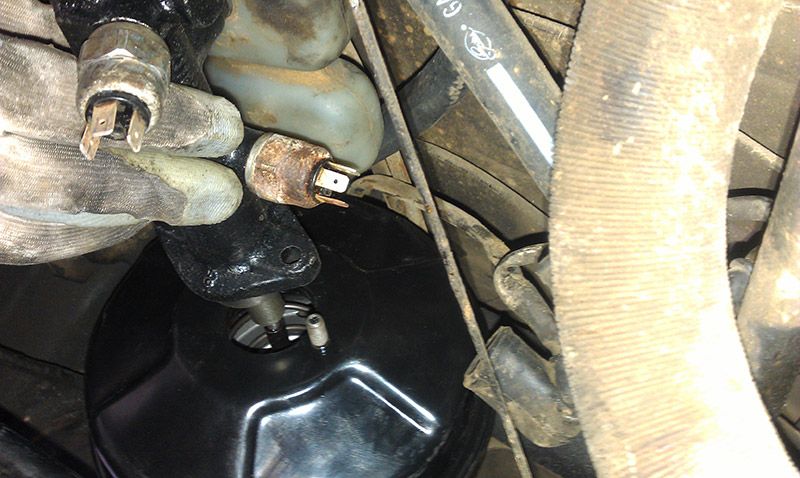
I bought the servo and new master cylinder as a bundle. I didn't want to take the chance as is common the cylinder has leaked into the servo and caused it to fail. Better to be safe than sorry. No need to bench bleed if you have a gunson easy bleed pressurised bleeder. Bleed all four brakes in order from back to front. You can see the original lower reservoir on the new master cylinder. I used the brake light switches from the original master cylinder, they look grubby but work perfectly well.
The new servo fixed back in place using the new holes drilled on the bracket and tighten down securely. Last thing to do is fit the new mc to the servo and reconnect everything and bleed the brakes and your good to go.
The difference really is night and day if your servo has failed and for £180 notes including a new master cylinder is well worth doing. It should give you a few more years of sharp stopping that won't pull your hamstring.
A German replacement is over 300 notes so I've opted for a Brazilian one at less than half the price but as you will see its need some drilling as the stud holes for the mounting bracket are different. This was how i did it on my 71. You will notice your engine running rough as well as the vacuum leak will kill your idle. I temporarily blocked the no return valve until the parts arrive to fix it.
Remove the Leaky servo by bleeding the brakes first then give the nipples a good squirt of WD40, you don't want to twist the hard line as it is a pain to replace. Pull the nipples free of the master cylinder. Loosen both vacuum hose jubilee clamps and remove the hoses, one front and one on the disc of the servo. Undo the pedal linkage and gently pull it free from the nose of the servo. You will need to loosen the upper reservoir [behind the driver/passenger seat] hose from the reservoir on top of the master cylinder.
Undo the four nuts on the servo mounting bracket and pull the whole assembly away from the beam. It might be a bit tight so you can remove the master cylinder first [two nuts] if you need to then pull the servo clear of the van. Installation is just the opposite. I found installing the servo first then the master cylinder much easier separately.
the old leaky 43 year old servo.
The new holes for the brazilian servo don't look too safe but when tightened down its going no where so don't worry. I used the metal gasket that came with the new servo to mark the mounting bracket holes
The holes again
Here you can see the front vacuum takeoff and the pedal linkage. If you find as i did that the pedal goes down quite some distance before biting you can adjust this linkage where it attaches to the front of the new servo nose.
Hard lines carefully removed from the master cylinder.
The new Brazilian Servo and metal gasket that holds the rubber boot in place.
The 'to atmosphere' hose attached to the front of the servo nose and the pedal linkage back in place.
The vacuum takeoff from the back of the servo is in a slightly different location, i had enough hose to stretch to meet it, yours should be the same.
I bought the servo and new master cylinder as a bundle. I didn't want to take the chance as is common the cylinder has leaked into the servo and caused it to fail. Better to be safe than sorry. No need to bench bleed if you have a gunson easy bleed pressurised bleeder. Bleed all four brakes in order from back to front. You can see the original lower reservoir on the new master cylinder. I used the brake light switches from the original master cylinder, they look grubby but work perfectly well.
The new servo fixed back in place using the new holes drilled on the bracket and tighten down securely. Last thing to do is fit the new mc to the servo and reconnect everything and bleed the brakes and your good to go.
The difference really is night and day if your servo has failed and for £180 notes including a new master cylinder is well worth doing. It should give you a few more years of sharp stopping that won't pull your hamstring.