You are using an out of date browser. It may not display this or other websites correctly.
You should upgrade or use an alternative browser.
You should upgrade or use an alternative browser.
Meet Gertie the rotten 72 lowlight crossover :)
- Thread starter exuptoy
- Start date

Help Support Early Bay Forum:
This site may earn a commission from merchant affiliate
links, including eBay, Amazon, and others.
Thanks.exuptoy said:Local steel suppliers about 5 years ago if I remember correctly. I only bought 2 handbrake ones but have 4 or 5 of the smaller ones. I'll have to see what I have spare and Il let you know.
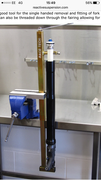
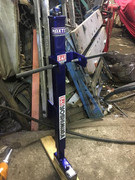
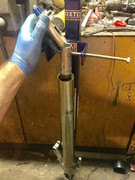
Today I decided to get the other handbrake tube in. Some struggling and choice words saw it finished. I notice there was a cable with a wing nut on it wrapped around the front beam which turned out to be the clutch cable and I also found another large tube I didn't know was there so I proceeded to install the clutch cable and Bowden tube. A good coat of etch primer then saw me paint all three tubes with grey Rusto and I have to admit it looks better under there.
I did have to scrub the thread on the clutch cable and borrow a 1/4 inch unf tap to run through the wing nut before covering the thread in copper slip but it's free to turn now along its full length. I also had to make a tag and weld it to the torsion beam as the original had long since rotted off.
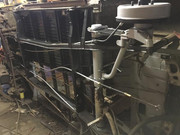
I did have to scrub the thread on the clutch cable and borrow a 1/4 inch unf tap to run through the wing nut before covering the thread in copper slip but it's free to turn now along its full length. I also had to make a tag and weld it to the torsion beam as the original had long since rotted off.


$27.95 ($13.98 / Count)
Marketplace Auto Parts Window Crank Handle Set of 2 - Chrome with Black Knob - Compatible with 1968-1978 Volkswagen Beetle
Parts Geek LLC

$124.78
Revell 07009 Volkswagen T1 Samba Bus Model Kit, 1:16 Scale 27.2 cm, Multi-Color, 223
Outstanding Outlet USA

$28.56
$32.43
Airfix Quickbuild Volkswagen Light Blue Camper Van Brick Building Model Kit, Multicolor
Amazon Global Store UK
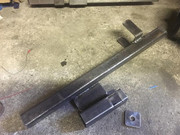
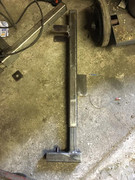
Cut out 2 corroded sections of heat exchanger control cable tubes, bent and cut 2 x new tubes to fit as I didn't have enough tube to replace them completely and made a couple of sleeves out of the larger tubes and welded to the front sections which weren't corroded. Still need to paint them but stuck some etch primer on them for now.
Just the throttle cable tube now and that bits done.
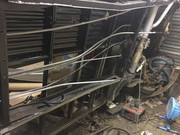
Just the throttle cable tube now and that bits done.

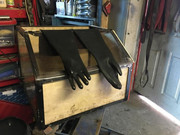
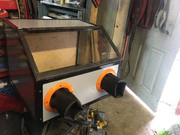
Nights tonight so thought I'd do a short shift in the garage and repurpose a steel and polycarbonate box previously used for ink printers in work into a blasting cabinet.
Removed the PC and cut the corner off before cutting the PC for a hinged lid then put in some supports. Some thin ply tomorrow or Friday and a coat of paint it'll be done. Already have gauntlets here.
All built from scrap as the box was in the skip! I hate waste.
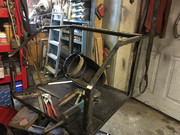
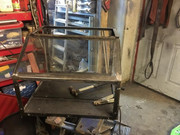
Removed the PC and cut the corner off before cutting the PC for a hinged lid then put in some supports. Some thin ply tomorrow or Friday and a coat of paint it'll be done. Already have gauntlets here.
All built from scrap as the box was in the skip! I hate waste.


graysummers
Well-known member
- Joined
- Jun 16, 2009
- Messages
- 470
- Reaction score
- 15
- Year of Your Van(s)
- 1972
- Van Type
- Crossover
You’re a dynamo. Haven’t watched the new Avengers Infinity film. But......... Were you one of the cast? You work fast. Iron Man? Looking like great ahead planning. Love the recycling too. Good fortune Mister. I’m betting this renovation, start to finish, has your name written all over it.
Haha, cheers Gray. Was in work when I saw the box at the scrap skip so I got a pass out note for it as I'd been looking at purchasing one used on Gumtree for around £50-£90 and thought I could do something similar without spending lots. I acquired 2 x 8x4 sheets of thin ply as my Mam had bought them then changed her mind about using them so it really has only cost me my time and a little scrap bar for the cross brace and corner mods. Should finish it tomorrow as I usually get up early after my last night shift.
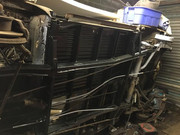
Had to sort out the garage today as there is stuff everywhere but thought I'd spare a little time for the cargo door that's been languishing in the garden for the best part of 8 years. I cut off the bottom and I know it CAN be repaired with home made repairs but should I just purchase a lower door inner skin repair and where can I find the best one or do I even need the best and are they all the same.
Is it even worth repairing the door?
Opinions and solutions please.
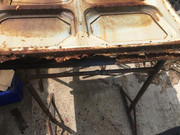
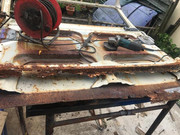
Is it even worth repairing the door?
Opinions and solutions please.


Similar threads
Vehicle For Sale
Early Bay Deluxe 1971
- Replies
- 5
- Views
- 2K
- Replies
- 4
- Views
- 3K
- Locked
- Replies
- 4
- Views
- 2K
- Replies
- 4
- Views
- 2K


