You are using an out of date browser. It may not display this or other websites correctly.
You should upgrade or use an alternative browser.
You should upgrade or use an alternative browser.
Monty the Red Campervan
- Thread starter mike202
- Start date


Help Support Early Bay Forum:
This site may earn a commission from merchant affiliate
links, including eBay, Amazon, and others.
gninnam said:Nice pics. When the weather is good it is nice down there :mrgreen:
thanks.
I've been cleaning up the gear shifter mech I added a 'quick shifter' kit as well. Also replaced the front bush. The gear shift coupler at the back has already been done so I think this is probably as good as I'm going to get it keeping stock. ")
I've been on a couple of short drives and it does change easier, although I still sometimes can't easily get it into 2nd from 3rd
However it is a lot better and the quick shift kit has shortened the throw quite a bit. I'm pleased overall with the results.
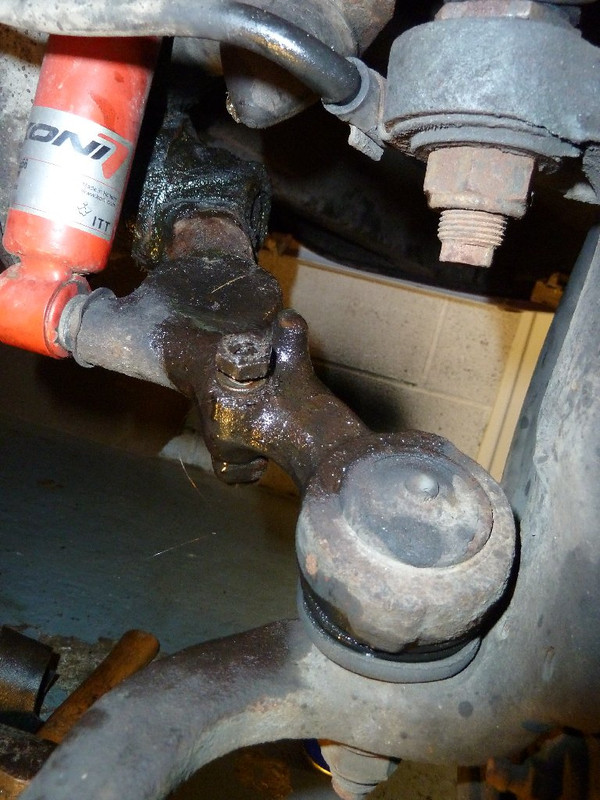
pic of the front bush (before I wiped it clean)
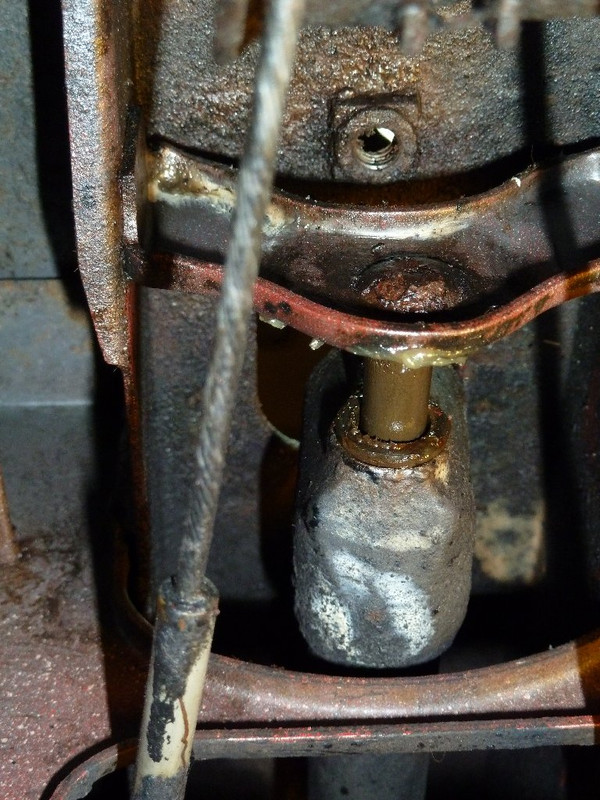
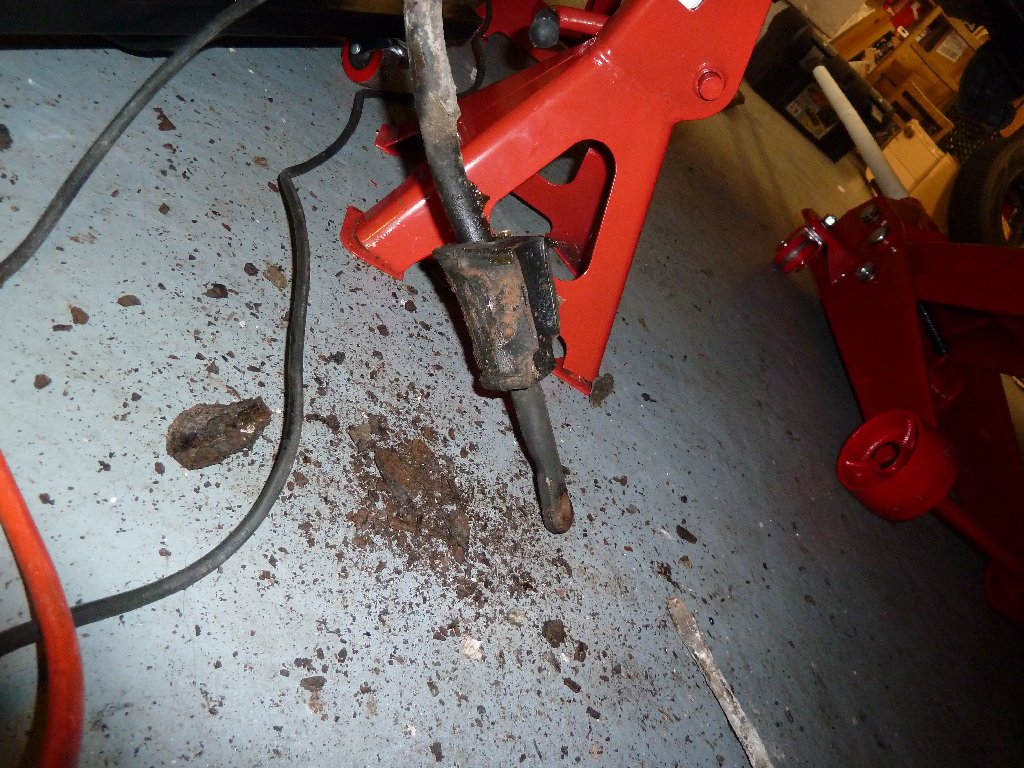
front bush removed

New boot and I did remove most of the grease before putting it back together!

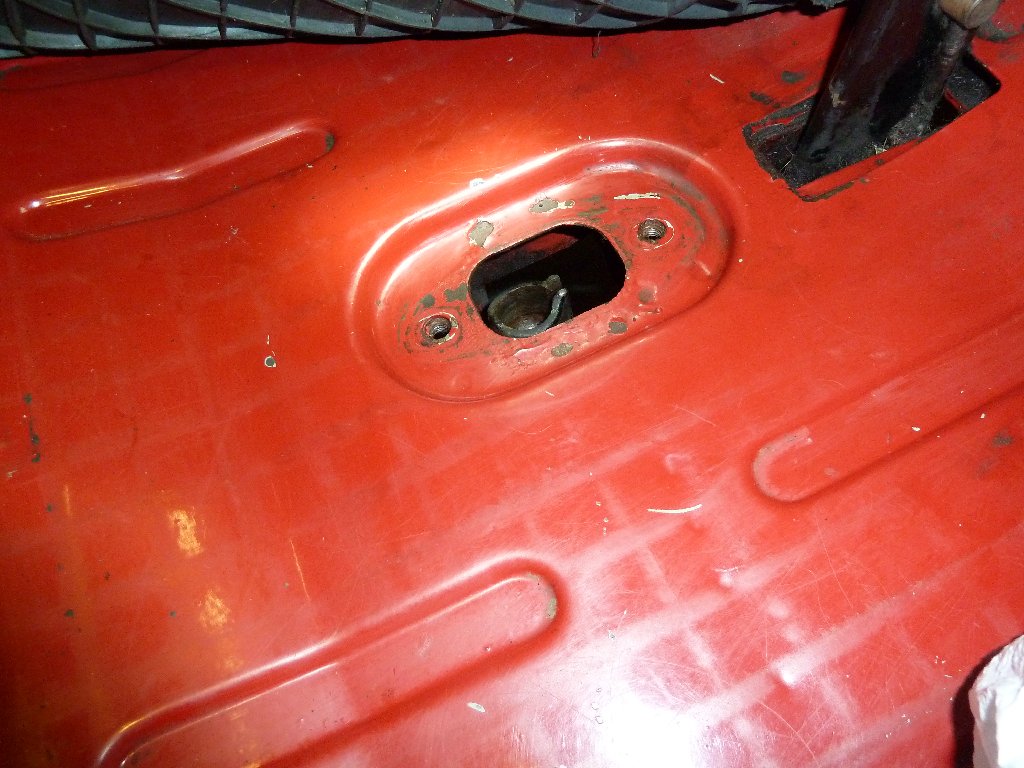
painted the base and shift plate, as well as the area around the gear stick on the cab floor.


thanks for looking.
I've been on a couple of short drives and it does change easier, although I still sometimes can't easily get it into 2nd from 3rd
However it is a lot better and the quick shift kit has shortened the throw quite a bit. I'm pleased overall with the results.
pic of the front bush (before I wiped it clean)
front bush removed
New boot and I did remove most of the grease before putting it back together!
painted the base and shift plate, as well as the area around the gear stick on the cab floor.
thanks for looking.
I have been doing a bit more whilst it's winter and the van is off the road.
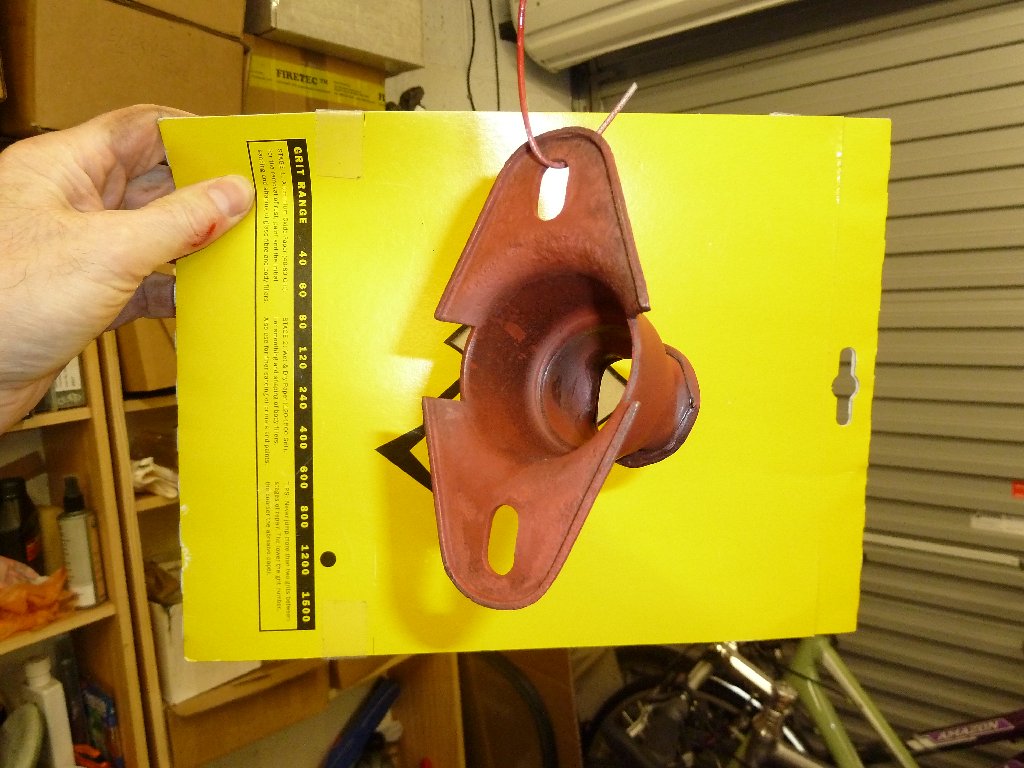
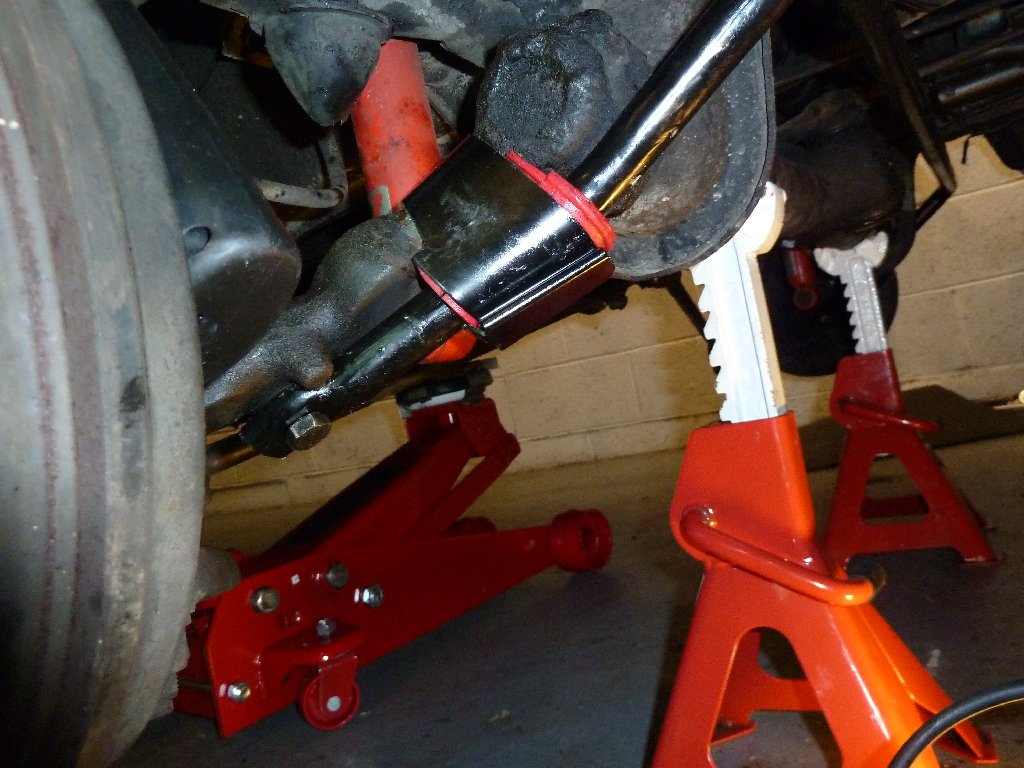
Fitted an uprated anti roll bar (or anti sway bar as some say). Empi brand and I decided to paint it with two coats of hammerite. Not really sure if this is essential but I would hate to see it go rusty!
I'm trying to get the handling as good as it can be, and this is another step in that direction.
the new clamps and bushes.


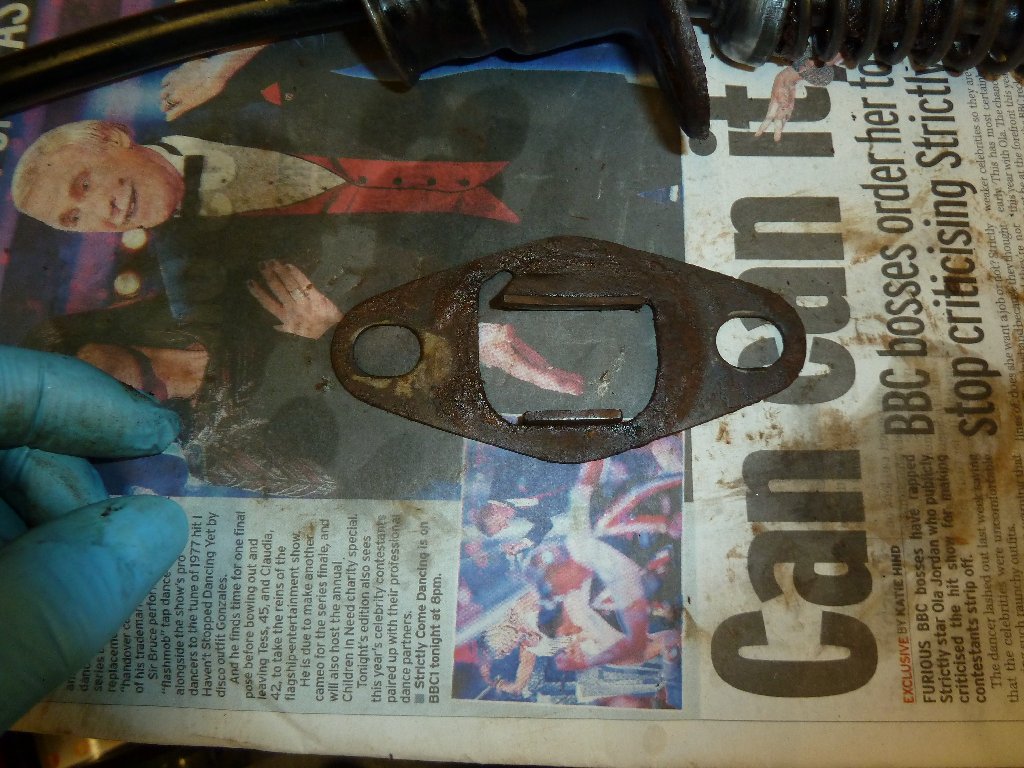
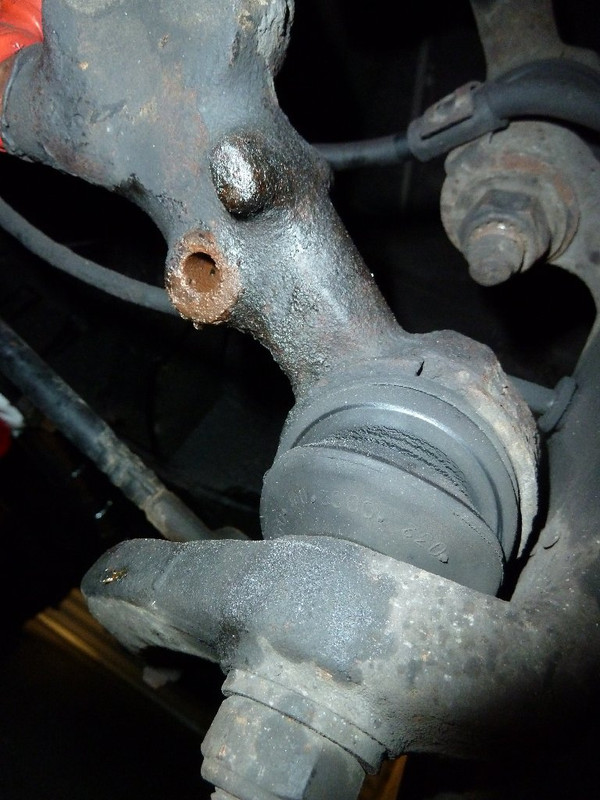
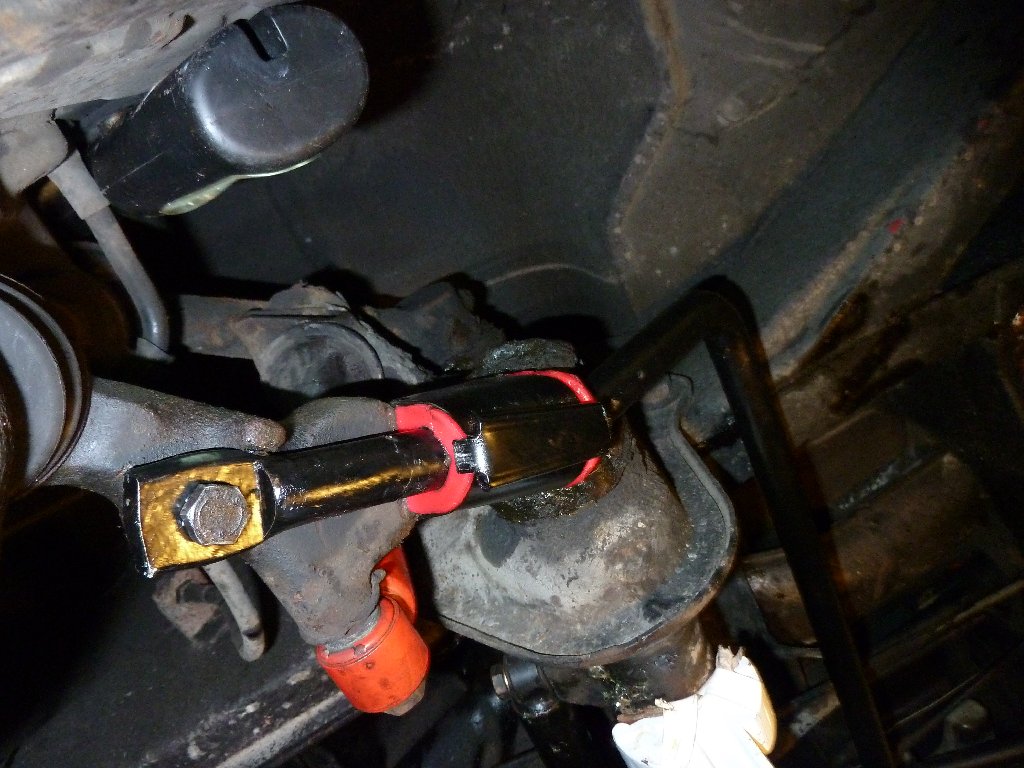
old clamp on r/h/s. The excess grease is there because I had just renewed the grease in the front beam.
the clamp clip has been put on the wrong way with the tab at the front but it has stayed on ok.
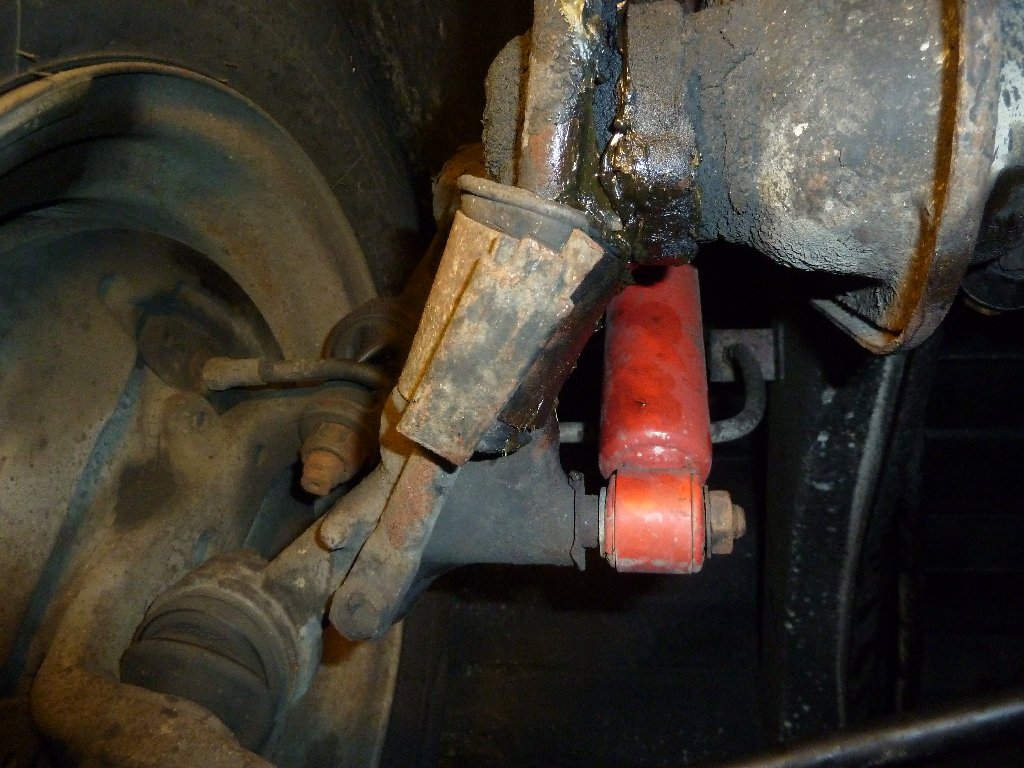
this one came off ok, on the right of pic.
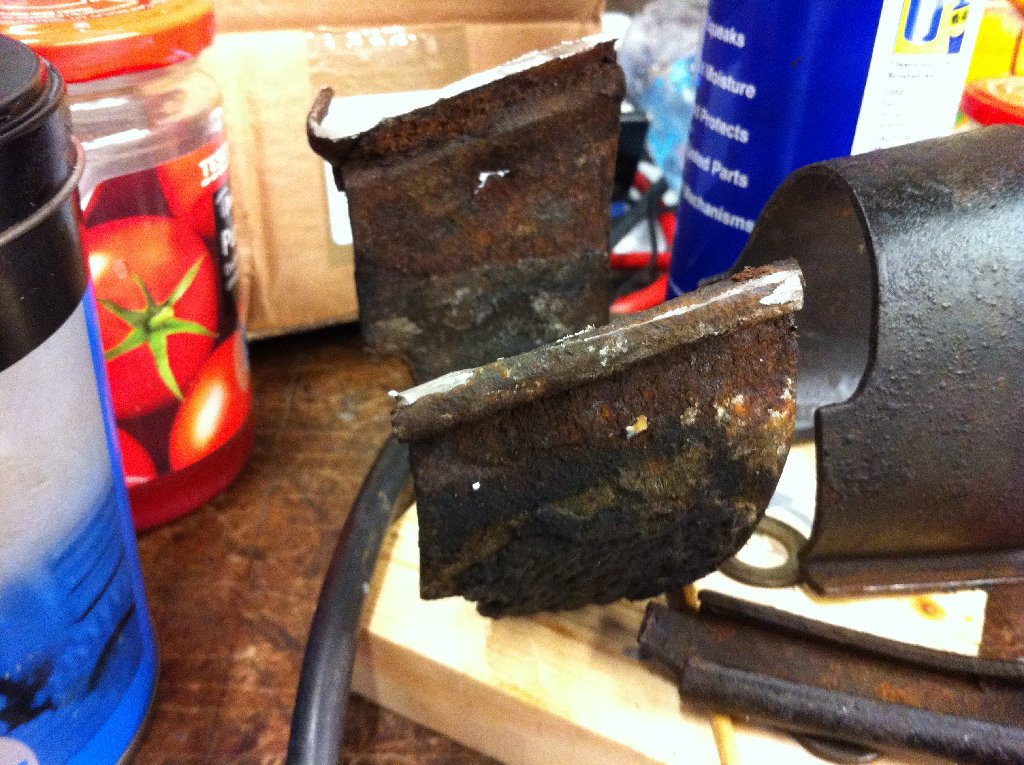
l/h/s clamp looks a bit rusty
had to cut the l/h/s one off after spending 20 mins trying to hammer the tab off, before I realised it was never going to come undone!
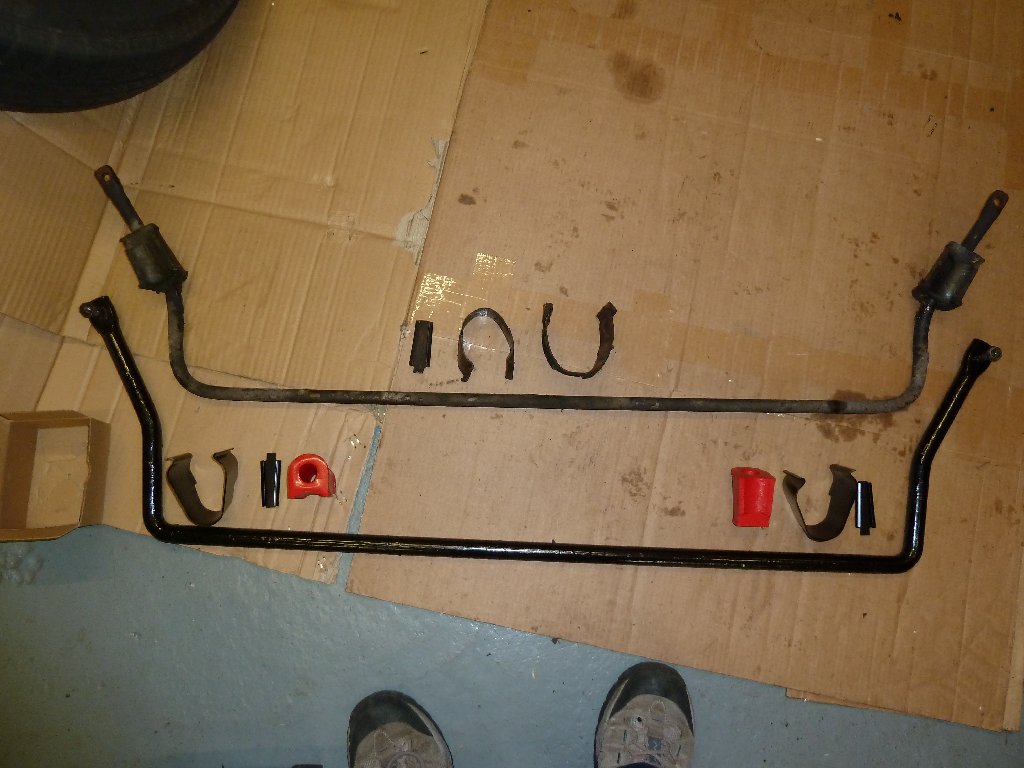
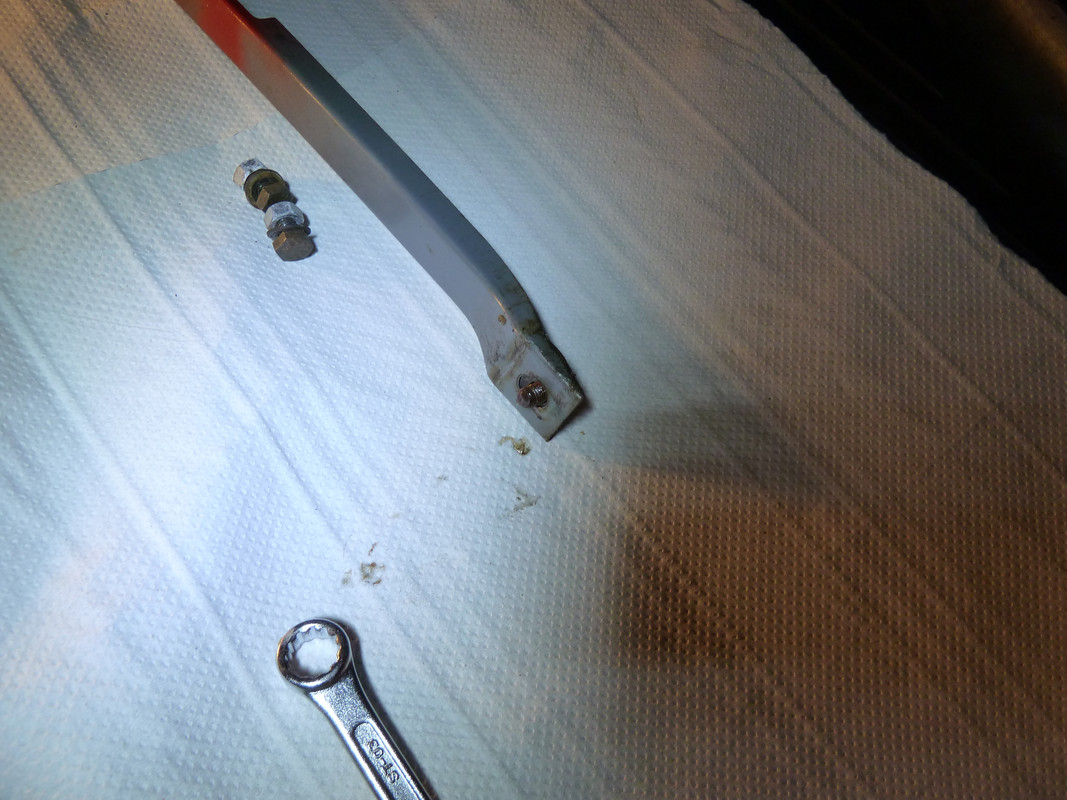
old and new ARB together. The new one looks a lot more beefy. I'll have to see how much better the handling is with it.
Fitted. I re-used the old bolts after cleaning them up, but put new spring washers in. You don't get new bolts with the kit any way.

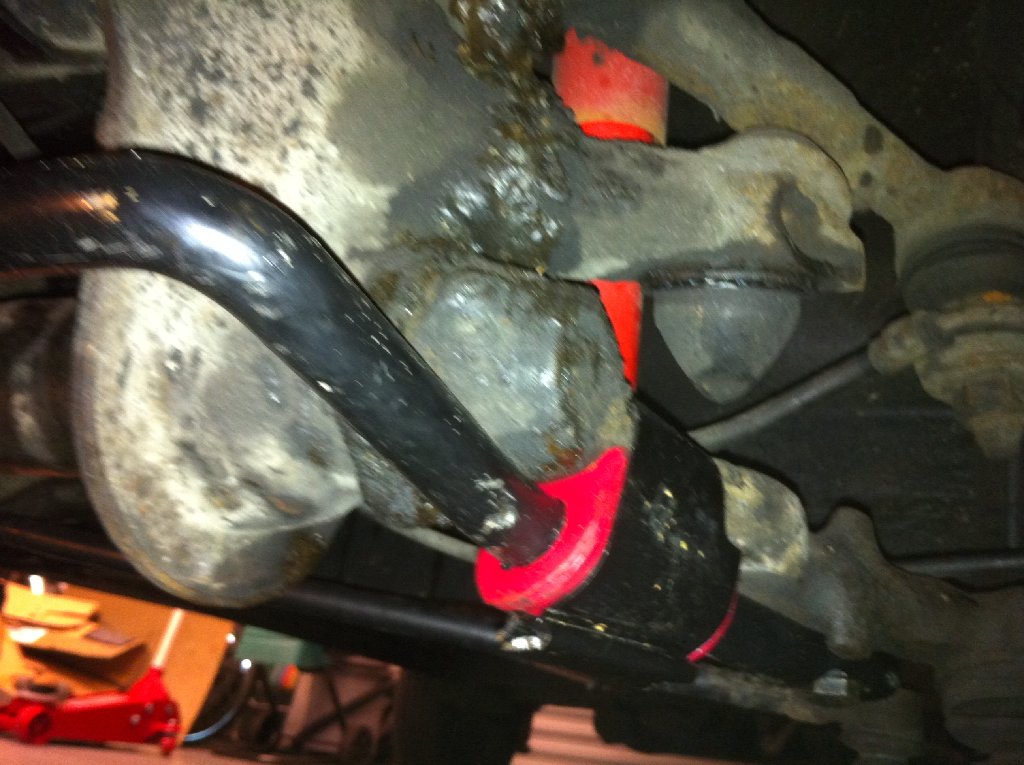
tab in the right place, at the back.
I used two mole grips to close up the clamps a bit at a time, thanks to Ozziedog in another thread for this advice
I tried using just one mole grip with a large pair of pliers at first, but the spring on the clamp is so strong
(or my grip too weak :lol: ) that I had to buy another pair of mole grips, and then it was easy to close them up and tap on the clip.
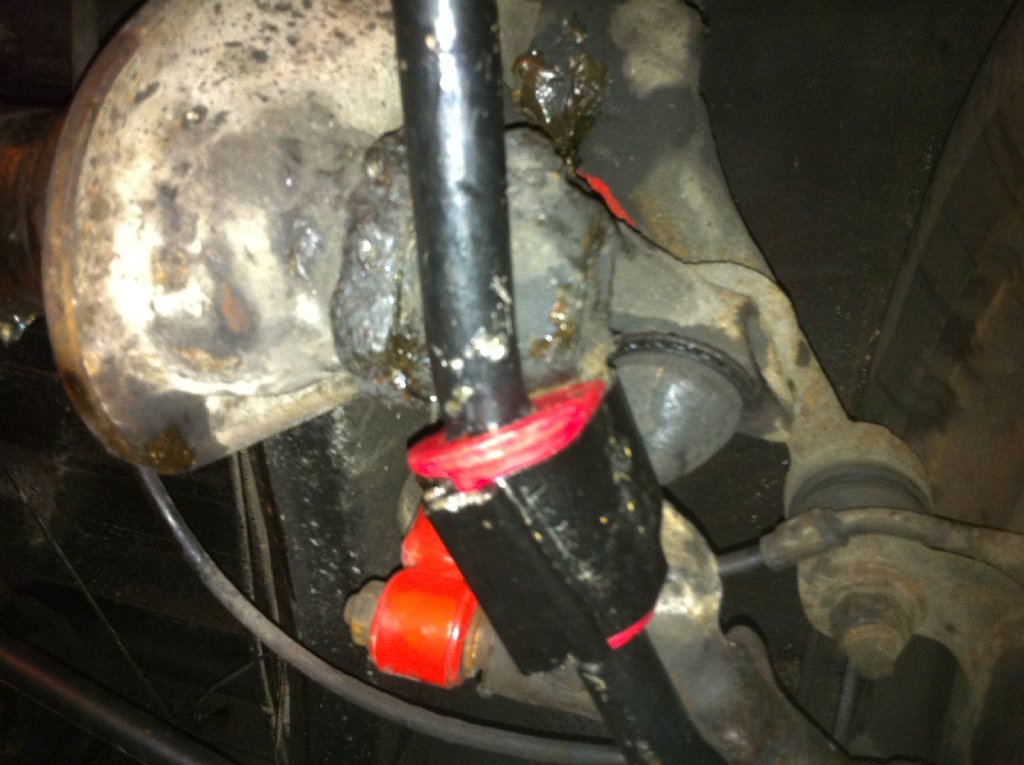
I didn't bother with any round nails or anything on the second clamp, between the mole grips and the clamps, and found that if I was careful the mole grips didn't damage the clamp. The ARB clamps seem good quality and quite tough. I did use a G clamp on the ARB clamp as well on the round bit of the clamp to help squeeze it closed. You can see where the sides are scuffed from the G clamp in the last but one pic.
It wasn't too difficult a job in the end, and I'm looking forward to testing it out.
Fitted an uprated anti roll bar (or anti sway bar as some say). Empi brand and I decided to paint it with two coats of hammerite. Not really sure if this is essential but I would hate to see it go rusty!
I'm trying to get the handling as good as it can be, and this is another step in that direction.
the new clamps and bushes.
old clamp on r/h/s. The excess grease is there because I had just renewed the grease in the front beam.
the clamp clip has been put on the wrong way with the tab at the front but it has stayed on ok.
this one came off ok, on the right of pic.
l/h/s clamp looks a bit rusty
had to cut the l/h/s one off after spending 20 mins trying to hammer the tab off, before I realised it was never going to come undone!
old and new ARB together. The new one looks a lot more beefy. I'll have to see how much better the handling is with it.
Fitted. I re-used the old bolts after cleaning them up, but put new spring washers in. You don't get new bolts with the kit any way.
tab in the right place, at the back.
I used two mole grips to close up the clamps a bit at a time, thanks to Ozziedog in another thread for this advice
I tried using just one mole grip with a large pair of pliers at first, but the spring on the clamp is so strong
(or my grip too weak :lol: ) that I had to buy another pair of mole grips, and then it was easy to close them up and tap on the clip.
I didn't bother with any round nails or anything on the second clamp, between the mole grips and the clamps, and found that if I was careful the mole grips didn't damage the clamp. The ARB clamps seem good quality and quite tough. I did use a G clamp on the ARB clamp as well on the round bit of the clamp to help squeeze it closed. You can see where the sides are scuffed from the G clamp in the last but one pic.
It wasn't too difficult a job in the end, and I'm looking forward to testing it out.
DeeDeeTheBay
Well-known member
- Joined
- Aug 6, 2013
- Messages
- 272
- Reaction score
- 0
Looking good! Keep up the god work! :mrgreen:
Dirty Harry
Well-known member
Have one of these too ready to be mounted, but first some cooling flaps and thermostat!


$27.95 ($13.98 / Count)
Marketplace Auto Parts Window Crank Handle Set of 2 - Chrome with Black Knob - Compatible with 1968-1978 Volkswagen Beetle
Parts Geek LLC


I think you hit the nail on the head there when you said about being careful, I`m not too good at that bit :lol: But it`s just a little easier to be careful when you know what`s coming up ,,, so to speak Real good to know that just every now and then, maybe every so often, perhaps once in a blue moon,, I can come up with a reasonable plan of action :mrgreen: Just so long as it involves brute force and an easier way to do it :shock: Very interested to hear the difference between this and a stocker one, not just that this one is probably stronger but the old original ones must be weaker after forty plus years of wear and tear and abuse.
Ozziedog,,,,,,,,,,,,,,, Let us know mate :mrgreen:
Real good to know that just every now and then, maybe every so often, perhaps once in a blue moon,, I can come up with a reasonable plan of action :mrgreen: Just so long as it involves brute force and an easier way to do it :shock: Very interested to hear the difference between this and a stocker one, not just that this one is probably stronger but the old original ones must be weaker after forty plus years of wear and tear and abuse.Ozziedog,,,,,,,,,,,,,,, Let us know mate :mrgreen:
thanks everyone for the comments.
I will update when I have road tested it.
I will update when I have road tested it.
Another winter project done!
The passenger quarter light (or vent wing) seal on Monty has been leaking in heavy rain. It allows a trickle of water to stream in down the door card and onto the speaker. On inspection this is because the fitted seal had been sliced in two places to fit it without removing the opening quarter light window. So there was a cut at the top hinge and a cut at the bottom pivot point. :roll:
There’s no way to fit the seal properly without removing the opening window from the frame. After owning the van for a while now, I know a bit more about it so have the confidence to attempt to do it myself properly. I used Saraj’s how to guide.
So onto removing the quarter-light. I removed the door card and plastic vapour barrier to get to the nuts and bolts.
With the window up I removed the rear window guide channel, it has a bolt at the bottom and a clip at the top which comes away with a smart downward pull.

Lowered the main window, had to temporarily re-attach the window handle, and undo the window lifter bolts and rest the window at the bottom of the door. I put rags against the glass to stop it moving.
Next undid the bolt at the bottom of the quarter-light frame beneath the front guide channel.
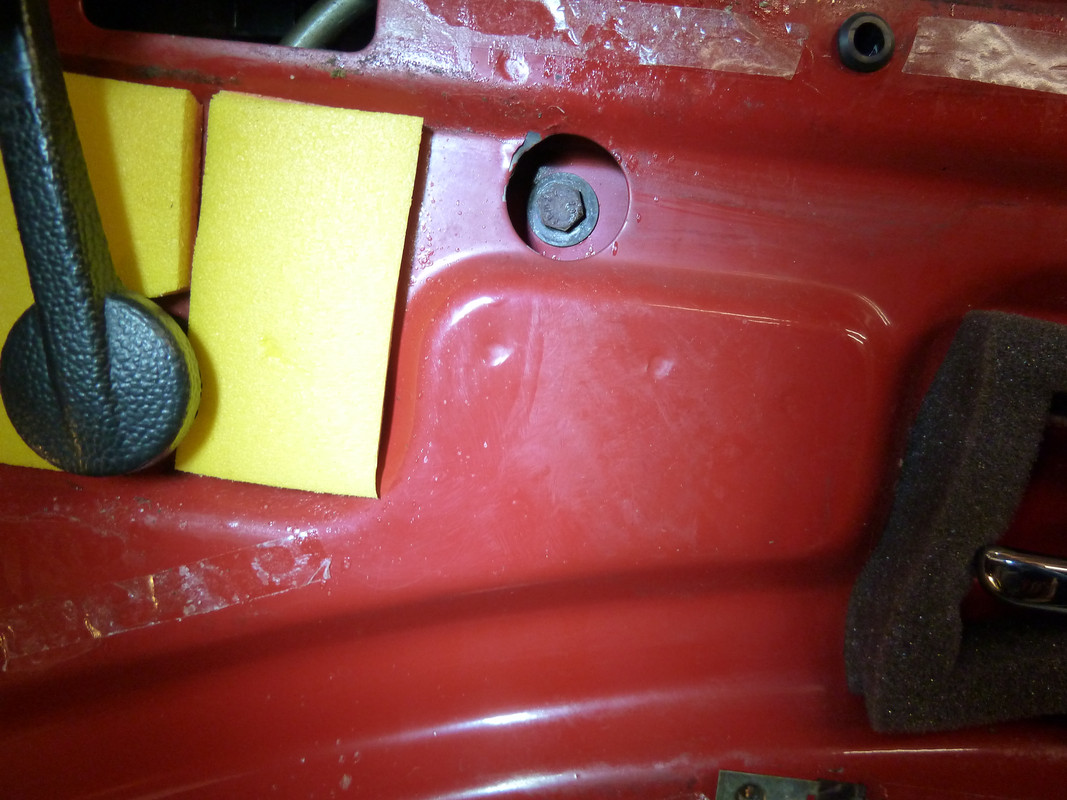
Then I removed the top screw securing the quarter-light frame which is under the felt channel so had to partly pull it out of the door frame.
Pic shows screw removed.
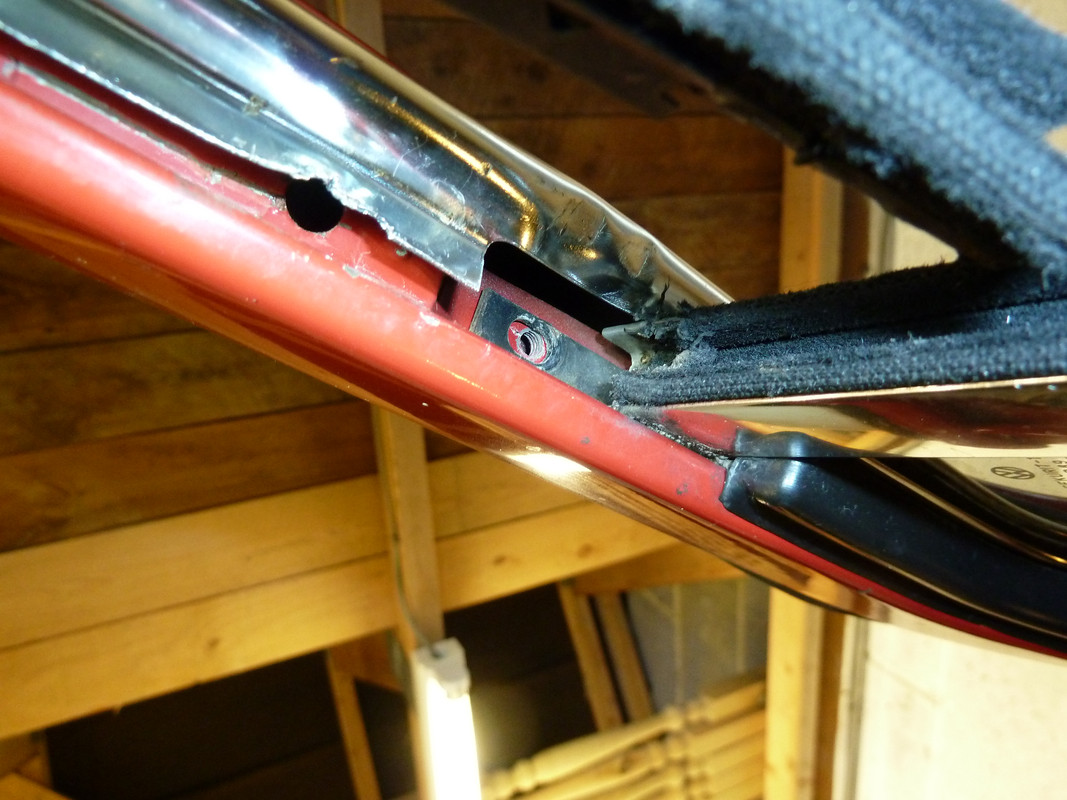
Felt channel pulled down for access to the screw
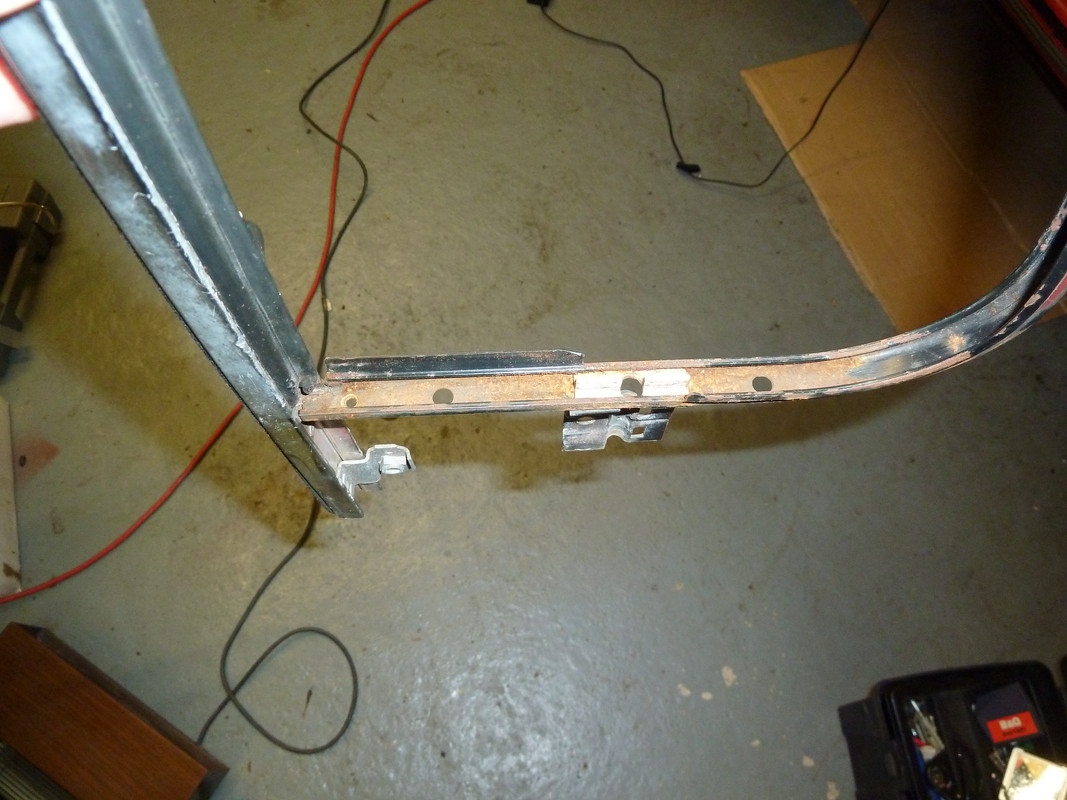
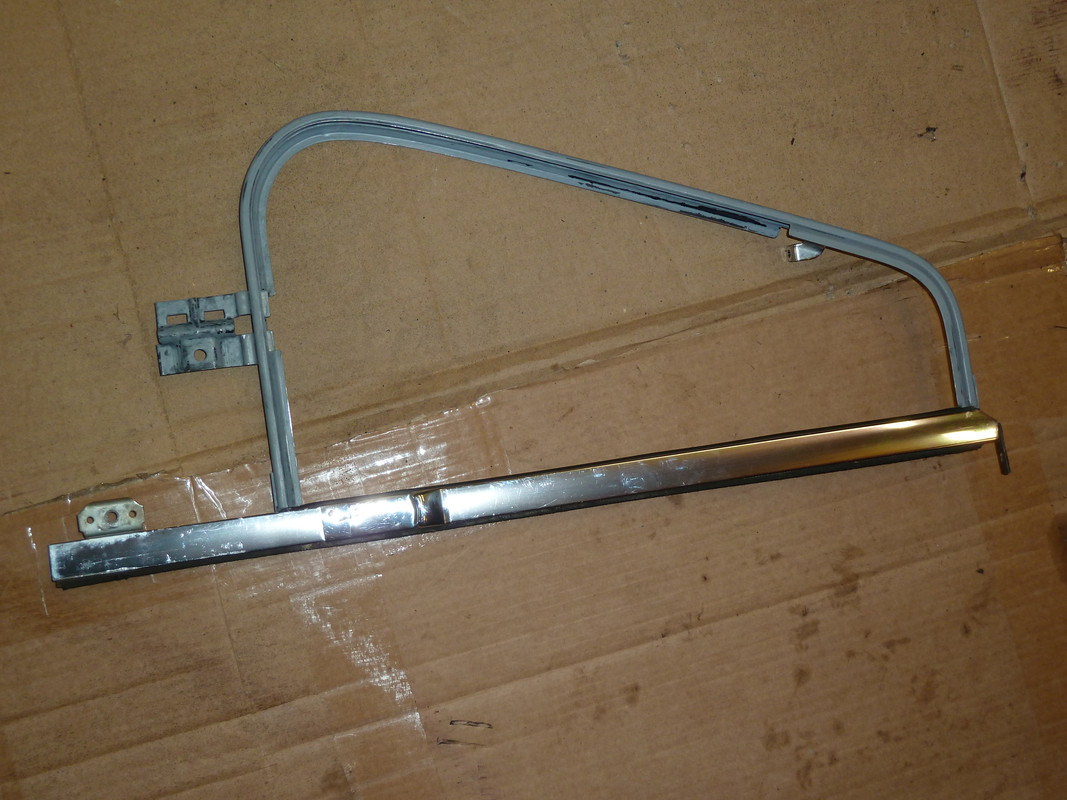
Then it’s onto removing the quarter-light frame and window. This is tricky. I put masking tape around the window on the door frame to prevent accidental scratching as I tried to remove the q-light. I first pulled the top down slightly and back then moving it to the inside of the door back up and out. (There’s also a good guide in Bentley about this process.)
Also I removed the felt channel to look at the clips it attaches with, and the outer scraper as I intended to replace it.
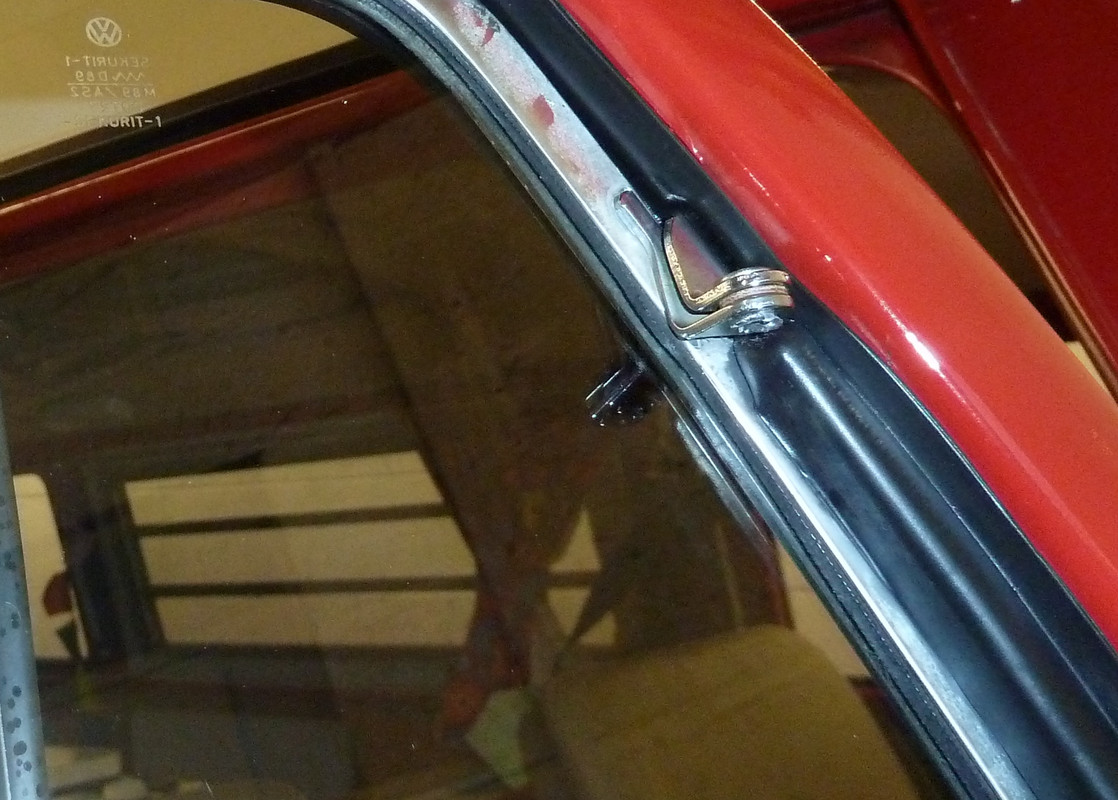
Cut in old seal at the bottom pivot point, there was a cut in the top one as well.

After removing the quarter-light, I carefully drilled out the top rivet which was brass from the colour of the swarf. The new one is Aluminium. Then unbolted the lower pivot point, and looked at the frame.

There was some rust in the lower part of the frame. Also some overspray. The rest of it was good.
Sanded rust and painted it with two coats of zinc primer

Then painted it satin black.
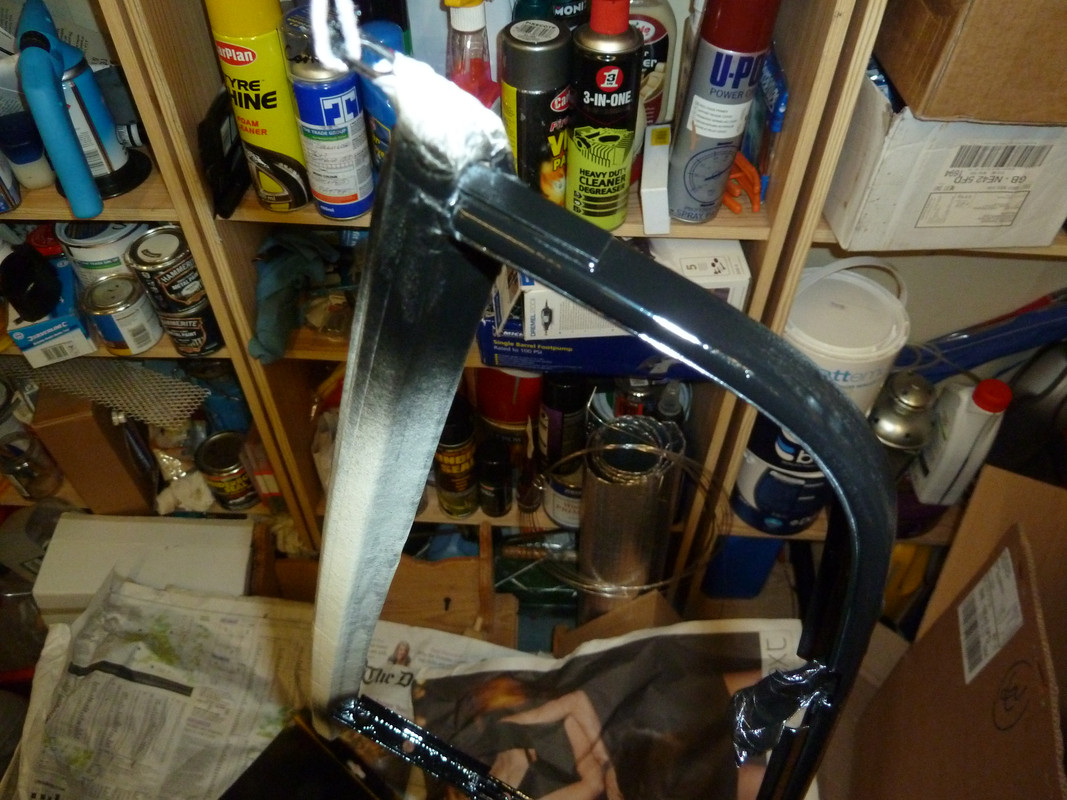
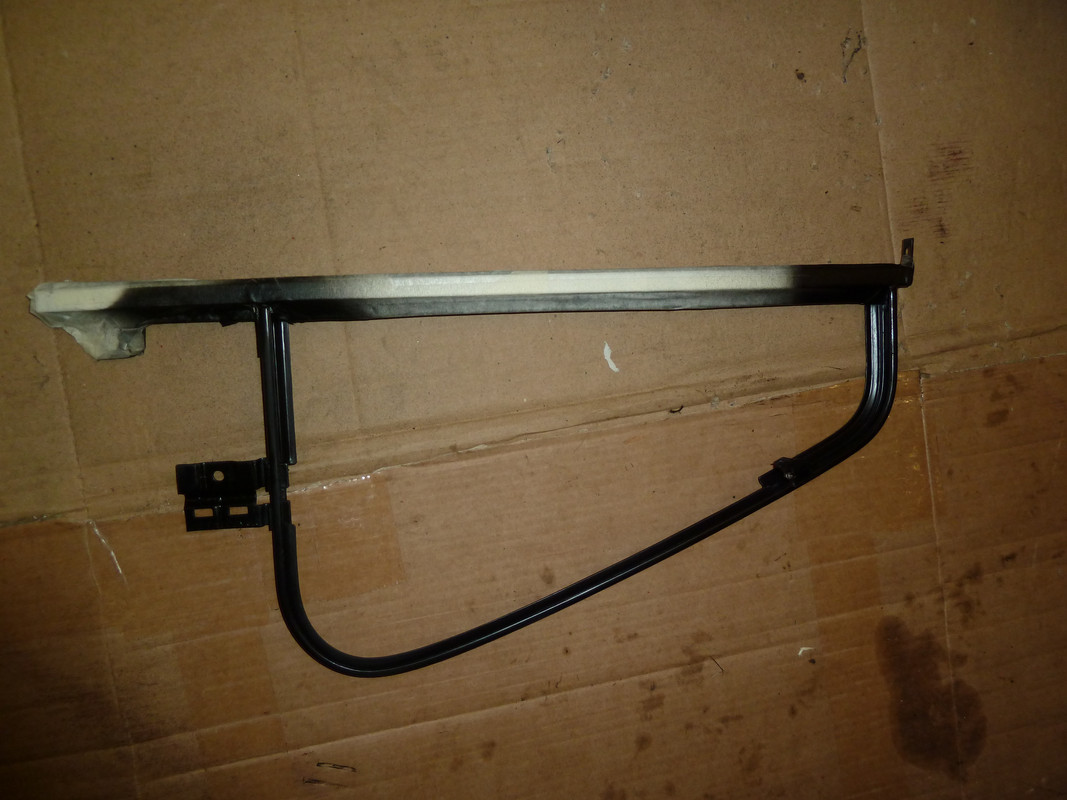
I put the new seal onto the frame and was pleased with the fit. There’s a hole for the top hinge to fit through, but the seal is continuous around it so won't leak!
Came in from the very cold garage to do this, so that the seal was nice and warm and easier to work with. I used some silicone lubricant to help.


The passenger quarter light (or vent wing) seal on Monty has been leaking in heavy rain. It allows a trickle of water to stream in down the door card and onto the speaker. On inspection this is because the fitted seal had been sliced in two places to fit it without removing the opening quarter light window. So there was a cut at the top hinge and a cut at the bottom pivot point. :roll:
There’s no way to fit the seal properly without removing the opening window from the frame. After owning the van for a while now, I know a bit more about it so have the confidence to attempt to do it myself properly. I used Saraj’s how to guide.
So onto removing the quarter-light. I removed the door card and plastic vapour barrier to get to the nuts and bolts.
With the window up I removed the rear window guide channel, it has a bolt at the bottom and a clip at the top which comes away with a smart downward pull.
Lowered the main window, had to temporarily re-attach the window handle, and undo the window lifter bolts and rest the window at the bottom of the door. I put rags against the glass to stop it moving.
Next undid the bolt at the bottom of the quarter-light frame beneath the front guide channel.
Then I removed the top screw securing the quarter-light frame which is under the felt channel so had to partly pull it out of the door frame.
Pic shows screw removed.
Felt channel pulled down for access to the screw
Then it’s onto removing the quarter-light frame and window. This is tricky. I put masking tape around the window on the door frame to prevent accidental scratching as I tried to remove the q-light. I first pulled the top down slightly and back then moving it to the inside of the door back up and out. (There’s also a good guide in Bentley about this process.)
Also I removed the felt channel to look at the clips it attaches with, and the outer scraper as I intended to replace it.
Cut in old seal at the bottom pivot point, there was a cut in the top one as well.
After removing the quarter-light, I carefully drilled out the top rivet which was brass from the colour of the swarf. The new one is Aluminium. Then unbolted the lower pivot point, and looked at the frame.
There was some rust in the lower part of the frame. Also some overspray. The rest of it was good.
Sanded rust and painted it with two coats of zinc primer
Then painted it satin black.
I put the new seal onto the frame and was pleased with the fit. There’s a hole for the top hinge to fit through, but the seal is continuous around it so won't leak!
Came in from the very cold garage to do this, so that the seal was nice and warm and easier to work with. I used some silicone lubricant to help.
continued...
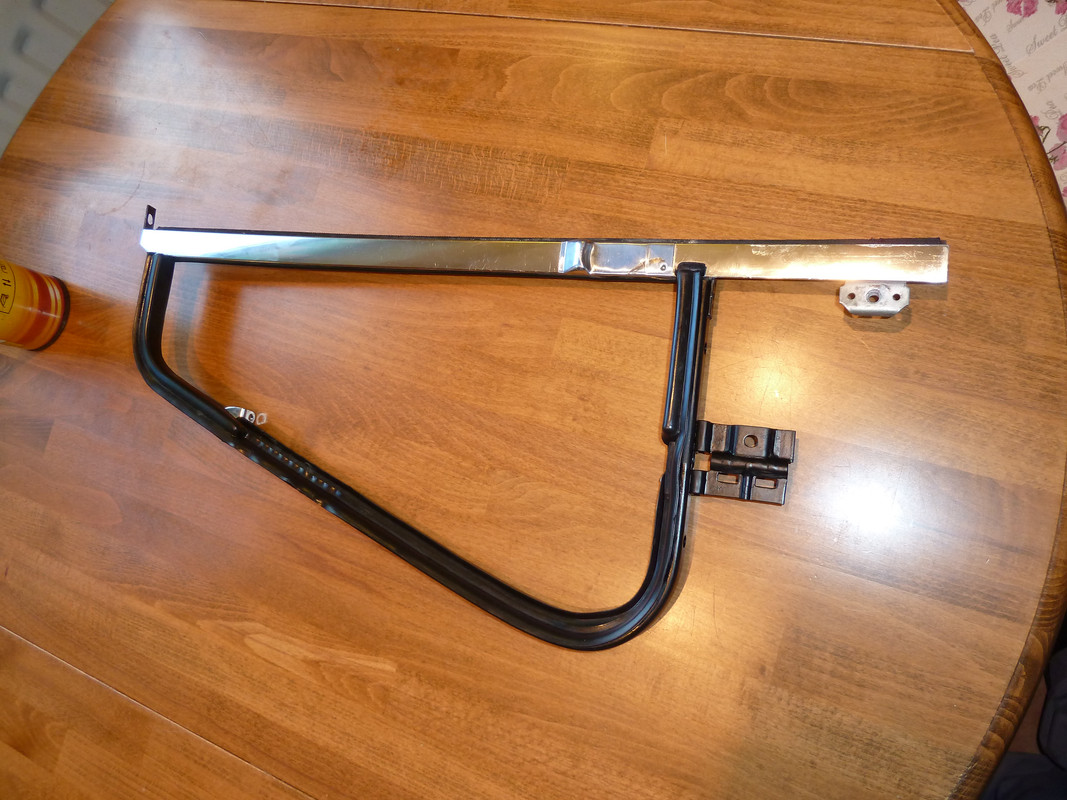
Q-light window back in frame

After fitting the seal I put the window back in. I used a 5mm ball bearing and some mole grips to squash the new rivet in the top hinge. Also used a new washer between the metal hinge parts.
Cleaned up the door where the clips for the outer scraper fit and painted the holes with a bit more zinc primer.

And thoroughly cleaned the inside of the door, removing all traces of old adhesive. The silver stuff on the door skin is Silentcoat noise insulation.
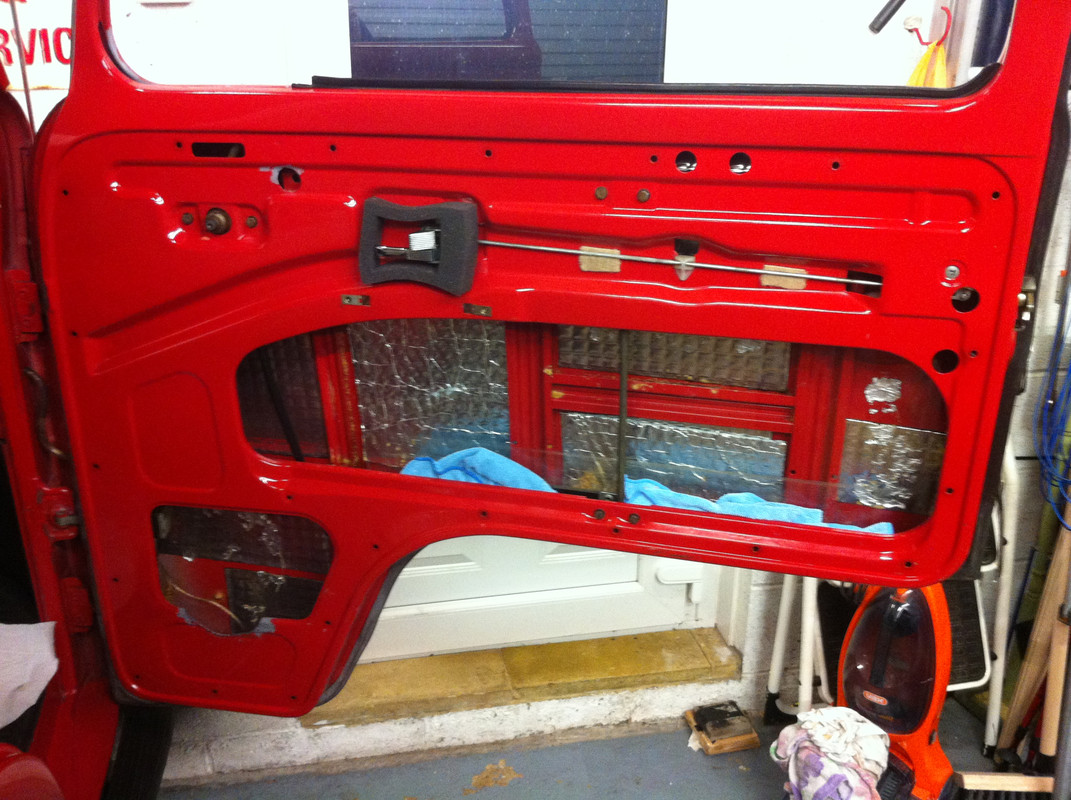
I thought everything seemed to going a bit too easy, and so went for the new outer scraper and positioned it on the door, just not pushing the clips all the way in; then I saw this! [emoji57] [emoji20]
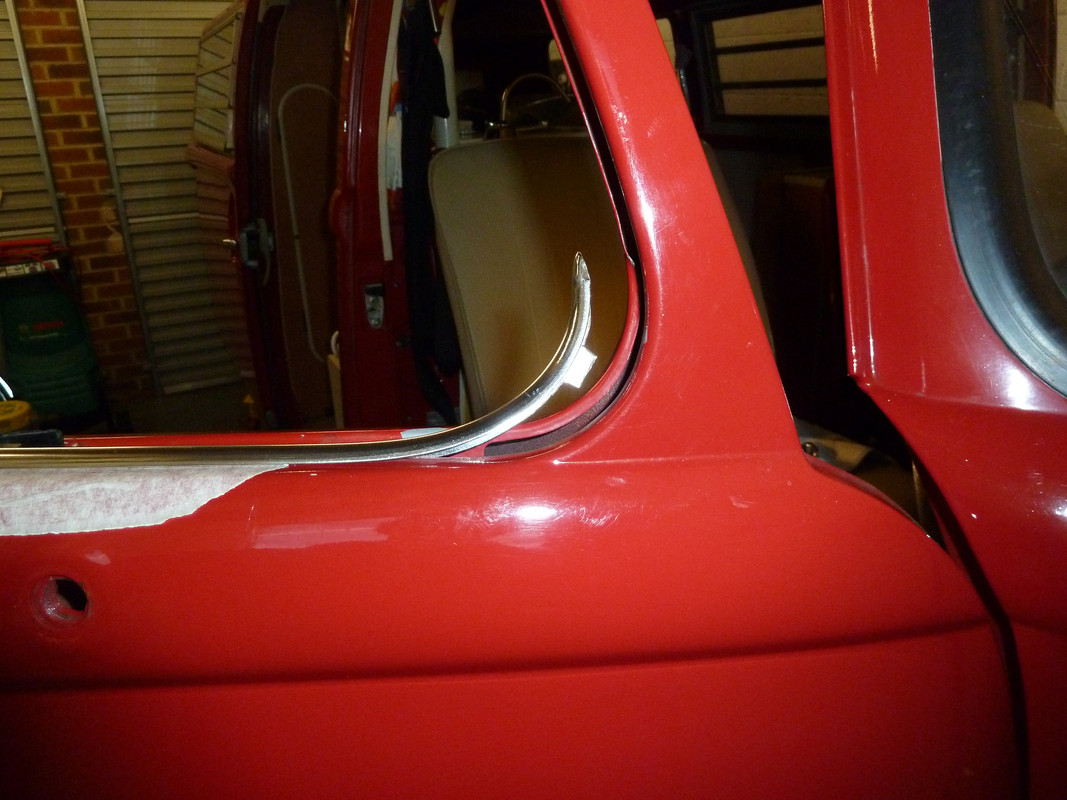

From inside the door. The new scraper or sash is too short and doesn't fit!
I thought maybe the white spirits fumes had got to me, but measuring it up against the old scraper proved to me that the new one was too short!

The top scraper is the old one looking slightly battered, and the lower one is the new one. I have trimmed the sharp metal corner off the new one by the front of the black rubber in the pic. I looked again at the old scraper realising that it would now be impossible to fit the new one. Even if I tried to bend the front end of new scraper it wouldn’t work, as the metal would deform, making it not only too short but unable to fit next to the rubber seal. I was glad I kept the old one and started to make repairs to it and have a go at re-fitting this one.
One thing about the scraper is that because the metal is thin and soft it is easy to work with and luckily I hadn’t mangled it too much taking it off the door. So after a bit of straightening, on went the old outer scraper; I didn’t remove the inner one as it looked good, and re-installed the quarter-light. It’s the opposite procedure of removal, and I bent away the inner scraper to make it a bit easier getting the window in. I have to say I was quite relieved to get this back in without too much fuss. (Edit A few weeks later I did fit a new outer scraper that was the correct length etc)
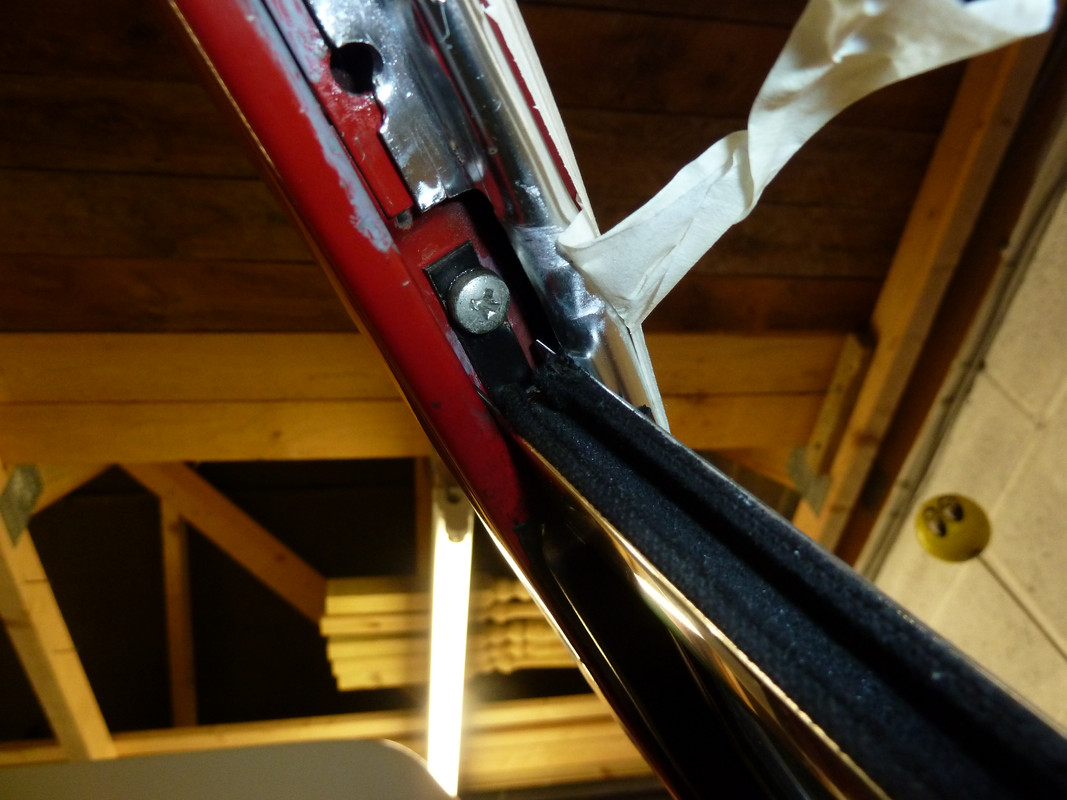
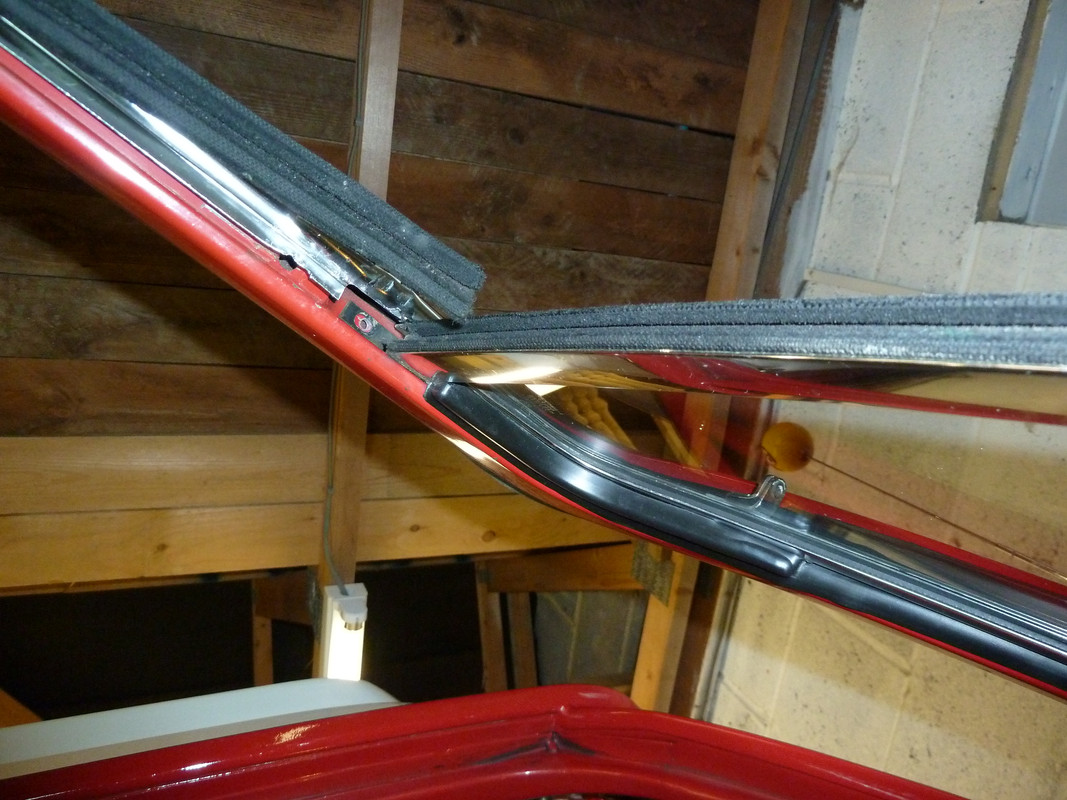
Top screw showing. To the right is a piece of masking tape to hold up the scraper trim. This is held by the felt window channel when fitted.
I bought a new felt channel clip as one was missing, and re-fitted the felt channel. I wouldn’t want to re-position this too many times, as the clips are sharp and chew away at the rubber outer part of the channel every time you take them off.
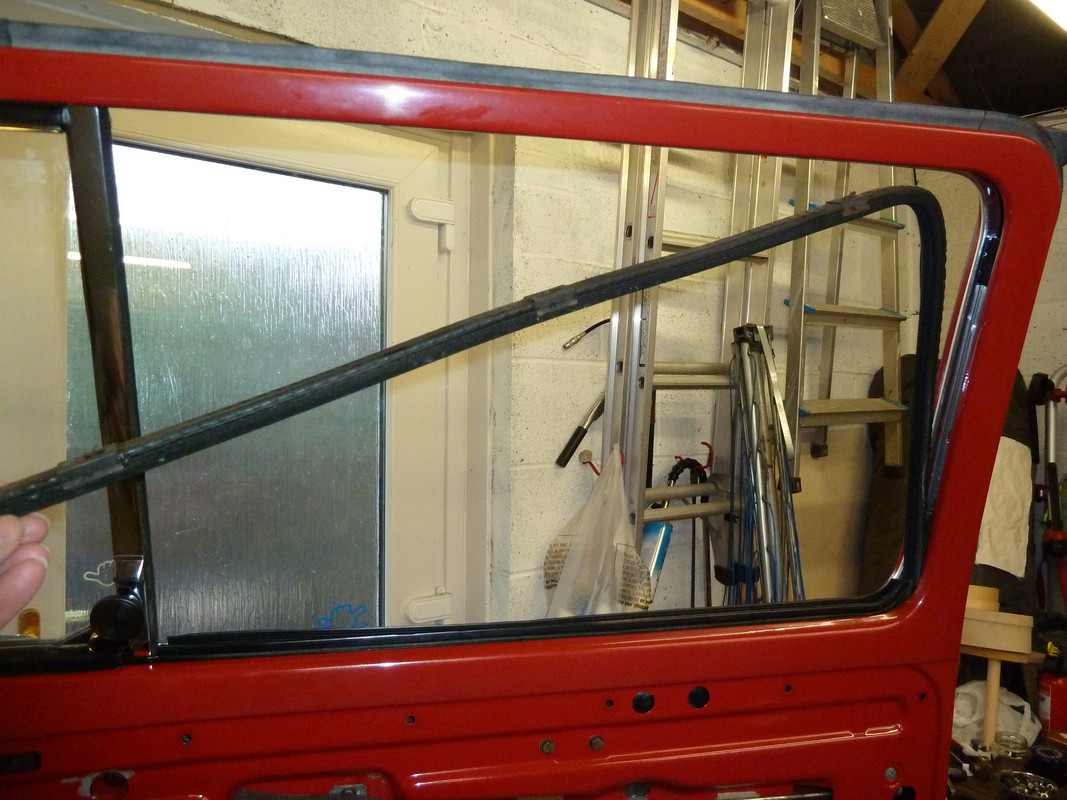
Finally the windows are back in. This pic is from a few weeks later and shows another brand new scraper that actually fits. 8)
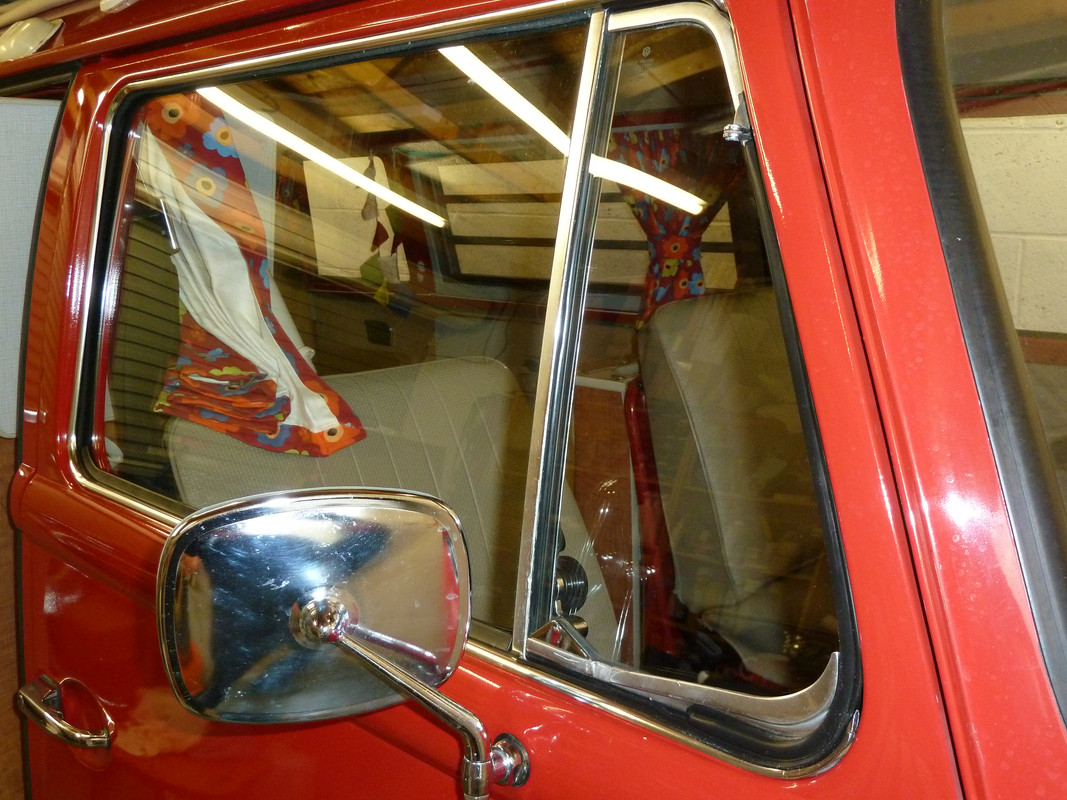
Thanks for looking. [emoji2]
Q-light window back in frame
After fitting the seal I put the window back in. I used a 5mm ball bearing and some mole grips to squash the new rivet in the top hinge. Also used a new washer between the metal hinge parts.
Cleaned up the door where the clips for the outer scraper fit and painted the holes with a bit more zinc primer.
And thoroughly cleaned the inside of the door, removing all traces of old adhesive. The silver stuff on the door skin is Silentcoat noise insulation.
I thought everything seemed to going a bit too easy, and so went for the new outer scraper and positioned it on the door, just not pushing the clips all the way in; then I saw this! [emoji57] [emoji20]
From inside the door. The new scraper or sash is too short and doesn't fit!
I thought maybe the white spirits fumes had got to me, but measuring it up against the old scraper proved to me that the new one was too short!
The top scraper is the old one looking slightly battered, and the lower one is the new one. I have trimmed the sharp metal corner off the new one by the front of the black rubber in the pic. I looked again at the old scraper realising that it would now be impossible to fit the new one. Even if I tried to bend the front end of new scraper it wouldn’t work, as the metal would deform, making it not only too short but unable to fit next to the rubber seal. I was glad I kept the old one and started to make repairs to it and have a go at re-fitting this one.
One thing about the scraper is that because the metal is thin and soft it is easy to work with and luckily I hadn’t mangled it too much taking it off the door. So after a bit of straightening, on went the old outer scraper; I didn’t remove the inner one as it looked good, and re-installed the quarter-light. It’s the opposite procedure of removal, and I bent away the inner scraper to make it a bit easier getting the window in. I have to say I was quite relieved to get this back in without too much fuss. (Edit A few weeks later I did fit a new outer scraper that was the correct length etc)
Top screw showing. To the right is a piece of masking tape to hold up the scraper trim. This is held by the felt window channel when fitted.
I bought a new felt channel clip as one was missing, and re-fitted the felt channel. I wouldn’t want to re-position this too many times, as the clips are sharp and chew away at the rubber outer part of the channel every time you take them off.
Finally the windows are back in. This pic is from a few weeks later and shows another brand new scraper that actually fits. 8)
Thanks for looking. [emoji2]
- Joined
- Feb 29, 2012
- Messages
- 891
- Reaction score
- 126
Another job well done Mike!
I did same last year but didn't think of measuring the lower chrome piece. Suspect now that it was shorter as it seemed to be ok, but somehow different to how I remember it being when I took it out. For all the angst we go through before starting, in the end its a surprisingly simple job. For me it's a whole lot quieter on the road, and a lot warmer too (I really only had the felt left on the larger panes).
I did same last year but didn't think of measuring the lower chrome piece. Suspect now that it was shorter as it seemed to be ok, but somehow different to how I remember it being when I took it out. For all the angst we go through before starting, in the end its a surprisingly simple job. For me it's a whole lot quieter on the road, and a lot warmer too (I really only had the felt left on the larger panes).
Bluesnailman said:Another job well done Mike!
I did same last year but didn't think of measuring the lower chrome piece. Suspect now that it was shorter as it seemed to be ok, but somehow different to how I remember it being when I took it out. For all the angst we go through before starting, in the end its a surprisingly simple job. For me it's a whole lot quieter on the road, and a lot warmer too (I really only had the felt left on the larger panes).
Thanks mate. You could see mine would never have fitted - really not sure what happened there. However I did get a refund promptly from VWH. I am glad I was able to re-use the older window sash and it doesn't look too bad.
I've yet to test the new quarter light seal in the rain so fingers crossed!
The dash pod needed getting out and looking at as there were a couple of things that have been bothering me.
The speedo is under reading the actual speed by about 10mph, and, the dial glasses on the speedo and fuel gauge are loose and rattle.
What looks like a simple job to the uninitiatated :lol: of just removing four screws from each corner of the dash pod is actually a pita because of the heater levers that need to be removed first. No pics of this process but basically you can apparently remove the little white b@st@rd clips holding onto the removable tops of the levers by using a small socket 4 or 5 mm and sort of punch it out.
I decided to use brute force and a sharp stanley knife. I just cut off enough of the clips to be able to push or pull them off the levers one at a time. In fact I still have enough of the clips left to re-use. I am not going to though, because the levers actually are held in firmly by a spring plate attaching to the inner part of the lever.
If I want to take the dash pod out again for any reason, like a new digital speedo, or a rev counter install, then it will be a lot easier without the clips holding in those heater levers.
I had to remove the radio and ash tray so I could my hand in to get at the white clips.
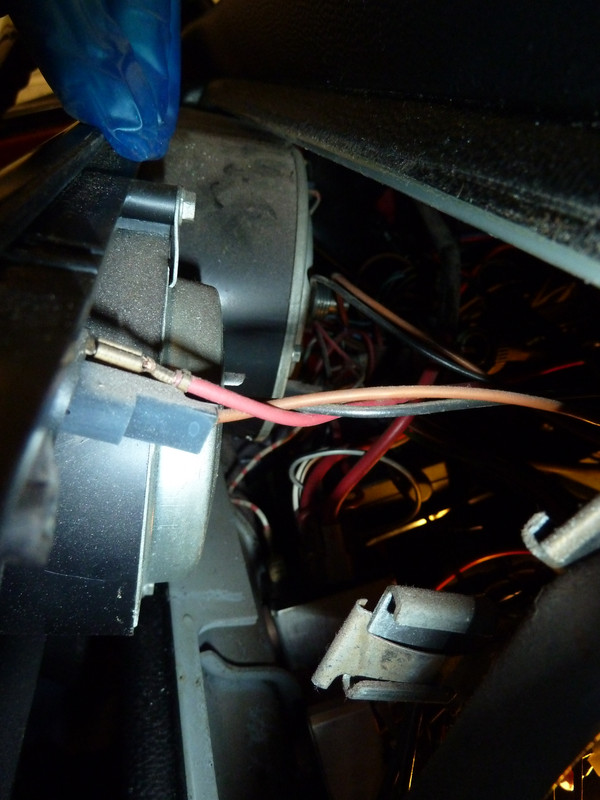
speedo cable unscrewed
There was quite a lot of dust behind the dash so time for a quick tidy up.
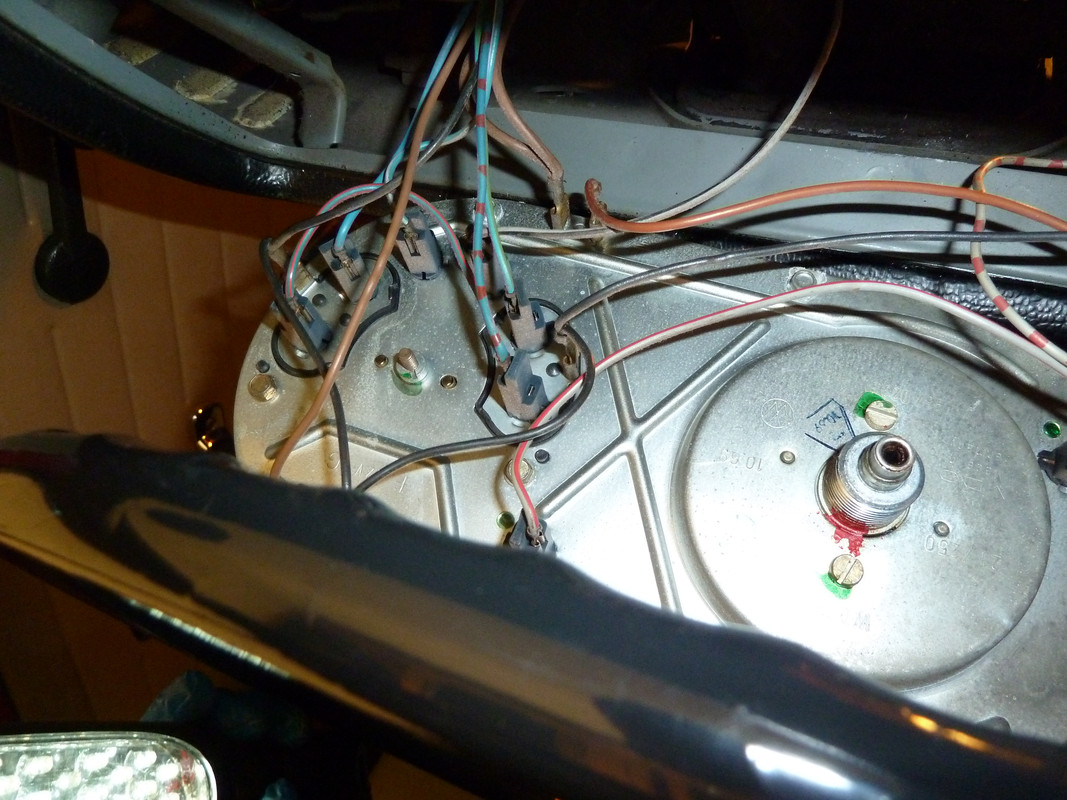
Before removing all those wires I took a few pics and also labelled each wire so I knew which terminal to put it back on. :shock:
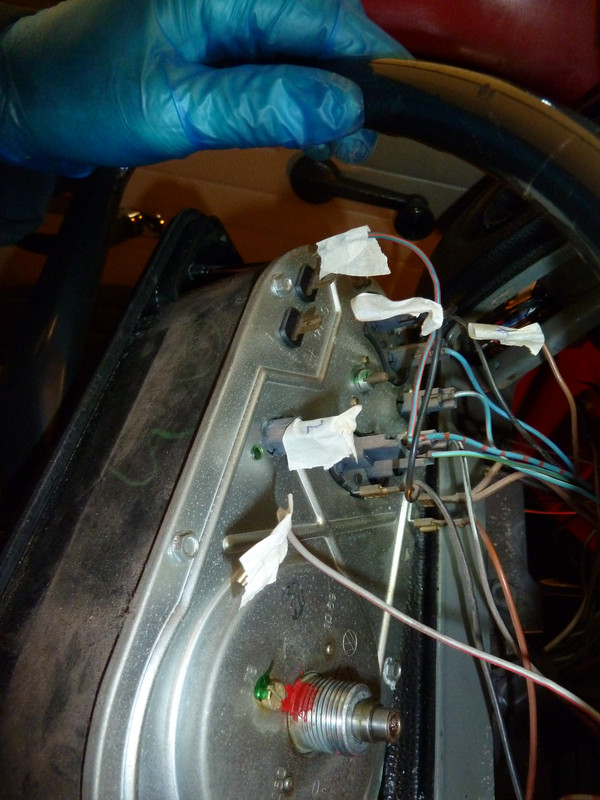
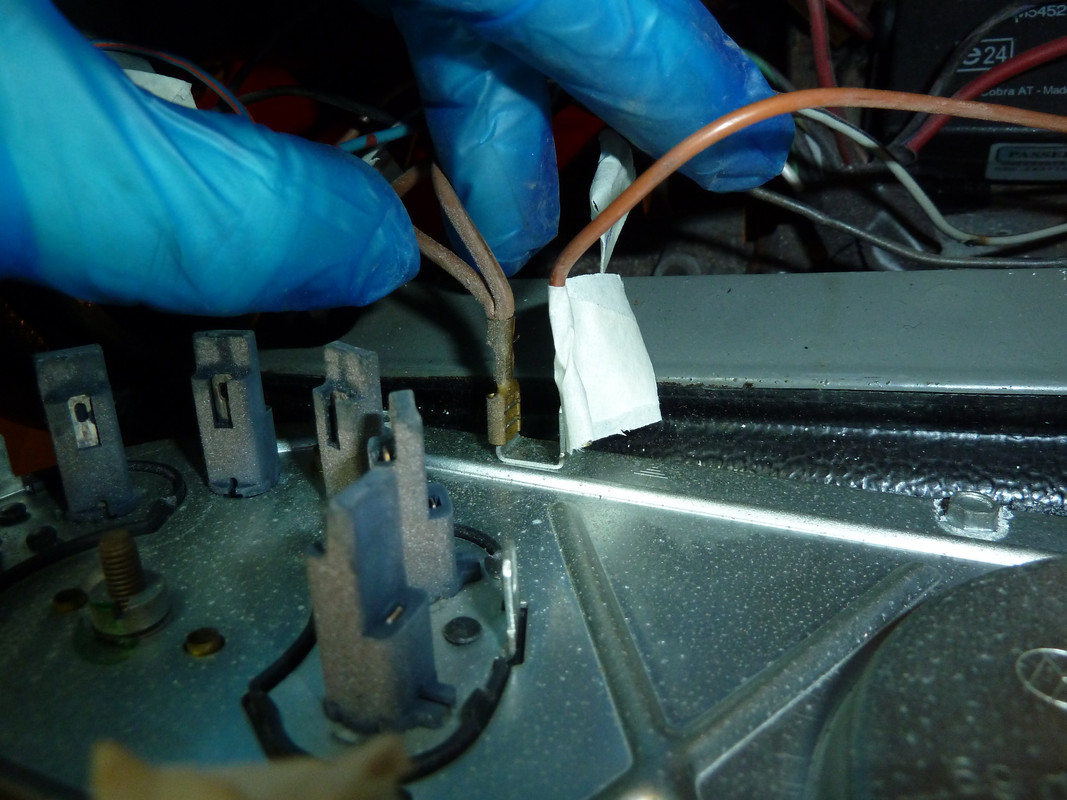
Having done that I removed the dash pod completely

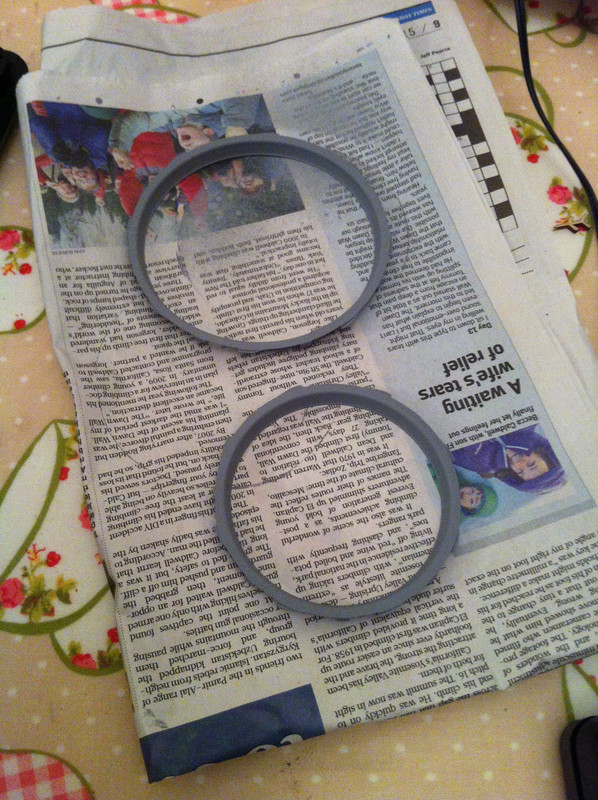
So in the warm now in the house I removed the dials and the metal rings that are supposed to hold the dial glasses firmly to the dash pod. They don't any more because they are held by small plastic posts and they have become brittle over the years and nearly all snapped off. The remains were mostly in the dash pod when I cleaned it out.
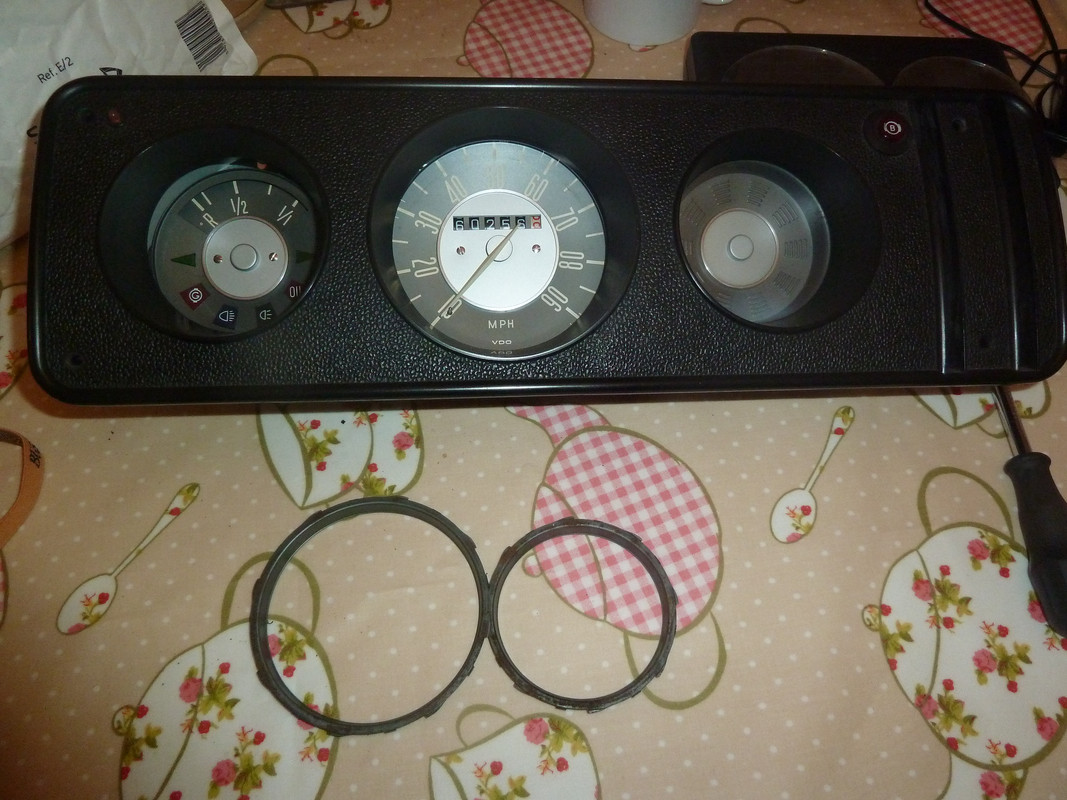
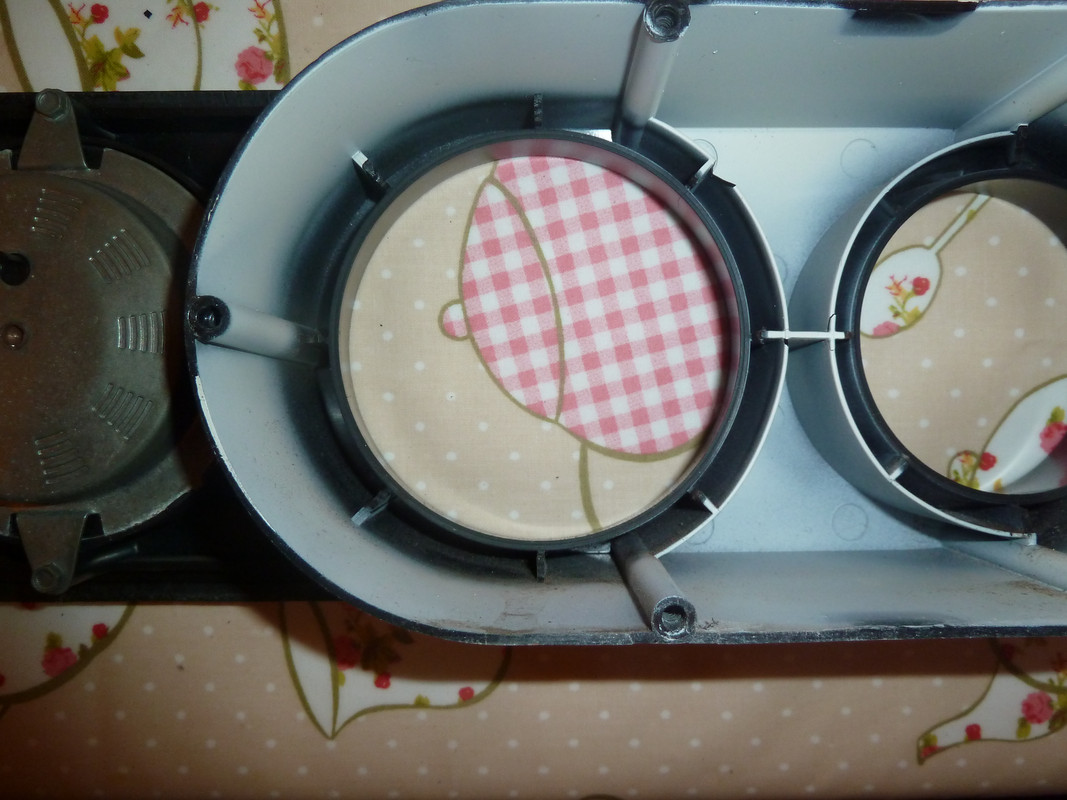
The gap around the dials
So looking at the rings they were a bit rusty and I sanded them down and put some paint on them, grey primer then Ford Nimbus grey which is a pretty good match. I also painted the bottom of the metal dash frame with Zinc primer as it was also slightly corroded.
I forgot to take pics during painting the top coat but I used two or three thin coats. I'm not really that good at painting, so I was quite pleased when no wrinkles appeared between each coat. :mrgreen:
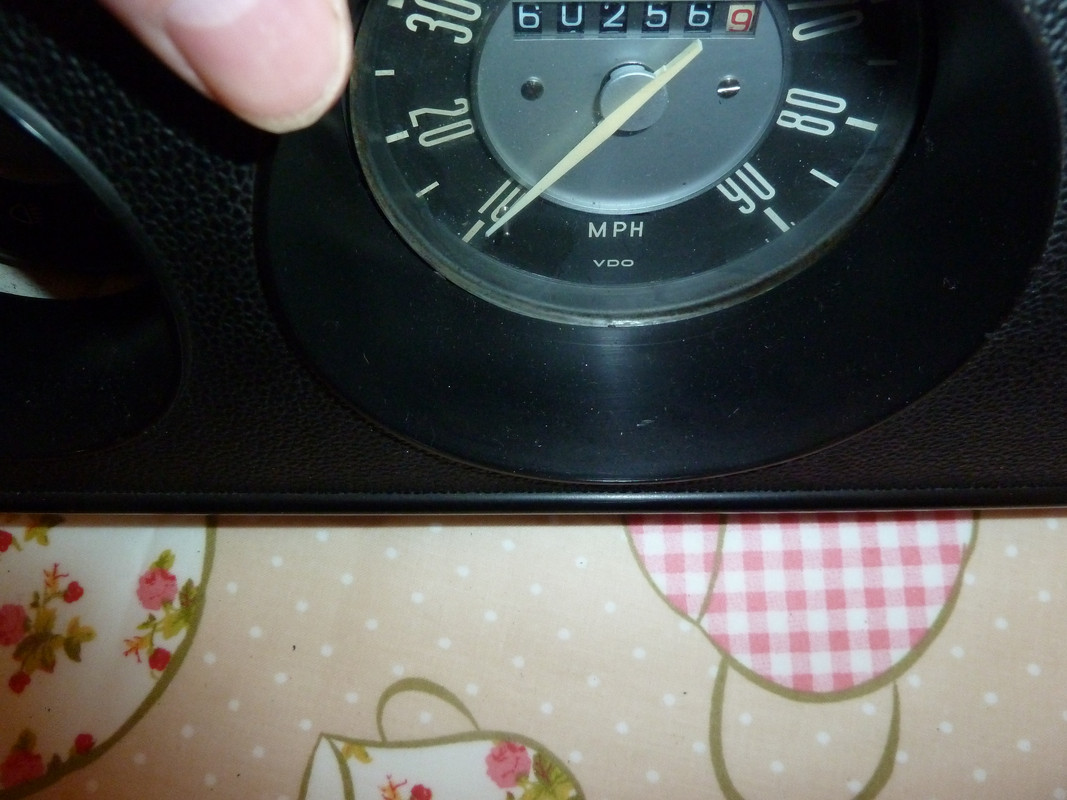
Whilst waiting for the paint to dry I thought I'd have a go at the speedo. I found this thread on the Samba amongst others that gives guidance on how to do it.
http://www.thesamba.com/vw/forum/viewtopic.php?t=474291&postdays=0&postorder=asc&start=0" onclick="window.open(this.href);return false;
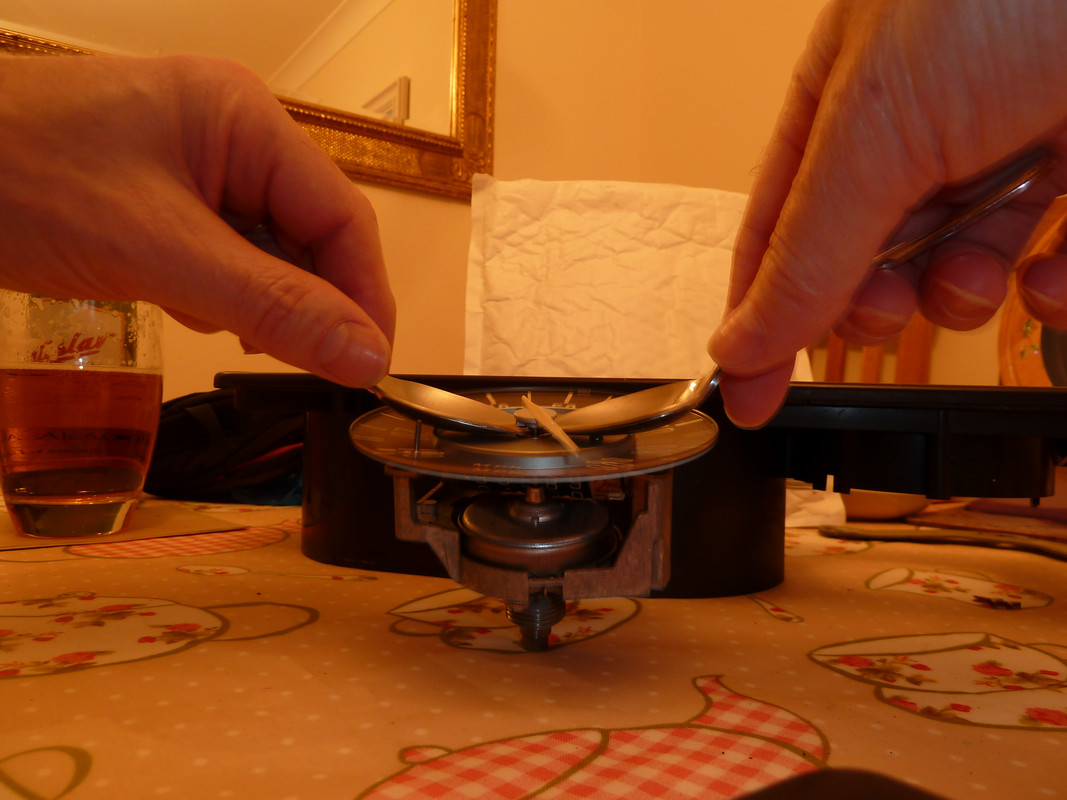
Basically you just remove and re-position the needle by however much it's out. However you have to be able to remove the needle first :evil:
I tried several methods using different tools and even the two teaspoons method but it would not budge.
So I was faced with a choice; am I prepared to remove the needle at any cost which may mean wrecking the speedo, or do I just leave it ?
I decided to leave it - for now.
I was actually using quite a bit of force and it seemed that the mechanism that the spindle is connected to would break rather than the damned needle come away!
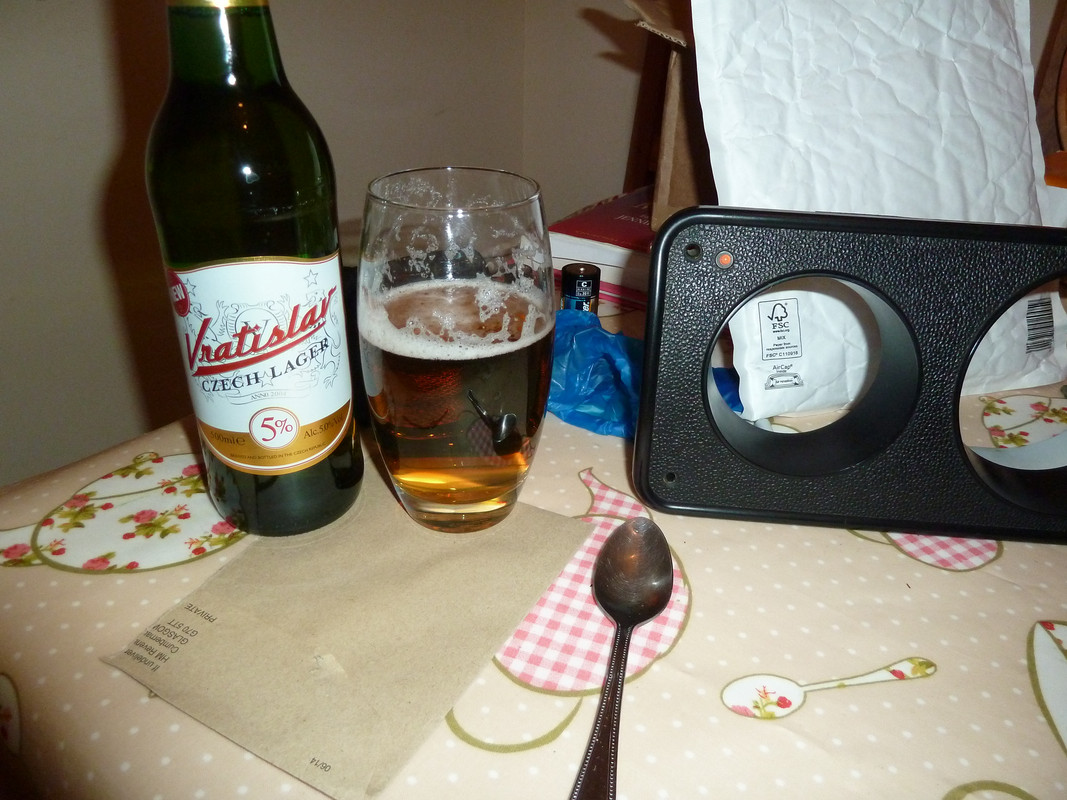
I had to have a lager to calm my nerves :lol:
I wonder if any one else on EB has done this successfully.
I had an idea that maybe it had already been done once as there was a mark on the back of the speedo that wasn't original. If it had been done before maybe the PO glued on the needle and that it why I was having such a hard time with it.
Oh well, some you win some you lose.
So, now the paint was all dry on the dial rings I put it all back together and used some clear adhesive to stick the ring to the posts and therefore hold the glasses in.

The Nimbus grey is slightly lighter than the OG shade but I am pleased with the look. There was a lot of muck over the speedo dial and especially the warning lights under the fuel gauge so I carefully wiped them clean. I used an old tooth brush to clean the back of the speedo. The warning lamps are a lot brighter now.
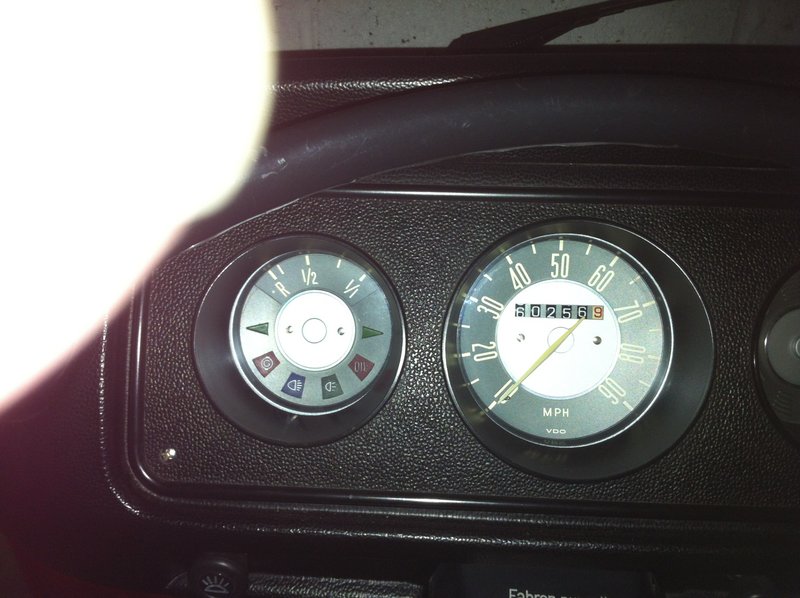
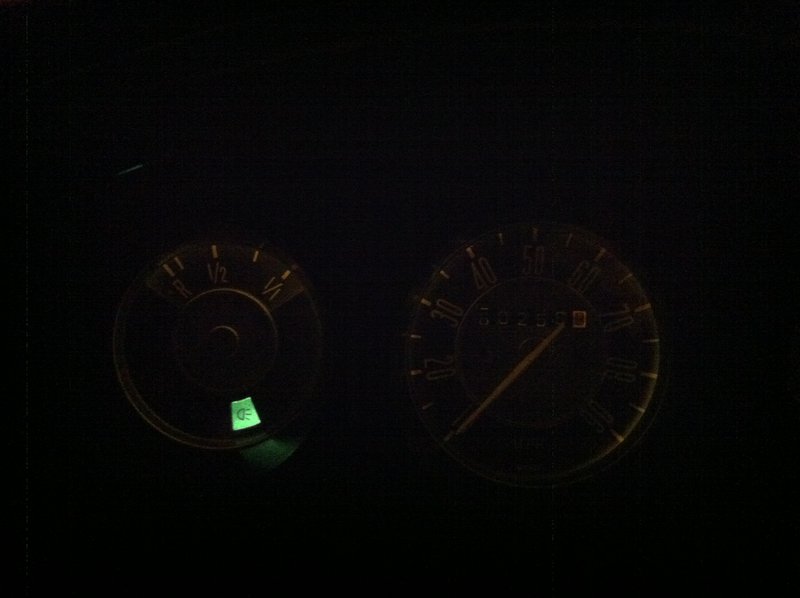
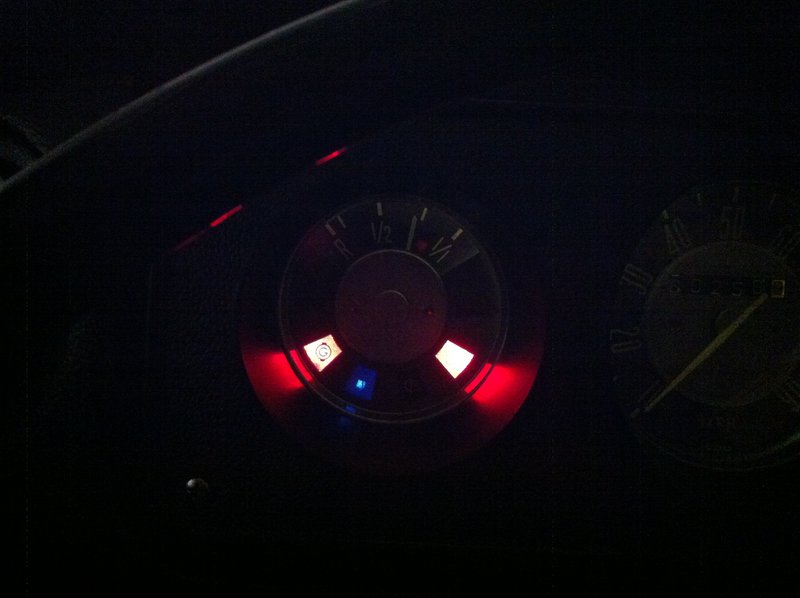
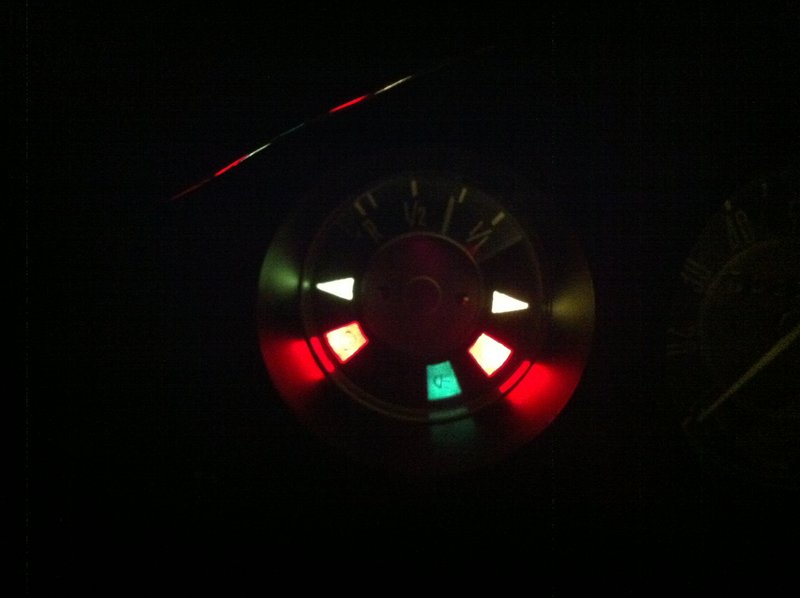
The lights around the edge of the dash pod are some sort of reflection I think.
Can't wait to start camping in Monty again, but first I want to renew the lower ply panels inside.
Thanks for looking.
The speedo is under reading the actual speed by about 10mph, and, the dial glasses on the speedo and fuel gauge are loose and rattle.
What looks like a simple job to the uninitiatated :lol: of just removing four screws from each corner of the dash pod is actually a pita because of the heater levers that need to be removed first. No pics of this process but basically you can apparently remove the little white b@st@rd clips holding onto the removable tops of the levers by using a small socket 4 or 5 mm and sort of punch it out.
I decided to use brute force and a sharp stanley knife.
I just cut off enough of the clips to be able to push or pull them off the levers one at a time. In fact I still have enough of the clips left to re-use. I am not going to though, because the levers actually are held in firmly by a spring plate attaching to the inner part of the lever.If I want to take the dash pod out again for any reason, like a new digital speedo, or a rev counter install, then it will be a lot easier without the clips holding in those heater levers.
I had to remove the radio and ash tray so I could my hand in to get at the white clips.
speedo cable unscrewed
There was quite a lot of dust behind the dash so time for a quick tidy up.
Before removing all those wires I took a few pics and also labelled each wire so I knew which terminal to put it back on. :shock:
Having done that I removed the dash pod completely
So in the warm now in the house I removed the dials and the metal rings that are supposed to hold the dial glasses firmly to the dash pod. They don't any more because they are held by small plastic posts and they have become brittle over the years and nearly all snapped off. The remains were mostly in the dash pod when I cleaned it out.
The gap around the dials
So looking at the rings they were a bit rusty and I sanded them down and put some paint on them, grey primer then Ford Nimbus grey which is a pretty good match. I also painted the bottom of the metal dash frame with Zinc primer as it was also slightly corroded.
I forgot to take pics during painting the top coat but I used two or three thin coats. I'm not really that good at painting, so I was quite pleased when no wrinkles appeared between each coat. :mrgreen:
Whilst waiting for the paint to dry I thought I'd have a go at the speedo. I found this thread on the Samba amongst others that gives guidance on how to do it.
http://www.thesamba.com/vw/forum/viewtopic.php?t=474291&postdays=0&postorder=asc&start=0" onclick="window.open(this.href);return false;
Basically you just remove and re-position the needle by however much it's out. However you have to be able to remove the needle first :evil:
I tried several methods using different tools and even the two teaspoons method but it would not budge.
So I was faced with a choice; am I prepared to remove the needle at any cost which may mean wrecking the speedo, or do I just leave it ?
I decided to leave it - for now.
I was actually using quite a bit of force and it seemed that the mechanism that the spindle is connected to would break rather than the damned needle come away!
I had to have a lager to calm my nerves :lol:
I wonder if any one else on EB has done this successfully.
I had an idea that maybe it had already been done once as there was a mark on the back of the speedo that wasn't original. If it had been done before maybe the PO glued on the needle and that it why I was having such a hard time with it.
Oh well, some you win some you lose.
So, now the paint was all dry on the dial rings I put it all back together and used some clear adhesive to stick the ring to the posts and therefore hold the glasses in.
The Nimbus grey is slightly lighter than the OG shade but I am pleased with the look. There was a lot of muck over the speedo dial and especially the warning lights under the fuel gauge so I carefully wiped them clean. I used an old tooth brush to clean the back of the speedo. The warning lamps are a lot brighter now.
The lights around the edge of the dash pod are some sort of reflection I think.
Can't wait to start camping in Monty again, but first I want to renew the lower ply panels inside.
Thanks for looking.
Pellwood said:Great job on the instrument cluster. I learned so much about my vans wiring when I refurbished mine.
thanks
yes- it's just like the Bentley wiring diagram. Mostly anyway.
Good job on the doors another on my to do list once I have cracked the rear quarterlights. Funny my Speedo is out by exactly 10 miles an hour too, I had it out once already but all I achieved was snapping the speedo needle - result :suicide: So I superglued it back and strangely it is still stuck for the moment - still reads 10 miles an hour too slow still though. Anyway it helped me waste a couple of days of my meaningless life doing it.
Like you I haven't put the clips back for the heater levers also, the amount of times the dash comes out i think it would be better putting it on a hinge :lol:
Like you I haven't put the clips back for the heater levers also, the amount of times the dash comes out i think it would be better putting it on a hinge :lol:
subheatadey said:Good job on the doors another on my to do list once I have cracked the rear quarterlights. Funny my Speedo is out by exactly 10 miles an hour too, I had it out once already but all I achieved was snapping the speedo needle - result :suicide: So I superglued it back and strangely it is still stuck for the moment - still reads 10 miles an hour too slow still though. Anyway it helped me waste a couple of days of my meaningless life doing it.
Like you I haven't put the clips back for the heater levers also, the amount of times the dash comes out i think it would be better putting it on a hinge :lol:
:lol: thanks,
I almost snapped my speedo needle as well.
I think I'll just stick with the satnav for now. The van always sounds as though its going ten miles an hour faster any way to sort of compensate :lol:
It's a lot easier getting the dash out without those clips isn't it? You'll get there in the end. 8)
ballbag
Well-known member
WOW, what a lovely bus Mike. I'm very impressed
- Joined
- Feb 29, 2012
- Messages
- 891
- Reaction score
- 126
Very neat and tidy! I can't believe how bright your warning lights are now. 40 odd years of dust must make a difference. Good write up too, love those photos
Regarding the white plugs, well I'm disappointed. I like to cut the back of my hands by sticking it through the radio slot, and rest my body weight on my head against the gearstick every now and again. Those clips give me the perfect excuse.
Regarding the white plugs, well I'm disappointed. I like to cut the back of my hands by sticking it through the radio slot, and rest my body weight on my head against the gearstick every now and again. Those clips give me the perfect excuse.
Similar threads
- Replies
- 0
- Views
- 127