You are using an out of date browser. It may not display this or other websites correctly.
You should upgrade or use an alternative browser.
You should upgrade or use an alternative browser.
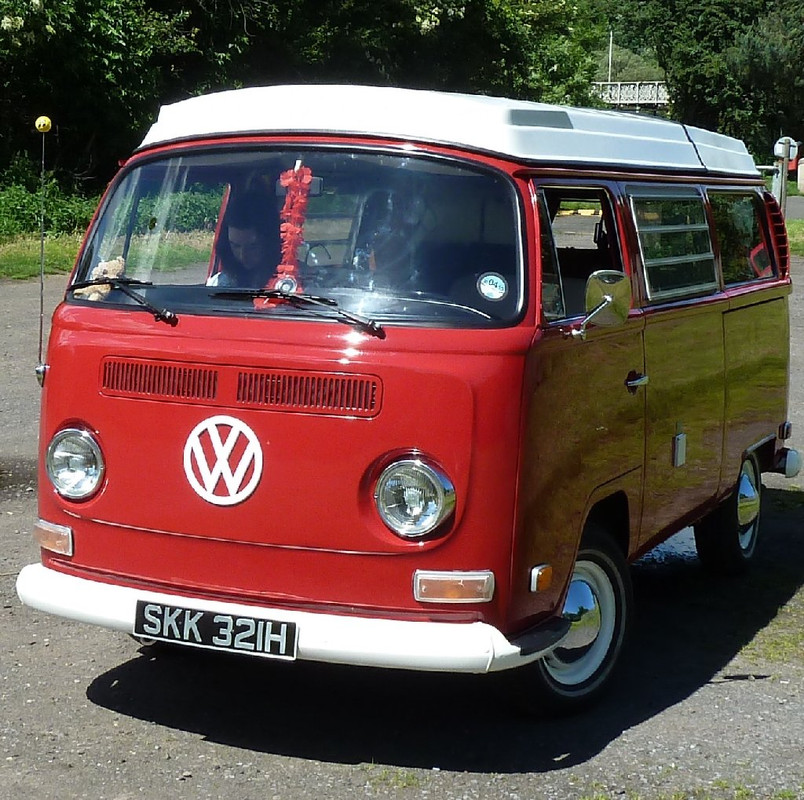
Monty the Red Campervan
- Thread starter mike202
- Start date


Help Support Early Bay Forum:
This site may earn a commission from merchant affiliate
links, including eBay, Amazon, and others.
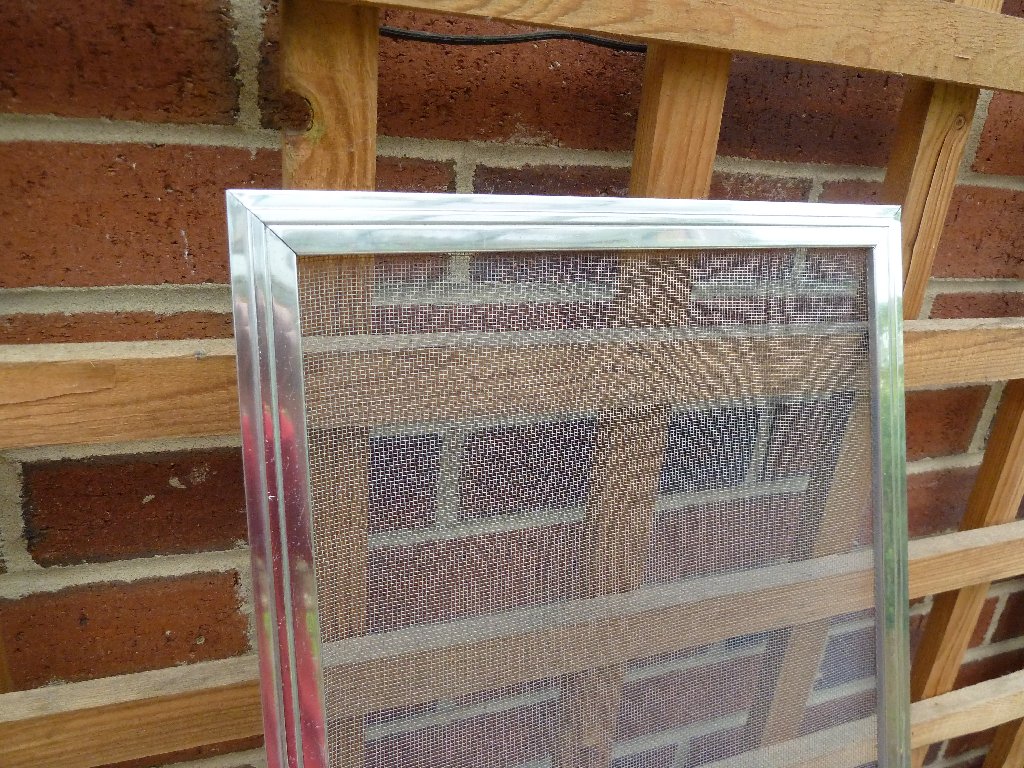
Bought a used ratty looking mozzy mesh frame for my other jalousie window as Monty only came with one. I thought it would be nice to have a matching one, so windows could be opened both sides without midges/wasps/bees etc flying in and causing consternation in the van!
The old mesh was knackered so I ordered some from Alistair (aogrady) on this forum. Looks just the same as the original.
I cleaned up the frame with the dremel mini flap wheel attachment and wire wheel but had to be careful not to scratch the ally frame. The frame was filthy when it arrived due to age etc but cleaned up ok and I like the used/ aged look. Looks OG.
Following cleaning up of the frame with brasso to get it shiney, putting the mesh in was fairly easy, I bought some new 2mm grey wire cable sleeve to retain the mesh in the channel on the rear of the frame. Looks just like the original which I removed.
from here;
http://www.ebay.co.uk/itm/160587903219?ssPageName=STRK:MEWNX:IT&_trksid=p3984.m1439.l2649" onclick="window.open(this.href);return false;
The only problem now is that the jalousie windows might not look as shiney as the mozzy frames! :lol: 8)
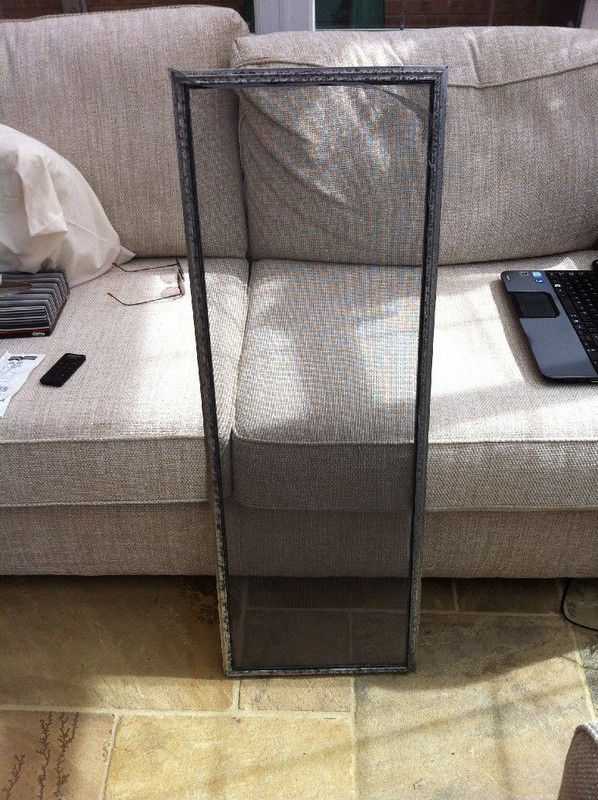
showing channel with plastic wire sleeve.

The old mesh was knackered so I ordered some from Alistair (aogrady) on this forum. Looks just the same as the original.
I cleaned up the frame with the dremel mini flap wheel attachment and wire wheel but had to be careful not to scratch the ally frame. The frame was filthy when it arrived due to age etc but cleaned up ok and I like the used/ aged look. Looks OG.
Following cleaning up of the frame with brasso to get it shiney, putting the mesh in was fairly easy, I bought some new 2mm grey wire cable sleeve to retain the mesh in the channel on the rear of the frame. Looks just like the original which I removed.
from here;
http://www.ebay.co.uk/itm/160587903219?ssPageName=STRK:MEWNX:IT&_trksid=p3984.m1439.l2649" onclick="window.open(this.href);return false;
The only problem now is that the jalousie windows might not look as shiney as the mozzy frames! :lol: 8)
showing channel with plastic wire sleeve.
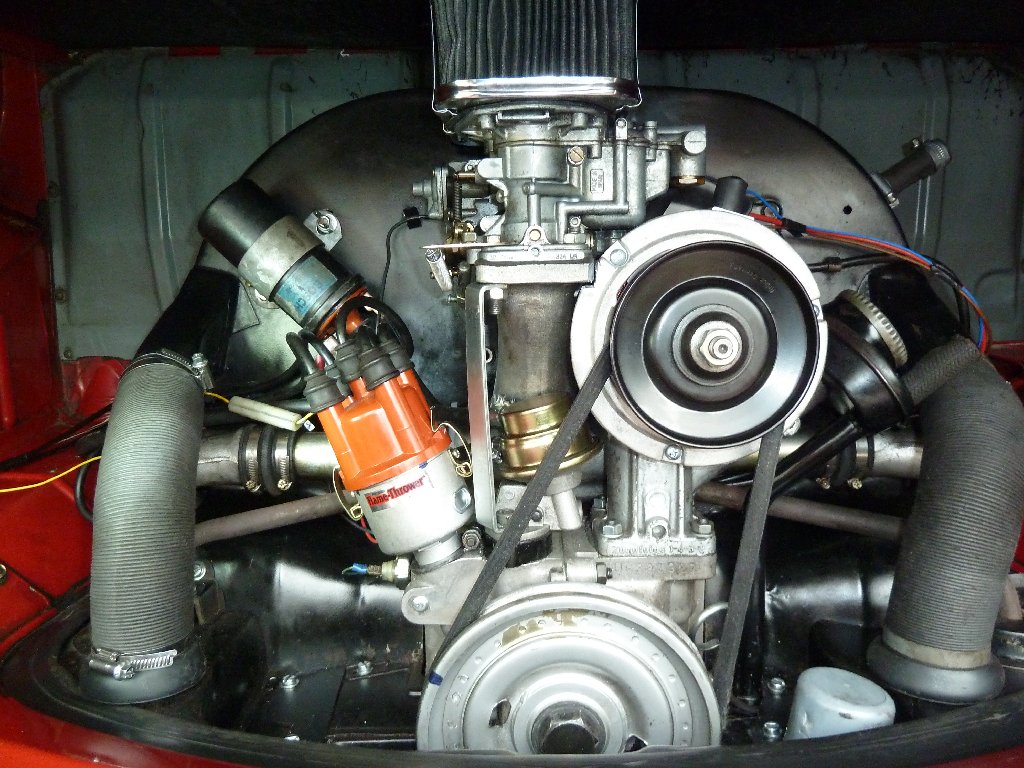
Bit of an update after my generator problems. After the first holiday this year I heard a worrying grinding noise coming from the engine which I discovered was the generator. The bearings were worn.
I decided, after reading up a lot on the subject, to go for a new Alternator. I think that if you don't have many other electrical devices in your bus like a fridge, stereo sound system, extra lights etc you could keep the generator and not have problems, but when the opportunity came up I went with the alternator because although I haven't got that much extra running off the car battery at the moment it was a good investment. My generator was not the OG 38A bus one any way, it was a 30A replacement albeit a Bosch one. Maybe if it had been an OG 38A one I may have decided to keep it and replace the bearings.
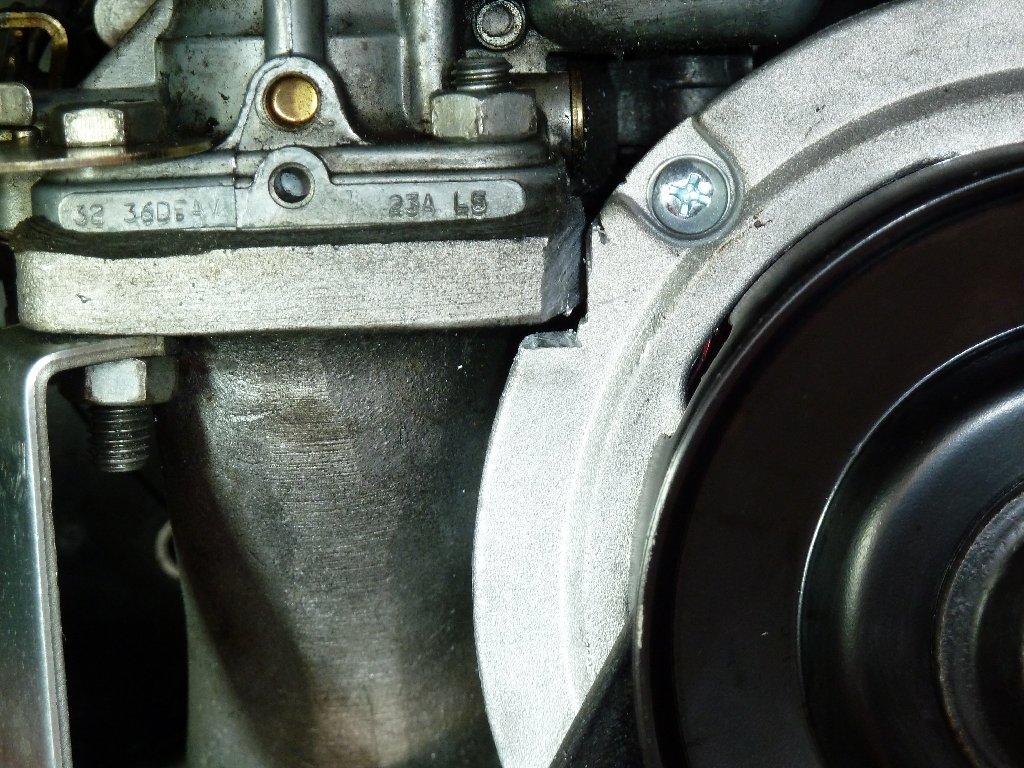
I have had a problem with keeping the previous battery charged up which was probably down to the old generator, but an alternator charges the battery up even at low revs whereas a generator doesn't have such a wide charging range. I wasn't sure I could put the conversion kit in, so I got the garage to put it in for me. Unfortunately because of the progressive 36/32 carb that's in there the new alternator had to be 'adapted' to fit. :roll: A small corner had to cut out of the front wide part of the alternator.
The engine sounds much better now, really quiet.
I am happy with the performance of this carb but would like to return to stock at some point. I already have an oil bath filter to go back on. This will mean a new manifold as well, and more money, so I don't want to think about it too much right now :lol: I have recently had to fork out for a new sill on the nearside which resulted in re-spraying the whole lower long side!
I also got a new car battery with the terminals on the 'right' sides. I have removed all the aftermarket alarm and stereo wiring fitted by the PO probably from around the 1980's. This is part of my on going quest to tidy up the engine bay!
Just need to fit my new plug leads and coil and that just about means everything is new in there apart from the tin wear! I will keep the old coil as a spare.
New Bosch alternator from VWH.

cheers for now.
Mike
I decided, after reading up a lot on the subject, to go for a new Alternator. I think that if you don't have many other electrical devices in your bus like a fridge, stereo sound system, extra lights etc you could keep the generator and not have problems, but when the opportunity came up I went with the alternator because although I haven't got that much extra running off the car battery at the moment it was a good investment. My generator was not the OG 38A bus one any way, it was a 30A replacement albeit a Bosch one. Maybe if it had been an OG 38A one I may have decided to keep it and replace the bearings.
I have had a problem with keeping the previous battery charged up which was probably down to the old generator, but an alternator charges the battery up even at low revs whereas a generator doesn't have such a wide charging range. I wasn't sure I could put the conversion kit in, so I got the garage to put it in for me. Unfortunately because of the progressive 36/32 carb that's in there the new alternator had to be 'adapted' to fit. :roll: A small corner had to cut out of the front wide part of the alternator.
The engine sounds much better now, really quiet.
I am happy with the performance of this carb but would like to return to stock at some point. I already have an oil bath filter to go back on. This will mean a new manifold as well, and more money, so I don't want to think about it too much right now :lol: I have recently had to fork out for a new sill on the nearside which resulted in re-spraying the whole lower long side!
I also got a new car battery with the terminals on the 'right' sides. I have removed all the aftermarket alarm and stereo wiring fitted by the PO probably from around the 1980's. This is part of my on going quest to tidy up the engine bay!
Just need to fit my new plug leads and coil and that just about means everything is new in there apart from the tin wear! I will keep the old coil as a spare.
New Bosch alternator from VWH.
cheers for now.
Mike
- Joined
- Feb 29, 2012
- Messages
- 891
- Reaction score
- 126
Looking tidy in there Mike. Fitted front grill mesh like you advised and looks like original, so good call
D
D
Bluesnailman said:Looking tidy in there Mike. Fitted front grill mesh like you advised and looks like original, so good call
D
Thanks, I'm getting there gradually. Yes, the mesh is pretty good.
")
After getting the alternator installed the van has been running much quieter. Had a trip over to the lakes doing around 200 miles so a good test. Haven't filled back up with petrol yet so don't know if there is any change with the mpg.
I saw one or two other VW owners with the progressive carb have fed a warm air pipe from the scoop opening to the carb air intake to help the fuel vapourise in the manifold on its long journey to the pistons. I would say it has stopped a slight halting when the engine is cold.
Anyone else done this?
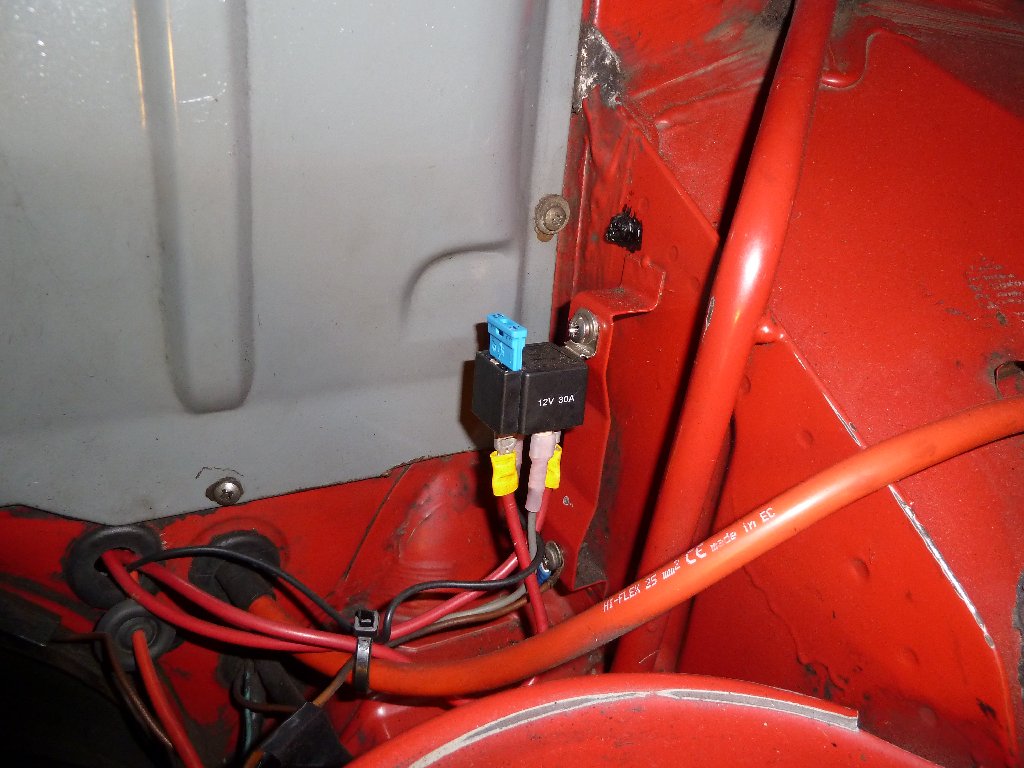
Also covered the alternator cables with conduit keeping the earth for now, and I have decided to fit a hard start relay. The alarm fitter had hacked into the OG ignition wire (red and black) and I thought it may relieve stress on the ignition switch and wires from the large current its get whilst cranking the starter. The relay came with a 30amp fuse. I might replace this with a 20amp as this is what I have read is best.
I can't say that I noticed much difference in practice though; it still takes a few seconds to get the engine to fire up when it's hot. Although from cold it starts first time.
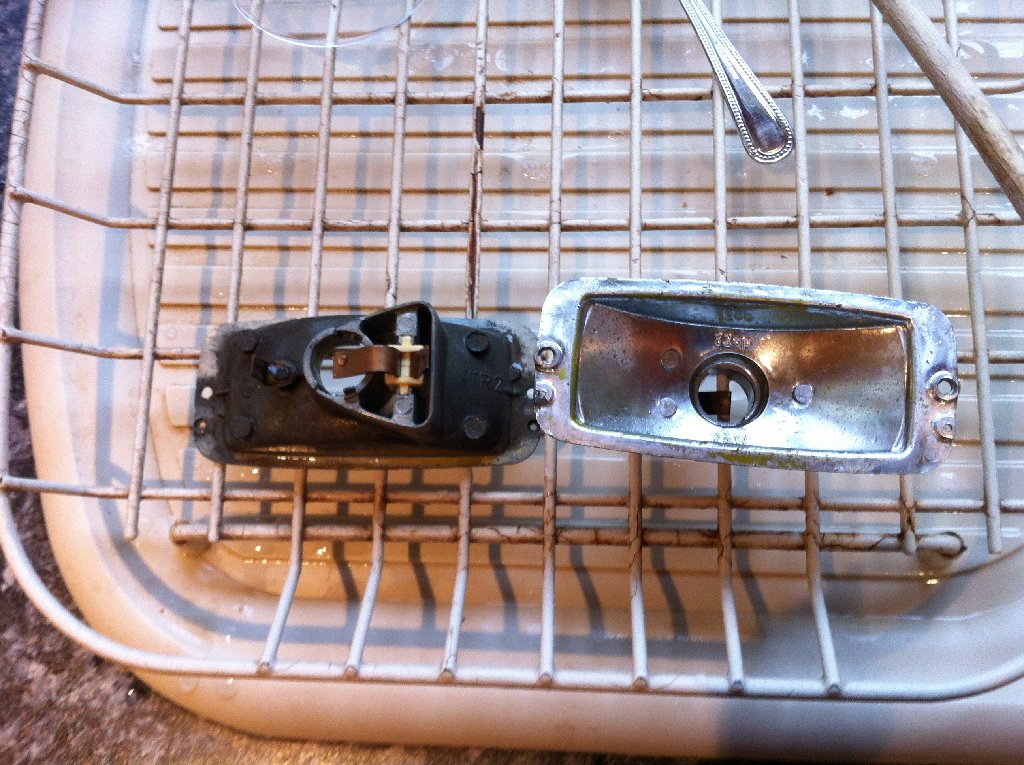
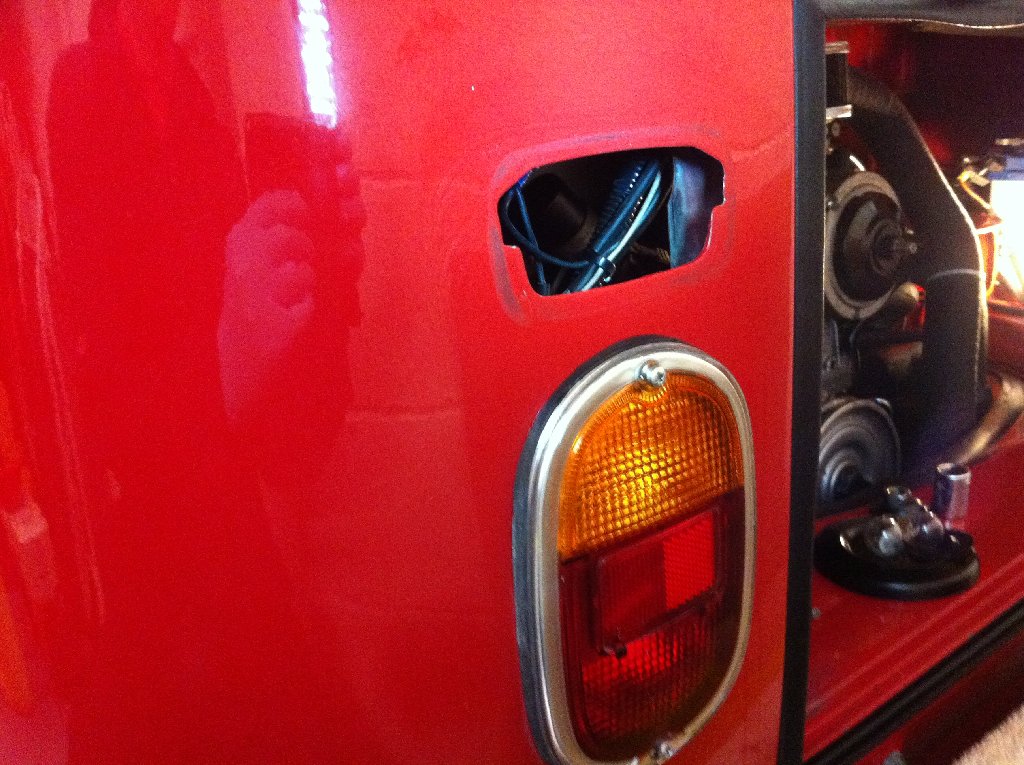
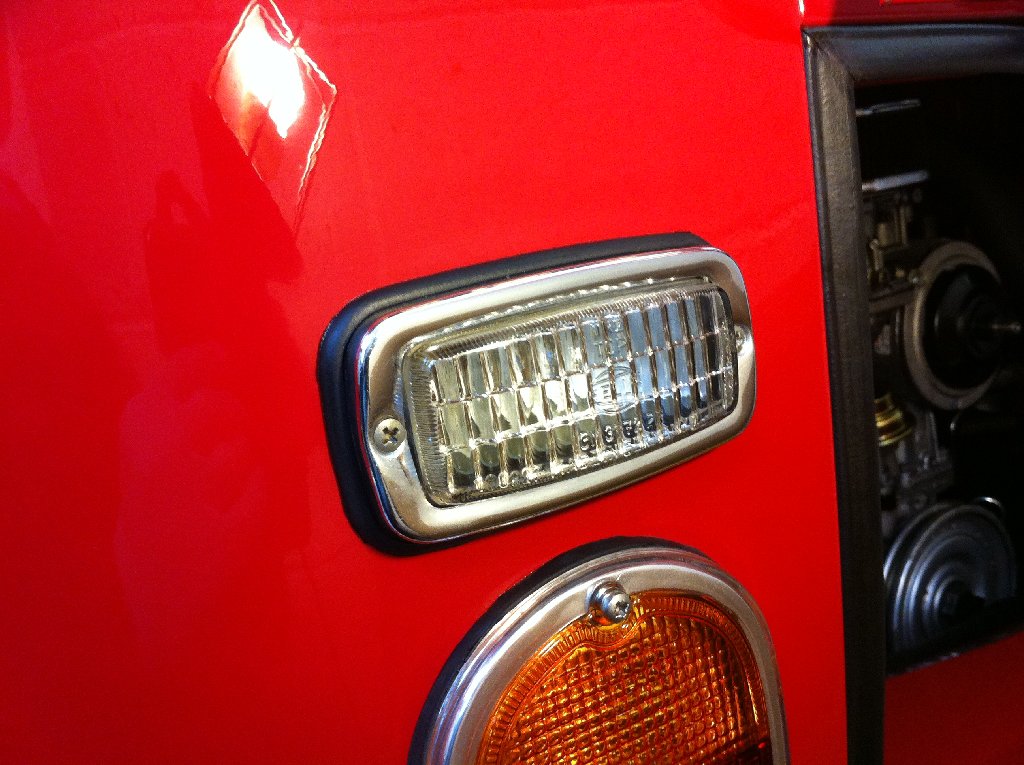
Got new seals for the backup lights, after I noticed condensation in the lens. Gave the lights a good wash whilst doing it.
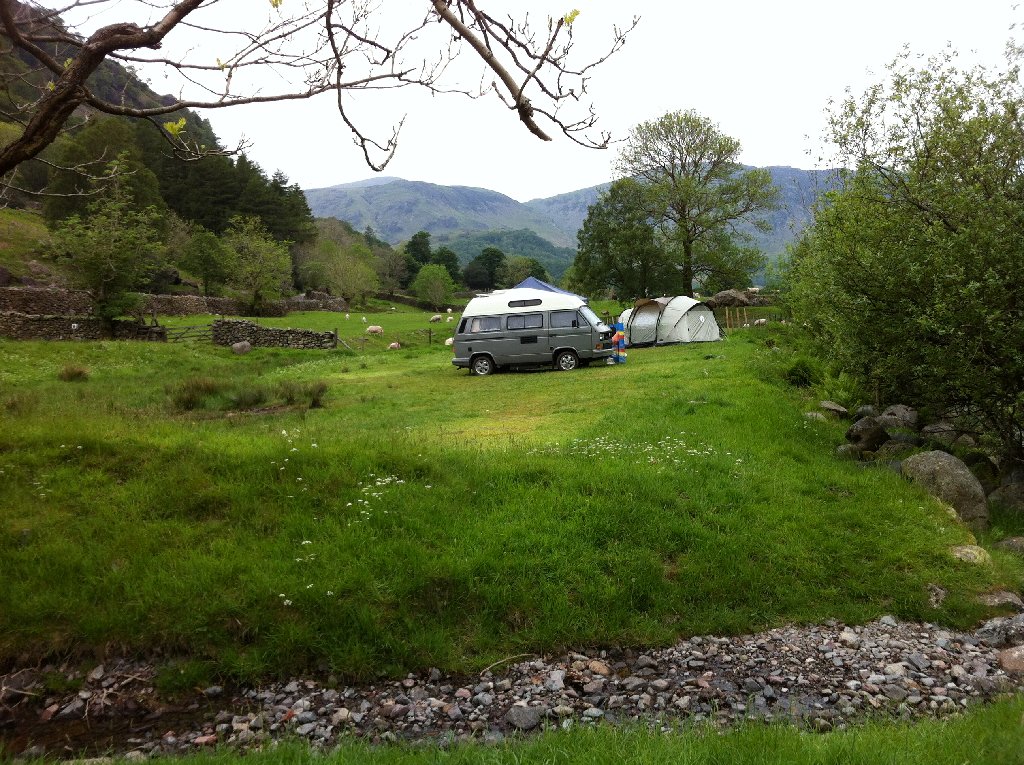
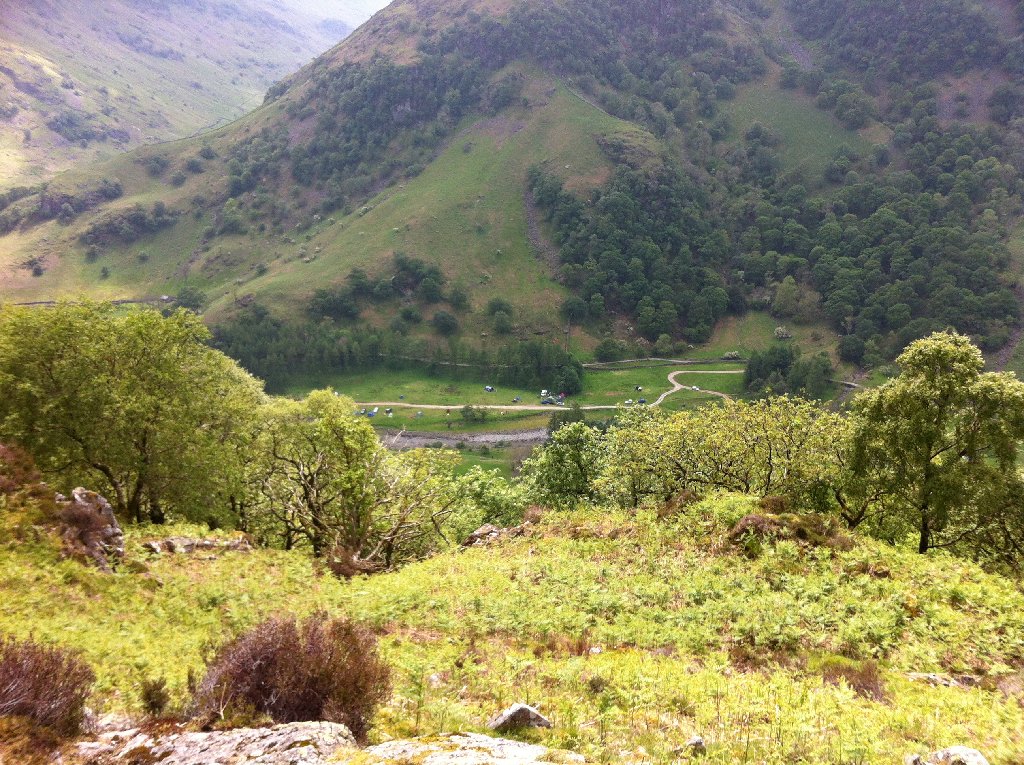
We went to the Stonethwaite site in the Lakes, and had a great time. There was a tidy looking T25 next to us, and a peppermint coloured Danbury but no other Bays. In fact I don't see many Bays at campsites in the Lakes and virtually never see a Split. Here's a few pics.

hard start relay

had to tighten the chrome surround fairly tight to stop the lens rattling around.

Campsite pics and hi top T25
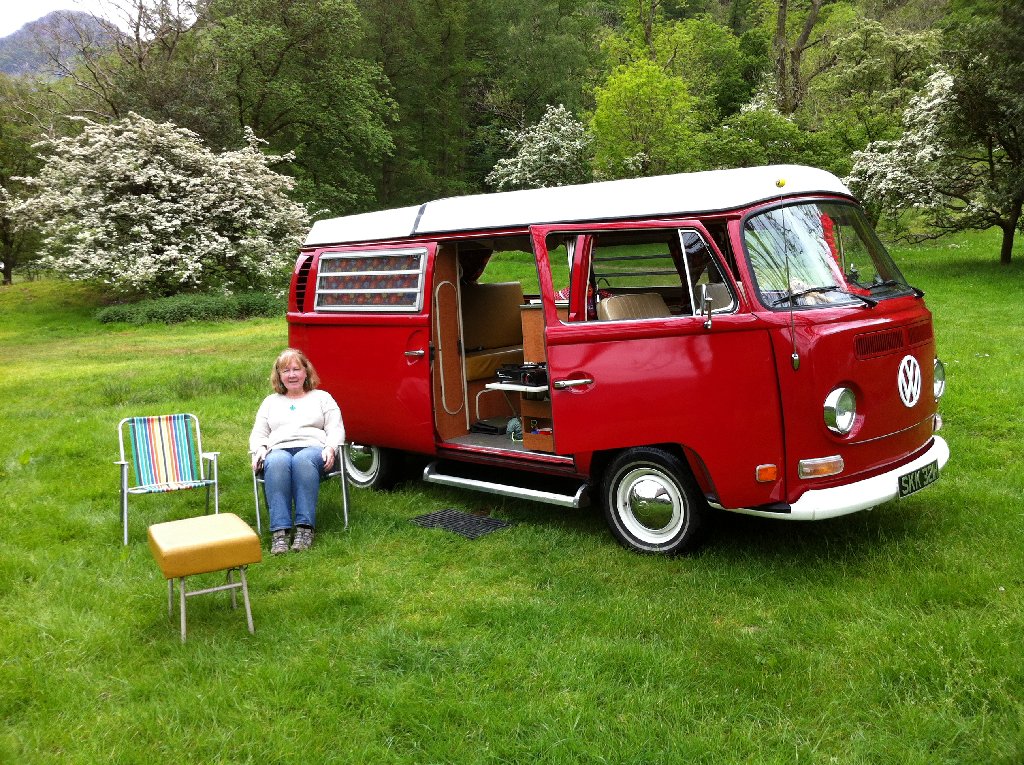


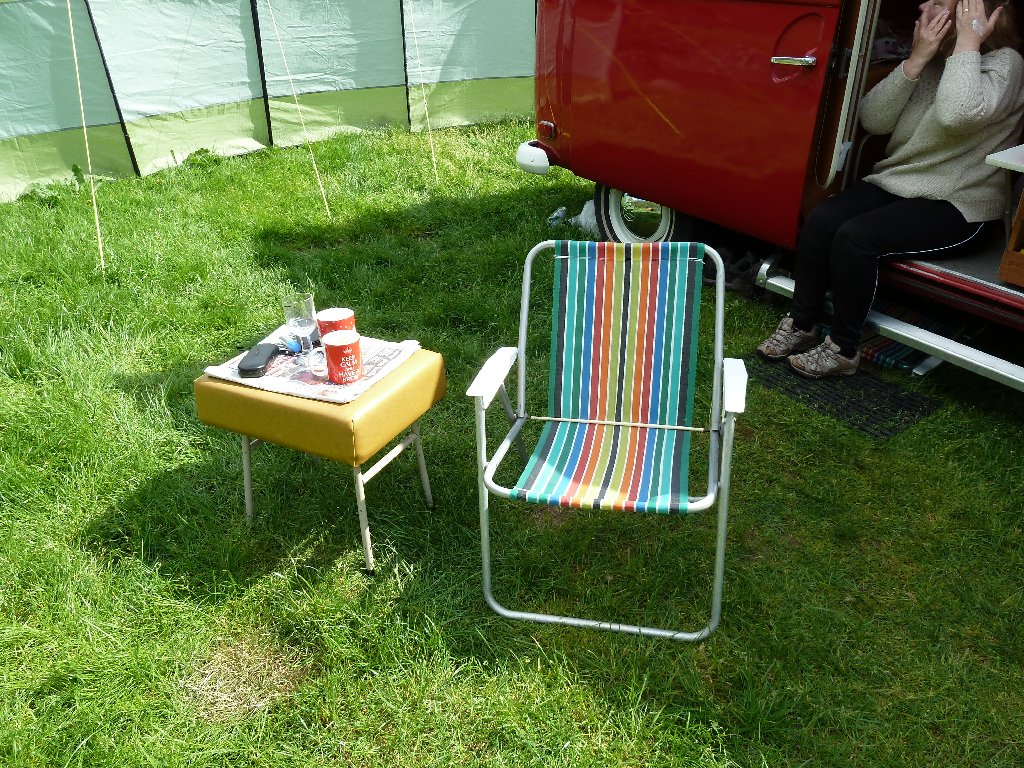
got a pair of retro stripey seats from fleabay 8)
Mike
I saw one or two other VW owners with the progressive carb have fed a warm air pipe from the scoop opening to the carb air intake to help the fuel vapourise in the manifold on its long journey to the pistons. I would say it has stopped a slight halting when the engine is cold.
Anyone else done this?
Also covered the alternator cables with conduit keeping the earth for now, and I have decided to fit a hard start relay. The alarm fitter had hacked into the OG ignition wire (red and black) and I thought it may relieve stress on the ignition switch and wires from the large current its get whilst cranking the starter. The relay came with a 30amp fuse. I might replace this with a 20amp as this is what I have read is best.
I can't say that I noticed much difference in practice though; it still takes a few seconds to get the engine to fire up when it's hot. Although from cold it starts first time.
Got new seals for the backup lights, after I noticed condensation in the lens. Gave the lights a good wash whilst doing it.
We went to the Stonethwaite site in the Lakes, and had a great time. There was a tidy looking T25 next to us, and a peppermint coloured Danbury but no other Bays. In fact I don't see many Bays at campsites in the Lakes and virtually never see a Split. Here's a few pics.
hard start relay
had to tighten the chrome surround fairly tight to stop the lens rattling around.
Campsite pics and hi top T25
got a pair of retro stripey seats from fleabay 8)
Mike


$27.95 ($13.98 / Count)
Marketplace Auto Parts Window Crank Handle Set of 2 - Chrome with Black Knob - Compatible with 1968-1978 Volkswagen Beetle
Parts Geek LLC


gninnam said:8)
Nice work on the alternator :mrgreen:
thanks Andy.
isay
Member
Looking ready tidy
Campsite location looks superb, next to the stream 8)
Campsite location looks superb, next to the stream 8)
DubBGood2Me
Well-known member
Bus looks really nice Mike. Very clean.
Good work with the modifications too.
Good work with the modifications too.
isay said:Looking ready tidy
Campsite location looks superb, next to the stream 8)
yes it's really nice there, beautiful site.
DubBGood2Me said:Bus looks really nice Mike. Very clean.
Good work with the modifications too.
thanks, there's always more to do. Some you choose, some are made for you!
mychatype3
Well-known member
Looking good Mike, keep up the good work and enjoy it
Greetings from Holland, mycha
Greetings from Holland, mycha
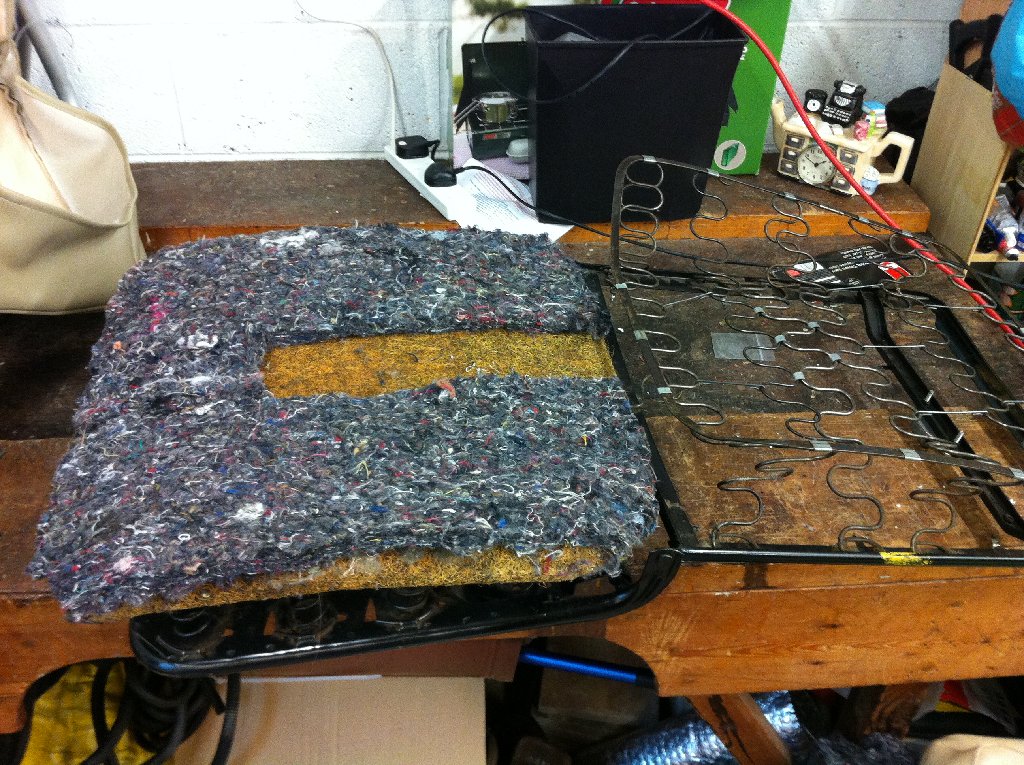
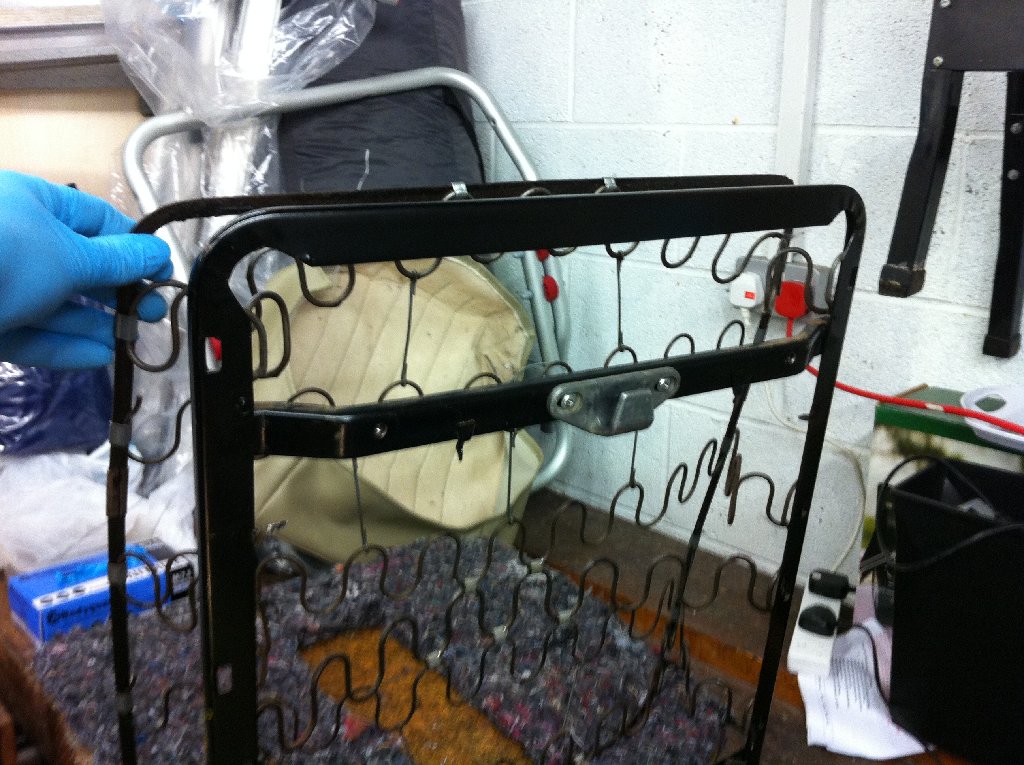
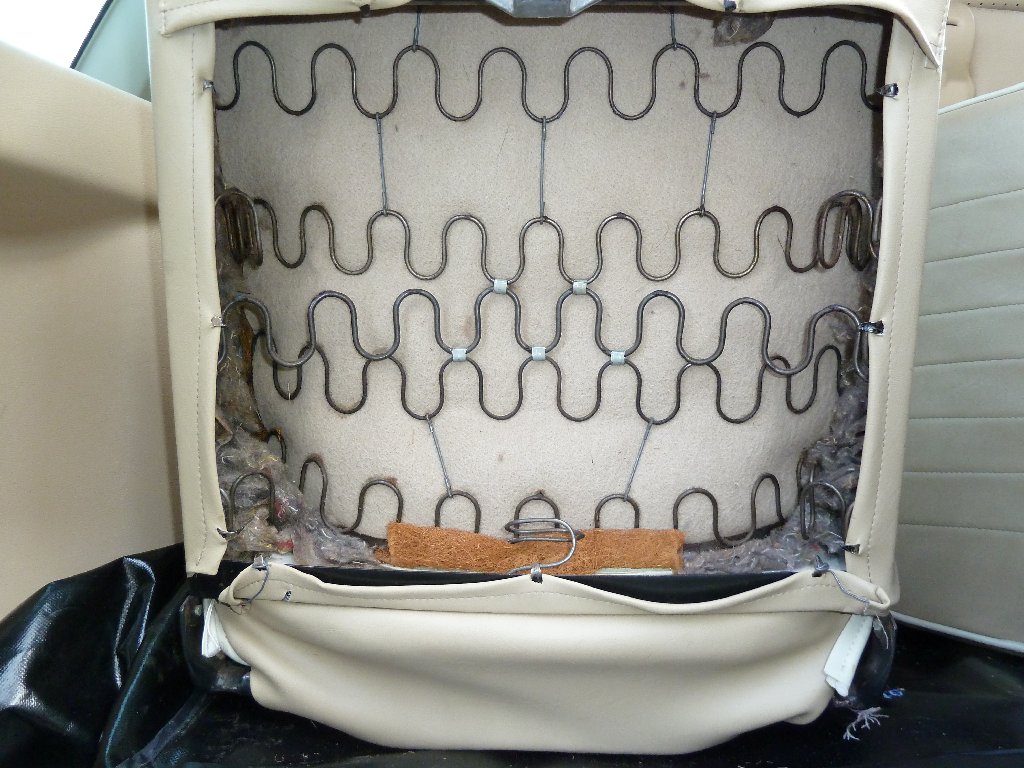
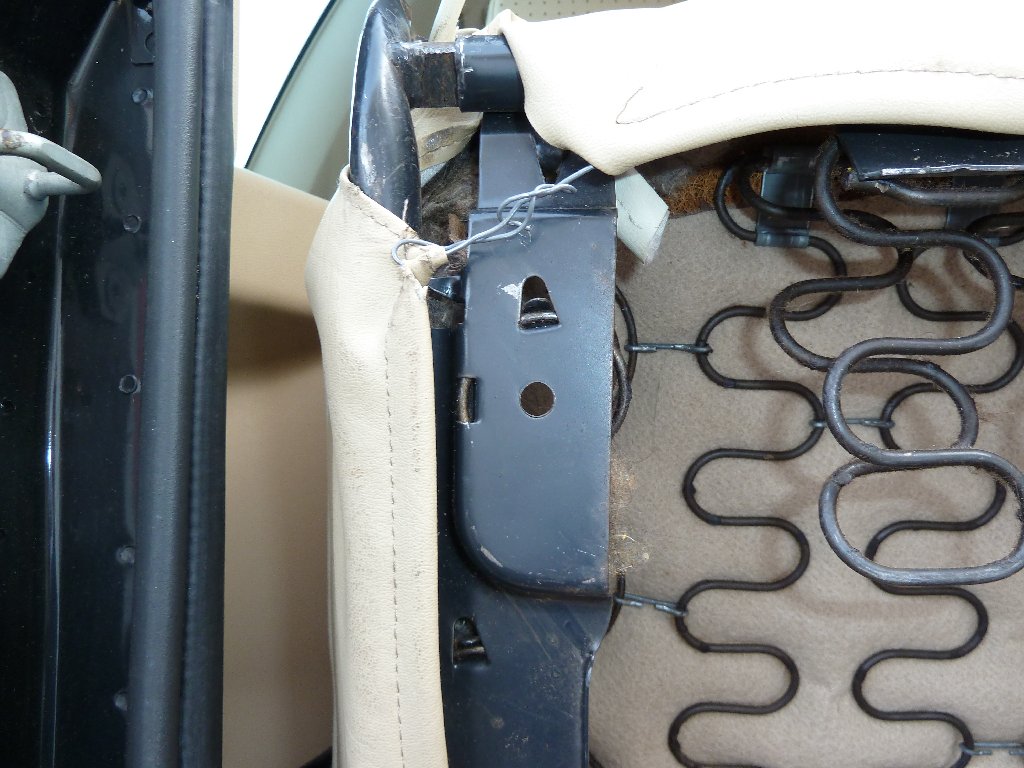
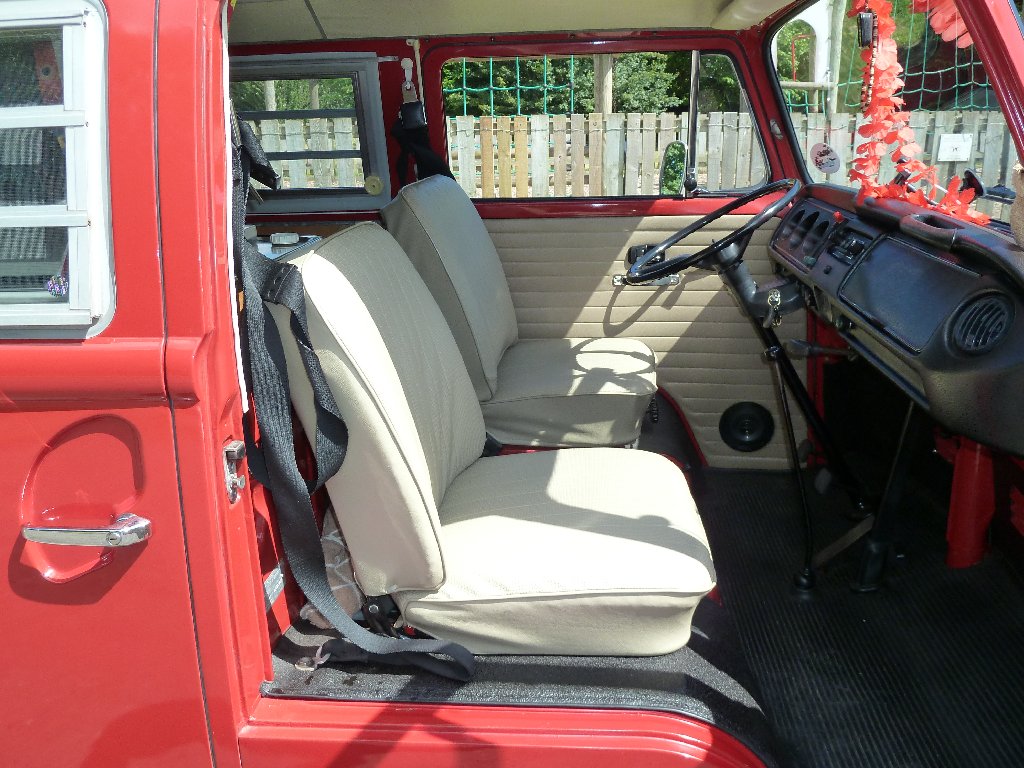
Re-covered the seats with beige basketweave vinyl from TMI, which it would have had originally. Really pleased with the pattern its more comfortable than the previous covers, and I have padded it out more than it was.
The springs were in good condition so I just cleaned the metal frame up a bit and then covered the springs with sisal liner, then coconut fibre mats (also known as horsehair) then cotton padding before the covers. I needed to use bailing wire in the seams to strengthen them and hook over the metal spikes.
I glued the cotton padding onto the fibre bases using spray carpet glue to keep them in place.
Looking for the two plastic or rubber stops for the back of the passenger seat either side of the hook if anyone has some :?:

Mike
The springs were in good condition so I just cleaned the metal frame up a bit and then covered the springs with sisal liner, then coconut fibre mats (also known as horsehair) then cotton padding before the covers. I needed to use bailing wire in the seams to strengthen them and hook over the metal spikes.
I glued the cotton padding onto the fibre bases using spray carpet glue to keep them in place.
Looking for the two plastic or rubber stops for the back of the passenger seat either side of the hook if anyone has some :?:
Mike
mychatype3 said:Looking good Mike, keep up the good work and enjoy it
Greetings from Holland, mycha
thanks Mycha, maybe see you at Busfest this year.
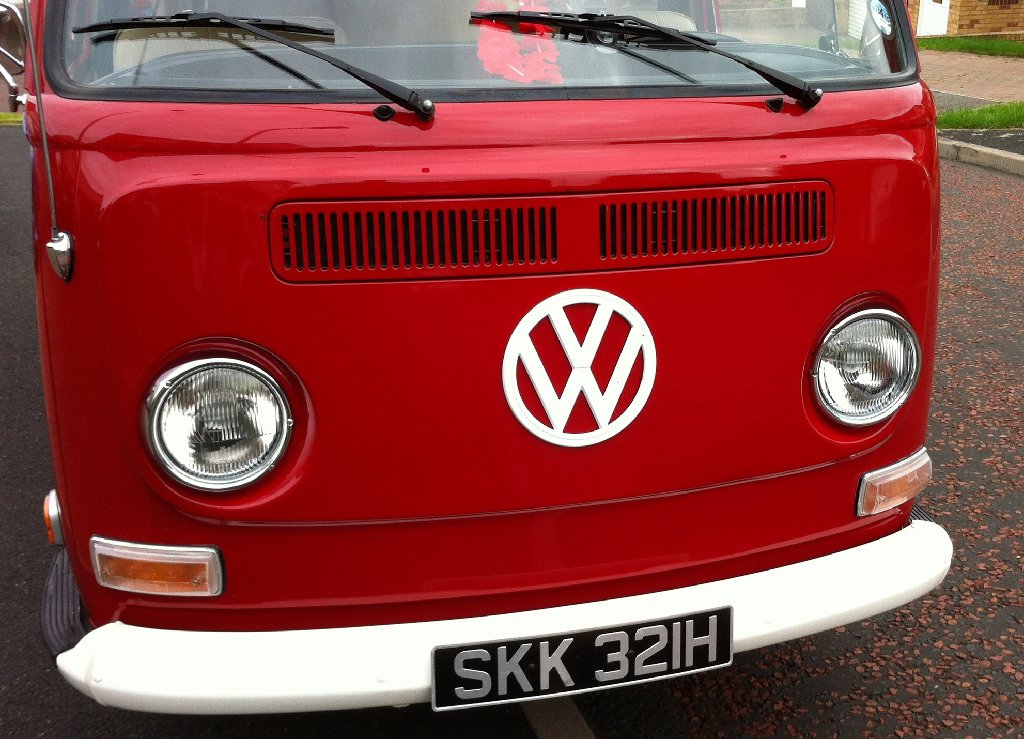
Thought I'd better wax the new paintwork (and the rest of the bus!) as it hasn't been done yet this year. I used Collinite after some recommendations off here. It goes on easy and dried quite quickly.
It wasn't exactly 'wax on wax off' as in the Karate Kid but more wax on, wax on, wax on, wax off, off, off :lol:
Any way glad that's done my arm is aching now though :roll:
Mike
It wasn't exactly 'wax on wax off' as in the Karate Kid but more wax on, wax on, wax on, wax off, off, off :lol:
Any way glad that's done my arm is aching now though :roll:
Mike
StuF said:Seats looking great Mike - didn't realise they had so many components!
Think mine could do with a little more padding! :lol:
Stu
got the grey cotton padding (or upholstery felt) from here;
http://www.ebay.co.uk/usr/diy-foam-upholstery-supplies?_trksid=p3984.m1439.l2754" onclick="window.open(this.href);return false;
Deffo makes a difference as I didn't have it before, and had to use a thin cushion on top of the seat. Its early days, but I sat three hours on the new seat driving to the Lake District and was fine. :msn4:
Mike
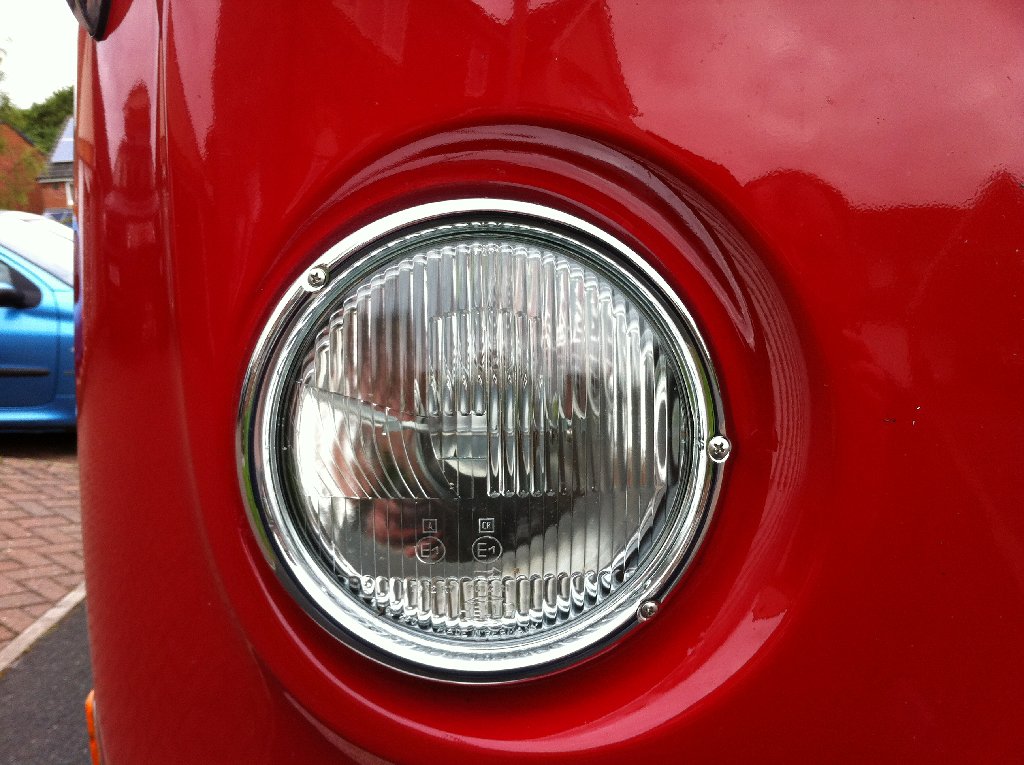
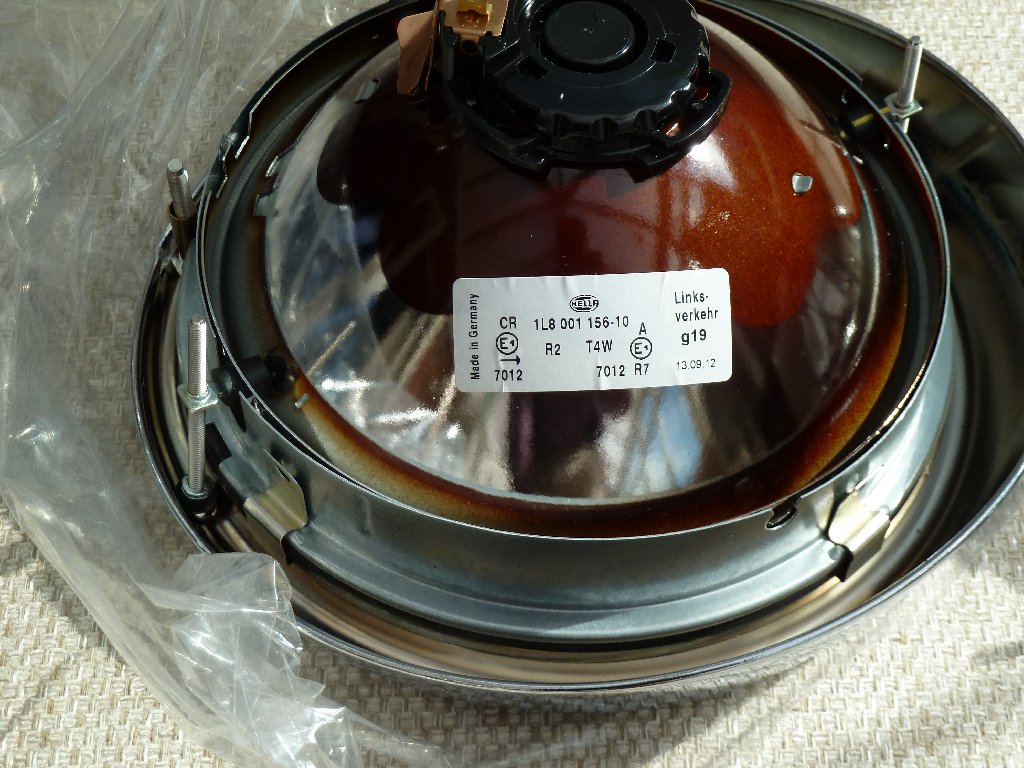
Fitted some new Hella headlamps. The rings are chromed brass so won't rust.
Got the live and earth wires for the side lights mixed up and wondered why the fuse kept blowing every time I installed the headlamp. It was shorting through the body of the headlamp and mounting screws. :roll:
I got them confused as the live is grey, and has an un insulated spade connector, whilst the 'earth' wire was red/yellow and had an insulated connector! 'Never assume the obvious is true'
Any how all connected up and adjusted.
The rings are chromed brass so won't rust. Got the live and earth wires for the side lights mixed up and wondered why the fuse kept blowing every time I installed the headlamp. It was shorting through the body of the headlamp and mounting screws. :roll:
I got them confused as the live is grey, and has an un insulated spade connector, whilst the 'earth' wire was red/yellow and had an insulated connector! 'Never assume the obvious is true'
Any how all connected up and adjusted.
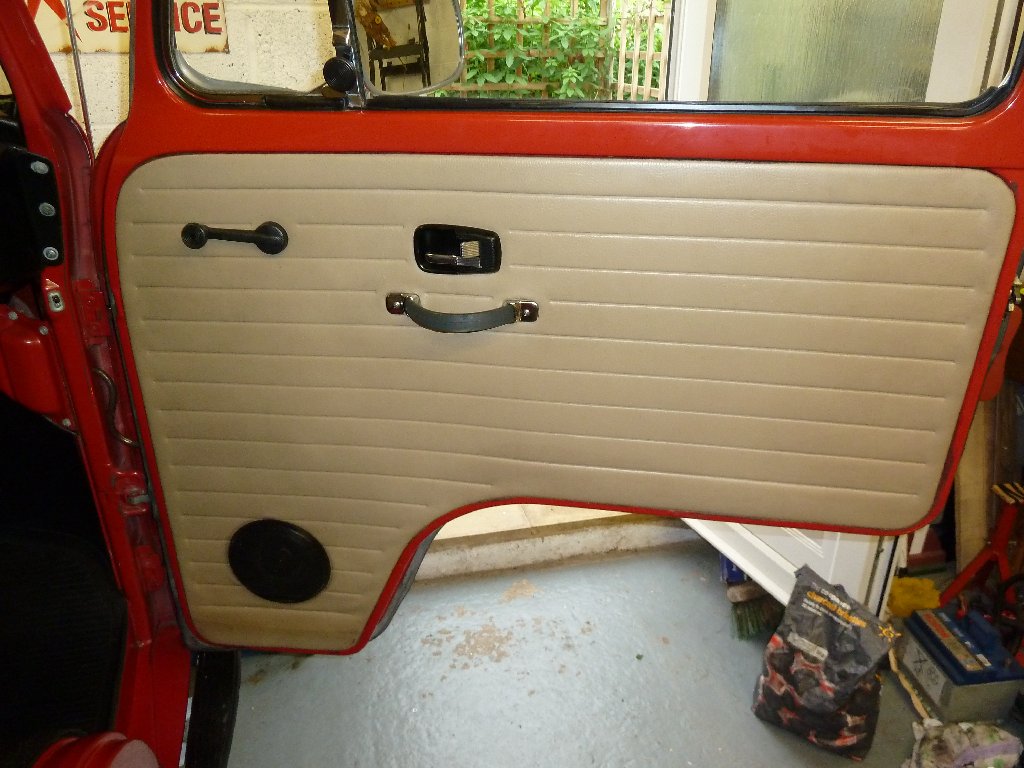
Decided to fix those dang door locks. I could lock the cab doors, but if I then returned to the door, and pressed the trigger before unlocking it, the key would then not 'un-lock' that door, and another door had to be used to gain access to the bus. Others may have experienced similar problems.
I followed this excellent guide;
http://www.type2.com/rvanness/lock.htm" onclick="window.open(this.href);return false;
some good pics on here as well 'Rustbus'
http://www.thesamba.com/vw/forum/viewtopic.php?t=377711&postdays=0&postorder=asc&start=120" onclick="window.open(this.href);return false;
I started with the passenger door as I thought it might be a bit easier as it's less used.
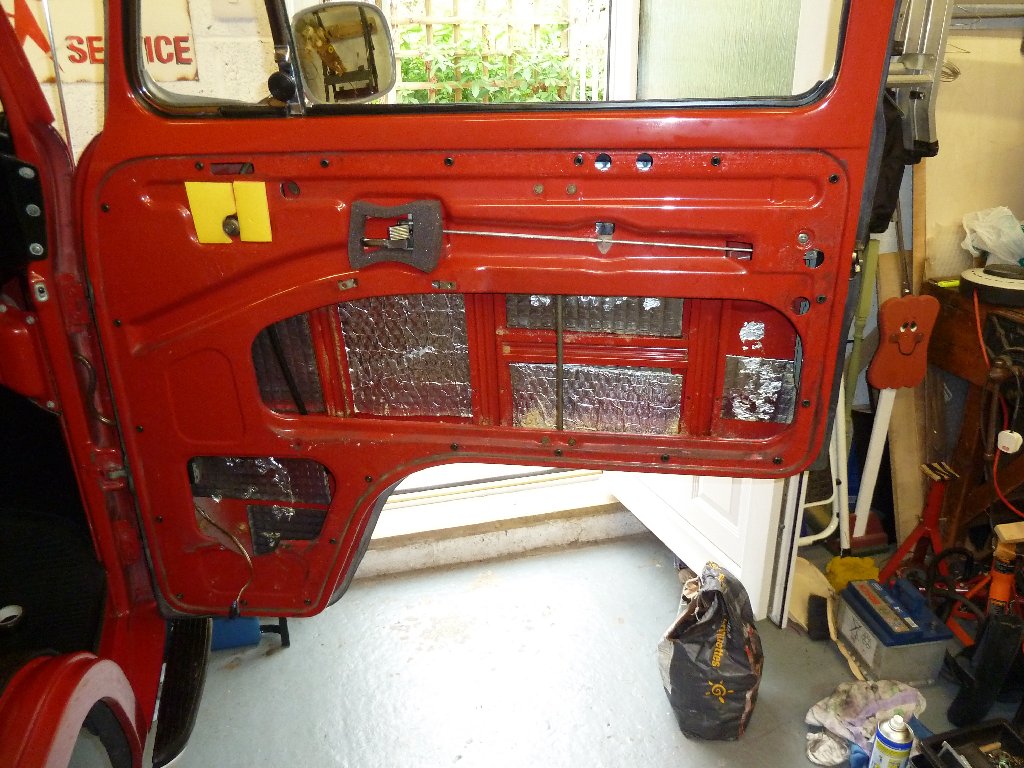
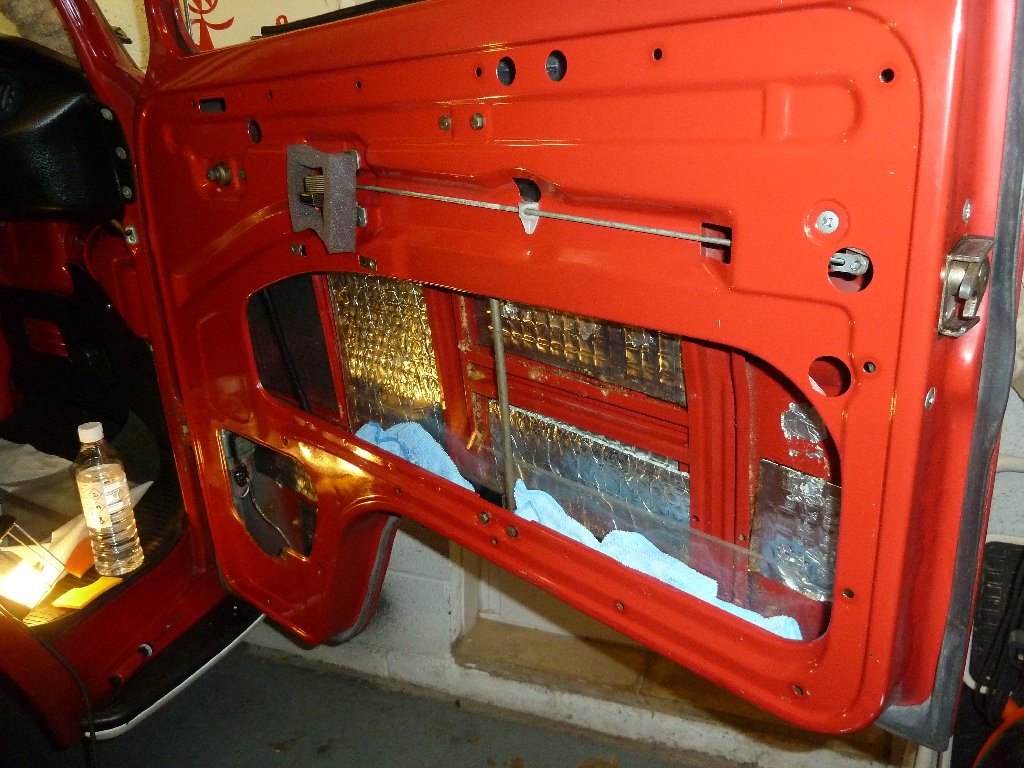
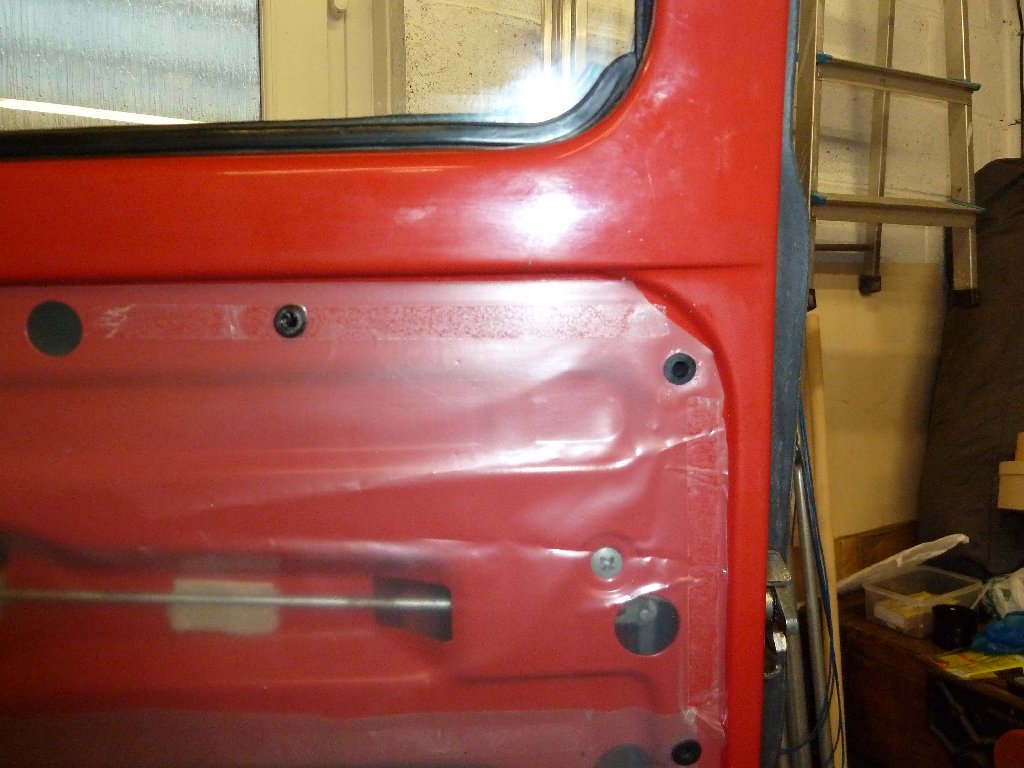
I undid the door release lever, after removing the door card and plastic vapour barrier.
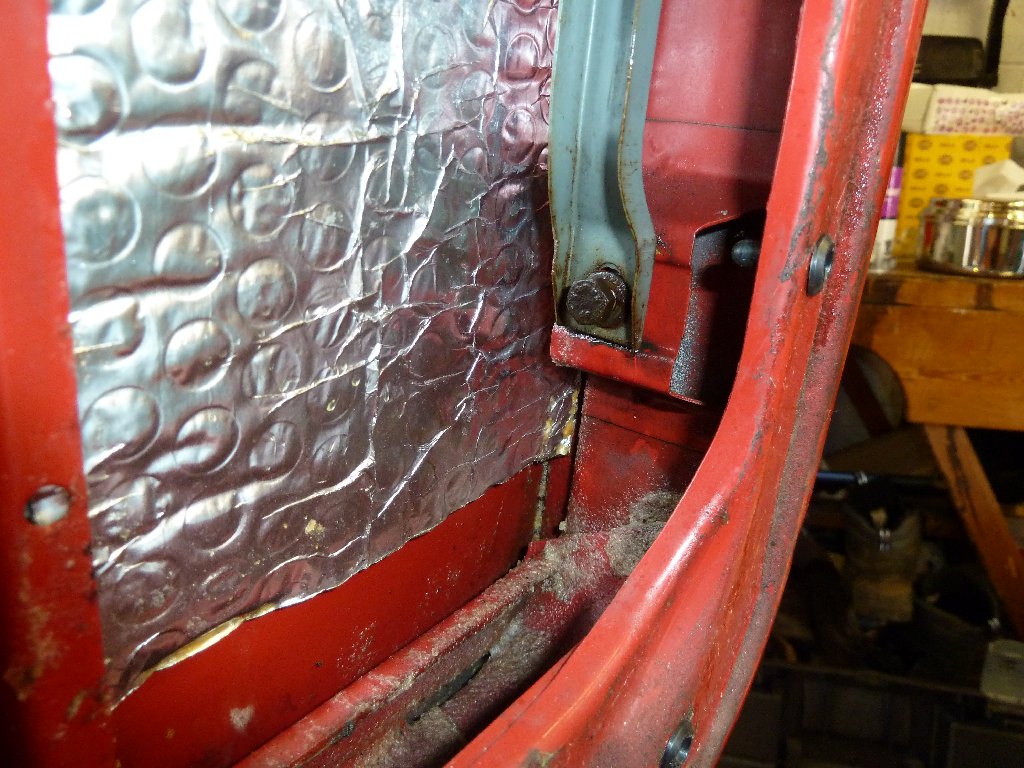
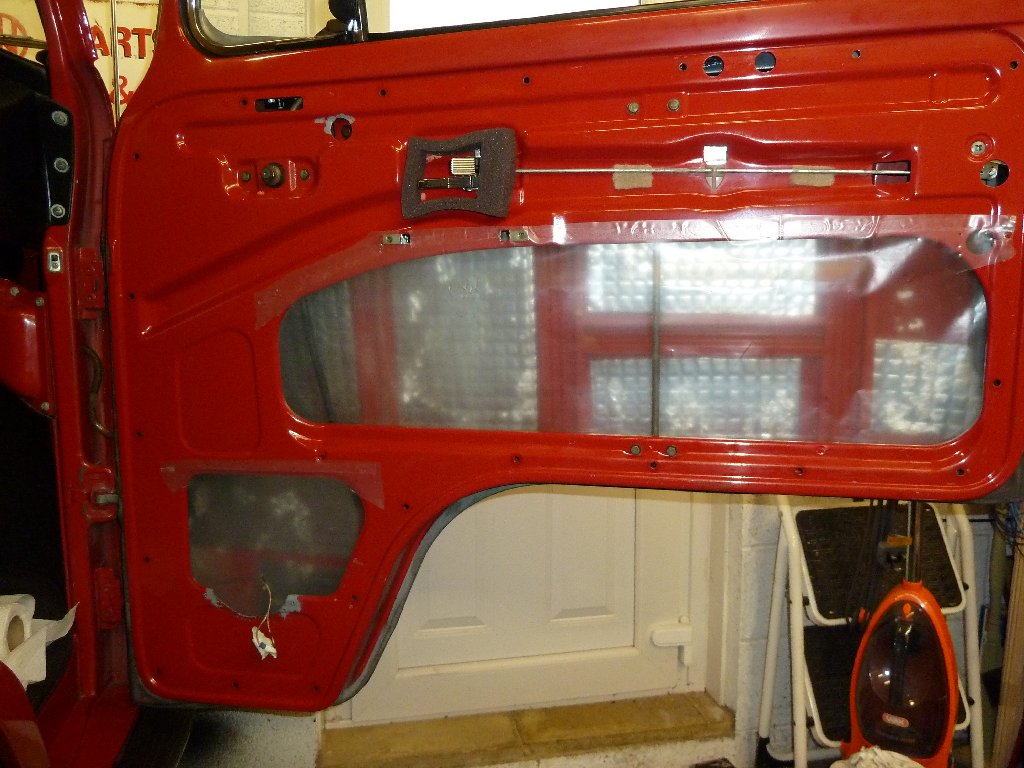
I got rid of the plastic silver bubble wrap type heat insulation, and just leave the silent coat noise insulation on the door. The plastic heat insulation had come unstuck in a few places from when I stuck it two years ago, and I questioned its value as a heat insulator in this situation. I removed it before fitting the vapour barrier plastic sheet.

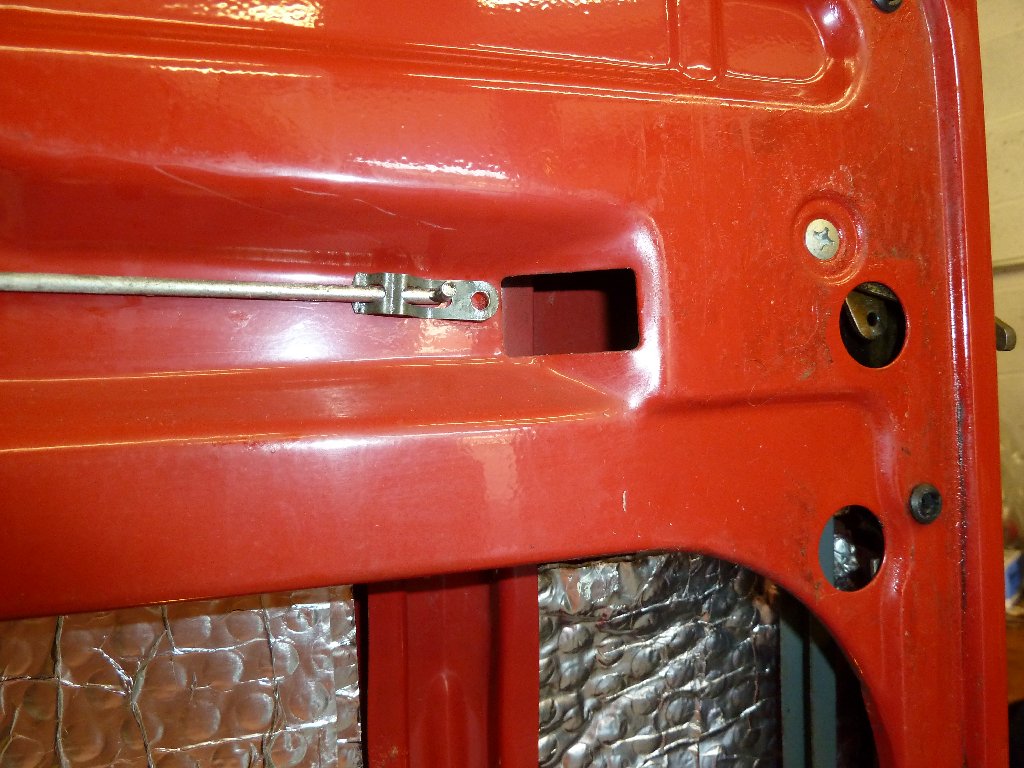

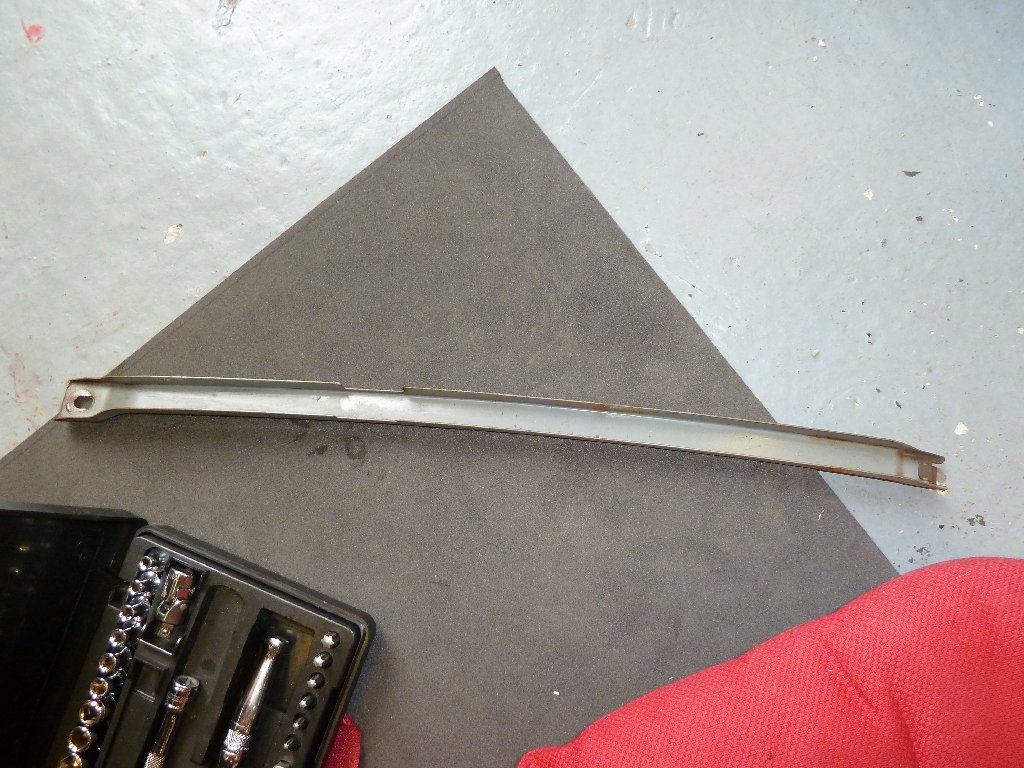
undo the bolt for the window guide channel
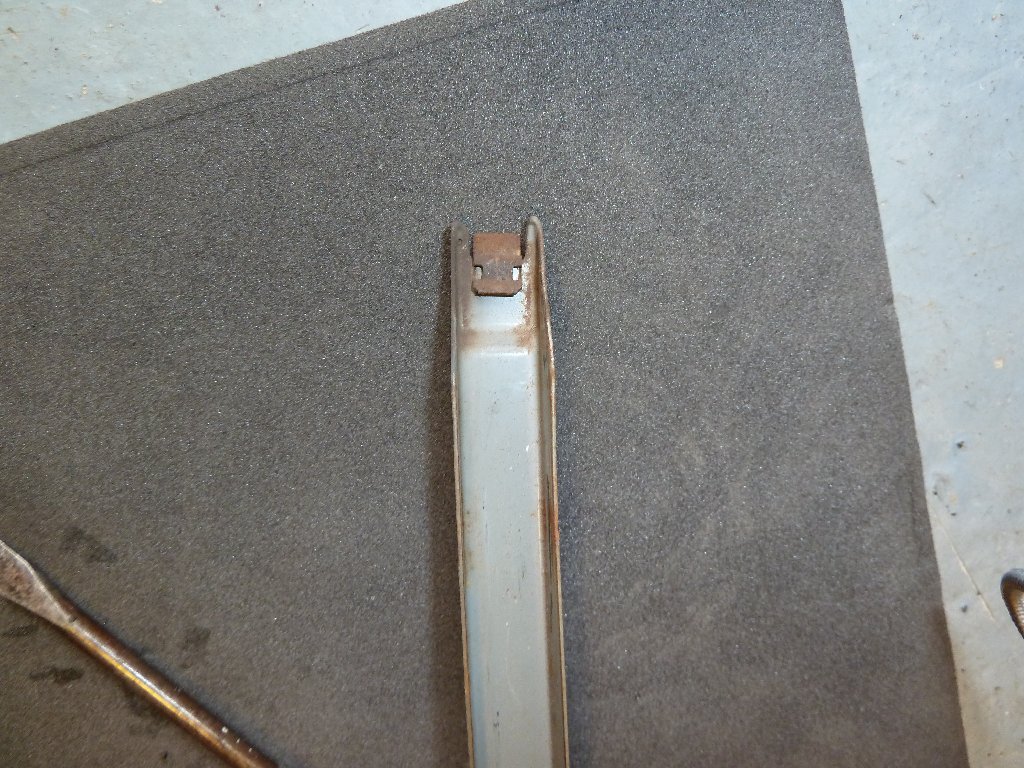
location for the clip at the top of the guide channel. ( this maybe the other door I think)
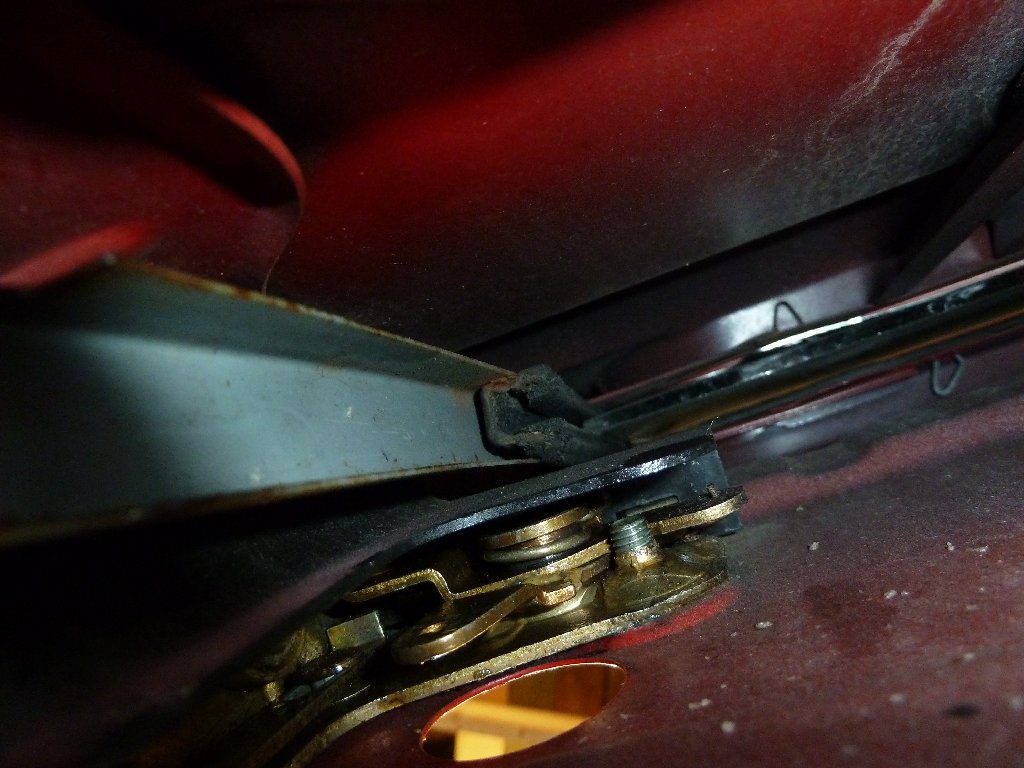
pull out the guide channel. Needs some force! It wasn't in too bad condition. I cleaned it up and greased it before replacing it.
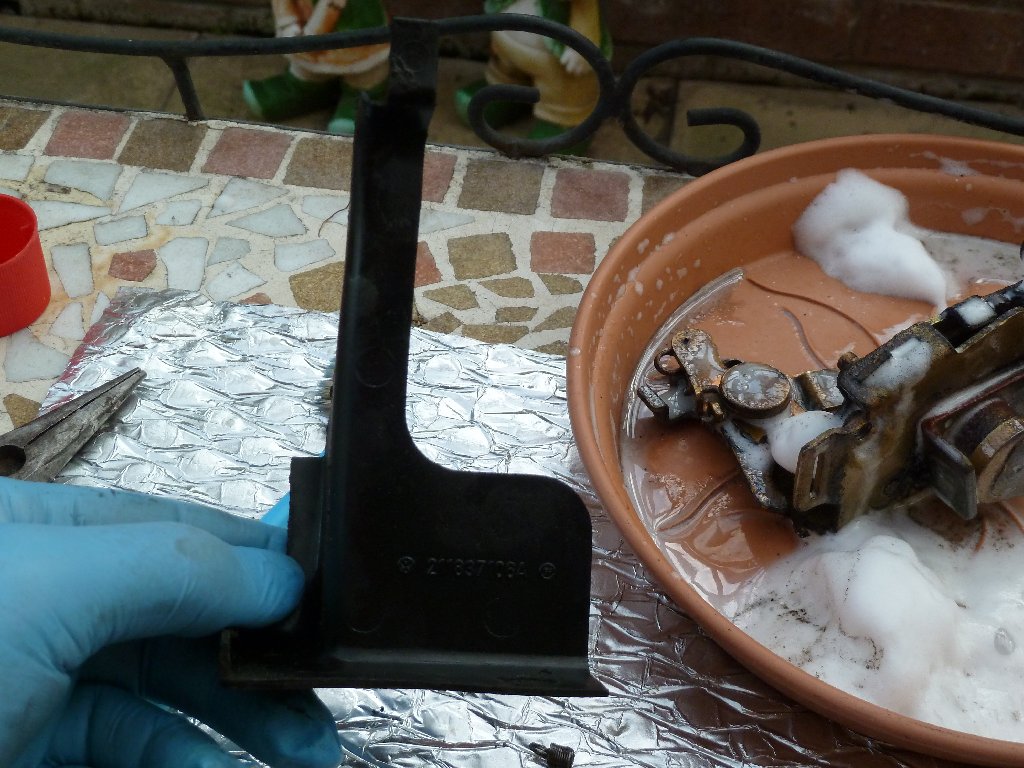
remove the door handle
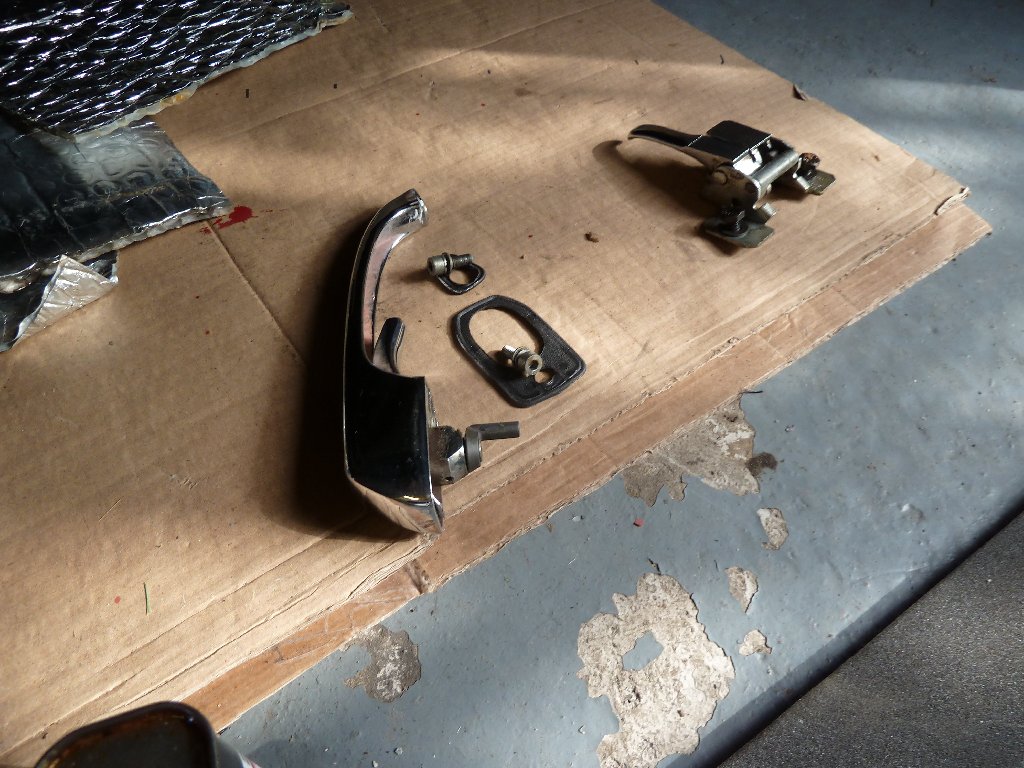
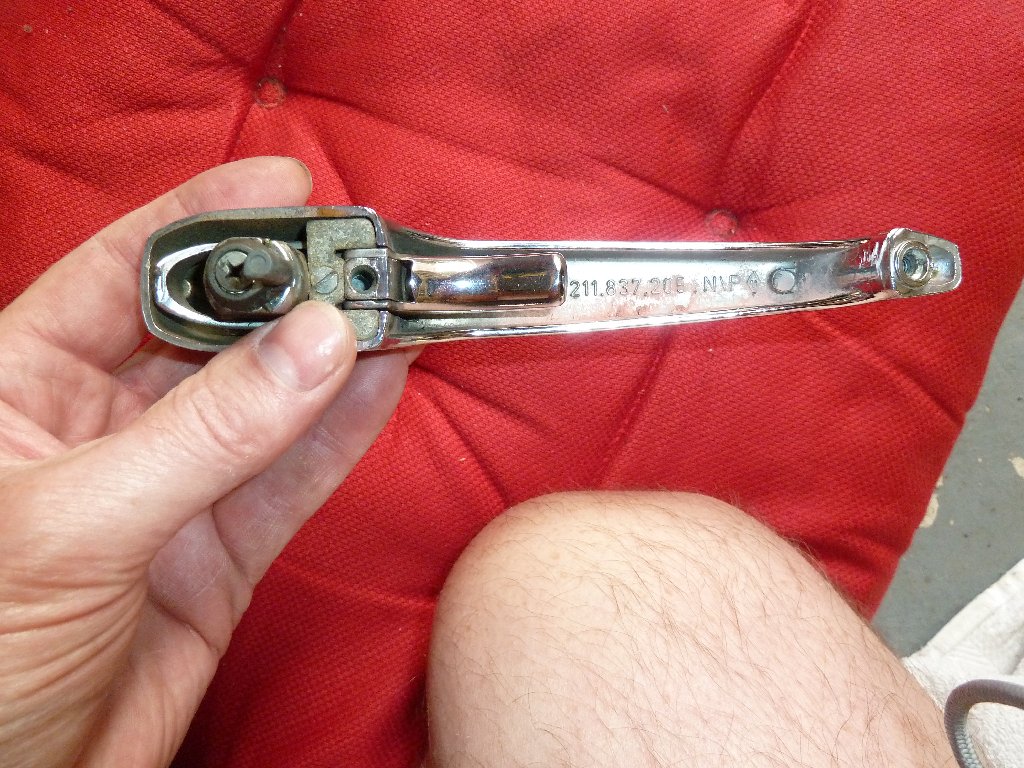
undo the three screws holding in the door lock mechanism. These came out ok just needed a big phillips screw driver.
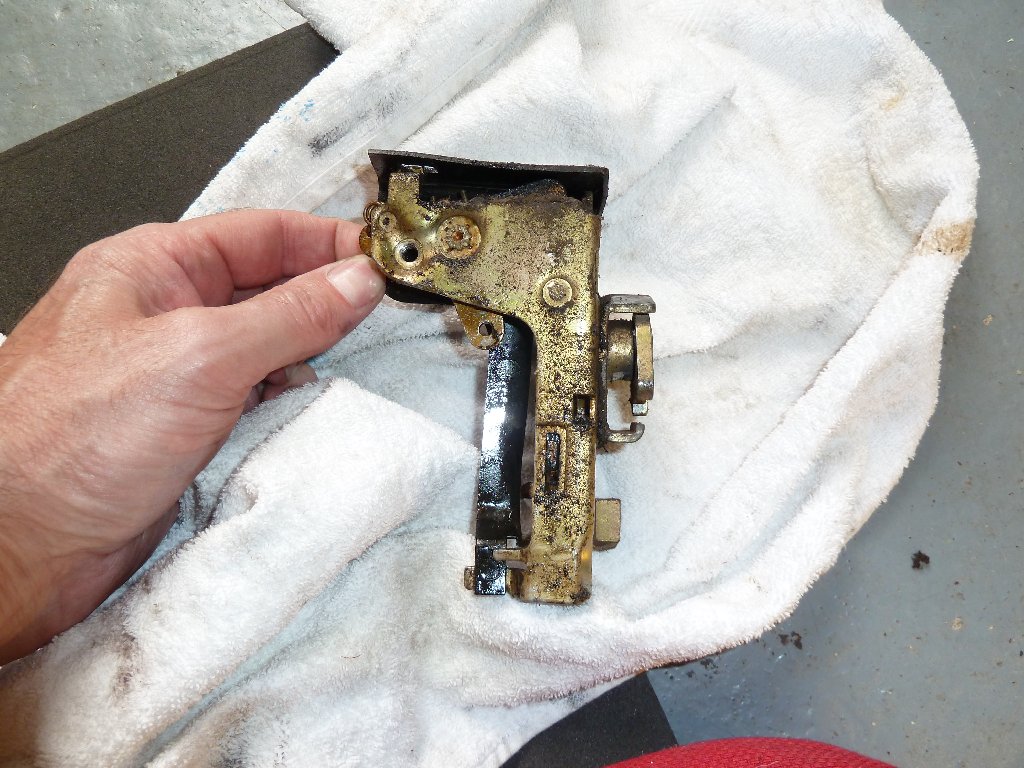
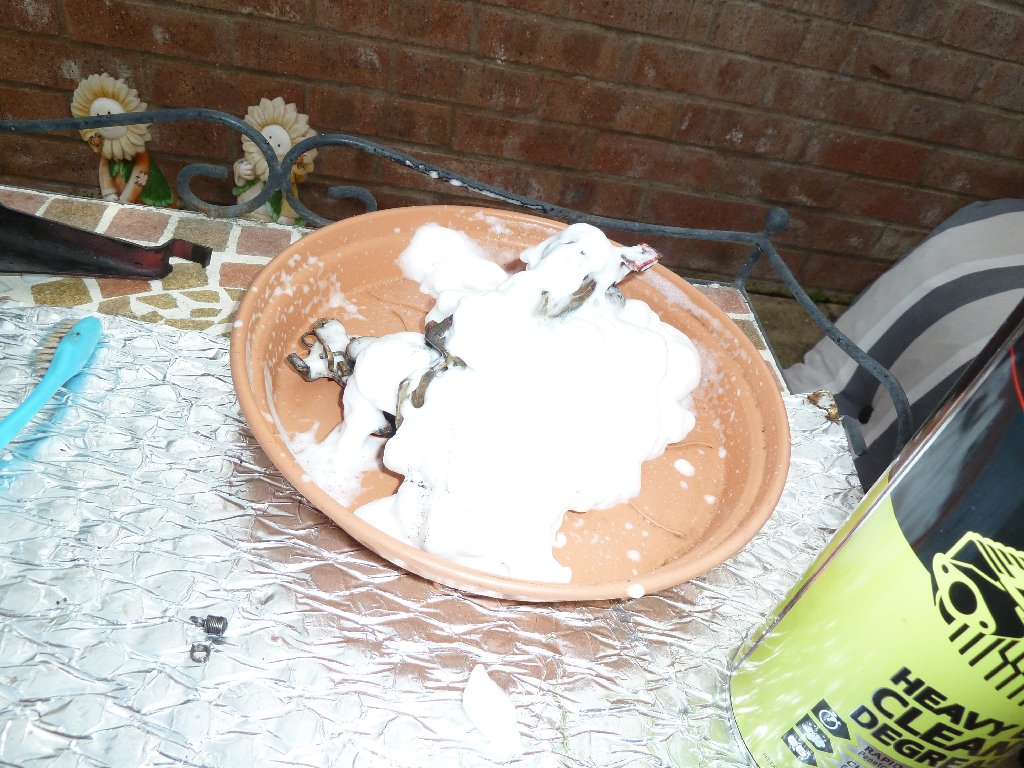
cleaning up the lock with foam degreaser
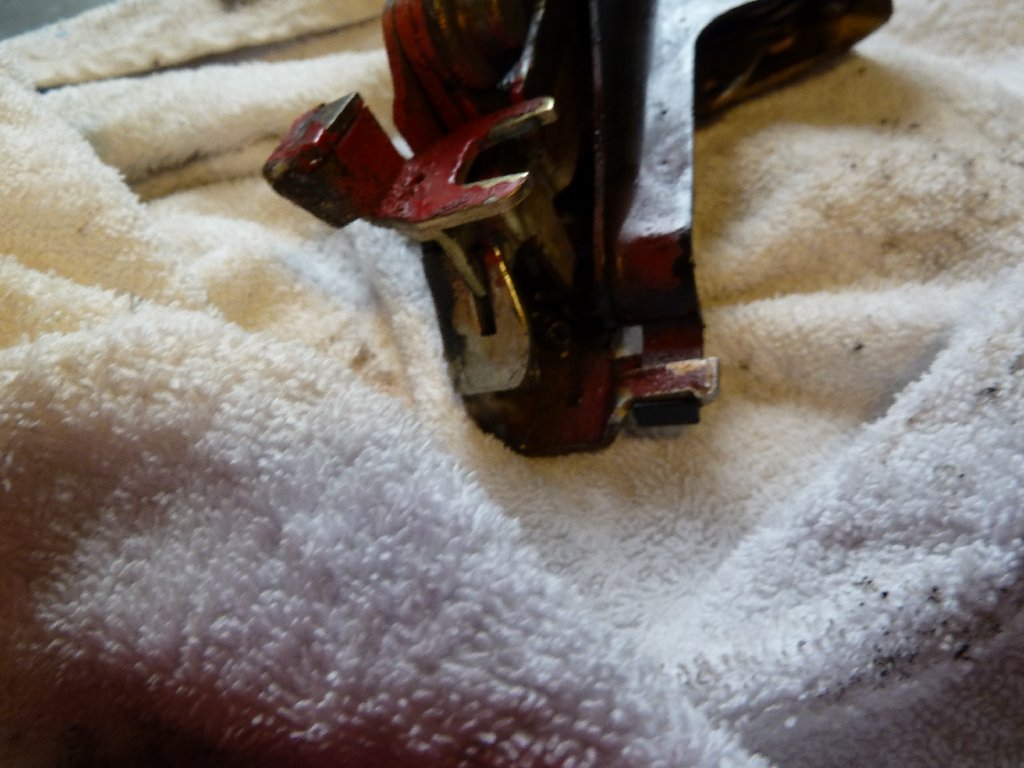
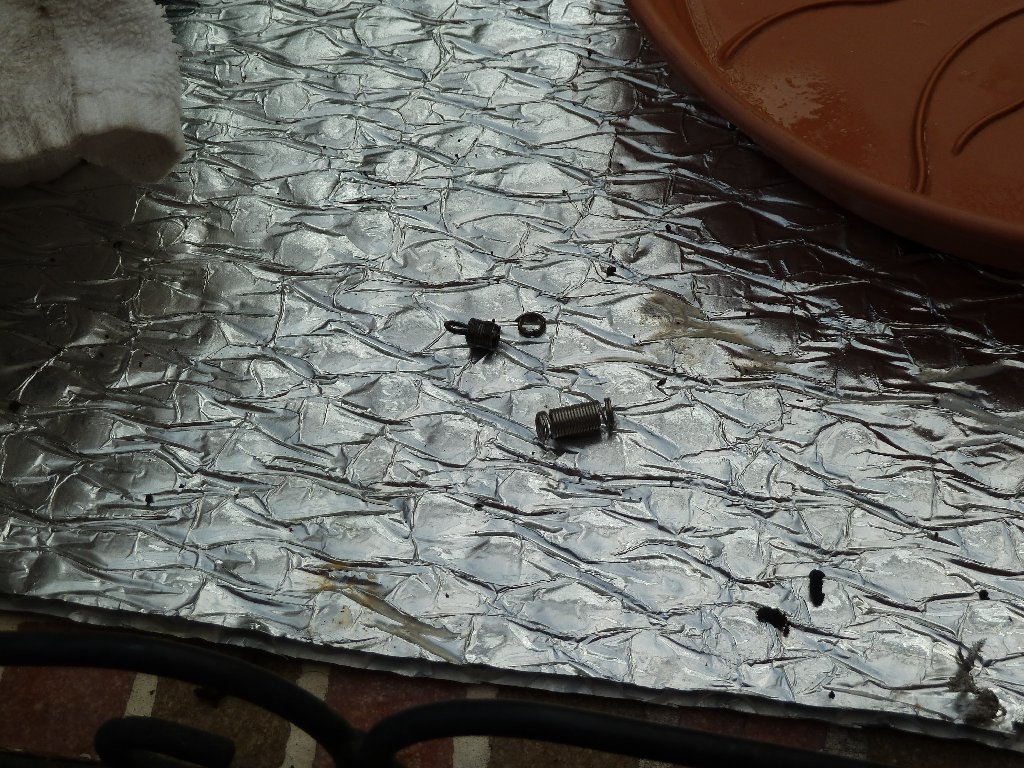
The broken spring can be seen.

offending spring, the driver's door spring I did later was completely missing.
new and old springs
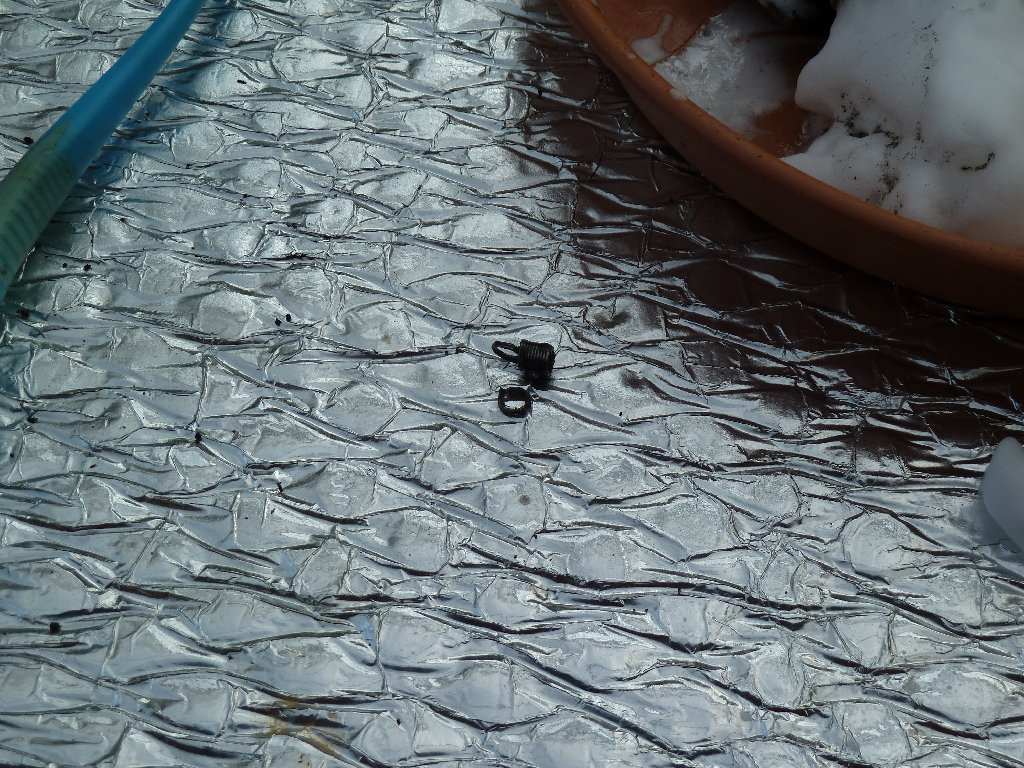
new spring fitted. It was a bit fiddly but not that difficult.
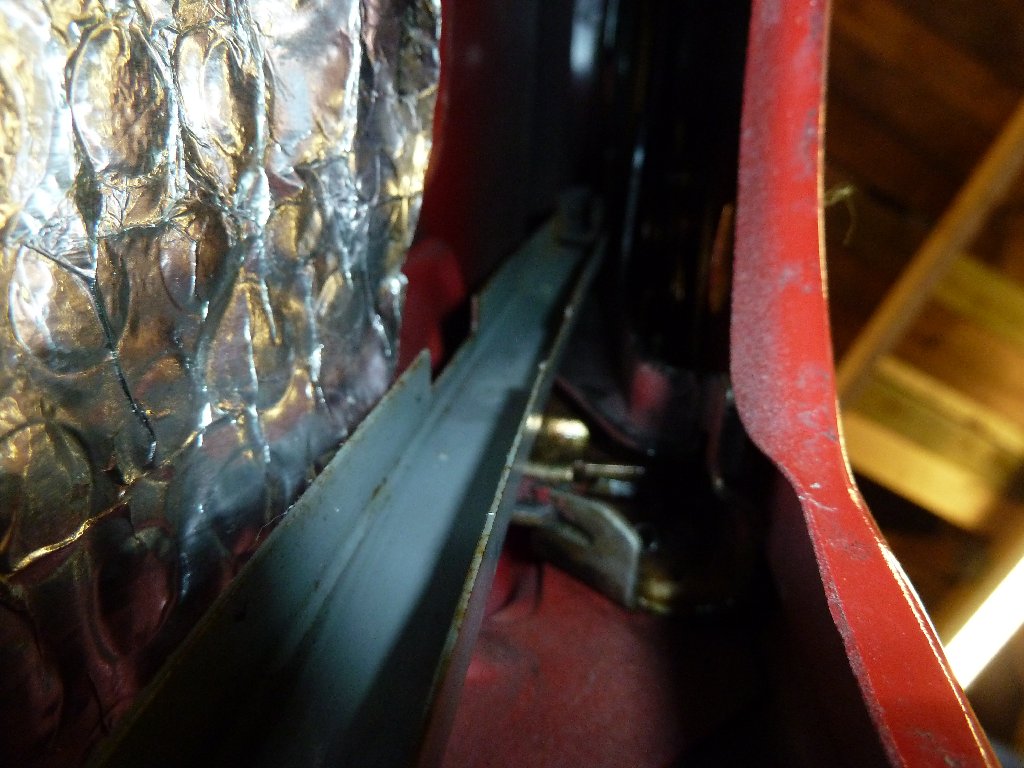
plastic sheild on door lock mechanism

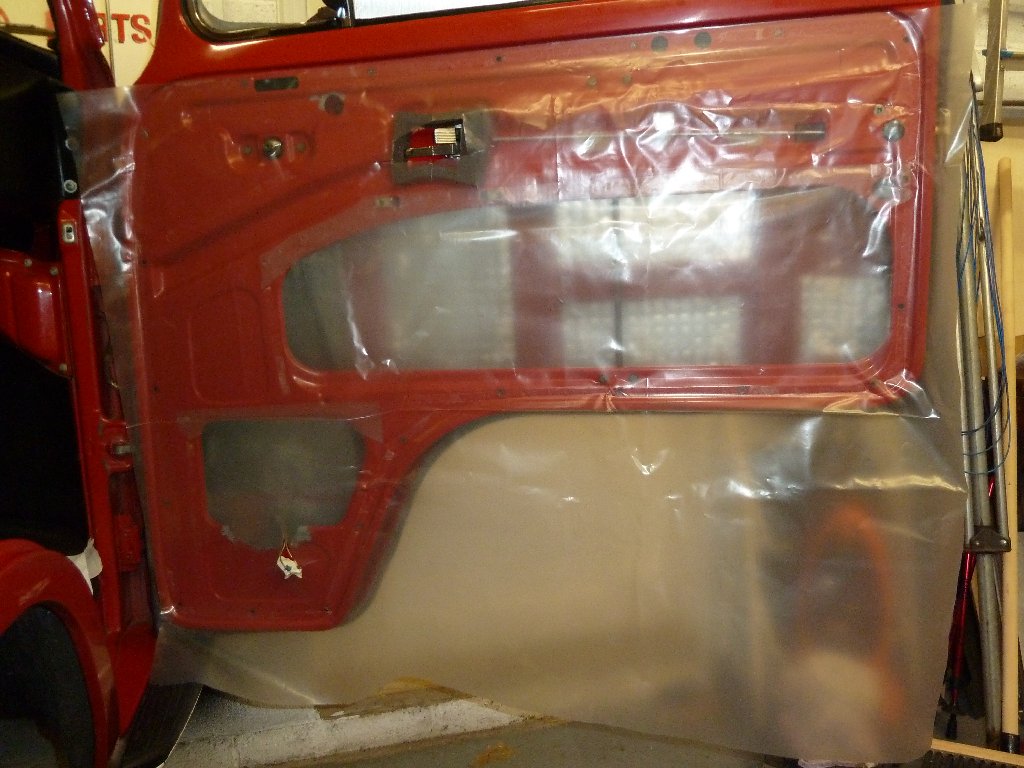
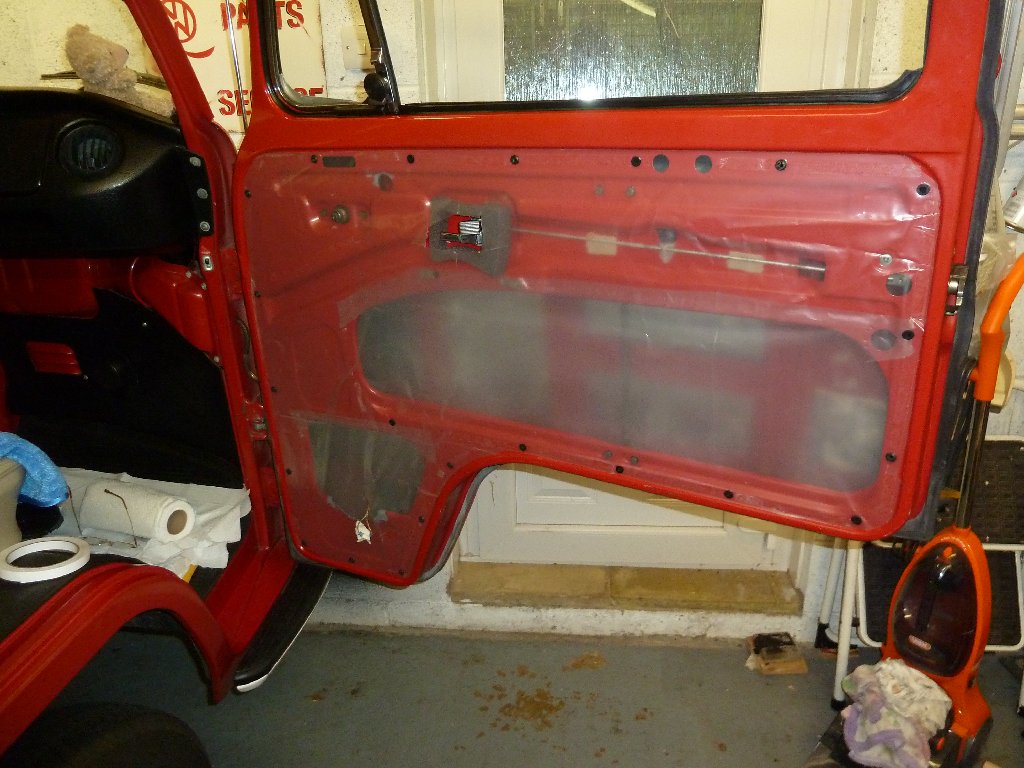
I also re-did the plastic membrane, using double sided tape, adding in a second layer for the holes in the door panel and tucking them in. I cleaned up the door with white spirit to get rid of all old glue and grease.
I used liquid graphite for the door lock mechanism after cleaning it up.
took me ages to do the passenger door, but only about 1 1/2 hrs for the drivers door. So nice to have the locks working properly!
I followed this excellent guide;
http://www.type2.com/rvanness/lock.htm" onclick="window.open(this.href);return false;
some good pics on here as well 'Rustbus'
http://www.thesamba.com/vw/forum/viewtopic.php?t=377711&postdays=0&postorder=asc&start=120" onclick="window.open(this.href);return false;
I started with the passenger door as I thought it might be a bit easier as it's less used.
I undid the door release lever, after removing the door card and plastic vapour barrier.
I got rid of the plastic silver bubble wrap type heat insulation, and just leave the silent coat noise insulation on the door. The plastic heat insulation had come unstuck in a few places from when I stuck it two years ago, and I questioned its value as a heat insulator in this situation. I removed it before fitting the vapour barrier plastic sheet.
undo the bolt for the window guide channel
location for the clip at the top of the guide channel. ( this maybe the other door I think)
pull out the guide channel. Needs some force! It wasn't in too bad condition. I cleaned it up and greased it before replacing it.
remove the door handle
undo the three screws holding in the door lock mechanism. These came out ok just needed a big phillips screw driver.
cleaning up the lock with foam degreaser
The broken spring can be seen.
offending spring, the driver's door spring I did later was completely missing.
new and old springs
new spring fitted. It was a bit fiddly but not that difficult.
plastic sheild on door lock mechanism
I also re-did the plastic membrane, using double sided tape, adding in a second layer for the holes in the door panel and tucking them in. I cleaned up the door with white spirit to get rid of all old glue and grease.
I used liquid graphite for the door lock mechanism after cleaning it up.
took me ages to do the passenger door, but only about 1 1/2 hrs for the drivers door. So nice to have the locks working properly!
Similar threads
- Replies
- 0
- Views
- 127