My 1971 Riviera Campwagen

Early Bay Forum

Help Support Early Bay Forum:

This site may earn a commission from merchant affiliate links, including eBay, Amazon, and others.
Time for an update on this one... :)

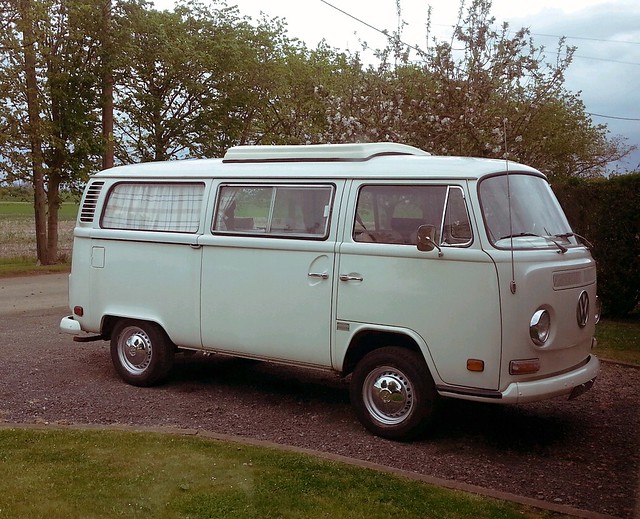
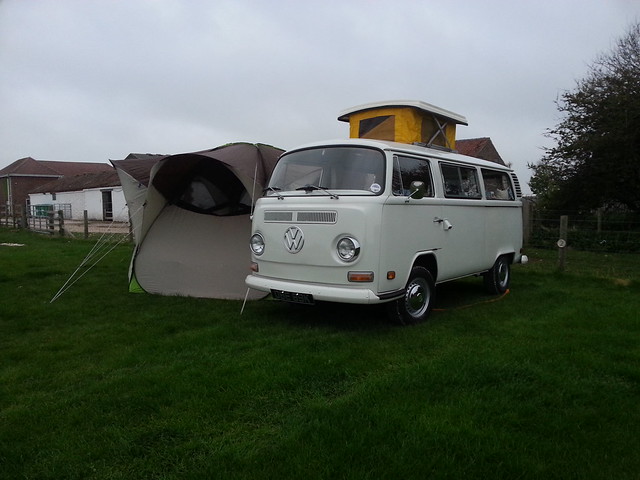
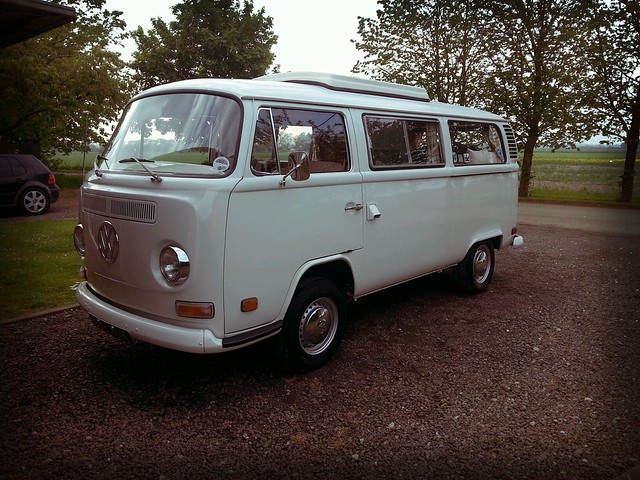
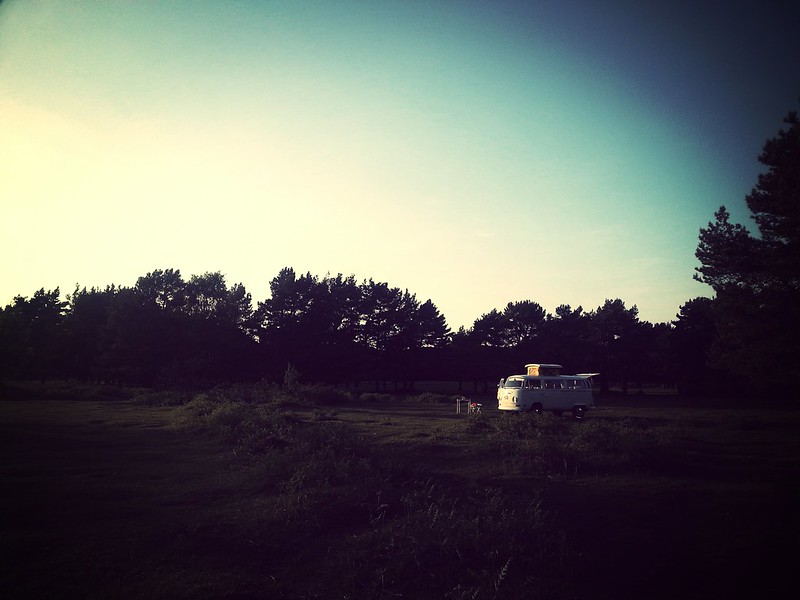
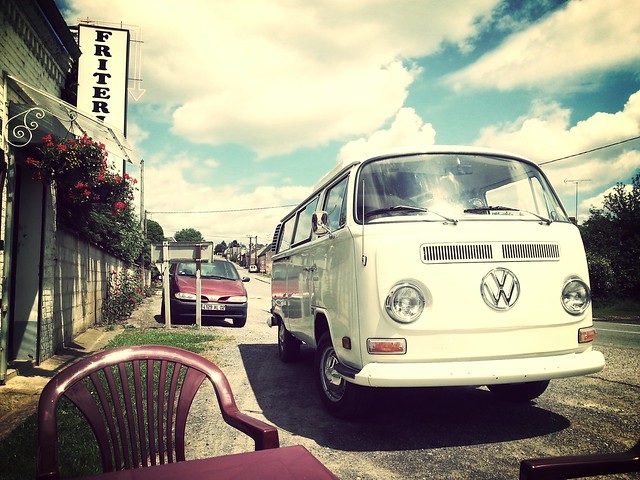
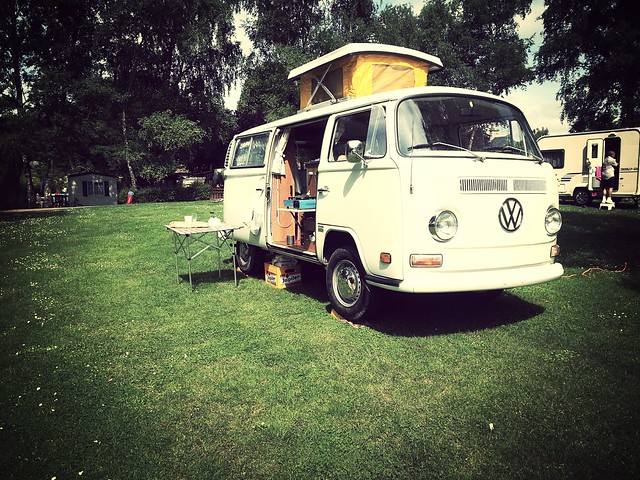
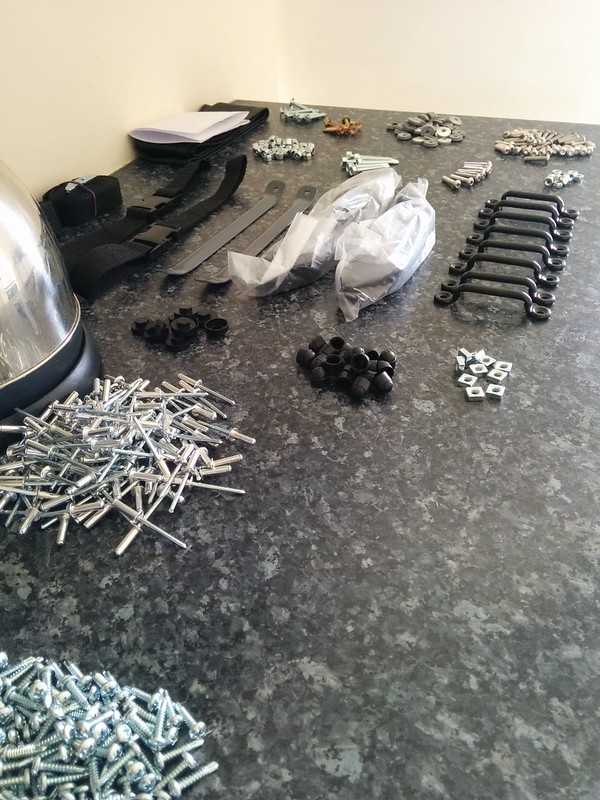
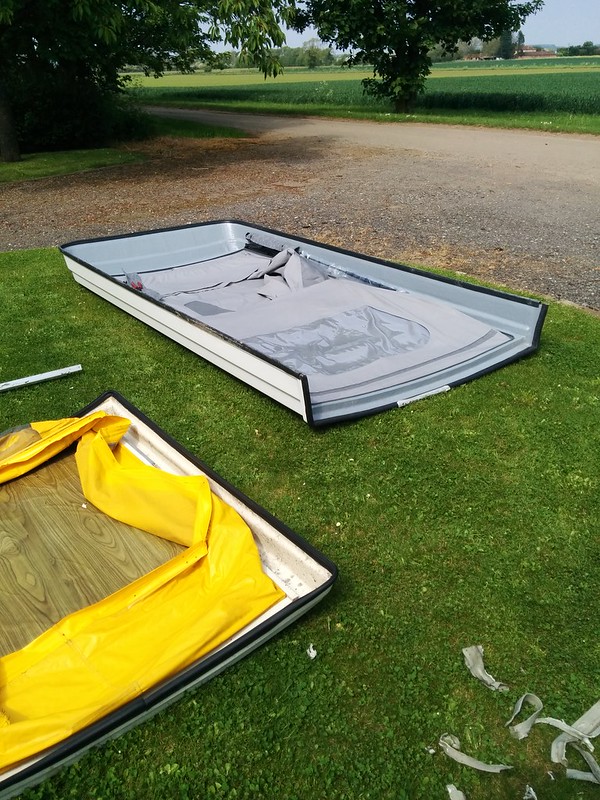
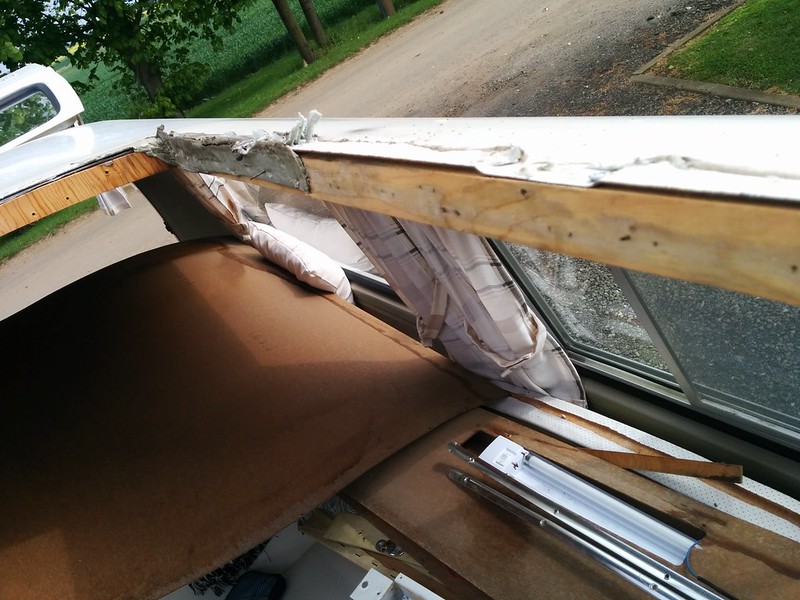
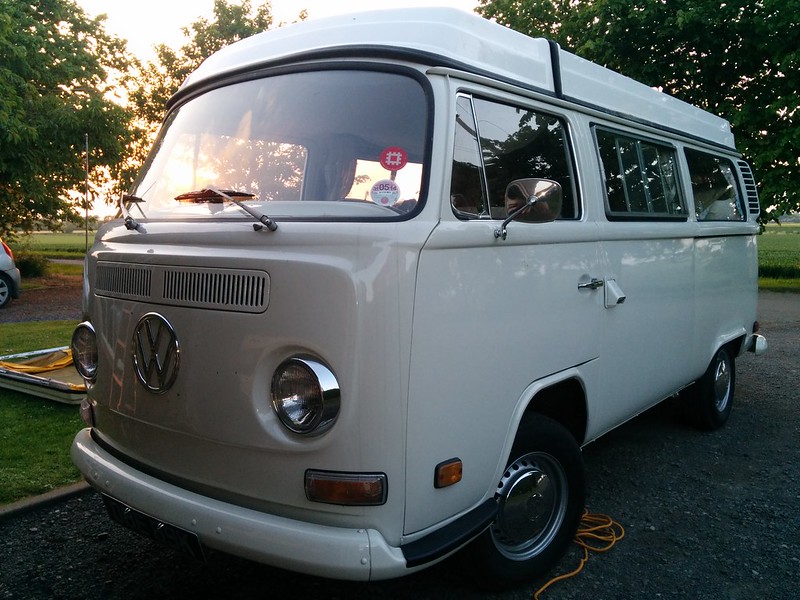
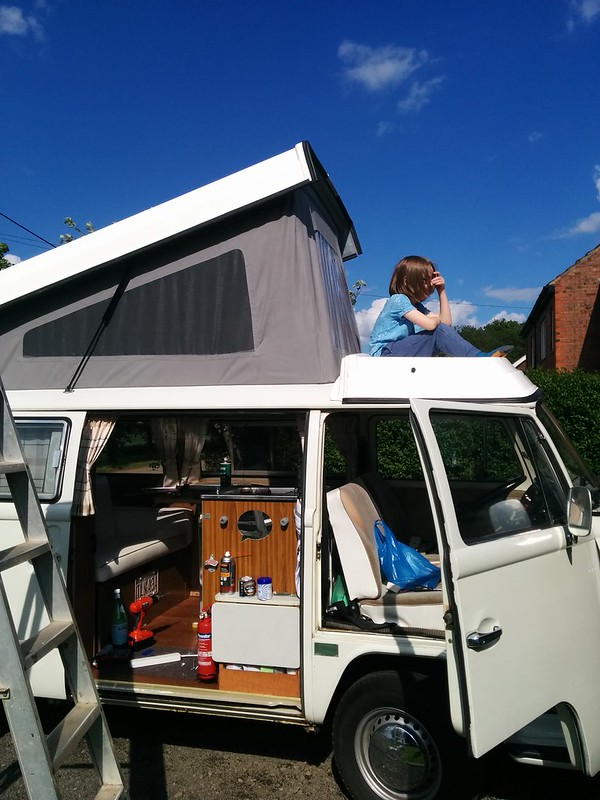
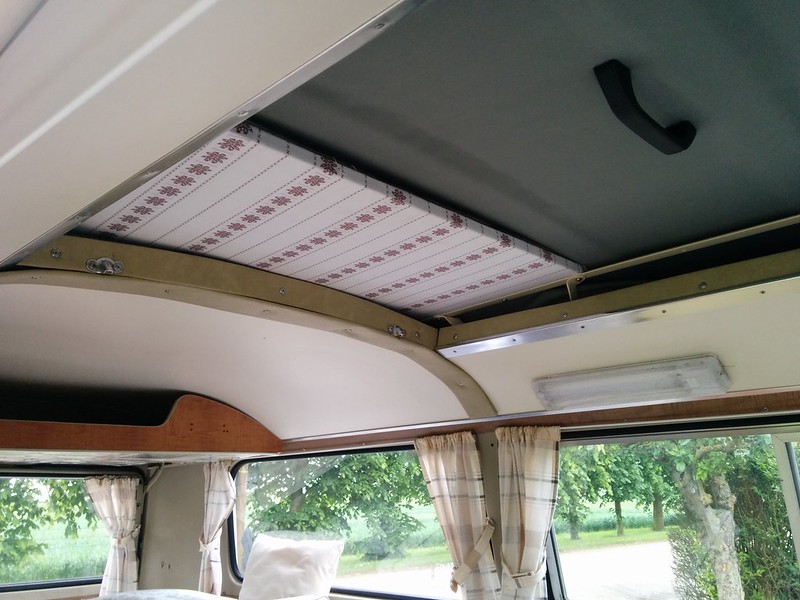
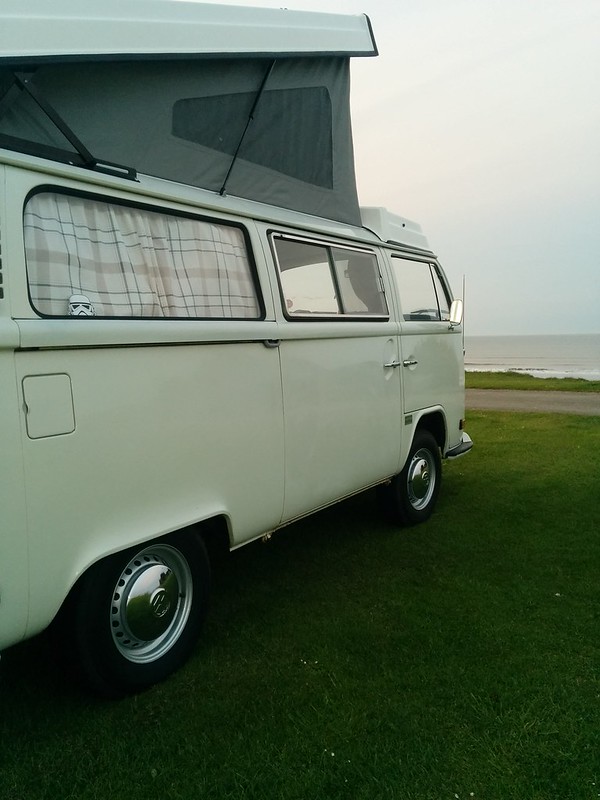
I've been nursing a spare room full of bits for the last month or so, and finally got some time today to do some fitting and fettling. The bus now has a fresh MOT and the tax disc reminder arrived while I was away, as it expires at the end of the month. I have been really chewing over going for a full poptop lately and have investigated both Westy and Devon options in order to try and get roof bunks... can't decide what to do. :?

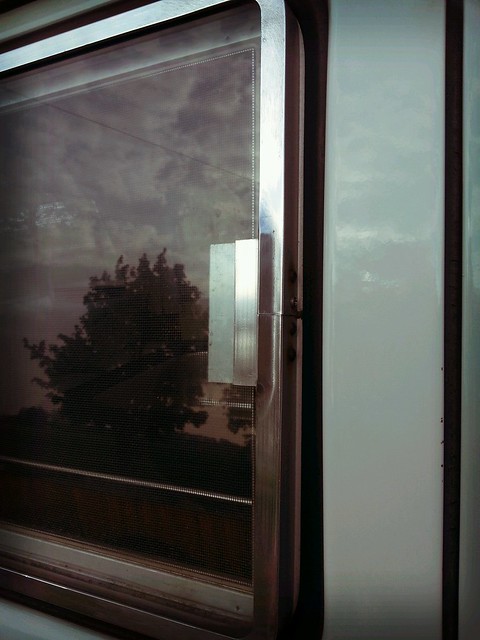
The MOT was a nice experience, needed a few things to be sorted out on the braking side as it was still pulling to the left somewhat. New OSF calliper, NSF flexihose and rear brake cylinders sorted that out. Fresh fluid too while that was being done. A new pair of shockers at the rear has tightened up the handling and a good grease of the front beam has eradicated a few more squeaks and creaks.


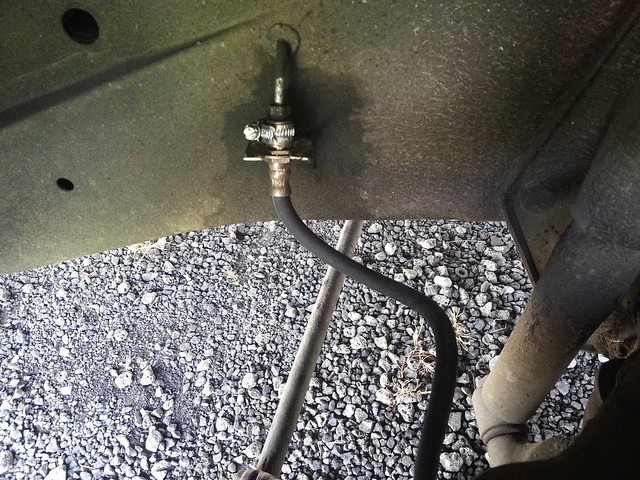
New flexi by iancleary, on Flickr

The poor running is finally sorted with a thorough service and the fitting of some standard-spec Solex carbs. I don't have any air filters yet for them as the box airfilter housing doesn't fit my engine. I think it's a later 2.0 one...


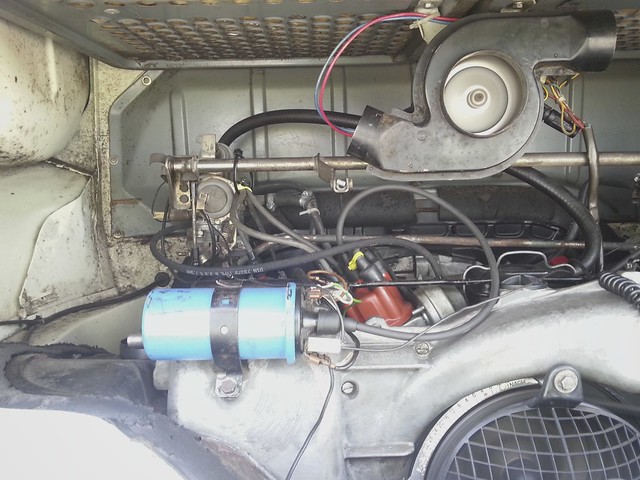
Twin Solex by iancleary, on Flickr

Anyway, the van is running beautifully now and pulls with a hell of a lot more enthusiasm than before! I'm interested to see how the economy is impacted.

Another recent purchase was a locking fuel cap from Ed on here. Popped it on this morning and that is another little piece of the puzzle in place. A nice NOS German part from an OEM supplier, it clicked right into place and didn't take more than a moment.


Locking filler cap by iancleary, on Flickr

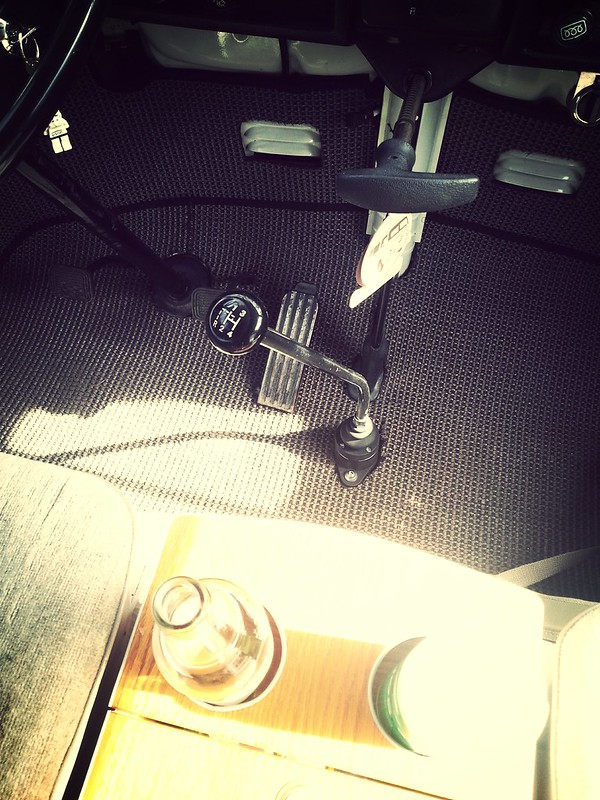
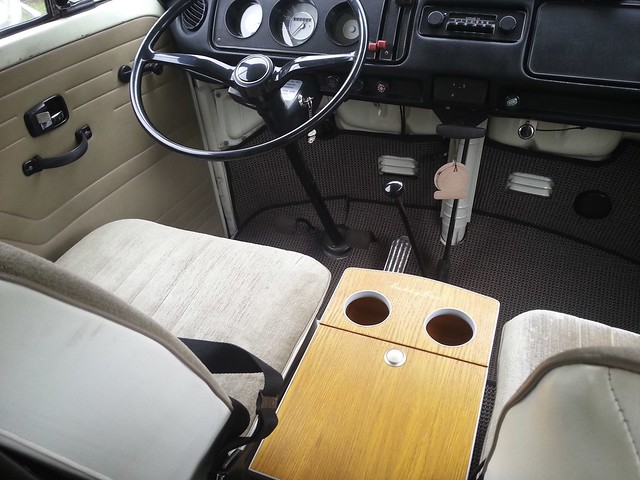
Thanks to Paul / Myvanway69 on here my next job was quite transformative for the cab area. I stripped out my tired looking Madmatz and gave the cab a good clean and a hoover...


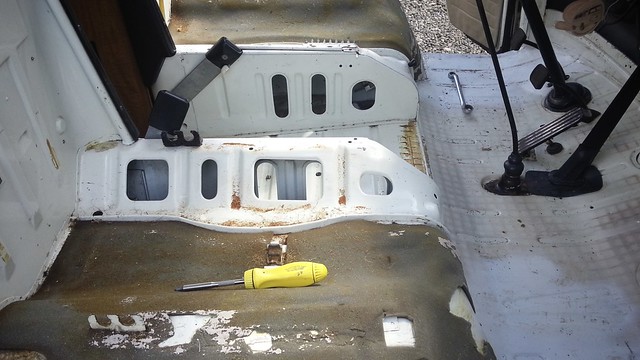
Stripped by iancleary, on Flickr

...before fitting the carpet kit I had picked up from him.


New carpet by iancleary, on Flickr

The more eagle-eyed among you will notice that my Buddybox is also now fitted and looks ACE!


Buddy box in place by iancleary, on Flickr

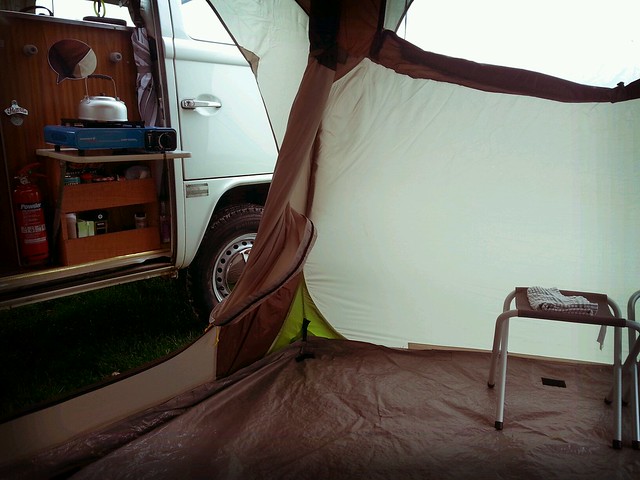
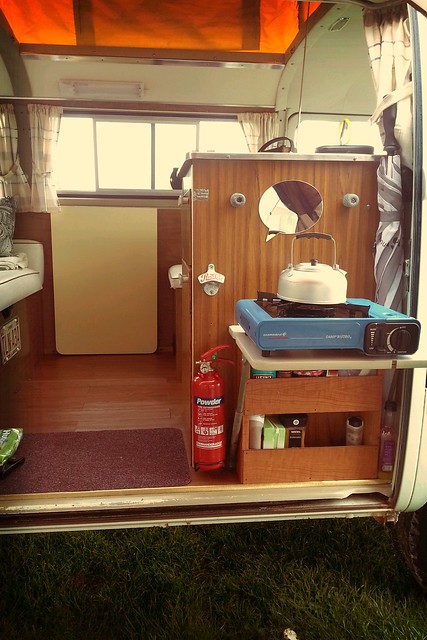
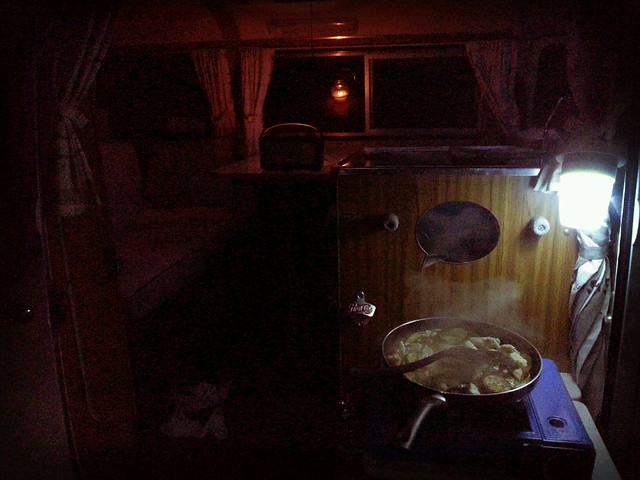
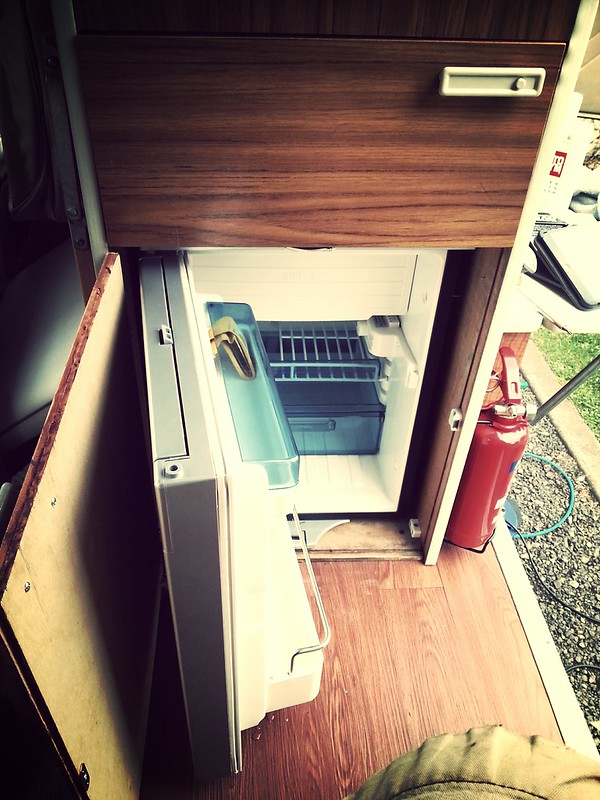
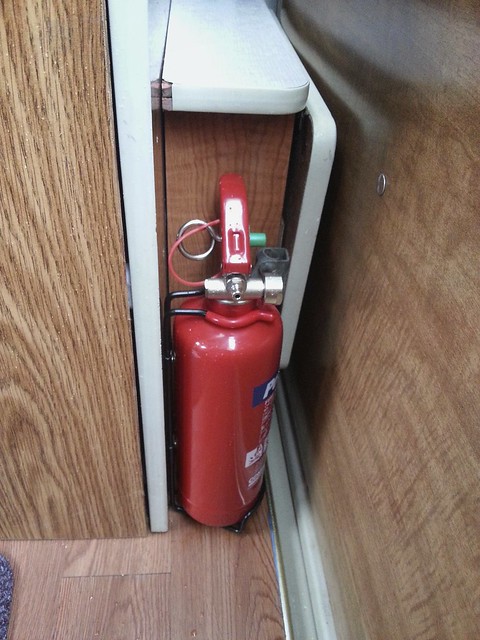
I've been a bit lax in not fitting a fire extinguisher. I'm seriously thinking of getting a Firetec for the engine bay, but for now I've fitted a portable unit next to the cooking area. Although I've got new fuel lines already in place the Firetec would provide peace of mind.


Extinguisher by iancleary, on Flickr


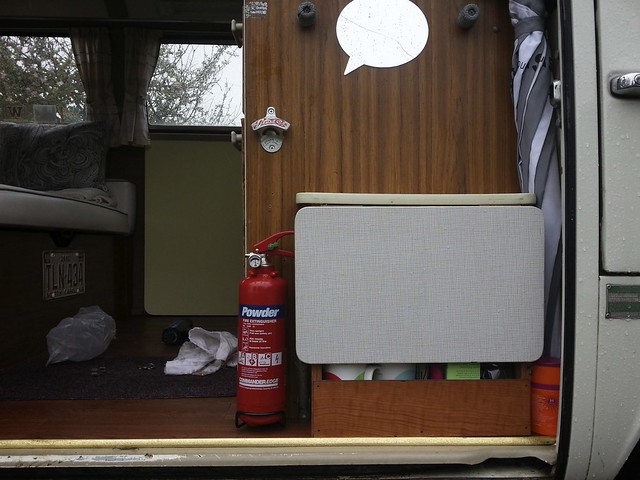
Sink unit by iancleary, on Flickr

The final job done today also proved to be the biggest ball ache... fitting of my Emden. I need a new aerial and the mounting clips / speaker plug for the radio turned out to be not included with it :roll:

Looks great though, and once I've wired up my DIN lead and got the clips and plug I think it's going to be a nice companion for longer runs. Radio 4 and iPod connectivity without having to go for a big ICE install. 8)


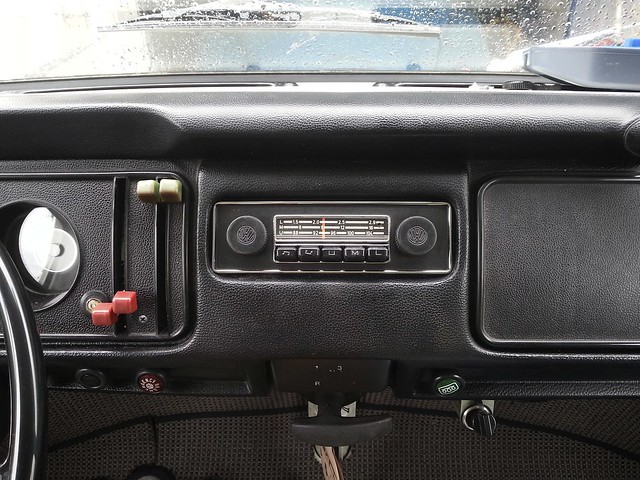
Blaupunkt Emden by iancleary, on Flickr

On a slightly OT note... my Beetle is now back from the paintshop and I've acquired a 2007cc stroker to up the fun somewhat... it's a real test of my willpower not to put the 1776cc motor that's in the Bug at the moment into my bus...


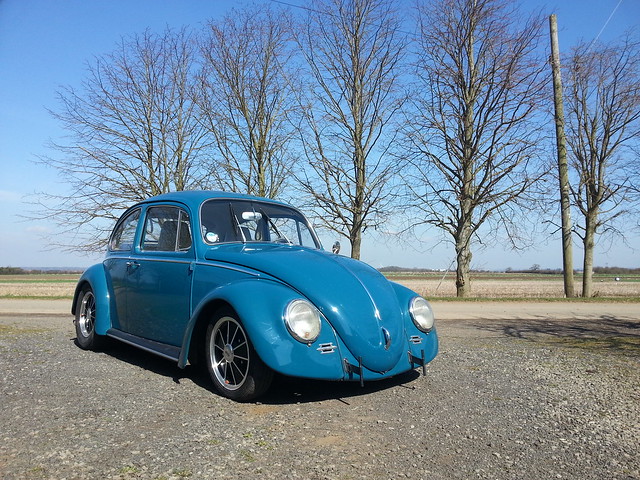
Back and blue. by iancleary, on Flickr

Next update on the van will hopefully be the relocation of the leisure battery to the engine bay, along with the fitting of a split charge kit and a Waeco CR50... :msn4:
 
After setting up the carbs I finally got a proper roadtest done tonight... was a bit flat above 50mph, as the dual vacuum dizzy that I've long suspected as being shady (but never managed to nobble with the timing light) finally showed it's true colours... it was failing to advance correctly. I stuck the 009 and Igniter combo on there and suddenly I seemed able to achieve a decent advance curve, and out on the road the results were immediately noticeable, there was actual eagerness

Right. It starts, stops, goes round corners and has 12 months T&T... next weekend might actually see some *whispers* camping...
 
A nice visible change today :)


Steel Wheels by iancleary, on Flickr

Finally fitted up the refinished steel wheels and hubcaps... with front tyres that look slightly less "gasser"... An awesome side-benefit is that the speedo now reads correctly! Woop :D

Other than that I also fixed the NS door courtesy light switch, so that now works again on the driver's door, and put the handle on the Westfalia wardrobe door.

Not a bad half-hour really 8)
 
Woop, got out camping... and *loved* all of the changes and work done so far...


Untitled by iancleary, on Flickr

Van Jamboree was rubbish, however... although I did manage to get some dim'able warm light LEDs for the interior that I need to bake into my split-charge / battery relocate / fridge shopping / working... but after the Saturday dullness of VJ I decided to go camping!


Awning life by iancleary, on Flickr


Kitchen by iancleary, on Flickr


Untitled by iancleary, on Flickr


Mr T mug by iancleary, on Flickr
 
Back home I took advantage of the decent weather to get rid of the dead flies and road grime, so nice to be cleaning up after a roadtrip rather than fixing things! :lol:


After a nice wash by iancleary, on Flickr


Clean and Shiny by iancleary, on Flickr

As I had some Autosol in my hand I stupidly decided to polish the middle window frame... now have appetite for getting a mirror finish. Hmmm...


polished frane by iancleary, on Flickr


Polished by iancleary, on Flickr

...my fingers hurt now.
 
Plenty done over the last few weeks... managed to get the fridge bought and fitted, which I'm very pleased with indeed.


Waeco CR50 by iancleary, on Flickr

Had to change the door hinge around but now that's done it fits neatly inside the Westy sink unit.

I also fitted the split charge unit and relocated the leisure battery into the engine bay... forgot to get pics of that though :roll:

Bit of an ongoing saga with my shifter however, I got a Vintagespeed one and it looks ace, but was faulty. I'm awaiting a replacement from the importer and am looking forward to spending a lot of time waggling this about...


Vintagespeed shifter by iancleary, on Flickr

One of these will see me through until next June...


Taxed by iancleary, on Flickr

So with all of that done, and the bus waxed and ready... what more was there to do but to get out there and use the bugger? :D


Camping New Forest by iancleary, on Flickr


New Forest by iancleary, on Flickr


Death by iancleary, on Flickr


Goathland by iancleary, on Flickr

All was going swimmingly until the crank pulley seal decided to lunch itself. I've cleaned out and replaced that today, but managed to mangle one of the fan bolts in the process... :roll: ...anyone got a fan hub and bolts going spare for a CB code type 4 motor? :|
 
Hi,

Looks great, lovely pictures. How do you get on with the fridge? I have the same in my westy cooler, yet to be used in anger though.

Keep up the good work, and the cool pictures!

Cheers!

Alistair
 
aogrady said:
Hi,

Looks great, lovely pictures. How do you get on with the fridge? I have the same in my westy cooler, yet to be used in anger though.

Keep up the good work, and the cool pictures!

Cheers!

Alistair

Thanks Alistair :)

Well we have had three trips now since fitting the fridge and it's awesome. I was worried that the CR50 might be a bit small but it's proving to be a good design that accommodates a ton of cold stuff and the freezer compartment means that we have Cornetto's on tap... what more could you ask for? :lol:

The actual method I've used to mount the fridge I'm going to refine a little. I've screwed from the inside of the fridge into the walls of the unit with long self-tapping screws... sounds more bodgy than it actually is. However, I'm going to make up some batons to screw inside the unit with nice facings to provide a more "finished" look. The reason I've held off on this has been I wanted to check whether there was sufficient ventilation for the Waeco before investing the effort. It runs very cool and other than a soft hum it's pretty quiet too... Battery-wise I have a 80ah leisure battery as I couldn't force a 110ah into the space under the spare wheel bulge in the engine bay. I tested it from full charge and I get about 36 hours of continuous power for the fridge from that... so (using my numpty calculations) it must be about 2ah draw for the fridge. I don't think I can complain about that, can I? :)

What is slightly more worrying is the split charge unit... I tested the voltage across the leisure battery with the engine running and was getting around 12.5v... would have thought it would have been higher if charging, but then I'm only getting about 12.6v across the van battery with the engine running... I did all of this in about 30 seconds but am now paranoid that my alternator is shot, or that the split charge isn't working right. Certainly on the drive back from Devon to London it didn't seem to make a whole lot of difference to the level of charge in the leisure battery, although I'm not suffering with any kind of poor performance in terms of headlights, starting power or anything like that... no generator / alternator light showing on the dash... ah well, problem for another day.

Of more importance is getting hold of a new fan hub and three new bolts... never ends, does it? And on that note, I'm off outside to wash all of the dead flies off the front, and all of the oil off the back :?
 
fire3500 said:
aogrady said:
Hi,

Looks great, lovely pictures. How do you get on with the fridge? I have the same in my westy cooler, yet to be used in anger though.

Keep up the good work, and the cool pictures!

Cheers!

Alistair

Thanks Alistair :)

Well we have had three trips now since fitting the fridge and it's awesome. I was worried that the CR50 might be a bit small but it's proving to be a good design that accommodates a ton of cold stuff and the freezer compartment means that we have Cornetto's on tap... what more could you ask for? :lol:

The actual method I've used to mount the fridge I'm going to refine a little. I've screwed from the inside of the fridge into the walls of the unit with long self-tapping screws... sounds more bodgy than it actually is. However, I'm going to make up some batons to screw inside the unit with nice facings to provide a more "finished" look. The reason I've held off on this has been I wanted to check whether there was sufficient ventilation for the Waeco before investing the effort. It runs very cool and other than a soft hum it's pretty quiet too... Battery-wise I have a 80ah leisure battery as I couldn't force a 110ah into the space under the spare wheel bulge in the engine bay. I tested it from full charge and I get about 36 hours of continuous power for the fridge from that... so (using my numpty calculations) it must be about 2ah draw for the fridge. I don't think I can complain about that, can I? :)

What is slightly more worrying is the split charge unit... I tested the voltage across the leisure battery with the engine running and was getting around 12.5v... would have thought it would have been higher if charging, but then I'm only getting about 12.6v across the van battery with the engine running... I did all of this in about 30 seconds but am now paranoid that my alternator is shot, or that the split charge isn't working right. Certainly on the drive back from Devon to London it didn't seem to make a whole lot of difference to the level of charge in the leisure battery, although I'm not suffering with any kind of poor performance in terms of headlights, starting power or anything like that... no generator / alternator light showing on the dash... ah well, problem for another day.

Of more importance is getting hold of a new fan hub and three new bolts... never ends, does it? And on that note, I'm off outside to wash all of the dead flies off the front, and all of the oil off the back :?

Hi,

Yes, mine is also a bit temporary too, i retained the westy fridge door seal and metal surround, so it closes to as normal, when i get around to i'll trim it a`bit too. Happy you get good run times, i too have a 80aH battery, but i am also fitting a 80w solar panel, and have a additional 210aH of Trojan deep cycle traction batterys to fit, i have details of this on my build thread... ;) Should keep me running for at least a week :lol: The propex does use a bit, and on my recent short journeys in cold weather had run down the battery, the fridge wont start if too low, though now we have summer weather, the propex isnt used.

Hmm, i would expect more voltage than what you have, are you sure the alternator is charging, you should have 13.8v or so i think?

Always something to fix - i need to get my bus ready for a weekend away, which means fixing the towbar on, wiring, sorting the trailer etc.....and so it does on!

Cheers!

Alistair
 
Well, as I didn't have a dipstick boot to hand (which answers the "is it still leaking" question), or the inclination to contort myself and fit it even if I had... I looked around for other little things to sort or attach. The LED lighting still isn't wired up for behind the wardrobe and top locker (bit of ambient light, like) and I wasn't inclined to further meddle with the alternator at this point (out of sight, out of mind) so I turned my attention to the small matter of "night-time door closure on quiet sites"...

Closing the sliding door is a fairly indiscreet affair, usually involving the wish to be quiet and slide the door slowly to keep the "swooooosh" down and then several attempts to latch it with an eventual "I give up" and a normal strength "SWOOOSH and CLUNK". Waking everyone up...

What was required was some kind of inner handle at the rear... so I went to work, slicing the handle off the canvas bag that my Beetle cover came in :)


Looper. by iancleary, on Flickr

There... that'll do nicely, and for the cost of £0.00 exactly we will now be a lot less unpopular in the early hours on campsites... a gentle "swooooooosh" followed by a quick tug and a yank on the handle to close and the job is done! WIN!
 
fire3500 said:
Time for an update on this one... :)

The final job done today also proved to be the biggest ball ache... fitting of my Emden. I need a new aerial and the mounting clips / speaker plug for the radio turned out to be not included with it :roll:

Looks great though, and once I've wired up my DIN lead and got the clips and plug I think it's going to be a nice companion for longer runs. Radio 4 and iPod connectivity without having to go for a big ICE install. 8)


Hiya, Bus is looking good..!! 8)

Quick question on the radio? :?: I've got the same radio and when i put the DIN lead in i get the ipod but no radio but if i pull it out again i get radio?? :? Do you have the same happening and how did you get round this?? :?:

Cheers
Tim
 
Gwar72 said:
Hiya, Bus is looking good..!! 8)

Quick question on the radio? :?: I've got the same radio and when i put the DIN lead in i get the ipod but no radio but if i pull it out again i get radio?? :? Do you have the same happening and how did you get round this?? :?:

Cheers
Tim

Hi Tim,

Thanks! :) I understand that there is some electrickery required to make this radio switch automagically. I've only got as far as wiring up the radio for regular AM/FM use (and incidentally the aerial I bought from Halfords was utter shit... very poorly assembled and, well... just shit. Halfords side-mount... avoid!) but I like the Emden a lot. I'm still needing some of the fittings for the side as it's sort of "plopped" into the dash at the moment, which is not the right level of vorsprung dutch technik at all, but hey, that's life.

Anyway... back to the wiring. I've got a wire with a 3.5mm minijack on one end and nothing on the other. I also have a 6 pin DIN (be wary... I bought a 5 pin DIN on "good advice" and it turned out to be a 6 pin. Using my eyes I counted them, I haven't yet Googled the right wiring for the 6 pin DIN and haven't soldered that up. I had the question in my head too about the switching... this thread was quite insightful and probably where I'll base my eventual experimentation upon:

http://www.vintage-radio.net/forum/showthread.php?t=54270" onclick="window.open(this.href);return false;

Let me know if you have a better answer on this one when you're digging around. The speed I'm moving at, it'll be Christmas before I get around to it... :shock:
 
The bus made it to EBI and back!


Eurotunnel by iancleary, on Flickr


Journey from EBI by iancleary, on Flickr


Berny Riviere by iancleary, on Flickr

The day before leaving I replaced the dipstick boot (don't know what all of the fuss is about, was a doddle!) and fitted a pair of ICTs onto the OEM Solex manifolds... runs great except for a small backfire, caused by leaking manifold... bah. Anyhow I managed to pick up a few bits at EBI and am going out to fix all of that this afternoon...

Latest work includes:

  • New horn
    Concealed LED lights behind wardrobe
    New aerial (the Halfords one *had* to go)
    Weber ICTs
    iPod radio lead into the Emden - Ace, although I need to wire in a capacitor now as the Radio is rendered inop by the lead being plugged in!

To do list now looks like:

  • New heater cables to fit
    New manifold gaskets to fit on inlet side
    OSR marker light has gone out, hoping it's just a bulb
    Still another LED strip to conceal, and the dimmer function on the control unit doesn't work... so need to get that replaced

Shopping list looks like:

  • Vintagespeed shifter on its way back to me, so going to give that another whirl
    Saw a Vintagespeed Type 4 exhaust at EBI and fancying one... very nice with the hidden tailpipe style (although won't be hidden on a Type 4 on a Bay)

Daydreaming/Mulling list looks like:

Roof beds and a bigger pop top - means cutting a hole in roof and fitting bellypans
Swivel front passenger seat - means cutting passenger seat back
 
Been a while since I updated, eh?

Well, I decided not to sell it in the end and so, with another MOT passed (no advisories, thank you) I have turned my attention to the sleeping arrangements. The Riviera conversion has the turret top rather than the full length poptop and although the roominess of the full length Riv' roof is amazing I figured I'd probably struggle to get hold of a good one.

So I ordered a kit from Poptop Roofs in the North East and as the sun was out today I decided to have a go at fitting it...

Kit of parts by iancleary, on Flickr

Roof by iancleary, on Flickr

Pulled off the old roof and finally settled the "is my bus a sunroof bus?" question. Nope, some Yank took a jigsaw to a tin roof bus.

Hole by iancleary, on Flickr

So I cracked on... the instructions in the kit are pretty woeful and a lot of the brackets were mis-drilled or shaped wrong, but on the whole the quality of the GRP is good and the main components are well made. The fitting of the hinges and struts took a while as I was redesigning the kit as I went along... fortunately that all worked out OK and at the end of the day today I've managed to mount the rear section, hinges and struts, secured the front edge of the canvas and predrilled the retaining strips for the other three sides. I've not started on securing the front cap as that needs all drilling and the brackets remaking. The bus looks like a bomb has gone off inside and it's covered in pencil marks all over the outside... but I'm getting there...

IMG_20140518_202247 by iancleary, on Flickr

Now, before anyone gives it the "wrong roof for the year" comment, I know! :msn4:

It was a conscious decision. I like the front elevating roof better and feel I can get a bigger bed up top that won't just provide space for the kids but also will let me sleep up there when wild camping, saving a lot of faff on a night because I can just hop up there and leave the living area intact "downstairs", not only this but I'll be able to keep the duvet on the bed up top and win back some luggage room behind the R&R bed. Makes it a 5 berth, and other than a diesel engine it's become pretty much the bus that's right for me... no more For Sale... I think... :lol:
 
Finished!!! :D

Am *so* tired though, and we had our maiden camp with the new configuration last night, no tears and everyone seemed happy enough with how it turned out. Pictures? Aw, go on then... :p

IMG_20140519_170305:nopm: by iancleary, on Flickr

The boy looking cool by iancleary, on Flickr

Bed raised by iancleary, on Flickr

Interior roof by iancleary, on Flickr

Cliff top complete! by iancleary, on Flickr

Well worth the hassle... and the hassle was not inconsiderable. The kit from Pop Top Roofs UK and the bed kit from Evolution were not without their hiccups, and both were modified to suit my bus and requirements. Both suppliers came good on support (although Evolution genuinely couldn't have sounded less interested) the quality control was such that I needed to chase missing or badly made parts and this all cost me time. I'm very pleased with the finished result... although now my NS middle window seal has started leaking. It never ends! :lol:
 

Latest posts

Top