Our Camper - Dorothy, 1970 RHD Devon

Early Bay Forum

Help Support Early Bay Forum:

This site may earn a commission from merchant affiliate links, including eBay, Amazon, and others.
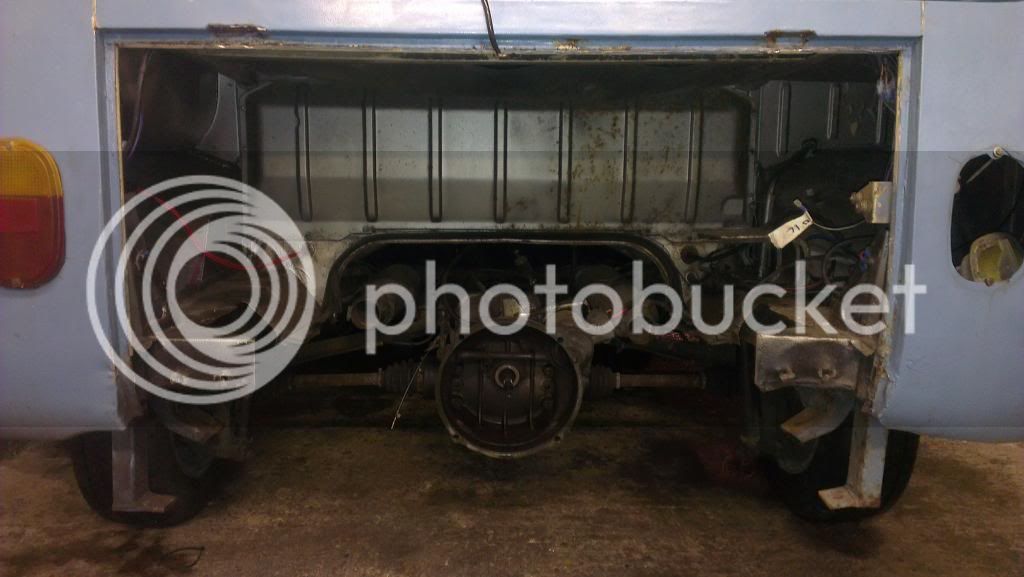
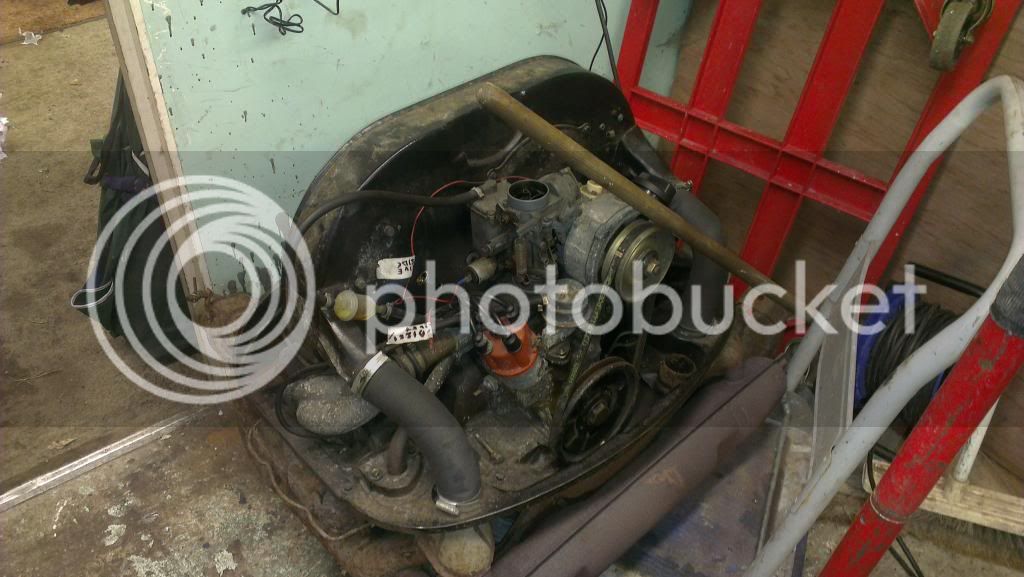
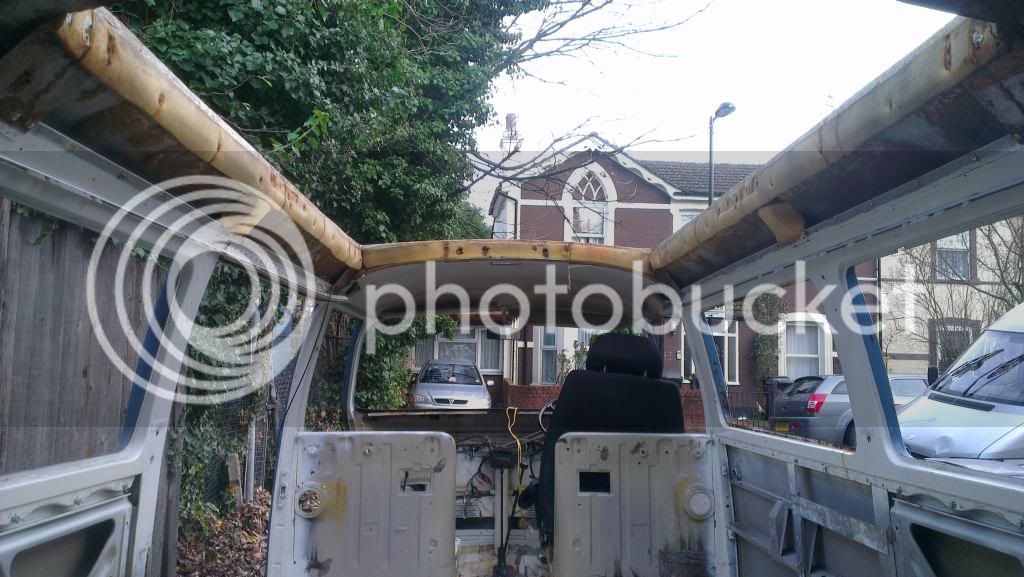
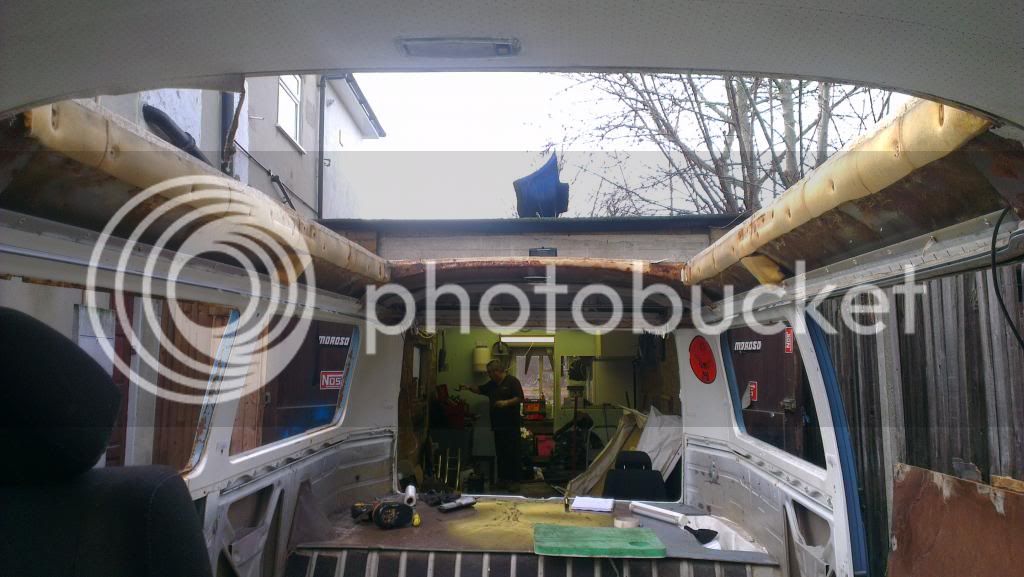
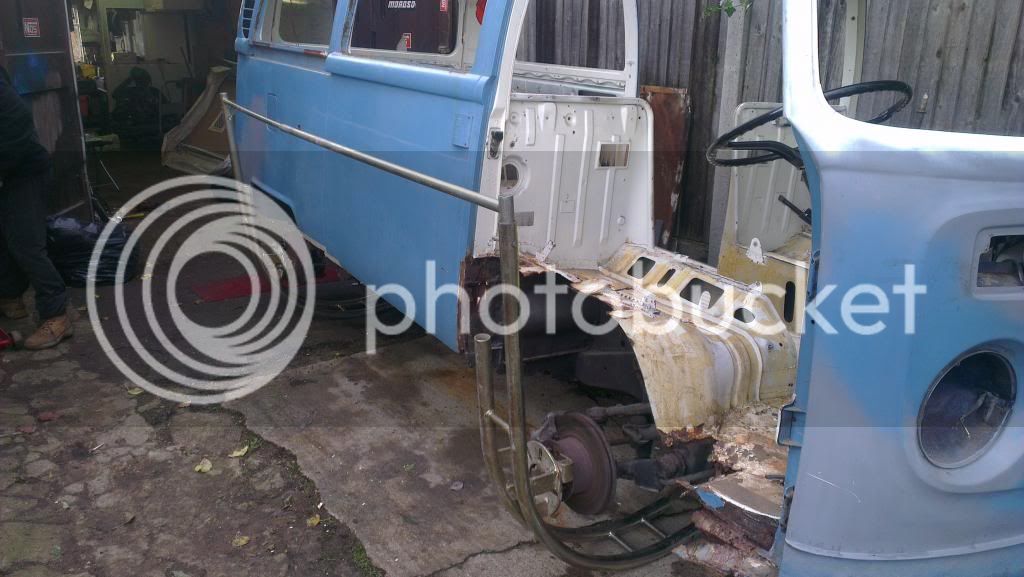
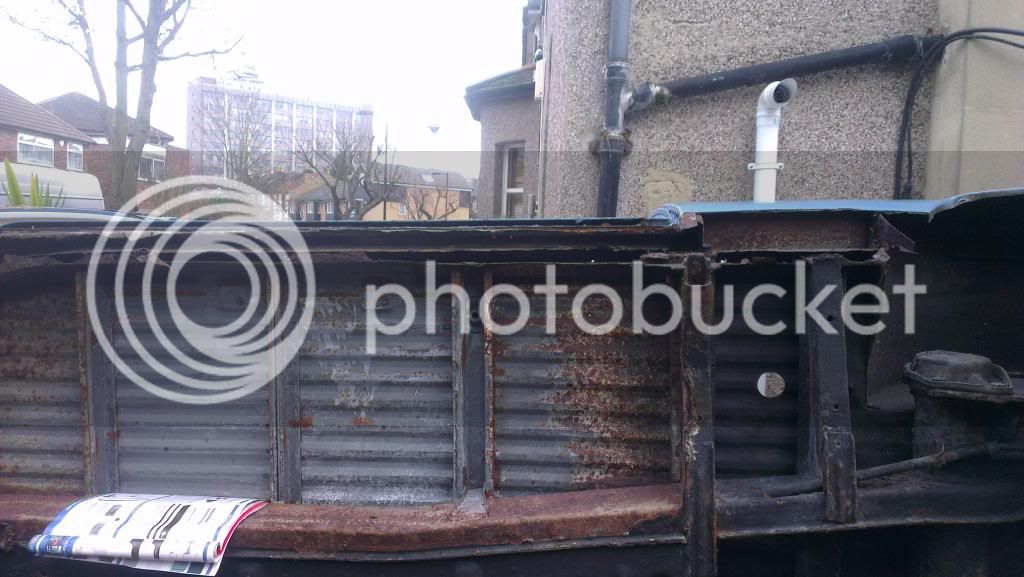
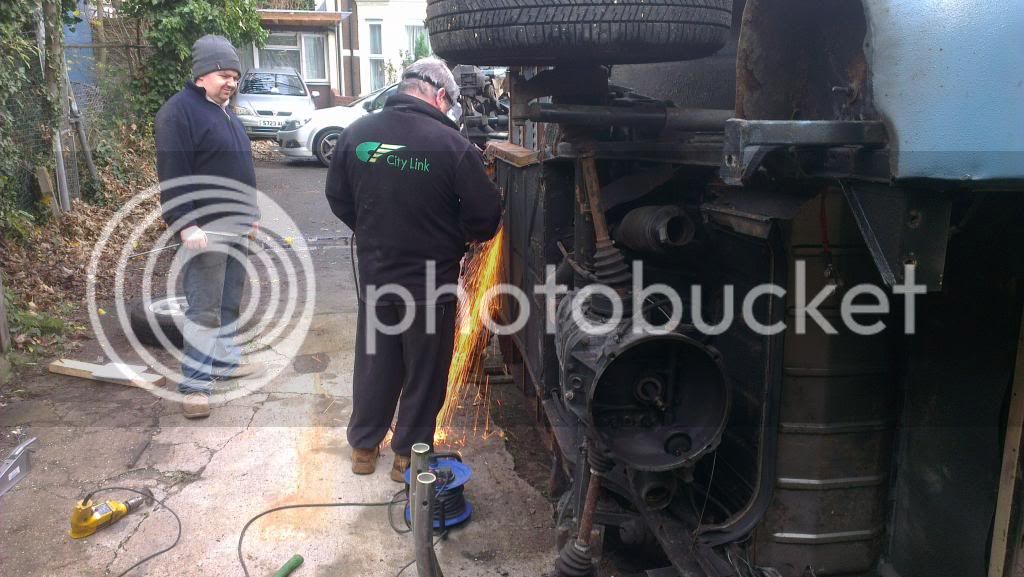
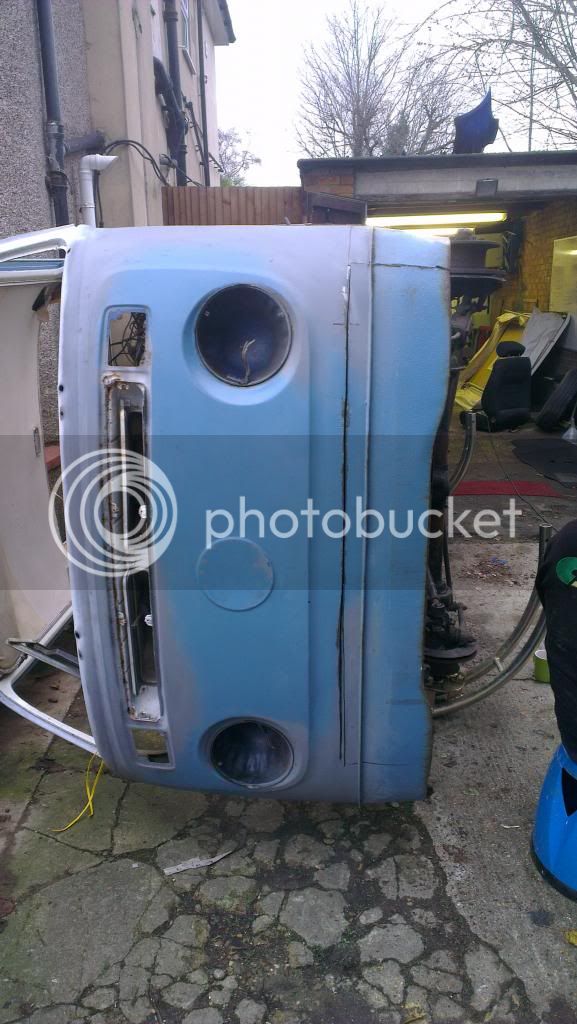
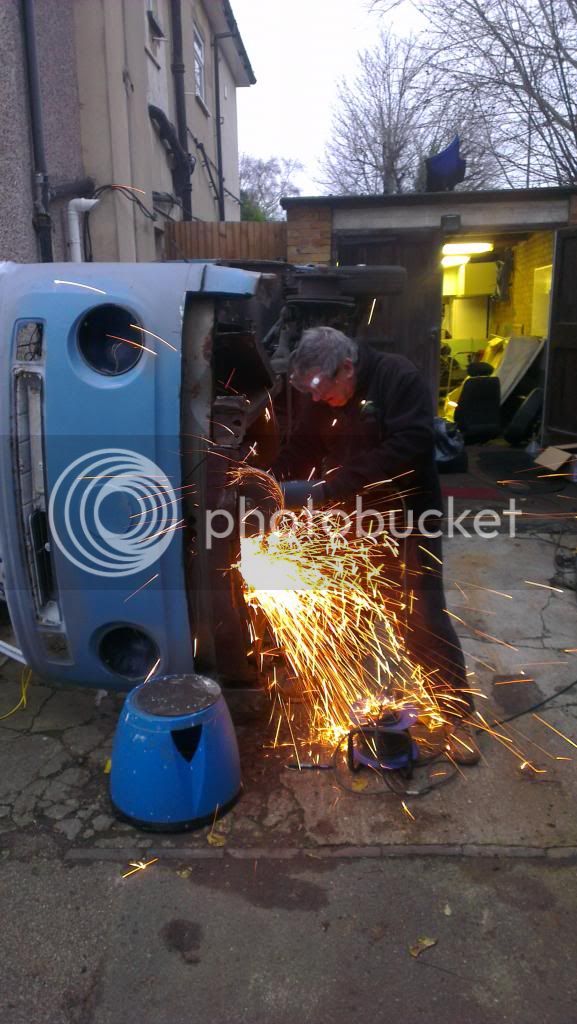
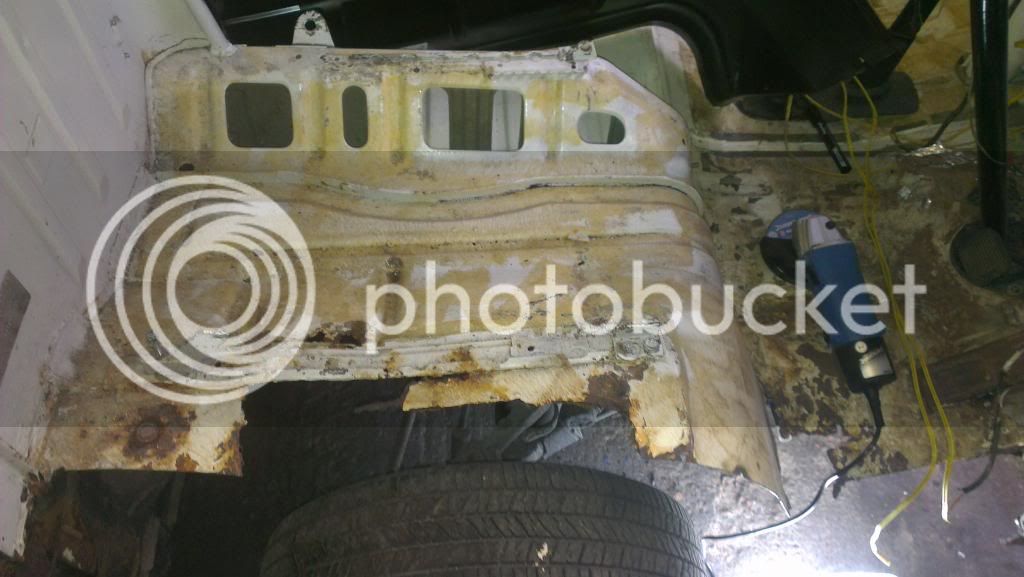
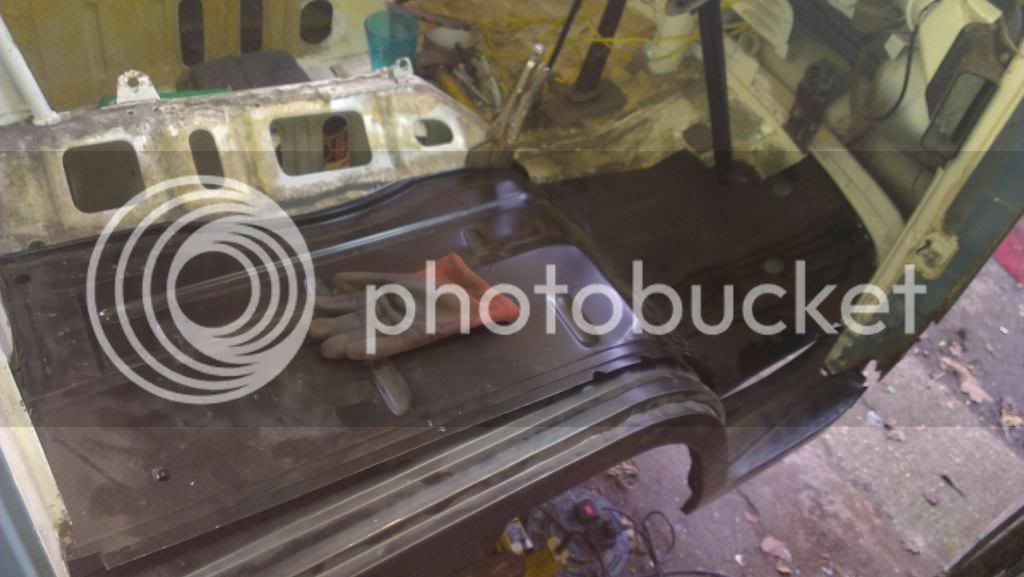
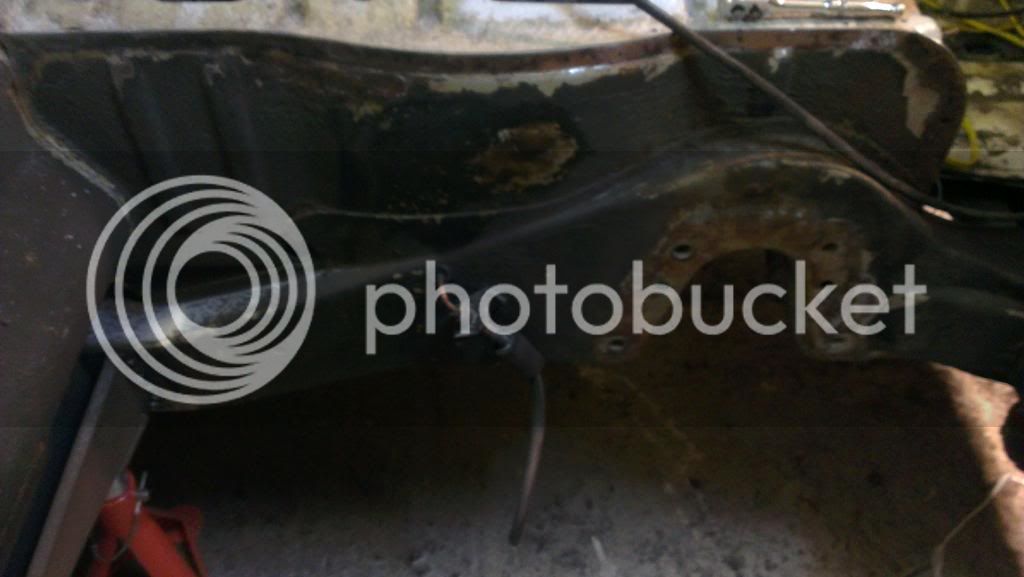
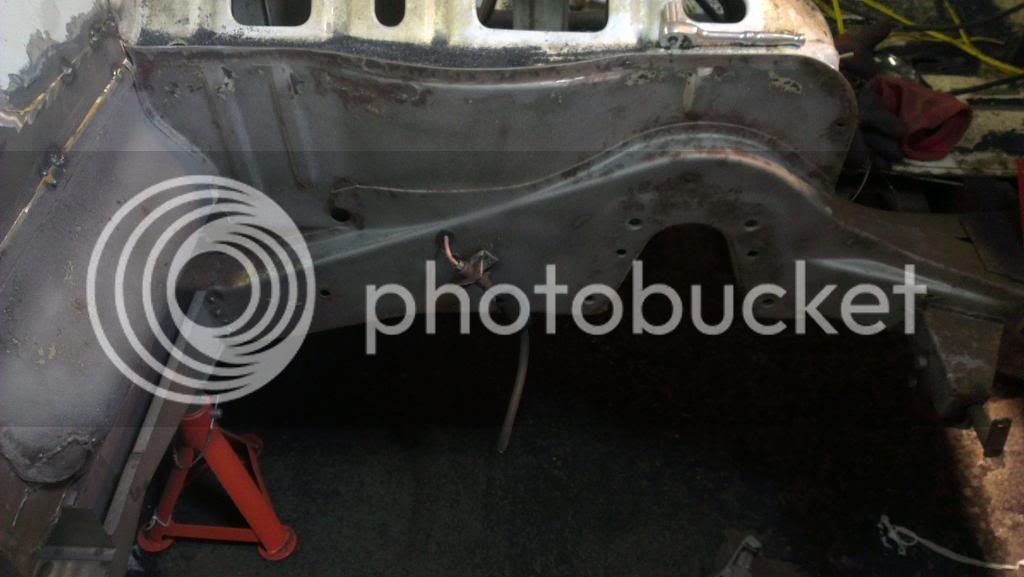
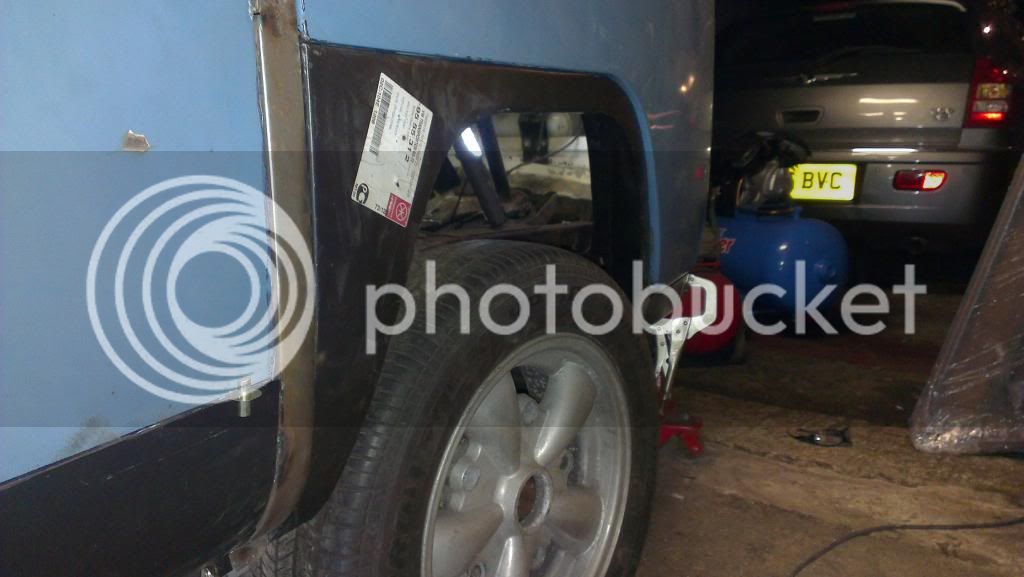
So hopefully today, inner windowscreen, cab floor left and right repair sections, front chasis left and right repair sections and b pillar plates will arrive! :) 
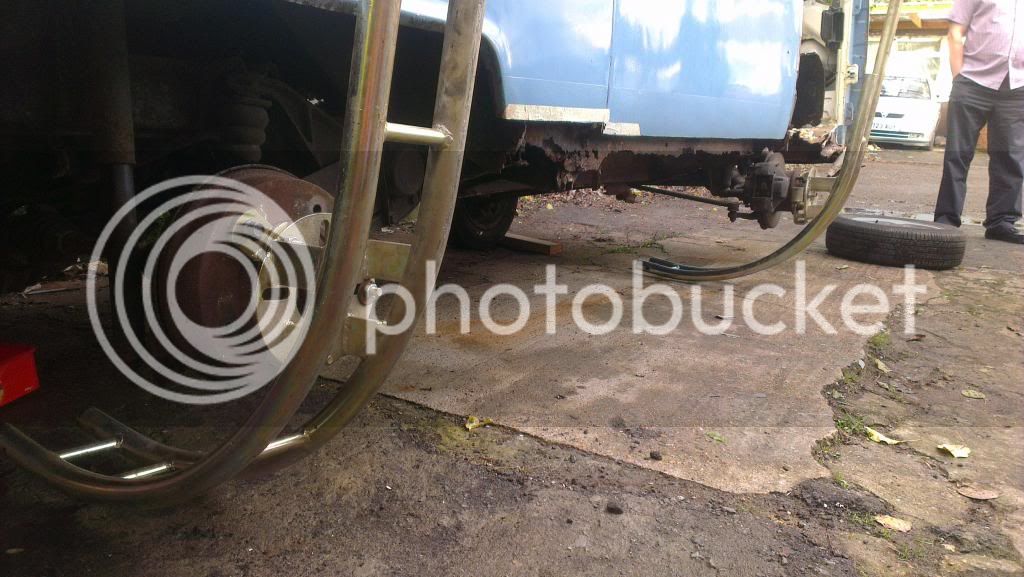
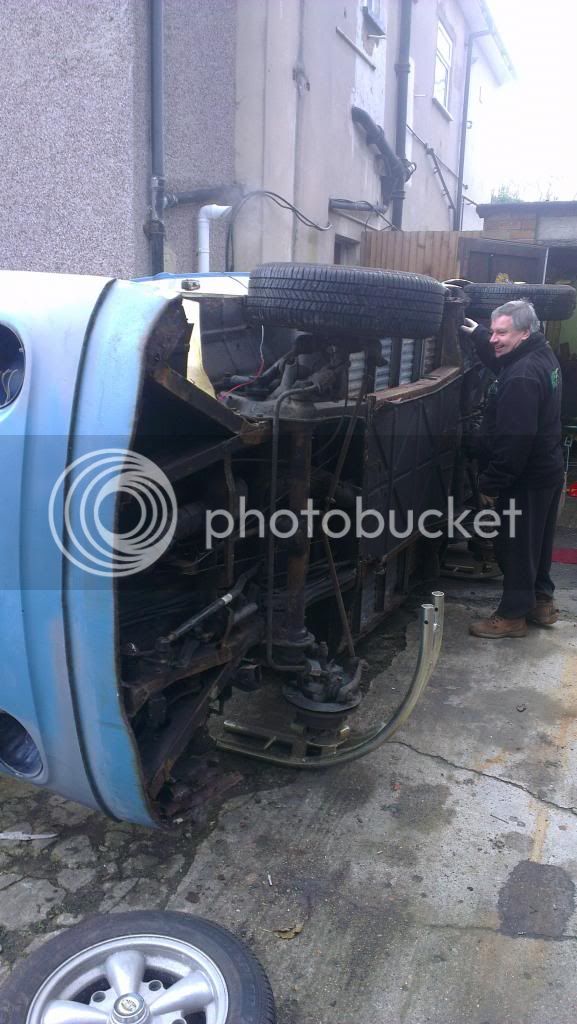
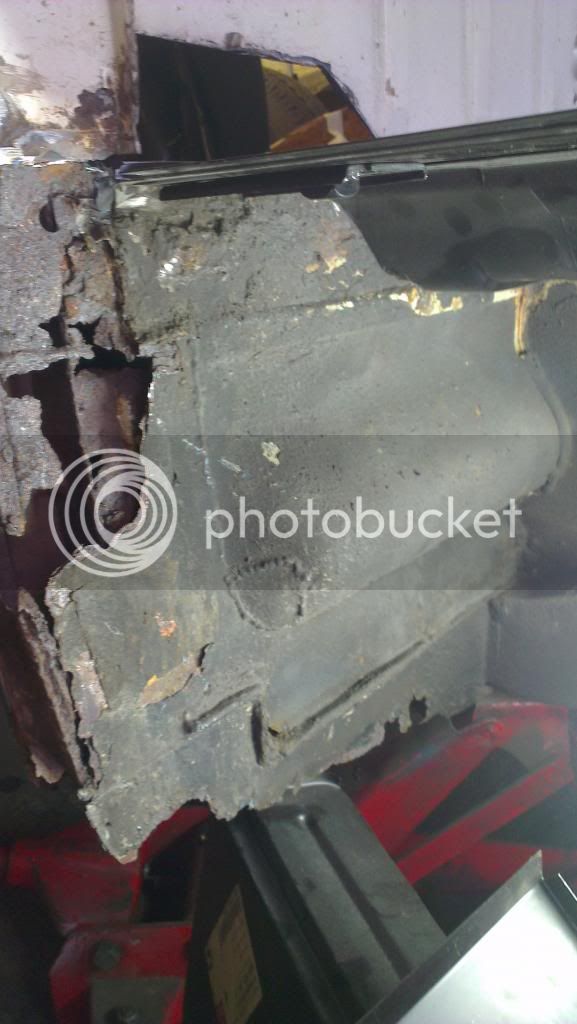
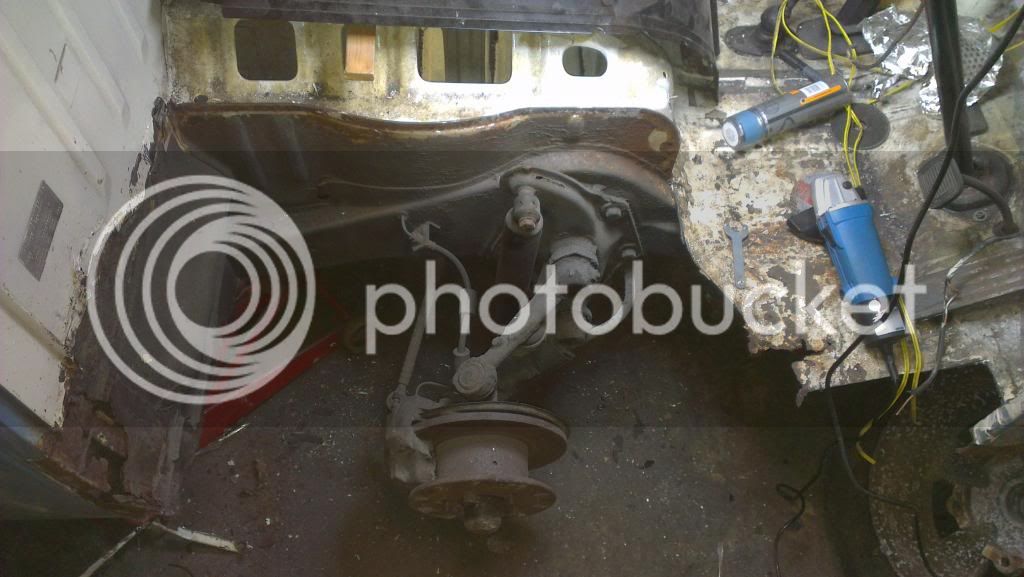
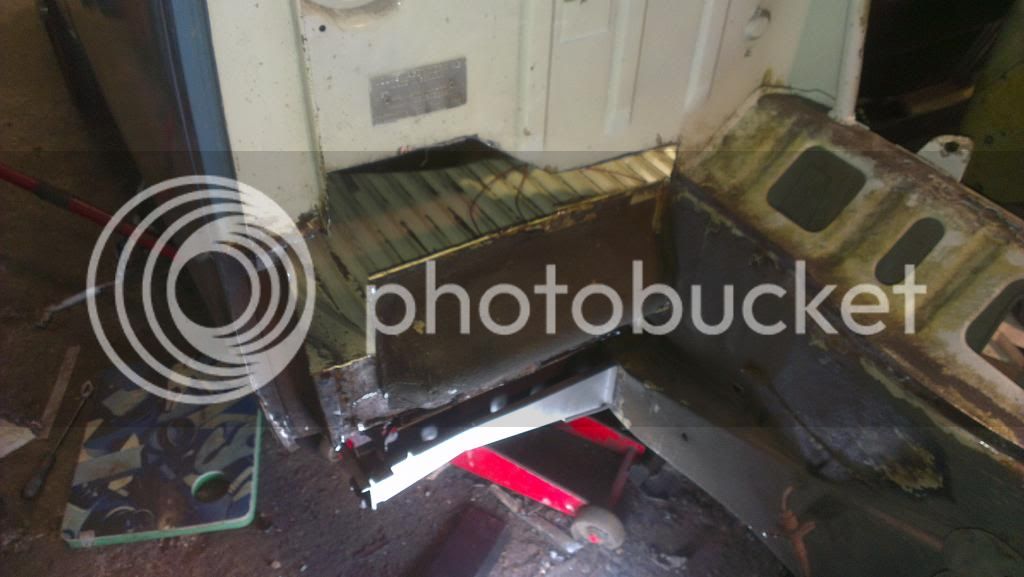
I still need to source the inner B-Pillars for both sides. But hopefully, engine out and roof off tomorrow, then we can get her on her side and actually start properly!

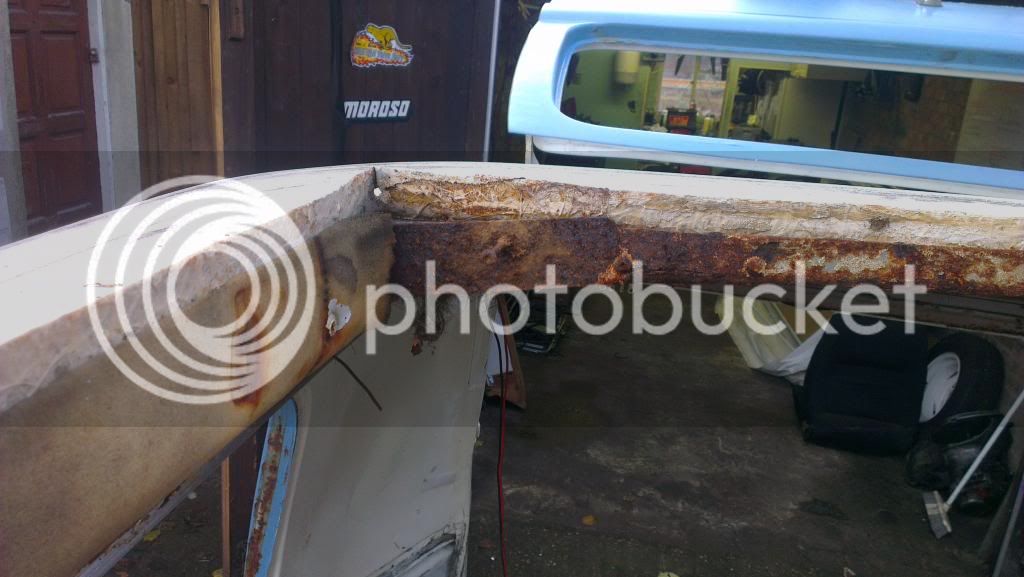
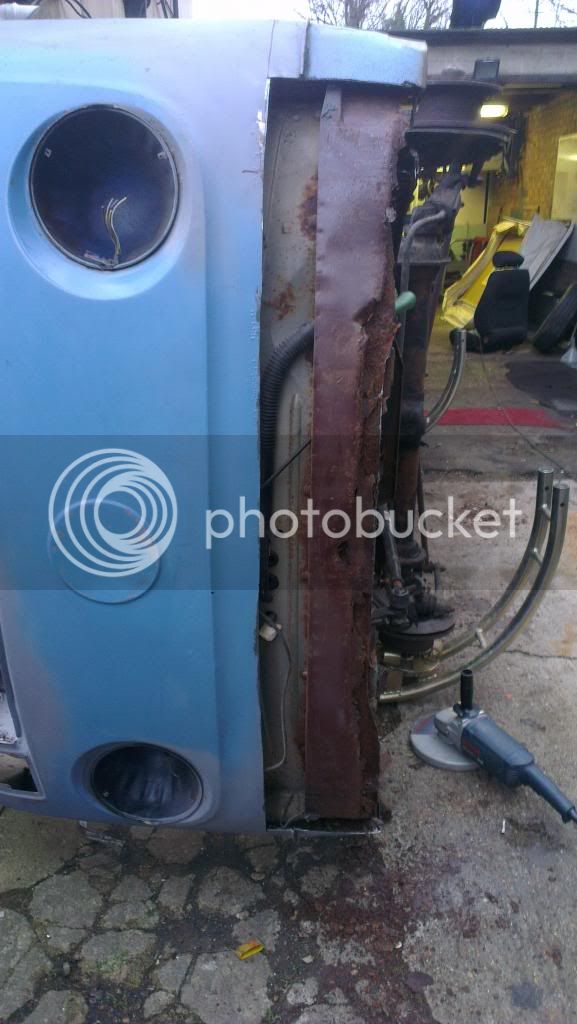
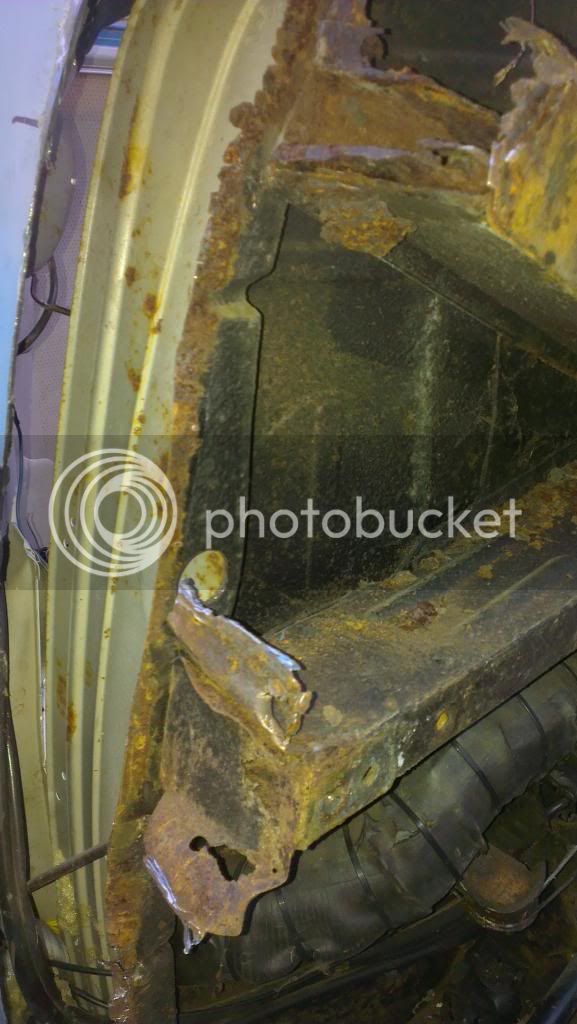
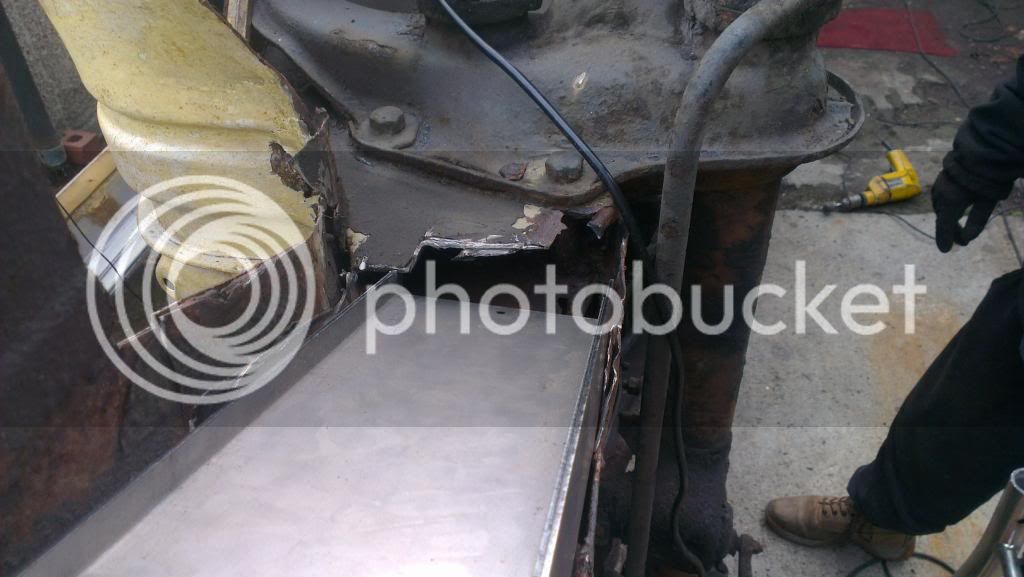
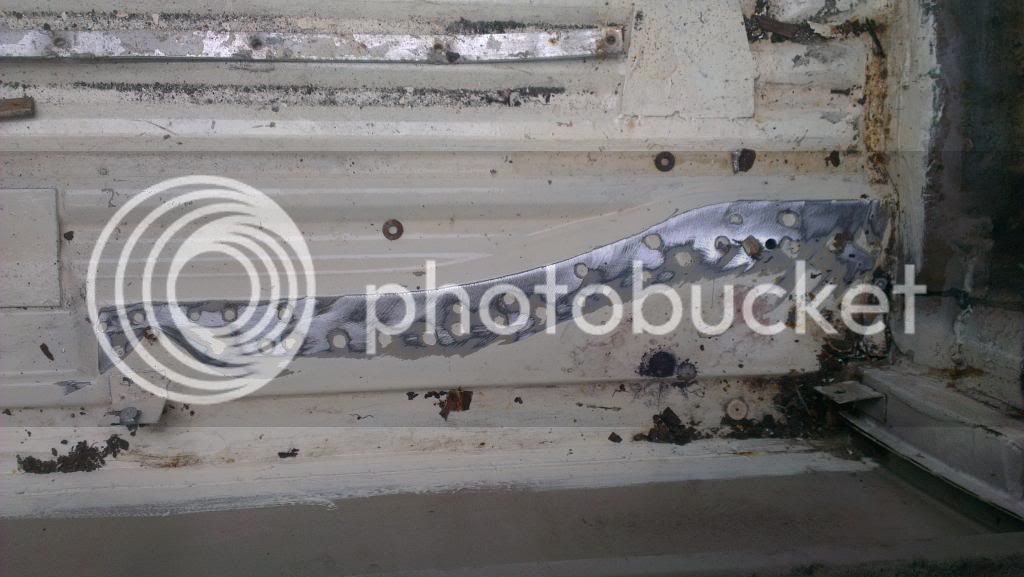
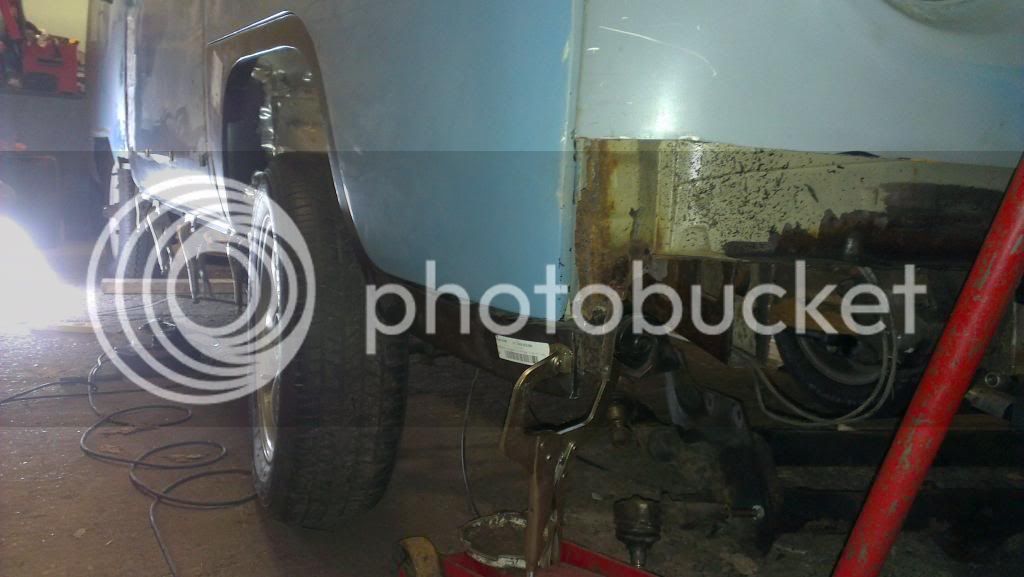
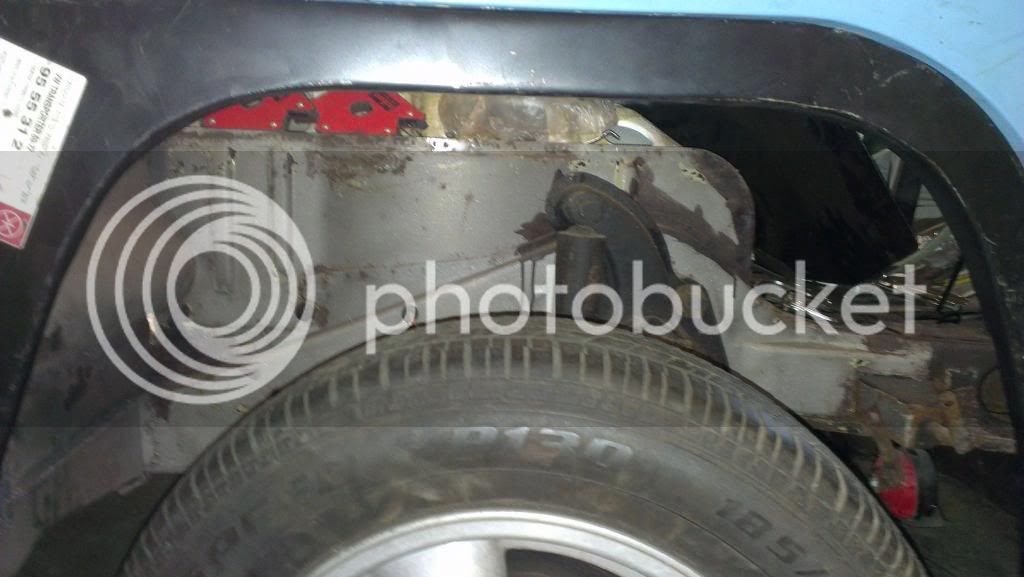
I also need to source stuff to kill/clean rust so I can then recoat the underside in something. I was thinking of giving the Rust Shop a call and seeing what I need to get. I assume as they are a sponser people have used them before and can recommend?

So hopefully over the next few weeks things should really start moving along. I am unfotunately working next week, however Father and Brother are off, and I am hoping to have that first week in January. So two pretty solid weeks of work should yeild some results :D
 
Weekend update!

The Engine came out on Saturday (those stupid bolts behind the fan housing is it? What a pain in the butt!)
2012-12-22233314_zps3a37d488.jpg

2012-12-22233319_zps9bf65efd.jpg


Then the roof came off. It needs a good clean and a lot of the screws holding the strip that held the canvas to the roof were rusted and snapped. Oddly there was no seals at all here, just strip, canvas then roof which I find wrong.
2012-12-23110232_zps1a1b9d16.jpg

2012-12-23110242_zpsf2453db1.jpg

2012-12-23110253_zpsa716d89b.jpg


Then we put her on the roller. I was seriously hesitating at buying this as some of you may have read, but bloody hell. There has been some great inventions in the last 20/30 years but this is seriously up there! Thanks again Madjack!
2012-12-23122231_zpsb1056f7f.jpg

2012-12-23122250_zps3a44d2e7.jpg

2012-12-23122719_zps3cccd8ed.jpg


I already knew the sills would need doing but on her side you can get such a great view of things.
2012-12-23124639_zps7fb47d11.jpg


We weren't going to take off the underfloor plate, but we noticed the Crossmember had rotted through and would need replacing so off it came. There were also two square sections cut out at either end in the middle which had us wondering what had been done before. I believe she should have a fixed heating tube? We wound a flexible conduit type thing. It would also enable me to clean the bottom up and re-coat some protection stuff.

My dad borrowed a heavy duty grinder, he didn't let go of it all day.... (I no way endorse the advertising there! Not sure why he has it to be honest haha!)
2012-12-23133342_zps93225089.jpg


The black lines are my markings. To replace the inner valance and front chassis rails. Also the low lights panel needs to go there somewhere as well! I didn't want to go near the bottom of the A-Pillar at the moment, as I am not entirely sure what it is supposed to look like.
2012-12-23144818_zps8dda08c6.jpg


Not really sure of the correct procedure of where to cut etc. Just reading a thread on here and I hope common sense made me think to cut the new panel and the old panel on a flat part, so as to not get anywhere near the headlights and the raised bump.

Old front panel off...
2012-12-23150135_zps6c95d956.jpg


Dad having fun once again
2012-12-23152731_zps2d703338.jpg


We tried to keep away from the chassis rail that is straight towards the front, but the angled sections will need to be replaced.
2012-12-23154042_zps7f11a6ca.jpg


Got most of the old inner valance out and then it got dark :( And as we had been out there all day I decided to let them go indoors :D
2012-12-23155018_zps9eca3a7f.jpg


So that was Saturday night and Sunday. Hopefully my Bentley book arrives today and some more panels/underside bits so I can't actually wait to go to work today!

If any of you have any tips or criticism I am open to everything and anything!

Whis.
 
madjack said:
Looks like your making great progress well done

I was glad to finally get a decent days work done. Although I love the reading (everything on here almost it seems!) and the thinking about what to do and how to do it, I just really wanted to make some progress!

I am really a rather impatient person at times. Take today for example, a day for eating, family, presents, relaxing...all I want to do is get the grinder out!!!

Merry Christmas to all in EarlyBay land. I trust you are all having fun!
 
Hi all, hope you've all had a nice Christmas/holiday.

After some help if you wouldn't mind. We are replacing the front chasis rail (the one to an angle of the main one running though the bus), and both my Dad and I are now stumpt as which way to procede. I assume that the repair sections I have aren't supposed to go down as far as we need them to.

2012-12-30141814_zps77a7ba0c.jpg

2012-12-30141807_zps2617aaf5.jpg


This is kinda where it needs to sit to sit flush with the front. However, we have to repair the other side at the front so I will be able to set this one further back and patch in a 2/3" section at the front if needed.

But there is also this hole
2012-12-30141906_zpsd4f1e5a9.jpg


What do you guys think I should do? We don't really have the skills to be able to make sections. A square patch will be doable but not if we have to start bending metal etc. Also, what to you think to patching in, and the MOT?

Thanks, for any help.

Whis.
 
Hi all, hope the new year has been good for you all!

Some progress pics for you all.

After the Y-Section discovery I decided to leave that for the moment and move on to the drivers side repairs.

This is what it looked like before I got about learning to grind :)
2013-01-02143220_zps2eb94b99.jpg

2013-01-03112830_zps9138160e.jpg


I popped down to C&C in Bookham to pick up a few bits and decided to treat Dorothy to a new wheel arch tub. C&C were really great and friendly guys, highly recommend checking them out if you haven't already!

The after!
2013-01-02210739_zps87eb3617.jpg

2013-01-04175234_zps5a1a0f0b.jpg


The cut in the bulkhead didn't really need to go as big as that but I decided to replace an existing patch which I think looked awful. So I will make a new section to weld in there, and hopefully it will at least be flush with the rest of the bulkhead.

I was also very happy when I clamped in the outrigger/jacking point, first piece of new metal being offered up! So I got carried away....
2013-01-04144620_zps4476bbc6.jpg


I then found two excellent resources for the bits I am working on here, one is a resto thread on here and one is a website. So then I was on to attacking the sills. Inner, middle and outer all have to come out :( I lucked out here by stumbling on how to see the spotwelds. I decided to run the grinder over and loads of little circles appeared (this is all new to me, so I assume this is common knowledge, just wanted to add it in for anybody new to this (like me), who couldn't find the correct way to see them after some 40 odd years!).
2013-01-05105135_zps6e07d050.jpg


So I set about drilling them out (this actually took bloody ages to do...and I hated it). Eventually, instead of using a big bit, I tried a small bit, then a medium bit, then up to a big bit, and managed to achieve the same amount of holes in 40 mins as had taken me 4 hours with just the big bit...you live and learn eh??

So with them all drilled, the sills came off. We have also decided to replace the rear outrigger/jacking point and the very rear outrigger whilst we are there.

So the next plan is to fabricate the bulkhead part, fabricate an inner B-Post part and also work out what the bottom of the A-Pillar should look like to attach the wheel arch skin and inner front valance too. Then we can get to welding in all the replacement parts for the whole of the right side :D :D

As ever, any comments, suggestions or criticisms are more than appreciated.

For reference, the thread on here is Mags' first resto thread here and Mike's photo resto site of Spooky found here - Thank you to you both if you read this, they have been very very helpful to me.
 
I'll see you next week -big project there but nice to see a good father son team working on keeping another bus on the road.

Make a list of questions / queries and make sure you have tea available ;) as there is nothing major or terminal I've seen on the thread or the 302 pics on dropbox -see Sparkwigs thread for an epic bus rebuild as it will make you feel so much better
 
ant said:
Great thread, keep up the good work :D

Thanks Ant, you know how sometimes you just feel that you ask too many questions without giving anything back? There is a lot of people that I owe a drink or two too!!

Waited at work until just gone half 7 today waiting for a new toy to arrive and the f**king courier still didn't show...waste of a damn evening. On the plus side I did manage to do Solitaire on Vegas game mode which I have never been able todo before!!! $216 woohoo!

P.S I will be contacting you about some white-walling :)
 
Turned out the Driver couldn't find my building (happens to be the tallest building in Croydon...) so I popped to the depot today.

After 2 hours of faffing and putting it together I must say it didn't impress me a whole lot. Maybe tomorrow will be a different matter.

It's a sealey soda blaster.
 
Well, tomorrow was a different matter!

Before
2013-01-24172327_zps27b21f72.jpg

After
2013-01-24181650_zps45135a0f.jpg


Turned out, we need a bigger compressor! My dad's friend popped round who happens to have a petrol one bolted to the back of his van. So we plugged that in and away I went! What a fricking mess, it is my own fault, I knew it would make a mess everywhere, but I was waaaay to impatient :lol: So gonna try to hire a bigger compressor for the weekend, get her on her side on Sunday (weather dependant) and get the bottom cleaned up. This was with grit that I ended up buying, not soda, very interested to see the soda with a decent compressor. Hopefully it should work great and get the engine real clean.

So the beam went back on last night so we can move her until Elliot get's his bus back and I get a nice rust free Ozzie one next weekend.
 
So then.....since we last spoke it seems it has taken ages and not much happened but then it seems as though it did!

We went and met Elliott who kindly gave up his front beam. A couple of days later my Dad and Brother surprised me with a new kick ass compressor. So early one Saturday morning I got carried away and made this.

2013-02-09113803_zpse17599cb.jpg


2013-02-09113810_zpsf77f0513.jpg


This is my take on a shot-blasting enclosure :D Ok, so it may not look particularly pretty but I was rather impressed with my self, it also worked an absolute treat. Amazing what you can do with some random wood, tarp and some dust sheets.

2013-02-09113821_zps33ae44a8.jpg


There is a couple of improvements to make when I put it together again. A bigger tarp on the floor to go up the sides so all the grit is caught and can be easily collected (as I started to get fedup with the dustpan and brush method...

2013-02-09133148_zps6df73cba.jpg


So the shot-blaster with new compressor works great. I decided half way through that it was a waste of time to do this at this stage and when it comes to it, I will take the beam apart and do it in pieces. We put the disc breaks off my old beam on to the new beam and stuck it in, went in with no issues. Broke the old beam down (or which is for sale in the for sale thread :)).

Following day I decided to have a go at welding...

2013-02-10133451_zps7b45424c.jpg


This started fine, but this section closest to the camera would not stick, so I gave up.

But we did manage to get the inner wing repair panel in, the outer b-post section in and the rest of the middle sill in.

2013-02-19165203_zps8158e4d9.jpg


2013-02-19165208_zpsdc3e6088.jpg


Then I decided to attack the outer sill. I think this looks pretty good.

2013-02-20202511_zpsf4887dd8.jpg


2013-02-20202453_zpsed554e92.jpg


I am not sure however, if I should weld this in before we sort out the damage left by a previous accident. I am thinking to get it in, then when someone (not sure who yet), either bashes it out some more (I have started and I think it is a lot better), or fills it and tries to get the lines back there is a reference point :?:

So then I decided to put the door on and see how the wheel arch fits, as that along with the seat tub and the drivers cab floor is next on the list.

2013-02-20202409_zps6d50351a.jpg


2013-02-20202420_zps942cfe0c.jpg


She definitely needs a smack with the lowering stick...

IMAG1119_zpscb735160.jpg


So, that is what we've achieved the last few weeks, oh, actually we had a weekend away in sunny Colton this passed weekend. We stayed in an amazing B&B on Saturday and then went to Dubfreeze on Sunday, which never having been to something like this we thoroughly enjoyed it!!! But it was expensive haha!!

Met Rusty Lee to pick up our new full width rock'n'roll, I purchased a full set of window seals and a pair of complete front indicators from C&C (I like those guys). A multi-spark HT lead, anyone used one of these? Apparently you can gain 13% extra MPG amongst other things and it was half price, so I bought it :)

Met Silversteve (nice bloke!!!), saw Lobie's van in the flesh. Although it is too much for me personally, what a cracking bus all the same.

So, as ever, any comments, criticisms', suggestions are greatly appreciated...there is only so much info I can gather from pictures. The rest is just like putting a puzzle together!
 
your doing a good job there , fair play to you for having a go :)
when are you hoping to have it finished ?


Dave
 
squirt72 said:
your doing a good job there , fair play to you for having a go :)
when are you hoping to have it finished ?


Dave

Thanks :) I probably thought it would be a little easier than it is proving to be! Hah, no idea no. Hopefully just as soon as I can! It would be nice to see some of the summer in her!

Ched said:
Great job so far, enjoying this thread :D

Thanks Ched. Lets hope in a few years I can read back and enjoy it too! :lol:
 
Ok, time for a long overdue update. From the last episode I'd just had a go at the sills on the drivers side (they are still clamped in where I left you last), and due to the weather I have been pretty much stuck in the garage for the last 6-8 weeks :( With the relentless snow, rain and wind it has proved very difficult to get her out and roll her over. I admire all you driveway/roadside resto people and you have my sympathy if you really haven't managed to do anything due to the poxy weather!!

So, from the sills I went up to the bottom of the A-Posts. These still need trimming and cleaning up but they are more or less there!


I did this 2nd, so learnt from my mistakes if you will and made it a lot longer and wider than I needed and could then trim it down once the front panels and wheel arch is in.


Bit of a poor picture (sorry about that), but the inner valance seemed to fit pretty well!


I think this is a picture of the fit once I had made various repairs to the front of the kick panel. I don't know wether it was just rust or my over zealous father when he took the old one off a fair few months ago! (I have know learnt to use the grinder and spot weld drillbits so things come off a lot cleaner now! Not just hacking at it with a hammer and screwdriver :lol: ).

Once I was happy that the front should be ok, I moved back to the wheel arch and wheel tub. Started by getting the door to fit properly (is it me or is that one of the trickiest things you will need to do with a bus??). I remember saying at the time after bloody hours trying to line it up as best as I could that I would start a thread about things you regret doing on your bus, well removing the doors is mine!!!

For some reason or another I don't have any pics of the wheel tub in, although the supposed 'correct fit' tub that I picked up from C&C didn't exactly fit correctly...the only way I can describe it is the sort of half moon shaped bit that is near the walkthrough, doesn't match! It is only a bit out, but I would expect a correct fit part to fit...So I lifted the tub to the shape of the door and tacked it in place. I figured as this was the correct shape I can then line the wheel arch up to that and fiddle with it as I went. I thought this was a good plan and went a head with the wheel arch.

I do remember putting the arch in and then having to remove it. I can't exactly remember why but I think it might have been when I went to toolstation to get some bits I gave my dad and brother directions, and they weren't listening. So out it came again, tidied it up and tacked it back in again. I think this time we did the back side, then the front step part, and then I believe we tacked in the middle. Forgetting to pull the middle out...so out it came again. By this time the seat tub is starting to look a bit worse for ware, and will need some serious cleaning, shaping and general tidying up. So in went the wheel arch once again and this time I was 97% happy with it, when I sat down and noticed the most massive of gaps down on the corner where the step starts. So in my head I just saw air, cold and wet coming in like it was an open bar...


This is when I was 97% happy with it.


This is when I noticed the gap...


The gap.

So, the start of the best part of 2 weeks trying to get this poxy gap gone. I decided that I would cut the step off, and take it apart to see if I could knock the inside out to shape the door.


I cut it off :lol:

And this is where I have to stop as Photobucket has broken and I need to go to work!

Till later readers!
 

Latest posts

Top