You are using an out of date browser. It may not display this or other websites correctly.
You should upgrade or use an alternative browser.
You should upgrade or use an alternative browser.
Our Camper - Dorothy, 1970 RHD Devon
- Thread starter Whistler
- Start date

Help Support Early Bay Forum:
This site may earn a commission from merchant affiliate
links, including eBay, Amazon, and others.
- Joined
- Nov 28, 2012
- Messages
- 926
- Reaction score
- 52
- Location
- Herne Bay, Kent
- Year of Your Van(s)
- 1970
- Van Type
- Devon
NickJ said:Great work, the joys of a UK Bus :roll: :lol:
Haha true. I must say we didn't anticipate so much work would be needed. And for a first ever vehicle project, having never welded, painted, grinded anything before, hell, we didn't even know what an early bay was! We could have made a wiser choice. But I must say we wouldn't swap her for any other bus.
A
Anonymous
Guest
got all that to do your doing a great job though 8) when your finished with the sand blast cabinet give us a shout will need it fir the small stuff :mrgreen:
- Joined
- Nov 28, 2012
- Messages
- 926
- Reaction score
- 52
- Location
- Herne Bay, Kent
- Year of Your Van(s)
- 1970
- Van Type
- Devon
ronnie12342003 said:got all that to do your doing a great job though 8) when your finished with the sand blast cabinet give us a shout will need it fir the small stuff :mrgreen:
My initial plan was to sell it on once we've finished with it but it is really handy! I will give you a shout if we do decide to move it on
- Joined
- Nov 28, 2012
- Messages
- 926
- Reaction score
- 52
- Location
- Herne Bay, Kent
- Year of Your Van(s)
- 1970
- Van Type
- Devon
This week started out with me finishing off the Y section repair.
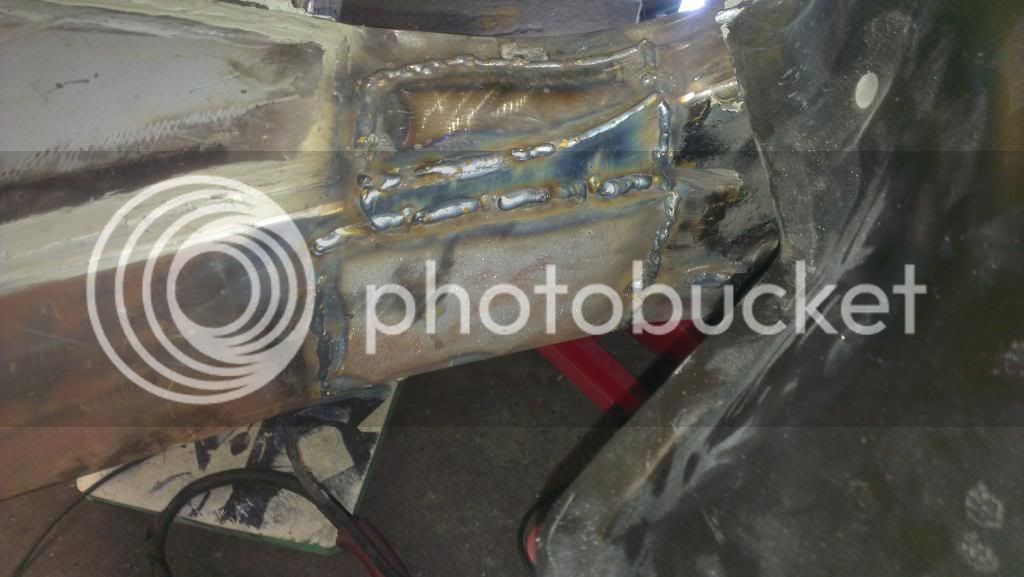
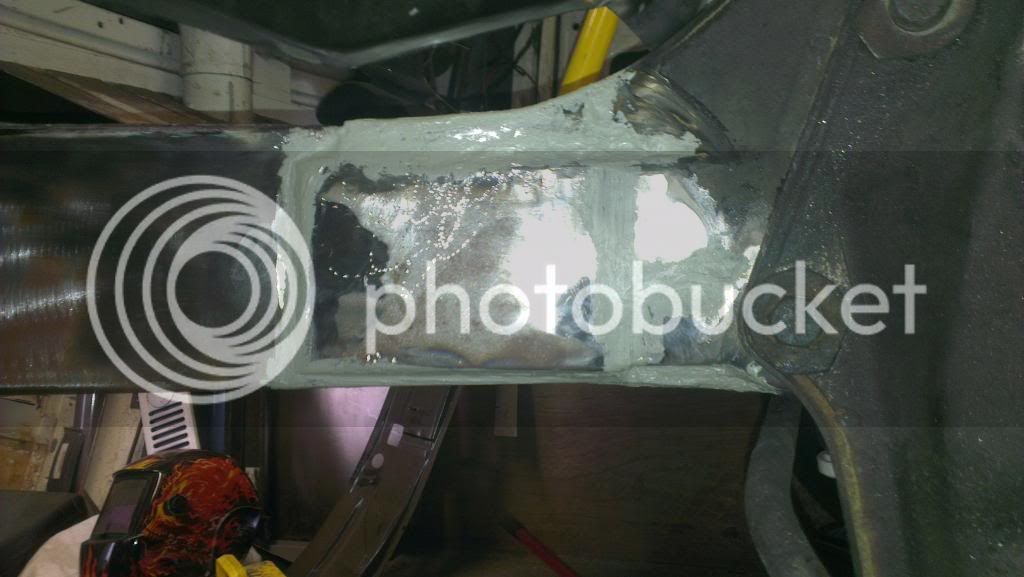
Then 2 coats of primer and 2 coats of hammerite to the top whilst it was exposed. Made it looks so clean and tidy! And I am very happy that bit is done, a wait off our minds finally.
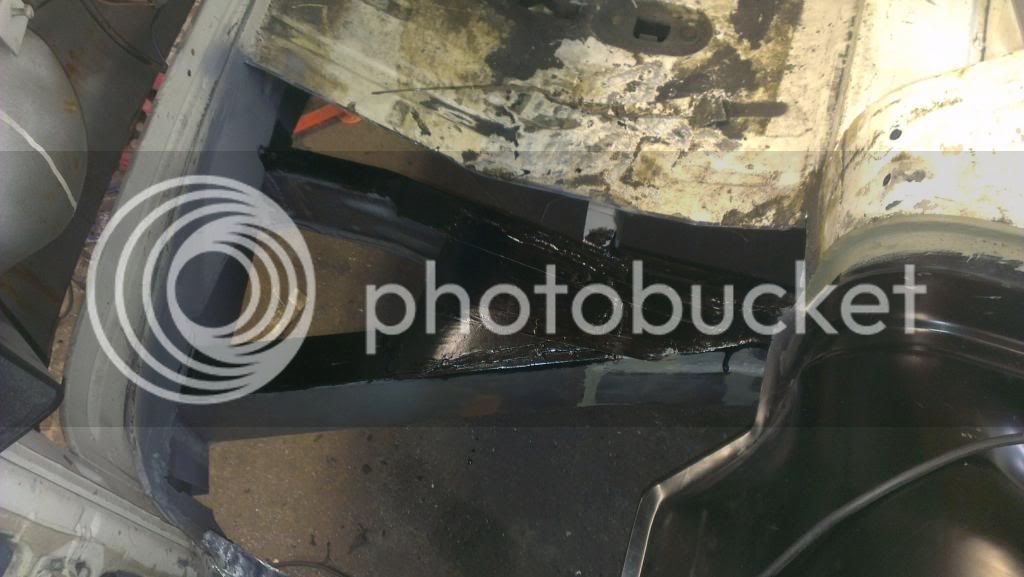
Then went for the rear seatbelt mounting point. I couldn't find the correct place for this to go, so I went with my gut. I can't imagine the 1cm difference I was wondering about will make much difference...well I hope it doesn't...
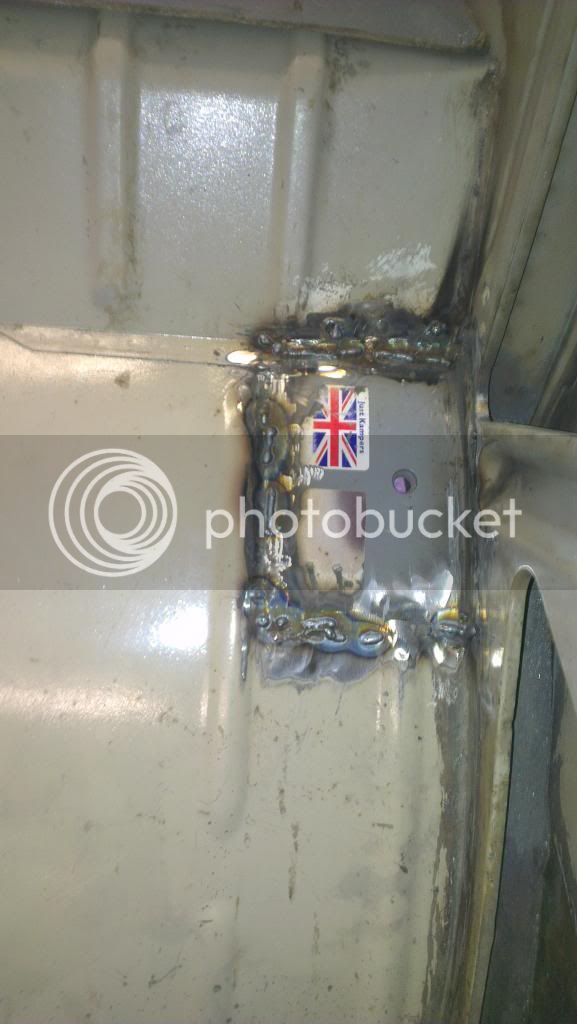
I had to repair the inside of the arch as well, so 2 evenings stuck up there wasn't a very pleasant experience! There was a repair to the inner arch, and also to the firewall. A right tricky section of bends and curves. So I had to treat it as two bits. I didn't take any pics of this as it wasn't particularly pretty! But needless to say a job that needed doing is now done!
And I couldn't actually make out the repair that a PO had done. It was like the original was rotten so with a mix of metal and silicon sealer they stuck it over the top. It also looked like another repair had been stuck over that as well :shock:
My repairs may not be great, but I am at least chopping out the crap, not just covering it up...
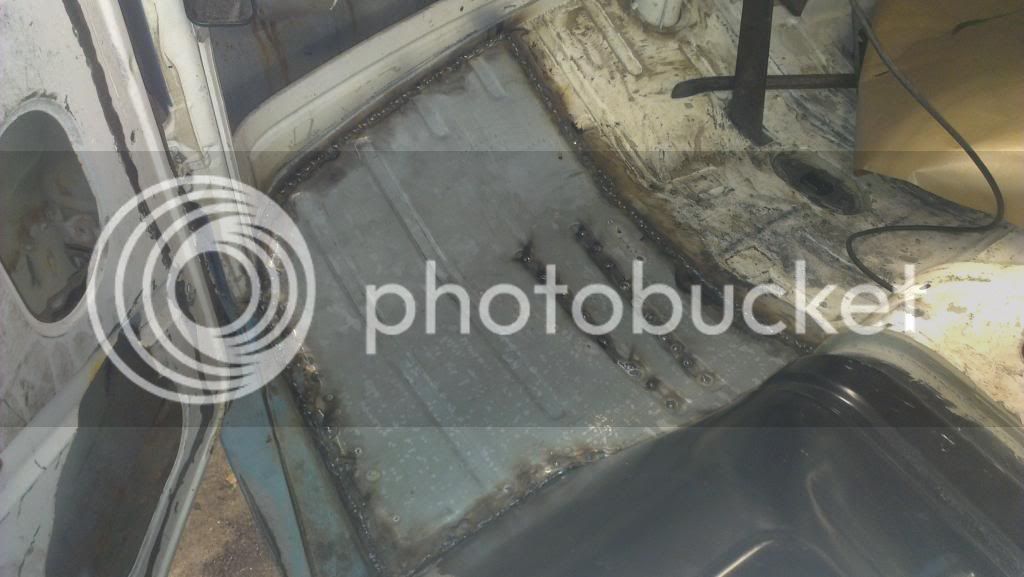
Then it was on to the cab floor. Welded in.
Cleaned up and sealed
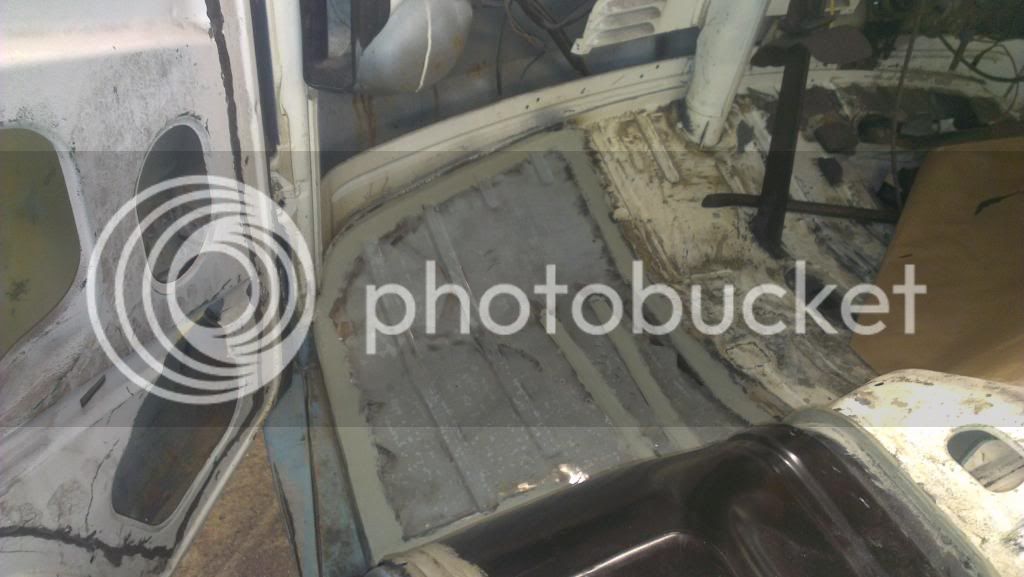
That means, with the exception of the slide door, and some filling that is that side completely done for welding!! 20 panels and bits of metal have gone on that side And that isn't counting the cross-members either!
So now it's back to the other side.
I am also unsure about the rear lower corners, and the battery trays...I don't know whether to leave them or replace them.


Then 2 coats of primer and 2 coats of hammerite to the top whilst it was exposed. Made it looks so clean and tidy! And I am very happy that bit is done, a wait off our minds finally.

Then went for the rear seatbelt mounting point. I couldn't find the correct place for this to go, so I went with my gut. I can't imagine the 1cm difference I was wondering about will make much difference...well I hope it doesn't...

I had to repair the inside of the arch as well, so 2 evenings stuck up there wasn't a very pleasant experience! There was a repair to the inner arch, and also to the firewall. A right tricky section of bends and curves. So I had to treat it as two bits. I didn't take any pics of this as it wasn't particularly pretty! But needless to say a job that needed doing is now done!
And I couldn't actually make out the repair that a PO had done. It was like the original was rotten so with a mix of metal and silicon sealer they stuck it over the top. It also looked like another repair had been stuck over that as well :shock:
My repairs may not be great, but I am at least chopping out the crap, not just covering it up...
Then it was on to the cab floor. Welded in.

Cleaned up and sealed

That means, with the exception of the slide door, and some filling that is that side completely done for welding!! 20 panels and bits of metal have gone on that side
So now it's back to the other side.
I am also unsure about the rear lower corners, and the battery trays...I don't know whether to leave them or replace them.
A
Anonymous
Guest
are you dropping the indicators down on the front just noticed there late ones :lol:

$9.37
Empi 4429 Ivory Sun Visor Clips for Vw Bug 1965-1967/ Vw Bus 1968-1979, Pair
MOORE PARTS SOURCE

$9.94
$10.95
Empi 00-4428-B VW Bug, Beetle, Sun Visor Clips, Type 1, 68-79, Black, Pair
MOORE PARTS SOURCE

$46.69
Billet Window Crank, for All Years VW Beetle, Pair, Compatible with Dune Buggy
✅ Dune Buggy Warehouse

$32.04
Airfix Quickbuild Volkswagen Light Blue Camper Van Brick Building Model Kit, Multicolor
Amazon Global Store UK

$10.00
Volkswagen Genuine VW Driver Gear VW Logo Specifications T-Shirt Tee - X-Large - Black
wolframitersqga

$7.91
$15.33
Door Panel Clips, for VW Aircooled Door Panels, 50 Pieces, Compatible with Dune Buggy
Appletree Automotive

$58.00
$69.99
Revell 07674 VW T1 Camper 1:24 Scale Unbuilt/Unpainted Plastic Model Kit
ChoiceToysUS
- Joined
- Nov 28, 2012
- Messages
- 926
- Reaction score
- 52
- Location
- Herne Bay, Kent
- Year of Your Van(s)
- 1970
- Van Type
- Devon
ronnie12342003 said:are you dropping the indicators down on the front just noticed there late ones :lol:
Sure am. When we bought her, we didn't know that the indicators were in the wrong place
We was hoping to get the front sorted week before last, but that is when I found the rot around the airbox so the repo panel has been delivered from JK last week. So hopefully soon I will attack that, which I am not looking forward to.
Also, it is weird, that the panel on there is off a Late Bay, it isn't a repo one. So I asusme the people who did it didn't know the difference, or at that time, the replacement panels weren't available.
A shame also that on eBay this weekend someone has put up 2 front clips, I would love one, but £650
A
Anonymous
Guest
well if you just want some pro assistance pm your number will help if you want to
- Joined
- Nov 28, 2012
- Messages
- 926
- Reaction score
- 52
- Location
- Herne Bay, Kent
- Year of Your Van(s)
- 1970
- Van Type
- Devon
Since the last update I think I've been pretty busy and got rather a lot done! 
After finishing the other side I turned her round to finish the other side. Hopefully with my experience now and that I had done the other side the plan was to not get the 'ump with the drivers side like I did some 6 odd months ago!
Starting from the back my plan is to get as much of the side done as I can so we can start tidying up the inside and painting it, leaving just the front to sort out and the odd roof repair.
No pictures as they are quite boring, but I put the other rear seat belt mounting panel in and had to make some real pain in the ass repairs to the inside of the wheel arch. Also the front lower rear wheel arch (like the other side), then the front of the wheel arch inside needed the bottom wavey bit. The rear jacking point, and then the rear jackingpoint/outrigger. I also had to fix the middle sill as the rear end kept popping off for some reason.
Then on Sunday I was having my morning coffee and decided to sort this out...
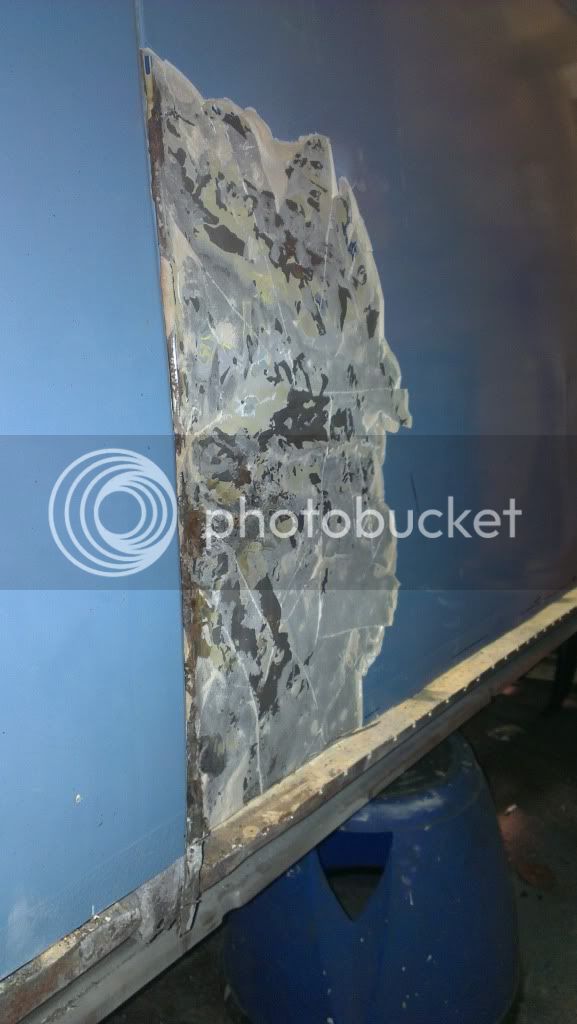
So I cut it out
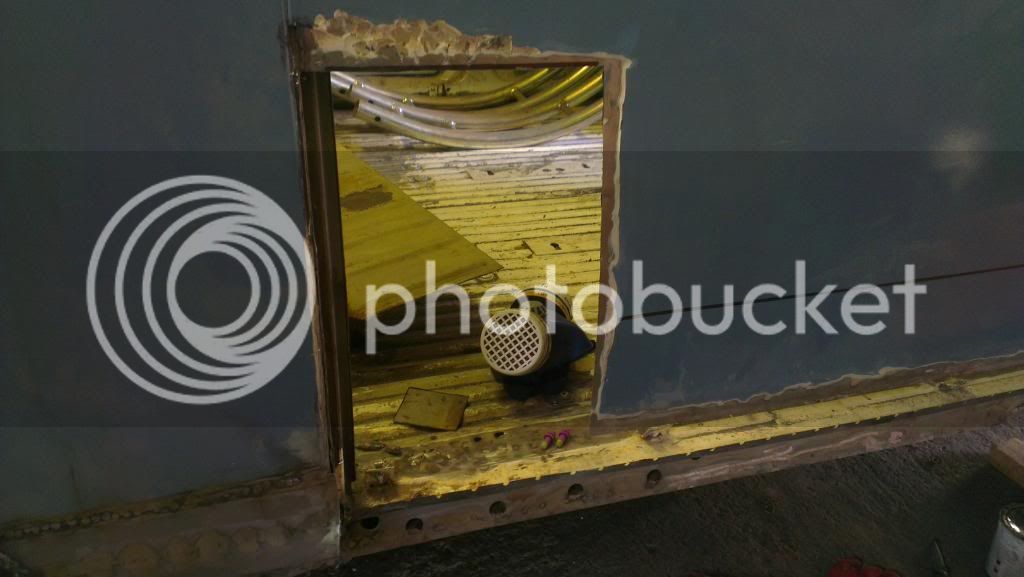
Whilst I was at it I also cut out the strengthener bar as this was crushed a bit due to the same impact I presume.
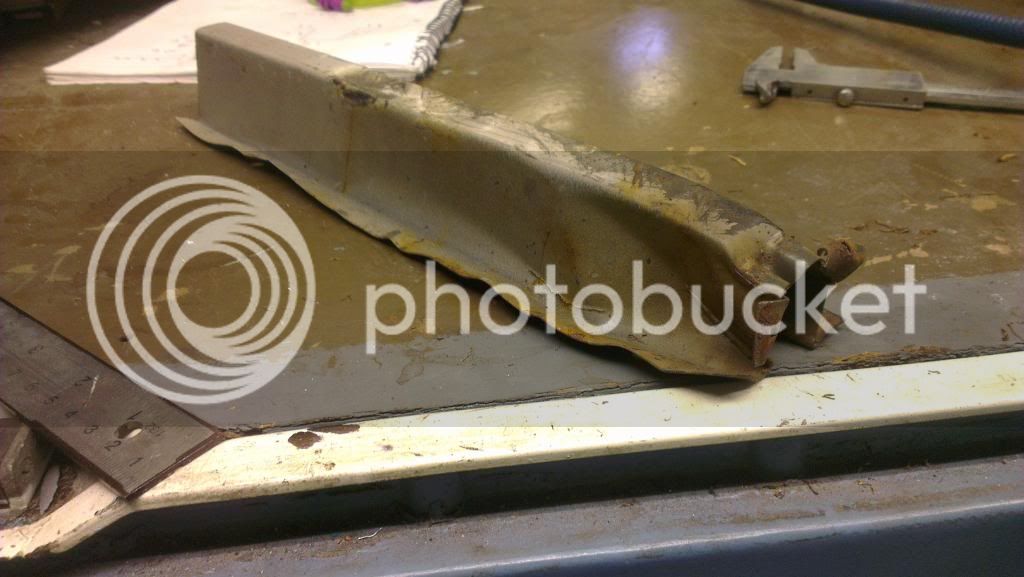
This bit was rather tricky for me! As although I cannot be sure I think the C post is a bit pushed in, so trying to match the repair sheet to the original line was tricky, I think it is a little out and will need help with a little filler.
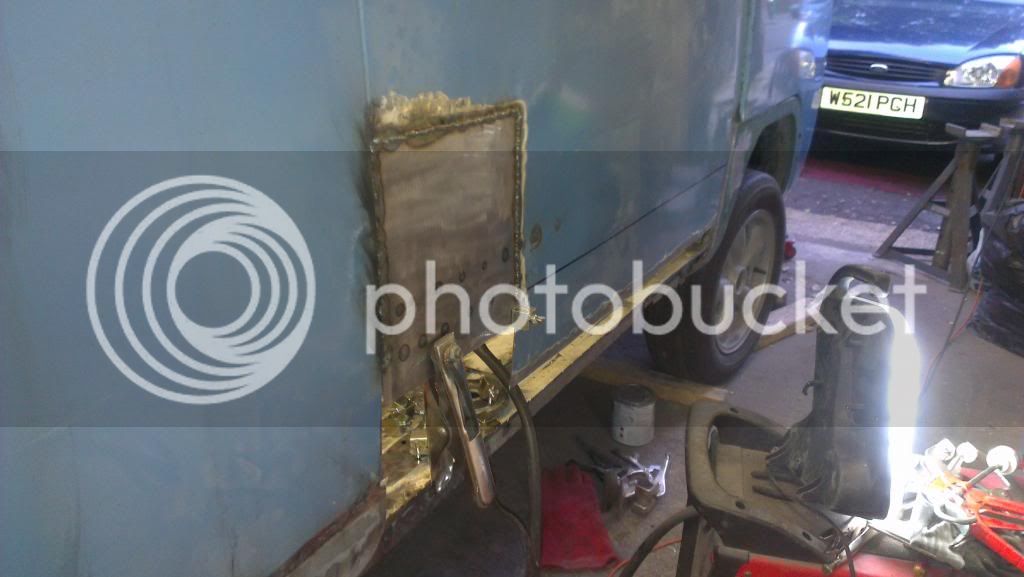
Welded in, but still needing a clean up.
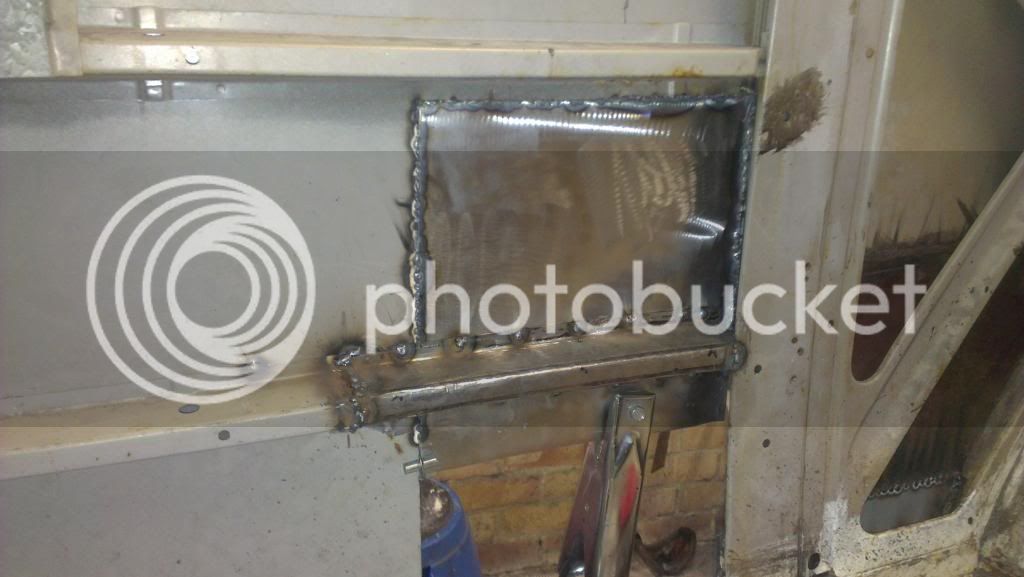
Ronnie popped over last week and suggested that I get a new panel for the lower long right side and use the joggler, so when I expressed how crap it was he revealed how to actually use it! Doh me However, skipping forward a bit, I still actually did it wrong
  I joggled the existing panel and it dawned on me that I should have joggled the new panel
  So I do have a step on the outside which will have to be smoothed over with filler. Unfortunately when I realised this the panel was done.
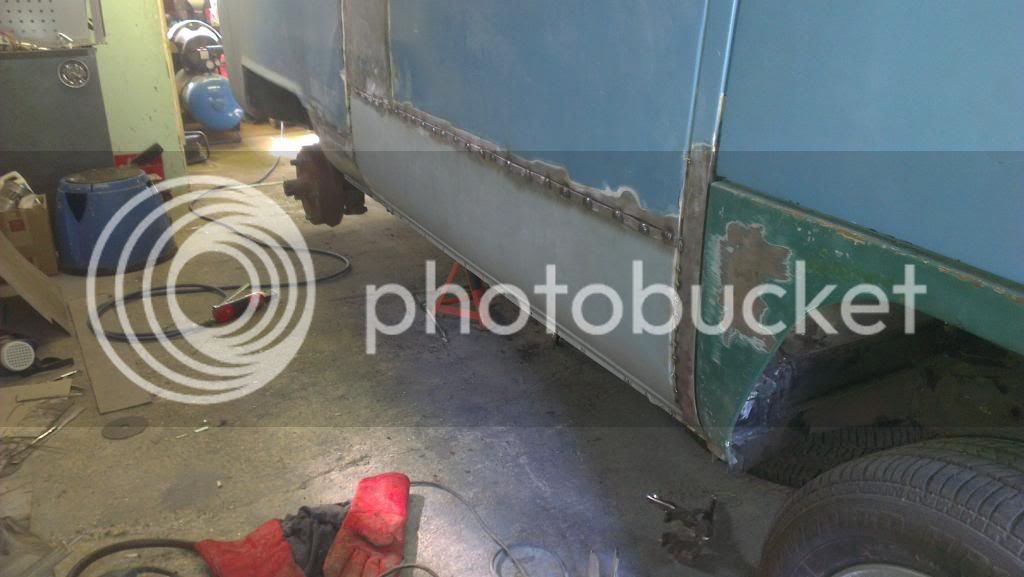
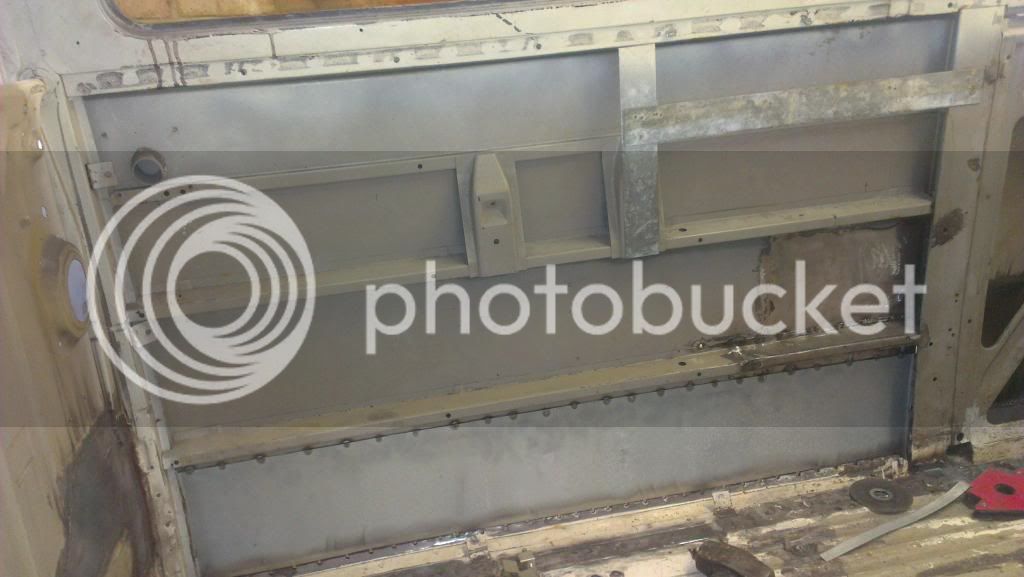
After I cleaned up the welds on all of that, I started going over the floor where the sills were and tidying those up a bit ready for some sealer/filler. I also went over the rear of the bulkhead again to cover up some thin metal or gaps in the welds. This was probably rather pointless thinking about it as the bit I was focussing on was above the wheel arch so probably didn't need any welding, as the weld was just blowing through the thin metal and pissing me off.
Then I got fed-up of grinding and called it a night.
I've also decided to do both rear corners and battery trays. So the parts arrived for those last week. I also picked up the bottom of the A-Pillar for the drivers side as per Ronnie's recommendation and I must say, it's a great bit of kit!
That's all for now
After finishing the other side I turned her round to finish the other side. Hopefully with my experience now and that I had done the other side the plan was to not get the 'ump with the drivers side like I did some 6 odd months ago!
Starting from the back my plan is to get as much of the side done as I can so we can start tidying up the inside and painting it, leaving just the front to sort out and the odd roof repair.
No pictures as they are quite boring, but I put the other rear seat belt mounting panel in and had to make some real pain in the ass repairs to the inside of the wheel arch. Also the front lower rear wheel arch (like the other side), then the front of the wheel arch inside needed the bottom wavey bit. The rear jacking point, and then the rear jackingpoint/outrigger. I also had to fix the middle sill as the rear end kept popping off for some reason.
Then on Sunday I was having my morning coffee and decided to sort this out...

So I cut it out

Whilst I was at it I also cut out the strengthener bar as this was crushed a bit due to the same impact I presume.

This bit was rather tricky for me! As although I cannot be sure I think the C post is a bit pushed in, so trying to match the repair sheet to the original line was tricky, I think it is a little out and will need help with a little filler.

Welded in, but still needing a clean up.

Ronnie popped over last week and suggested that I get a new panel for the lower long right side and use the joggler, so when I expressed how crap it was he revealed how to actually use it! Doh me


After I cleaned up the welds on all of that, I started going over the floor where the sills were and tidying those up a bit ready for some sealer/filler. I also went over the rear of the bulkhead again to cover up some thin metal or gaps in the welds. This was probably rather pointless thinking about it as the bit I was focussing on was above the wheel arch so probably didn't need any welding, as the weld was just blowing through the thin metal and pissing me off.
Then I got fed-up of grinding and called it a night.
I've also decided to do both rear corners and battery trays. So the parts arrived for those last week. I also picked up the bottom of the A-Pillar for the drivers side as per Ronnie's recommendation and I must say, it's a great bit of kit!
That's all for now
A
Anonymous
Guest
Hi mark Saturday was a disaster got floode at work so Sunday was spent mopping up so was not in the mood for working on Monday will try and get round yours this weekend and I will show you how to use the joddler again lol mind the side panel looks ok your doing a grand job
- Joined
- Nov 28, 2012
- Messages
- 926
- Reaction score
- 52
- Location
- Herne Bay, Kent
- Year of Your Van(s)
- 1970
- Van Type
- Devon
Cheers guys, always nice to hear that I am doing it right 
A good few days, and when Ronnie sorts the front end out I will be one very happy person! It is starting to get near the end of the welding which to be honest we've had enough of now. Fed up with the mess and the noise, roll on the cleaning, painting and putting it back together!!!!
A good few days, and when Ronnie sorts the front end out I will be one very happy person! It is starting to get near the end of the welding which to be honest we've had enough of now. Fed up with the mess and the noise, roll on the cleaning, painting and putting it back together!!!!
mattp
Well-known member
Looking really good -well impressed. Do you want to finish any of my projects? :mrgreen:
- Joined
- Nov 28, 2012
- Messages
- 926
- Reaction score
- 52
- Location
- Herne Bay, Kent
- Year of Your Van(s)
- 1970
- Van Type
- Devon
mattp said:Looking really good -well impressed. Do you want to finish any of my projects? :mrgreen:
Thanks Matt
- Joined
- Nov 28, 2012
- Messages
- 926
- Reaction score
- 52
- Location
- Herne Bay, Kent
- Year of Your Van(s)
- 1970
- Van Type
- Devon
At the end of last week I was just mainly filling in a few little holes in the bulk head and then a little repair piece to the bottom of the bulge on the inside. Got that all ground down and ready for seem sealer and tidied up the garage for Ronnie's arrival on Saturday.
I didn't anticipate him to be early so was a little ashamed I was still sitting on the sofa watching tele when I got a call saying he was outside Ran down and then the best days work so far began
He had already worked out what needed doing when he popped over last week. I had bought a new bottom A-Post repair from Schofields, Klokkenholm inner and outter step repair. So the plan was to give me a hand with the inner windscreen panel and then the front panel as well. When he popped over we established that I had welded on the chassis repair section without lifting the front corner up, which is why I couldn't get the door to close properly. Thinking about it on the other side, I had jacked the front up when I fitted the wheel arch so it all made sense! I am sure I would have lifted it if I was doing it on my own, but on the drivers side I had done it in reverse, the chassis first, then the arch. Where as passenger side was wheel arch first, then the chassis repair. So we went about jacking the front up and getting the door nicely aligned. He cut out the A Post repair I had made many months ago and stuck in the 3 part Schofields bits which to be honest I was pretty impressed with.
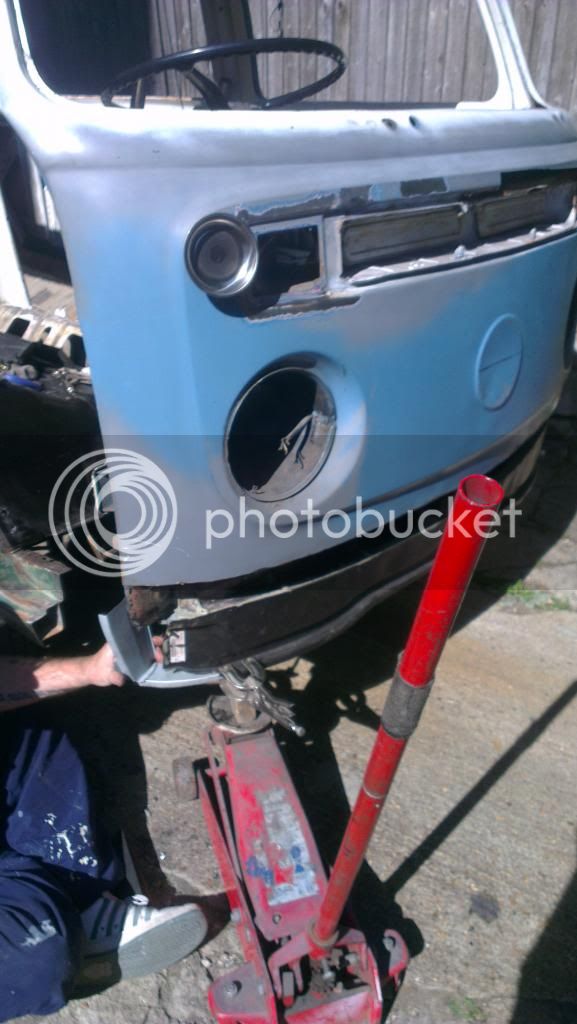
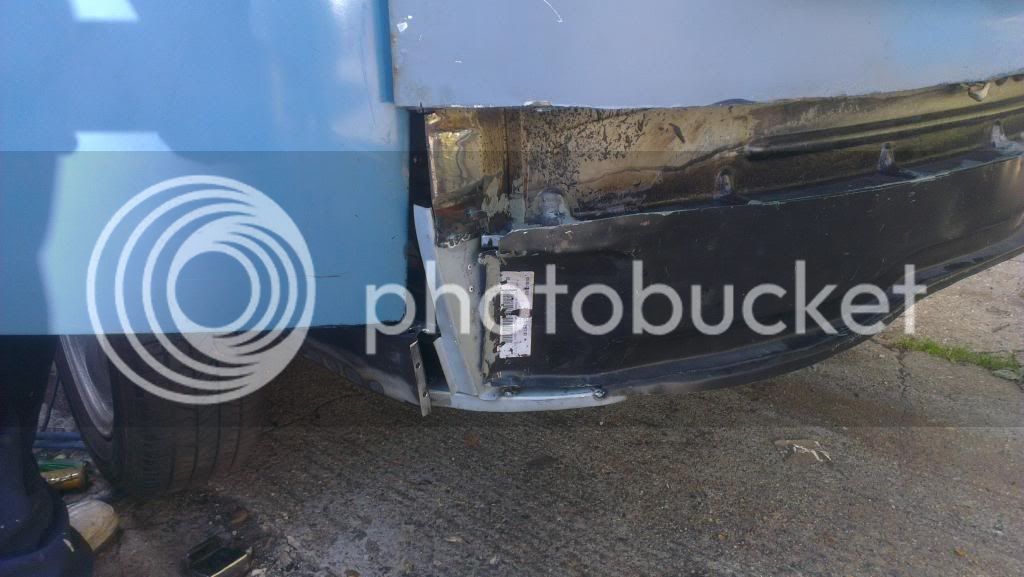
Next up was getting something welded in to keep the A-Post at the right height. Because I had already welded in the chassis leg (and done a lot of weld), there was the option to undo it all and reset it or using the inner strengthener bit of the A-Post to fold that round and weld that to the chassis section. Then with the arch in and the floor in it should bring it all together. If it dropped a tad we could just adjust the doors a couple mil.
So on with the inner step repair which wasn't too bad if I remember correctly.
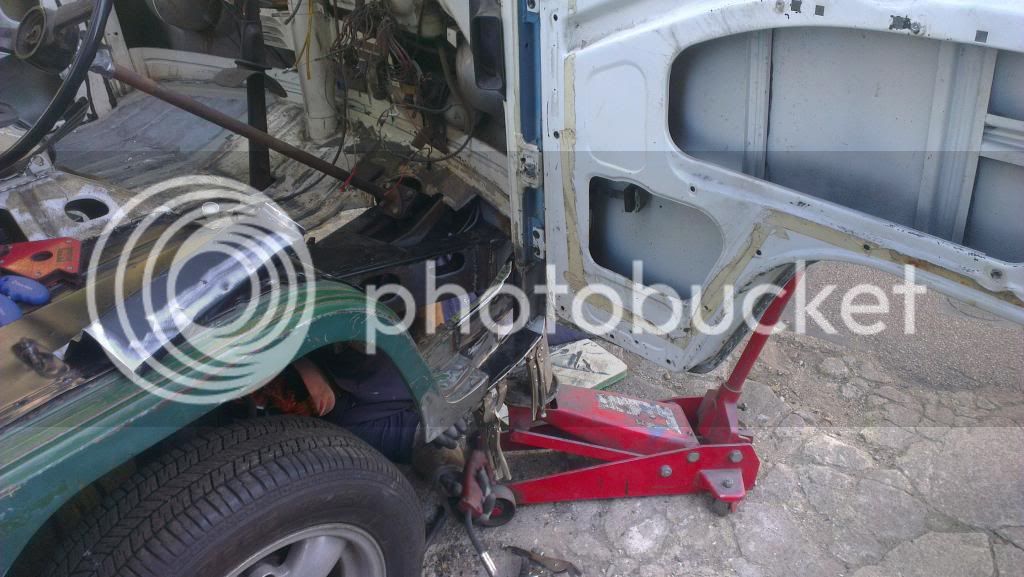
With the outer step section, it was awful. So Ronnie unpicked the two parts, and welded the top in first and then rolled the side part around to get the shape of the curve that is in the door. And all done!
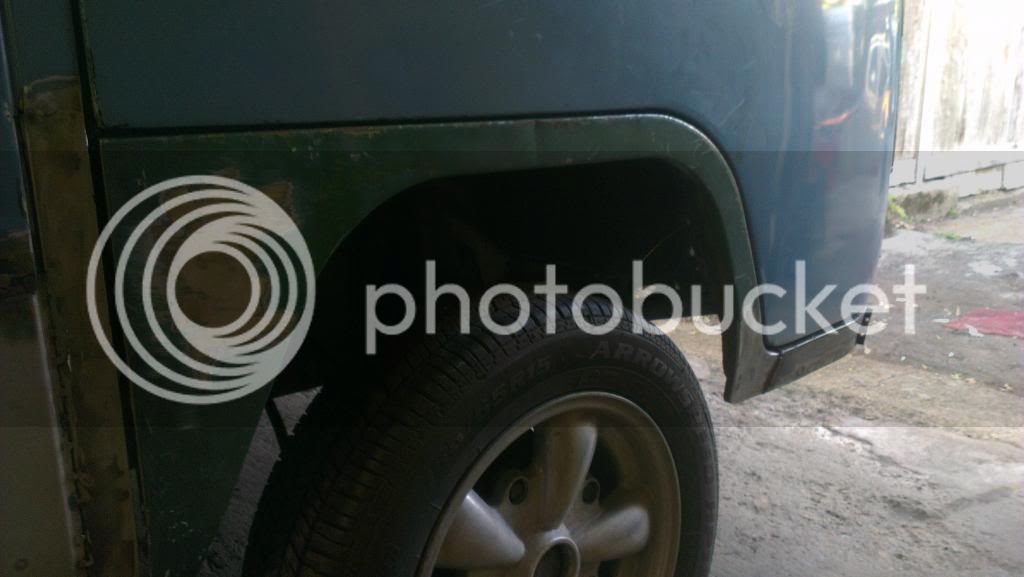
Where I had major issues with the repo arch the seat tub is in pretty crap condition where I was having to keep drilling out welds. The tub was tacked in place and the wheel arch tacked in (I have to run a plate up the inside of the tub/arch to give it some strength) and then the floor positioned and welded in.
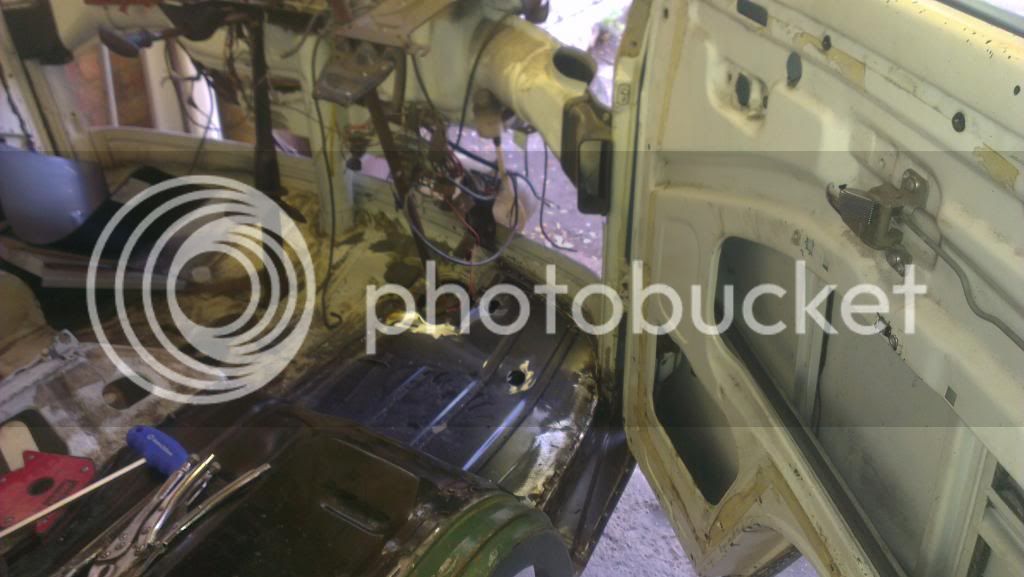
Then it was time to take the front panel off! What I have been waiting for since we found out back in December/January...she has the wrong face!!!
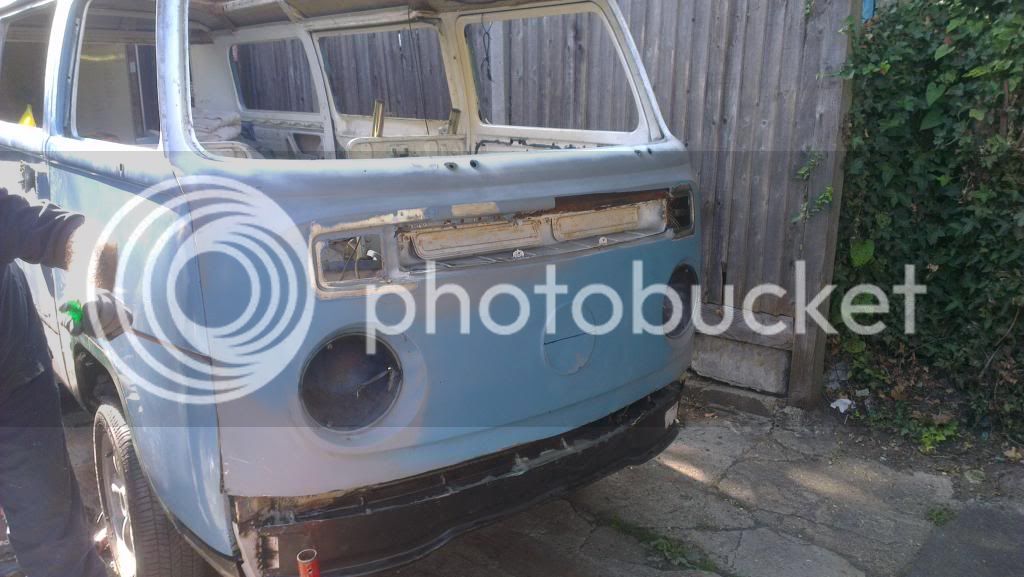
After running the grinder down the side to separate the panel from the return around the A-Post it pretty much fell off :shock:
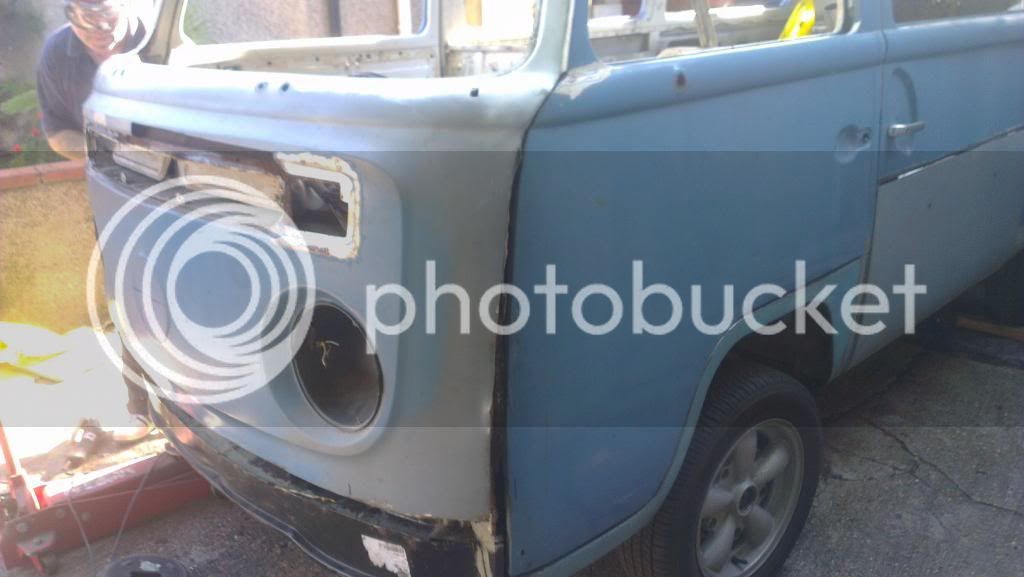
In fact, Ronnie actually lifted it like a car bonnet :shock: :roll:
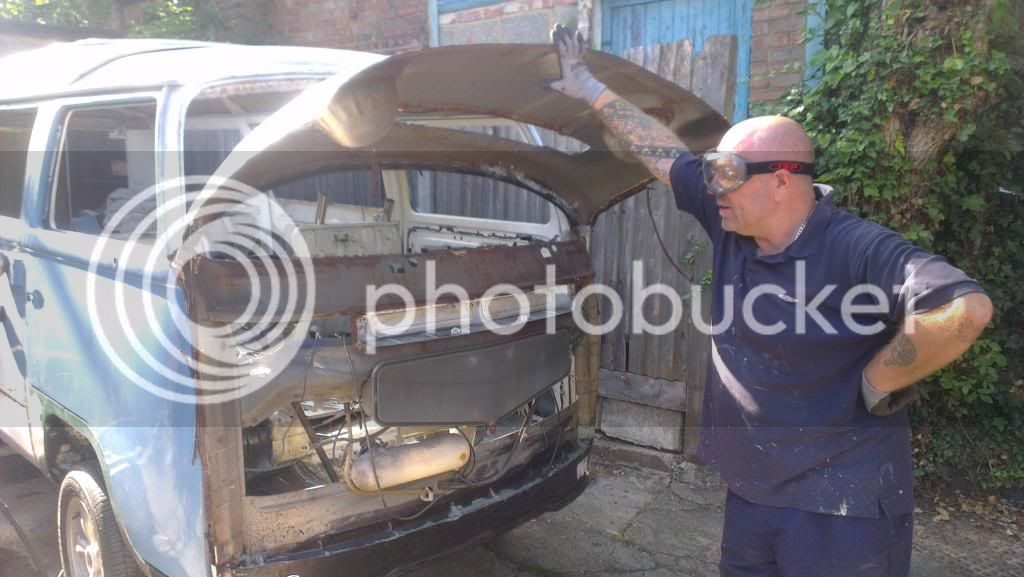
Two little cuts along the A-Post and it was off. Pretty worrying that it wasn't welded anywhere around the air box...
I was a bit gutted here as the inside of the front needs cleaning up so we couldn't do the front panel
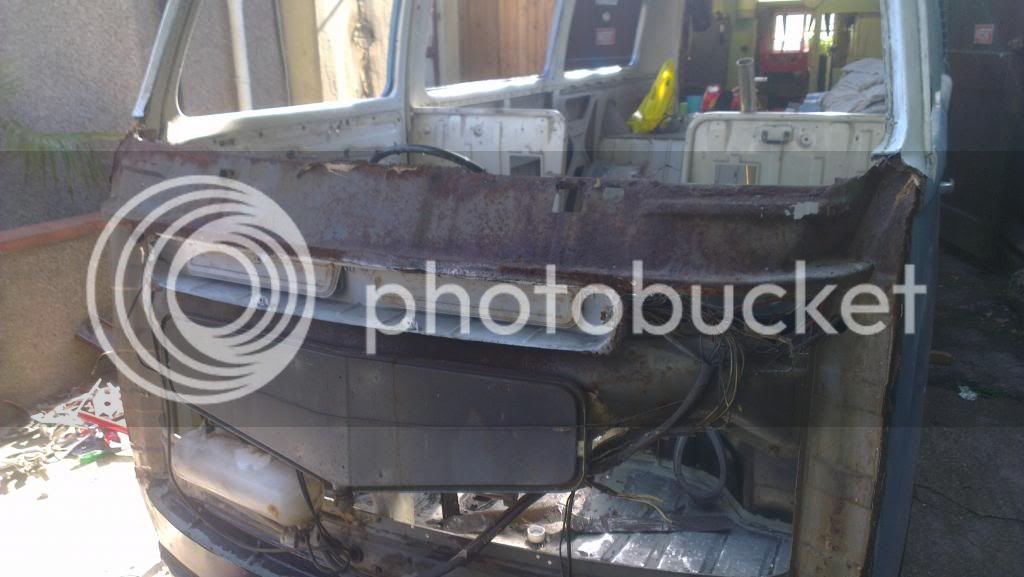
The inner windscreen was cut out and the new bit welded in.
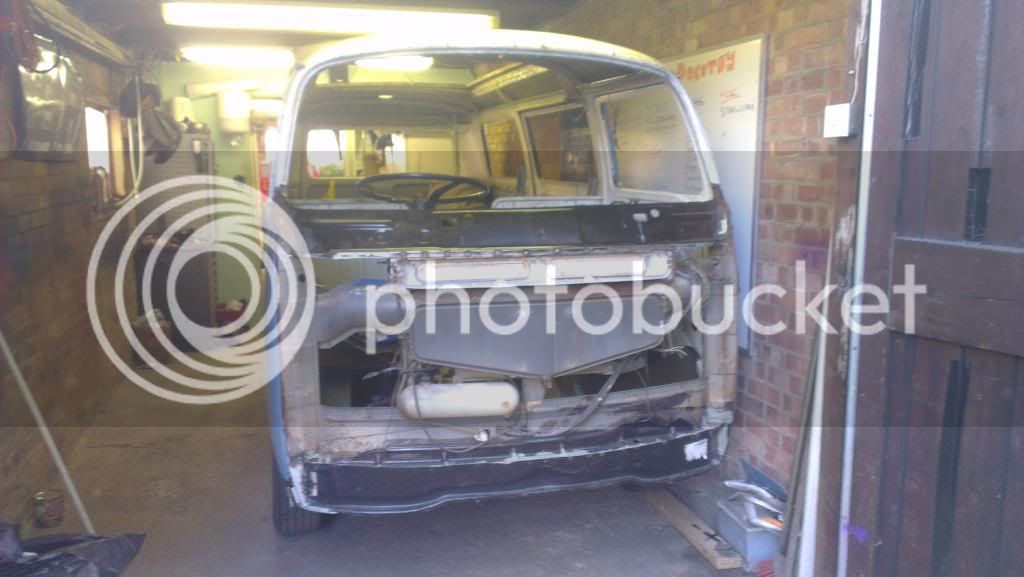
And then we trial fitted the new late panel.
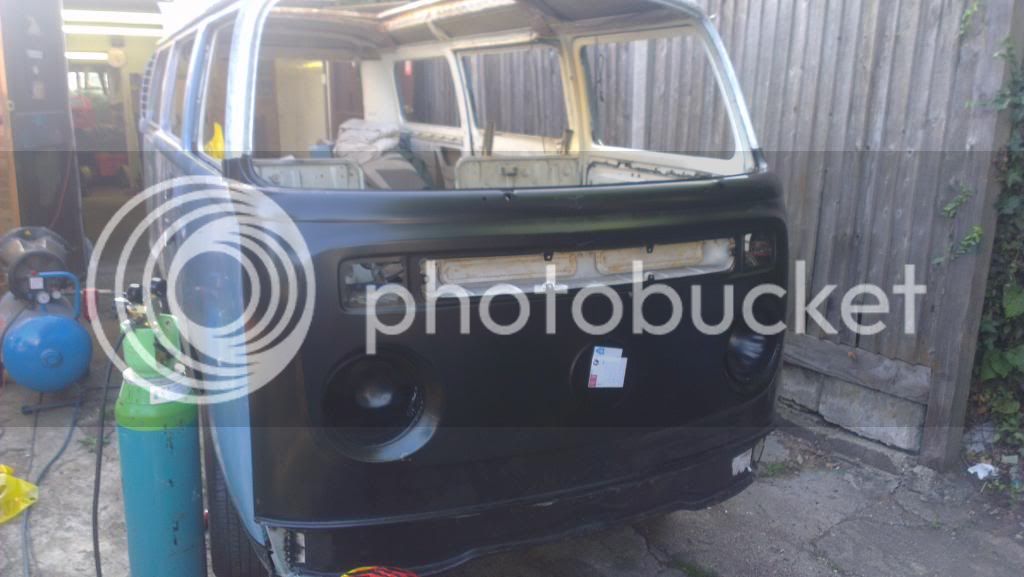
And to my surprise it didn't look like it was far off at all.
So that was all in one day :shock: That would have taken me around a month to do all that :lol: And it was a pleasure watching someone who knows what they are doing. I didn't really do much yesterday accept be an apprentice but I was exhausted last night through concentrating and trying to soak up as much information as I could!!!
So thank you again Ronnie, it is really very much appreciated.
I have a few things to finish off and clean up. The lip on the front panel needs taking off, and I need to clean the rust up that we can see now the front panel is off. But it definitely took a massive step to the finish line yesterday!
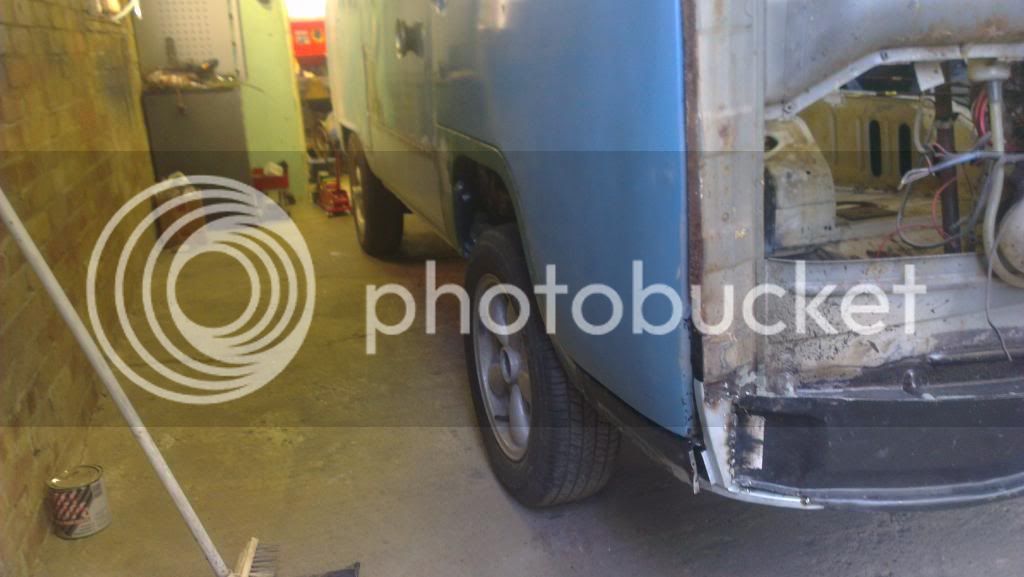
One very happy campervan owner
I didn't anticipate him to be early so was a little ashamed I was still sitting on the sofa watching tele when I got a call saying he was outside
He had already worked out what needed doing when he popped over last week. I had bought a new bottom A-Post repair from Schofields, Klokkenholm inner and outter step repair. So the plan was to give me a hand with the inner windscreen panel and then the front panel as well. When he popped over we established that I had welded on the chassis repair section without lifting the front corner up, which is why I couldn't get the door to close properly. Thinking about it on the other side, I had jacked the front up when I fitted the wheel arch so it all made sense! I am sure I would have lifted it if I was doing it on my own, but on the drivers side I had done it in reverse, the chassis first, then the arch. Where as passenger side was wheel arch first, then the chassis repair. So we went about jacking the front up and getting the door nicely aligned. He cut out the A Post repair I had made many months ago and stuck in the 3 part Schofields bits which to be honest I was pretty impressed with.


Next up was getting something welded in to keep the A-Post at the right height. Because I had already welded in the chassis leg (and done a lot of weld), there was the option to undo it all and reset it or using the inner strengthener bit of the A-Post to fold that round and weld that to the chassis section. Then with the arch in and the floor in it should bring it all together. If it dropped a tad we could just adjust the doors a couple mil.
So on with the inner step repair which wasn't too bad if I remember correctly.

With the outer step section, it was awful. So Ronnie unpicked the two parts, and welded the top in first and then rolled the side part around to get the shape of the curve that is in the door. And all done!

Where I had major issues with the repo arch the seat tub is in pretty crap condition where I was having to keep drilling out welds. The tub was tacked in place and the wheel arch tacked in (I have to run a plate up the inside of the tub/arch to give it some strength) and then the floor positioned and welded in.

Then it was time to take the front panel off! What I have been waiting for since we found out back in December/January...she has the wrong face!!!

After running the grinder down the side to separate the panel from the return around the A-Post it pretty much fell off :shock:

In fact, Ronnie actually lifted it like a car bonnet :shock: :roll:

Two little cuts along the A-Post and it was off. Pretty worrying that it wasn't welded anywhere around the air box...
I was a bit gutted here as the inside of the front needs cleaning up so we couldn't do the front panel

The inner windscreen was cut out and the new bit welded in.

And then we trial fitted the new late panel.

And to my surprise it didn't look like it was far off at all.
So that was all in one day :shock: That would have taken me around a month to do all that :lol: And it was a pleasure watching someone who knows what they are doing. I didn't really do much yesterday accept be an apprentice but I was exhausted last night through concentrating and trying to soak up as much information as I could!!!
So thank you again Ronnie, it is really very much appreciated.
I have a few things to finish off and clean up. The lip on the front panel needs taking off, and I need to clean the rust up that we can see now the front panel is off. But it definitely took a massive step to the finish line yesterday!

One very happy campervan owner
A
Anonymous
Guest
yes it was a shame we did not have the time to put the front panel on but my wife thought I had been sold into the Russian sex trade and didn't want to pay the ransom to get me back :lol: mark we got a lot done and I think it went well see how the week goes mite be back sat :mrgreen: :mrgreen: :mrgreen:
A
Anonymous
Guest
another productive saturday its no longer a late bay :shock: 8) 8) 8) 8) 8) 8) 8) 8) 8) 8) 8) 8) 8) 8) 8) 8) 8) 8) 8) 8) 8) 8) 8) 8) 8)
- Joined
- Nov 28, 2012
- Messages
- 926
- Reaction score
- 52
- Location
- Herne Bay, Kent
- Year of Your Van(s)
- 1970
- Van Type
- Devon
Another AWESOME Saturday. Again Ronnie, thank you so much for the help!!!
Due to work, I didn't manage to get as much time on the bus the last couple weeks. I had to plate a few strips under the drivers wheel arch as it was a bit weak where it sat against the bulkhead and along the seat tub (this was mullered by me when I was trying to fit the Klokkenholm arch). I finished the welding that Ronnie had started and cleaned it all up.
Then Saturday we went to Busfest. Only got one pic And it isn't a very good one :lol:
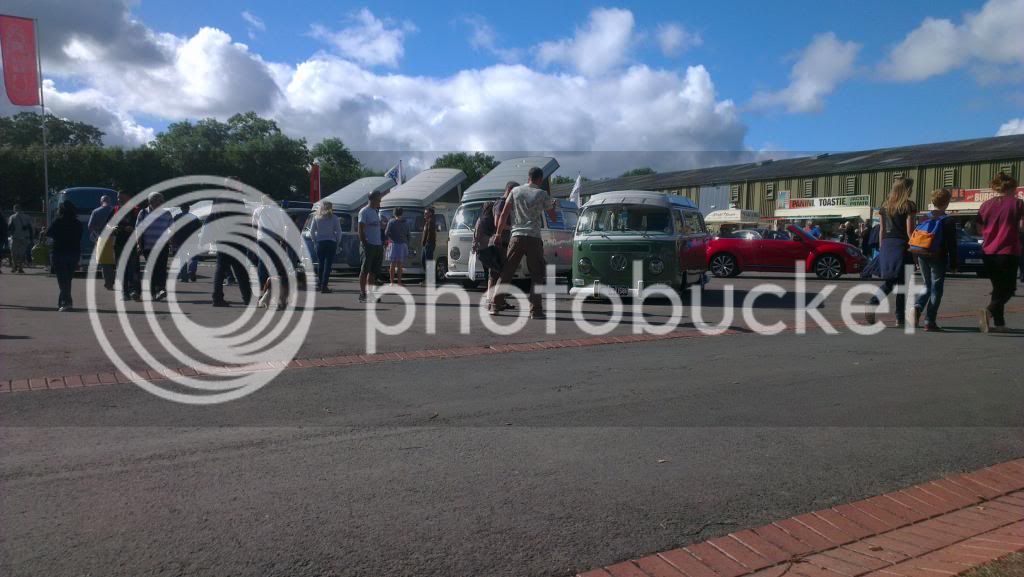
Picked up a few bits as well, which we all love doing!!
Oh I did get another pic...
About 3 hours after the sun of Busfest
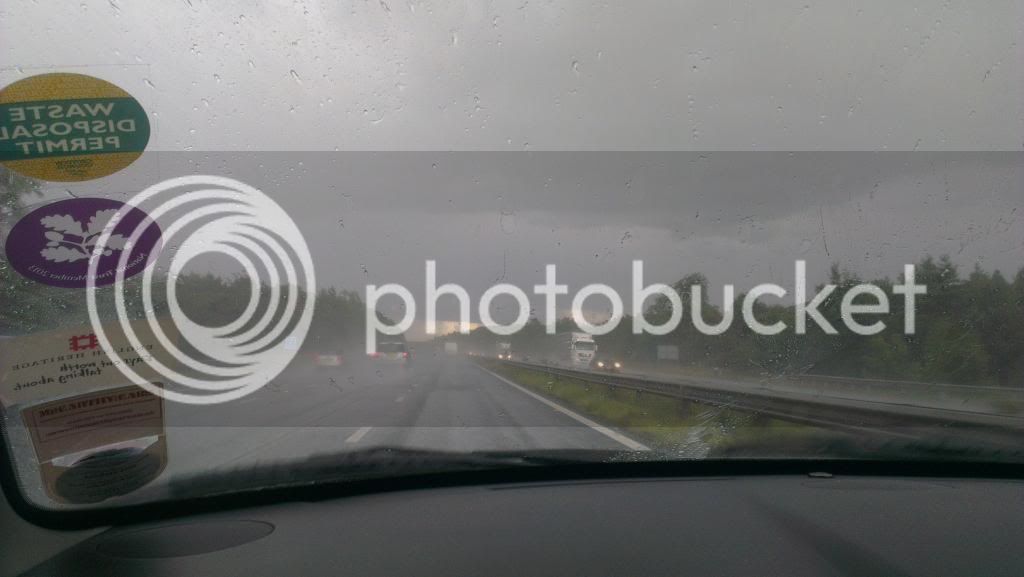
Absolutely hammered down for a good hour on the motorway.
The Sunday I painted the front bits.
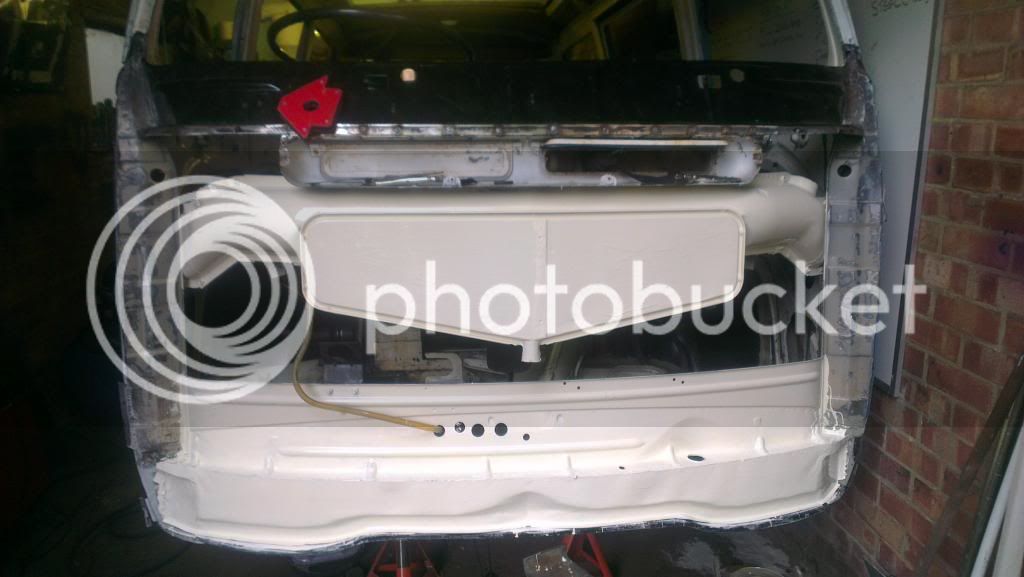
I reaallllly enjoyed the quiet and cleanliness of painting. I cannot wait until the grinding and welding is finished!!!
I was experimenting with colours here. Something that won't be seen again (hopefully), so I wasn't fussed about the colour being not what I wanted. Although I must admit, I do like it. And it was just nice to see something looking clean/finished/new!
As a side note here, I have bought some bits off The Rust Shop (advertise on the forum), and whilst it is an operation to apply everything, I am really impressed with the cleaner and also the rust blast/etch part of the process. It ate through the rust on the A-Pillars and it just washed off. Annoyed I didn't get any pictures, but at the time it made such short work of the rust that I think you could actually use it underneath and bring it up to almost bare metal. All you do is keep the area wet with the product for 1-2 hours and then wash it off! It also has the added bonus of leaving a zinc residue that gives you up to 30 days before painting. The only pain is that you can't let it dry out, and you get water everywhere. But I recommend looking in to their products. Also, a very helpful couple run the business. I'll get some proper pictures the next time I use it.
So Saturday started with me being up and on time (unlike the last :lol: ), all ready and waiting. I'd been checking the weather all week and it had been saying Drizzle, although another place said no rain. Anyways, it rained...from about 9am until I don't know when! I popped up to Halfords to get a gazebo but they'd taken them off the shelf...annoying as most of the summer they were something silly like 40% off...Got one from Argos in the end.
So here is my makeshift base to keep us dry and stop Ronnie from getting electrocuted. After all, he'd not done any work yet so it was important I kept him healthy..
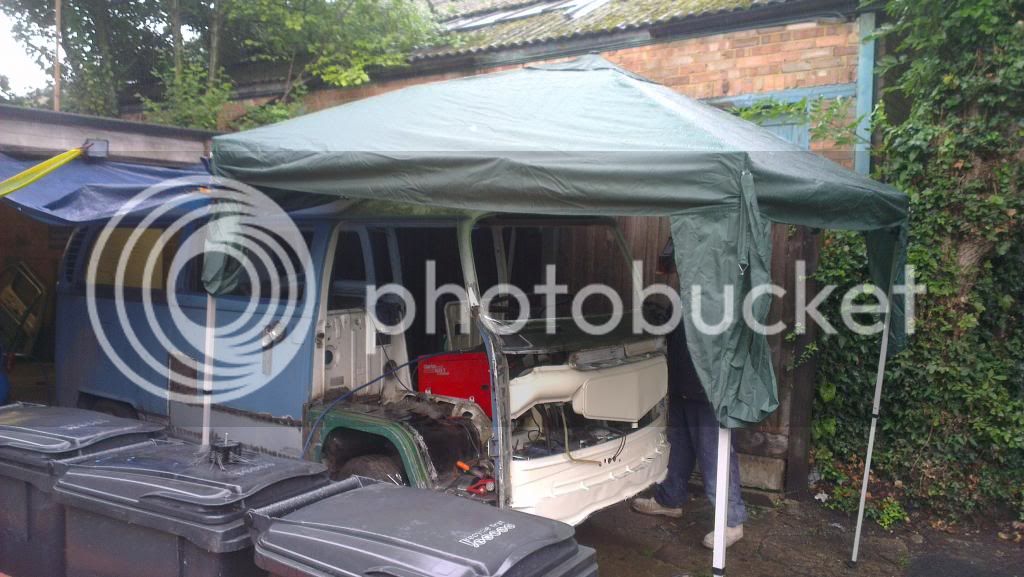
Ronnie set about working on fixing up the A-Pillar flaps (that the panel wraps around), and also plating up above the belt line where rot had got. We then turned our attention to making the panel fit. Surprisingly I didn't think it was that bad a fit, the only bit of work we had to do was cut off the lip for the late bay lower valence? So after checking twice on the fit we set about cleaning everything up ready to set it in it's final place. I'd bought some 3M metal bonding stuff which is f**king expensive, but apparently brilliant. We had a right laugh getting it out the tube as I refused to pay the £190 for the gun... In the end Ronnie came up with a great idea and all was good, so we stuck it all down the A-Pillar lip and along the inside where the front panel met the inner windscreen section and put it on.
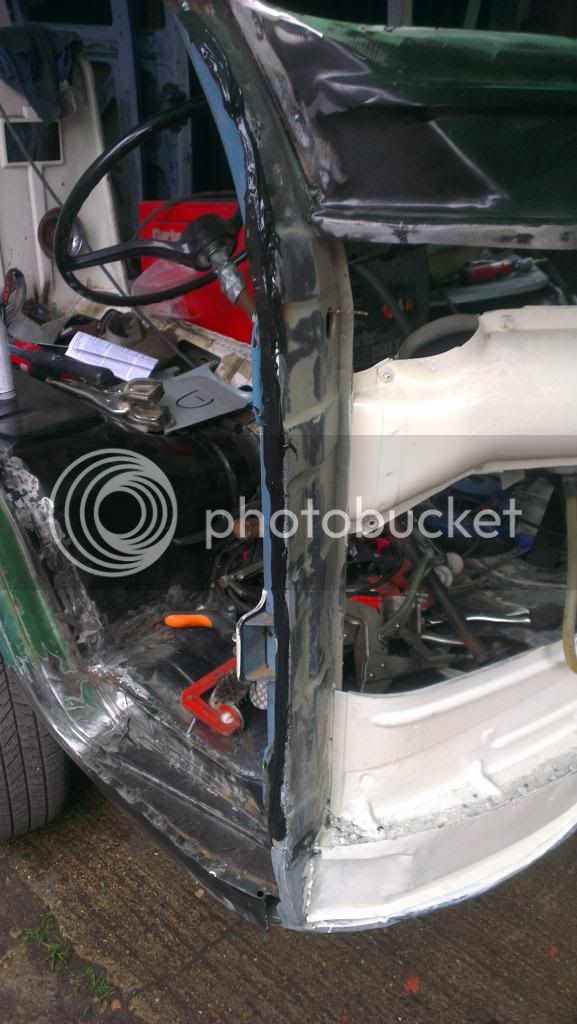
Ronnie bent round the lip along the A-Pillar and welded the top lip with the windscreen. Next up were the indicator block offs. Now..bare in mind here that when we bought her on 25th November last year, we didn't know the difference between an Early Bay and a Late Bay. All due respect to the Late Bay guys I am sooooooo bloody glad we got it right and got an Early Bay 8) Since we signed up to this site it has been the one thing that the girlfriend and I had wanted most...the low lights. So to see the blanking plates was fricking awesome...
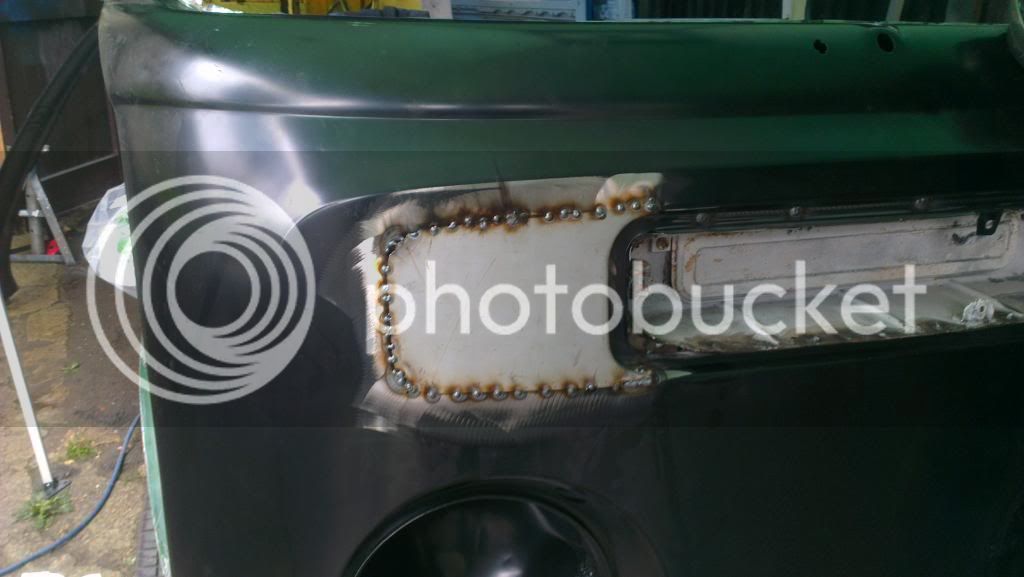
We opted for Just Kampers ones I think. Or Heritage, actually they could quite easily be C&C :lol: I know for sure they aren't Schofields Any way, Ronnie did a great job getting them to fit and also the line around the grill he managed to get is awesome.
This is her 50% of the way to an Early Bay


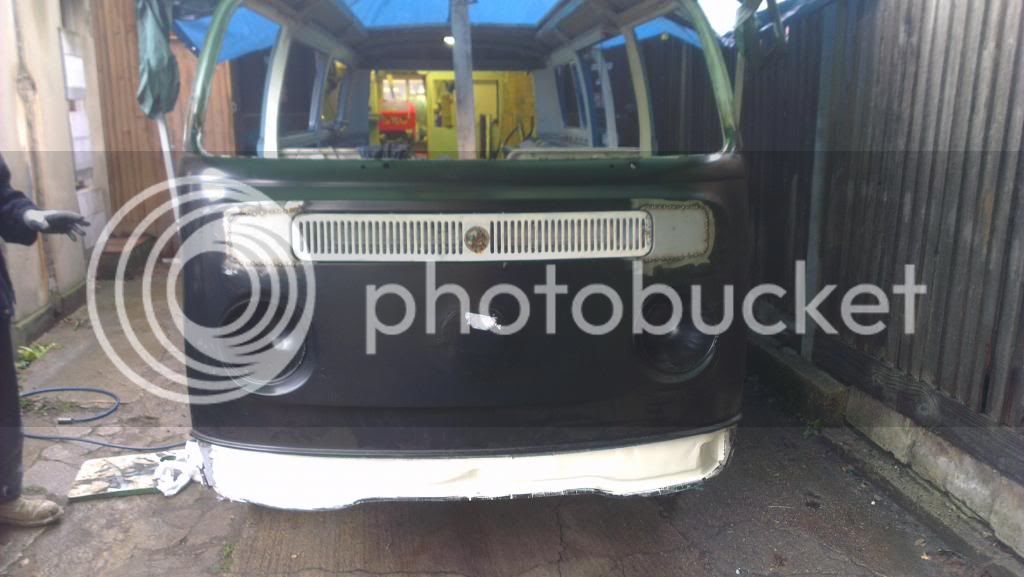
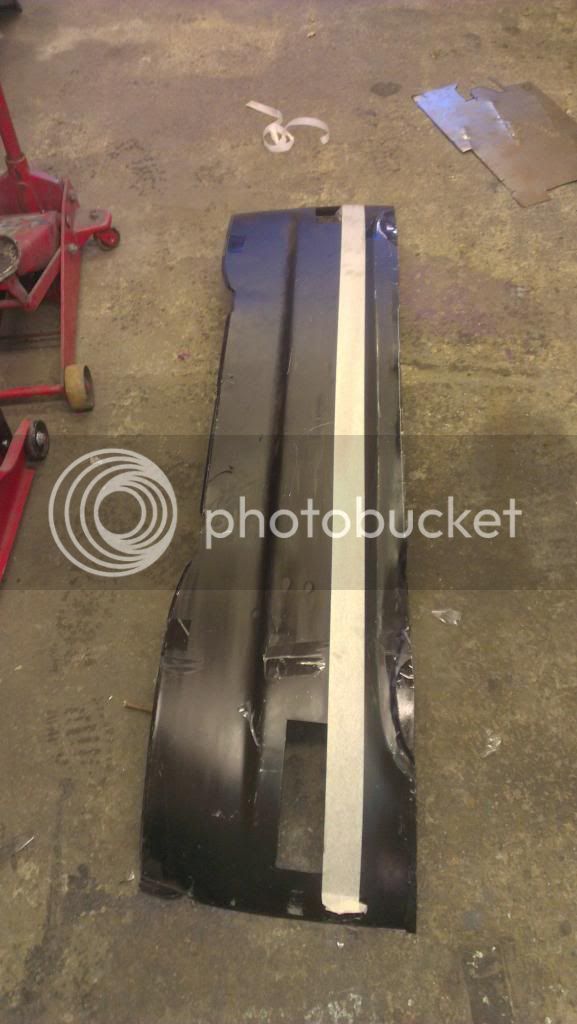
No for the other 50%. The bit to the right of the tape is all we lopped off the lower panel
She has a windscreen!!!!!
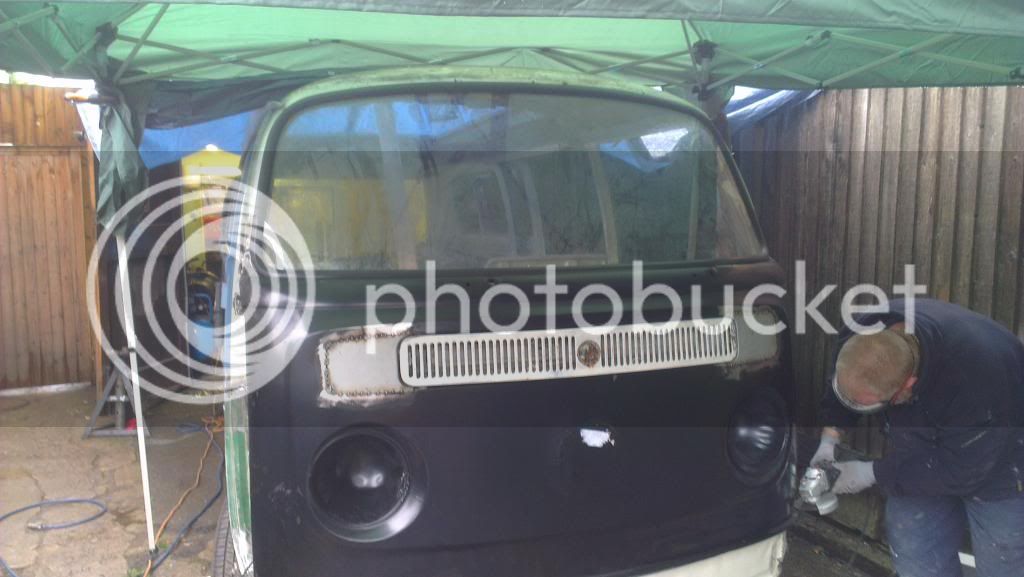
This took us a little while (probably down to me not having done this before), I think it was on the 3rd attempt it popped in. Like a glove it fitted!! This is probably the part that made me not want to attempt this my self. Of course if Ronnie hadn't saved the day then I would have to have done it my self, as it is just too expensive to have it done at a garage.
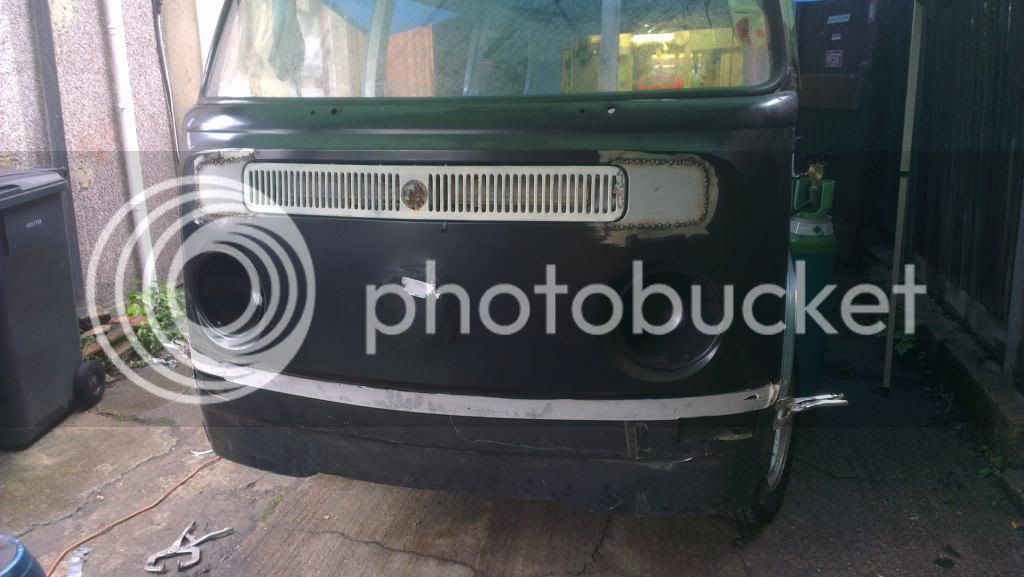
The first signs of an Early Bay!!
Done!!!!!!!!!!
 8) 8)
8) 8)
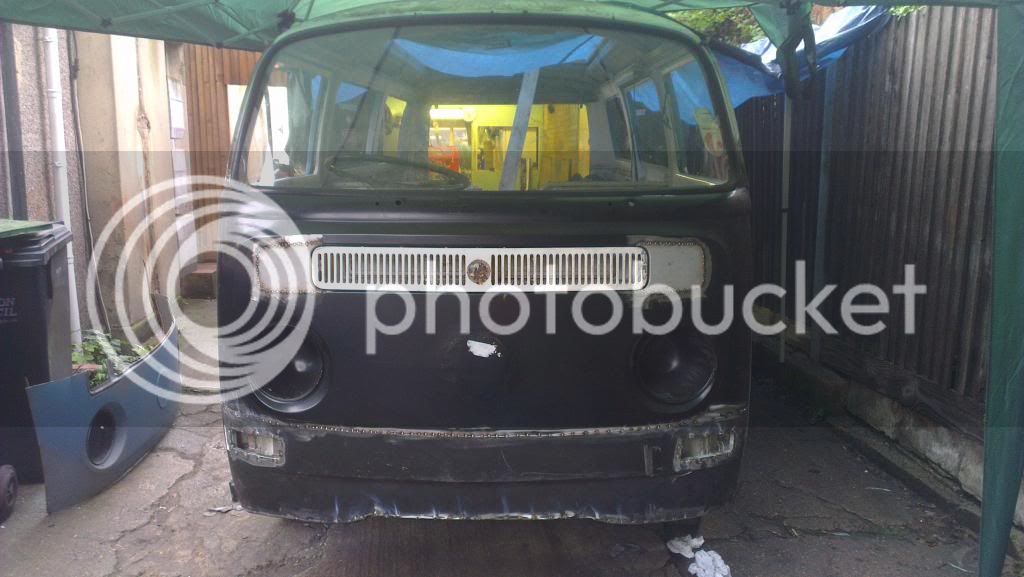
Finally guys, we have an Early Bay!!! To say I was as happy as a pig in **** is an understatement. Over the bloody moon with the result. A real massive thank you to Ronnie for giving up two of his Saturdays to help someone he had never met before!!
So today, I will clean up the welds and move on to the next bit
Due to work, I didn't manage to get as much time on the bus the last couple weeks. I had to plate a few strips under the drivers wheel arch as it was a bit weak where it sat against the bulkhead and along the seat tub (this was mullered by me when I was trying to fit the Klokkenholm arch). I finished the welding that Ronnie had started and cleaned it all up.
Then Saturday we went to Busfest. Only got one pic

Picked up a few bits as well, which we all love doing!!
Oh I did get another pic...
About 3 hours after the sun of Busfest

Absolutely hammered down for a good hour on the motorway.
The Sunday I painted the front bits.

I reaallllly enjoyed the quiet and cleanliness of painting. I cannot wait until the grinding and welding is finished!!!
I was experimenting with colours here. Something that won't be seen again (hopefully), so I wasn't fussed about the colour being not what I wanted. Although I must admit, I do like it. And it was just nice to see something looking clean/finished/new!
As a side note here, I have bought some bits off The Rust Shop (advertise on the forum), and whilst it is an operation to apply everything, I am really impressed with the cleaner and also the rust blast/etch part of the process. It ate through the rust on the A-Pillars and it just washed off. Annoyed I didn't get any pictures, but at the time it made such short work of the rust that I think you could actually use it underneath and bring it up to almost bare metal. All you do is keep the area wet with the product for 1-2 hours and then wash it off! It also has the added bonus of leaving a zinc residue that gives you up to 30 days before painting. The only pain is that you can't let it dry out, and you get water everywhere. But I recommend looking in to their products. Also, a very helpful couple run the business. I'll get some proper pictures the next time I use it.
So Saturday started with me being up and on time (unlike the last :lol: ), all ready and waiting. I'd been checking the weather all week and it had been saying Drizzle, although another place said no rain. Anyways, it rained...from about 9am until I don't know when! I popped up to Halfords to get a gazebo but they'd taken them off the shelf...annoying as most of the summer they were something silly like 40% off...Got one from Argos in the end.
So here is my makeshift base to keep us dry and stop Ronnie from getting electrocuted. After all, he'd not done any work yet so it was important I kept him healthy..

Ronnie set about working on fixing up the A-Pillar flaps (that the panel wraps around), and also plating up above the belt line where rot had got. We then turned our attention to making the panel fit. Surprisingly I didn't think it was that bad a fit, the only bit of work we had to do was cut off the lip for the late bay lower valence? So after checking twice on the fit we set about cleaning everything up ready to set it in it's final place. I'd bought some 3M metal bonding stuff which is f**king expensive, but apparently brilliant. We had a right laugh getting it out the tube as I refused to pay the £190 for the gun... In the end Ronnie came up with a great idea and all was good, so we stuck it all down the A-Pillar lip and along the inside where the front panel met the inner windscreen section and put it on.

Ronnie bent round the lip along the A-Pillar and welded the top lip with the windscreen. Next up were the indicator block offs. Now..bare in mind here that when we bought her on 25th November last year, we didn't know the difference between an Early Bay and a Late Bay. All due respect to the Late Bay guys I am sooooooo bloody glad we got it right and got an Early Bay 8) Since we signed up to this site it has been the one thing that the girlfriend and I had wanted most...the low lights. So to see the blanking plates was fricking awesome...

We opted for Just Kampers ones I think. Or Heritage, actually they could quite easily be C&C :lol: I know for sure they aren't Schofields
This is her 50% of the way to an Early Bay

No for the other 50%. The bit to the right of the tape is all we lopped off the lower panel

She has a windscreen!!!!!

This took us a little while (probably down to me not having done this before), I think it was on the 3rd attempt it popped in. Like a glove it fitted!! This is probably the part that made me not want to attempt this my self. Of course if Ronnie hadn't saved the day then I would have to have done it my self, as it is just too expensive to have it done at a garage.
The first signs of an Early Bay!!

Done!!!!!!!!!!

Finally guys, we have an Early Bay!!! To say I was as happy as a pig in **** is an understatement. Over the bloody moon with the result. A real massive thank you to Ronnie for giving up two of his Saturdays to help someone he had never met before!!
So today, I will clean up the welds and move on to the next bit
Lee C
Well-known member
:bliss: :bliss:  arty0003:
  arty0009:
Fantastic bit progress !!!!
Excellent to see people helping each other out!!!! :mrgreen:
Fantastic bit progress !!!!
Excellent to see people helping each other out!!!! :mrgreen:
A
Anonymous
Guest
that looks very nice now maybe ill do my bay next :lol:Whistler said:Another AWESOME Saturday. Again Ronnie, thank you so much for the help!!!
Due to work, I didn't manage to get as much time on the bus the last couple weeks. I had to plate a few strips under the drivers wheel arch as it was a bit weak where it sat against the bulkhead and along the seat tub (this was mullered by me when I was trying to fit the Klokkenholm arch). I finished the welding that Ronnie had started and cleaned it all up.
Then Saturday we went to Busfest. Only got one picAnd it isn't a very good one :lol:

Picked up a few bits as well, which we all love doing!!
Oh I did get another pic...
About 3 hours after the sun of Busfest

Absolutely hammered down for a good hour on the motorway.
The Sunday I painted the front bits.

I reaallllly enjoyed the quiet and cleanliness of painting. I cannot wait until the grinding and welding is finished!!!
I was experimenting with colours here. Something that won't be seen again (hopefully), so I wasn't fussed about the colour being not what I wanted. Although I must admit, I do like it. And it was just nice to see something looking clean/finished/new!
As a side note here, I have bought some bits off The Rust Shop (advertise on the forum), and whilst it is an operation to apply everything, I am really impressed with the cleaner and also the rust blast/etch part of the process. It ate through the rust on the A-Pillars and it just washed off. Annoyed I didn't get any pictures, but at the time it made such short work of the rust that I think you could actually use it underneath and bring it up to almost bare metal. All you do is keep the area wet with the product for 1-2 hours and then wash it off! It also has the added bonus of leaving a zinc residue that gives you up to 30 days before painting. The only pain is that you can't let it dry out, and you get water everywhere. But I recommend looking in to their products. Also, a very helpful couple run the business. I'll get some proper pictures the next time I use it.
So Saturday started with me being up and on time (unlike the last :lol: ), all ready and waiting. I'd been checking the weather all week and it had been saying Drizzle, although another place said no rain. Anyways, it rained...from about 9am until I don't know when! I popped up to Halfords to get a gazebo but they'd taken them off the shelf...annoying as most of the summer they were something silly like 40% off...Got one from Argos in the end.
So here is my makeshift base to keep us dry and stop Ronnie from getting electrocuted. After all, he'd not done any work yet so it was important I kept him healthy..

Ronnie set about working on fixing up the A-Pillar flaps (that the panel wraps around), and also plating up above the belt line where rot had got. We then turned our attention to making the panel fit. Surprisingly I didn't think it was that bad a fit, the only bit of work we had to do was cut off the lip for the late bay lower valence? So after checking twice on the fit we set about cleaning everything up ready to set it in it's final place. I'd bought some 3M metal bonding stuff which is f**king expensive, but apparently brilliant. We had a right laugh getting it out the tube as I refused to pay the £190 for the gun... In the end Ronnie came up with a great idea and all was good, so we stuck it all down the A-Pillar lip and along the inside where the front panel met the inner windscreen section and put it on.

Ronnie bent round the lip along the A-Pillar and welded the top lip with the windscreen. Next up were the indicator block offs. Now..bare in mind here that when we bought her on 25th November last year, we didn't know the difference between an Early Bay and a Late Bay. All due respect to the Late Bay guys I am sooooooo bloody glad we got it right and got an Early Bay 8) Since we signed up to this site it has been the one thing that the girlfriend and I had wanted most...the low lights. So to see the blanking plates was fricking awesome...

We opted for Just Kampers ones I think. Or Heritage, actually they could quite easily be C&C :lol: I know for sure they aren't SchofieldsAny way, Ronnie did a great job getting them to fit and also the line around the grill he managed to get is awesome.
This is her 50% of the way to an Early Bay


No for the other 50%. The bit to the right of the tape is all we lopped off the lower panel

She has a windscreen!!!!!

This took us a little while (probably down to me not having done this before), I think it was on the 3rd attempt it popped in. Like a glove it fitted!! This is probably the part that made me not want to attempt this my self. Of course if Ronnie hadn't saved the day then I would have to have done it my self, as it is just too expensive to have it done at a garage.
The first signs of an Early Bay!!

Done!!!!!!!!!!
8) 8)

Finally guys, we have an Early Bay!!! To say I was as happy as a pig in **** is an understatement. Over the bloody moon with the result. A real massive thank you to Ronnie for giving up two of his Saturdays to help someone he had never met before!!
So today, I will clean up the welds and move on to the next bit
Similar threads
Vehicle For Sale
'72 "Betty Blue", RHD Modernised Devon Moonraker Campervan
- Replies
- 0
- Views
- 270
Vehicle For Sale
1971 westy weekender
- Replies
- 0
- Views
- 288


