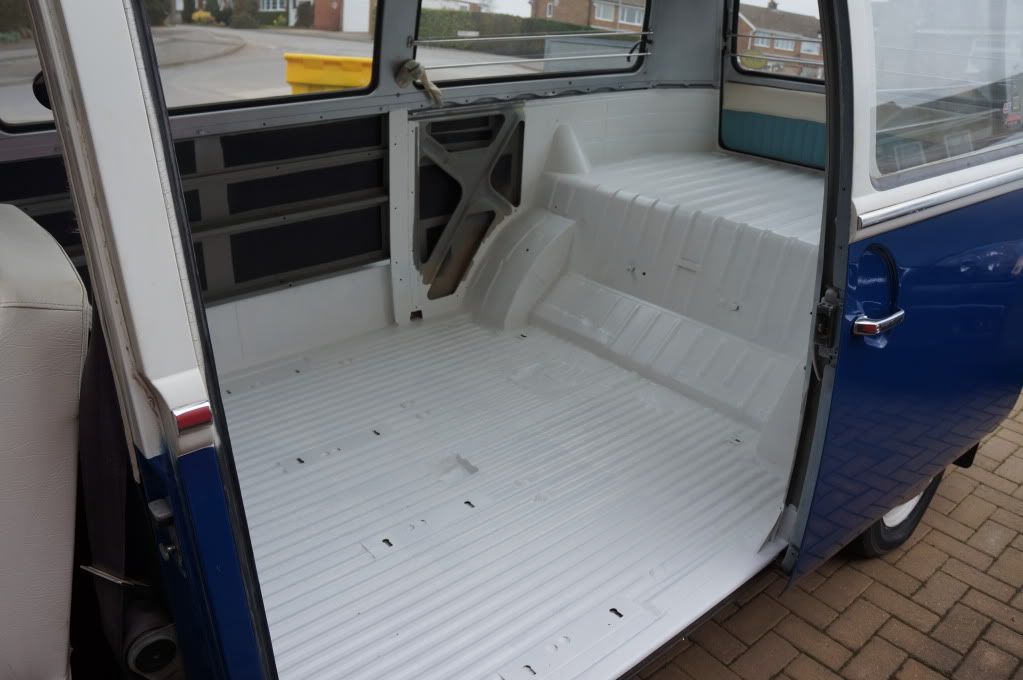
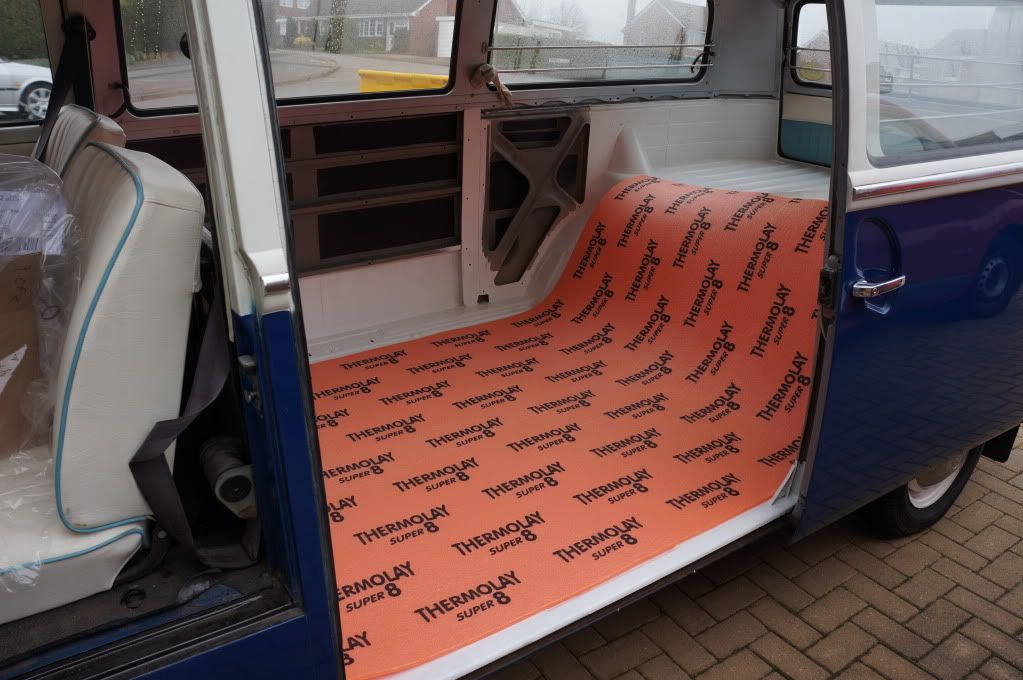
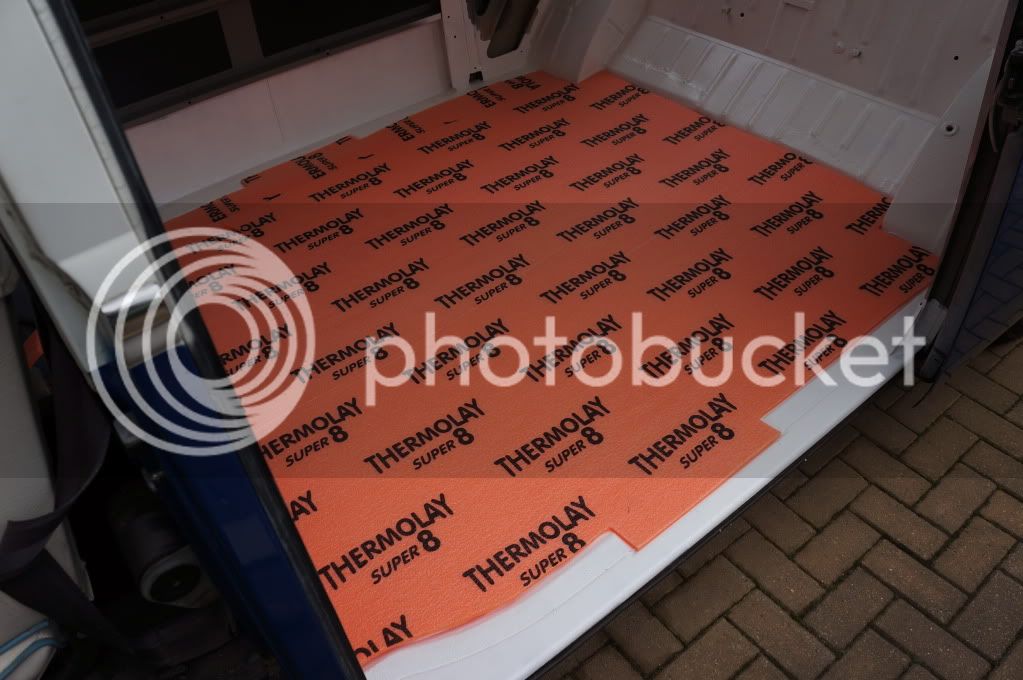
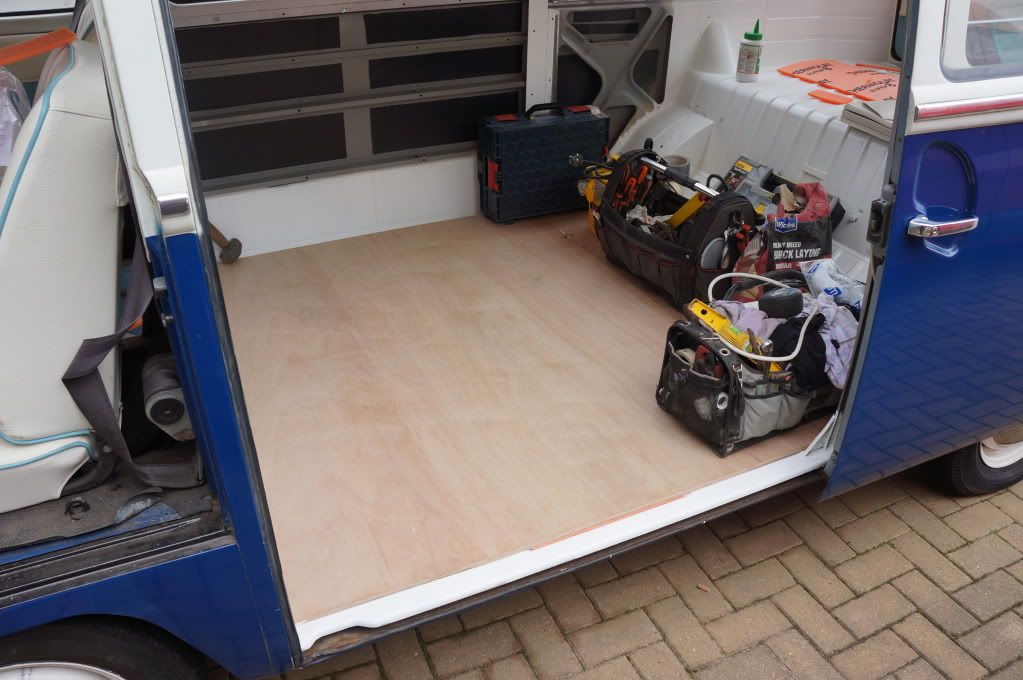
What have you lined your cargo floor with?

Early Bay Forum

Help Support Early Bay Forum:

This site may earn a commission from merchant affiliate links, including eBay, Amazon, and others.

Mags

Well-known member
Supporting Member
Joined
May 22, 2009
Messages
519
Reaction score
2
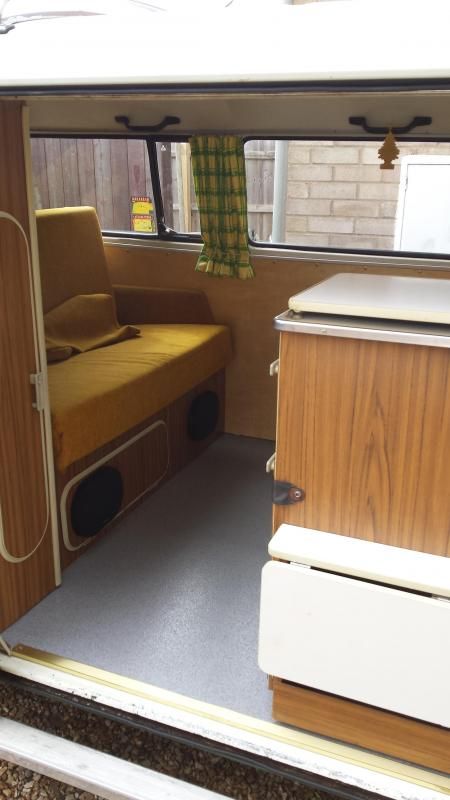
When I stripped out my Danbury covering the metal cargo floor it had about 8mm hardboard all over that was then just covered with vinyl.
Is there a better way of covering the floor and insulating it at the same time without hugely increasing the depth of the covering?
The hardboard was screwed through the metal floor so again, is there a better method? Interested to see what others have done.

Thanks, Mags.
 
Roof flashing then Velcro board to that then a cushion on top

Jth

That's what I did anyway works great and no holes. Cheap too. , cheaper than dyno matt anyhow
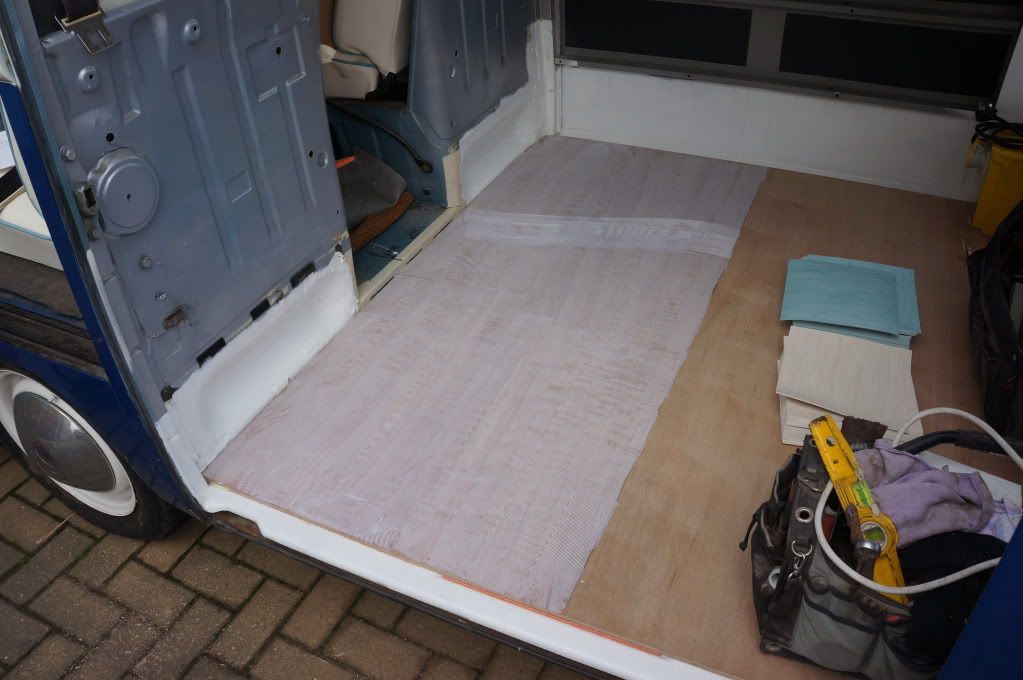
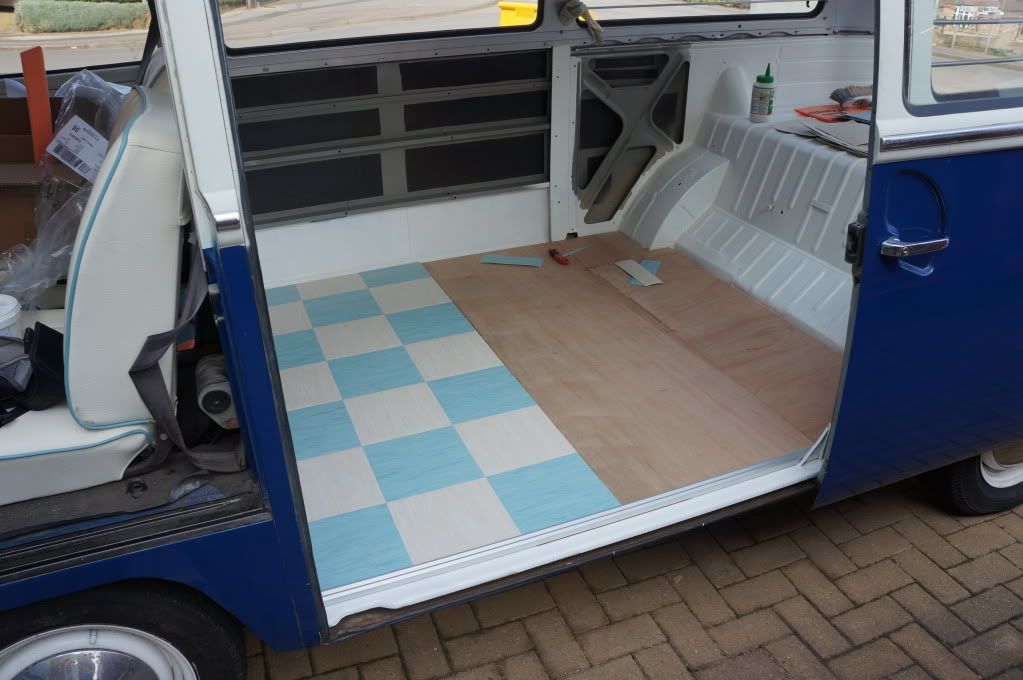
 
There's no need to screw the boards to the metal floor. The boards should just sit on the cargo floor. In my Westy the furniture holds it down as well as its own weight if that makes sense.

I just cleaned my metal floor up, and painted it with Hammerite, then put the boards back as they weren't too bad.

Some people put insulation on the floor under the boards, I didn't think it was worth it. Maybe a bit of noise insulation wouldn't do any harm but remember theres no need to cover the whole floor! :)
 
I used some 3mm high density closed cell foam with adhesive backing and covered the whole rear floor. this was then covered with marine ply wood by Upholsterers before laying vinyl.

Out of interest, are you putting the Danbury interior back in or are you changing?
 
Thanks all. Never thought about not needing to fix it down, but it makes sense its not needed with the furniture. The only problem is the front 2 Danbury seats have runners they slide on do which do need fixing down, probably only 4 or 6 screws each though.
Yes, the Danbury interior is going back in.
 
john the horse said:
Roof flashing then Velcro board to that then a cushion on top

Jth

That's what I did anyway works great and no holes. Cheap too. , cheaper than dyno matt anyhow


Might be a stupid question, but what does the roof flashing do?
 
Pearl69 said:
john the horse said:
Roof flashing then Velcro board to that then a cushion on top

Jth

That's what I did anyway works great and no holes. Cheap too. , cheaper than dyno matt anyhow


Might be a stupid question, but what does the roof flashing do?

Its sound deadening, cheaper version of Dynomat.
 
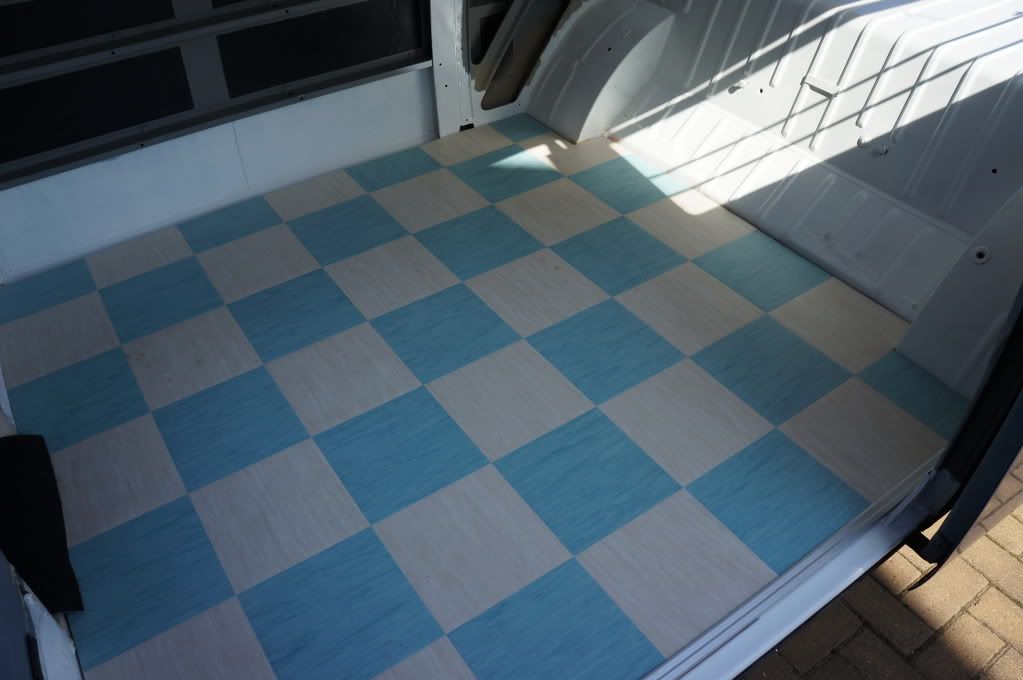
On my cargo floor I have a layer of madmatz double layer insulation to keep noise levels down and act as an insulation layer. I can't rate it highly enough and it's cheap too. On top of that I have 6mm ply then a layer of checkerboard vinyl. I haven't bolted anything to my cargo floor and nothing has shifted yet. It's warm, quiet and comfy.
 
Closed cell insulation, then 9mm ply with 6mm glued onto that to stagger the joints in the wood, then topped off with mad mats, but if I was to do the tiles again I would go karndean it's top notch stuff 8)

march_2044.jpg


shaun2012010.jpg


shaun2012012.jpg


shaun2012013.jpg


shaun2012014.jpg


shaun2012016.jpg


shaun2012018.jpg


april2012008.jpg


:mrgreen:
 
68_early_bay said:
Closed cell insulation, then 9mm ply with 6mm glued onto that to stagger the joints in the wood, then topped off with mad mats, but if I was to do the tiles again I would go karndean it's top notch stuff 8)
:

Nice one, thanks. 15mm of ply + 8mm of insulation seems a hell of a lot though, the 8mm hardboard I had was a single sheet, no joints, I guess you can't get that with ply?
 
Mags said:
68_early_bay said:
Closed cell insulation, then 9mm ply with 6mm glued onto that to stagger the joints in the wood, then topped off with mad mats, but if I was to do the tiles again I would go karndean it's top notch stuff 8)
:

Nice one, thanks. 15mm of ply + 8mm of insulation seems a hell of a lot though, the 8mm hardboard I had was a single sheet, no joints, I guess you can't get that with ply?

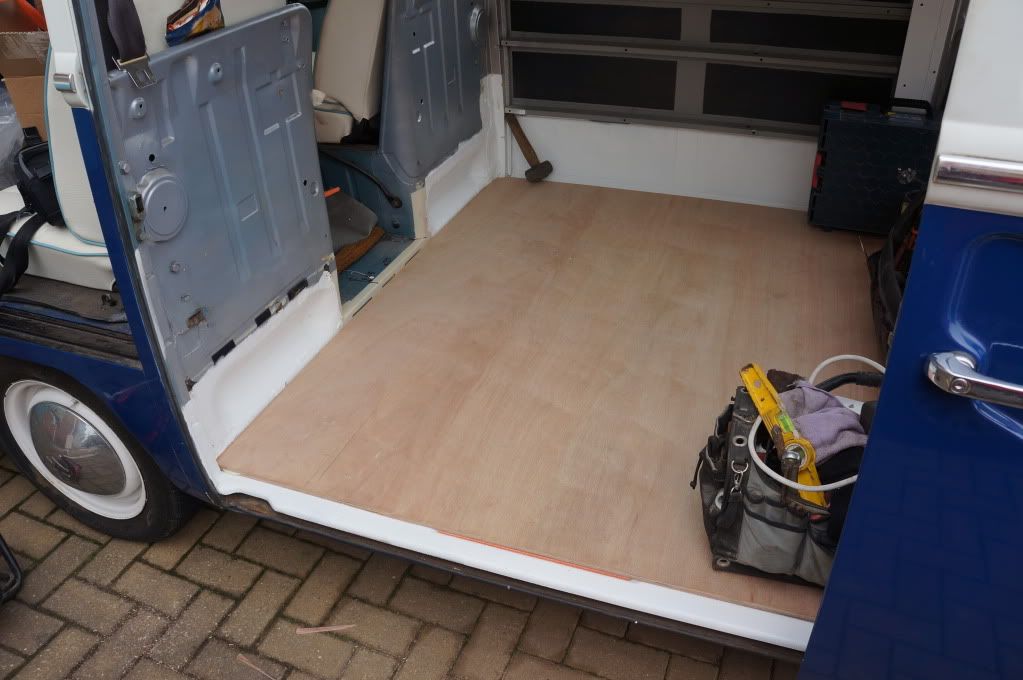
It isn't a lot really, the insulation is cut so it sits in the recess/corrugated part of the floor, then the ply is on top sat on the higher bit of the floor all the way around and the threshold of the sliding door,


You can get ply big enough to do it in one piece, but you have to buy it in 10x5 sheets which hardly anywhere keeps in stock which makes it more expensive :)
 
Similar to some on here, I liberally covered my floor in wax, and then laid a layer of 6mm treated ply to follow the contours of the floor followed by a layer of 9mm ply.

On top of that I laid an industrial vinyl which has metal moulded in which makes it tougher and non slip (made it difficult to cut though :lol: )

 
I'm sorting the floor in my Danbury too so have been following this closely. After sorting floor rust I'm planning on keeping the same set up as before: 8mm hardboard with vinyl over the top. I considered adding extra ply but worry how it would affect the fixings for the rear seat and that it would cover the front warm air vent. I won't be putting all the fixing screws back in, just the ones for the two front seat sliders so I'm pretty sure it's not going anywhere!

Monkey
 
68_early_bay said:
Closed cell insulation, then 9mm ply with 6mm glued onto that to stagger the joints in the wood, then topped off with mad mats, but if I was to do the tiles again I would go karndean it's top notch stuff 8)

march_2044.jpg


shaun2012010.jpg


shaun2012012.jpg


shaun2012013.jpg


shaun2012014.jpg


shaun2012016.jpg


shaun2012018.jpg


april2012008.jpg


:mrgreen:


Ok, so I've stripped the van out and it's new plywood time! Just a few questions! Once the old floor is rustproofed and repainted is this the order of replying?
A - put the closed cell insulation down first on the inner lower section of floor.
B - put a 6mm marine ply sheet directly on top of this on the lower section to bring it level with the outer floor height.
C - now the floor is all level cover in 9 mm marine ply.
D - cover the ply with chosen top finish, aluminium edge strip etc.

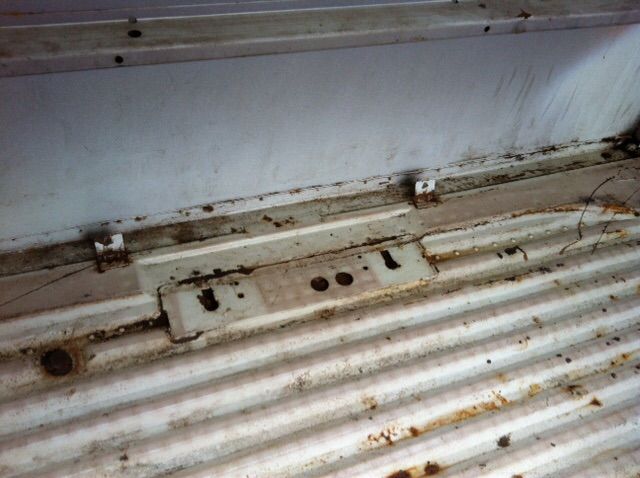
All the floors are floating? And also the opposite sliding door card panel when on sits right down on to the metal floor and fixes through two clips which come up from the floor. So does this mean you put the floor down and but up to the panel or get a shorter panel made and floor to the edge and remove the metal clips at the bottom? Bit confused? Have a look at the pic below. Thanks :D
Oops almost forgot, where sells the super 8?

 
Cab89 said:
68_early_bay said:
Closed cell insulation, then 9mm ply with 6mm glued onto that to stagger the joints in the wood, then topped off with mad mats, but if I was to do the tiles again I would go karndean it's top notch stuff 8)

march_2044.jpg


shaun2012010.jpg


shaun2012012.jpg


shaun2012013.jpg


shaun2012014.jpg


shaun2012016.jpg


shaun2012018.jpg


april2012008.jpg


:mrgreen:


Ok, so I've stripped the van out and it's new plywood time! Just a few questions! Once the old floor is rustproofed and repainted is this the order of replying?
A - put the closed cell insulation down first on the inner lower section of floor.
B - put a 6mm marine ply sheet directly on top of this on the lower section to bring it level with the outer floor height.
C - now the floor is all level cover in 9 mm marine ply.
D - cover the ply with chosen top finish, aluminium edge strip etc.

All the floors are floating? And also the opposite sliding door card panel when on sits right down on to the metal floor and fixes through two clips which come up from the floor. So does this mean you put the floor down and but up to the panel or get a shorter panel made and floor to the edge and remove the metal clips at the bottom? Bit confused? Have a look at the pic below. Thanks :D
Oops almost forgot, where sells the super 8?


The order looks good 8)

Closed cell I got with my tiles from madmatz

http://www.madmatz.co.uk/fitting-accessories.html" onclick="window.open(this.href);return false;

I glued the two layers of wood together with this stuff to create a sandwich

http://www.everbuild.co.uk/adhesives/wood?product_id=71" onclick="window.open(this.href);return false;


I ended up putting a couple of these to support the door card opposite the slider

http://www.ebay.co.uk/itm/20-ZINC-PLATED-METAL-1-5-L-SHAPE-CORNER-BRACE-ANGLE-JOINT-SHELF-BRACKET-SUPPORT-/271459990513?pt=UK_DIY_Material_Nails_Fixing_MJ&hash=item3f3446bbf1" onclick="window.open(this.href);return false;

And it is all floating apart from at the slider I found the floor floated at the door so I put two screws in there before I put my alluminium finishing strip on 8)
 
Excellent, sounds like I'm in the right track then! :)
So you took the floor right to the edge then the trim panel sat on top?
Looks like I may have to grind those bottom clips off!
 
mattyd72 said:
Similar to some on here, I liberally covered my floor in wax, and then laid a layer of 6mm treated ply to follow the contours of the floor followed by a layer of 9mm ply.

On top of that I laid an industrial vinyl which has metal moulded in which makes it tougher and non slip (made it difficult to cut though :lol: )


where did you get the vinyl from?
 

Latest posts

Top