'68 Deluxe

Early Bay Forum

Help Support Early Bay Forum:

This site may earn a commission from merchant affiliate links, including eBay, Amazon, and others.
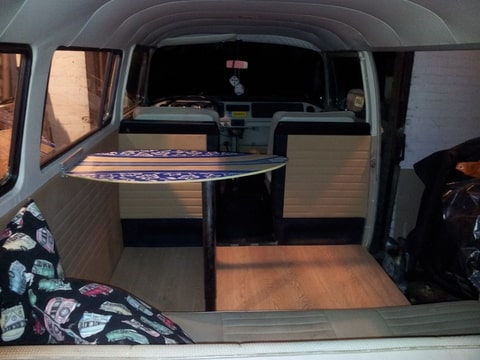
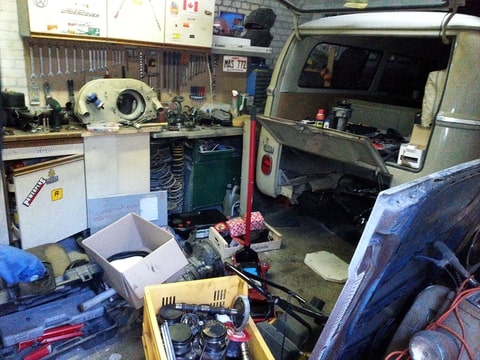
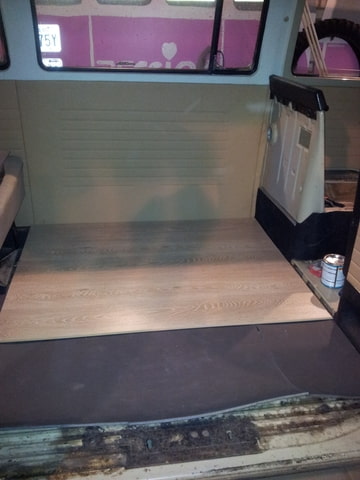
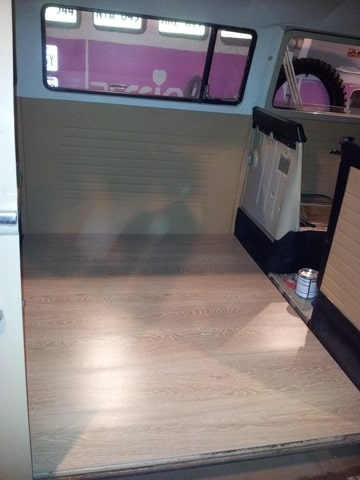
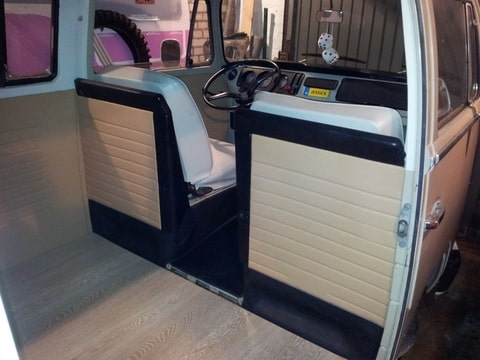
Some topics here gave me the inspiration to put in a nice floor in my bus today.
I had some laminate flooring laying around and some 6mm foam material.

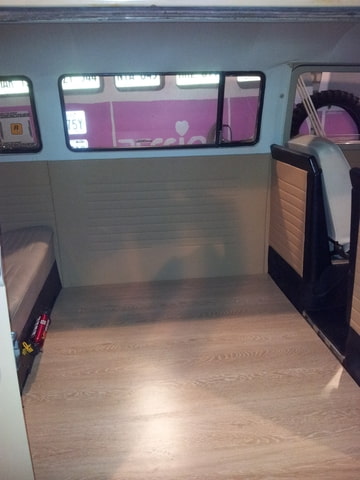
I used the foam as underfloor and put the laminate flooring on top. It only took me about 30 minutes to complete. It was fortunate that the floor slats where exactly long enough so no cutting was required.
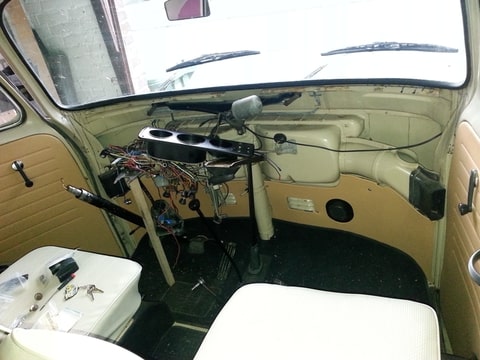
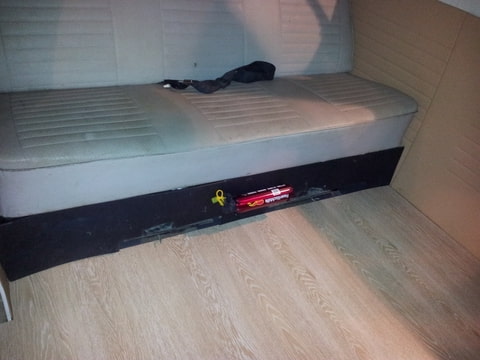
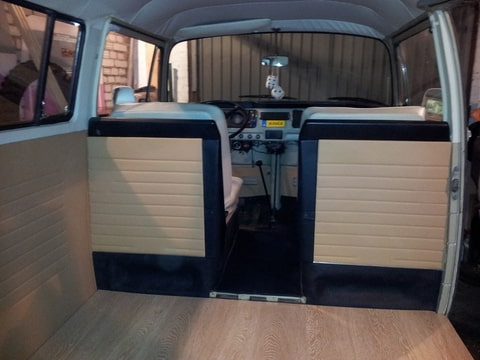
I also put the seat stand mat for the drivers seat in and installed a little fire extinguisher just in case.
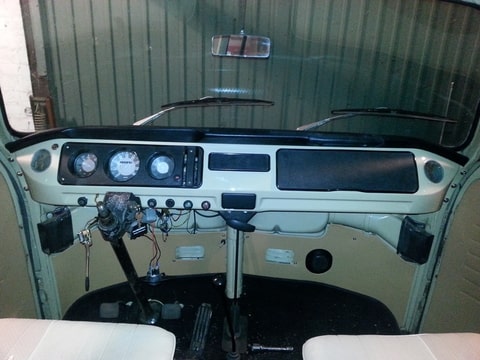
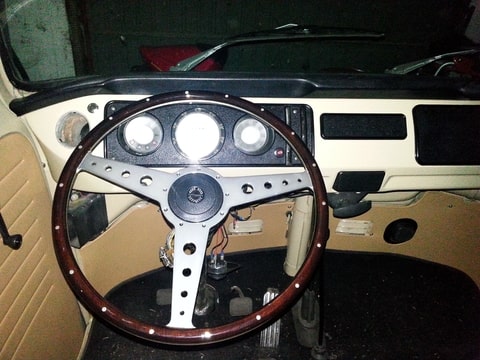
The interior is now almost done. One of the last things to do is paint the dashboard and re-upholster the rear seats.

Foto-NJB6PS6M-D.jpg


Foto-JOQKHKPZ-D.jpg


Foto-CJTOBNMB-D.jpg


Foto-ECTCGOUJ-D.jpg


Foto-GWJCGDTA-D.jpg


Foto-KFMACRYY-D.jpg
 
I have been working on some small stuff last 2 weeks. Nothing really special. Finished the last (rear) corner of the headliner and it is all done now.
Rewired the running lights back to the indicators like it was originally in the US. It is not legal but looks so nice.
Also tried to fit the 4 into 1 header and Bugpack muffler that came originally with the bus. It did fit but not as good as I hoped and it is very loud so decided to go back to the stock exhaust.

Foto-KR3VQICM-D.jpg


Last week I removed the bumpers, beat the dings out of it as much as I could and brought all the bits of for blasting, metal spraying and powcer coating. Should come out nice and clean and will upgrade the bus again a bit.
This is the pile I gathered;

Foto-M3GBOHQU-D.jpg
 
Thanks for the kind words guys.
Today was a sunny day so took the bus out of the garage to wash it. When I was polishing the front I noticed that the deluxe trim was scratched and dull. Decided to take them off one by one and polish them.

Right one is before, left one is after polishing phase 1
Foto-HFZE88YD-D.jpg


Then took it a step further with a finer polish. Difference between phase 1 on the left and phase 2 on the right. The trim came a long way if you cmpare the piece above with the ne below.
Foto-EBBYDD6T-D.jpg


To really make it shine I had to polish of the chromed and scratched top layer. Here you can see the difference.
Foto-NG3K6SNX-D.jpg


Big difference opposed to the other unpolished trim and the mirror.
Foto-6Y66WOHQ-D.jpg


When twilight set in it was time to call it a day and store the beast back in its cave.
Foto-AHE4L6ZB-D.jpg


Now I can't wait till it's friday so I can pick up the powdercoated bumpers.
 
Yeah...the powdercoated parts arrived.
Foto-GNU377UX-D.jpg


Very pleased with how they turned out, except for the rear bumper. It wasn't very straight when I brought it away and now that it is powdercoated the dents and defects are even more visible. Will have to source a straighter bumper sometime.

I was lucky to have someone helping me put all the parts together.
Foto-HDTPZLQE-D.jpg


Put back together. Not sure if I will install the overriders again. I did order new rubbers for them and they do look nice.
Foto-NEHXIFYQ-D.jpg


The rear bumper
Foto-8UMQMV7Y-D.jpg


The front bumper without the overriders. I still need the step rubbers and have to paint the original bolts on the side.
Foto-Z4HTYR6A-D.jpg
 
Looking very nice.
Hope you don't mind me asking but how much for the blasting and powder coating of the bumper iron work ;)
 
I've always wondered why people are shy of telling what it costed to have stuff done. Why not share so other people can decide if they want to have it done as well.
Anyway, I had it done over here at a renowned company for 225 Euro's, so let's say 200 Pounds. That is for blasting, metal spraying and powdercoat finish in RAL9001.

I had the 2 bumpers and 10 parts (irons, splashpans, etc) coated. Hope this helps.
 
Cheers for that :D
Sounds like a reasonable price so might look into doing it.
 
If you don't put the overriders back on. i'm interested....................... ;)
 
I don't know if I will sell the overriders. They are in great shape and I have all new rubbers for them, so at some point I will probably put them back on. They owe me a fair amount of money right now.

Polishing is great but it does take a lot of time and elbowgrease. It is well worth the effort though.

I insulated the roof with eggshell foam. Very cheap, easy to get your hands on, easy to cut and apply and does the job very well.
 
The rubbers for the overriders arrived yesterday, so fitted them immediately.
Also had ordered some rubbers for between the overrider and the bumper. All rubbers bought here on the forum!

Foto-SPG8WBDD-D.jpg


Foto-P34T6PH7-D.jpg


Foto-YPXT6ZMU-D.jpg


Foto-JFTBUSRM-D.jpg


Also bought two different size woorden skimboards for cheap. I will be using one of them as a table.
Not sure how I'll be mounting it though. Don't want to drill into my new panels or freshly covered windowsurrounds. I also don't really want to drill a big hole in my floor. Not sure yet what the golden idea is...
Foto-STLZRYRY-D.jpg
 
Finally got round to fitting the table. I thought about it long and hard. I didn't want to drill into the freshly upholstered panels or window surrounds. But I had no choice, so I figured out the best way to fit the table. I found a suitable metal profile in my garage and changed it to make the table slide in. It can also be removed when not needed by sliding it back out.
At the other end I am not sure how to fit the table leg. I now have an Ikea table leg that is adjustable in height. But its kinda big and heavy, overkill really. so i'll have to find a smaller lighter one and fix it to the table.

I'm happy with the results so far.

Foto-LFQGS3MI-D.jpg


Foto-LNYGTUYW-D.jpg


Also got these in the mail yesterday. Not sure what I will do with them yet.
Foto-JKWCO6BR-D.jpg
 
I glued one of the script badges to the back of my bus. I like the look of it, although it is very different in color to the original Volkswagen script. I guess I have to replace the original script with another script that I have to make it look more uniform.

Foto-IAHJWH4C-D.jpg


Foto-XH3FJSOK-D.jpg
 
I haven't updated this topic in a while but a lot has happened since.
Eventhough I had never driven the van for more than 200 miles I decided to take it for a holiday in Spain. We loaded up the van with all the camping gear that we have and food and clothes and we took of to Spain. The bus ran great from Holland to Spain and also during all the daytrips in Spain. On the way back home it started to make strange noises and when I stopped to check it out couldn't find anything but then it wouldn't start anymore.
Managed to get it running again but somehow had to drive home without horn and indicators.

The last 200 miles it started using more and more fuel, but we made it home. The day after we got back the garage floor was covered in oil. I thought it was the engine so I pulled it but it was the seals on the gearbox. Still wanted to check the engine now that it was out and had my local mechanic check it out. We tore the engine apart and did not like what we saw. The cylinders were scraped and blue from getting to hot and the bearings were damaged as was the crankshaft. All this after 3500 miles!!
We decided to rebuild the entire engine but now with 1776cc, different camshaft, etc. Everything will we balanced and we will not be using cheap parts anymore like the other engine builder did.

Some recent pics:

A puddle of oil on the floor of my garage
Foto-3Z3UUPK3-D.jpg


Engine and gearbox out
Foto-DOQ8WVTC-D.jpg


My garage stuffed with bits and pieces from the engine and everything that had to come off to pull it out.
Foto-ZJDDNE77-D.jpg


In the meantime I couldn't do much with the bus so decided to pull the dash out to sort the electrics and repaint the dash. Dash is out:
Foto-PZVWYGLV-D.jpg


Dash painted and back in. Also numerous parts still at the powdercoater.
Foto-RQKIC8EB-D.jpg


I bought a steering wheel on the forum here. The wheel looks amazing, but the boss does not fit. We are sorting that out at the moment.
Foto-FEZJOOOZ-D.jpg


I bought a Rapido folding caravan from the mid seventies. It is super cool. It folds from a little trailer in to a 7 square meter caravan with kitchen, cupboards and a sitting area and it sleeps 6 if necessary.
Folded in:
Foto-34XXAJIF-D.jpg


Folded out:
Foto-A8IR3ILR-D.jpg
 

Latest posts

Top