'68 Deluxe

Early Bay Forum

Help Support Early Bay Forum:

This site may earn a commission from merchant affiliate links, including eBay, Amazon, and others.

Resto-raider

Well-known member
Joined
Mar 30, 2011
Messages
653
Reaction score
3
Location
Limburg, Netherlands
Hey everybody,

Joined this forum today to share my restoration with you and maybe exchange some information about early bays.
I already introduced myself in the proper thread, but I'll introduce myself again in this thread.
My name is Rick, I live in the south of the Netherlands and am 29 years old.

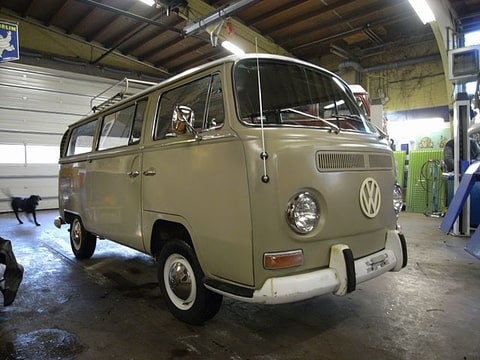
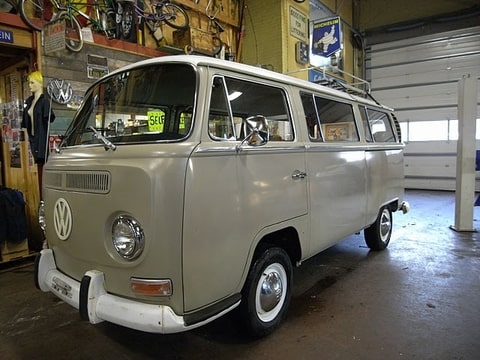
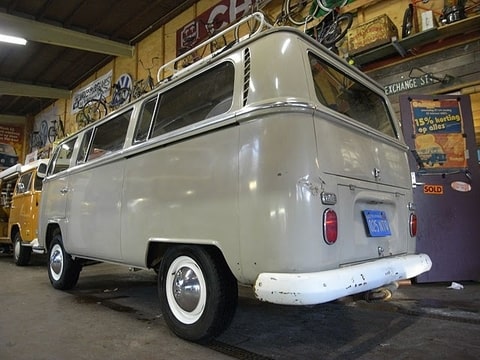
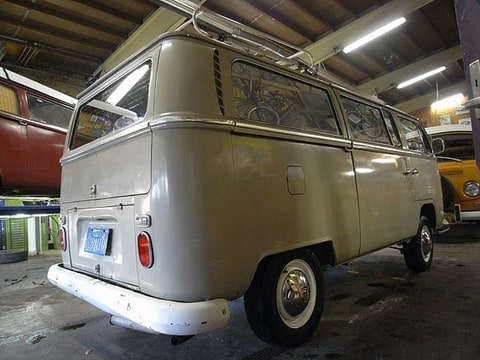
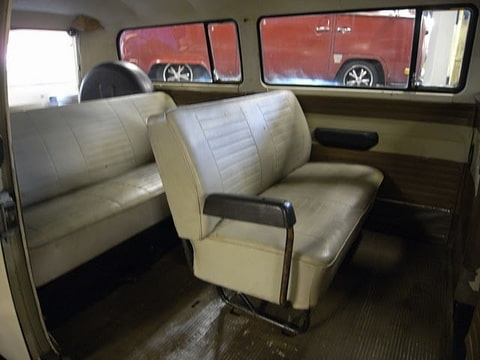
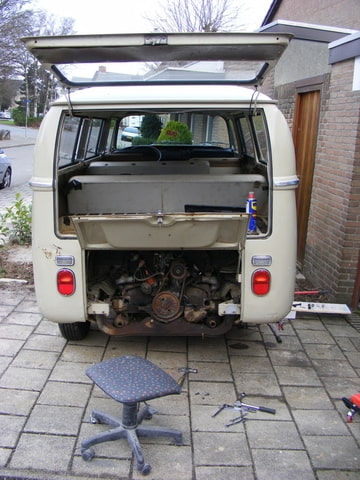
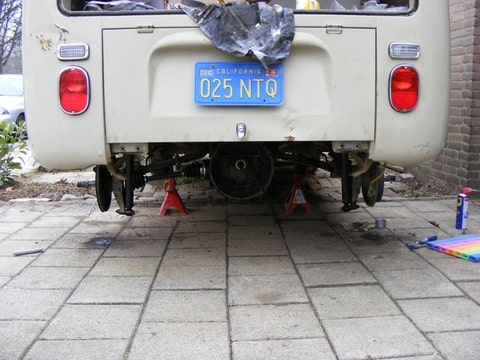
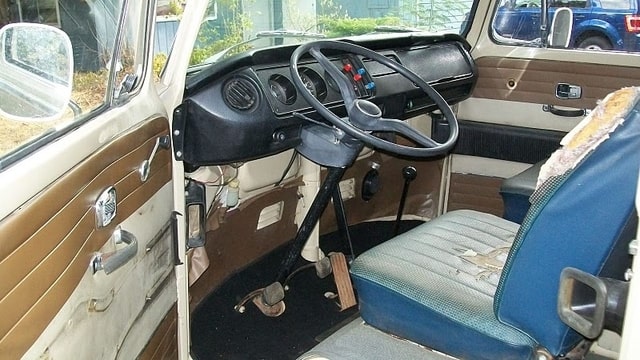
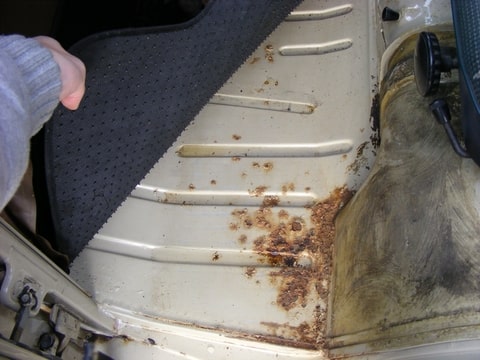
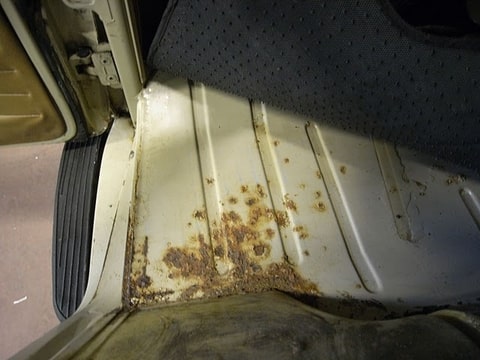
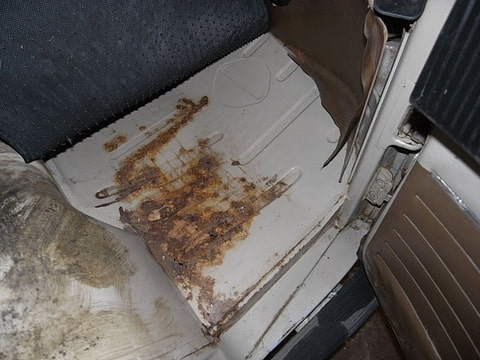
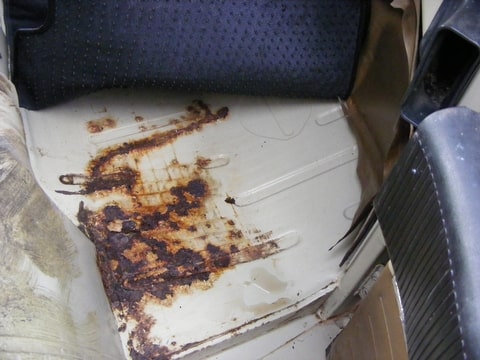
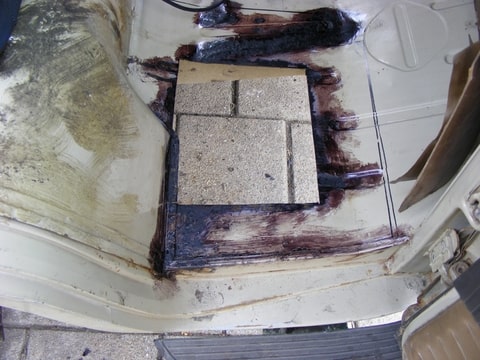
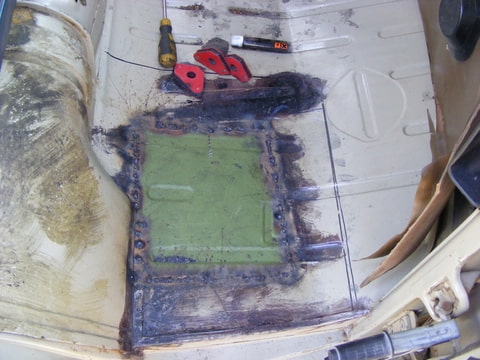
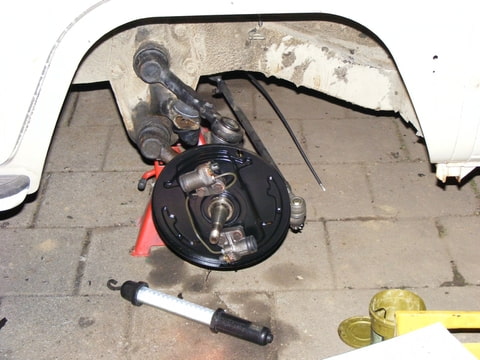
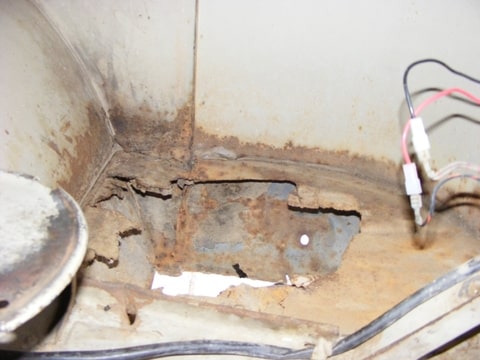
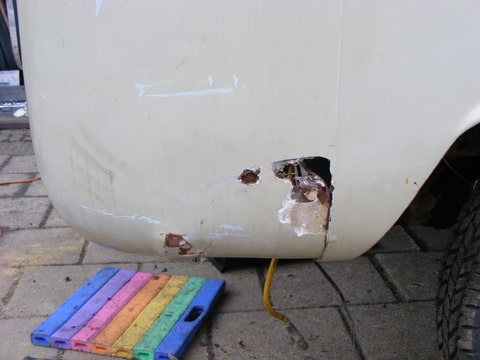
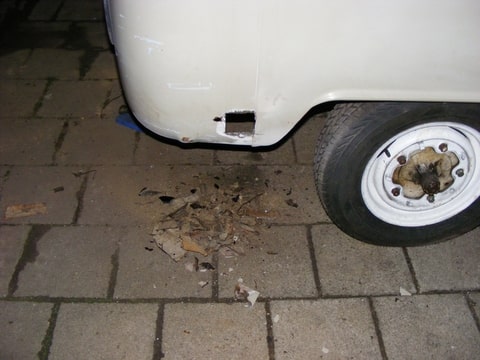
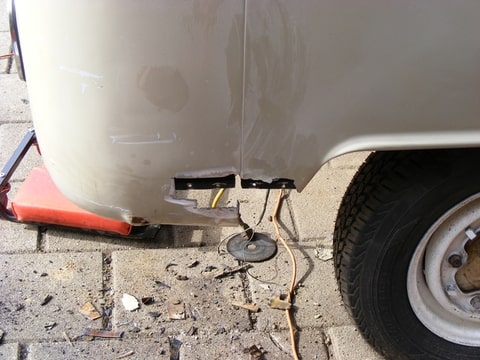
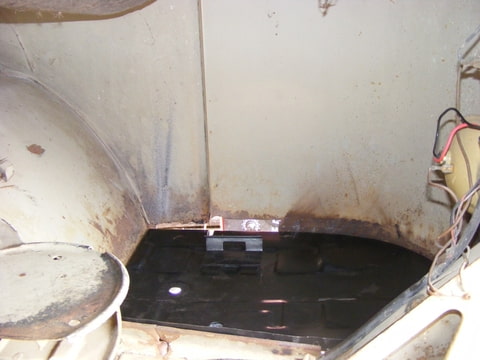
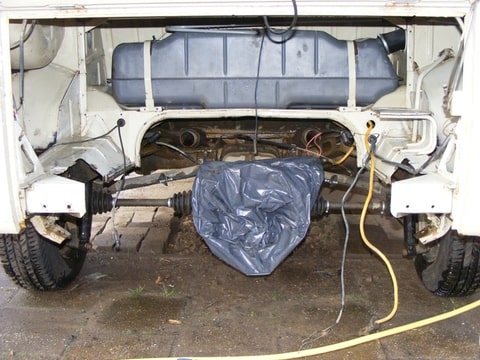
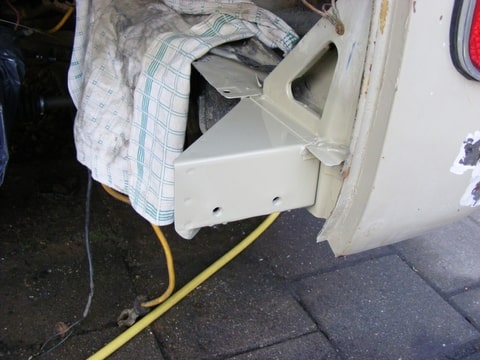
I have been restoring a '77 mk1 Golf, but couldn't wait to buy a bus. So eventhough the Golf is not nearly finished I bought an early bay from '68 (although at first I thought it was from '69). It's a 7-seater LHD imported from California with hardly any rust. I only had to repair two small parts in the cabine floor and yet have to repair the batterytray.

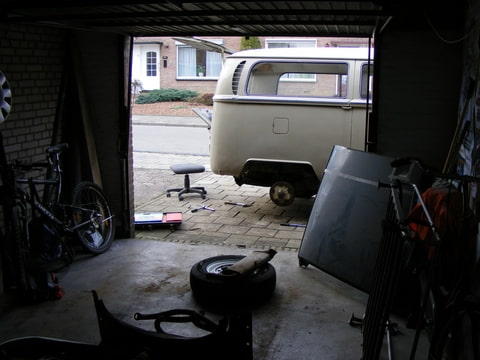
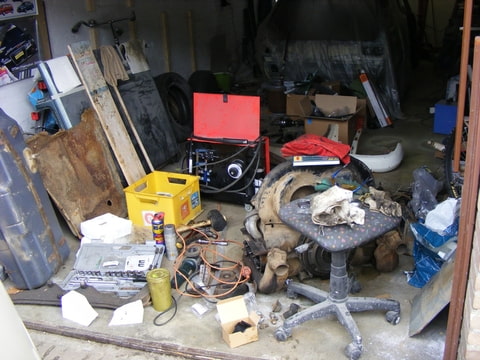
Because of the Golf and also the height of the bus it doensn't fit in my garage so I am working outdoors in the driveway at the moment. Luckily we have been blessed with sunshine the last 2 weeks so I got on pretty well.

What have I done so far:
- Replaced all brake cilinders
- Replaced all brakepads and fixings
- Replaced the main brake cilinder
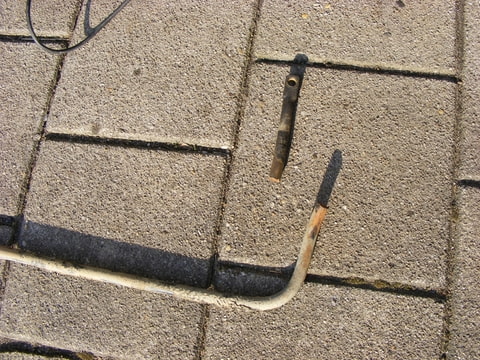
- Replaced all the brake lines (hard and soft)
- Replaced bearings on the front wheels
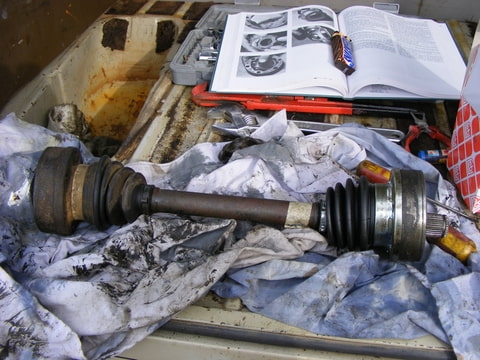
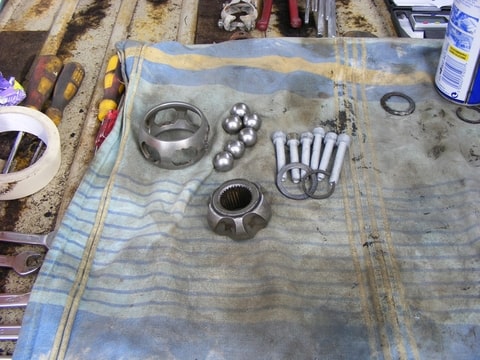
- Replaced all steering parts underneath the bus, except for the steering box.
- Replaced all cables, eg. clutch cable, accelerator cable, speedo cable, etc.
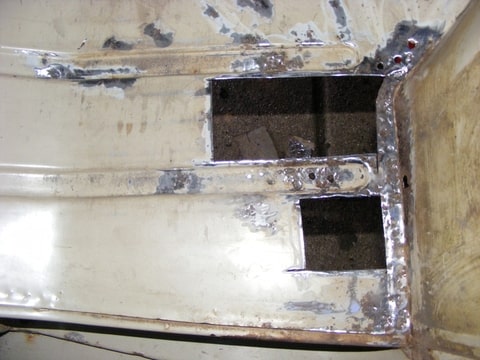
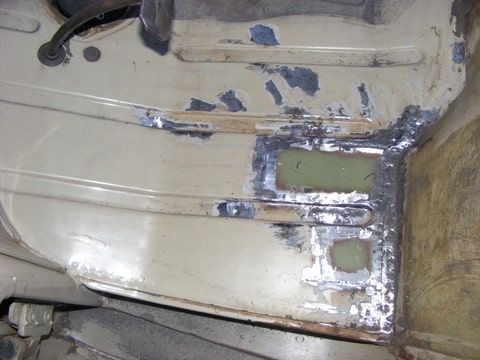
- Welded new funky green metal in the cabine floor
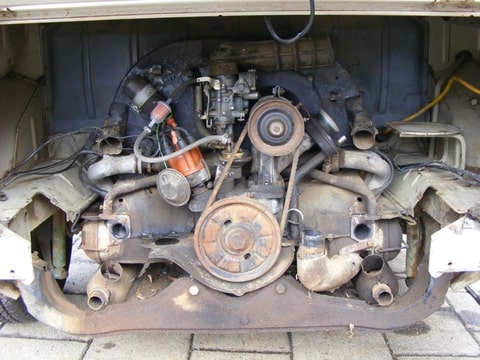
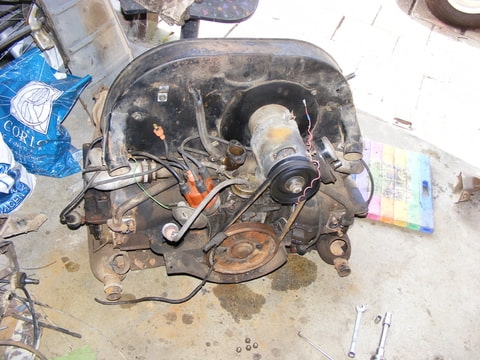
- Replaced all gaskets on the engine
- Gave the engine a nice tune-up with new distributorcap, sparkplugs and cables, etc.
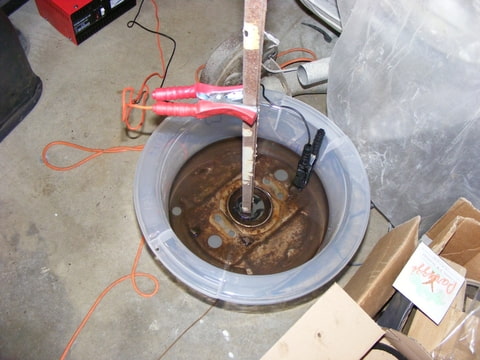
- Removed rust from the gastank
- And much more really.

What I still have to do for the MOT/DMV/RDW:
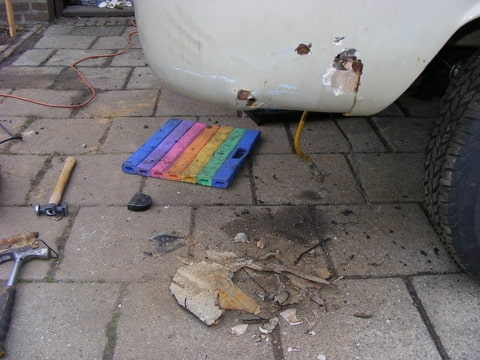
- Weld in the batterytray
- Replace the brakefluid reservoir
- Fill her up with brakefluid and adjust the brakes
- Put the steering column and wheel back in
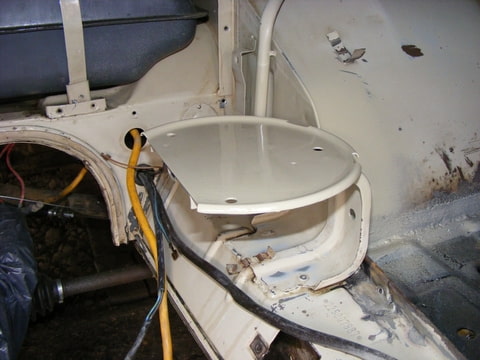
- Sort out the messy wiring behind the dash
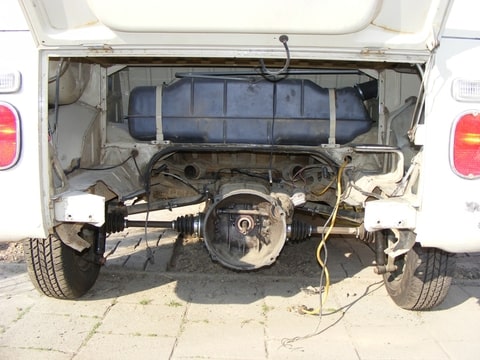
- Put the gastank back in as well as the engine
- Test if the engine, the brakes and all the electrics work

I'll post some pics later on, but I already have some posted in the 'who's new section'.

Hope you enjoy this thread.

cheers,
Rick
 
Sounds like you have been a busy boy ;)

Looking forward to the pictures and welcome :D
 
I sure have been busy these last few weeks. Started working in the weekends only, but progress was slow so now I also work in the evenings as long as I can see what I am doing.
Also had a lot of help from my brother in law whom owns a '66 beetle and he has been in the aircooled scene for many years, so he knows a thing or two...

Enough words, on with the pics:

Thoroughly cleaned by K&K where I bought it.
Foto-CGO8C8MR-D.jpg


Foto-JOB6CCV8-D.jpg


Foto-JTNLBDYN-D.jpg


Foto-HFVYTCZF-D.jpg


Foto-L83WFCGH-D.jpg


Some pics on the driveway:
Foto-46N4RYF7-D.jpg


Foto-VK6FD886-D.jpg


Foto-MUQ3CAO3-D.jpg


Foto-SZDXRLQS-D.jpg


Garage full of parts, both old and new:
Foto-GAN8I6SF-D.jpg


The left cabinfloor had rust blisters. After removing the blisters a couple of minor holes apeared so decided to cut out small sections and replaced them with new metal.
Foto-KGFIVWDS-D.jpg


Foto-ZLQJYV8T-D.jpg


Foto-VKFYXQZ7-D.jpg


Foto-4O8PDI66-D.jpg


Same shit, different side of the cabin. This side was pretty crispy as the quarterlight didn't close anymore.
So here I needed a bigger piece of metal. I used funky green sheet metal which is pretty good quality if you ask me.
Foto-6XUYOYP4-D.jpg


Foto-HZWSA3CP-D.jpg


Foto-PRFYF3L7-D.jpg


Foto-BZ3POBBE-D.jpg


The rest of the works are not really interesting to make pictures of, but here are a few of new bits and pieces.
Foto-XH7JGZQN-D.jpg


Foto-RIFNWAZK-D.jpg


Foto-RIAKOW7E-D.jpg


Foto-Q8PZHS3F-D.jpg


Foto-C33ZY8CL-D.jpg


Stabiliser bar on the front broken in half... :?:
Replaced it with a brand new one from JK:
Foto-K7JZQQ6V-D.jpg


I have been trying some electrolytical de-rusting and it works like a charm. The rust simply disapears just like that, all you have to do is clean it up with a brush and a degreaser.
In this pic I did it on a small scale with a brake plate, but I also de-rusted the fuel tank on the inside like this. There is no cheaper way to do it than this!!
Foto-UGVZH76Q-D.jpg


That's it for now. Will crack on tomorrow evening with putting the engine back together and this saturday I will put the engine back in. All that's left then is to sort out the wiring. Unfortunately the PO cut a lot of cables in the engine bay when ripping the engine out at some time.
Also the wiring loom under the dash is not really organised and intact. Not looking forward to this but it has to be done to make this a rolling van.
 
This weekend tried to work on the van a bit more.
I was planning on getting the engine in, but before I could do that the battery tray or what was left of it had to be removed. So removed that and tried to weld the new tray in. What a pain that is...

While working on the battery tray I noticed some rocks on the inside. Tried to remove these but they turned out to be rocks of filler. When removing them a hole appeared in the outer skin. After poking around a bit the hole started growing and growing. So in the end I cut out a big piece to be welded up again.

Foto-QUM36WKA-D.jpg


Foto-EON8JZV3-D.jpg


Foto-SVGJ7IS6-D.jpg


Foto-KWKGNVLO-D.jpg


Foto-H3V4O3FW-D.jpg


Foto-CQ68YF4A-D.jpg
 
That's the problem with poking holes - they tend to get bigger :lol:

Fingers crossed that you start to sort this all out :D
 
No work on the van has been done this week. Motivation is at its low right now.

I took the engine to a retired VW engine specialist whom still builds 3 engines a week. He tells me the engine I have is no good. Compression on all 4 cilinders is around 6 and should apparently be 10,5. He also tells me that the engine I have is built up out of different engines. So it seems like the engine that was in the van was only mocked up for the sale but is never going to be a runner. It is also no good for a rebuild.

I can have a completely new engine build from scratch for around 1500 pounds which for a complete engine is a great price I believe, but I don't have the budget for that right now. So now we are going to try to use another engine that my brother in law has and get that one running. Fingers crossed that I get a little bit luckier with this one.
 
I was in thouch with the engine guru to get some more info and I asked him if he could also build me a 1641. He's offered me to build this engine for the same price which is really nice of him. I still need to source the money from somewhere though :)

Now I need to find a 34 PICT 3 for the new engine and a 009 distributor. I'll probably have the new engine up and running in 6 weeks time. The engine builder only needs 2 weeks to build it, but this gives me some time to get the penny's together.

The original plan was to take the bus to Denmark for a weeks holiday with the missus and 2 friends in June, but I'm not sure if we are going to make it. But we'll see. It's not the end of world if we don't make it in time.

Hope to make some progress in the engine space this weekend so it will be ready for when the new engine is built.
 
Looks a great bus fella, 8)

Just one thing, you sure you want to run a 34 Pict carb with a 009? I'm no expert by any means but when I had my Beetle I had a major flat spot,
I'm sure if you do a search much more intelligent people will be able to tell you why.

Jus something to think about, wouldn't want you wasting money dude :)
 
Evenstar3019 said:
Looks a great bus fella, 8)

Just one thing, you sure you want to run a 34 Pict carb with a 009? I'm no expert by any means but when I had my Beetle I had a major flat spot,
I'm sure if you do a search much more intelligent people will be able to tell you why.

Jus something to think about, wouldn't want you wasting money dude :)

I've got an 009 and there is no flat spot plus I know a few people who run 009's on big engines without any issues

Karl
 
Westy Richardson said:
Evenstar3019 said:
Looks a great bus fella, 8)

Just one thing, you sure you want to run a 34 Pict carb with a 009? I'm no expert by any means but when I had my Beetle I had a major flat spot,
I'm sure if you do a search much more intelligent people will be able to tell you why.

Jus something to think about, wouldn't want you wasting money dude :)

I've got an 009 and there is no flat spot plus I know a few people who run 009's on big engines without any issues

Karl


Hi,

Don't want to open a can of worms on this, I'm sure for many it works fine, I think it's not an issue with big engines, just ones with the stock carb and/or cc. Not the dizzy's fault, it just seems to get the blame for the wrong combination.

This may help to explain a little better but there's plenty of info out there:

http://www.aircooledtech.com/34pict3_modification/" onclick="window.open(this.href);return false;

Matt
 
Thanks for your concerns guys, but the chap that is building this engine is 72 years old and has been building VW engines most of his life. I trust on his judgement on this engine build. And if it doesn't work out I will go back to him and ask him kindly to make it work anyway :D

I'll keep you posted on the engine-trouble.

Today I have completed the batterytray and welded the rear corner back in. I started with a little hole, but when trying to weld it it grew and grew and I came across more putty than is good for a bus. In the end managed to patch it all up and have a solid corner now.
Also keyed and painted the firewall a fresh new coat of grey.

Am planning to clean up the engine room and give it a respray as well. I had some aerosol spraycans made with the original Savanah-Beige. I alreayd used these cans on my Golf mk1 with an og metallic colour and they work great.
 
I was just now lying in the garden enjoying the last bit of sun when I got bored and decided to have a look at the M-codes and chassis-number in my bus. I decoded them all and found out that my bus is not from 1969 like they told me, but it was produced on august 21, 1968!! So the bus is even older than I thought.
Exciting news for me 8)
 
Did some work in the engine bay tonight. First used the pressure washer to get most of the dirt out, then I started wet sanding to prepair for a new coat of paint.
Already painted some small bits to test the colour.

Before
Foto-E7GK4OUL-D.jpg


After
Foto-3WQGDRXQ-D.jpg


Cornerbracket testpainted
Foto-EOWPXEVQ-D.jpg


Airfilterbracket testpainted
Foto-ADJPNICG-D.jpg


New batterytray
Foto-N6F7W4M8-D.jpg


Tried to polish a bit of the paint on the latch. Worked out pretty well and got the shine back in the paint.
Foto-FYI6HVW4-D.jpg
 
Thanks Gninnam

Hope to finish respraying the engine bay tonight. It will make a big difference.
Also bought some parts from a member here, so I can finally finish the steering column assembly with the correct parts.
 
Resto-raider said:
I was just now lying in the garden enjoying the last bit of sun when I got bored and decided to have a look at the M-codes and chassis-number in my bus. I decoded them all and found out that my bus is not from 1969 like they told me, but it was produced on august 21, 1968!! So the bus is even older than I thought.
Exciting news for me 8)


this means its a 69 model year bus, being built after the 1st august (makes it a next year model bus)
 
I knew it was a 69 modelyear bus, but I also thought it was built in 1969 because the invoice from the seller said so.
They probably didn't take a minute to look at the M-plate and assumed it was a 69 bus.
So when I deciphered the M-code and it turned out to be an august 21, 1968 built bus I was happy!
 

Latest posts

Top