You are using an out of date browser. It may not display this or other websites correctly.
You should upgrade or use an alternative browser.
You should upgrade or use an alternative browser.
'68 Riviera panel
- Thread starter AIR_CHILLED
- Start date


Help Support Early Bay Forum:
This site may earn a commission from merchant affiliate
links, including eBay, Amazon, and others.
AIR_CHILLED
Well-known member
Cheers Graeme it's nice to see your van out and about, lookin kool as fook especially with the new rims!
T2-Nate
Well-known member
Niiiice work! You rattle canned it or proper paint? Anyhow looks good.
Did you pull out the dent in the beltline or filled it :roll: ?
Did you pull out the dent in the beltline or filled it :roll: ?
AIR_CHILLED
Well-known member
The paint has been sprayed using compressor, will do for now until I have saved some pennies for the pros to take over.
The dent in the bent line was cut, pulled out then welded back up and filled")
gninnam I thought Rustoleum was enamel based paint like Hammerite, didn't know it would ingrain dirt etc? this paint is also glossy and not the satin finish.
Cheers for comments.
The dent in the bent line was cut, pulled out then welded back up and filled
gninnam I thought Rustoleum was enamel based paint like Hammerite, didn't know it would ingrain dirt etc? this paint is also glossy and not the satin finish.
Cheers for comments.

$37.99
Window Sash, 1 Piece Windows,for Beetle 58-64 & 68-77, Pair, Compatible with Dune Buggy
Texas Air Cooled LLC


$58.00
$69.99
Revell 07674 VW T1 Camper 1:24 Scale Unbuilt/Unpainted Plastic Model Kit
ChoiceToysUS

$10.00
Volkswagen Genuine VW Driver Gear VW Logo Specifications T-Shirt Tee - X-Large - Black
wolframitersqga


$9.94
$10.95
Empi 00-4428-B VW Bug, Beetle, Sun Visor Clips, Type 1, 68-79, Black, Pair
MOORE PARTS SOURCE


$7.91
$15.33
Door Panel Clips, for VW Aircooled Door Panels, 50 Pieces, Compatible with Dune Buggy
Appletree Automotive

$9.37
Empi 4429 Ivory Sun Visor Clips for Vw Bug 1965-1967/ Vw Bus 1968-1979, Pair
MOORE PARTS SOURCE


$32.43
Airfix Quickbuild Volkswagen Light Blue Camper Van Brick Building Model Kit, Multicolor
Amazon Global Store UK


AIR_CHILLED
Well-known member
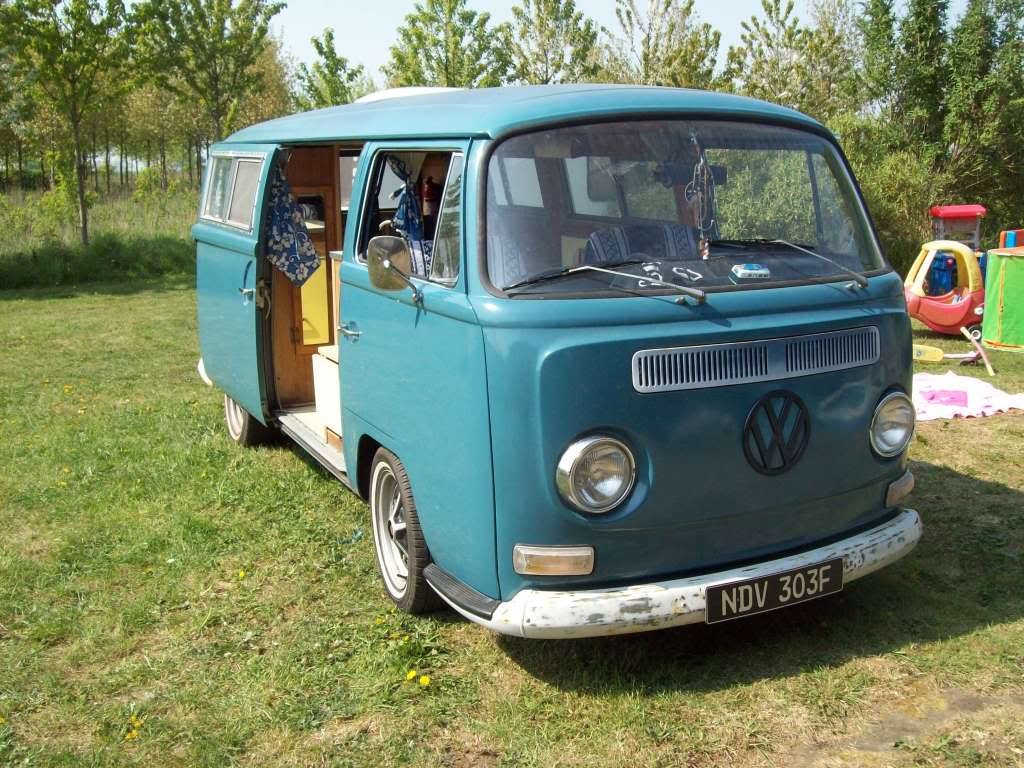
Hello all just a few more recent pics as it currently stands, new rims thanks to ant (mr whitewalls), lowered, new bugpack exhaust. Drives really nice!
A work in progress, enjoy:


Thanks for looking,
Mike.
A work in progress, enjoy:
Thanks for looking,
Mike.
dubscum
Well-known member
mint, reminds me of benders bus, just need to drop the front an inch ir 2 :mrgreen:
AIR_CHILLED
Well-known member
dubscum said:mint, reminds me of benders bus, just need to drop the front an inch ir 2 :mrgreen:
Yeah man bender's bus is a great inspiration to me!
I tried to drop it further on the adjuster but ran out of suspension travel and almost needed a back op.
Dropped spindles and tubbed arches is the way forward me thinks.
Cheers for the kind words chaps.
AIR_CHILLED
Well-known member
Last weekend I fitted some twin weber 34 ict's and synced them, very easy to install and set-up I highly recommend them.
Fitted them with the engine installed although propably would of been quicker to pull the engine but I havn't done that before.
Before I installed carbs, gave engine a little tune going by advice off here, gapped the plugs, adjusted valve clearances and when it came to check/ set the timing I found a pertronix ignitor and flamethrower coil bonus!! After this the engine was running the best it's ever been, very quite and smooth so at least it gave me a headstart when setting up the carbs.
Few pics of install.


Thanks for looking.
Fitted them with the engine installed although propably would of been quicker to pull the engine but I havn't done that before.
Before I installed carbs, gave engine a little tune going by advice off here, gapped the plugs, adjusted valve clearances and when it came to check/ set the timing I found a pertronix ignitor and flamethrower coil bonus!! After this the engine was running the best it's ever been, very quite and smooth so at least it gave me a headstart when setting up the carbs.
Few pics of install.
Thanks for looking.
AIR_CHILLED
Well-known member
gninnam said:Looks nice.
Do you have a fuel filter between the fuel tank and the fuel pump! If so, the I would remove the filter from the pump to the carbs - if you don't then you should
Hello Andy,
I don't have a filter between the tank and pump only this one, how would the different set-up affect fuelling/ engine?
Thanks for advice,
Mike.
It's more for safety to be honest - if the filter fails and starts to leak, then the fuel will be on your hot engine, a recipe for a fire - if the filter is after your fuel tank, then the engine will just die but not catch fire!!
Just trying to save you from a possible disaster :mrgreen:
Just trying to save you from a possible disaster :mrgreen:
AIR_CHILLED
Well-known member
Hello all, just a little update I haven't touched the van in months until recently. I have just repaired the rust on the bottom of the passenger door and added extra drain holes in the plate that has been welded in. I fixed the dents in the door and resprayed it, outer scraper and door seal replaced. The door seal seams too wide though and doesn't allow the door to fit flush!?

Thanks,
mike.
Thanks,
mike.
AIR_CHILLED
Well-known member
Hello all, just a couple of updates as I'm just started to paint driver's door:

The vans parked up in my grandad's old barn next to his tractor, it's probably older than the van but he still uses it! :lol:
The barns full of old junk, I bet you trinket pimps would love it in there :roll:
Anyways the door is pretty solid and the only dent free panel on the whole van so painting should be easier.


My next show destination should be Alive and Vbubbin.
Mike.
The vans parked up in my grandad's old barn next to his tractor, it's probably older than the van but he still uses it! :lol:
The barns full of old junk, I bet you trinket pimps would love it in there :roll:
Anyways the door is pretty solid and the only dent free panel on the whole van so painting should be easier.
My next show destination should be Alive and Vbubbin.
Mike.
AIR_CHILLED
Well-known member
Hello all, I'm still working away on getting the van straighter and painted but progress is slow. I have started the drivers side, the rear arch started off completely bashed in same goes for the corner of the middle side corner, also the us side markers have been welded smooth. The panels were hammered straight then skimmed with filler. The red stuff in the pics is 3m stopper putty (yet to be sanded) to fill small imperfections in the filler but as you can see I applied too much
Weather permitting I will spray this side tomo:


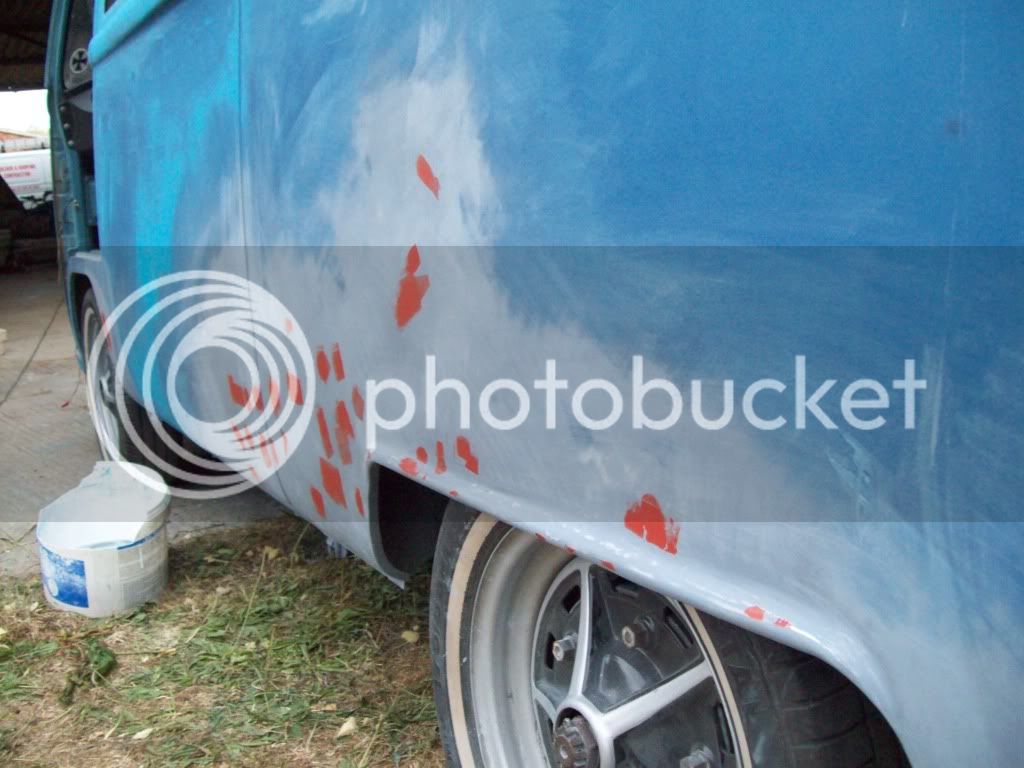
The arch still is not perfect but I have spent far too long on these panels now! It is easier to see imperfections in your work once there is a reflective surface and rustroleum is super cheap!
Weather permitting I will spray this side tomo:
The arch still is not perfect but I have spent far too long on these panels now! It is easier to see imperfections in your work once there is a reflective surface and rustroleum is super cheap!
AIR_CHILLED
Well-known member
Right I sprayed this side today while the weather was good, to be honest it didn't go as well as I hope. It needs to be warm for the paint to cure off in a realistic time but it is bad to spray in direct sunlight which is what I did :roll: resulted in a satin finish!
Here's pics:


Some paint reacted around the windows (cracked) and some areas of filler will need some more work.

The paint on the cab floor repair section also reacted with the redoxide primer and caused a slight hammered affect.
Think I'm going to wait for the paint to harden off and use the van and enjoy it as it's been off the road far to long.
Thanks for looking,
Mike. P.s. see you at Alive and Vdubbin hopefully in this if I get it back together tomorrow!
Here's pics:
Some paint reacted around the windows (cracked) and some areas of filler will need some more work.
The paint on the cab floor repair section also reacted with the redoxide primer and caused a slight hammered affect.
Think I'm going to wait for the paint to harden off and use the van and enjoy it as it's been off the road far to long.
Thanks for looking,
Mike. P.s. see you at Alive and Vdubbin hopefully in this if I get it back together tomorrow!
cyberdyne systems
Well-known member
- Joined
- Aug 21, 2008
- Messages
- 634
- Reaction score
- 0
Yeah looks good in the pictures despite the problems you mentioned. Really looks nice and straight and the seams look great too
Similar threads
- Replies
- 12
- Views
- 577
Vehicle For Sale
1974 ld panel van with lowlight panel conversion and bumpers
- Replies
- 0
- Views
- 93
- Replies
- 1
- Views
- 473
Latest posts
-

-

-
-
-

-
-
-
 Parts Wanted Original rear corner Splash panels wanted 1969 bay
- Latest: TheOriginalWazza