Haveacamper
Well-known member
- Joined
- Oct 2, 2007
- Messages
- 2,068
- Reaction score
- 3
OK, so some of you know that I moved over to Australia for a couple of years and as a result have had to leave the camper behind in storage. having not that long finished a 5yr resto on my bus I obviously miss the hell out of not having the chance to drive or work on her.
Therefore, while I am over here I have decided to work on a project that I can upgrade when we return in a yr or two....yep a slow burn project.
So a bit of history...I am running a 3.0L Porsche 911 SC engine. This engine has a standard Bosch fuel injection system fitted - type k-jet. K-Jet stands for continuous injection. In other words fuel is injected constantly, whether the inlet valves are open or closed. as the valve opens the already pre atomised fuel is sucked into the combustion chamber until the valve closes again. This system works well when tuned, but is a bit of a nightmare when it doesn't run well. I have had a little bit of trouble keeping the engine tuned. so i have chosen to upgrade the fuel injection system.
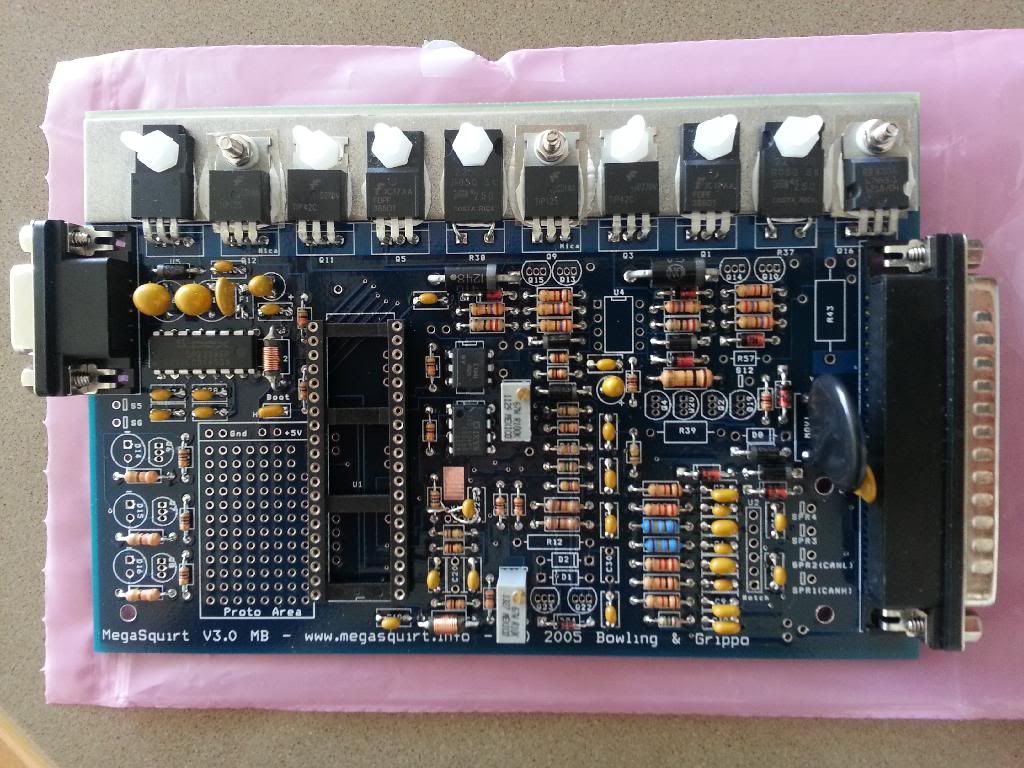
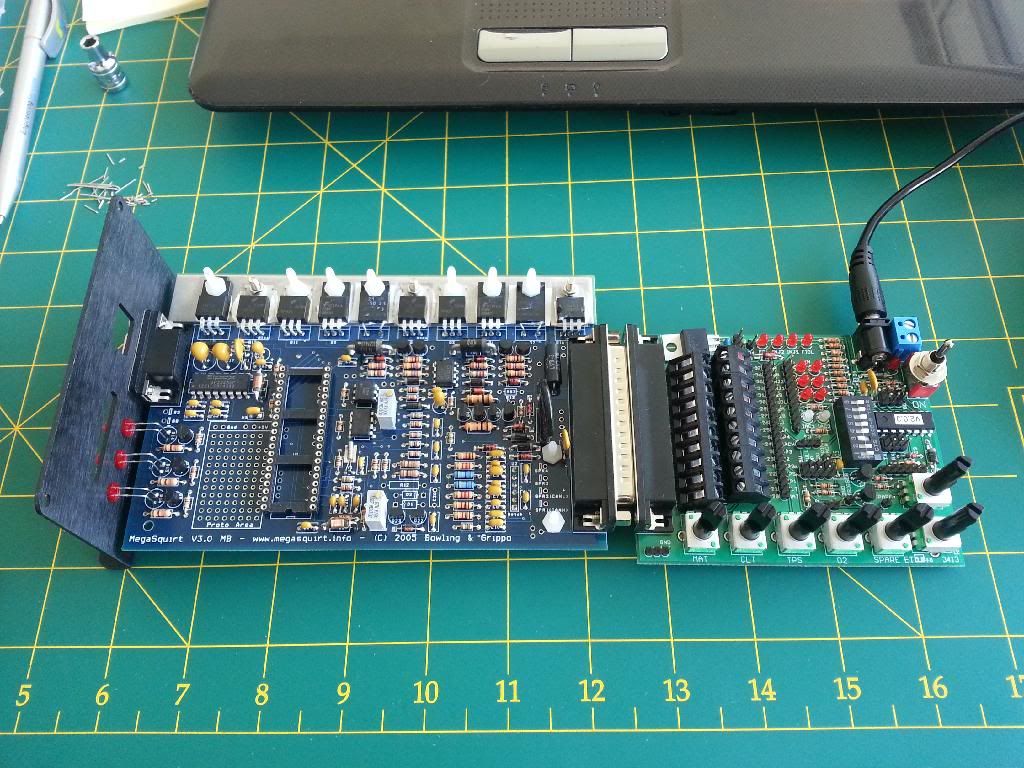
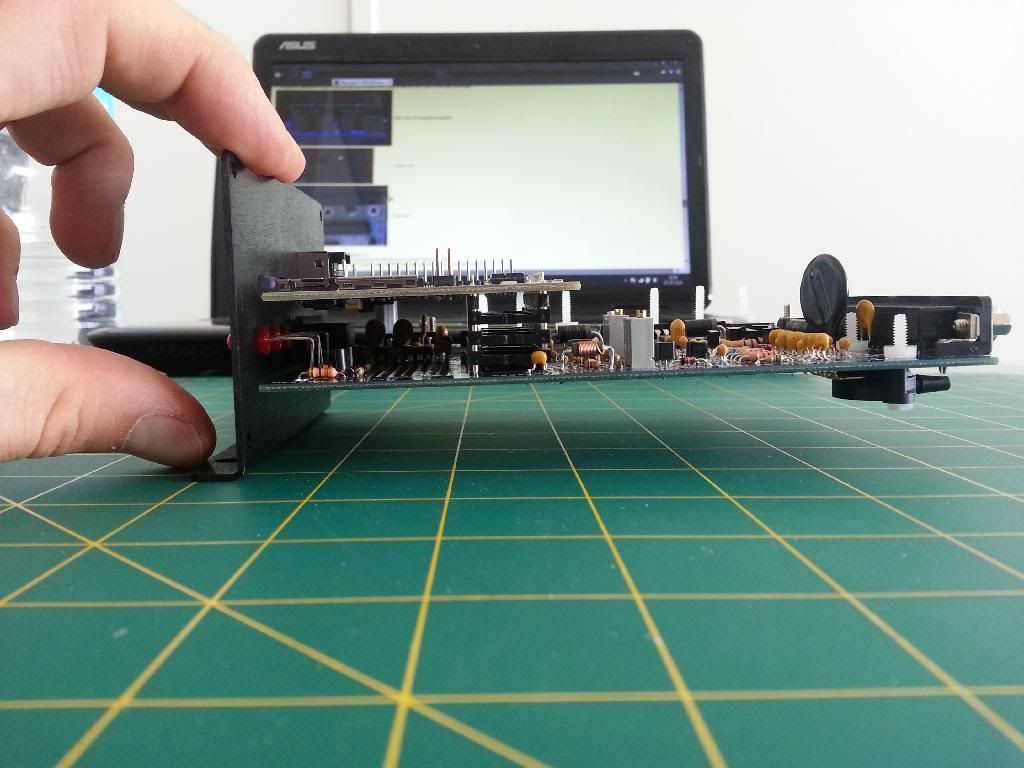
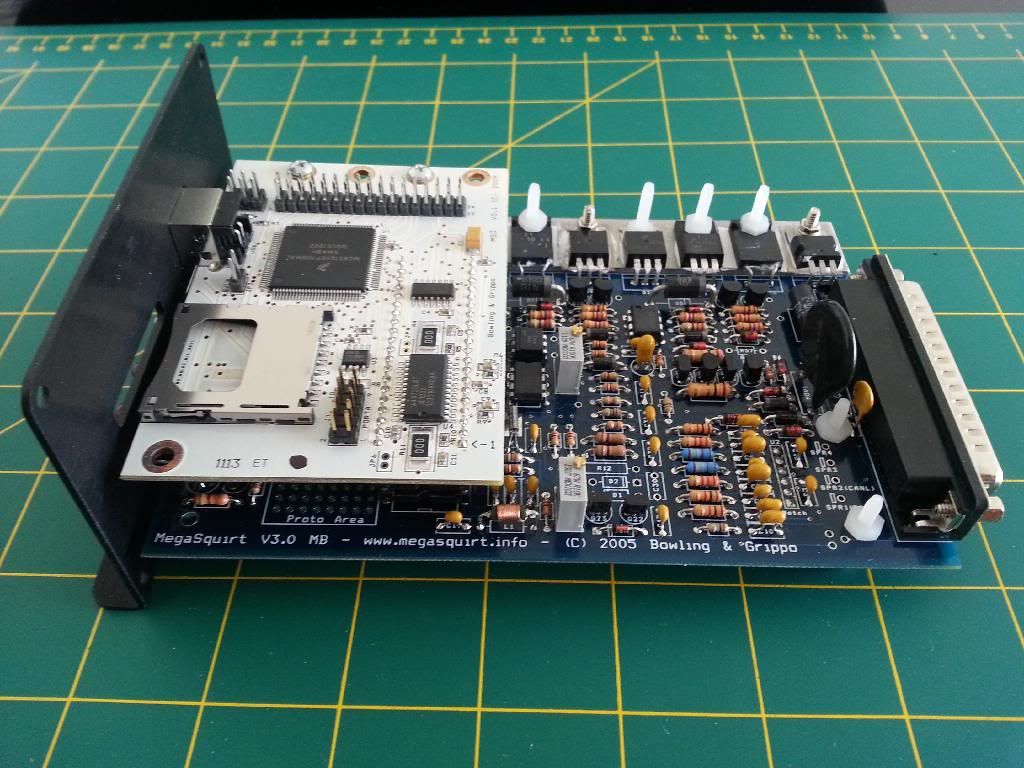
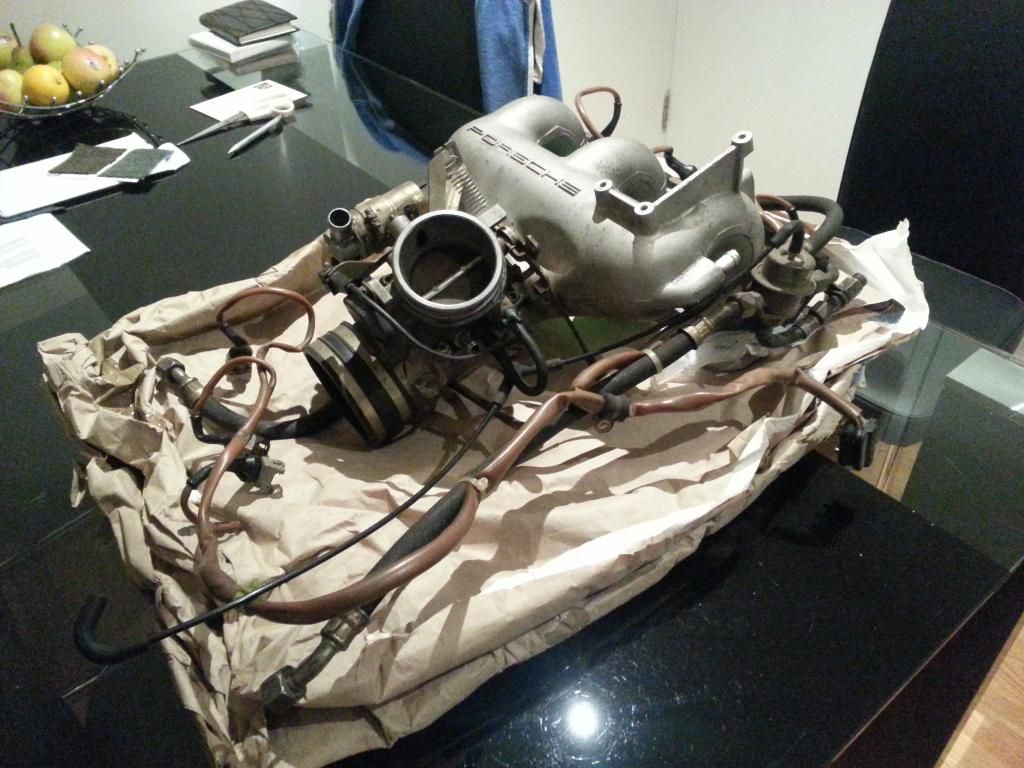
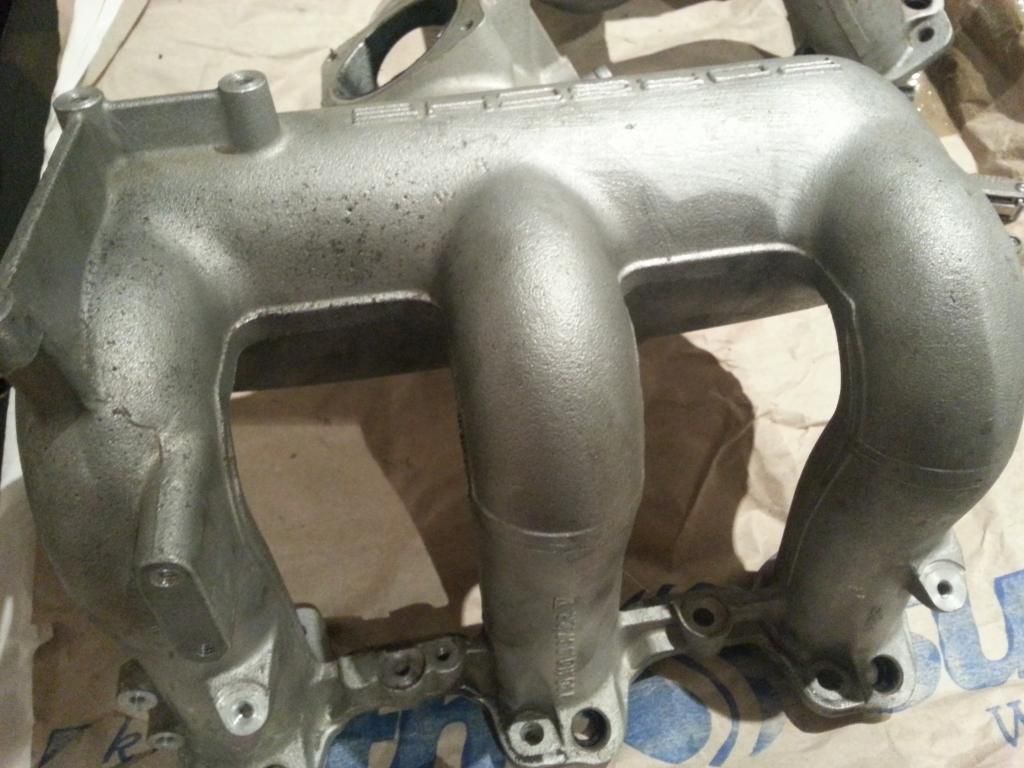
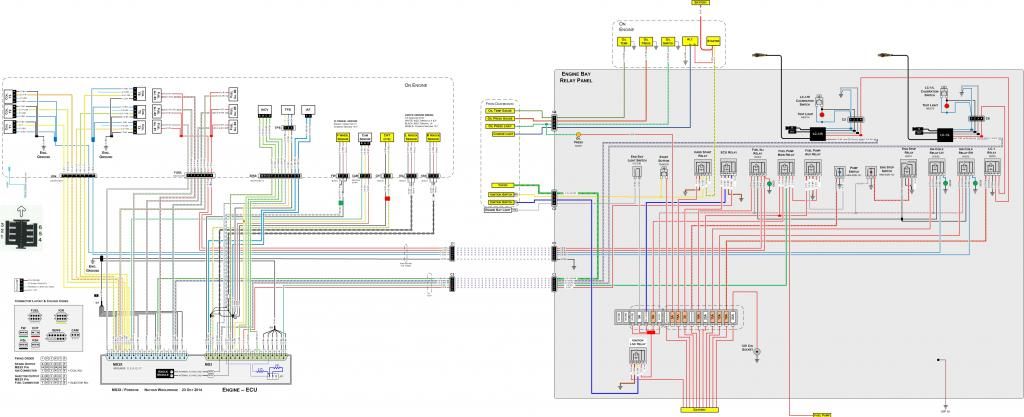
I am going to be fitting a Porsche Carrera 3.2L fuel injection system with a bit of a twist. I am going to build my own Megasquirt 3 ECU.
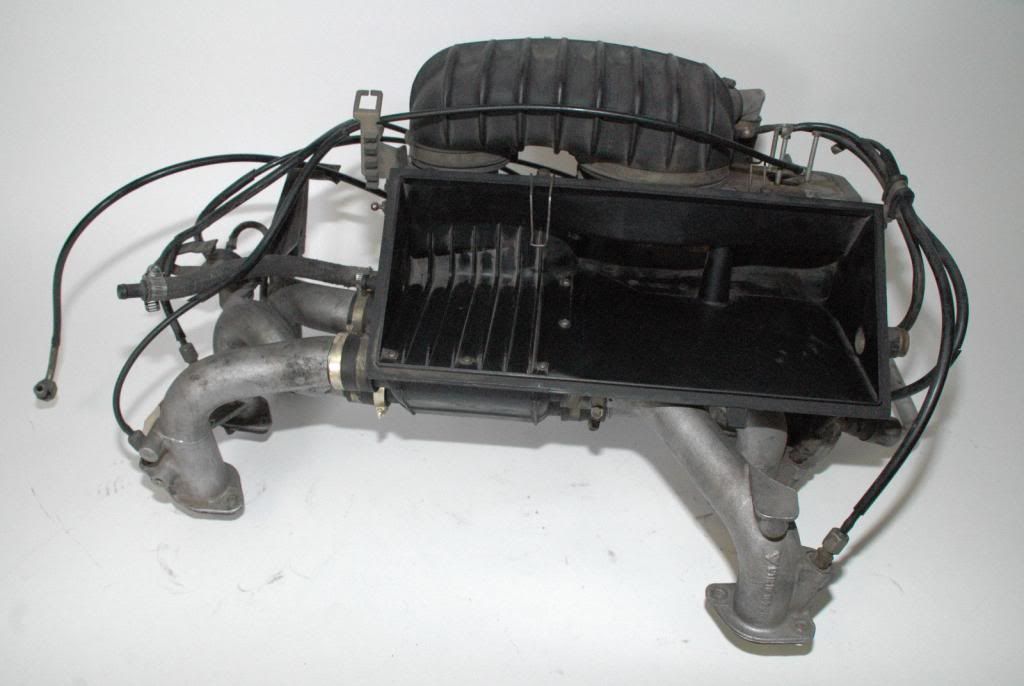
it is possible to modify the CIS (Continuous Injection System) I have, but I want to do a swap out and possibly sell the original CIS system further down the line. Also, and most importantly, the 3.2L setup will look a hell of a lot better than a modified CIS system. to give you an idea this is the modifying option:
Standard CIS system:
Modified CIS system:
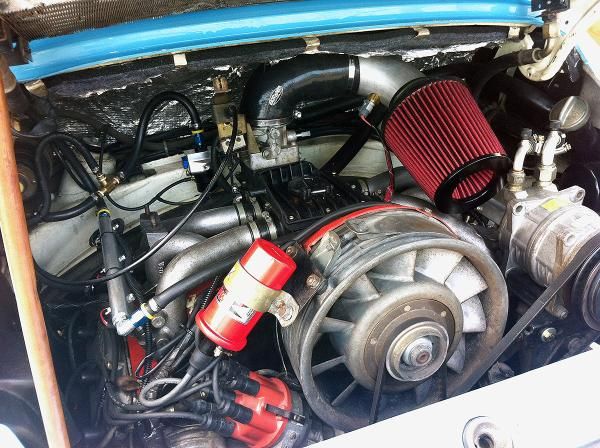
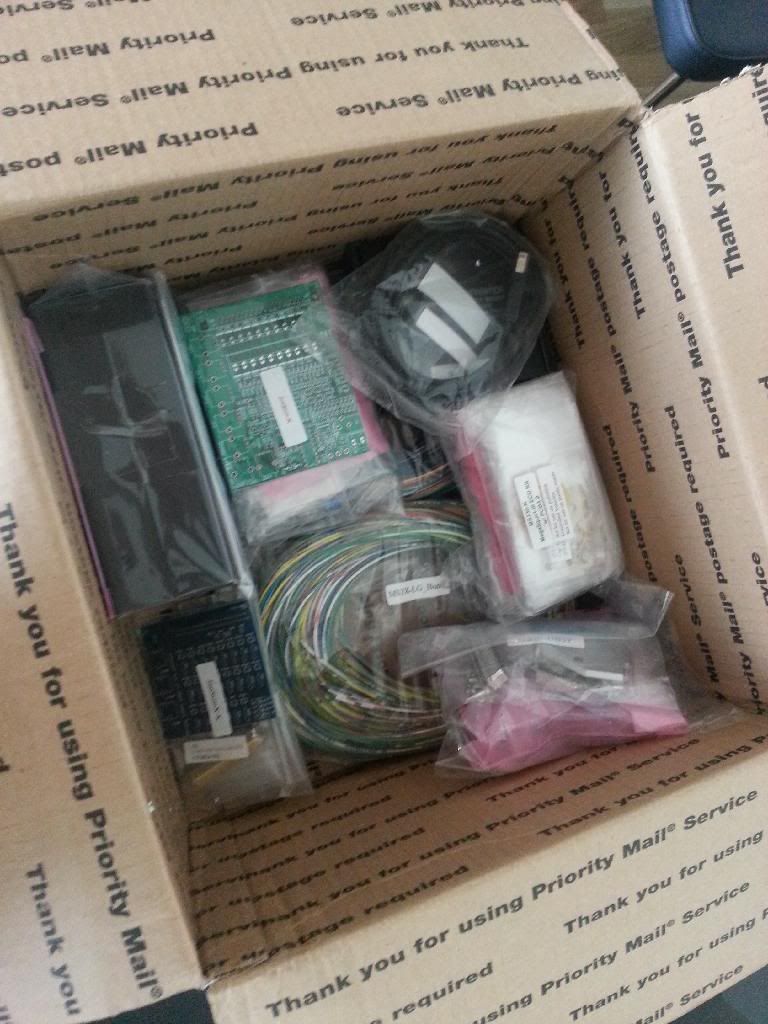
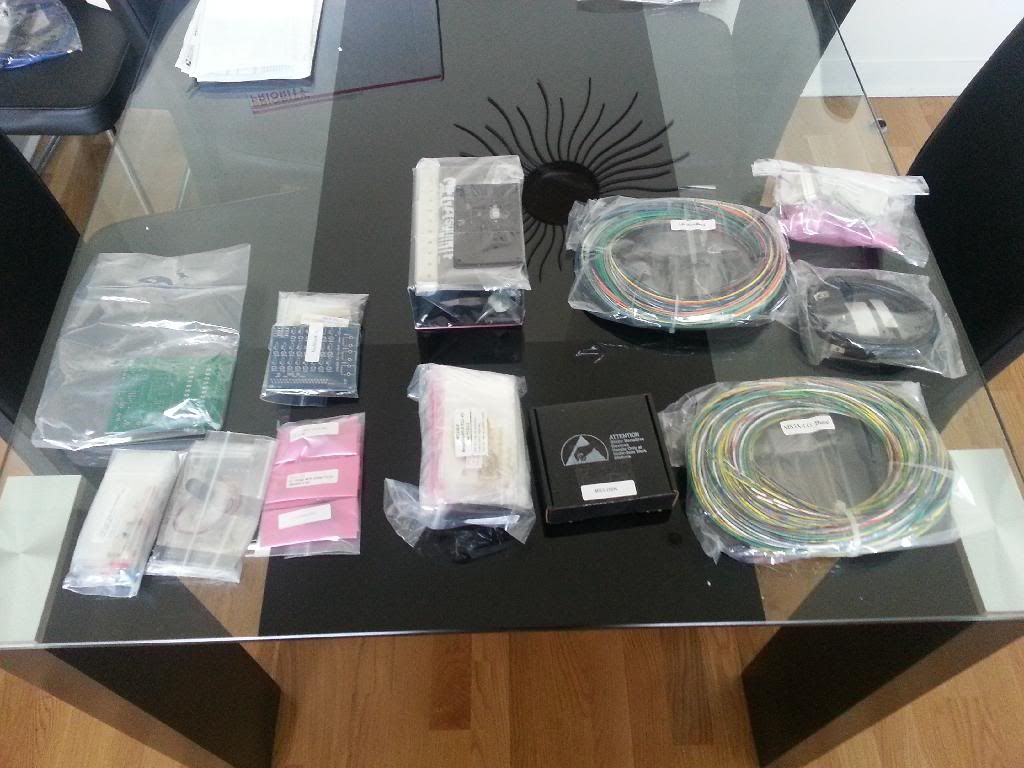
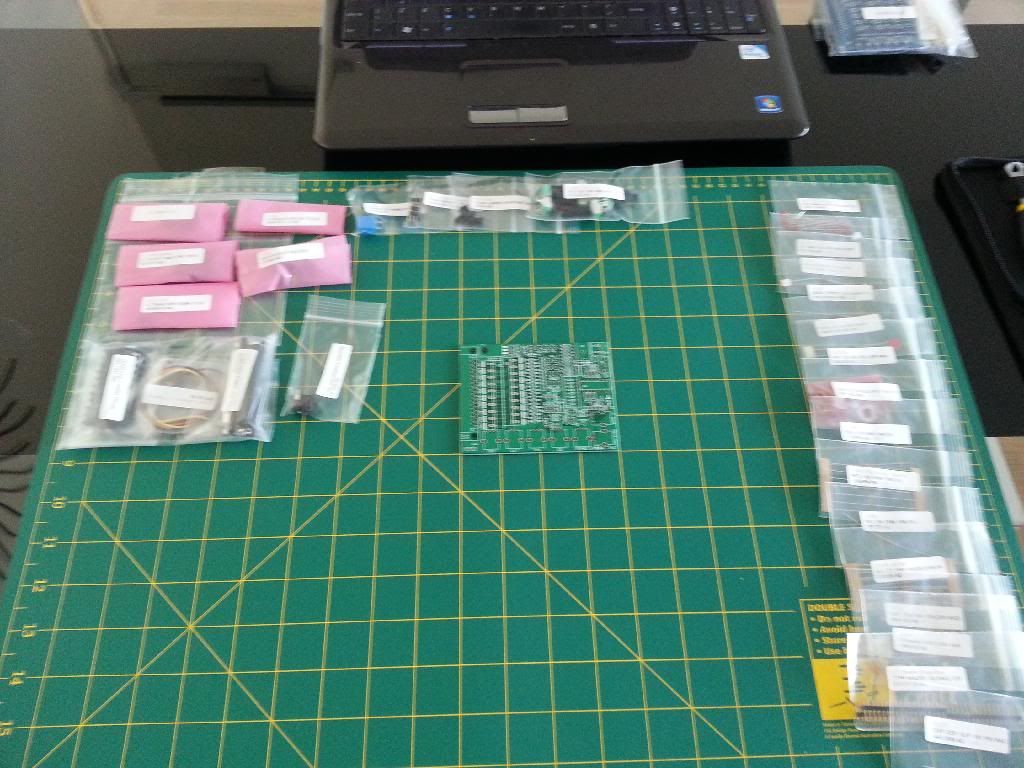
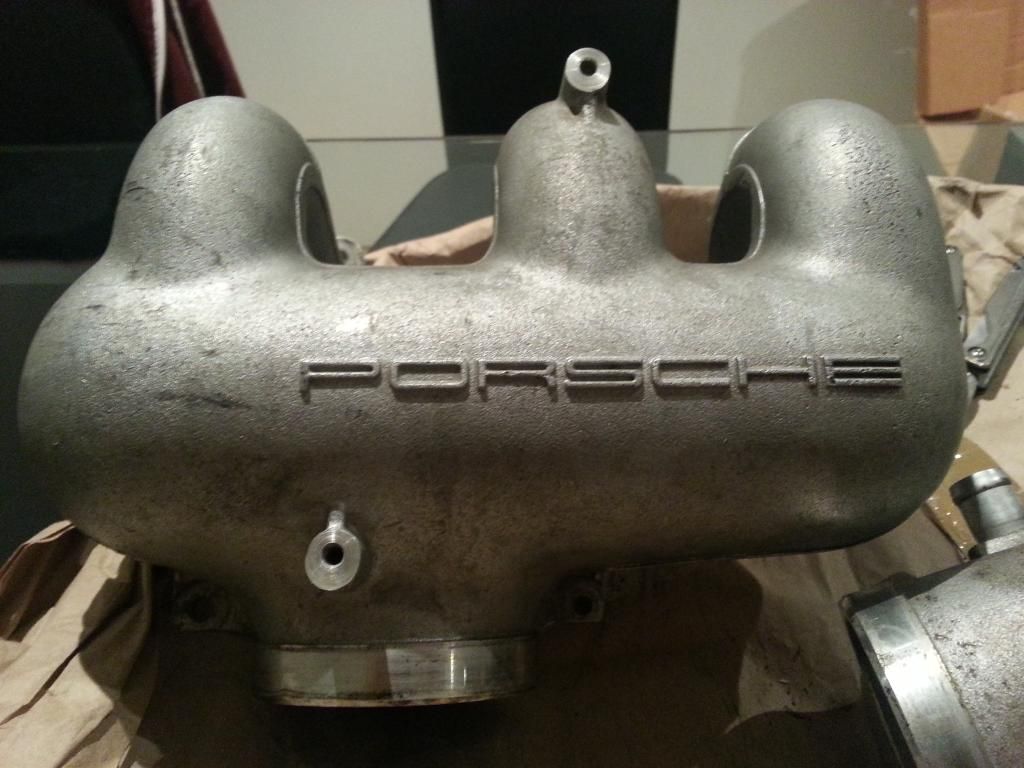
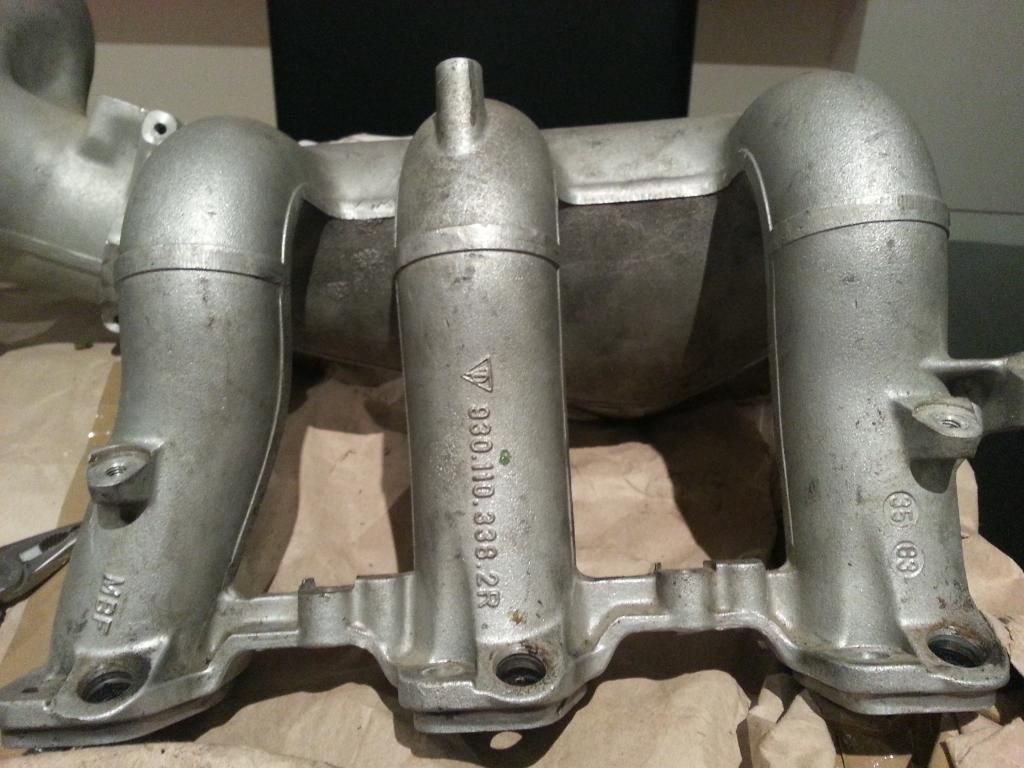
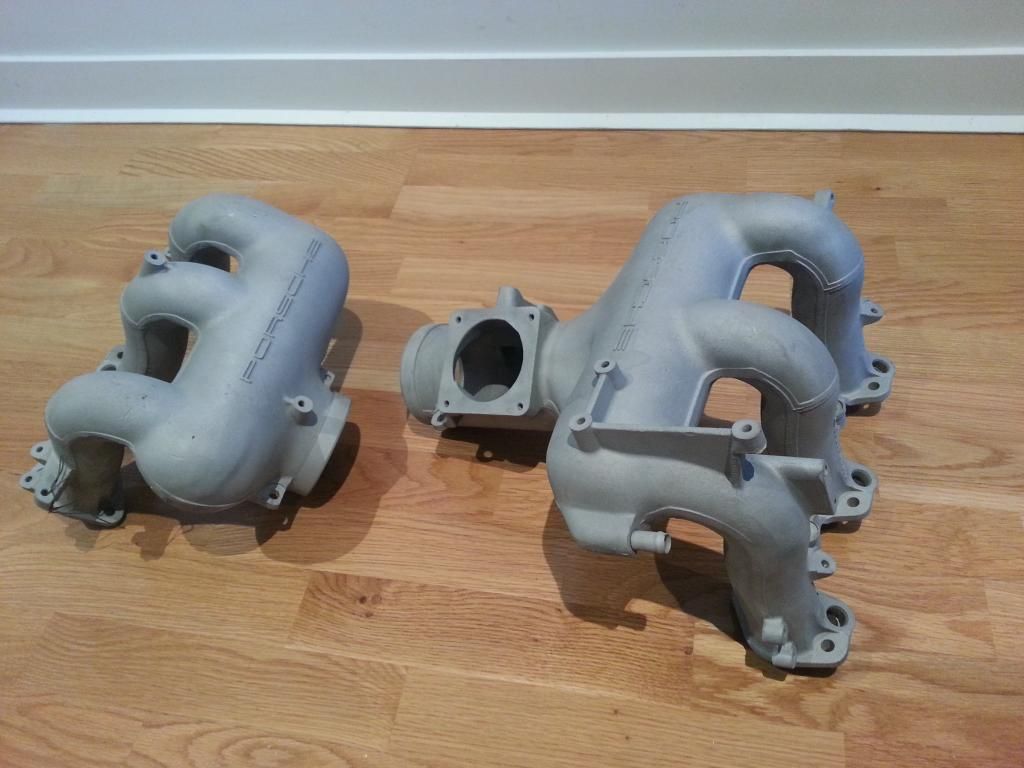
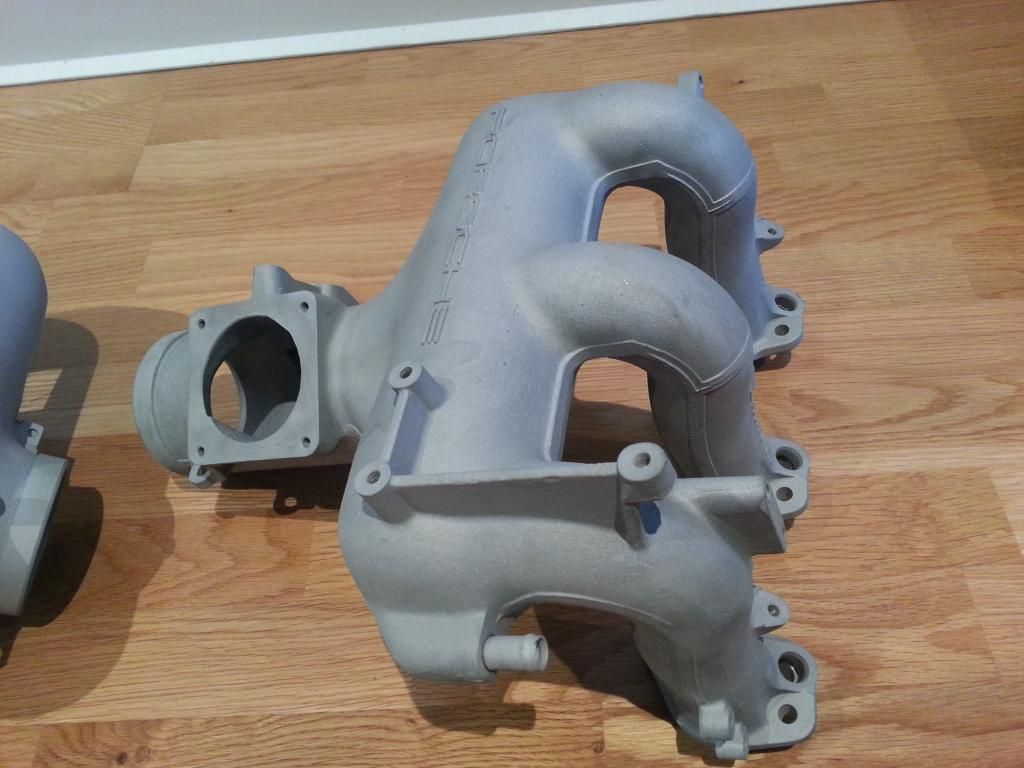
Rather than butchering up the original I have bought this:

The plan is to fit the Megasquirt ECU so I have sequential firing and injection
So what will I have to do on engine...briefly....
- Change fuel injectors to high impedence injectors
- Fit MAP sensor (manifold Absolute Pressure)
- Fit Manifold air temperature sensor
- TPS (Throttle position sensor)
- O2 sensor - wide or narrow band
- Crank trigger wheel
- Cam sensor - either direct from the cam or modify distributor
- may replace fuel pressure regulator with adjustable FPR
As for the ECU....
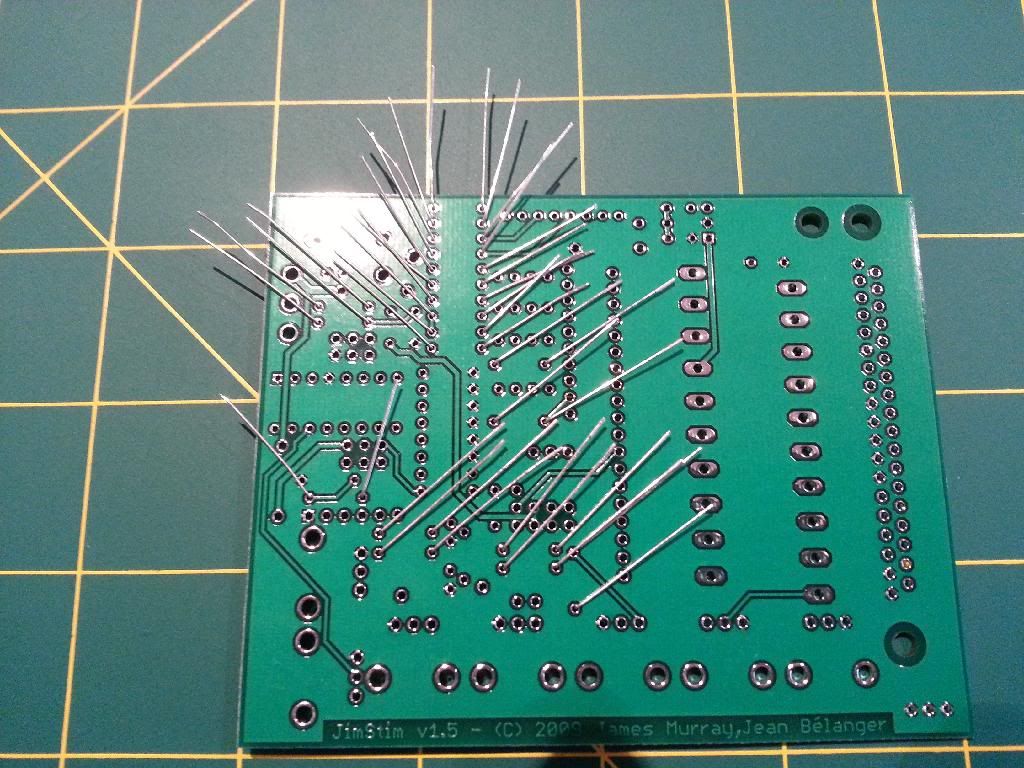
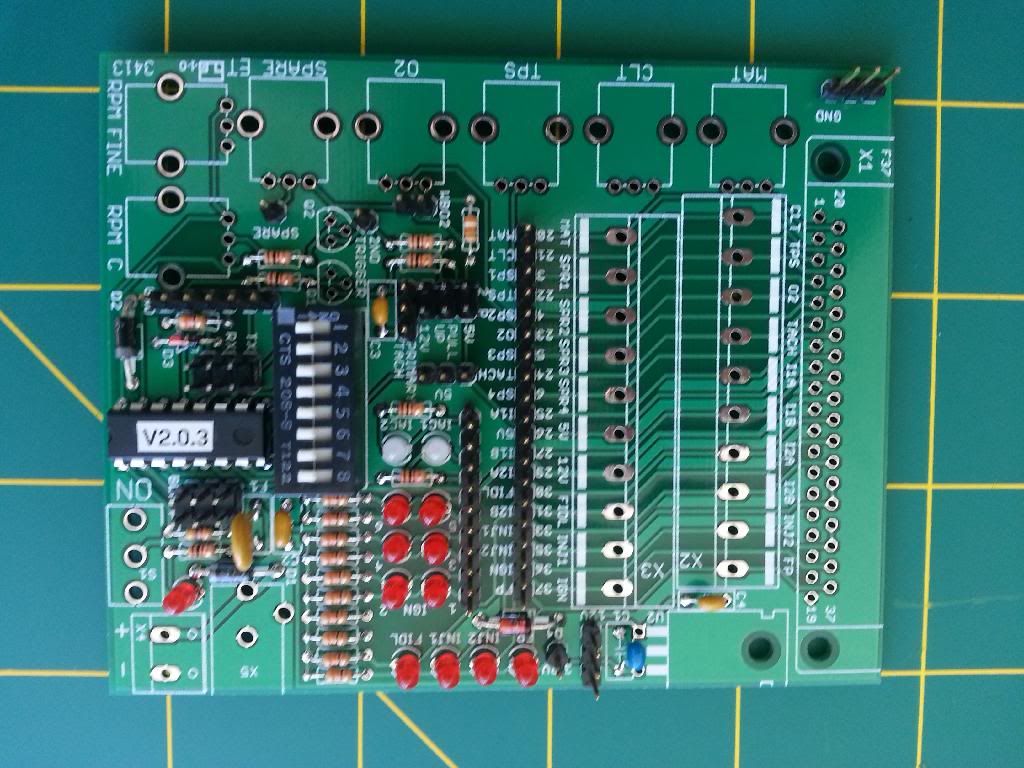
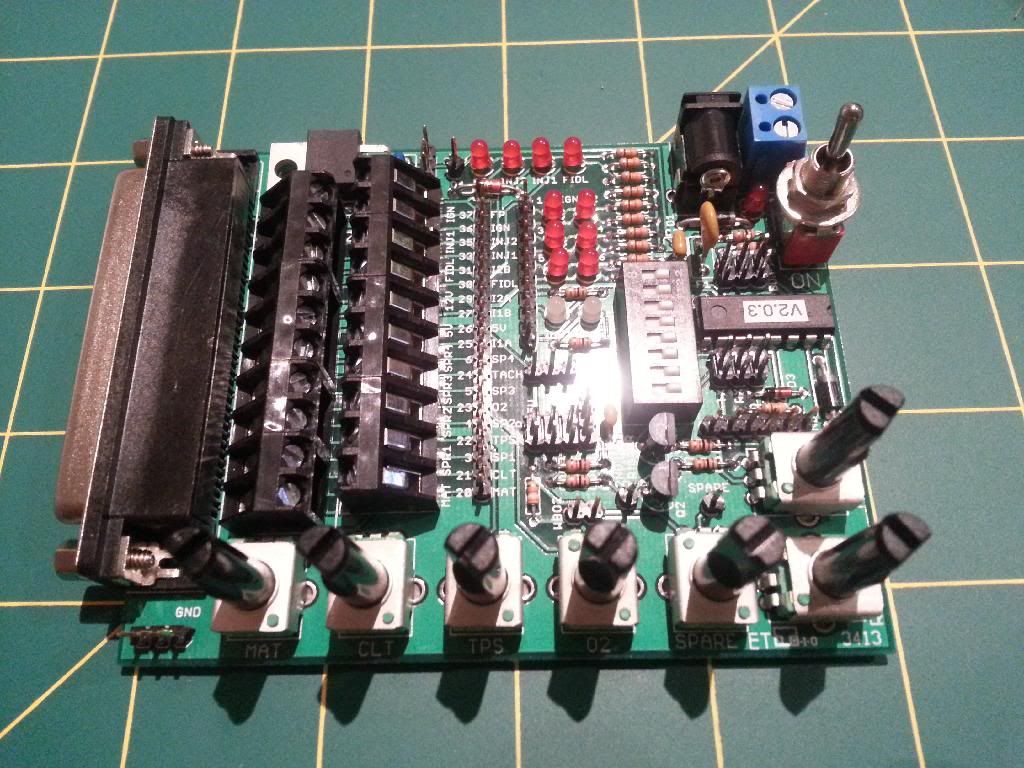
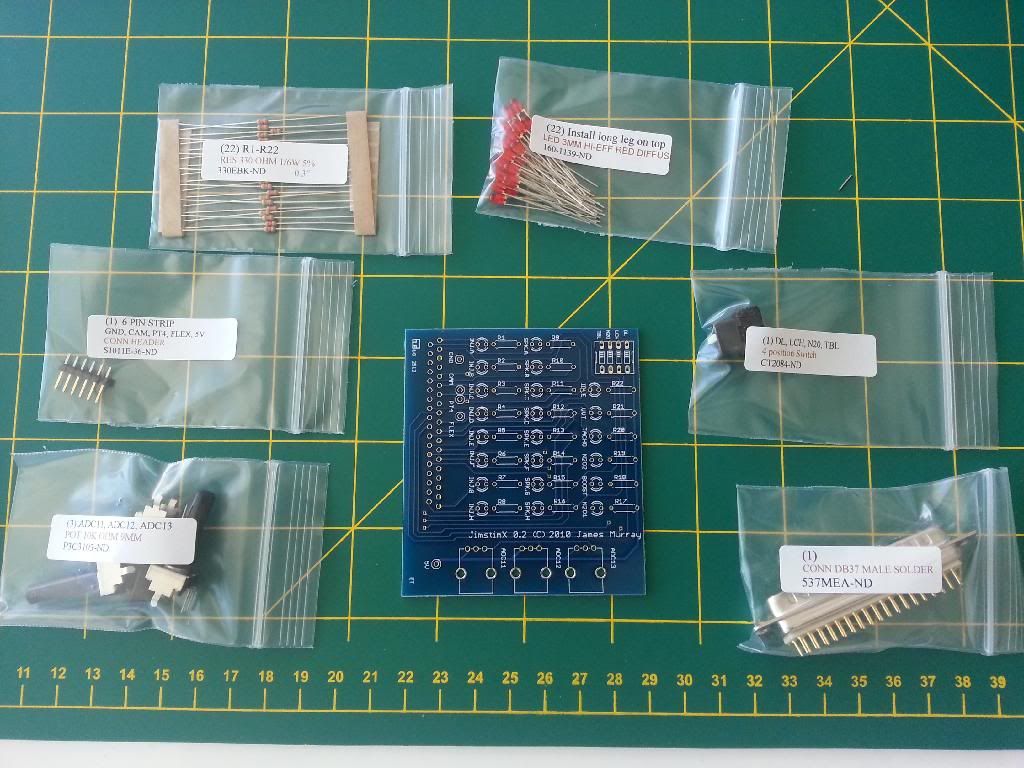
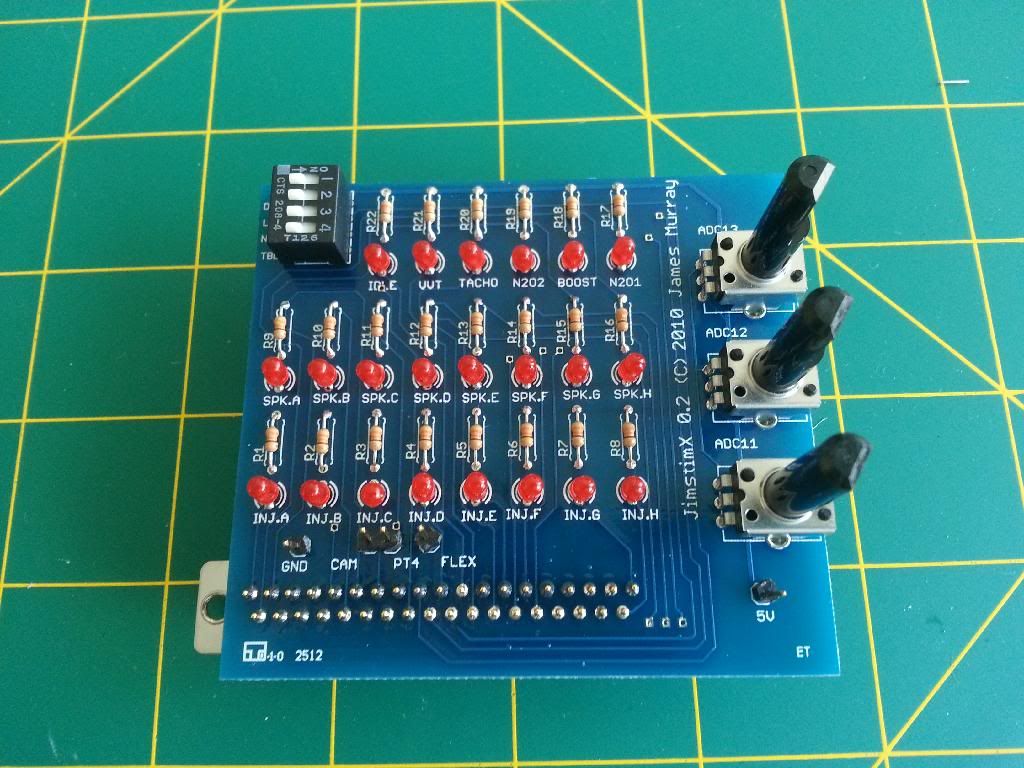
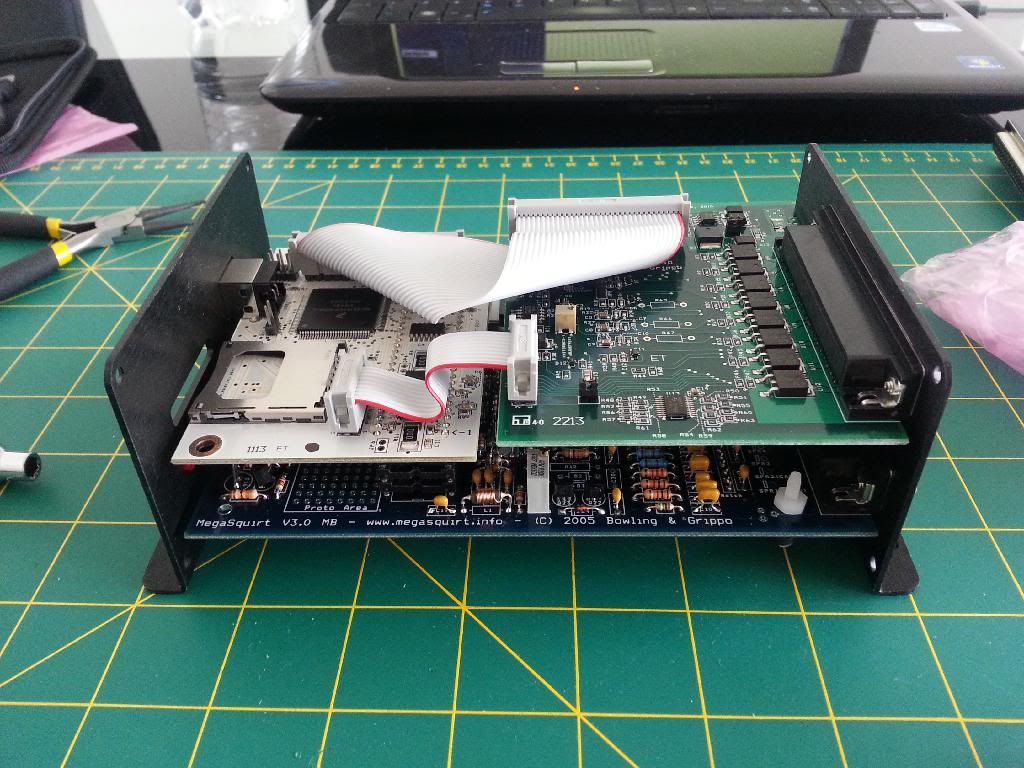
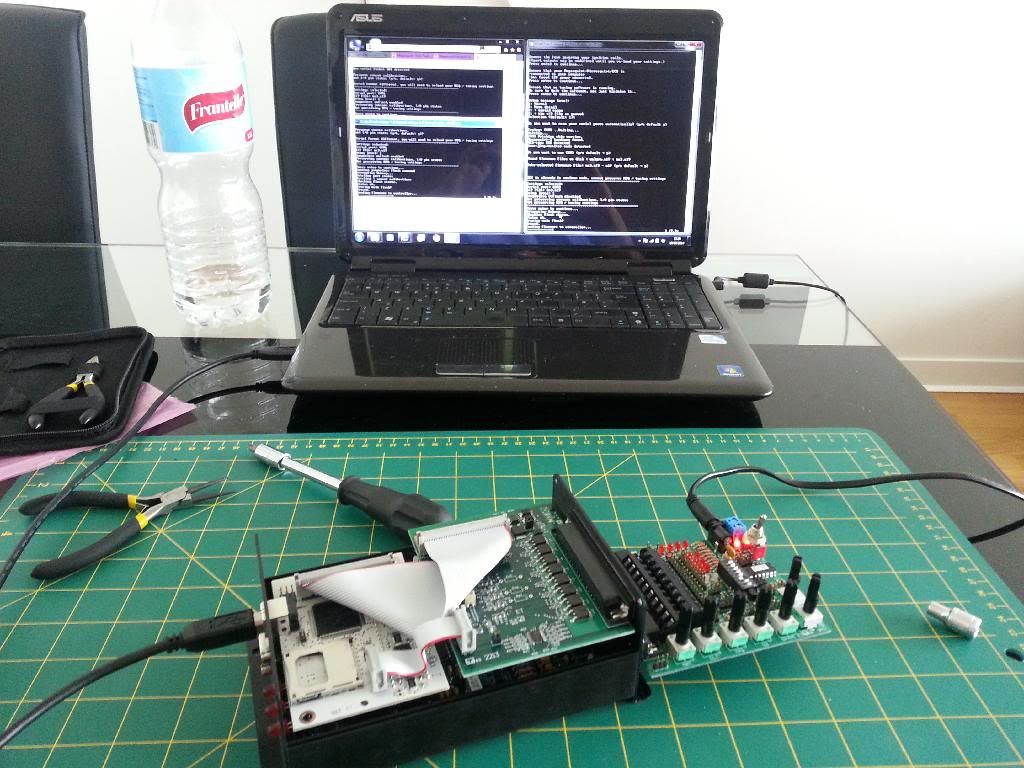
I have ordered the unassembled version MS3 with the MS3X (expansion) to allow me to build in what I want to build in (which will probably be everything!). I have bought the stimulator too, which will enable me to bench test along the way and make sure that its working ok before I put in on the engine.
For those interested I ordered it from http://www.diyautotune.com" onclick="window.open(this.href);return false;
MS3 - http://www.diyautotune.com/catalog/megasquirtiii-wpcb-v30-unassembled-kit-with-black-case-p-419.html" onclick="window.open(this.href);return false;
MS3X - http://www.diyautotune.com/catalog/megasquirtiii-ms3x-expansion-card-p-434.html" onclick="window.open(this.href);return false;
JimStim - http://www.diyautotune.com/catalog/jimstim-v15-megasquirt-stimulator-wheel-simulator-unassembl-p-174.html" onclick="window.open(this.href);return false;
JimStimX - http://www.diyautotune.com/catalog/jimstimx-expansion-board-unassembled-p-473.html" onclick="window.open(this.href);return false;
The Megasquirt parcel is due to arrive next week so I will update then
NaFe
Therefore, while I am over here I have decided to work on a project that I can upgrade when we return in a yr or two....yep a slow burn project.
So a bit of history...I am running a 3.0L Porsche 911 SC engine. This engine has a standard Bosch fuel injection system fitted - type k-jet. K-Jet stands for continuous injection. In other words fuel is injected constantly, whether the inlet valves are open or closed. as the valve opens the already pre atomised fuel is sucked into the combustion chamber until the valve closes again. This system works well when tuned, but is a bit of a nightmare when it doesn't run well. I have had a little bit of trouble keeping the engine tuned. so i have chosen to upgrade the fuel injection system.
I am going to be fitting a Porsche Carrera 3.2L fuel injection system with a bit of a twist. I am going to build my own Megasquirt 3 ECU.
it is possible to modify the CIS (Continuous Injection System) I have, but I want to do a swap out and possibly sell the original CIS system further down the line. Also, and most importantly, the 3.2L setup will look a hell of a lot better than a modified CIS system. to give you an idea this is the modifying option:
Standard CIS system:
Modified CIS system:
Rather than butchering up the original I have bought this:
The plan is to fit the Megasquirt ECU so I have sequential firing and injection
So what will I have to do on engine...briefly....
- Change fuel injectors to high impedence injectors
- Fit MAP sensor (manifold Absolute Pressure)
- Fit Manifold air temperature sensor
- TPS (Throttle position sensor)
- O2 sensor - wide or narrow band
- Crank trigger wheel
- Cam sensor - either direct from the cam or modify distributor
- may replace fuel pressure regulator with adjustable FPR
As for the ECU....
I have ordered the unassembled version MS3 with the MS3X (expansion) to allow me to build in what I want to build in (which will probably be everything!). I have bought the stimulator too, which will enable me to bench test along the way and make sure that its working ok before I put in on the engine.
For those interested I ordered it from http://www.diyautotune.com" onclick="window.open(this.href);return false;
MS3 - http://www.diyautotune.com/catalog/megasquirtiii-wpcb-v30-unassembled-kit-with-black-case-p-419.html" onclick="window.open(this.href);return false;
MS3X - http://www.diyautotune.com/catalog/megasquirtiii-ms3x-expansion-card-p-434.html" onclick="window.open(this.href);return false;
JimStim - http://www.diyautotune.com/catalog/jimstim-v15-megasquirt-stimulator-wheel-simulator-unassembl-p-174.html" onclick="window.open(this.href);return false;
JimStimX - http://www.diyautotune.com/catalog/jimstimx-expansion-board-unassembled-p-473.html" onclick="window.open(this.href);return false;
The Megasquirt parcel is due to arrive next week so I will update then
NaFe
")