my 1971 danburyfalia pop top project

Early Bay Forum

Help Support Early Bay Forum:

This site may earn a commission from merchant affiliate links, including eBay, Amazon, and others.
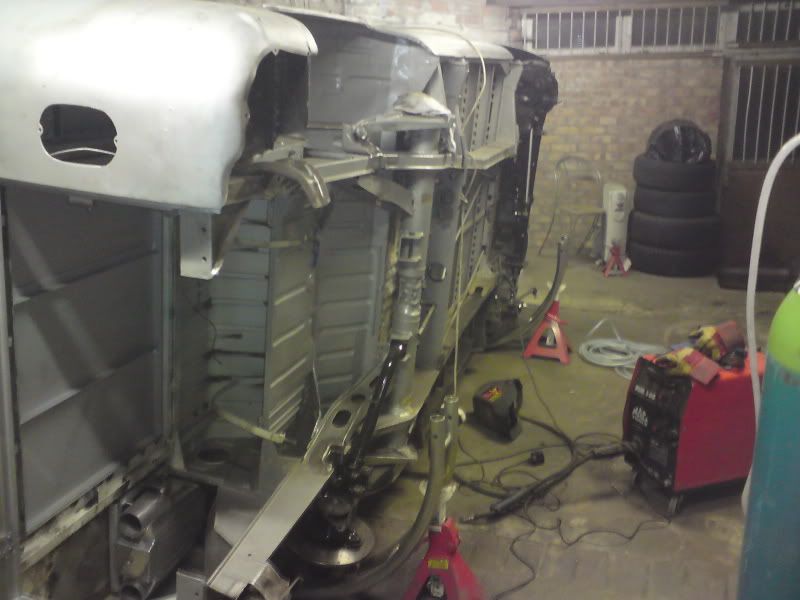
my lovely wife and kids have gone to cleethorpes for a few days as of yesterday arvo :( . this will be there longest time i have been apart from her in 8 years. one plus point though is i went round last night night and recruted a few boys to get it flipped again.


aw2.jpg


aw1.jpg


aw3.jpg


DSC00351.jpg


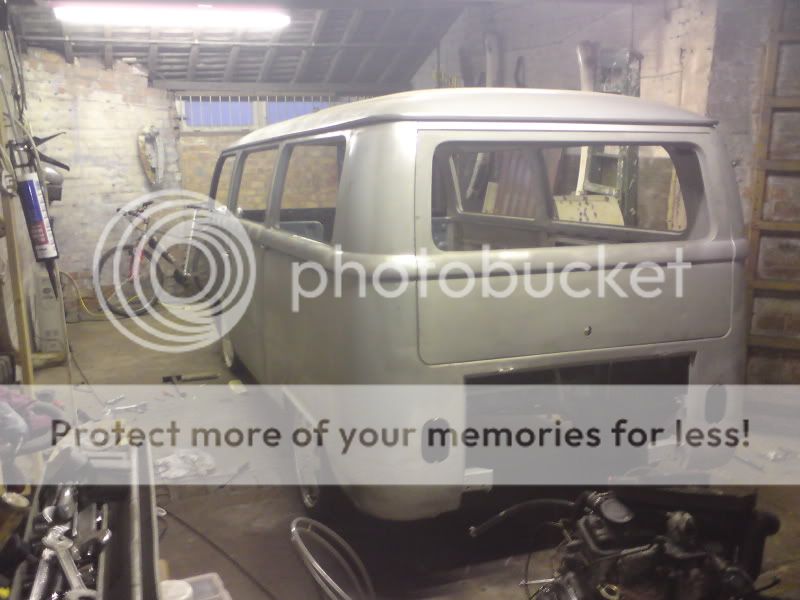
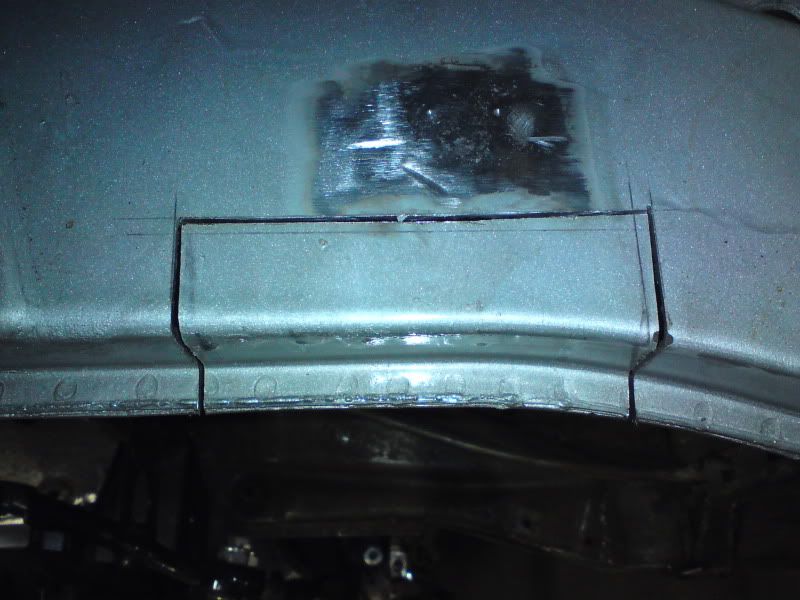
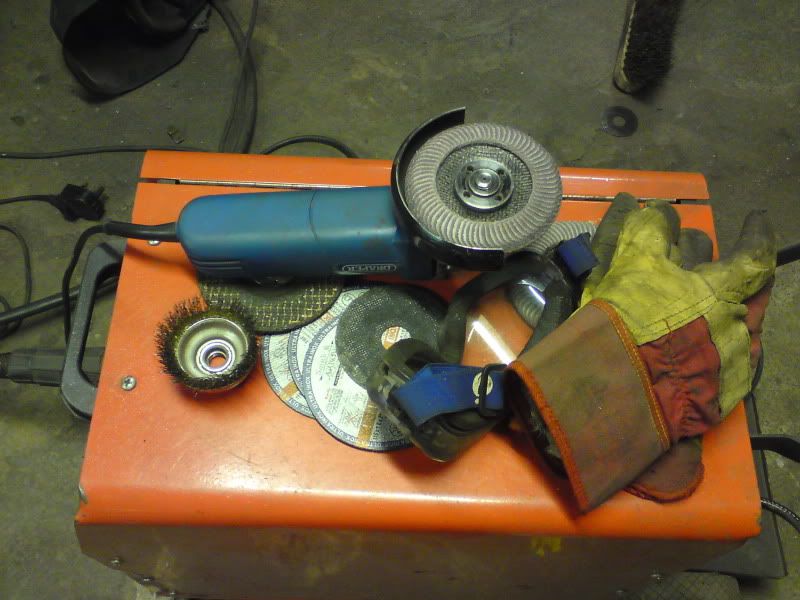
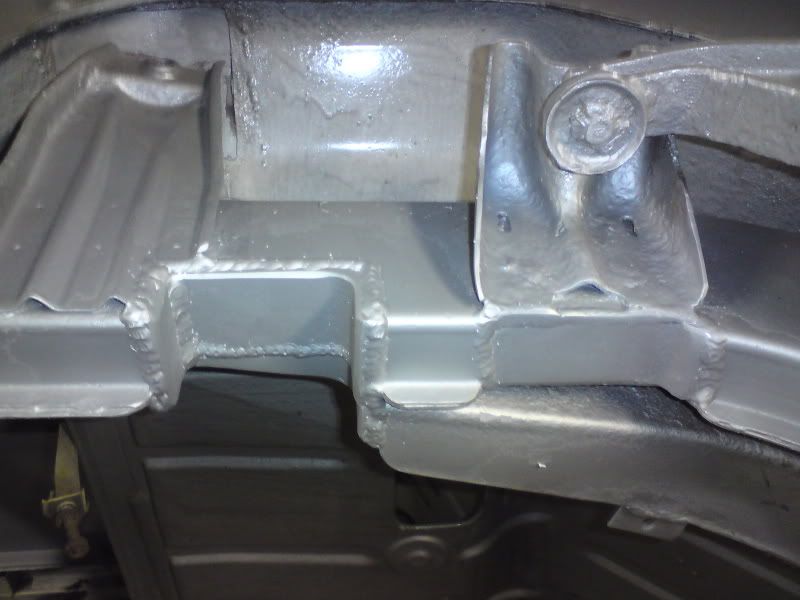
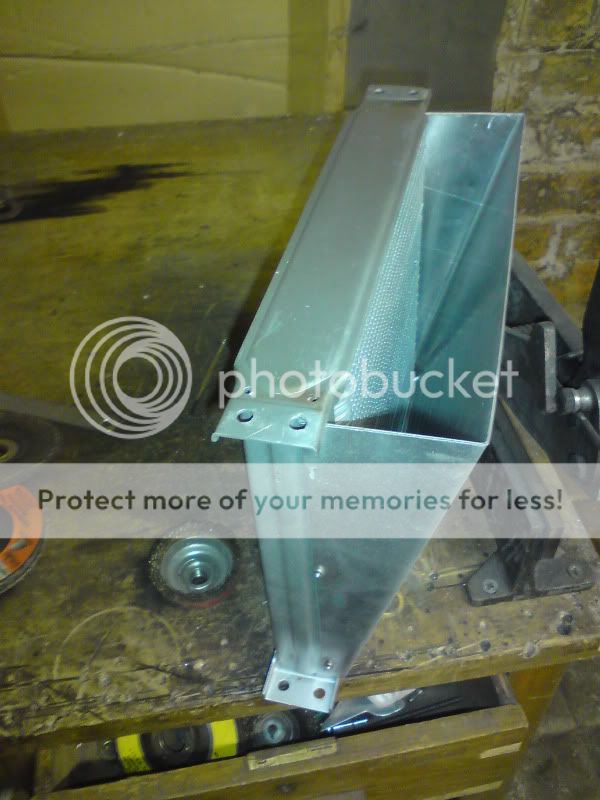
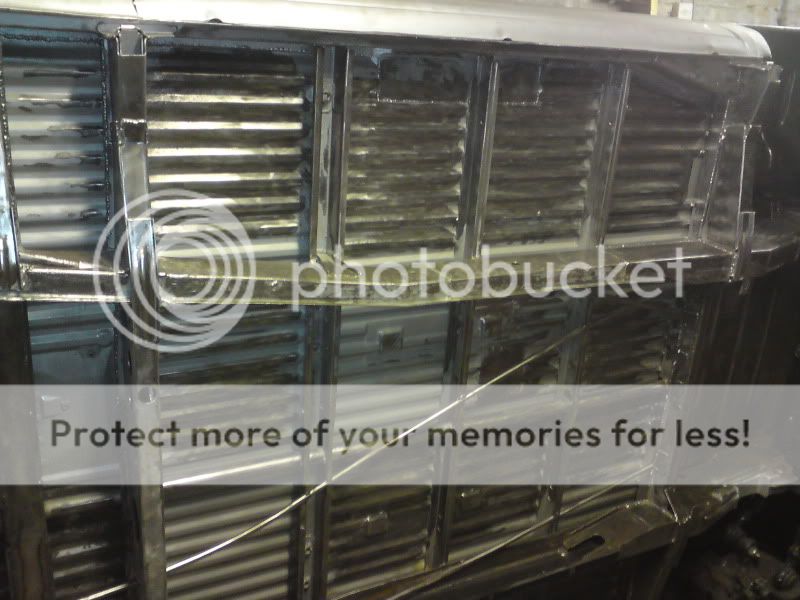
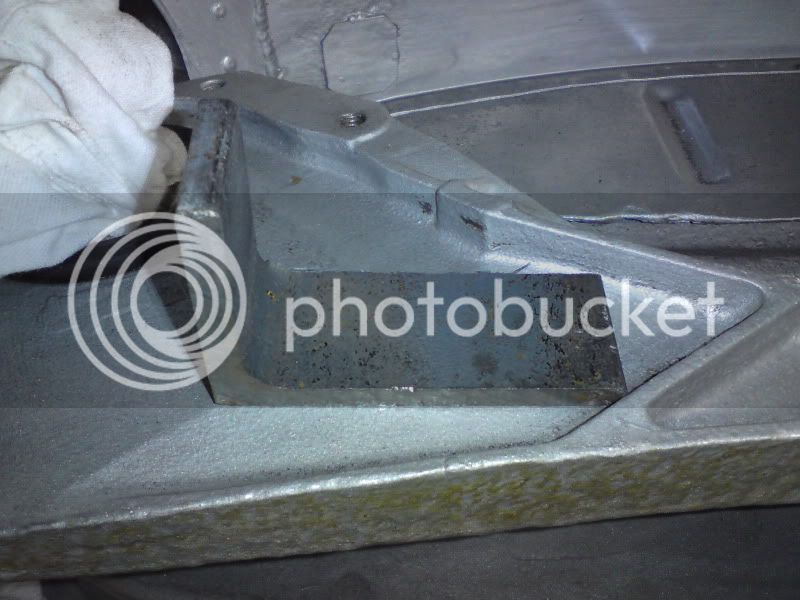
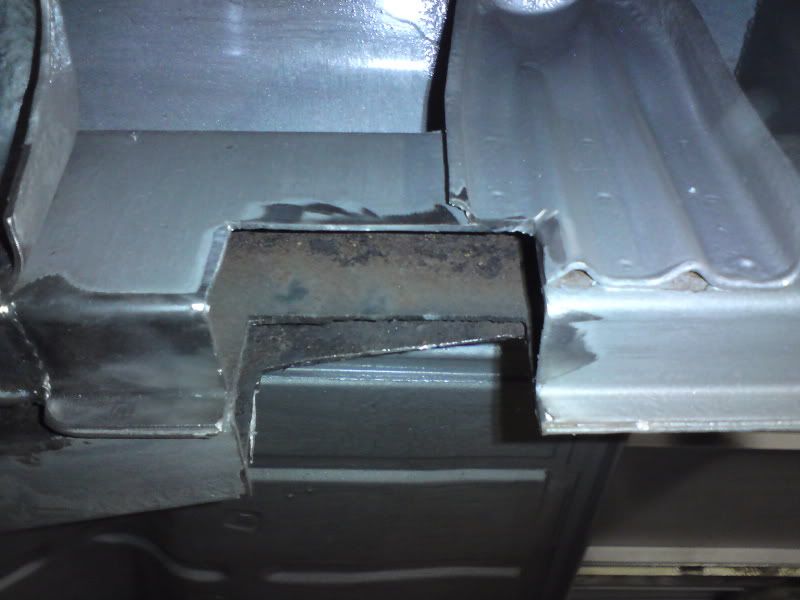
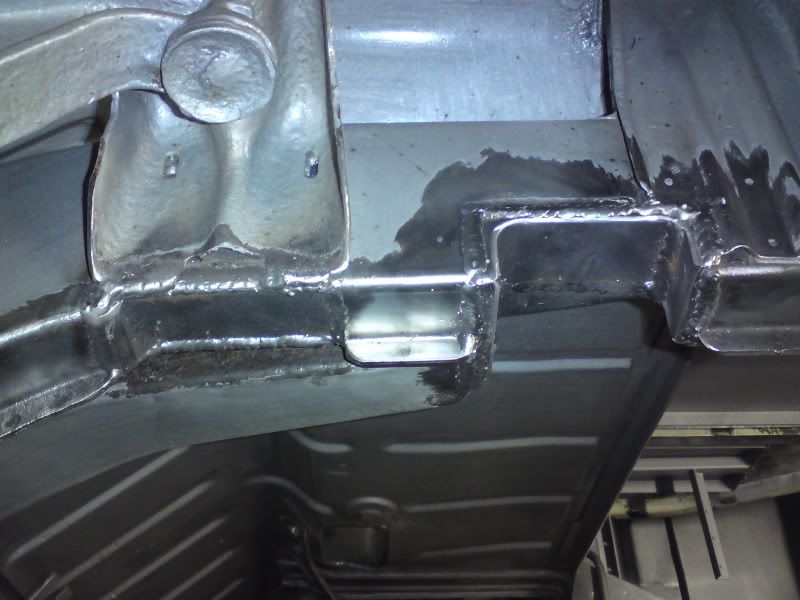
probably dont need to notch my van but all you guys are doing it and i felt a little left out so here goes

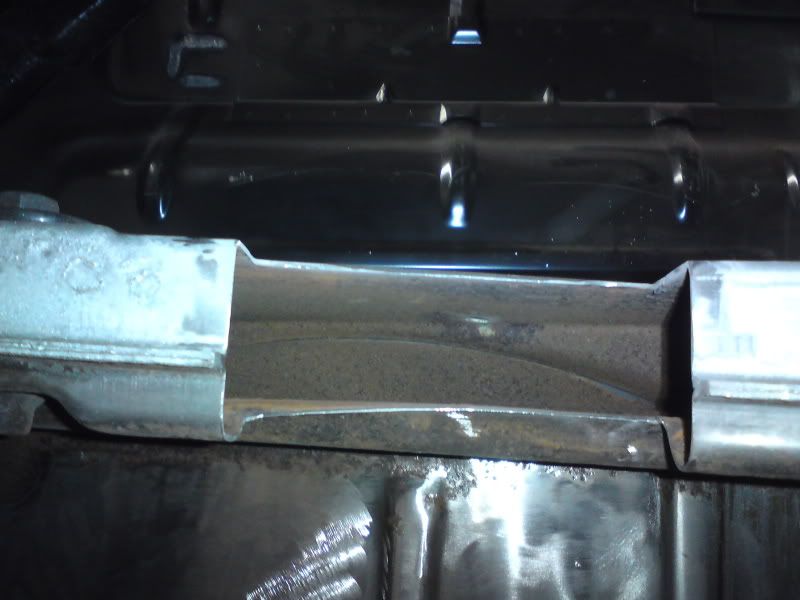
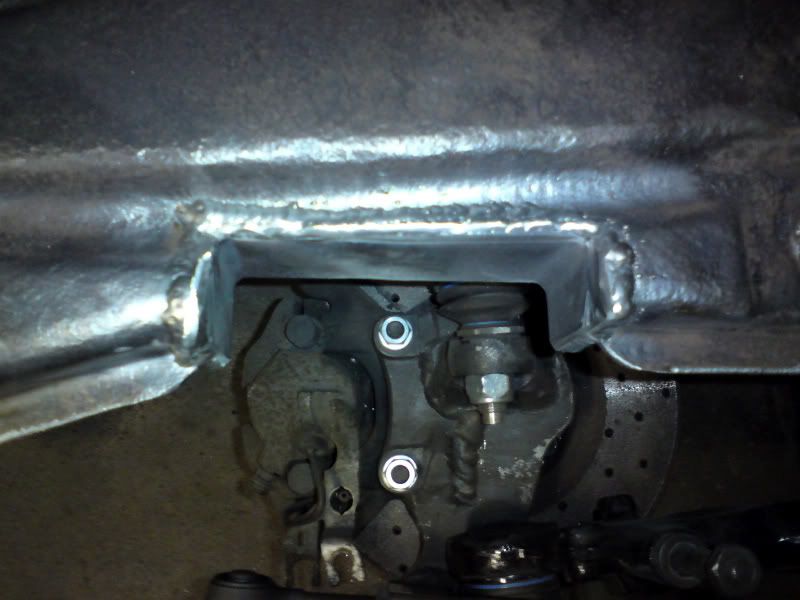
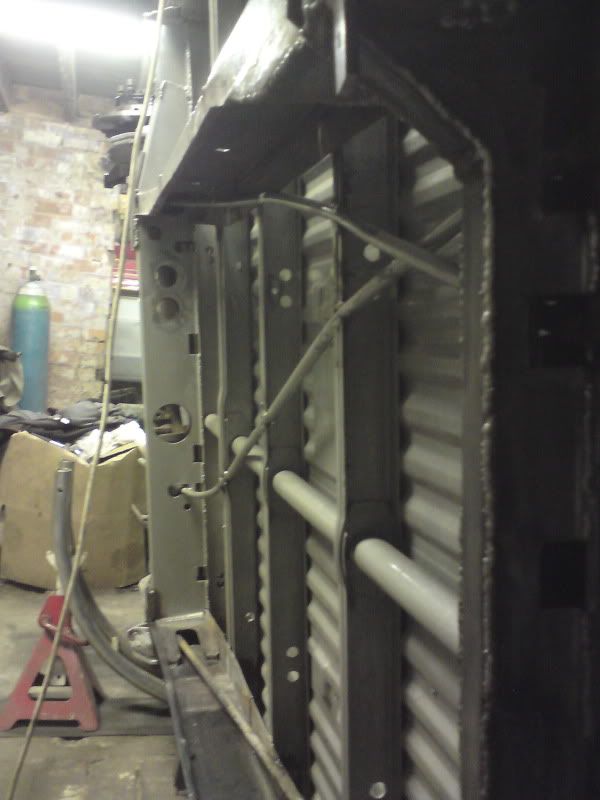
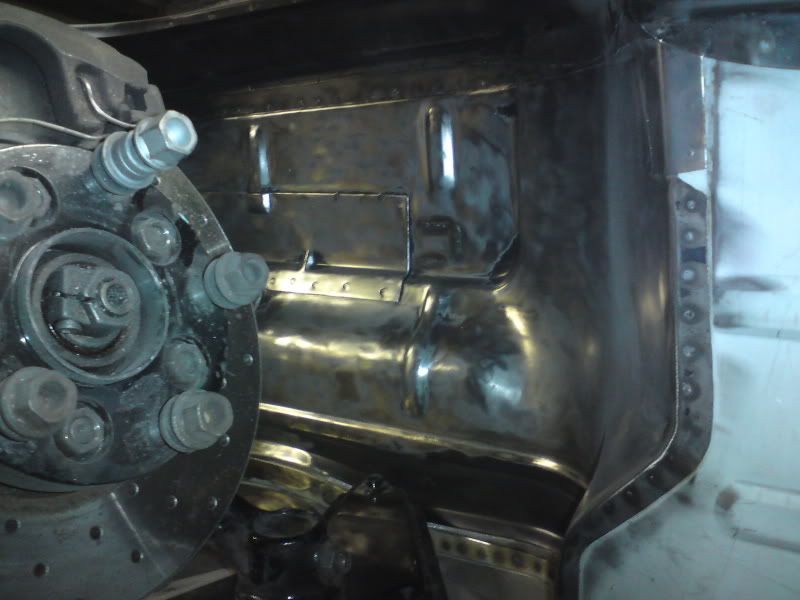
a little clearance for the trailing arm which a lot of folks seem to forget about. only around 15 mm of clearance but it all counts


DSC00366.jpg


DSC00367.jpg


DSC00368.jpg


DSC00369.jpg


DSC00370.jpg


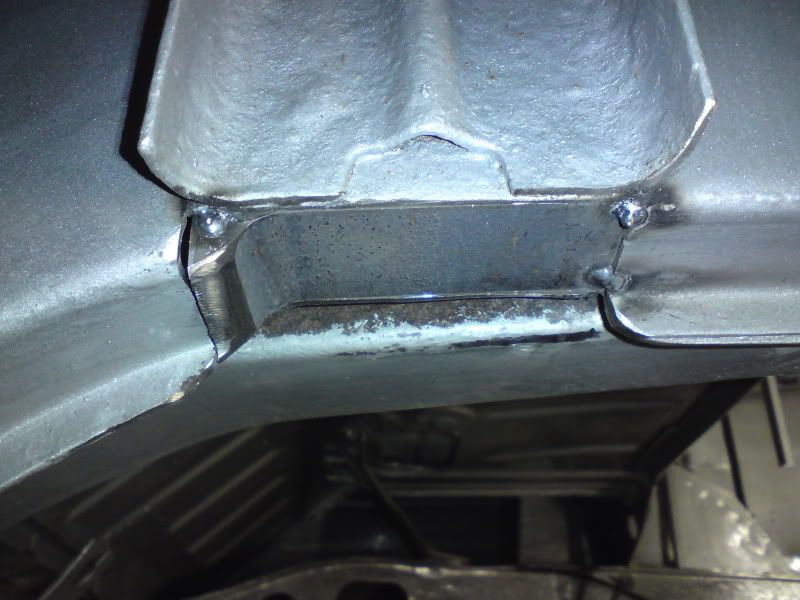
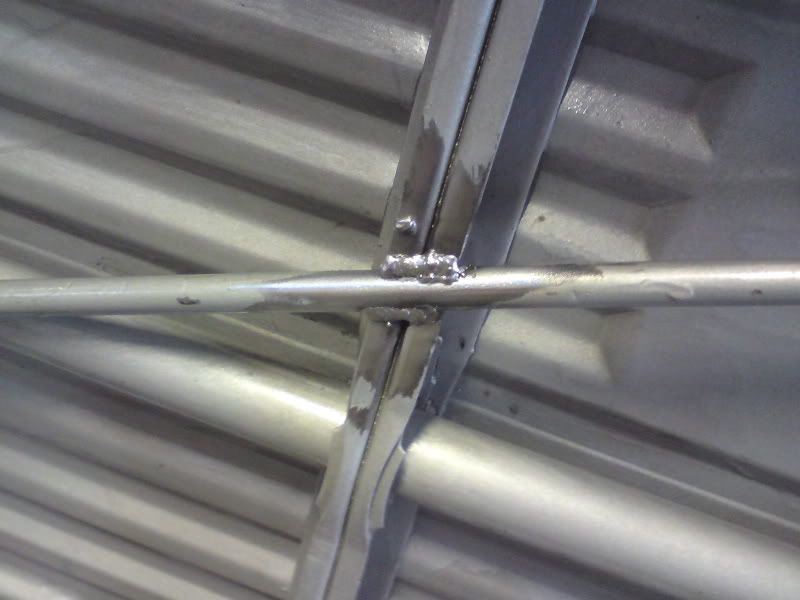
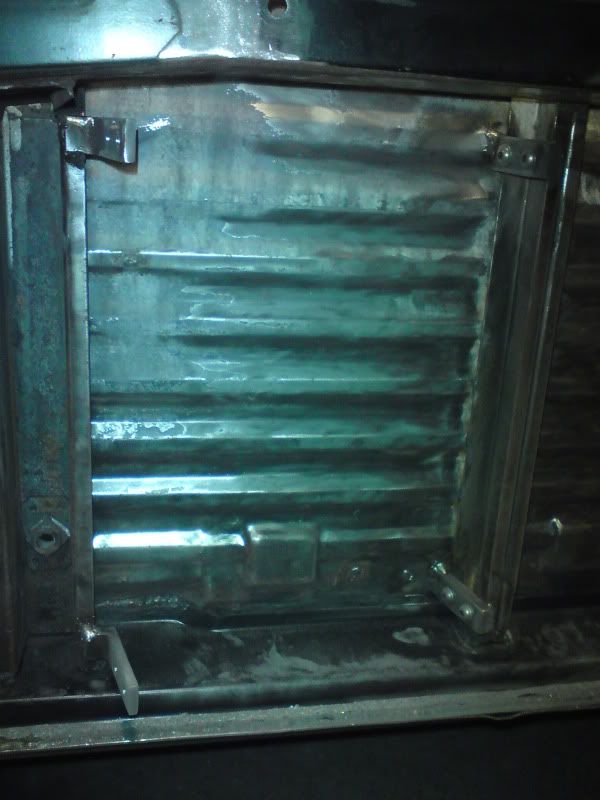
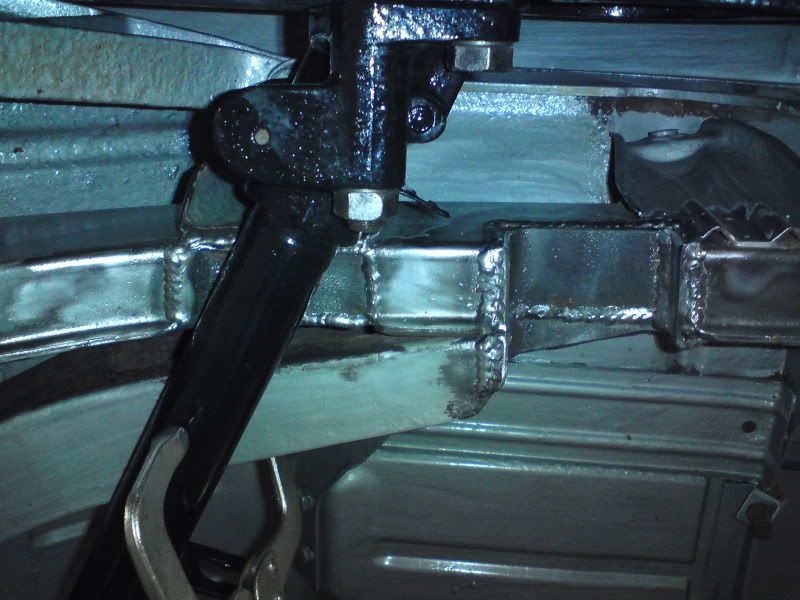
then to the drive shaft


DSC00371.jpg


DSC00372.jpg


DSC00372.jpg


DSC00374.jpg


DSC00375.jpg


DSC00376.jpg


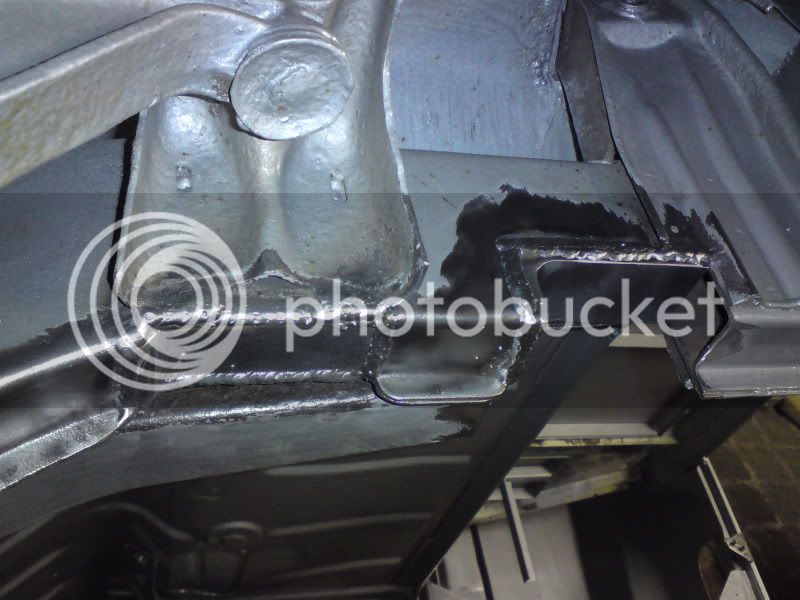
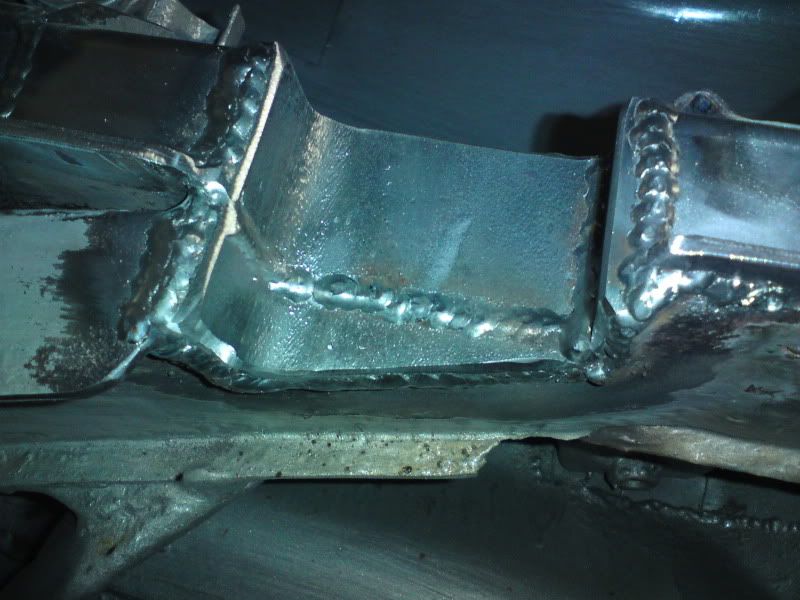
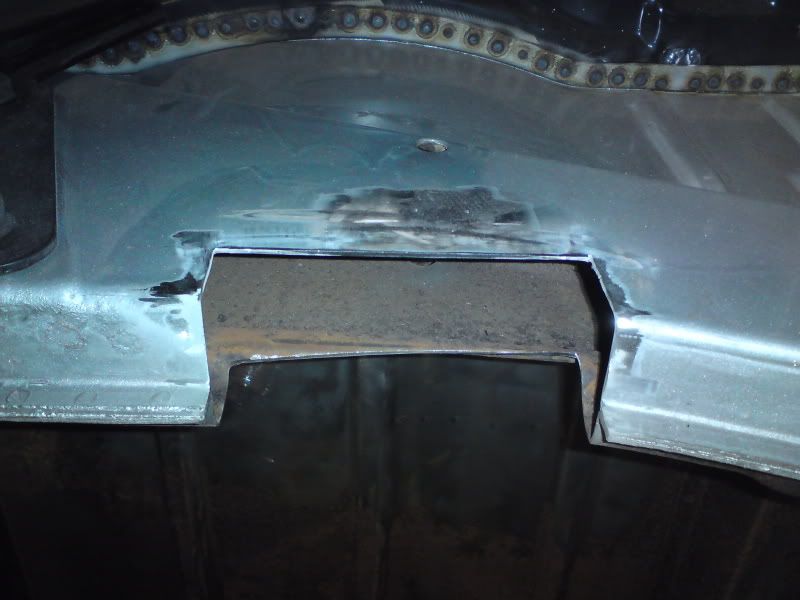
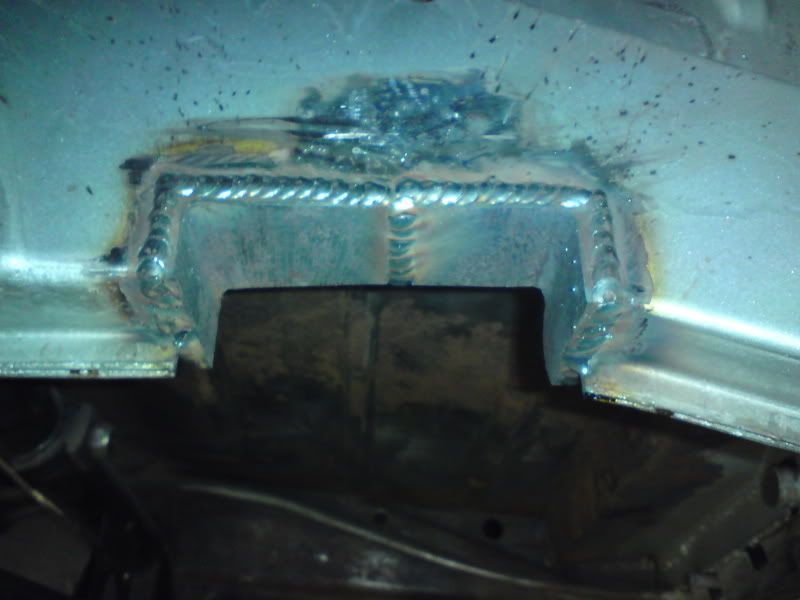
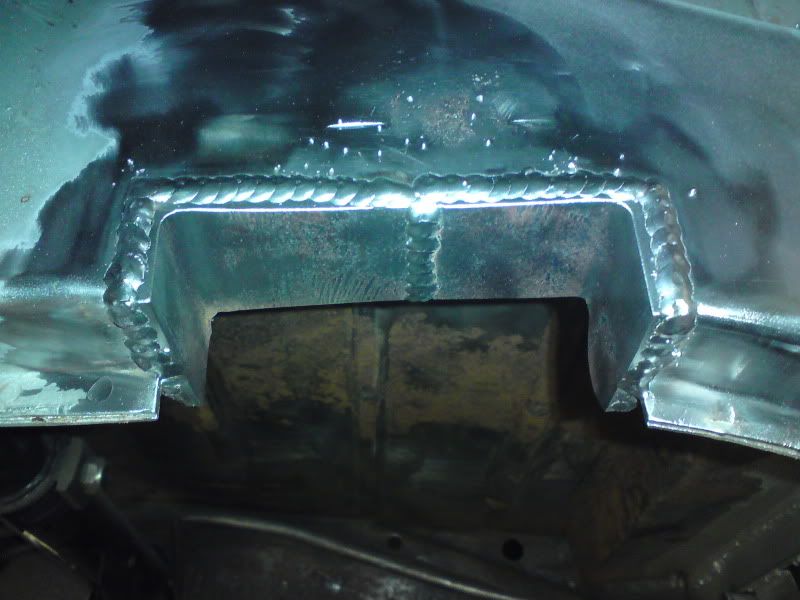
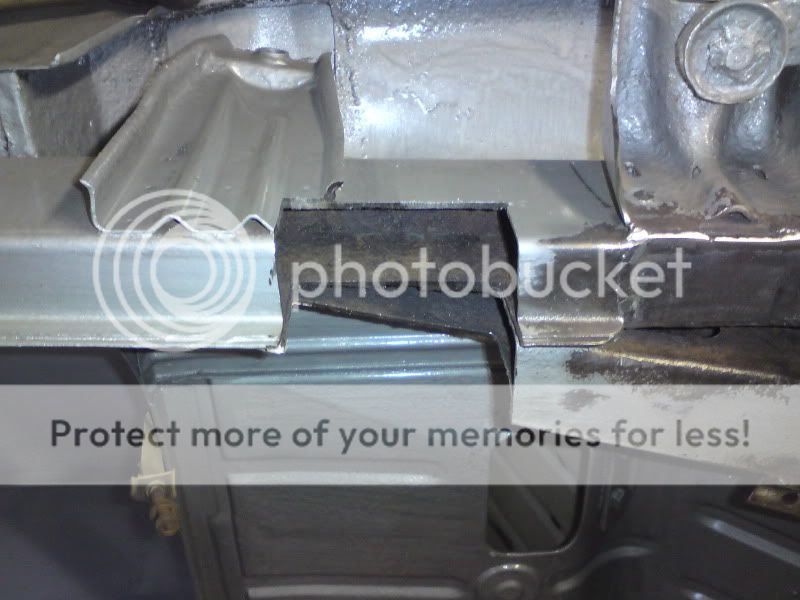
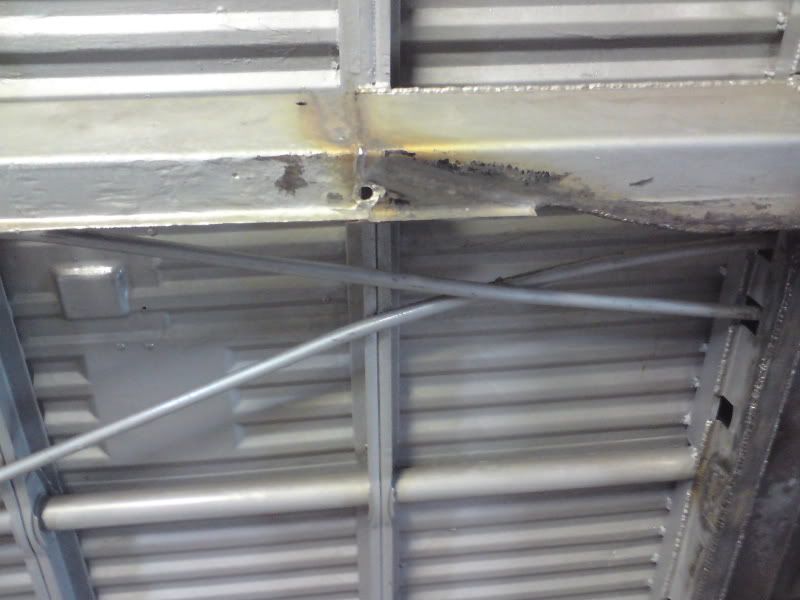
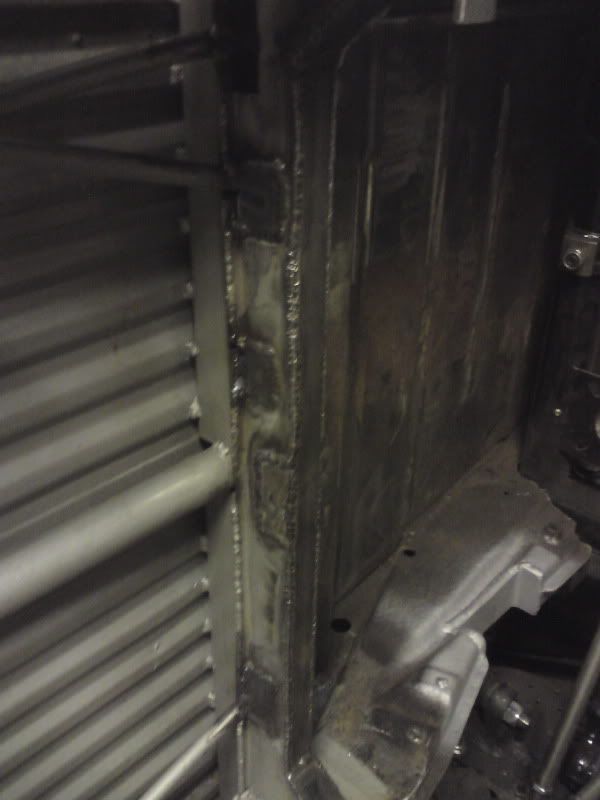
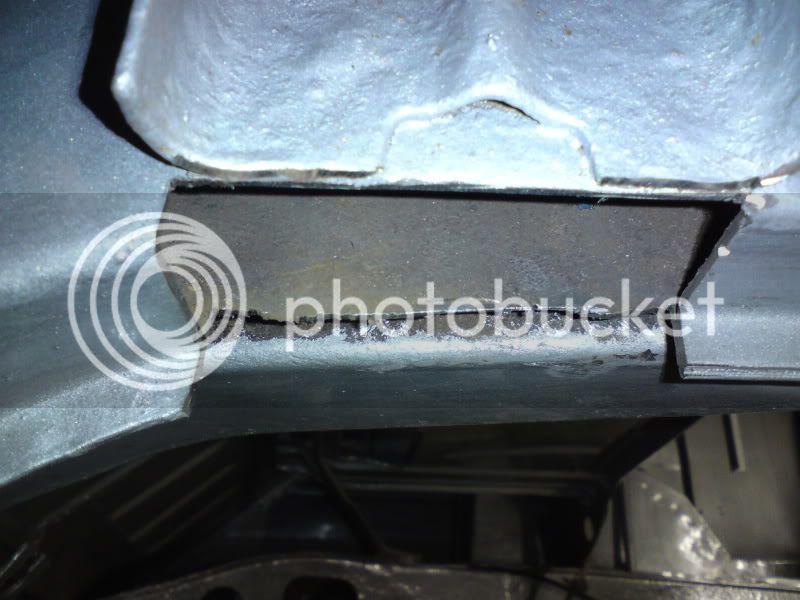
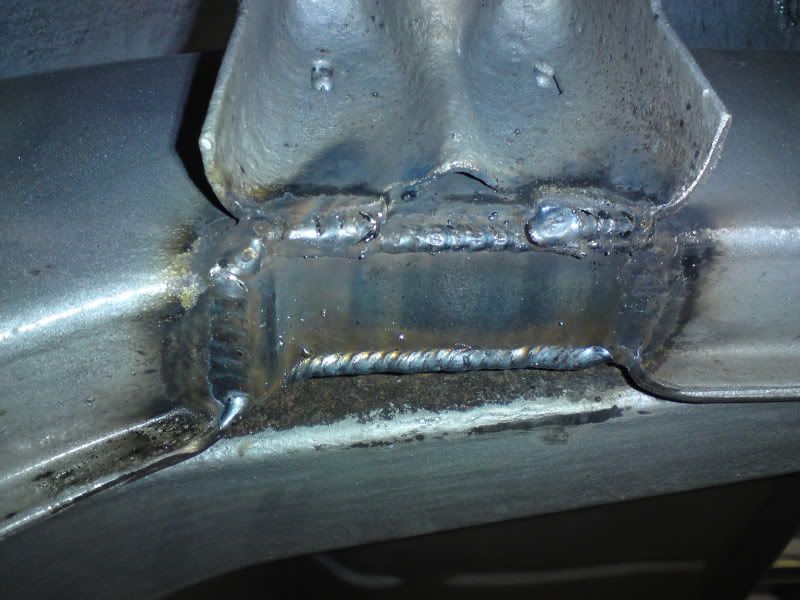
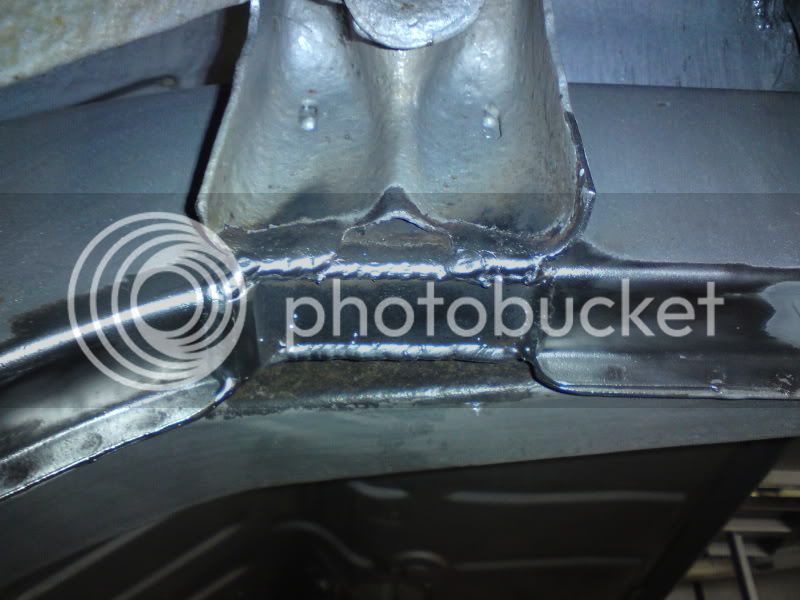
i did the notch in two sections to make sure the chassis was fully welded all round then the diagonal section welds to it


DSC00377.jpg


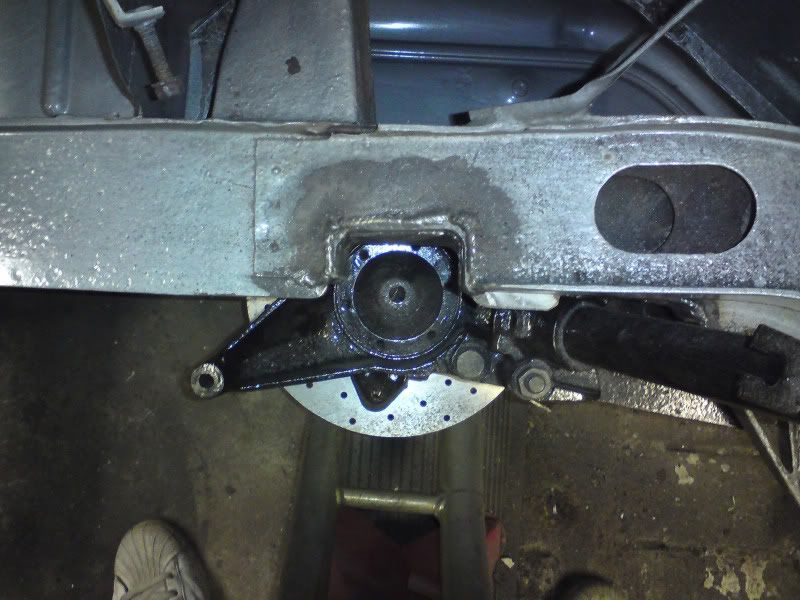
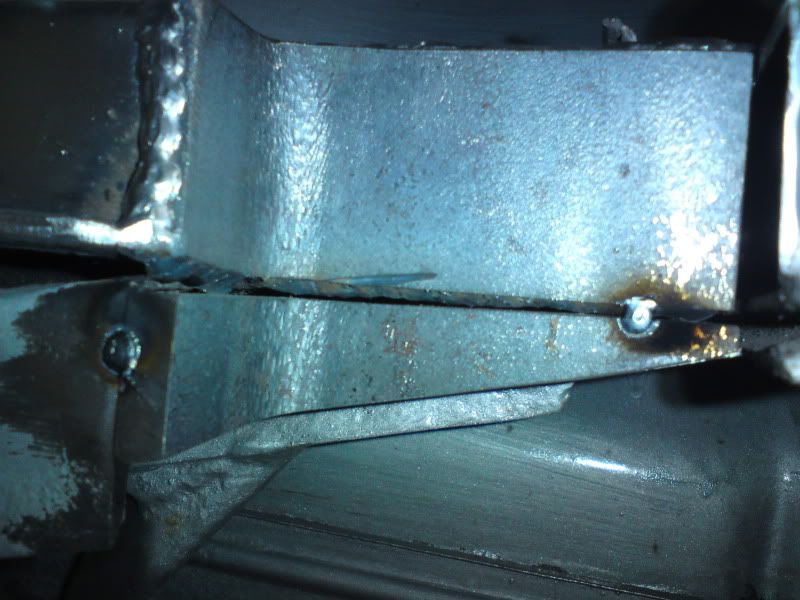
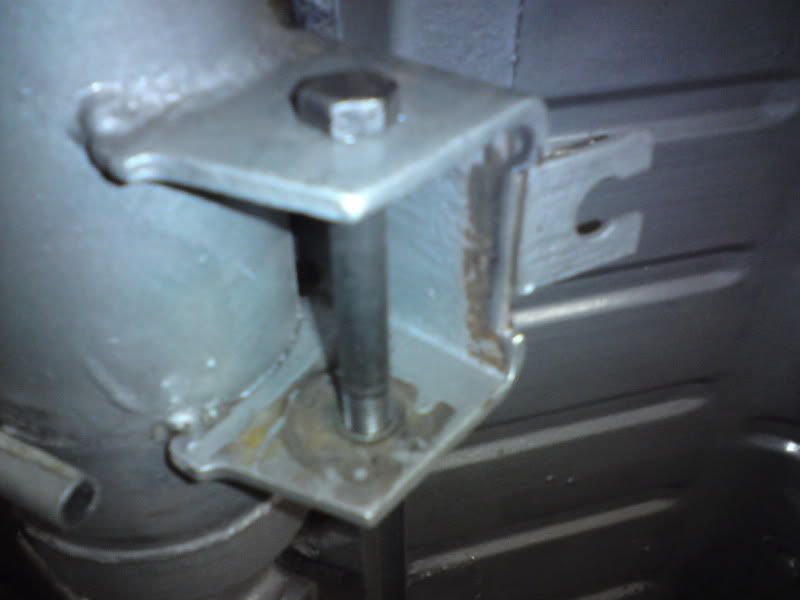
little bit of clearance on the arm pivot
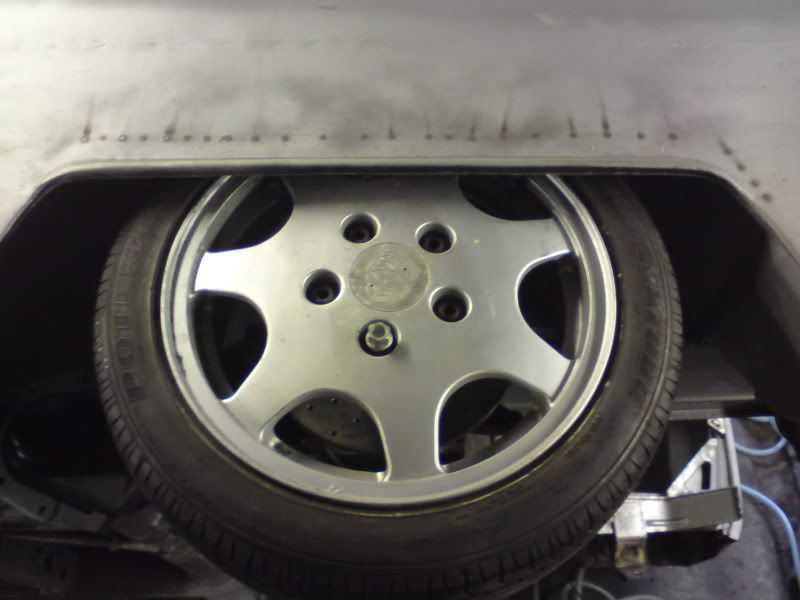
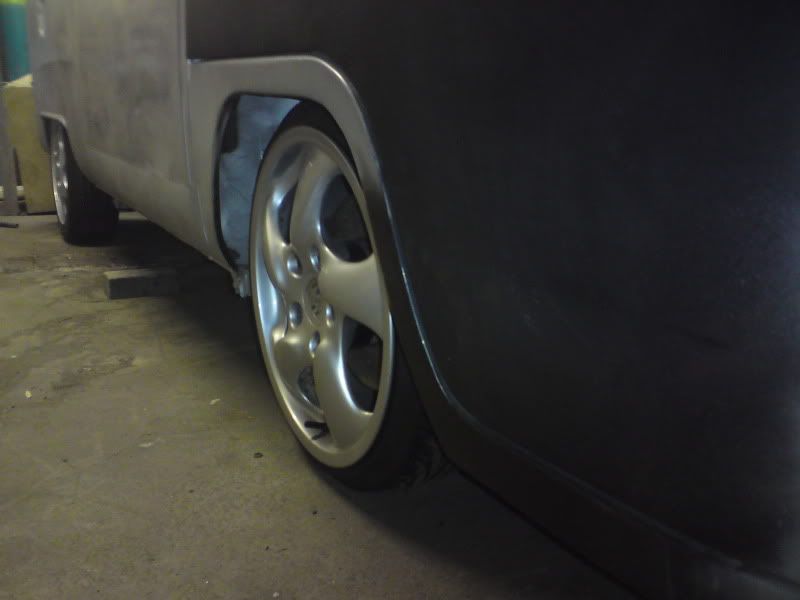

DSC00378.jpg


DSC00380.jpg


DSC00379.jpg


bit of camber :D


DSC00381.jpg
 
oh and i did a bit on the front too


DSC00382.jpg


DSC00383.jpg


DSC00384.jpg


DSC00385.jpg


DSC00386.jpg


DSC00387.jpg


after having one of those eureka moments earlier. i have decided to notch the hand brake cables and clutch cable into the top hat sections of thew floor. this should lift them 20mm allowing me to lift the rads 20mm nearer the floor allowing the van to run 20mm closer to the floor. :D
 
Love the welds, can you try to describe how you get that look? Its as though you have placed a spot of weld and then added another and so on, how you get it so straight and clean looking is beyond me and my skills! :oops:
 
mate! that is professional!

just out of interest...are you not more likely to get contact between your wheel and wheel arch then contact with steering rod and chassis? you've got me thinking that i may need it. i'm going down two splines on the back and just off lowest setting on albertros adjusters on the rear.

also..can you give be a bit of a step by step guide as how you roll your bus. loxy my dad and i did mine last night with ALOT of effort and was wondering if we were doing it right

NaFe

p.s. keep up the amazing work!
 
Haveacamper said:
also..can you give be a bit of a step by step guide as how you roll your bus. loxy my dad and i did mine last night with ALOT of effort and was wondering if we were doing it right

p.s. keep up the amazing work!

top work andy, @ Nafe your not alone, two of us 30 mins to roll my bus and it was a real episode, there were some hairy moments but i put it down to my shit roller. looks like you have one of those decent ones.
 
i have rolled it with three of us before but would say that four or more is best. we alway start with two people pulling and two pushing it over then when the weight shifts the two pulling take the weight to stop of rolling too fast. its going back over the other way tonight as i need to notch the drivers side. luckily where my van is i have three flats with tennents in who dont mind giving a hand :D

last time we tipped it it had engine and g box in. now that was a hernia popper. :shock: six of us did it that time and still struggled. these things get heavier the more rust is replaced with solid steel
 
cyberdyne systems said:
Love the welds, can you try to describe how you get that look? Its as though you have placed a spot of weld and then added another and so on, how you get it so straight and clean looking is beyond me and my skills! :oops:


my tips would be. get a good weld. mine is a 180. clean the area you want to weld properly. if its nots clean enough that you wouldnt mind licking it, it aint clean enough. speed glass welding mask. tip dip to prevent loads of spatter clogging up the weld tip shroud. decent welder tip and shroud. patiance.............

as for get the weld to look nice. on chassis i turn my welder up to 3 out of 10 as this meens you get awsome penetration. if you simply hit the button and started a full weld. due to the setting it would blow through. what i do is a series of welds. hit the button till you get a nice pool. release the button and move along. just before the pool cools fully, hit the button again for the same amount of time. then repeat.i always use my spare hand to steady the weld nozzle if i can. try never to weld upside down if you can avoid it. alway ensure that the cord the the gun isnt spun around or kinked as this snags the wire feed. always make sure the earth wire is in goo nick and clamp onto a spotless park of the bus. i use boc argoshield gas as this helps stop spatter etc.


practice on whatever you can, start on chassis work as this doesnt warp as bad. welding body panels is a nightmare as it warp the sh@t out of your bus.

cheers
 
bit more progress on the bus. flipped it the other way on friday and did a bit on it. then went to leeds on sat night for a good few beers and a trip to harewood house on the sunday 8) good show with a good mix of cars

spent monday arvo moting the t4, getting it serviced and getting it lowered

then tonight got a few hours on the bus

few pics of the progress


DSC00391.jpg


the metal i have to fit in it is a bit over kill but it was cheap

DSC00392.jpg


and my tools are a little bit poo. £15 grinder isnt quite as good as a plasma cutter but what i dont spend on tools, i can spend on the bus


DSC00394.jpg


DSC00393.jpg


DSC00389.jpg


DSC00390.jpg


DSC00401.jpg


DSC00402.jpg


thsi came in the post today. it is a 30 row oil cooler i got on ebay to use as a charge cooler radiator


DSC00397.jpg


looking forward to getting it fitted with a decent scoop on the passenger side outer floor section.

just need to find an external oil cooler kit to run on the opposite side to keep the engine a little cooler
 
got another four hours on the bus last night. thought id take on the simple (or so i thought) job of raising the handbrake cables. this is so i can lift my rads another 20mm and in turn lower the bus another 20mm 8) every mil counts.

turned out to be a right job :evil: very time consuming and fiddly

DSC00404.jpg


DSC00403.jpg


DSC00405.jpg


DSC00407.jpg


even i began to question my sanity by the end of it so i had an earlier finish than planned and went for a bath.


need to find a spare £140 to buy an oil cooler kit fo it now but i am skint :(
 
Looking good and like the idea of moving the pipes though looks like a lot of work but the 20 mil drop should be worth it :mrgreen:
 
progress slow on the camper of late. spent about a week mounting the charge cooler rad and making a scoop for it.

then went to action for the weekend :? :? proper messy. i dont think i have drank soooo much in one night. cracking weekend and when i finnaly broke my tent down i went ot the tat section and scored the slinding door bit ive been after for a while (the bit with the little spring that hold the door back) for a tenner :) and i also got a set of wide five to chevy adapter for 12 quid so i can now lend my chassis rollers to lads with early buses now.

then this week i have been tackling the spirit crushing job of stripping of the por15 i painted underneath my bus :evil: it is crap paint, dont do it!!! i followed the instructions to the hilt yet it still didnt go on well and if you castch it right you can peel little strips off it. not good. i just want to shot blast it to get it cleaned off right.

no pics anything as my phone broke at action which caused me mayhem :evil:
 
andewilson said:
progress slow on the camper of late.

+1

andewilson said:
and i also got a set of wide five to chevy adapter for 12 quid so i can now lend my chassis rollers to lads with early buses now.
:mrgreen: :party0021:


andewilson said:
then this week i have been tackling the spirit crushing job of stripping of the por15 i painted underneath my bus :evil: it is crap paint, dont do it!!! i followed the instructions to the hilt yet it still didnt go on well and if you castch it right you can peel little strips off it. not good. i just want to shot blast it to get it cleaned off right.

:

Arr don't say that - my bus is held together with P15 :shock: :lol:

I've found it likes a rough surface to stick to, so if you have been putting fresh chassis components on etc, maby give them a quick rub down with some rough sandpaper, then Metal Ready it. I've seen some bits peal off, but the stuff that has gone down on parts that I have wire-wheeled, then Metal Ready'd won't come off unless you use a grinder! :shock:

What are you going to use instead?
 
mate, thats bad new about the P15. i do hear mixed reviews about that stuff. the worryin gthing is, that you have been maticulous with everything on this bus and it still messed up. it seems with P15 that you have to jump through alot of hoops and then its still not guarenteed to work.

i've just primered the underside of my bus and will be painting grey stonechip over the top next week. i went for the red oxide paint - 3 coats of it

NaFe
 
I've used POR15 on some components for the bunks in the Dormy and so far (touching lots of wood now - not superstitious though...) and seems to be holding on.

Sounds like action held up to its name then ;)
 
after feeling a bit down on the bay of late due to the mamouth task of re bare metaling the entire underneath ready for spray i went to vanfest with a large wad of cash to spend.

sadly most of it went on the t4 :( £640 to be precise to take care of a couple of bits my friend brought up during the mot. stainless exhaust, grooved disks all round and a couple of engine goodies all from bluebird.

and a new front bumper for the bay, well not new but better than i had previously bought.


back on the bus this week. i made some brackets for the bottem of the bus

DSC00020.jpg


to fit this

DSC00019.jpg


then after fannying around for too long with these


DSC00009.jpg


DSC00010.jpg


i dicovered this kicking around in the workshop. 120mm diameter sorted the progress out no end


DSC00011.jpg


DSC00014.jpg


DSC00013.jpg


DSC00012.jpg


the wife wasnt impressed when i came home like this :lol: it mullers the bath.

DSC00015.jpg
 
andewilson said:
i dicovered this kicking around in the workshop. 120mm diameter sorted the progress out no end


DSC00011.jpg

Isn't that the great thing about a chassis roller? You couldn't use a wire-wheel on a grinder confidently under the bus! :character0036:
 
The 'beast' looks to have made good short work of the bottom of the bus ;)
 

Latest posts

Top