You are using an out of date browser. It may not display this or other websites correctly.
You should upgrade or use an alternative browser.
You should upgrade or use an alternative browser.
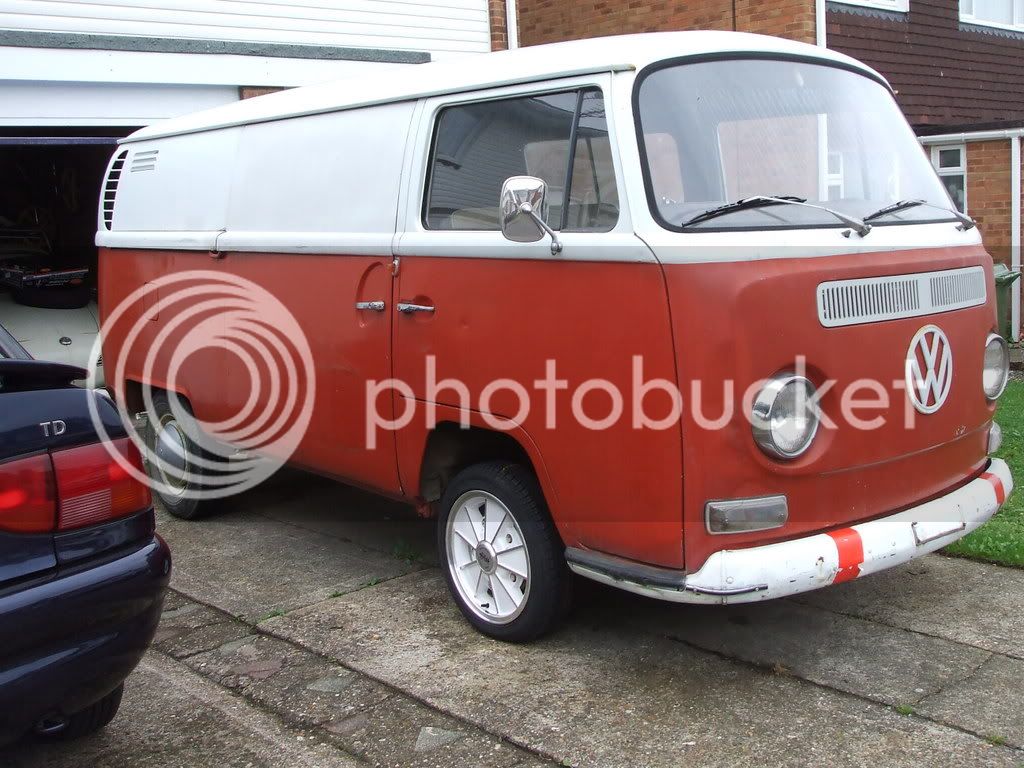
My 69 Panel
- Thread starter jabbo
- Start date


Help Support Early Bay Forum:
This site may earn a commission from merchant affiliate
links, including eBay, Amazon, and others.
Well as mentioned on the MOT thread, I took it for an MOT and it failed. It was also the first time I'd driven the van, as prior to that I'd only had it running on the drive.
List of jobs to sort for the MOT are as follows;
1)Sort offside washer jet
2)Remove stickers from front window
3)Fix offside headlight dipped beam
4)Sort rear offside brake binding.
So, all in (including the money I've spent so far since it's been in the country) it's gonna cost me about £20 to get it through the MOT. Not bad considering according to the Italian paperwork it's actually been off the road since 1987!
Well all the jobs above are done and I'm off for my retest in a minute.
The MOT man also pulled me up about the front tyres, so I decided to do something about it to keep him happy.
Before;

After;
I've only done the front's for now, I'll do the rears at the weekend whilst doing some other little jobs.")
The MOT man also pulled me up about the front tyres, so I decided to do something about it to keep him happy.
Before;
After;
I've only done the front's for now, I'll do the rears at the weekend whilst doing some other little jobs.
The good thing is it also resulted in an instant subtle lowering!
Before;
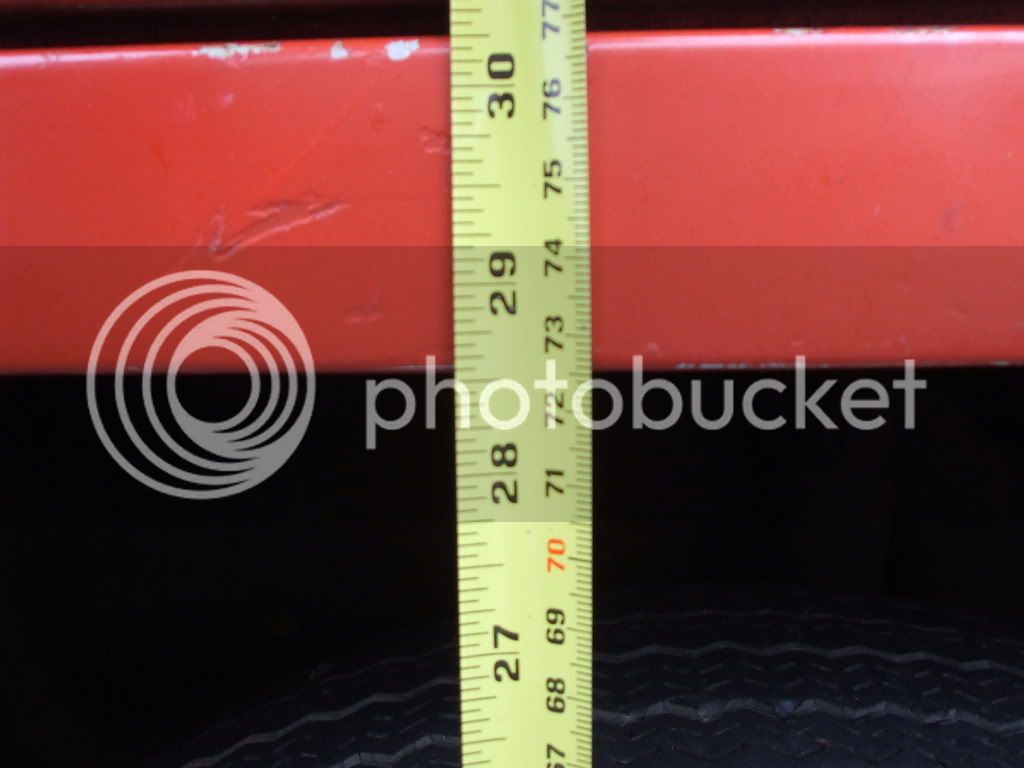
After;
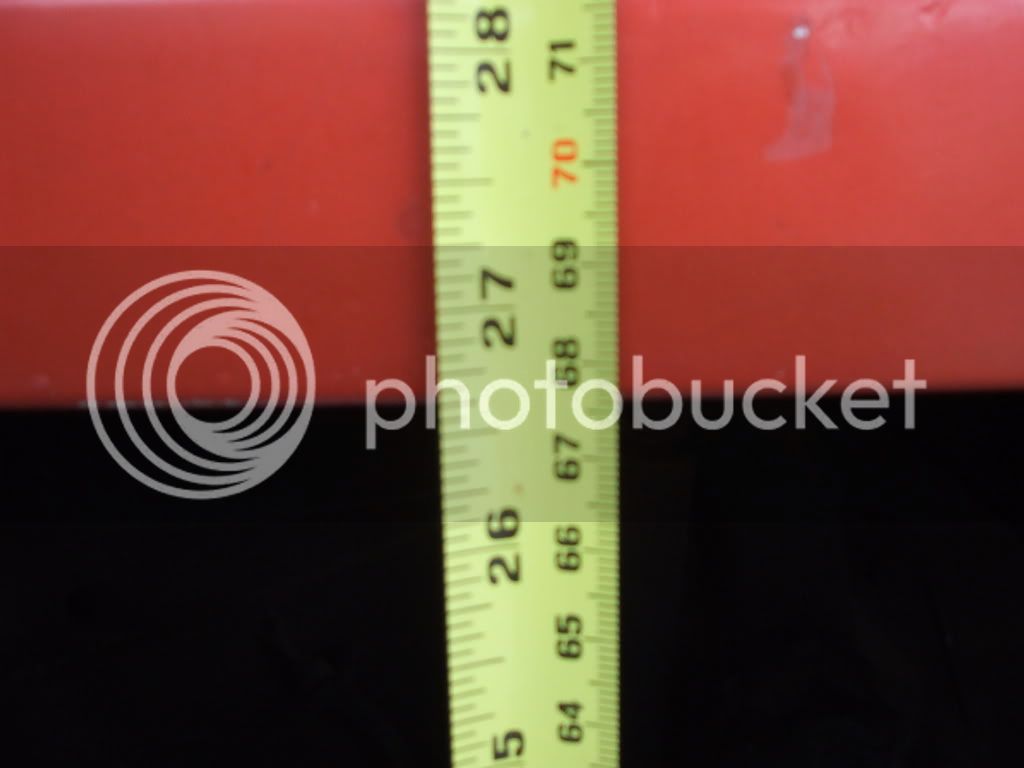
Just needs proper lowering now. What sort of front arch height are you slammed boys running? I figure I should be able to run at about 23" if I lower it, or 21" if I narrow it too.
Before;
After;
Just needs proper lowering now. What sort of front arch height are you slammed boys running? I figure I should be able to run at about 23" if I lower it, or 21" if I narrow it too.
good question, i have never measured the arch height :roll: i will do and let you know.
All i do know is that there is an inch between the top of my tyre and the arch :shock: never rubbed or anything 8)
All i do know is that there is an inch between the top of my tyre and the arch :shock: never rubbed or anything 8)
dubberdaz
Well-known member
57cm (22 and 1/2') floor to arch on mine dude, that van is going to look the nuts! 8)


$124.78
Revell 07009 Volkswagen T1 Samba Bus Model Kit, 1:16 Scale 27.2 cm, Multi-Color, 223
Outstanding Outlet USA


$27.95 ($13.98 / Count)
Marketplace Auto Parts Window Crank Handle Set of 2 - Chrome with Black Knob - Compatible with 1968-1978 Volkswagen Beetle
Parts Geek LLC


$28.56
$32.43
Airfix Quickbuild Volkswagen Light Blue Camper Van Brick Building Model Kit, Multicolor
Amazon Global Store UK


Well today I went and had another couple of hours on the bus. I decided to remove all the rear stickers cos they just looked ar$e IMO.
So the van went from looking like this;
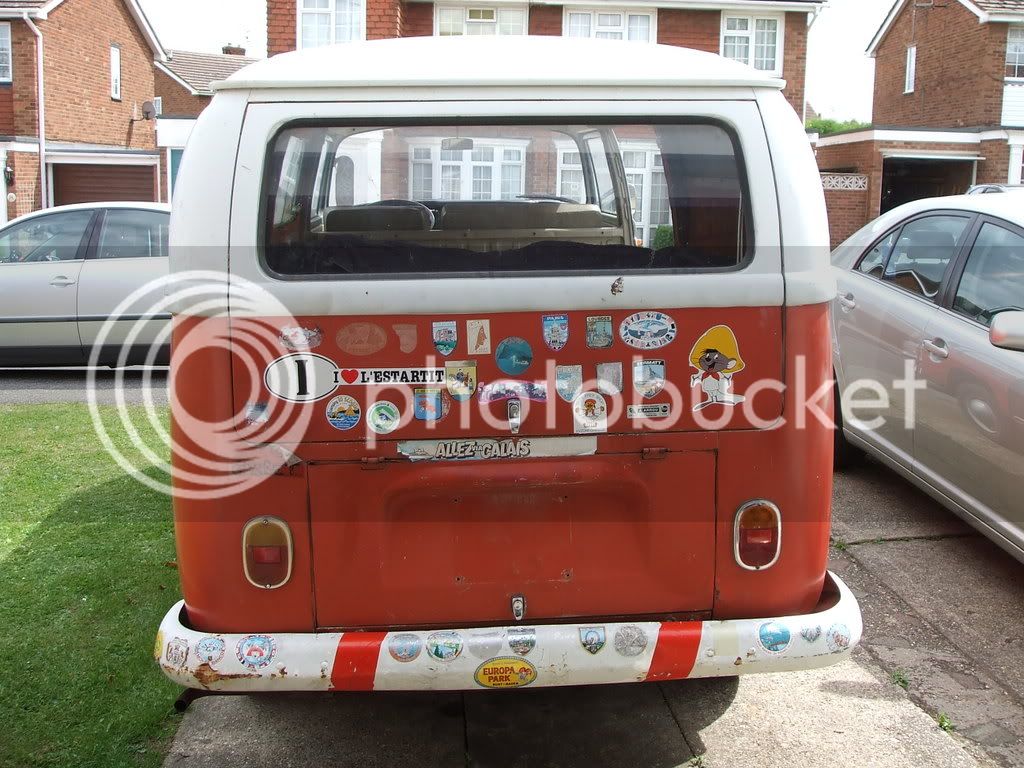
Halfway through - my maturity knows no bounds!;

And ended up looking like this;
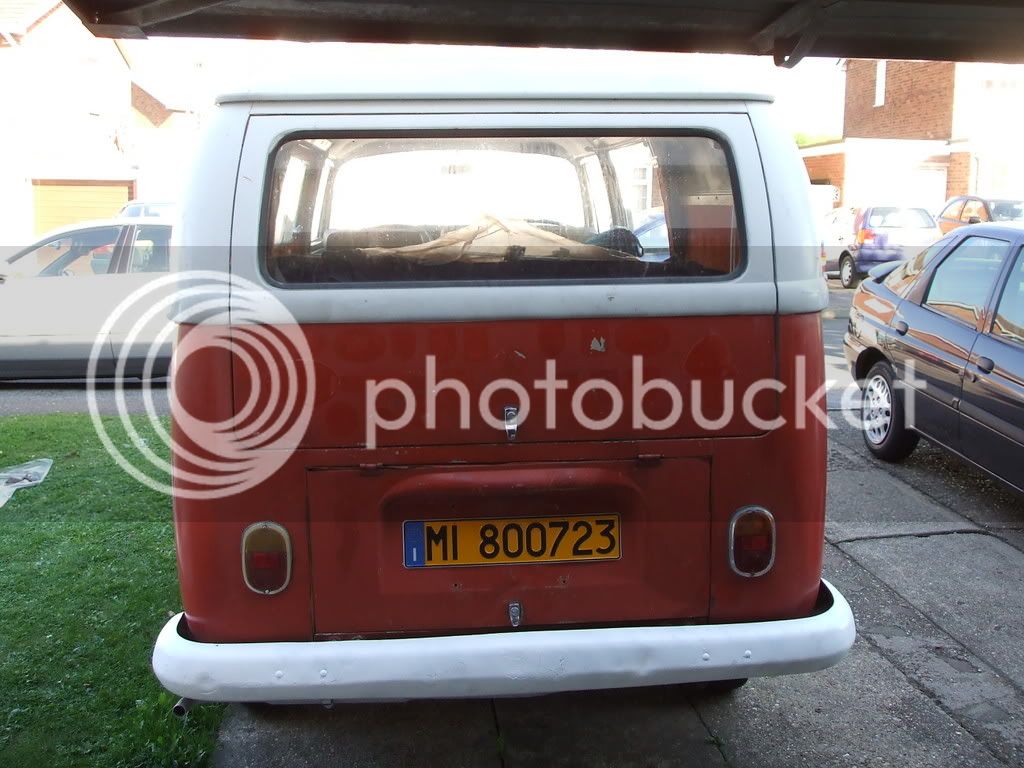
I also gave the bumper a quick aerosol of paint (I didn't bother smoothing it down as the bus is staying ratty), and fitted an Italian style show plate til it's UK registered. Just need to give it a good t-cut now to try to clear up some of the sticker marks.
So the van went from looking like this;
Halfway through - my maturity knows no bounds!;
And ended up looking like this;
I also gave the bumper a quick aerosol of paint (I didn't bother smoothing it down as the bus is staying ratty), and fitted an Italian style show plate til it's UK registered. Just need to give it a good t-cut now to try to clear up some of the sticker marks.
Whilst I was doing this I got the good lady to start polishing up the exhaust I'm sticking on the van;
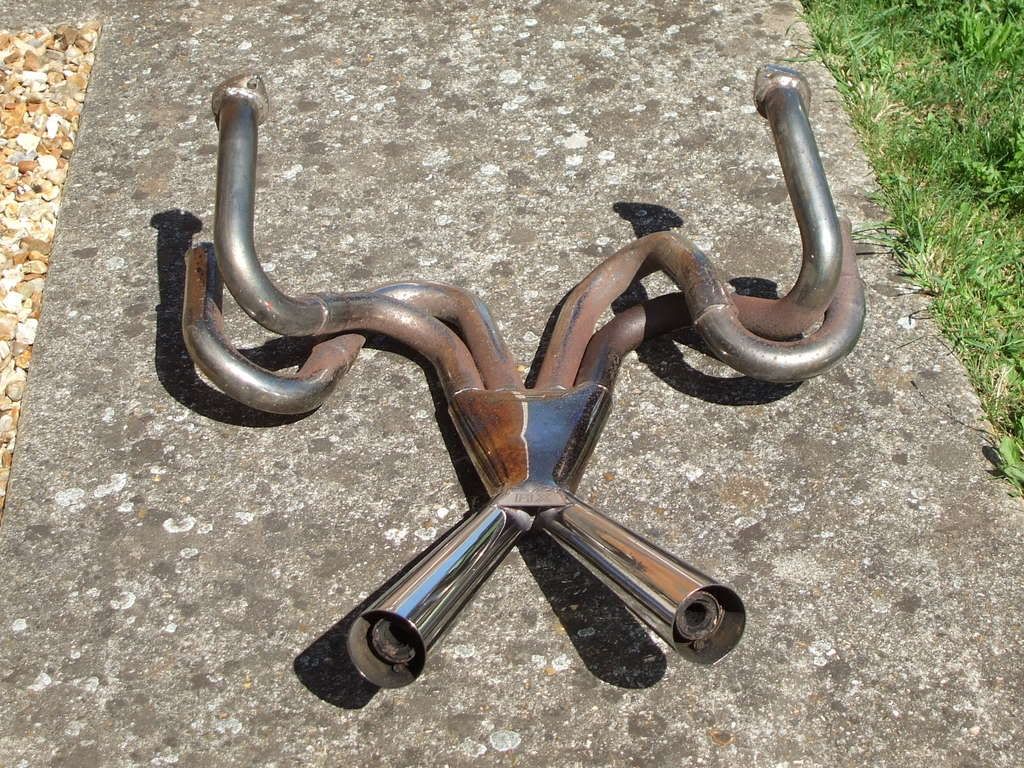
I just need to get some pre-heat block-offs before I can fit it though. :roll:
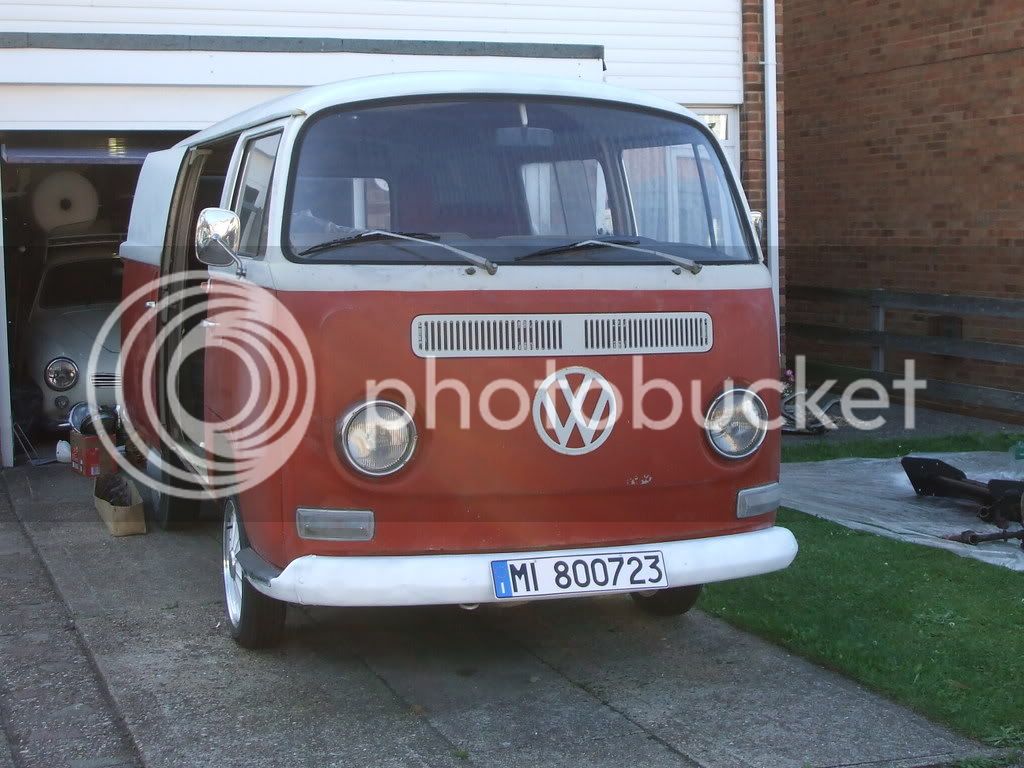
Aswell as the back the front bumper got a quick respray and numberplate too;
And I also started clearing out the inside to see what the floor was like exactly;
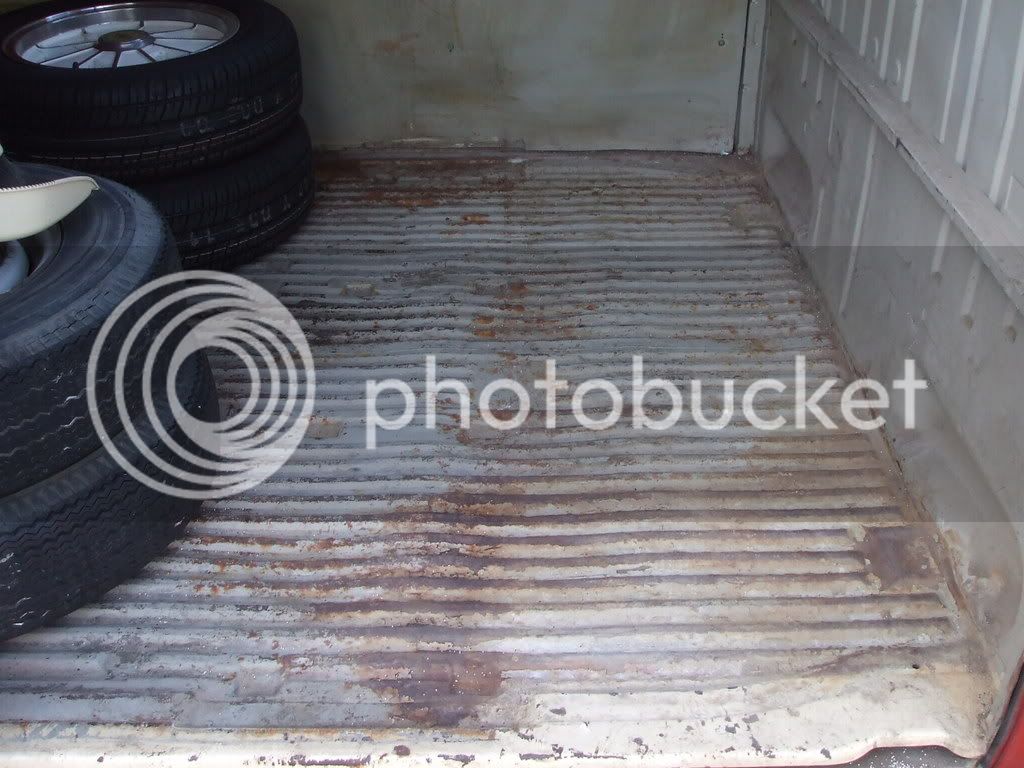
Survey says - solid as a rock!
I just need to get some pre-heat block-offs before I can fit it though. :roll:
Aswell as the back the front bumper got a quick respray and numberplate too;
And I also started clearing out the inside to see what the floor was like exactly;
Survey says - solid as a rock!
Grazy said:is it gonna be a van fest Jabbo ??? 8)
No dude. I've not started the registration process yet, so it's only legal to and from the MOT centre.
If I do go to vanfest it'll be in our other bus, as we've got that up for sale. At the moment though it's looking like I'll be busy next weekend picking up our new accesory, so Vanfest is probably a no-no anyway.
lowblow said:nice panel how low are you going.
Not entirely sure yet TBH. I've always liked my vehicles slammed and narrowed to get the maximum drop possible, but seeing as plans are to tow a vintage caravan behind this now I may have to keep it somewhere between sensible and stupid height. :lol:
Well I finally managed to get a couple of hours on the van today (first time in weeks), so I set about building myself an interior.
First up the rear load area was totally cleared;

I conmtemplated properly wire brushing it back and painting it, but the plan was for the bus to stay rough and ready so that seemed like overkill.
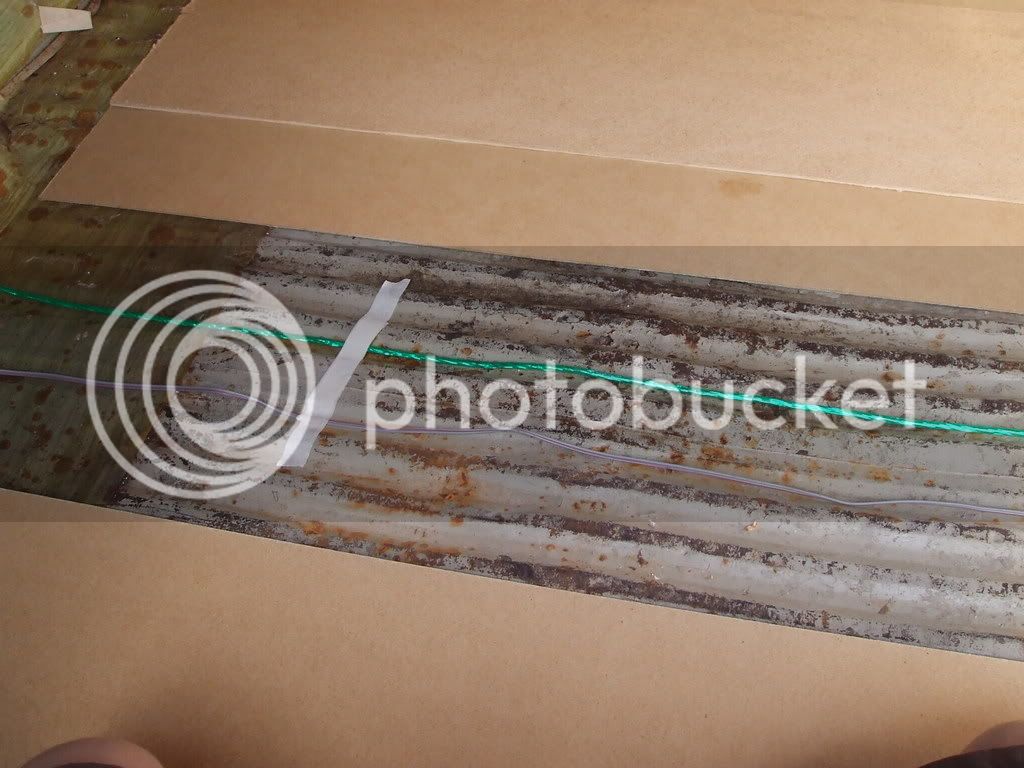
Next I decided to lay all the necessary wiring for a 4-channel amp. Luckily having been into stereo equipment for years I've always got loads of wire laying around;
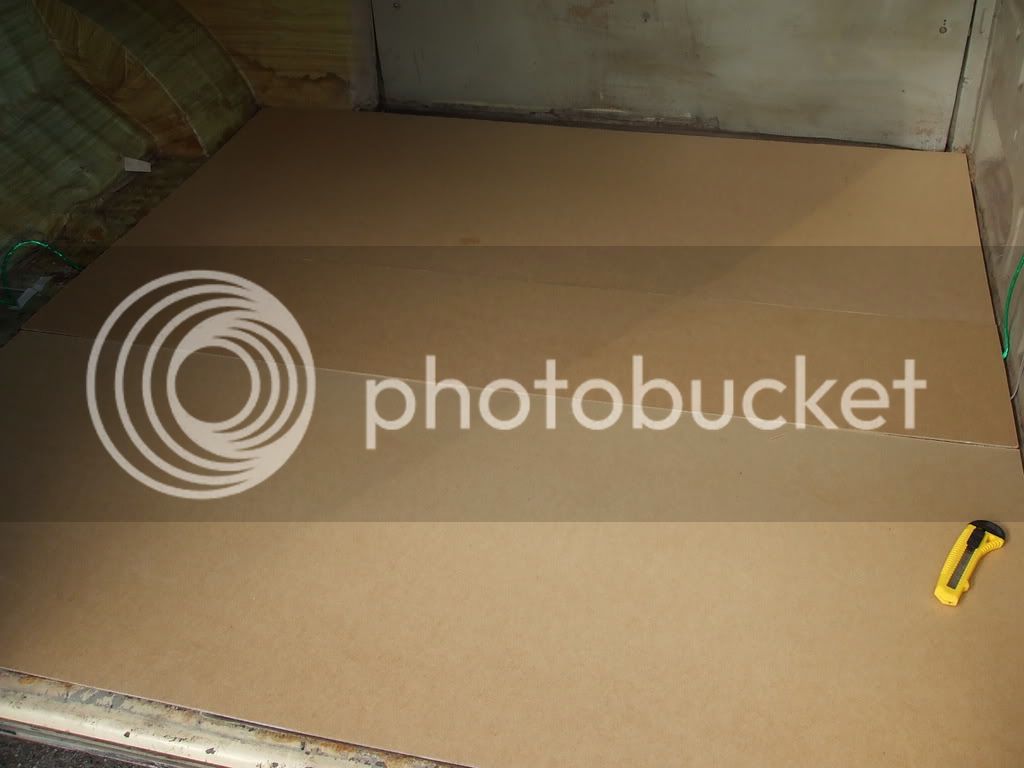
With that all sorted some hardboard was put down for a more even surface;
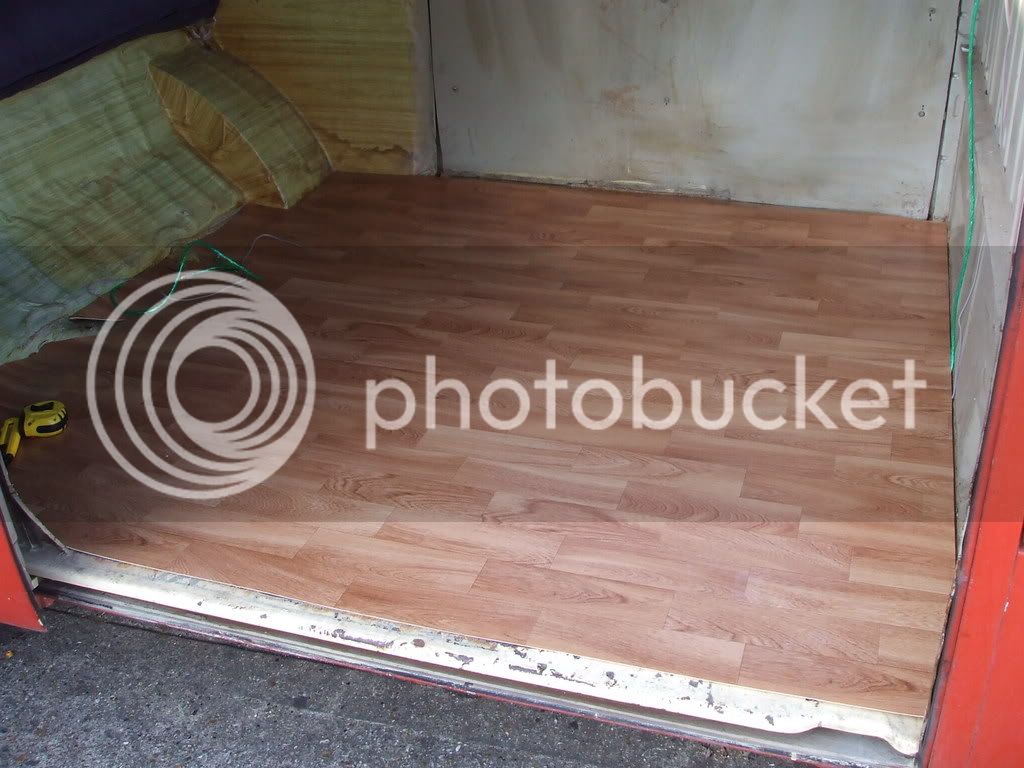
Which was finally topped off with some wood effect vinyl;
First up the rear load area was totally cleared;
I conmtemplated properly wire brushing it back and painting it, but the plan was for the bus to stay rough and ready so that seemed like overkill.
Next I decided to lay all the necessary wiring for a 4-channel amp. Luckily having been into stereo equipment for years I've always got loads of wire laying around;
With that all sorted some hardboard was put down for a more even surface;
Which was finally topped off with some wood effect vinyl;
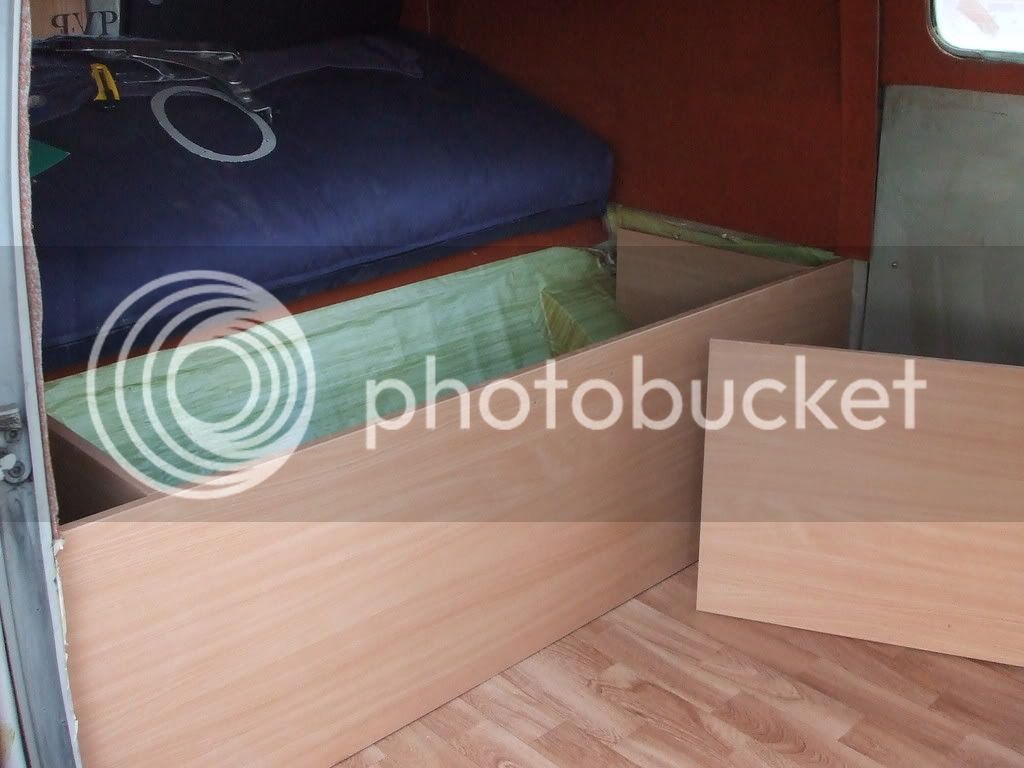
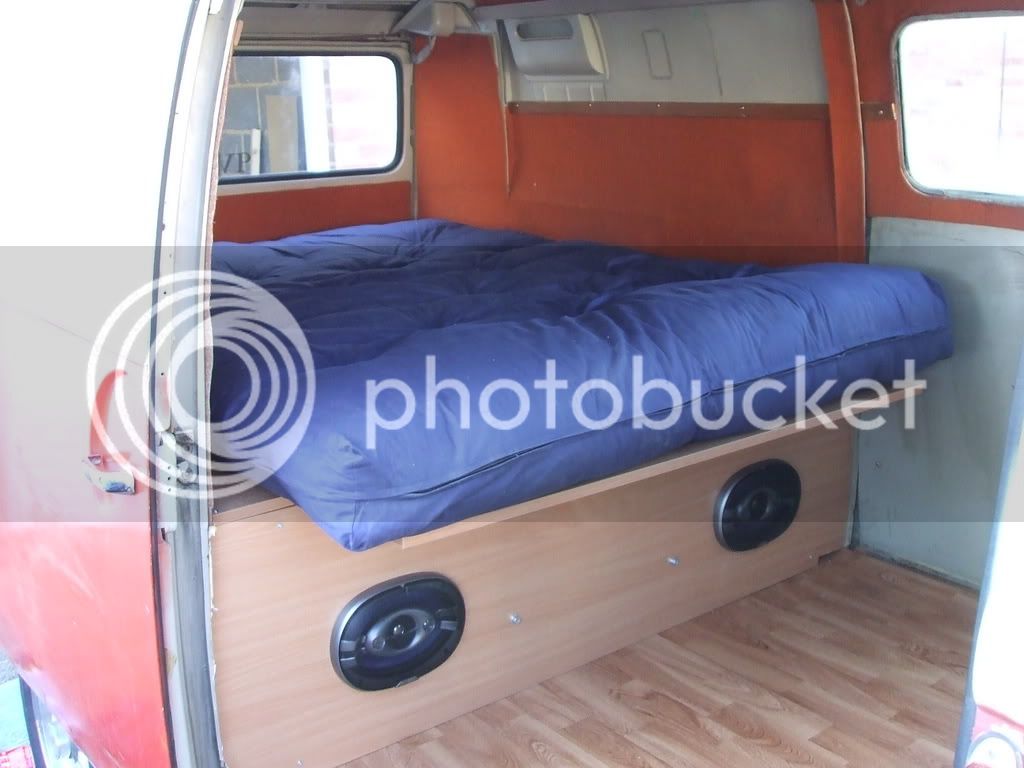
With the flooring and wiring done I set about building me a bed! Luckily I got a load of wood free the other day from my local furniture manufacturer (offcuts are a godsend :lol: ).
First up was the basic structure;
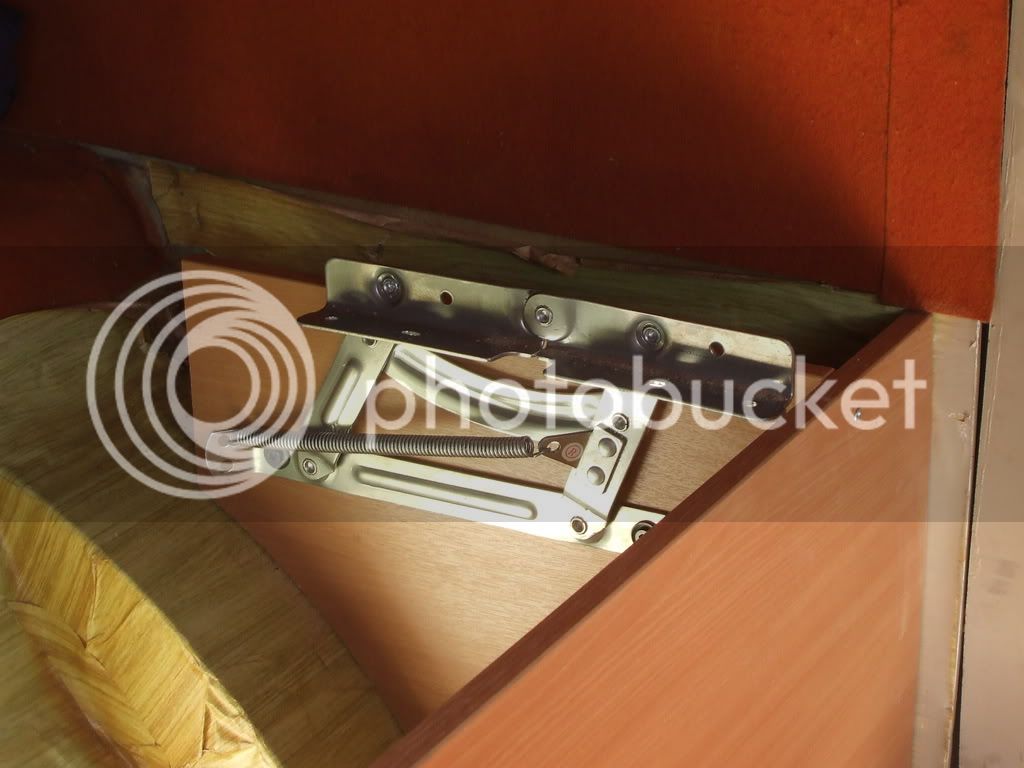
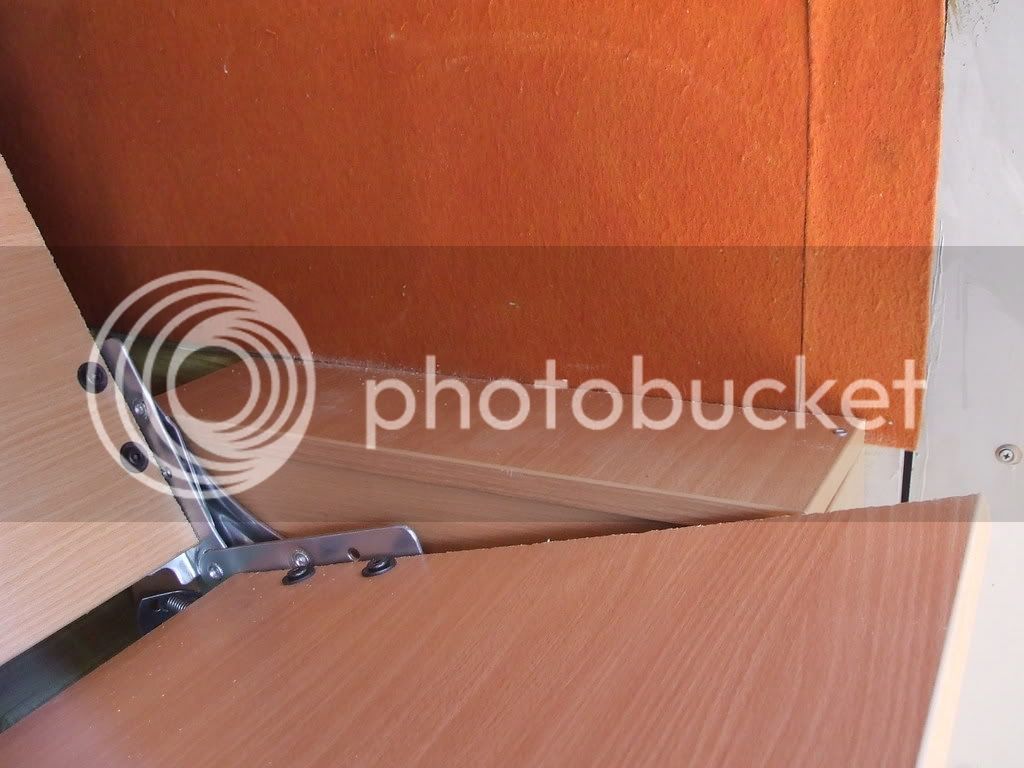
Next I adapted some hinges I had laying around and fitted them;
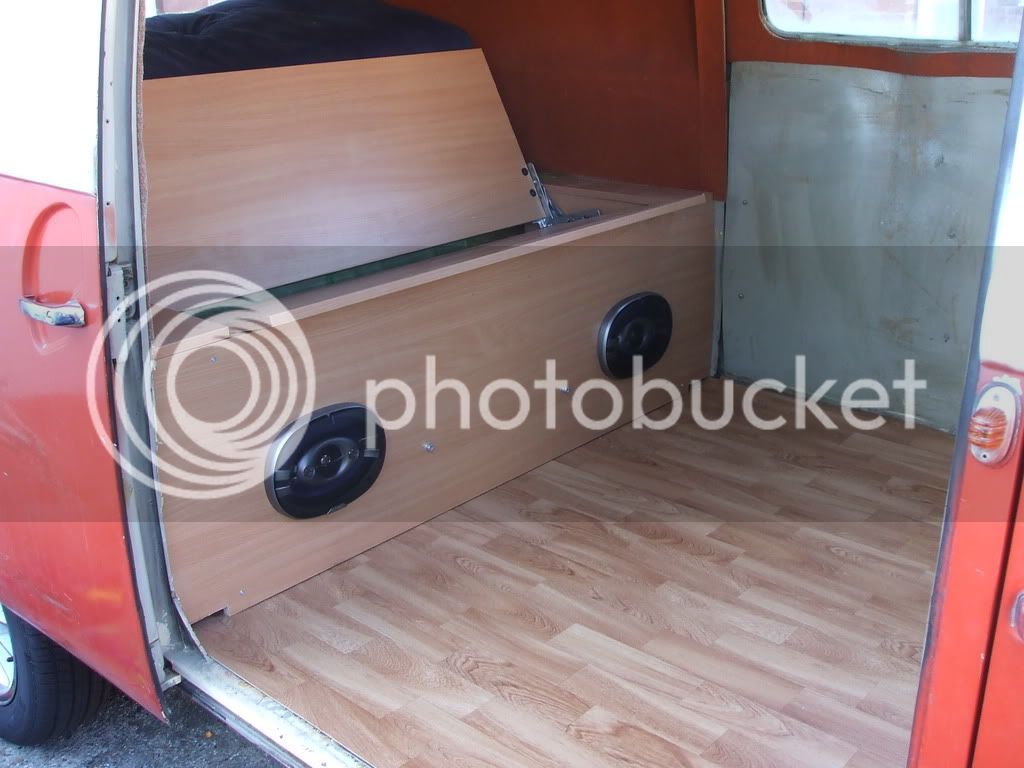
With the base in place I decided to start on the stereo (as it'd be a pain to fit once the seat was complete);
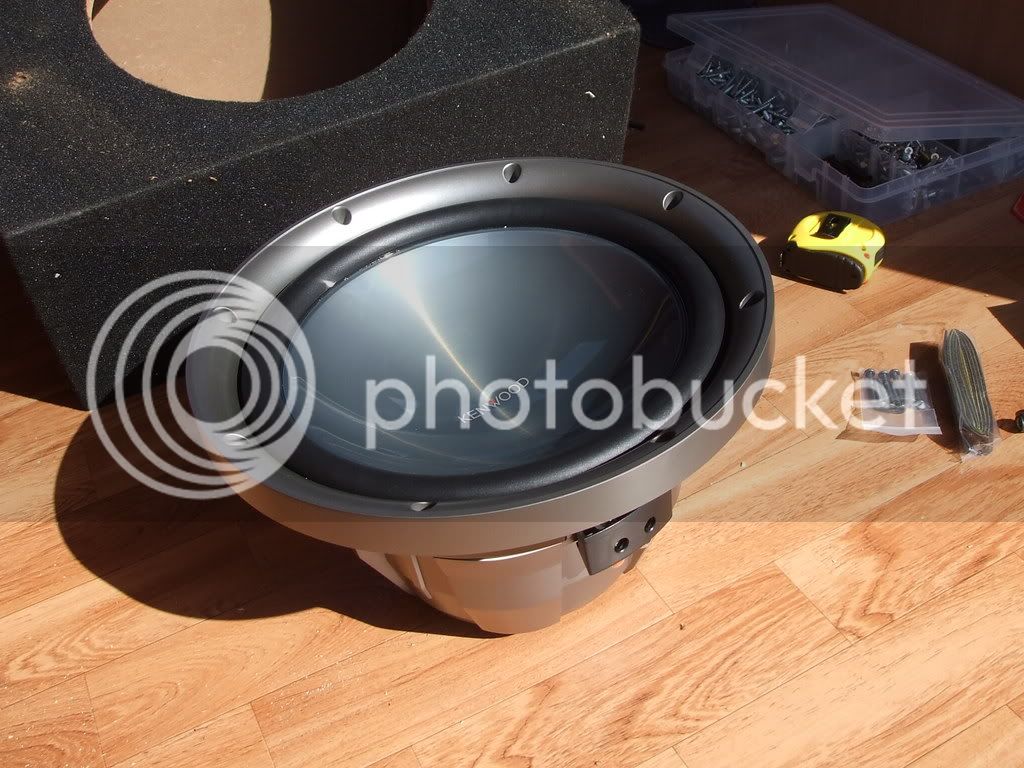
The sub was then boxed and mounted behind the seat. I mounted it through the base of the seat to give it a bit of extra stability (so it doesn't roll around when I'm flying around corners!).
First up was the basic structure;
Next I adapted some hinges I had laying around and fitted them;
With the base in place I decided to start on the stereo (as it'd be a pain to fit once the seat was complete);
The sub was then boxed and mounted behind the seat. I mounted it through the base of the seat to give it a bit of extra stability (so it doesn't roll around when I'm flying around corners!).
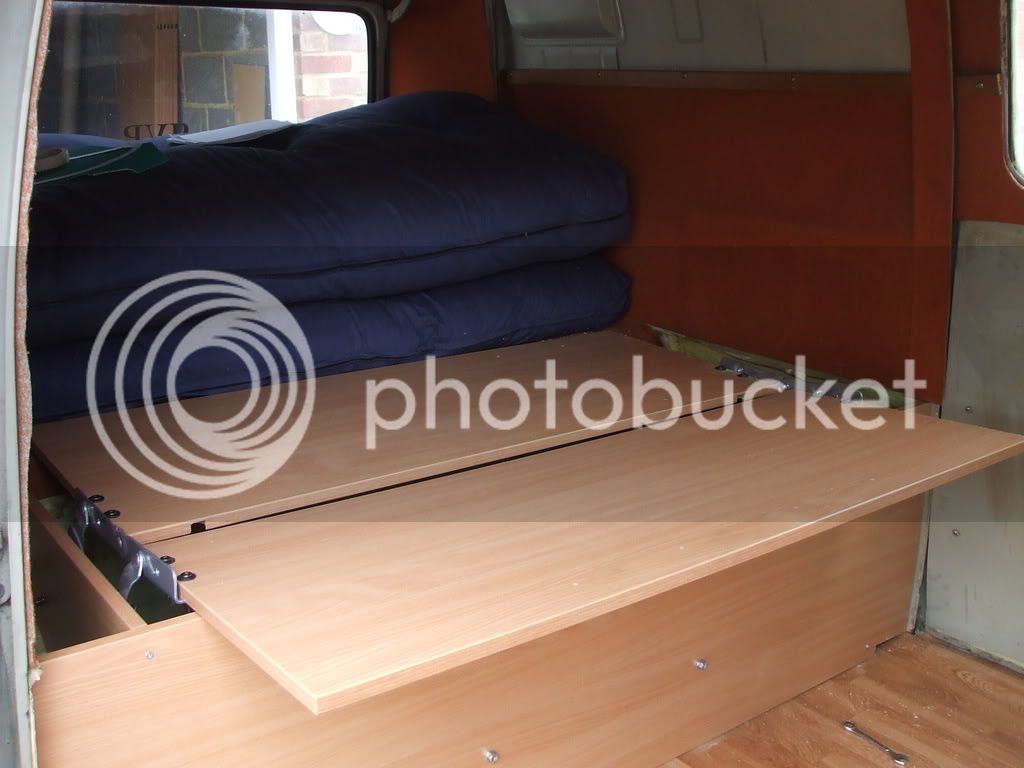
With that all mounted up I got on with cutting and fitting the seat part;

And unfolded;
I then decided to cap off the areas next to the seat, to tidy it all up, and they can also be used as tables;
All that's left to do now is cut some holes to mount some speakers, but unfortunately Tescos was calling so that'll have to wait til Monday.
Got to admit I'm pretty happy with it so far (considering it cost me less than £10 all in (stereo equipment excluded)
Justin & Muttley
Well-known member
Nice work dude - but what is that stuff on the rear arches?
Chris
Well-known member
proffesional looking job,
nice one
nice one
Similar threads
- Replies
- 1
- Views
- 663
Vehicle For Sale
1971 Danbury £14,500
- Replies
- 0
- Views
- 480
Vehicle For Sale
VW EARLYBAY 69 TIN TOP DELUXE SOLD OFF TO BELGIUM
- Replies
- 0
- Views
- 1K