My 71 ex-Westy

Early Bay Forum

Help Support Early Bay Forum:

This site may earn a commission from merchant affiliate links, including eBay, Amazon, and others.
Finally got my 17 fusch copies on the back


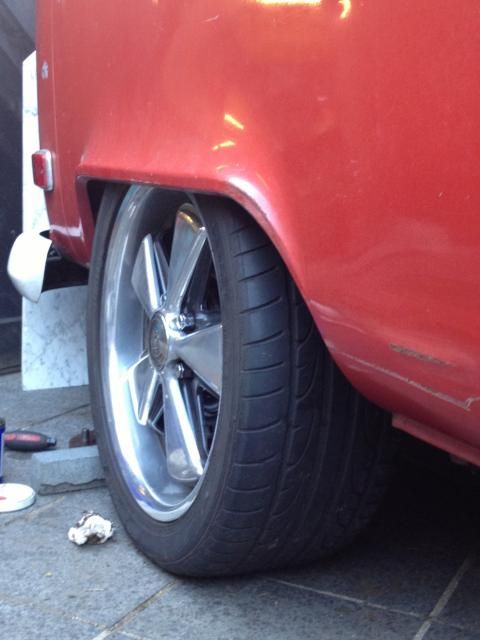
a little mucking about, another set of hubs with longer studs, and much modified 15mm spacers, and bingo, no rubbing anywhere, and its a decent size tyre, 225.

Next, get my 15 inch fronts detailed and on :)

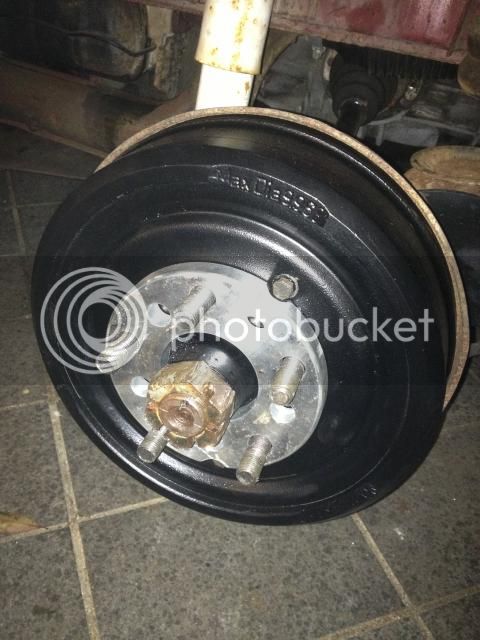
...and yes, there is a split pin fitted, just not in that pic ;-)
 
A little steering wheel update, I contacted ISP about the horn push, and they do sell one. Coincidentally, a friend of mine had one he wasn't using :) But I didn't like the ally horn mount that came with the boss, I really wanted something more 'OEM' looking. So I radiused the edge of the horn mount, which left me with a polished ring. I then masked up the ring, painted the rest black, and viola!

I now dont like the ISP logo, but i'm working on that.
I've also just about finished a custom horn mount that uses a stock VW horn push, so I could use a Wolfsburg crest button, which would be nice. If I can work out the ISP button tho'. i'll probably not bother finishing the custom one.
 
Bit of a 'fail' on the steering wheel front, after all that work mucking about with adapters and horn pushes, when it's on you cant read the tacho or the fuel gauge!

I tried to talk myself into it being o.k, but I couldnt, so I went with plan B, a fairly large grant style wheel and a grant boss, bolted on in 30 minutes, all sorted!

I think I'm going to finish my other horn push off tho, and use it on this wheel instead of the chrome Grant thing. But i'm going to keep an eye out for a more suitable wood rim wheel.

I've been working on detailing the MWS fusches. They come with a really sharp edge on the spokes from being diamond cut in the factory, which looks pants

So i've been filing, sanding and polishing them to loose it


Next is some paint detailing, then tyres and they're on!
 
Hi,

Great work on the wheels, looks much better with a radius on, the adaptors look good too, and the wheel, is that a standard Grant wheel and a adaptor to fit? Beetle? Looks very smart! 8)

Alistair
 
I masked up the front 15x5.5 fusch reps and took them to Angus at Final Finish. He turned them around double quick time and did a great job. Tyres tomorrow and on the bus :) I've gone for 175 60 15's as they measure up the same height as the 185 65 14's currently on the bus, which allow for suspension travel and dont have a massive arch gap.

 
aogrady said:
Hi,

Great work on the wheels, looks much better with a radius on, the adaptors look good too, and the wheel, is that a standard Grant wheel and a adaptor to fit? Beetle? Looks very smart! 8)

Alistair

Thanks

All Grants have a 3 hole mount which I believe is the same, and alot of other wheels use the same mounting, such as this one. The Adapter is bus specific, and not made by Grant anymore. If you want to scour ebay etc, the adapter kit part number is 3507
 
Got the wheels on tonight, but it was dark, and although i took a pic, its very Hayburner style, i.e dark and not a lot to see..;-)

Its MOT day tomorrow, so I'll take a daylight pic and post it then.
 
ground hugger said:
I like it.. just looked at the other side on shot 8) that combo would look even better with a bit more drop :D

Yeh, i know. Need to keep it reasonable as its a bit of a work horse. Next big spend is paint and sign writing, tho I do have some beam adjusters lined up...
 
Well, things are happening again, after driving it around last summer, and slamming the beam into a speed bump at 30 (stopped dead, no fun) I fitted some coil overs, which has stopped it dropping when loaded up, tho its not as cool, but i'll work on that. Spent a long time sorting out the sunroof, making it work and retro fitting all the bits VW left out when they made special order Westies ( i'll be doing a thread on it, long and scary!) it's now at the paint shop http://www.volkswagenemporium.co.uk/" onclick="window.open(this.href);return false;
Going the original Chianti red, then a bit of sign writing and an interior refresh.
The roof as it came, some one got frisky with some sand paper and a grinder..


I'm going to get the sunroof panel blasted, but Chris at Chris' VW Emporium has been working his magic on the roof.. http://www.volkswagenemporium.co.uk/" onclick="window.open(this.href);return false;


Hi,

Great work, coming along nicely. The sunroof sounds great, I always wondered actually how do-able it would be to retro fit all the sunroof mech into a factory westy.....look forward to the write up!

Did you ever sell the wooden rim steering wheel with the little holes?, debating whether to buy one myself....

Cheers!

Alistair
 
Re the wood rim, I've kept it for another project. If your looking for one go to MCJ, designed for a bus, so you'll see the gauges :)
 
My bus gettin some lovin at my goodates shoppe:
https://m.facebook.com/photo.php?fbid=716530618467724&id=100003323779535&set=a.616181791835941.1073741830.100003323779535&source=48" onclick="window.open(this.href);return false;
(You may need to login to Facebook to see the link)
 
Little bodywork update, Chris has been removing the dents in the lower rear quarter and around the elec hookup


and I've been looking at repairing my 'other' bumper


But decide that its too far gone with this rust and other repairs and filler, and probably a pattern anyway as its rather thin, so I've cut the ends off to graft on to my pattern slash cut.
 
Been to the paint shop, it's coming on well.


The front panel is being massaged back to 'straightness' after the spare wheel mount and a light knock by one of the previous owners

You can see that the U.S 'respray' has caused a bit of a problem, as it wasn't prepped properly, so is impossible to feather out for repainting. This has resulted in all the repaired panels being taken back to bare metal, as will the complete van.

This is the sunroof back from the blasters, all the rust has gone, and there's not a ripple in site. I tried three other places that wouldn't touch it because its a tricky thing to do. Chris can arrange this for you if you require it.
 
Modified my rear repop slash cut bumper today with the ends of my rusty diamond cut original. A few pics showing the process..
The slash cut tapers away too much underneath, so the 'replacement needs a long bottom, cut here..


then place on top of the slash cut where you want it, mark and cut


Then line up, tac, check and weld. I tried to make sure all the edges and the crown on the bumper face lined up and flowed. I had to pie cut the top of the repop on this side to get it to blend, but didn't on the other, repop quality..


I also reinforced the back of the bumper behind the mounting holes to try and stop it distorting when its bolted on (like it had done before..). Off to the blasters, and then over to Chris for some paint.
 

Latest posts

Top