My 71 ex-Westy

Early Bay Forum

Help Support Early Bay Forum:

This site may earn a commission from merchant affiliate links, including eBay, Amazon, and others.

neilswheels

Well-known member
Joined
May 26, 2012
Messages
729
Reaction score
14
Location
leafy surrey
Year of Your Van(s)
1971
Van Type
Ex Westy,
I've had my bus for about 18 months, and now think its about tome to start a 'build' thread, tho its not so much a 'build' as an 'assemble'.

To the beginning, I wasn't looking for a bus, it hadn't even entered my mind as I have far too many projects to need another one, but at the 2012 VolksWorld show, I was walking around the for sale carpark, passing time waiting for the doors to open when i found this 71 bay

It's an Arizona import, really clean, virtually zero rust, but had obviously been used as a parts car, no engine, no transmission, no interior and no poptop. Someone had put a sunroof in the factory hole, but there were no cables etc to make it work. But it was just too nice to walk away from, so I didn't.
 
Having made a deal, and got the bus home, it was time to re assemble it. I spoke to my good mate Andy at Farnborough VW Center, and he sourced me a trans and 1600 engine and a load of other little bits, like the rear engine bar, etc etc. The main problem with this bus was the amount of little bits missing, and because they were missing I had no idea what they looked like!

One of the problems was the dash, it came with the wrong one for a late bay, so i had to find a left hooker early bay dash. After some searching i went back to Andy, and he had an early right hooker with a butchered radio hole, but it was a good price, so i had it. All I had to do then was convert it to LHD and repair the radio hole. The conversion was easy enough, basically cut up through the dash pod and glove box pod, and swap them over. Then I had to fix the dash, so I made a steel former, hammered out the new panel, then sectioned it into the dash.


With the dash repaired, painted and fitted, it was electrics time.

I'm rubbish at this, so i got a good mate, Jake, to help me out. It took about 4 days to work out the spaghetti that had been left behind, and of curse to convert from US spec indicator/running lights to UK spec, but we got it done, eventually.

So with a running bus, it was off for an MOT, and it passed, but on the way back, I lost second gear, and 3rd was getting dodgie, turned out thet the bush between the shaft and the nosecone had given up. Should be an easy fix, right? Wrong. I bought a 'VW' part, and i think it was, just soo badly made. Apart from the pinch bolt not being drilled square or centrally, there was no 'drop' like my stock one, so I couldnt line up the coupling with the trans nose. I ended up making one out of various pieces i had, which works fine
(one on the right came out of my bay, black one on left is VW part, one in the middle was out of my crew cab.)


So then it was off to the DVLA for registration. I borrowed a friends low loader, and of we headed..


Despite some 'number' issues due to the way Arizona register cars in that state, Mr DVLA ticked the box and I had it registered and legal.
 
I drove it around like this, basically stock for most of 2013, the only issue I had was a slight fluid leak at the front, which turned out to be the proportionin valve. it got so bad that when the brakes were applied, you could see fluid leaking out all around the joint where the valve bolts together! I swapped it out for a late model bay valve, which wasn't as easy as i thought either, as the outlet to the back is in a different place! Alot of lost brake fliuid later, and it was finally fitted.
Knowing that i really wanted to lower it, I kept an eye out for some second hand dropped spindles, found some and bought them. Unfortunately, they weren't what they seemed, two of the arms had really bad scoring on the bearing surfaces making them useless junk.


On talking to Alex at Transporterhaus, and sending him some pics, he also feared that the balljoints weren't up to the job, so I needed four new arms!Plus no adjustable tie rod, so i had to get one of these as well.. my slightly cheaper spindles had just become a very expensive option, so be warned people, second hand stuff needs to be seen properly before its purchased!
Anyway, after licking my wounds, i got into the job of fitting the spindles. I didn't want to cut a great big chunk out of my backing plates, so I sectioned in a recess to clear the bottom balljoint.

On fitting the spindles and calipers, i wasn't happy with the way the brake flexis were being pulled up to the mount, now on top of the spindle, so i made some new mounts that put the hose back to its stock location, and made some new hardlines to the calipers. The front sat alot lower, and the bus now had a comedy rake!

here's my bus with its new comedy rake. At this point a friend pointed out to me that I should have gone slotmags, radiused rear arches and a Starsky and Hutch stripe!
 
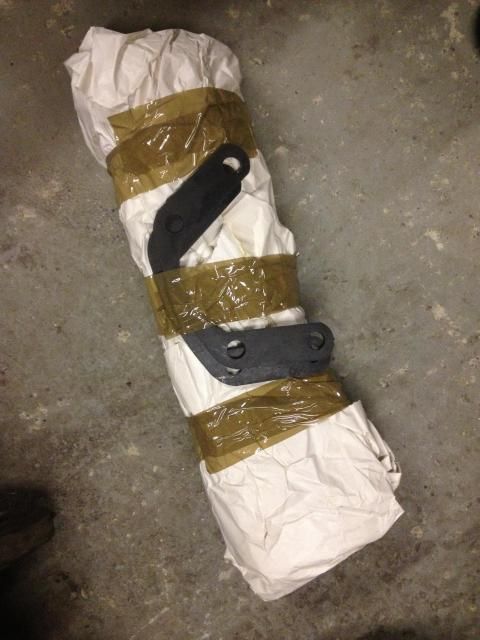
Well I couldn't drive it like this, so I bought myself an early Christmas present, which arriced on the 27th of December, Transporterhaus Adjustable spring plates. No second hand stuff this time tho, straight to the source!

The come in a black zinc finish, but I wanted a little extra protection, so I primed and sprayed them black. (not Hammerite by the way, I've used it once on something else, and its rubbish, never again!)

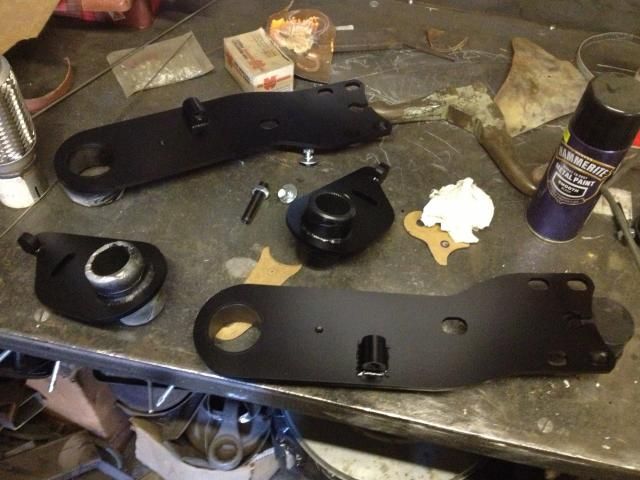
So, just fit them now then..

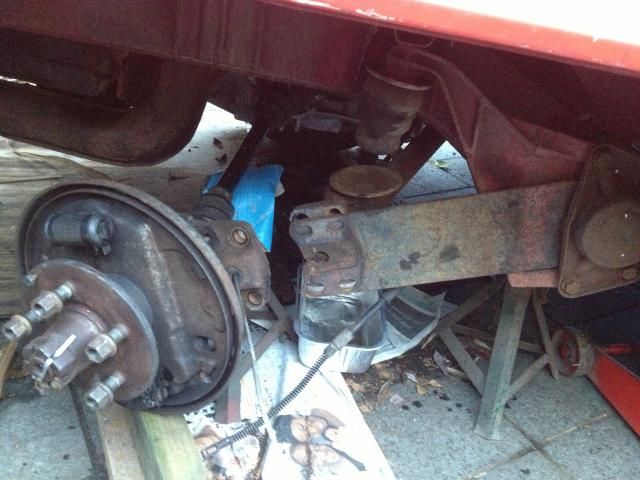
You need to support the axle and hub when you take it apart, and remove that poxi hardline, more brake fluid wasted!!!
On the Nearside, i ran the handbrake cable thru the hole in the springplate, thinking you had to cos it was lower, but the cable conduit ended up with a bad kink in it, so on the O/S I ran the cable under the trailing arm as per stock, and this seemed alot better, so no i have to take the nearside apart again to re run the cable, if it ever stops raining!

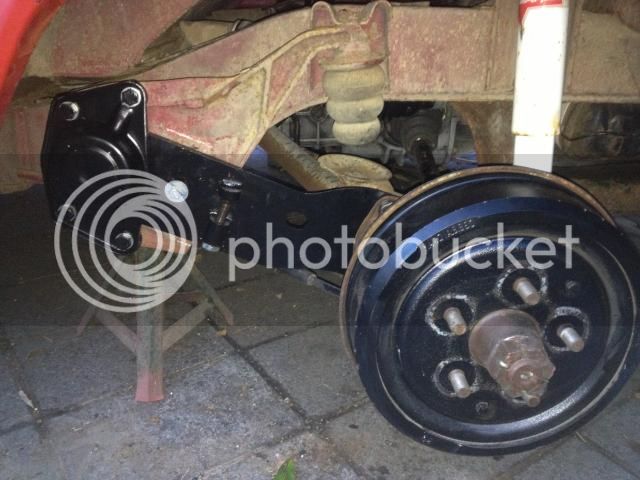
I put the plates on as close to stock height as I could as they come with a 1 inch drop built in, and I only need 2 or so inches, as the ass on my bay is a tad saggy, but I still had to cut the bump stops down. At the moment I've just cut off the first 'lump, but that only gives me 10 mm of free travel, so I think i'll be loosing another lump, leaving me with 1/3rd of the bumpstop. I also noticed how close the adjuster block is to the inside tyre wall, which may cause me trouble when i go to my alloys and bigger tyres. I hope to run a 205 70 15 or similar on the back, and 165 70 15 on the front.

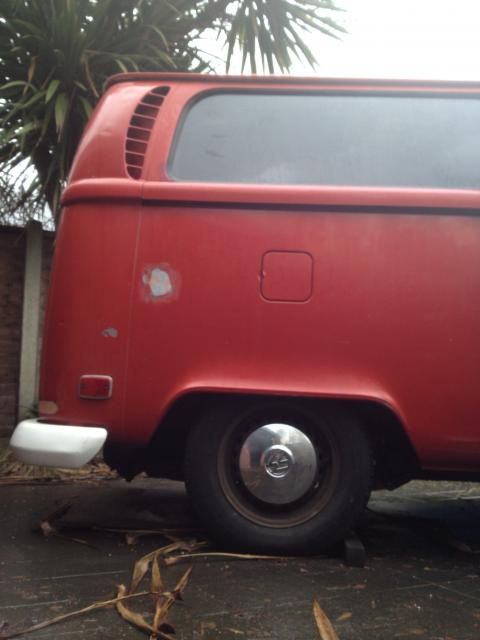
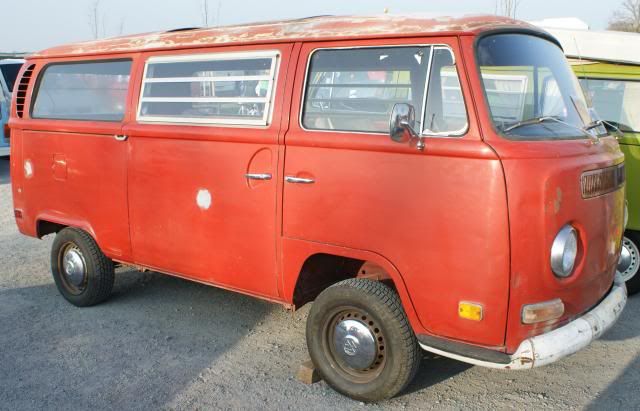
I've got a set of 17 fuch copies that we had on our A4, and they look cool on the back

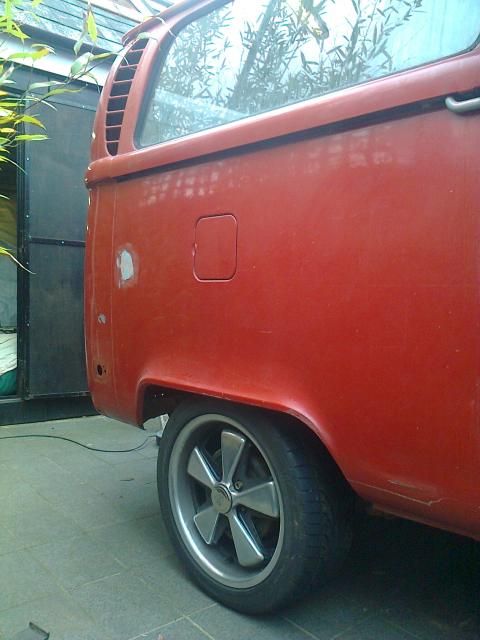
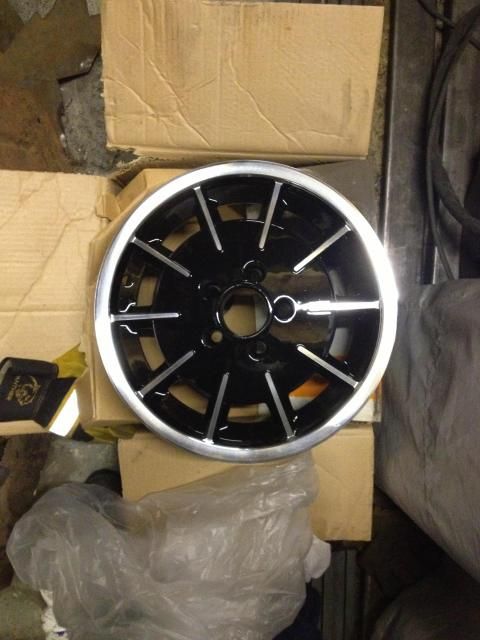
(this pic was before i lowered it) but i dont like 17's on the front of a bus, so i would have to buy a couple of 15's. I do however have a set of Gas Burner reps that I bought for my Crew Cab (one of those other projects that I've since sold) so for now i think these will be going on.


There's a bunch of other stuff i want to do, I've fitted one of the 'early bay' rev counters, http://forum.earlybay.com/viewtopic.php?f=27&t=55602" onclick="window.open(this.href);return false; very nice it is to, and i have a Berg shifter to go in and a rather nice woodrim wheel,
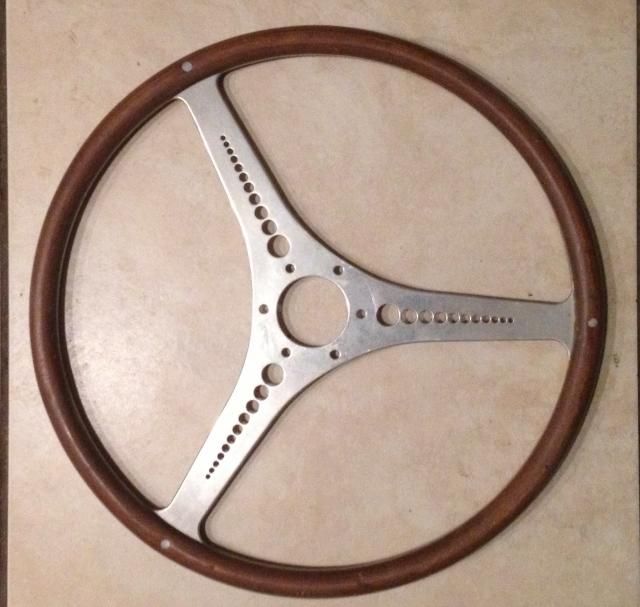
which is another story, but I really need to sort out the sunroof next as i cant leave the bus uncovered in the rain cos it pees in all over the floor as there are no drain tubes at all, or any provision for fitting! So the hole in the roof is going to be my next big headache

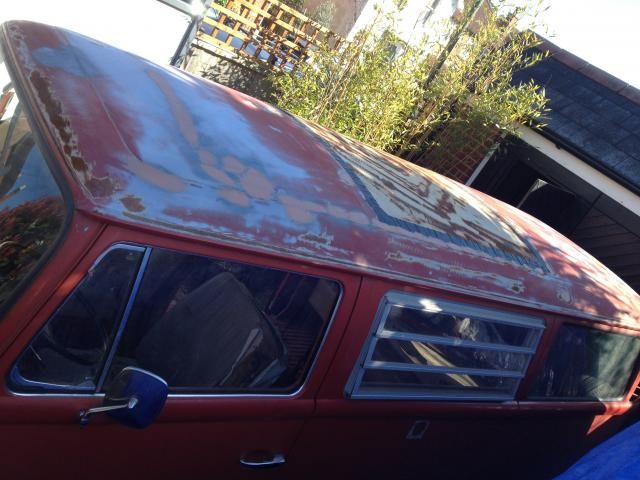
I've located a fair amount of all the little pieces i need to get it working, but i still need a few more, then once its functional I'm going to get the roof blasted and painted. i'd like to paint it body colour, but the bus has had a cheap U.S respray at some point, so is no longer the lovely Chianti red that VW gave it, but more of a tomato sauce red, so i may be going off white with the roof, until i can get the hole thing painted, then i'll have the roof repainted to match...one day!
 
I remember seeing that bus for sale, looked solid enough like!!!
I've got horse shoe plates to fit on my bus this week or next ( hopefully)!!!
 
Finally got the breaks bled in between the rain, and took it for a ride around the block, so heres a few before, during and after shots,


Not slammed, but its got a nice rake on it, now, tyres and gas burners..
 
Today I've been arsing around with wheels. I would like to run something big on the back, a 205 70, but wanted to make sure it would clear before I splashed out. Luckily I have a very friendly tyre place that fitted a used tyre for me to try out. So, jack up the bus, slide the wheel over the studs, and bugger! The offset on my gasburners appears to be completely wrong.

to show what I mean, heres a pic of the stock wheel, and its clearance between it and the spring plate, then the same with the gas burner.


Having previously had one of my 17x7 fusch copies on the back, I thought I'd see if this would still work knowing that it would be tight on the adjustable springplate, but alas not, it fouls big time. If I space it off the drum with a spacer, the studs arent long enough, and the tyre is about the same place as the burner.


So now I have no wheels for my bus! I quickly looked to see if I could get the back of the wheel machine down to change the offset, but to get enough i would completely loose the seating surface for the wheel nuts.

I think I will try and get a stock width tyre on it, a 185, just to see if that will work, but looking at it, I think the tyre wall will still foul on the lip and inner arch

The box is marked up as 'offset 6' which doesnt tie up with MWS current listing which is 'Offset ET20'. I've sent MWS an email, but as I bought them at least 6 years ago for another project, I dont hold out much hope.
 
Wheel update, just had a mooch around on the net http://www.ebay.com/gds/Wheel-Offset-Backspacing-what-it-means-finally-/10000000009860383/g.html" onclick="window.open(this.href);return false; and going by whats written there, and using a couple of steel rules, the difference between the front face to the wheel mounting surface and the back face to the wheel mounting surface is 20 mm, so the ET on my burners is 20, as per the current wheels, so what gives, why cant I get a tyre under there??

Just looked on the tyre/stance thread, there's a set of GB's on a bus there, JGE's with apparently 42 offset, though it doesn't mention offset on JGE's site, so i dropped them a mail.
Also saw a bus with ssp fusch copies, according to their site, they are 5.5 x 15 with et20, same as mine. That bus is pretty low running 195 65' so maybe that's my next move? It will be super tight if it clears, but a miss is a miss.
 
After trying a 205 70 tyre and seeing there was no way it would ever fit, I've gone with the heard and tried a 195 instead. Its as tight as the perverbial ducks arse! Litrally a fag paper between the tyre wall and the arch when its on the floor, and about 2mm up in the inner arch, and its defo gonna hit that plastic thing if i get some weight in it (its basically an empty bus at the mo, no interior)Theres plenty of room on the spring plate, double the stock rim. Cant believe the offset on these rims, it seems to be the common size, but its all wrong!


I took the bus around the block today with the 195 70 on, and despite the fag paper clearance there was no rubbing! Thing is, I've now decided I dont like the Gas Burners, so its gotta be the 17 inch Fuches on the back. I was originally thinking that i could get the wheels narrowed to 6 inches by Taylor Machine, but i've had my ruler out, and I think i can get them on with a 12mm spacer and longer studs. Looks like the Burners will be up for grabs, as i'll need to fund a couple of 15x5 Fuch for the front, and some new tyres.
Couple of pics, Burners with 195's and 17 Fusch

 
Great bus! :)

Loving the stance on it, subtle and still practical, but no arch gap 8)

I assume those gas burners are 5x112?
 
Yes Matty, 5 on 112. The Porsche patten ones that JAVA and Heritage sell have a much better offset, but you need to change all your brakes!
 
Little update, Burners sold, and new MWS polished 15x5.5 Fusch copies for the front stashed away.

Got a little detailing to do, remove the horrible sharp edges caused buy the machining, and then black detail the rims to get a more OEM look. I bought some 2nd hand rear hubs of mattp on here, pressed out the studs and pressed in super long front ones from JK, and the 15mm spacers are currently at the machine shop having a little 'trimming' done to clear the snout on the hub.

I've also been playing with my steering wheel, havn't got a clue what its off, but its super nice. I've had grief finding an adapter tho, and after spending the best part of £120 on bosses that wont work, i splashed out on a ISP Grant adapter from lime bug. I've had to make an adapter plate to get my wheel on, then drill new holes in the boss, cos the original holes are an odd thread, and I needed longer bolts, so i drilled and tapped for M6, then whenit all fitted togetjher, painted the boss semi gloss back, so it will blend in with the column mount. I'm hoping to adapt a bay horn push to the top part of the boss, after all, it is called a 'horn adapter'.

Hopefully i'll get the spacers back early next week, so I'll be looking at getting the 17's on the back and settling on a tyre size. Its Gonna be tight again, but not as tight as those Burners.

Oh, also found the NOS Commercial Bay rear view mirrors that I bought for my Crew cab, I think these will be going on.
Here's a few pics


Latest posts

Top