New to this game!

Early Bay Forum

Help Support Early Bay Forum:

This site may earn a commission from merchant affiliate links, including eBay, Amazon, and others.

Tino

Member
Joined
Oct 16, 2007
Messages
13
Reaction score
0
Location
Aberdeen
Hi all!

Having spent most of my motoring life as a Jap car man, I've recently moved into the ranks of camper van owner

It was a completely unplanned move but when I saw the ad in the Integra forum 'VW Camper - free to a good home', I was sold (so to speak! )

Long story short a local guy had a 1972 van sitting on his drive that he needed rid of and I (and my mate Dan - he'll be along shortly) were happy to oblige!

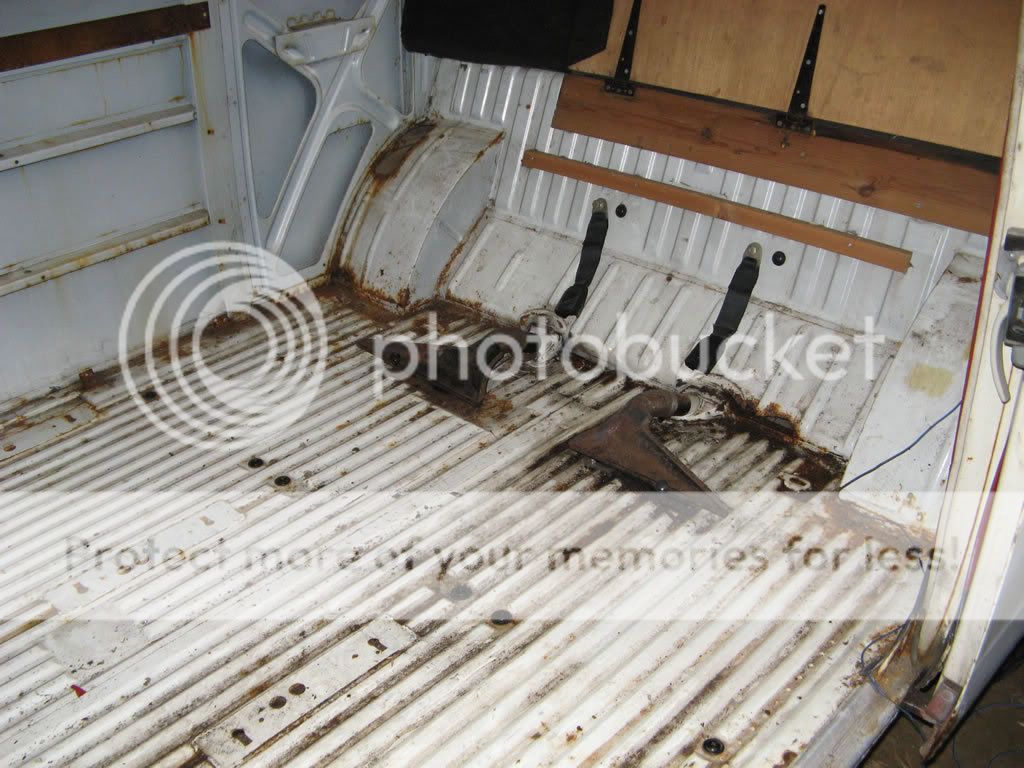
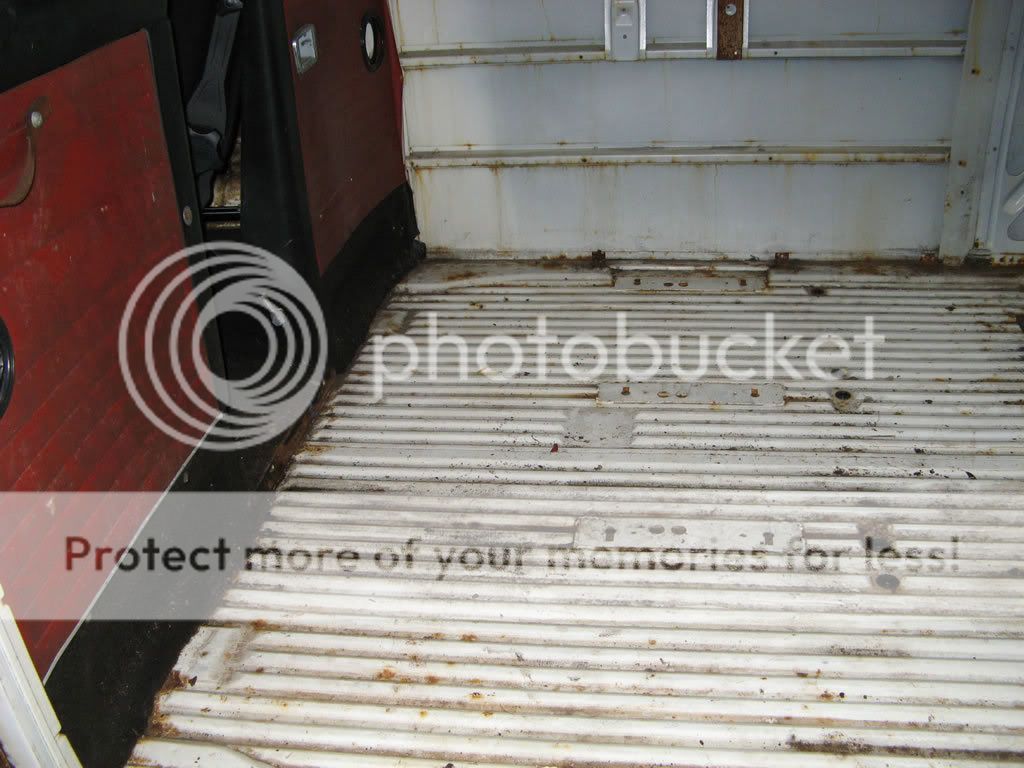
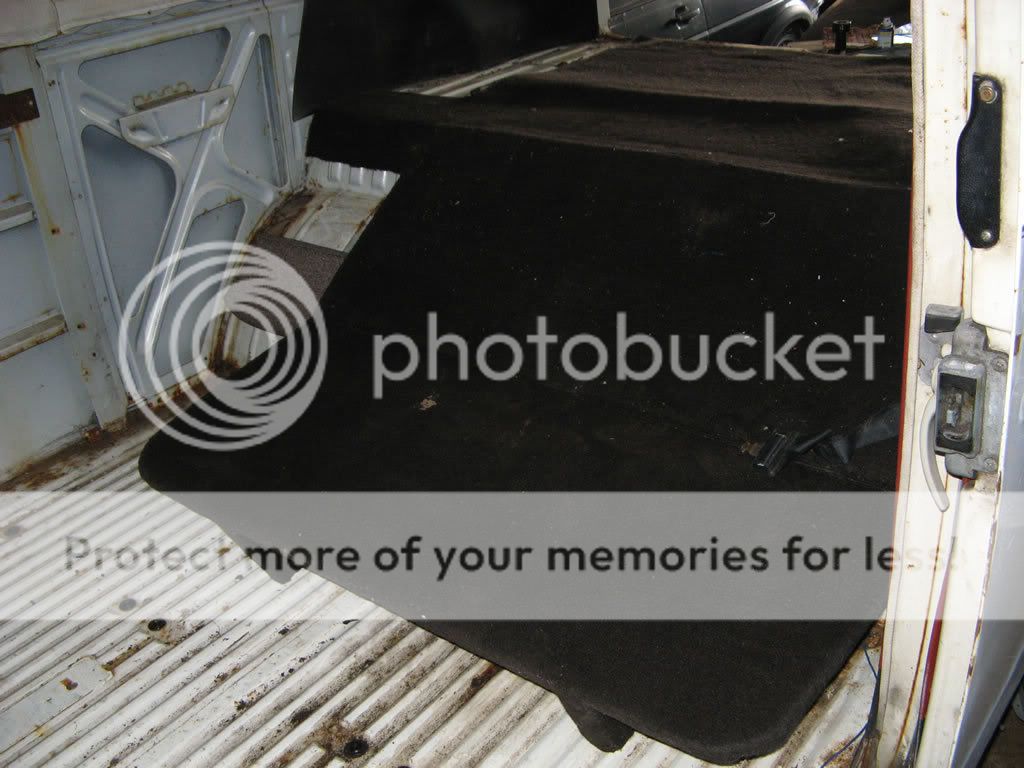
Anyway, here's a couple of pics:

IMG_1959.jpg


IMG_1954.jpg


IMG_1956.jpg


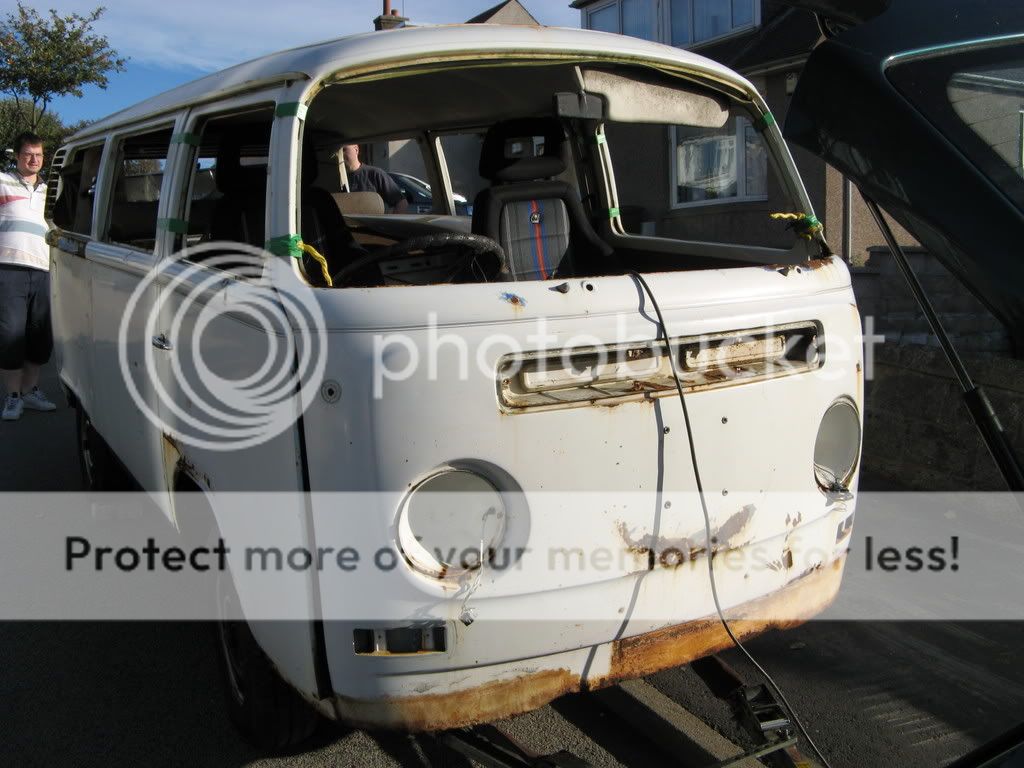
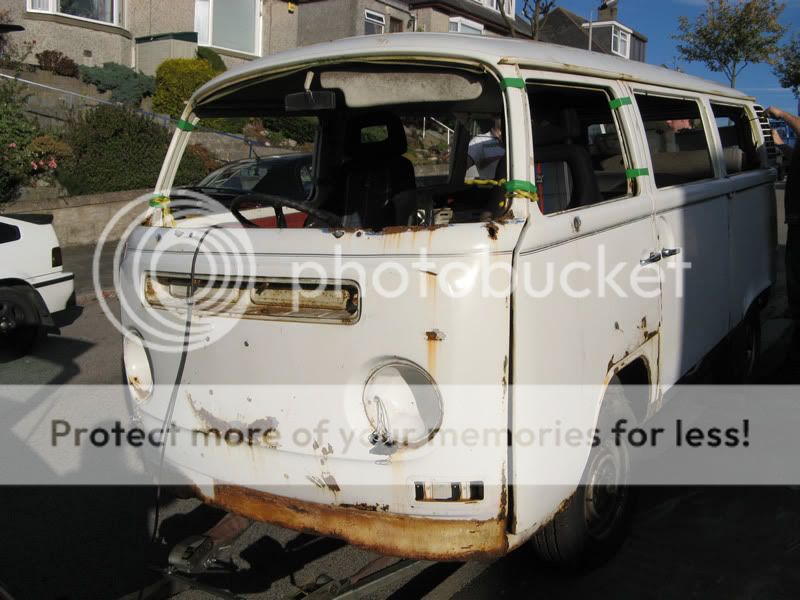
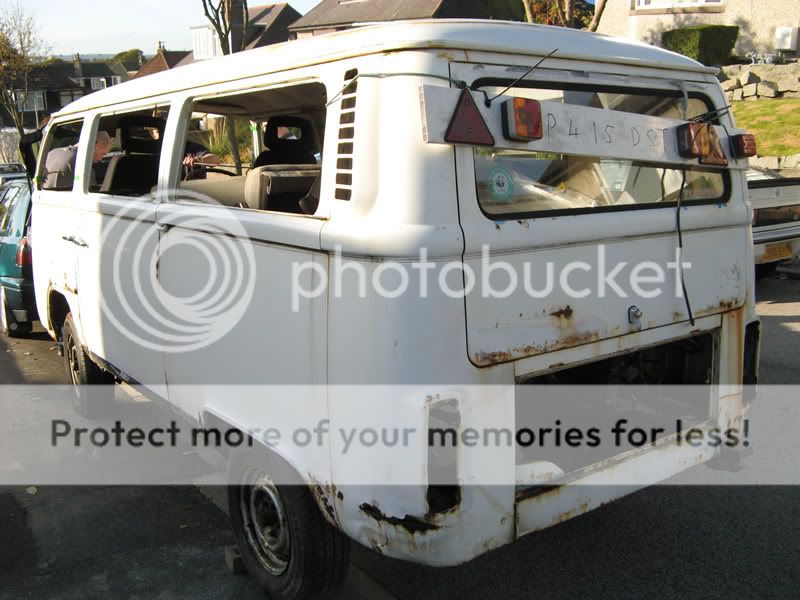
As you can see it'll need a lot of attention, but it's not too bad. Also, there was over 50 items inside, including a whole lot of new parts bought from Just Kampers by the previous owner who was planning to restore it.

As I said I'm completely new to all this so I've got a lot to learn, hoping to do a lot of that here!

What I've gathered so far is that it's a Type 2, bay window and not much else So what other basic info do I need to know about this new baby?

Cheers,

Tino
 
its a crossover tintop, 1972, earlies generally run from 1967 - 1971 and crossovers 1971-1972, late bays 1973 - 1979.

welcome to the EB ranks.

if it has an interior show us some pics and we might be able to tell you what conversion if any it is. chassis number would help too.
 
Cool cheers. Yeah I read the chassis code is a good place to start so I'll check that the next time I'm up at the van.

Some interior shots, probably not much use!

IMG_2081.jpg


IMG_2082.jpg


IMG_2083.jpg


And the colour of the side windows :lol:
IMG_2084.jpg
 
Looks like it was a microbus. the previous owner may have removed the seats and put in a fold out 3/4 bed?
 
If you post the details of the M-plate should be able to give you a few historic details from the vans production. sometimes it throws up a few supprises.

You appear to have a bargain there :D
 
Well done on your 'free' buy - looks like you got a good project there. :D
Keep us updated - plenty of pics please :wink:
 
Good luck with the project there! Keep us updated with more pictures.Has someone started cutting the front end off there?
 
Don't worry, the camera won't get a minutes rest once we get going with this :D

Has someone started cutting the front end off there?

Only the horrible metal eating beasties! :(
 
hello mate and welcome, defo a microbus :wink:
 
Well done, what a great find! You and your mate are going to have great fun restoring it.

Like easy said, defo a microbus.
 
Cheers :D

I'm just uploading all the pictures of the bits that were inside the van(will post a link soon). I noticed at the time that the replacement panel for the front is the later spec one, with the high indicators. What do you guys reckon, should I sell that on and get one the same as the original, or just go with that?
 
Hello Tino - nice to have another crossover on the forum, and free too! We like those prices!

Tino said:
...I noticed at the time that the replacement panel for the front is the later spec one, with the high indicators. What do you guys reckon, should I sell that on and get one the same as the original, or just go with that?

Early Bay front panels are no longer made :cry: - if you want to replace the panel your best bet is to weld up the upper indicator holes, remove the dimple where the later badge sits, and cut in the lower front indicator holes - for many Early owners the low front indicators is what it's all about! Check out Tofufi's resto thread to see how it's done...

http://forum.earlybay.com/viewtopic.php?t=556 (page 12)

Good luck and keep those pics coming...

;)
 
Yes the front clip is a pain this came up recently in a thread and I believe C&C will provide an already modified fron end but at a price....

you'll also have to remove the indicator mounts from the original and weld them onto the new low appertures.

Re the buldge a lot of people disguise it rather than cut it out, mount the large early roundel on the bulge with the centre section reamed out thinner so the badge sits over it.
 
Seeing as you love to see pics, I've just uploaded pictures of everything we took out of the van the day we got it up the road.

http://s196.photobucket.com/albums/aa55/Tinohead/1972%20VW%20Camper%20Van/Parts/?start=all

I've titled all of them with the name of the part, or what I think it is, or, unknown if I have no idea. Any additional info or help identifying the unknowns would be greatly appreciated! :D
 
unknown 1 and 2 and 3 are all engine tinware.

unknown 4 is the part of the heater channel tube near the rear of the van

unknown 5 is the gearbox mount and CV joints and axles (in bad shape) :lol:

unknown 6 is the seat belt mounting plates and panels for the front cab.

I cant believe the amount of gear you got for free.... your very lucky, looks like you got it all to get it running again. :D
 
That is a real good bit of luck you had there getting that lot!
With the front panel if you're handy with a welder you can convert it to early yourself or pay about £275 for one already converted or get a complete second hand front clip from someone who imports from usa or australia.
 
I did think we'd done well getting all that, but hearing it from the experts makes me even happier :D

Unknown 6, the seat belt mount, where does that go, between the 2 front seats?

Oh, and I remembered while going through those pictures that there's a tray with various, what looked like, engine related parts in that I forgot to take a proper picture of.

You can see some of it in this one though:

http://s196.photobucket.com/albums/aa55/Tinohead/1972%20VW%20Camper%20Van/?action=view&current=IMG_2088.jpg

I remember seeing the dizzy and a few other engine bay bits, although I wasn't sure exactly what they were. I'll get some proper pics when I go to check the M-code.
 

Latest posts

Top