Our Camper - Dorothy, 1970 RHD Devon

Early Bay Forum

Help Support Early Bay Forum:

This site may earn a commission from merchant affiliate links, including eBay, Amazon, and others.
I've been pretty busy on the bus the last couple of weeks. Maybe it's because I am fed-up of everyone asking how long it will be till it's on the road!!! :lol: OR maybe it's also that the end is in sight. People reassure me that the putting back together is the fun part!

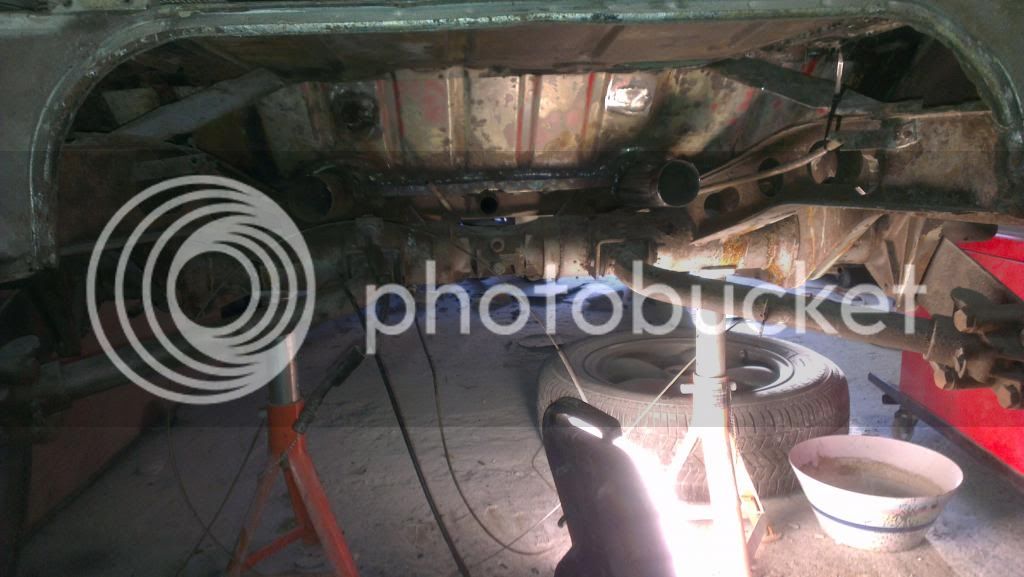
Heater pipe all done, well I say all done it's welded in. Still needs sealing, painting etc. It was really hard to get the right angle as the original is bent slightly. Hopefully the flexibility of the of heater tubes will compensate for it not being spot on.


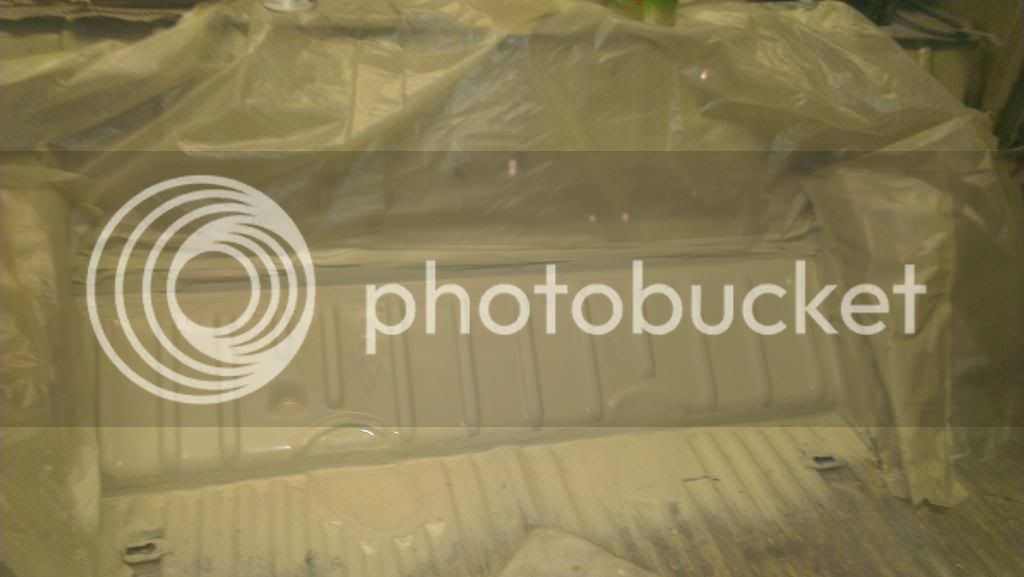
The heater panel thing is all done, sealed up and etch primed.


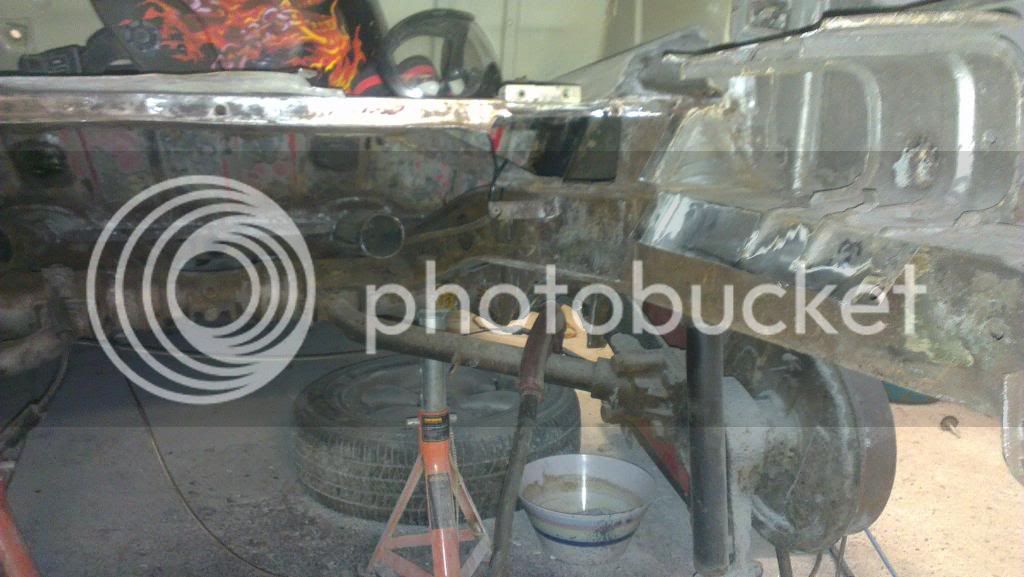
Next up was to attack where the engine seals go. The bit over the gearbox needed sorting and also the bit down the side
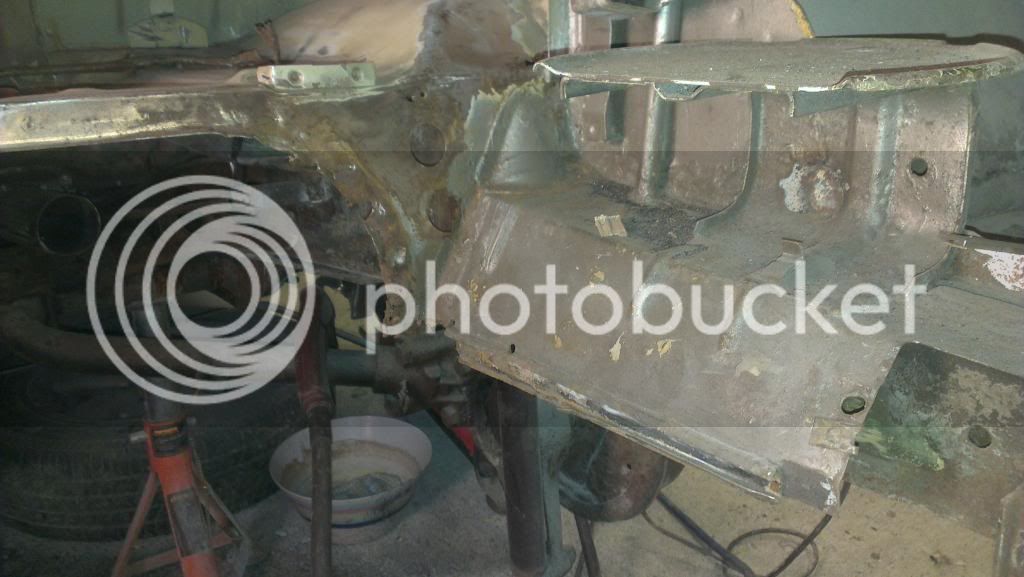

So I cut stuff out.


Put a new plate in and will make the cuts when I am confident it's in the right place.


No I did do the bit down the side and it's all clamped up but seems to be an issue with Dropbox and the photos haven't uploaded.

I got a bit stuck last night as the bit I've welded in over the gear box was sitting at an angle. From top to bottom it started to bend towards the front. Now I don't know if it's supposed to be angled or it is supposed to sit flat. I tried to get an idea from the other side but I couldn't get anything in there to work out if it's a right angle or not.

So my question is, the face of the bit that sits over the gearbox, is that flat? As I am worried that if I stick it all where I think it should go, the engine tin might not fit? Or it might not be sealed up properly. The only way I can think to be sure is to put the engine back in and I don't really fancy doing that!
 
Saturday 25 January 2014 marked our busses 44th Birthday :) :)


Ronnie was round to continue the filling work. We got the indicators in to make sure they are in the right place, was really happy seeing this. First was replacing the front panel but to have the actual 'low lights' in really finished it off :) However, I have a real problem with the 'best quality' set we picked up from C&C last year. For £130 or so they are shite. There is markings on the top where it was on a tree of many and when cut off not covered by the chrome stuff. They also may not be the correct depth as they don't get anywhere near the brackets we got from Schofields, I am happy to stand corrected here if they aren't supposed to, but it seems as though they should? The rubbers are crap also. Very disappointed.


New track cover welded in, nice quality from Schofields.


I also got a new rear valance from Schofields, nice rust free and solid! Also a pretty cool colour.


Starting to come together now, just an engine lid to source still. (forgive the tailgate being miss-aligned, I had to stick it on and I am rubbish at lining it up :lol: )


The drivers side is finished, there is a tad more to do on the passenger side of the front panel but other than that it's ready to be turned around and the other side done. We also (after over a year), uncovered the engine to bring in the garage to start breaking down for gasket/seal replacement.


It turned over and there was no end float (not really sure what this is to be honest but I think it's OK). Started taking off the tinware to get an idea of what needs replacing. Fairly sure we don't have a thermostat as I couldn't find it :lol: Might be there, who knows!

Why on earth did VW (assuming it was them), choose to use flat head screws to hold down certain parts of the tinware and not the others? If it's a PO's job then why on earth did they use them as well??? All rusted solid and needing cutting off :evil:


Hopefully the engine works as to be honest we cannot afford a new one :lol:

So all is going well I reckon :)
 
Happy 44th! :party0037:

Meant to tell you that the stuff arrived - I just haven't unwrapped it yet! Much appreciated, cheers.

Keep up the good work :mrgreen:
 
The last 3 weeks or so, working on the camper around a very busy period at my 9-5 (who actually does 9-5 anymore??) They are putting the pension age up thinking we will live longer, but the 45+++ hour weeks means we will die earlier?!?! :lol: We also had a weekend trip to Southern Ireland which was lovely. Although the journey there was a nightmare, and the wind...oh my...

First up for me was to sort out in the inside of the front panel. A Previous owner had painted it white, and I can only presume they just painted straight over the Savannah Beige as I started to key it and it pretty much fell off. There were some real pain in the ass bits so after non intending to sand it all back I did.

It started like this.


This is once I've sanded it down, cleaned it and rust proofed.


Etch Primed, not sure how many coats this particular picture was, but I put a very good couple of coats on.


I then seam-sealed everything up. This is after 4 coats of stonechip with the exception of the air box and chanels which will be the same colour as the rest of the inside. This pic is the best one out of a large selection of shit photos. My phone went for repair so I am not sure if the camera is not working properly now, or it's me taking pictures too quickly :?


Really happy with how that looks now :) So nice to see something clean looking and finished!

After that I had to sand back all the existing paint down the drivers side, in all the little nooks and crannys which I must say I did not enjoy...I also took the wood off the pop-top. Not too bad, not very straight though so thinking about what todo with this at the moment.


After a 3 week hiatus Ronnie was back round to work his magic :D The bus is at the stage where the drivers side and front panel was done, so it was primer time!! :D :D

Masked it up.


Ronnie did do a bit more filling and sanding down work on the front panel here and there. I am pretty sure this was the last photo after the last of the filling and sanding.

Then it was primer time! Now, I know that last year I was stupid and did this my self, but to know that this is getting towards the last stages is fricking amazing! :D After the primer was on Ronnie matt blacked it can be flattened back. But that is for another day, we had to turn it around now to start the other side.


Again, sorry for the crappy pictures. The first time she has been out in the air for I don't know how long!


So long in fact that I'd sort of forgotten what the other side looked like!


Oh yeah....I remember now...

Another of the front to cheer my up :)


A little welding work done inside the rear arch and then we stuck a JK door that we picked up from Slough at the end of last year.


And that was it! A very long and successful Saturday's work from Ronnie and I :)

I've got to remove all the paint from the passenger side this week if I get time. Also changing the gaskets etc on the engine is still on-going. But happy days :)
 
Thanks guys, really cannot wait to get to driving it! Just hopefully it all goes back together properly. I could just do with a month of work to get some serious unbroken time on it! Still so much to do when I think about it.

We do have a deadline set so hopefully we can make it! Won't say what it is as I've given deadlines before and never got anywhere near close :lol:
 
Since the last update I feel I've been really busy and Ronnie has been doing stuff but I guess I just didn't take many pictures as it looks like not a lot has been done!

I took all the paint off the n/s rear corner, wheel arch panel, all around the windows up to the gutter, inside the sliding door, inside the front door and the front wheel arch (hated doing that...)

The rear wheel arch panel is all flat now. Not a great pic again annoyingly. I'll take more with a camera that works.


Next up was the sliding door.


After much sodding around getting the sliding door to shut and line up pretty good it was on and done! Also I bought the middle roller wheel from Autocraft and we decided it was not very good. Considering it costs a bloody fortune...the old one went back on.


I then stuck the front door back on to see what it looks like. I was happy :D :D


So still to do is a bit of filler work on the sliding door and front door. Reset the rear corner which hopefully will be done this weekend. So next picture should be all welding etc DONE!!! Tailgate lined up, engine lid lined up and valance in. Skim of filler then it's painting time!!! WooHoo!!
 
Whistler said:
Since the last update I feel I've been really busy and Ronnie has been doing stuff but I guess I just didn't take many pictures as it looks like not a lot has been done!

Looks like a lot of work to me.

Whats the plan with paint?
 
woz said:
Whistler said:
Since the last update I feel I've been really busy and Ronnie has been doing stuff but I guess I just didn't take many pictures as it looks like not a lot has been done!

Looks like a lot of work to me.

Whats the plan with paint?

Glad you think so! Certainly feels like it :)

We have had an idea for a few months now, but there is another idea which has thrown a spanner in the works. Keeping our ideas quiet for the time being.
 
I didn't have time to do much on the bus last week. I only managed to get in the garage on Friday evening. Cleaned up all the surface rust behind the engine lid hinge section and rust killed it. Started to strip the engine lid and sliding door also.

This was the engine lid we picked up. To be honest, the price for these things is mental and after being told it was a good one I am pissed off with what we got for the money we paid. Just keep telling my self that we will not have to buy one again... Someone had welded over the hinge bits because a screw had snapped. They'd riveted some kind of strap device to both of the bottom sides and there are two extra holes around the number plate holes as well. Apart from being a bit dented the most important thing I guess is that it is completely and utterly rust free.


Ronnie was back round Saturday and he set the plan of re-setting the rear corner. Because of the whack she had the top right rear corner had sagged a bit and we were unable to get the tailgate to fit with the perfect lines. We also struggled getting the rear valance on properly. The plan was to cut through the corner under the swage line and lift the top up. It was only out by about 3-4mm then re-weld it back up in place. The rear part of the chassis would need to be cut out again and reset with the valance in.

So this is how she started the day. (Well sort of, this is with the hinge repair panel in already.


Next up was lining up the engine lid.


All welded, lined up and working! :D


This is with the tailgate lined up as best we could. You can see the way the tailgate is higher on the left side than on the right if you look at the bottom where it meets the hinge panel.


I like this one!


Then it was time to lift the corner. Ronnie cut through the corner and we used the porta power to lift the top up bit by bit until the tailgate sat perfectly. Measurements were taken, taken again and double checked! At the same time we replaced the panel on the inside.


All welded up and lined up!


Happy!!!! However, next up was getting the valance to fit properly. This valance is really straight so we had a good benchmark to work from. I didn't get any photos of the actual process but it took ages and was really fiddly. It involved taking the triangle section the valance bolts in to out, and also replacing the triangle section inside the bus at the end of the chassis rails where it meets the back of the bus. Fortunately we had a cut that was still attached to the corner I picked up. So after many hours this happened.


:D :D :D :D :D :D :D :D


So all in all, a really really good day! There is some welds to finish off and tidy up but that is all the major body work finished! Well with the exception of a bit of bashing the left corner and filling! Really happy with the end product though, it looks more like a camper every day Ronnie is round so really chuffed!

Also, a couple of pictures of the sliding door that we did last weekend but had crap photos.


One of my favourite photos to date!


That's all for now!
 
Gwar72 said:
Great job..!! 8) Coming along nicely..!!! :D :D :D

It certainly is, can't thank Ronnie enough to be honest. It's mad how he acheives some of the things he does. Every time he comes over now things just seem to move so quick. I keep forgetting that half the bus is done already and this side is a couple days off being done as well!!
 
I thought it was a while since our last updated but I didn't realise it was that long! We've been pretty busy since then so here is where we are up to as of yesterday.

The filler work continues! Both rear corners, the sliding door, the B-Post, the outer sill and the front arch needed a little of work.


The sliding door had some etch primer.


(not sure if these pictures are coming out in order :roll: New phone with googledrive with an after market auto-upload app, hopefully they are in order and not some missing!)

We picked up a full set of door cards from Harris (or Harrison, never remember) trim supplies at Volksworld. I also picked up some seat frames from MattP. I couldn't resist having a little look to the future...


After that it was more filling work! The pictures are of it all done and ready for the first coat of primer.


In the week I was to attack the roof :(


So after much sanding down all the crap was off it. I rust proofed the four corners where the roof sat as it had pitted quite badly. I had three sections that needed welding. A bit at the rear on the passenger side and a bit along the back and also filling the rotten circle hole where the fan was. I only got pictures of one of the repairs.


I didn't get one of it all cleaned up for some reason. Also no idea why there isn't other pictures!

Then it was sunny outside, sooooo the bus came out to bask in the sun for the day whilst I sanded the other side of the roof down. So some pictures in the sun incoming!


:D :D

Picked up a nice rear bumper from Jay on here from Volksworld as well! It's all stripped now with just a couple of dents in it. Someone had welded up all the bumper iron holes so not entirely sure how it was attached to the bus!


It was then primer time!


The rear end and passenger side was also done. It was then time for me to flat it back. Never done it before obviously so on the drivers side I went a bit too far, I wasn't allowed to do the rear corners :lol: The passenger side went a lot better though and it looked great!

This is the front after I got my hands on it :)


I was very happy with how I'd done!


Ronnie did some awesome repairs to the front panel. The line that goes down the door was awful from the repo panel. So some welding and cutting later it is now nice and straight. He also had to do some work to the sill under the sliding door where I hadn't done it quite right.

So then last week it was time to finish the underneath now that all the welding and filling had been done. So it was off with all of the running gear. We are going from wide 5 to narrow 5 so the idea was to put all the narrow 5 stuff back on. This was fine until I remembered (almost last minute!), that we didn't have any tyres on the narrow 5 wheels we have!! :oops: so once done all the wide 5 stuff has gone back on for the time being.


So apart from wire brushing everything for what felt like two days, we shot blasted the trailing arms and spring plates. Then rust proofed everything with some FE stuff from Rust.com I had issues here as I wanted to use the same stuff as I had for the rest of the bus. But The Rust Shop owners are currently selling their business so are not placing any more orders with KBS and they were out of all the rust killing/converting stuff. They did however have the same Satin black.

I also had to attack the repair for the seal for the rubber that goes around the engine. Too cut a long story short, do not use the left side for reference as they are bloody different!!! After I figured that out I was quite happy with the results! After a little tidying up I am sure it will look lovely :)


I do still have to work out the bend properly and trim that piece up.

I also had to weld the front closing panel in the drivers side wheel arch. A tab that goes under where the fuel tank goes (no idea what cable goes here at the moment :lol: ) and a new bracket for the clutch cable tube.

After an evening painting the rust stuff on it looked like this (ignore the masking up that was done another day!)


Everything was then sealed up and then this happened.


As we went to Stanford Hall on Sunday my dad offered to do the top coat (which was nice of him, as I would have been in the garage till around 3am Sunday morning otherwise!!!)

Stanford was awesome, again great weather and also looking at all the earlybays that work!! Also met Paul when I collected my Budget Box (awesome bit of kit!), we also picked up some very decent heat exchangers, some jailbars and one of Buttys throttle kits! When we got back from the show my dad had painted everything and was in the process of putting things back on, so down I popped to help out.

It was dark at this point so it was really hard to get a decent photo.


One of the tins of paint went like sponge as soon as it went in the gun so we didn't have enough paint to do the trailing arms and spring plates :( But I will be making a call today as that paint must have been off or something! There are also a few spots that will need touching up as well.

So that was the underside more or less finished! It was also a really tight deadline as Ronnie was back yesterday to do some more primer stuff and we needed the bus to move! So it was a nice relief to get her back on her wheels Sunday night just in time!

Last week we had used some stopper on all the pin holes and any dents we found after flatting down. I'd also managed to make a small scratch on the tailgate :oops: Yesterday some final fiilling and sanding down was done and then it was time for the final coats of primer! Queue one happy chap!! I'll photo bomb a bit now as it doesn't really need any descriptions :lol:

Before Primer


After!


:D :D Well happy!

We didn't do the roof as I need to sand it more and get some rust stuff on it. That will be next time :)

So it's really coming along now, still lots of late nights ahead but the end goal is going to be worth it!
 
It took me an hour + to put that post up, it also took what feels like 100++ hours to do all that. How come it took less than 3 minutes to read it!?! :lol:

It's mad the amount of time and effort that goes in to the work we are doing. I have so much respect for anyone doing the same. And just thankful I am now being helped by someone who knows what they are doing.
 
Supertramp said:
Excellent progress. Something about a bus in primer, nice and clean. Keep it up!

I agree! It's just that it is one colour and clean it makes such a difference. It also means it's done as well which is such a nice feeling!
 

Latest posts

Top