RePhil
Well-known member
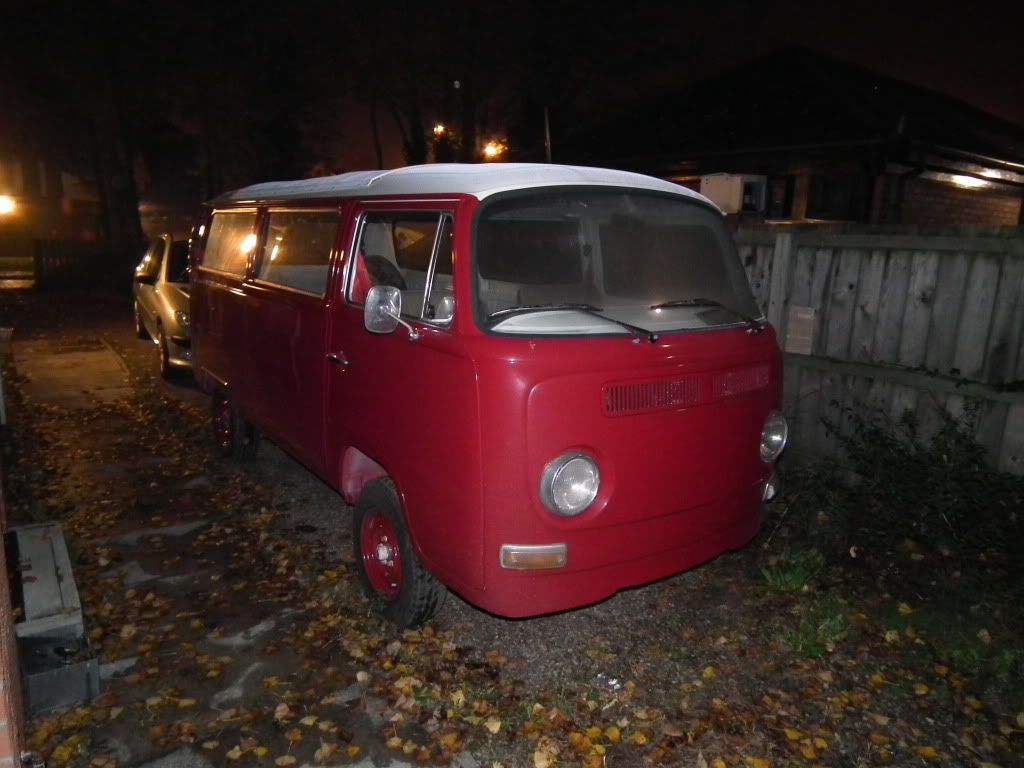
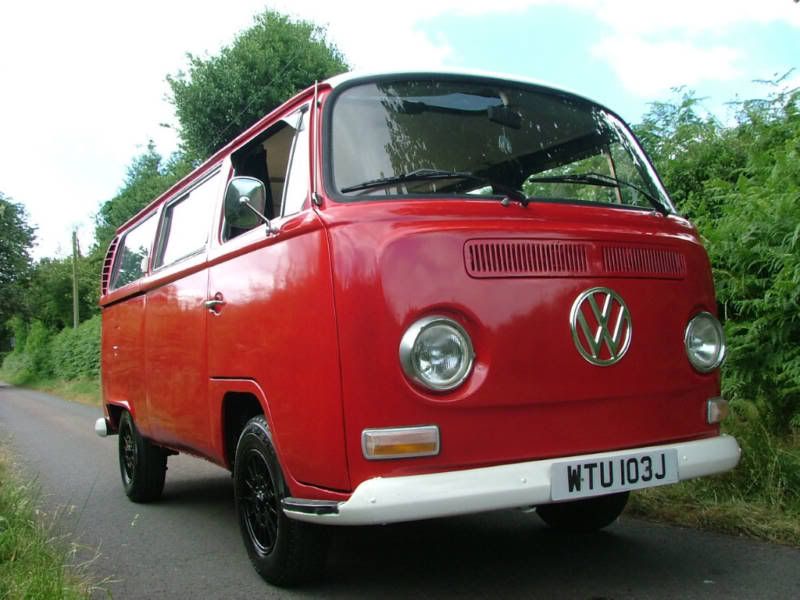
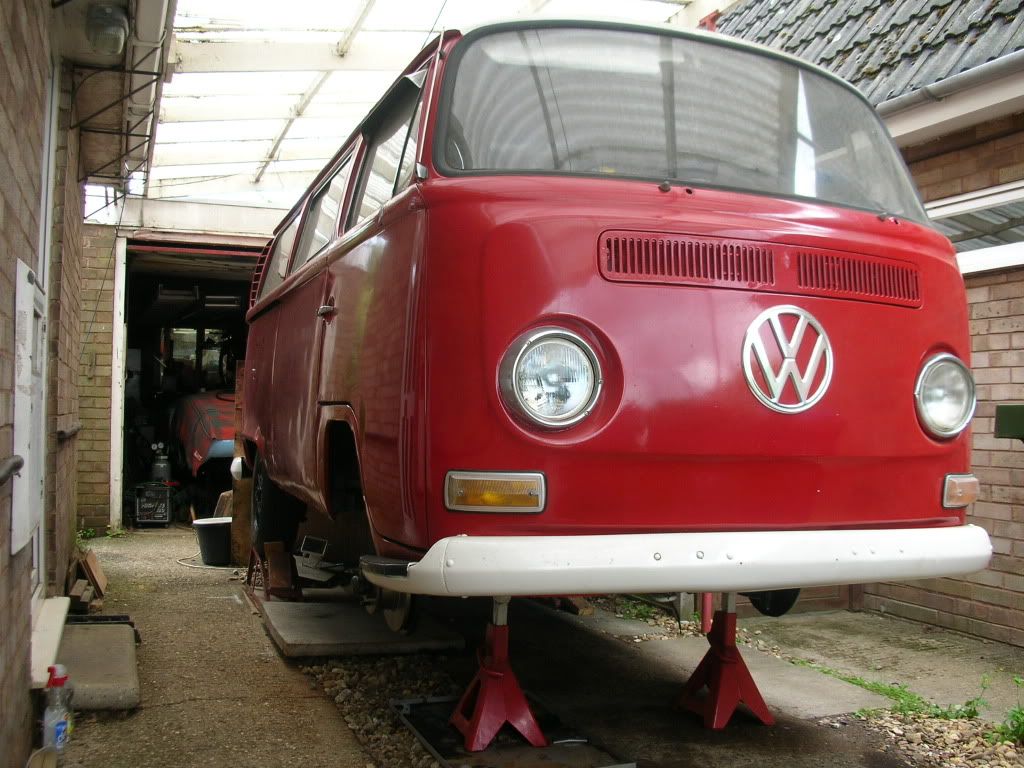
Here is RED.
Like many people on here I must have been wearing my rose coloured glasses when I bought our bus. Therefore I missed a few things, like the rust, & I also underestimated the time it would take to complete the few “little” jobs I had identified. Hey ho such is life.
I’m enjoying everything I learn about the bus & the VW mechanics immensely. This is my first aircooled vehicle & I’m impressed by the simplicity & complexity at the same time.
Just a quick thank-you to all those of you who have posted their bus or resto. pics on here as I’ve spent hours studying many of them. I hope posting my 10 penne’th may help someone too.
Our bus “RED” isn’t, & never will be, a show winner & our eventual aim is to use it as a camper. Therefore it needs to be safe & reliable. It may get a bit low.
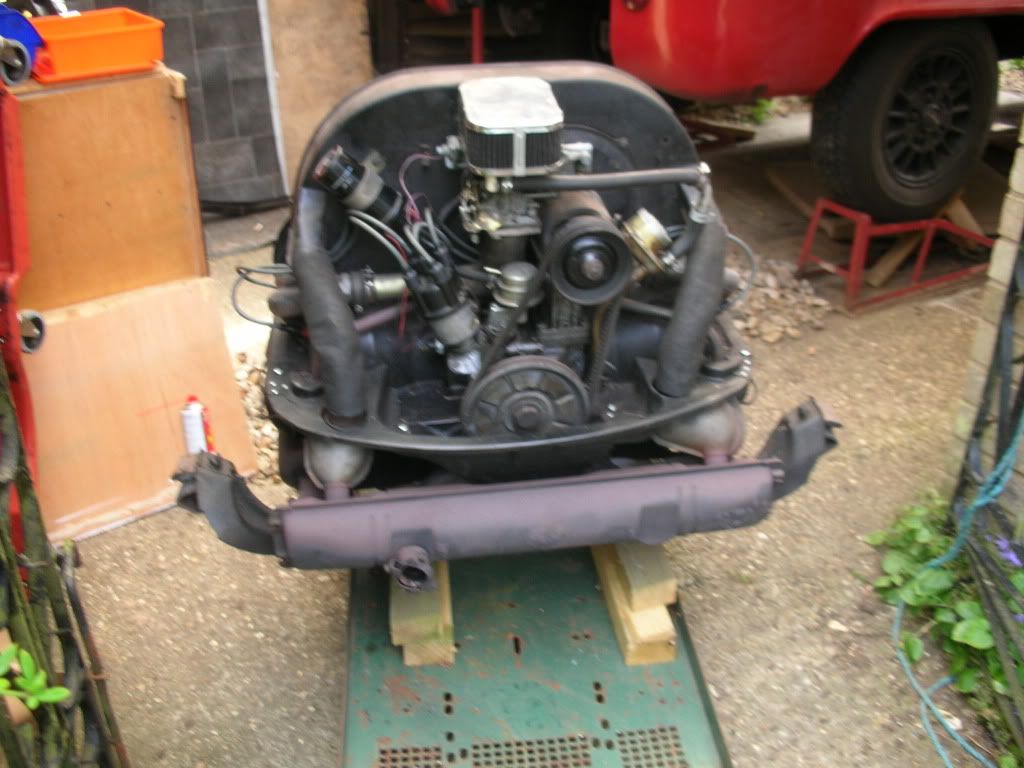
First I had to sort the tinwear which was partly missing. (Cue the first of many trips to Barclay at Status just on the other side of town.)
Off came the heat exchangers which needed the flaps repairing.
Once sorted everything seems to be OK in the heating & cooling department. (I was later to find that I had no stat & that the flaps had been welded open.)
I learned from my Dad that you always check out the brakes as soon as you can, so I set about the rears first. The backplates were pretty bent where somebody had tried to lever off the drums so I fitted new ones. One cylinder & new springs brought them up to standard. While the hubs were off I did seals & bearings where needed. Wheel bearing nuts were a pig & I needed the obligatory scaffold bar & lots of agro to crack one side. When I realised how cheap the nuts were I chopped off the other side rather than waste all that time. The front brakes seemed OK for now.
Drive shafts were replaced next & I was now happy enough to go off on a camping weekend. Having just set-up the rear brakes I stopped a few times en route to check they weren't getting hot. They were & I laid under to back off the adjuster a tad, in a layby. Virtually the next passing car happened to be a beetle. The driver pulled over to see if we were OK – what camaraderie. He was on his way home from working at McLaren – Thanks again if you read this.
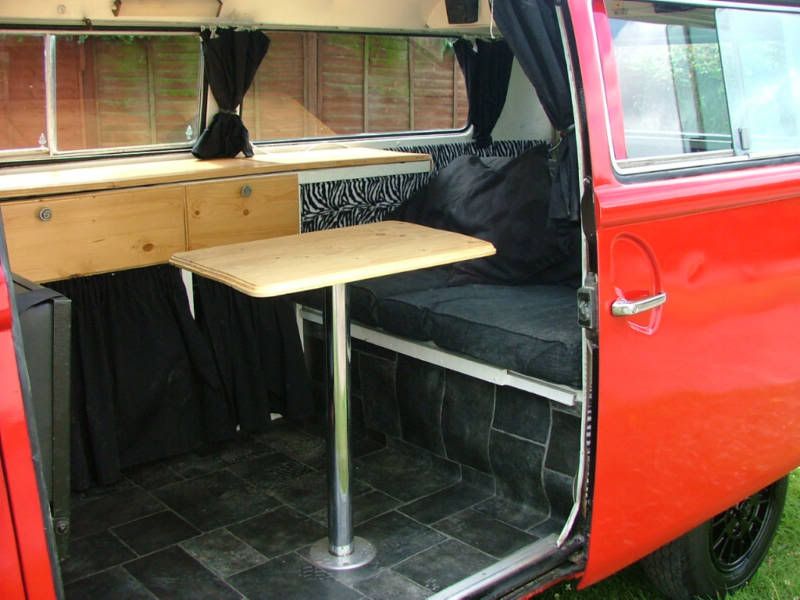
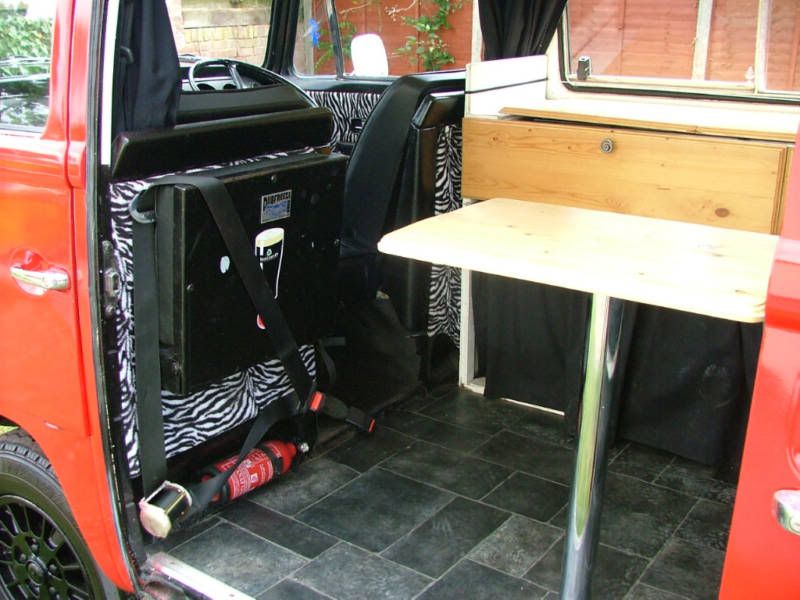
All went well with the camping weekend & the layout worked well for our needs so even though we’re going to gut it & redo the interior we’ll keep the same set-up.
The only issue we had was a whiff of petrol which I kept getting. When I got back I lifted the rear deck covering to reveal a neat (plasma cut) hole that somebody had cut presumably to access a fuel filler hose joint. It was neatly folded back but not sealed. I fitted a cover with gasket. No more fumes.
My list of stuff I needed kept growing & I went to each show with a big shopping list expecting to find everything there, in good condition, sold by fellow enthusiasts at bargain prices. Mmmm.
It seems that there is an increasing supply of newly manufactured items, some at very reasonable cost if not all at of the best quality. However when it comes to rust free Californian (actually battered, rusty & maybe possibly imported via southern USA) items, well we are all being sold the story that there’s a very limited & diminishing supply so we have to keep raising the cost exponentially. I’m not convinced so I’ll stay out of that game.
I have however been able to buy a few items I’ve needed off guys on here at reasonable, fair prices. Thanks, & when I find I’ve got bits left over I’ll do the same.
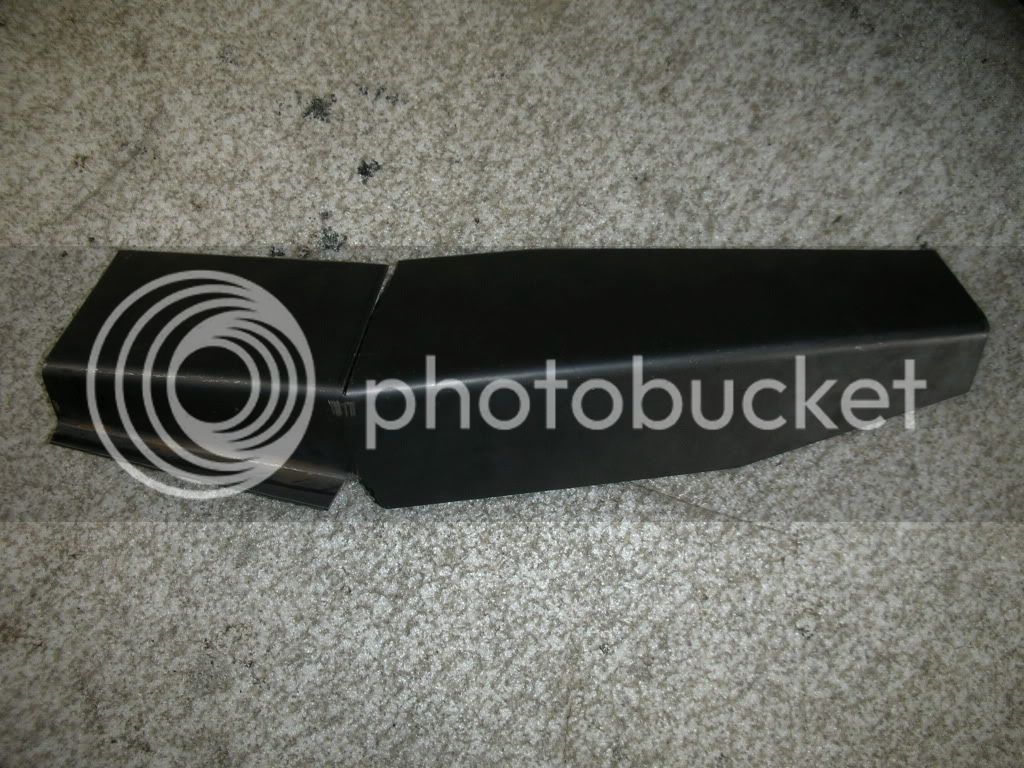
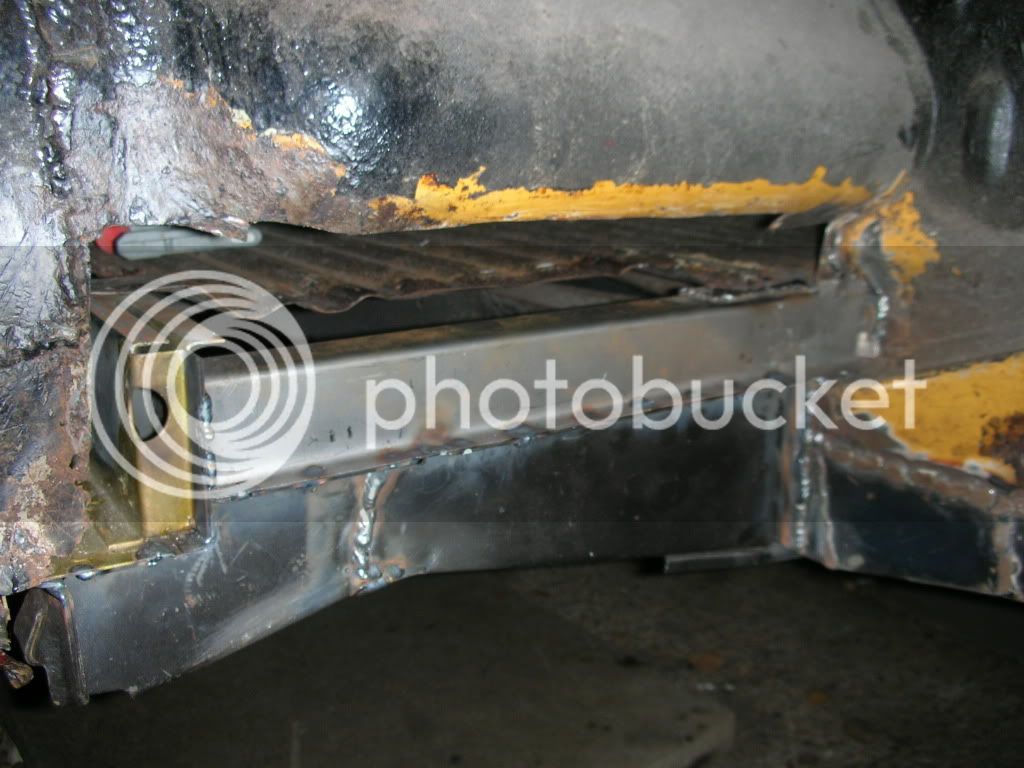
I bought a job lot of outriggers & jacking points & set to work hacking out the nsf corner first. The front edge of the inner & middle sill were missing so I had to add some metal to them. Further back they were OK.
The chassis had a few very thin areas so I had to cut out some of that too. I’ve tried not to chop too much at once & seem to be getting on OK.
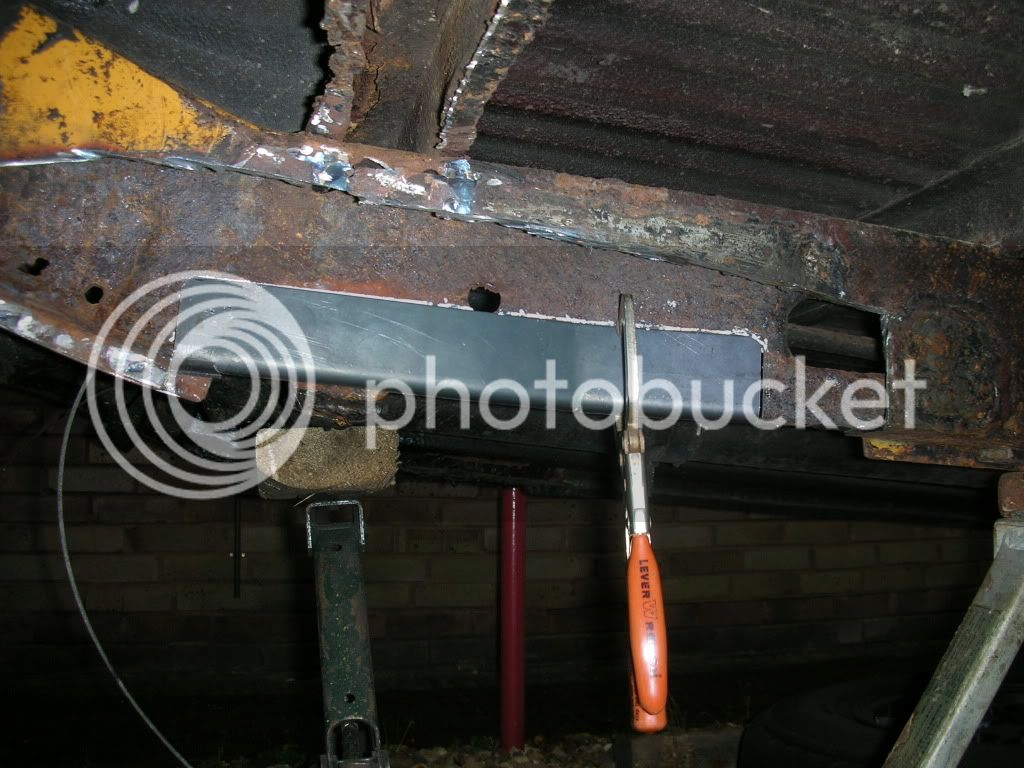
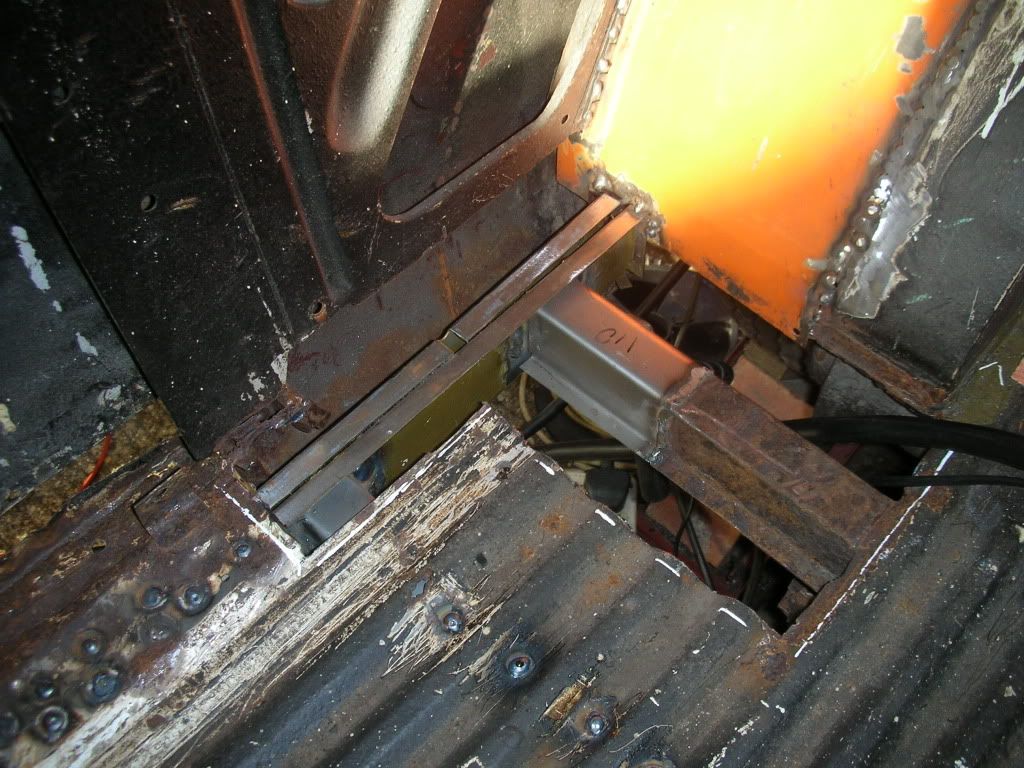
I’m managing to bend cut & weld various sections to resemble what, I think, was there originally. I keep checking the opposite side & other’s buses when unsure. Sometimes making very slow progress.
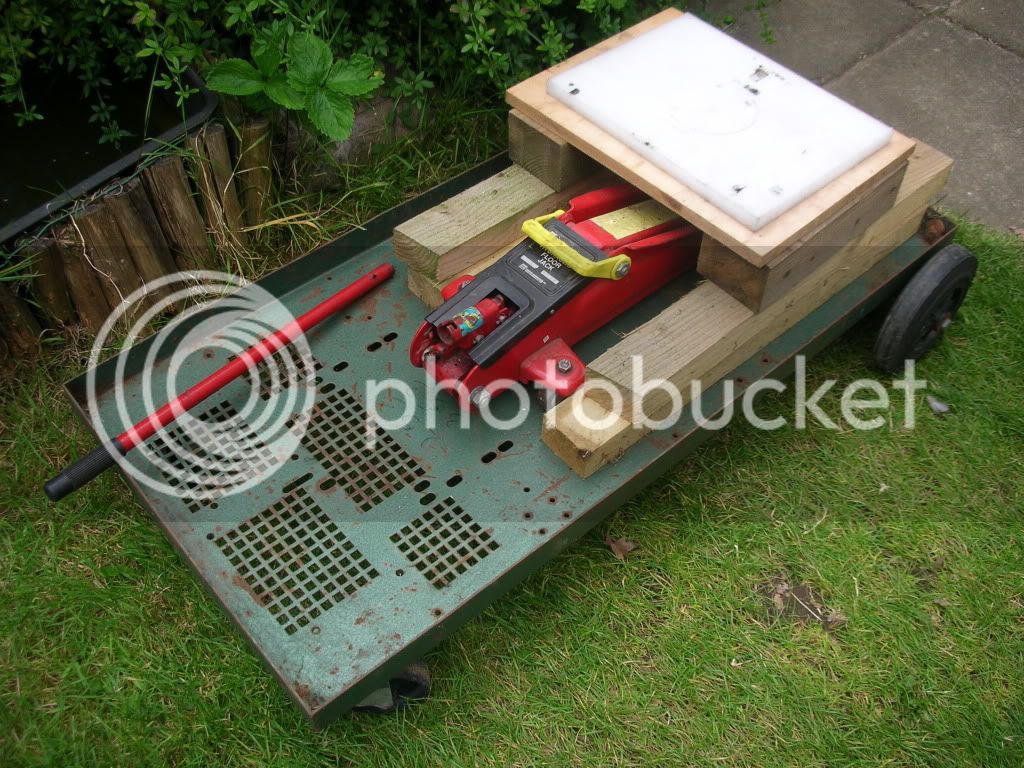
My next big item to buy & fit was the front beam. I bought a lhd unit from someone on here who had gone the Red9 route & then sold his bus! I made a wooden frame so I could lower the beam on my own & without a proper trolley jack. This all went quite well & after much persuasion it came free to reveal even rustier areas than I had already seen. I’m glad I’m consigning it to the bin.
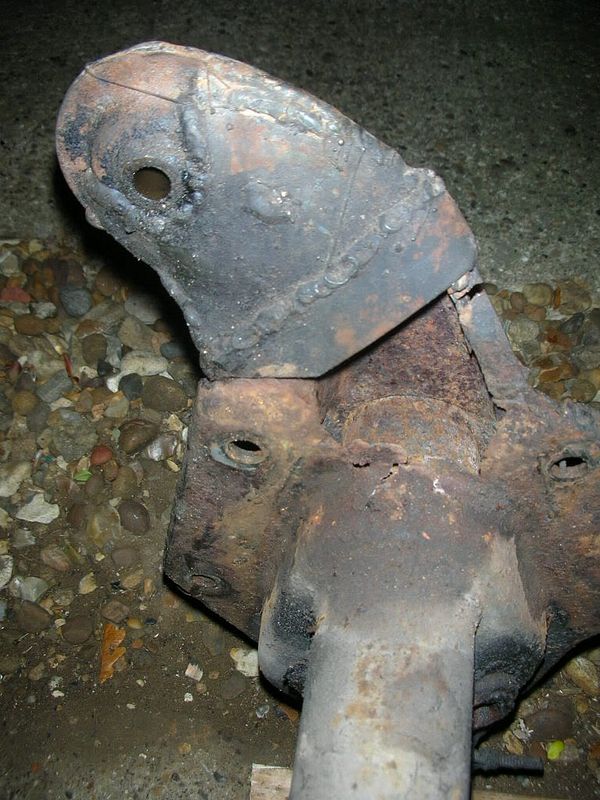
The new beam had no steering stops on it so I grafted the ones off the old one. I don’t know whether they should be there but they look & feel right. The beam also had height adjusters fitted but they were stiff as hell. I persuaded the living daylights out of them by alternately whacking them back & forth to work them free. (I may have rounded over the holes that the leaf springs insert into as I had a job getting the springs back in.) They may need a revisit in future.
I fitted new ball joints to the trailing arms. I used the tips on here for removing the old ones. Getting the new ones in was too big a job for my arbour press but the butterfly press at work did the job. Just.
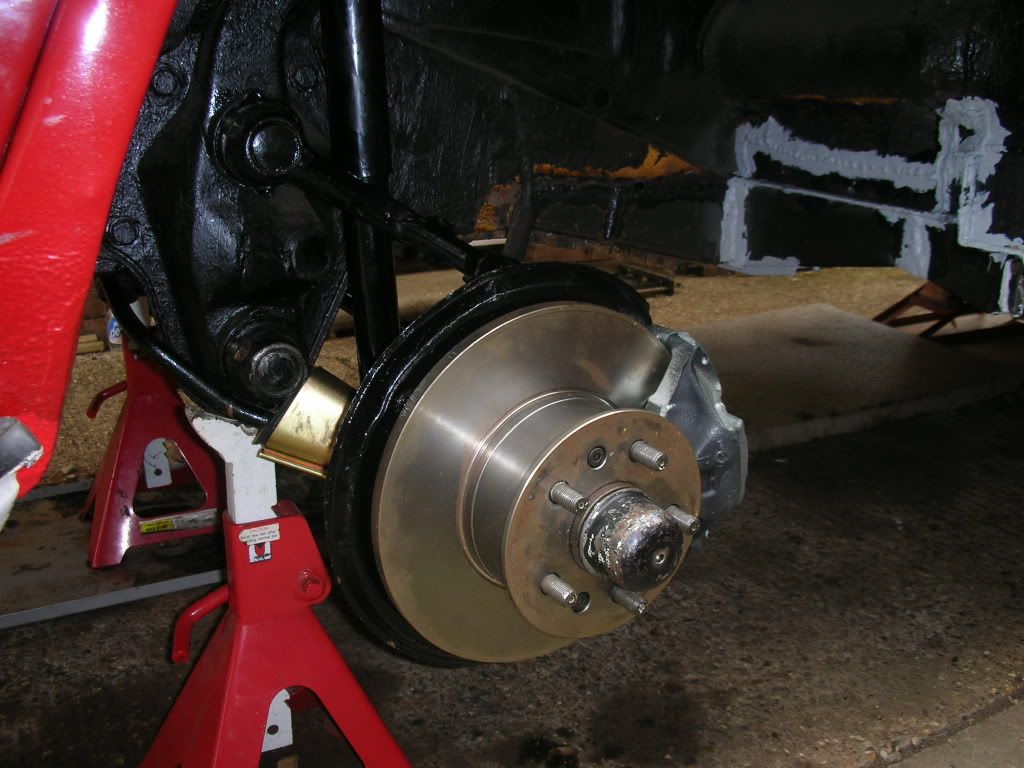
Overhauled & painted hubs etc were refitted without issue.
Refitting the beam was quite straightforward, though I had to make shims as the chassis legs were slightly narrower than the new beam. Better than the other way round.
One of the brake callipers was badly corroded so I decided it would be a waste of effort rebuilding them. I replaced both with later model callipers plus spacers. It’s too easy to press “add to basket” on the net.
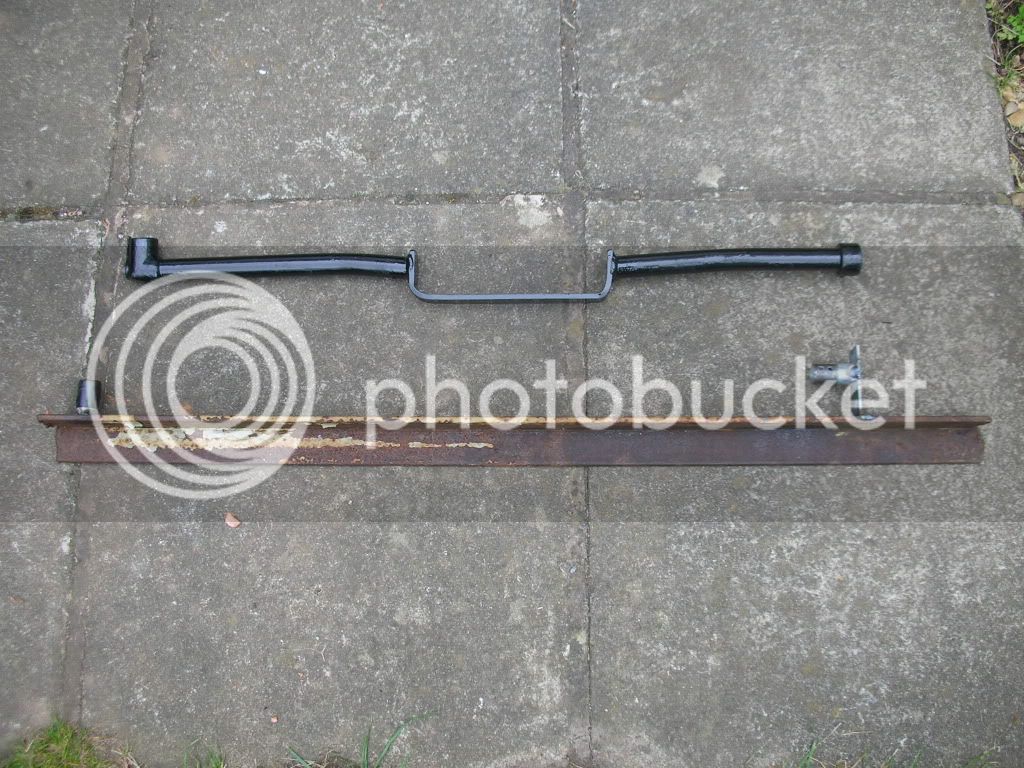
I then modded the gear change shaft to clear the beam adjusters & fitted new bushes.
Cont:
Like many people on here I must have been wearing my rose coloured glasses when I bought our bus. Therefore I missed a few things, like the rust, & I also underestimated the time it would take to complete the few “little” jobs I had identified. Hey ho such is life.
I’m enjoying everything I learn about the bus & the VW mechanics immensely. This is my first aircooled vehicle & I’m impressed by the simplicity & complexity at the same time.
Just a quick thank-you to all those of you who have posted their bus or resto. pics on here as I’ve spent hours studying many of them. I hope posting my 10 penne’th may help someone too.
Our bus “RED” isn’t, & never will be, a show winner & our eventual aim is to use it as a camper. Therefore it needs to be safe & reliable. It may get a bit low.
First I had to sort the tinwear which was partly missing. (Cue the first of many trips to Barclay at Status just on the other side of town.)
Off came the heat exchangers which needed the flaps repairing.
Once sorted everything seems to be OK in the heating & cooling department. (I was later to find that I had no stat & that the flaps had been welded open.)
I learned from my Dad that you always check out the brakes as soon as you can, so I set about the rears first. The backplates were pretty bent where somebody had tried to lever off the drums so I fitted new ones. One cylinder & new springs brought them up to standard. While the hubs were off I did seals & bearings where needed. Wheel bearing nuts were a pig & I needed the obligatory scaffold bar & lots of agro to crack one side. When I realised how cheap the nuts were I chopped off the other side rather than waste all that time. The front brakes seemed OK for now.
Drive shafts were replaced next & I was now happy enough to go off on a camping weekend. Having just set-up the rear brakes I stopped a few times en route to check they weren't getting hot. They were & I laid under to back off the adjuster a tad, in a layby. Virtually the next passing car happened to be a beetle. The driver pulled over to see if we were OK – what camaraderie. He was on his way home from working at McLaren – Thanks again if you read this.
All went well with the camping weekend & the layout worked well for our needs so even though we’re going to gut it & redo the interior we’ll keep the same set-up.
The only issue we had was a whiff of petrol which I kept getting. When I got back I lifted the rear deck covering to reveal a neat (plasma cut) hole that somebody had cut presumably to access a fuel filler hose joint. It was neatly folded back but not sealed. I fitted a cover with gasket. No more fumes.
My list of stuff I needed kept growing & I went to each show with a big shopping list expecting to find everything there, in good condition, sold by fellow enthusiasts at bargain prices. Mmmm.
It seems that there is an increasing supply of newly manufactured items, some at very reasonable cost if not all at of the best quality. However when it comes to rust free Californian (actually battered, rusty & maybe possibly imported via southern USA) items, well we are all being sold the story that there’s a very limited & diminishing supply so we have to keep raising the cost exponentially. I’m not convinced so I’ll stay out of that game.
I have however been able to buy a few items I’ve needed off guys on here at reasonable, fair prices. Thanks, & when I find I’ve got bits left over I’ll do the same.
I bought a job lot of outriggers & jacking points & set to work hacking out the nsf corner first. The front edge of the inner & middle sill were missing so I had to add some metal to them. Further back they were OK.
The chassis had a few very thin areas so I had to cut out some of that too. I’ve tried not to chop too much at once & seem to be getting on OK.
I’m managing to bend cut & weld various sections to resemble what, I think, was there originally. I keep checking the opposite side & other’s buses when unsure. Sometimes making very slow progress.
My next big item to buy & fit was the front beam. I bought a lhd unit from someone on here who had gone the Red9 route & then sold his bus! I made a wooden frame so I could lower the beam on my own & without a proper trolley jack. This all went quite well & after much persuasion it came free to reveal even rustier areas than I had already seen. I’m glad I’m consigning it to the bin.
The new beam had no steering stops on it so I grafted the ones off the old one. I don’t know whether they should be there but they look & feel right. The beam also had height adjusters fitted but they were stiff as hell. I persuaded the living daylights out of them by alternately whacking them back & forth to work them free. (I may have rounded over the holes that the leaf springs insert into as I had a job getting the springs back in.) They may need a revisit in future.
I fitted new ball joints to the trailing arms. I used the tips on here for removing the old ones. Getting the new ones in was too big a job for my arbour press but the butterfly press at work did the job. Just.
Overhauled & painted hubs etc were refitted without issue.
Refitting the beam was quite straightforward, though I had to make shims as the chassis legs were slightly narrower than the new beam. Better than the other way round.
One of the brake callipers was badly corroded so I decided it would be a waste of effort rebuilding them. I replaced both with later model callipers plus spacers. It’s too easy to press “add to basket” on the net.
I then modded the gear change shaft to clear the beam adjusters & fitted new bushes.
Cont:

")