The van with no name.....

Early Bay Forum

Help Support Early Bay Forum:

This site may earn a commission from merchant affiliate links, including eBay, Amazon, and others.
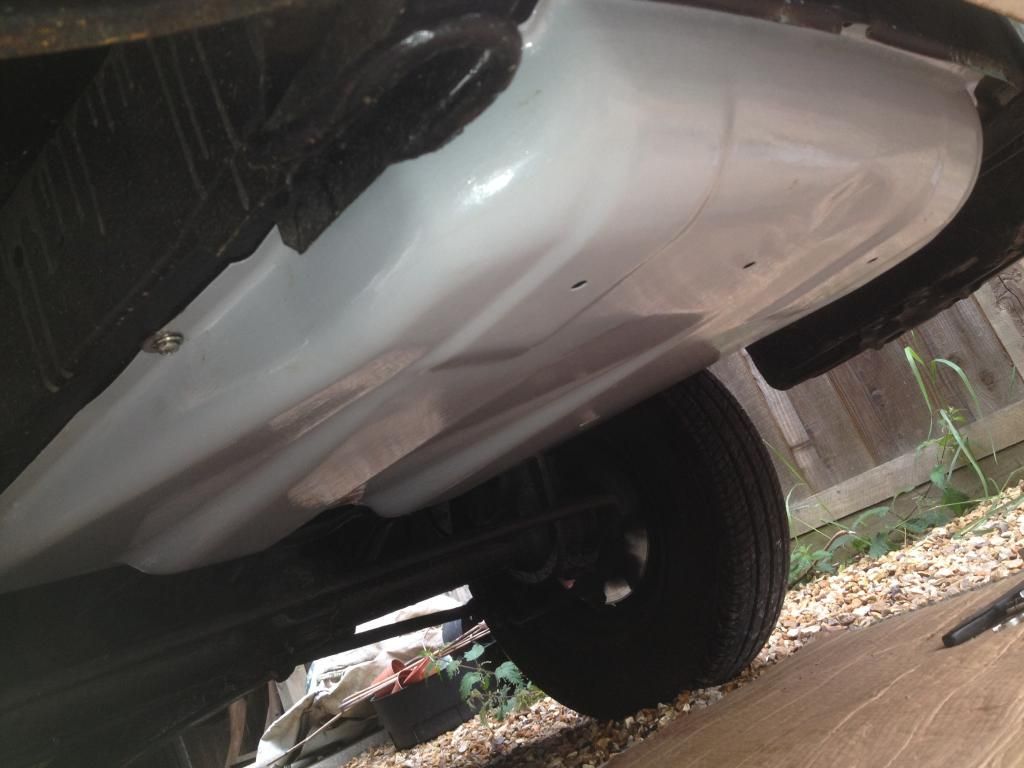
Yip, heater tubes are pretty good so am leaving in situ. after a good sanding they got a coat of rust inhibitor and my plan is to give them a couple of coats in a brush on 2 pack undercoat with a grey enamel over the top. Not sure that I'm going to get the original insulation back on though....but assuming I do then I'll give the exposed ends a spray with some chassis dinitrol. seems like a bit of overkill I know, but can't see anyone going here again for a few decades.

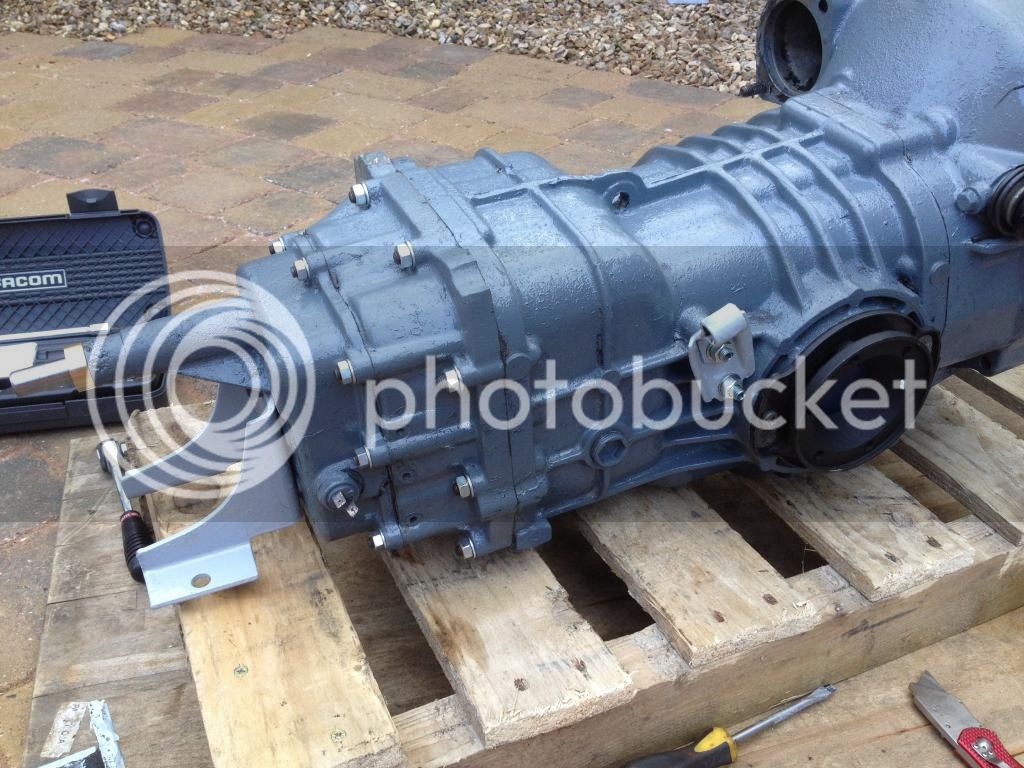
While I'm at it i'll be giving the gearbox mountings, clutch cable bracket a coat of enamel as well. no good reason other than so I can look at them when i'm under there in the future http://forum.earlybay.com/posting.php?mode=reply&f=2&t=59893#" onclick="window.open(this.href);return false;

I've got a full set of bellows, linkages and plastic things for refitting the gear shifter too. Again, looks like never done before, and will be a long time before its reached again.
 
Sounds like a good plan. If you can re-fit the OG insulation it's worth it as I haven't seen anything that fits as good.

I had a new central heater tube on my van, the old one was missing, and I used some black hammerite on it. I haven't painted the bits of the heating system at either end yet though....

I am sure the new gear linkage bits will improve things :)
 
The shift is not too bad and having dismantled the rear section it seems pretty good, however hope it makes it better.

I'll hold on to the insulation, problem I had was it was a really tight fit against the chassis above, I've no idea how they got it on!

For me, I'm no longer a fan of hamerite, or black for that matter. I got some good products from rustbusters in Sleaford. The 2 pack stuff you can brush on seems really good as it gives a chemical bond.

I'm liking my grey at the moment, can see when it's chipped and starting to rust....

URL=http://s1295.photobucket.com/user/Bluesnailman/media/Mobile%20Uploads/image_zpsaa3d5b99.jpg.html]
image_zpsaa3d5b99.jpg
[/URL]

 
Bluesnailman said:
The shift is not too bad and having dismantled the rear section it seems pretty good, however hope it makes it better.

I'll hold on to the insulation, problem I had was it was a really tight fit against the chassis above, I've no idea how they got it on!

For me, I'm no longer a fan of hamerite, or black for that matter. I got some good products from rustbusters in Sleaford. The 2 pack stuff you can brush on seems really good as it gives a chemical bond.

I'm liking my grey at the moment, can see when it's chipped and starting to rust....

URL=http://s1295.photobucket.com/user/Bluesnailman/media/Mobile%20Uploads/image_zpsaa3d5b99.jpg.html]
image_zpsaa3d5b99.jpg
[/URL]


I'm liking that!
 
and so reassembly commences. just about anyway

yesterday this showed up having been repaired by bears motorsport

URL=http://s1295.photobucket.com/user/Bluesnailman/media/Mobile%20Uploads/image_zps2a4330f5.jpg.html]
image_zps2a4330f5.jpg
[/URL]

add that to some new gear linkage bits and bobs. disappointingly, the new plastic spacers for the linkage rod turned out to be a poor imitation of the originals. after giving the originals a good clean - i reused them

 
I like it shiny, much better than rusty!

So, the jobs that never end continue. Reassembly is properly underway, and the engine bay is looking much better


Rust treatment and a couple of coats of brush on 2 pack makes it right mess, but it all comes good in the end


Nearly ready for the engine going back in now. I did put oil in the gearbox, but snagging still to be done (eg must remember to torque drive shaft bolts!)
 
I thought now would be a good idea to put some better noise insulation in the engine.

So a 2metre roll of 25mm of the fire resistant foam goes a long way. With the petrol tank out this comes right down the inside of the bulkhead, and fits nicely between the structure of the rear deck floor/engine compartment roof.

http://www.easyfoam.co.uk/fireseal-acoustic-foam.php" onclick="window.open(this.href);return false;


Was really surprised, but managed to squeeze the petrol tank in without cutting it, so I have an almost continuous wall of foam forward and above the engine.

I replaced the front bushing on the gear linkage rod, fitted EMPI quick shift - both of which seemed a bit rubbish in fit. So I took the dremel to the shift plates and now they sit snugly.

Also, changed the accelerator peddle hinge pin and fitted buttys peddle link. So with my refreshed steering of last year, and the upgraded brakes of 2013 my hand and foot controls should be nice!

Oth good news includes my soldered fuel sender is working now that it's back in the van and I've put some fuel in it - relief. Never want to take that out again, or at least I never want to try and put it in again, especially with the sound insulation in place

I've a rackhams made piece of fireproof plywood That I've fitted too, will fix fire extinguisher to it and post some photos.
 
Engine bay is looking very tidy now.
Might have to look into the foam for when I reassemble mine (I do have the original stuff for up there but very tatty and oily).
 
Insulation looks good and should make things a bit quieter. :)

How have you fixed the fire extinguisher rack to the spare wheel well? Can you still fit the spare wheel in place?

I have a firetec that I really must fit, its been in the garage for about three years! :lol:

I think part of the problem is not knowing the best place to fit the rack holder.
 
Bit more work tonight...

the firetech is bolted into the wheel well, and I don't carry a spare (the bolts do intrude to the inside Mike). I carry a can of inflation gunk, and confess I've little confidence in it - but hey, new cars come with them.....

In another life I might be tempted to hang it though (could hang it from the insulation holder - its a good piece of work), and use cable clips to make sure it didn't come out of its bracket.

Anyway from tonight - first re-inflate fire extinguisher. Yip you read it right!


the car tyre pump screws on and take it back into the green at 150 psi! Goggles on what taking that apart....


and fitted to the rackhams insulation holder


You can see that I've got a couple of wires coming from the engine to the extinguisher - well here's the logic. I ordered one with a switch which switches 'off' if discharged. Meaning that its "on" the rest of the time. So - My coil feed goes via the extinguisher - a discharged extinguisher means no spark to the engine, which means no engine which means no fuel pump. Only problem is that I've been loosing pressure in the extinguisher over time and a couple of occasions Ive not had a spark. The tyre pump works though, and I nip the cap back on with a pair of pliers in the hope that it lasts a bit longer. Apparently more likely to be a problem with a powder type (like mine)

I'm feeling like i'm getting closer and closer to driving it again....
 
driving it but without taking my foot off the accelerator seemed to be the challenge. An insatiable need to stall seems to have developed......

having checked plug gaps, attempted to check the timing (difficult when it wants to stall at idle), I resorted to tackling the carb

VWDarrin has an excellent youtube video of how to adjust - step 1, check you're pilot valve is clean.

however, with a BOCAR 34 pict 3 i discovered that this is not so simple....
so I had a go at adusting the idle - but this made no difference what so ever

The samba revealed this thread on idle problems: basically attributing them the pilot valve again

http://www.thesamba.com/vw/forum/viewtopic.php?t=56411&postdays=0&postorder=asc&start=240&sid=ea2ccebf9227f0b9720d3fb3c7eb9c17" onclick="window.open(this.href);return false;

Pilot is marked as "B" here

http://images.thesamba.com/vw/gallery/pix/588835.jpg" onclick="window.open(this.href);return false;

number34 on this

http://www.vw-resource.com/images/34carb_exploded_view.jpg" onclick="window.open(this.href);return false;

however - in a BOCAR this takes the form of two parts. An outer plug unscrews and reveals a much much smaller inner valve. But to get the valve out you have to remove the carb from vehicle, pour out petrol and then unscrew the value and turn carb on it's side and out it drops. 10 min of carb cleaner and some wire and the valve had a hole in it again!

put it back on the engine, started, and idled Hopefully of some use to others out there
 
Dave.P said:
Good work, liking that foam, can you tell if its making it quieter yet ?

Well, you know - yes it does make it quieter. Not like a Prius but certainly takes a few decibels out. So 55 - 60 seems a bit more comfortable on the ears. Unlike a 911 i don't think I'll ever leave the noise behind me and be travelling in silence.

Do have a more noticeable whistle from passenger cab door though now, so it never ends....
 
It's all back together now, and I've overcome the 'timing' problems

first problem.... If you have one of these watch what you're doing with the dial on the back of the gun. Mine had turned slightly and so I was going stir crazy with the readings versus how it sounded and ran. (i.e. the problem was operator)

http://www.gunson.co.uk/item.aspx?cat=1356&item=1832" onclick="window.open(this.href);return false;

So, my service trying to get it working was quite comprehensive, full strip down of ignition, back to basics marking points on the crank pulley, plugs, valves gapped etc etc. Even the carb came apart - found a fault I didn't know I had etc etc.

Anyway, turning the dial back to zero advance helped enormously.


As did a fresh tank of BP's finest super unleaded.

What i did find though was that my accuspark SVDA doesn't quite advance to 30deg (ish) at 3000rpm if you set idle at 7deg. So, as I don't drive at idle I've set it at 30deg at 3000rpm. It idles and starts ok, but must be closer to 8 or 9 deg at 850rpm. seems ok, but I know its not ideal.

I added a bit more of the foam sound insulation behind the R&R bed, and following limited testing I'm really pleased with the reduction in noise levels. At 50 - 60mph it is appreciably quieter, so real pleased with that. I'm also really pleased with the reconditioned gearbox and new bushings and links, and quick shifter plate - all working nice

So, with the exception of an MOT i'm feeling ready for summer.


My interior mirror has been missing 'something' - some sort of rubber bit between the windscreen and the screw. So, in a moment of 'making up something else to do' i made a nice little piece of rubber from sugru. Don't know if other people have used it, but good for thinks like this, also makes a good job of silencing the rattly bits of the westy bed mechanism.


https://sugru.com" onclick="window.open(this.href);return false;
 
That stuff looks pretty good, I'll have to remember that

You must have bought your Firetec about the same time as me, mine still sitting in the garage.... [UNAMUSED FACE]
 
Well, I've not 'done' much to the van this summer, other than use it - but I did look at my paperwork and on the inside of my owners manual was a name and an address. A short internet search later revealed the same family at the same address - 47 years later. So I wrote, and at the weekend the original PO wrote back.........

I must work out how to PDF and post it here, but an American family order an American spec Westy, picked up in Europe and used for a year and a half before they took it back to USA, then drove it across the USA to San Fran where they lived..

Some cracking photos too (e.g.)


and.... it came with an offer. Would I like the original tent that came with it? Still in good condition, mine for the cost of shipping

I'm gob smacked (current photo)


Latest posts

Top