You are using an out of date browser. It may not display this or other websites correctly.
You should upgrade or use an alternative browser.
You should upgrade or use an alternative browser.
1968 Campervan conversion
- Thread starter joaonar
- Start date


Help Support Early Bay Forum:
This site may earn a commission from merchant affiliate
links, including eBay, Amazon, and others.


Gadget Boy said:[...]
[...]
After seing this picture in the new Gadget Boy thread, I need some help. Gadget Boy got this replacement panel from Alan Schofield shop.
I've already sent some emails to them when I was looking for the rear corners but shipping them to me was far more expensive than parts being shipped from Justkampers ou VWHeritage... I really don't know why but it was the same as both replacement panels.
So, I need someone from this forum to get it for me and shipp it to me using regular postal services.
Can someone help me?

Thanks in advance
still waiting for the part I need to finish the task. Unfortunately the part came to Portugal but they didn't find Hugo's bodyshop so the postal services sent it again to London...
Maybe I can have it next week.... :evil:
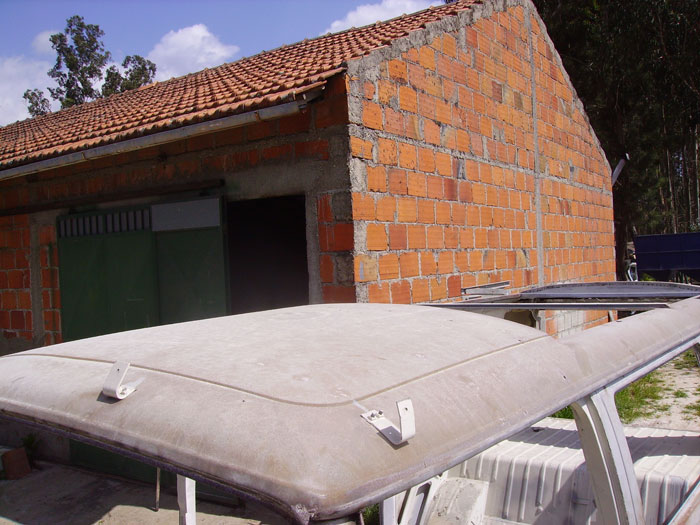
Meanwhile, I started working on both pop tops I have. One is the poptop I'm going to use and the other one is for selling.
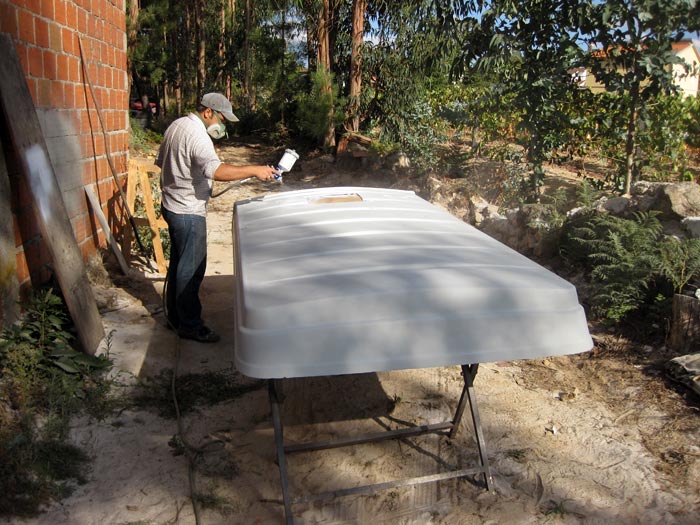
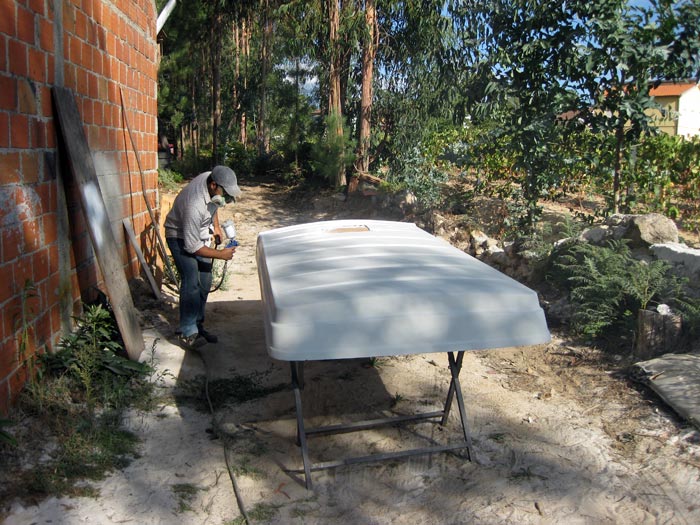
after a lot of sanding, I applied some layers of spray filler:
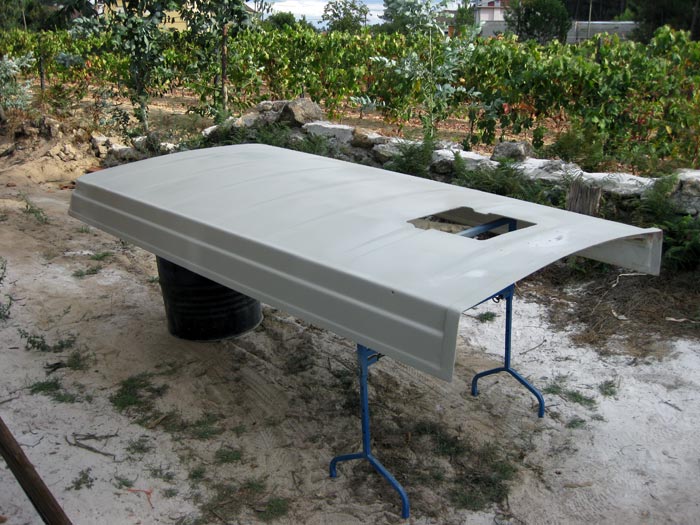
and with lots of sanding in between....
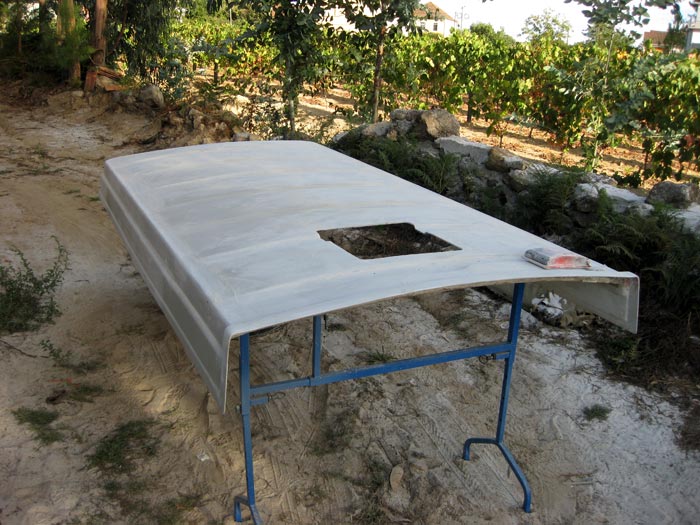
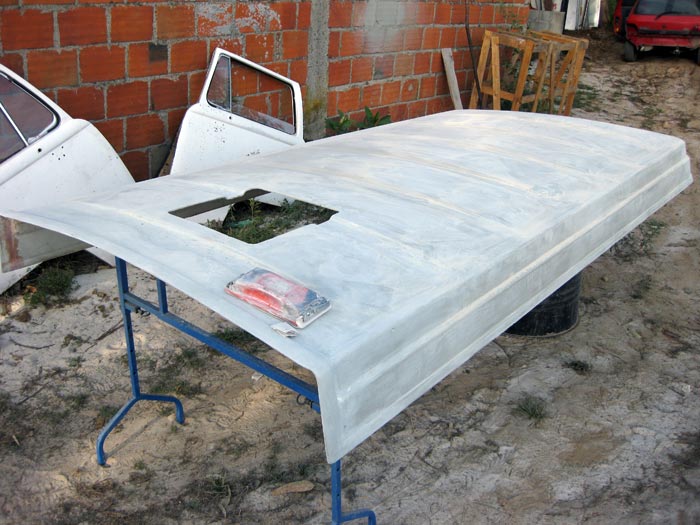
and as a finishing toutch a final layer of high-build primer:
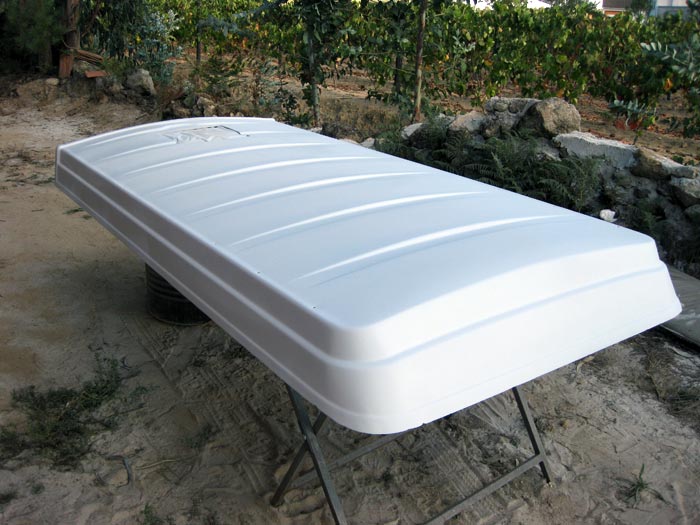
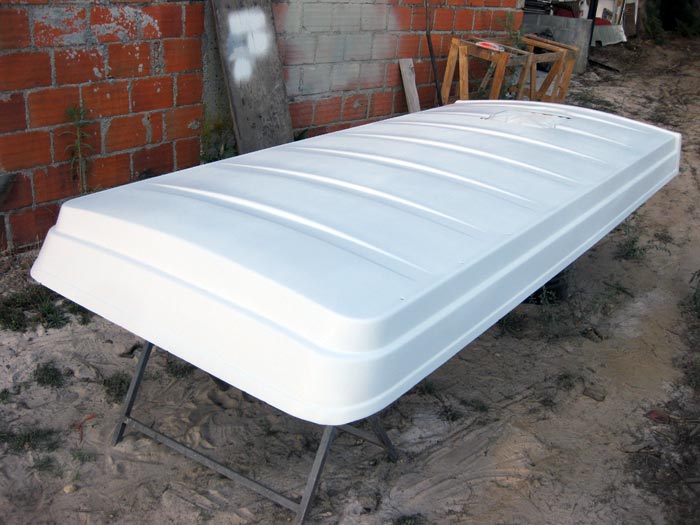
when the primer dried out, the final result was excellent:
On the interior, I want to leave this one as it was originally.
So I had to take out all of the old lining.
For that I tried some tinner and some acetone.
Acetone is far more quicker to react:
and a couple of hours later, the task was almost done:
I also started to cover the poptop wooden frame with fiberglass top coat, but there's still a lot to be done here....
Maybe I can have it next week.... :evil:
Meanwhile, I started working on both pop tops I have. One is the poptop I'm going to use and the other one is for selling.
after a lot of sanding, I applied some layers of spray filler:
and with lots of sanding in between....
and as a finishing toutch a final layer of high-build primer:
when the primer dried out, the final result was excellent:
On the interior, I want to leave this one as it was originally.
So I had to take out all of the old lining.
For that I tried some tinner and some acetone.
Acetone is far more quicker to react:
and a couple of hours later, the task was almost done:
I also started to cover the poptop wooden frame with fiberglass top coat, but there's still a lot to be done here....
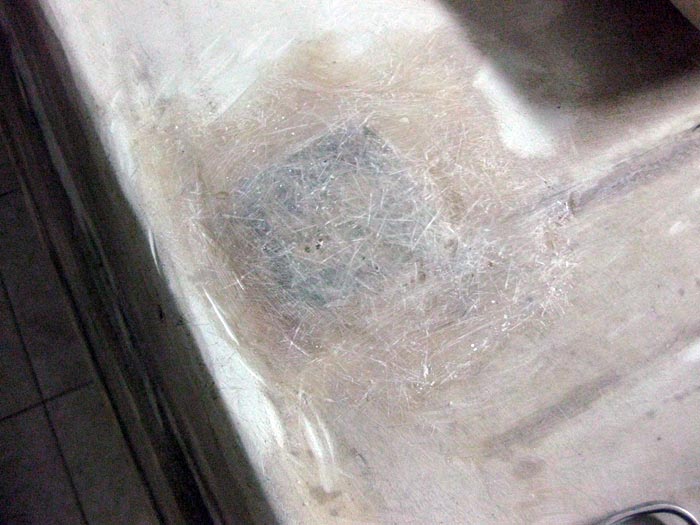
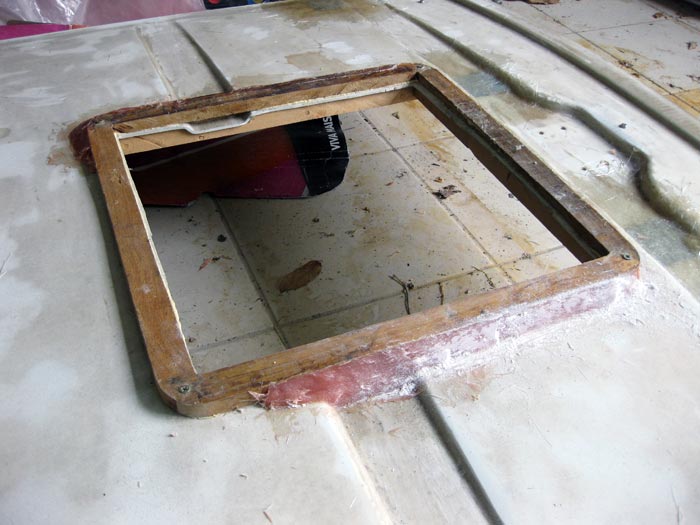
regarding the one I'm going to use, i decided to make some reinforcements on the fiberglass, since those areas where already fragile on one side and broken on the other:
(2006 pictures)
and where the inner handle was bolted:
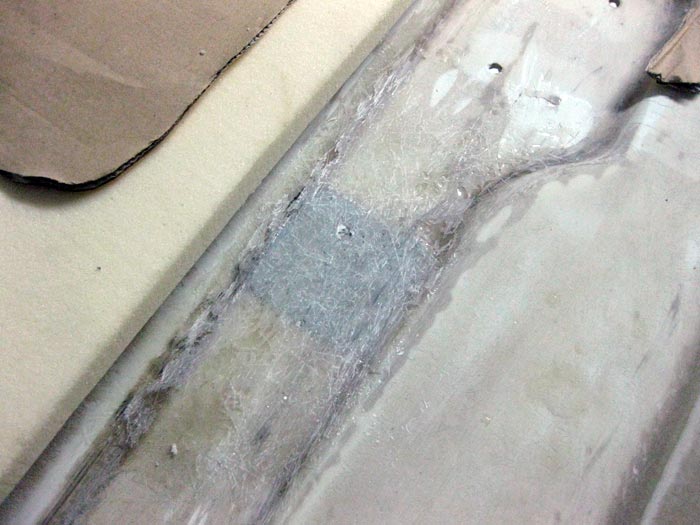
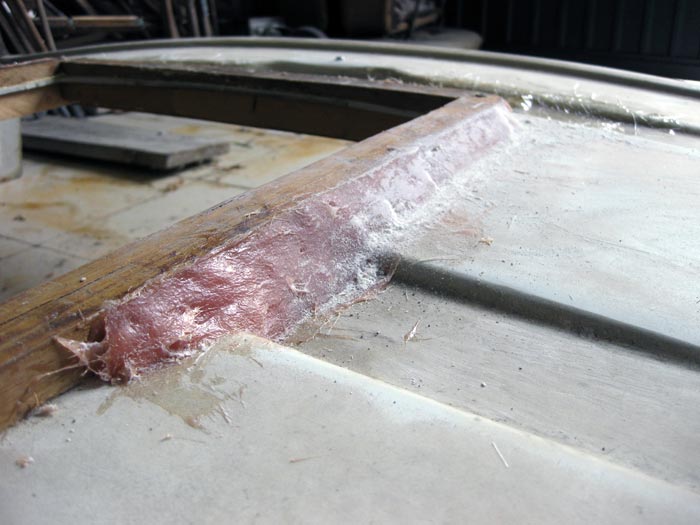
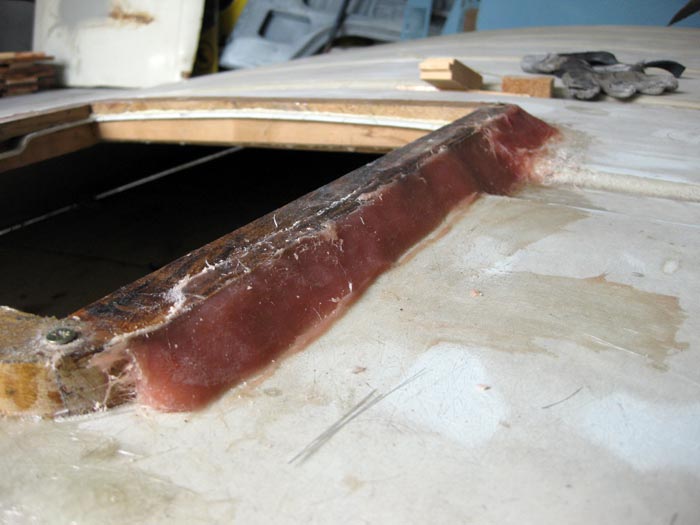
.... and now, 2010, after fixing all the holes on the fiberglass properly, I then decided to make the reinforcements using small pieces of sheet metal. I painted them all with Por-15 and covered them with some layers of fiberglass:
and after some sanding:
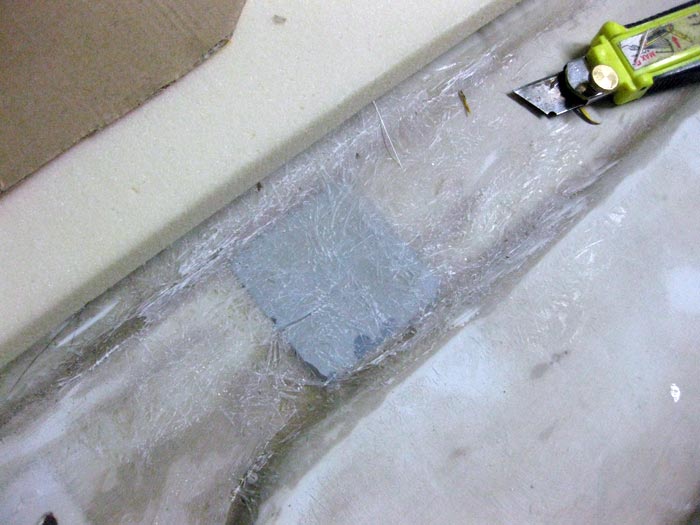
in the end, no one will notice that they are there
(2006 pictures)
and where the inner handle was bolted:
.... and now, 2010, after fixing all the holes on the fiberglass properly, I then decided to make the reinforcements using small pieces of sheet metal. I painted them all with Por-15 and covered them with some layers of fiberglass:
and after some sanding:
in the end, no one will notice that they are there
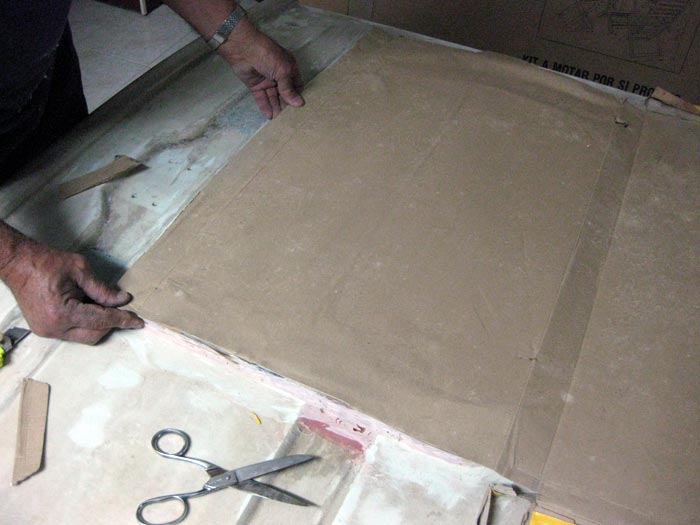
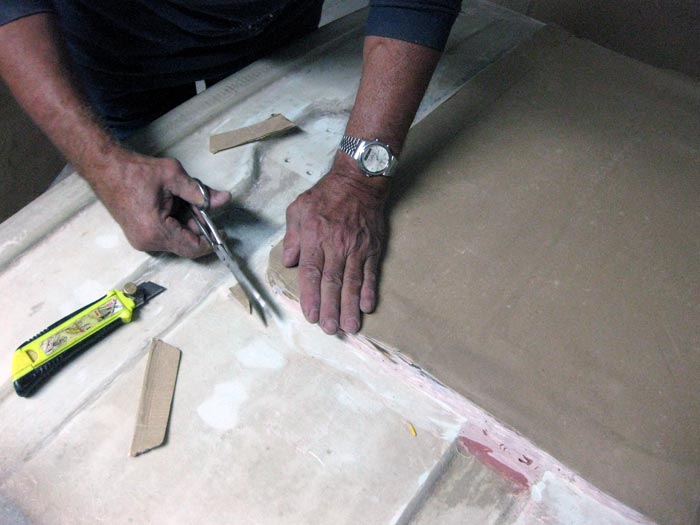
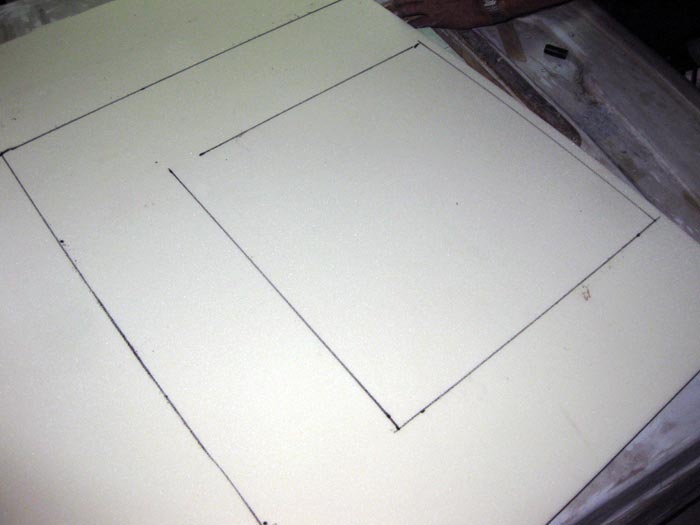
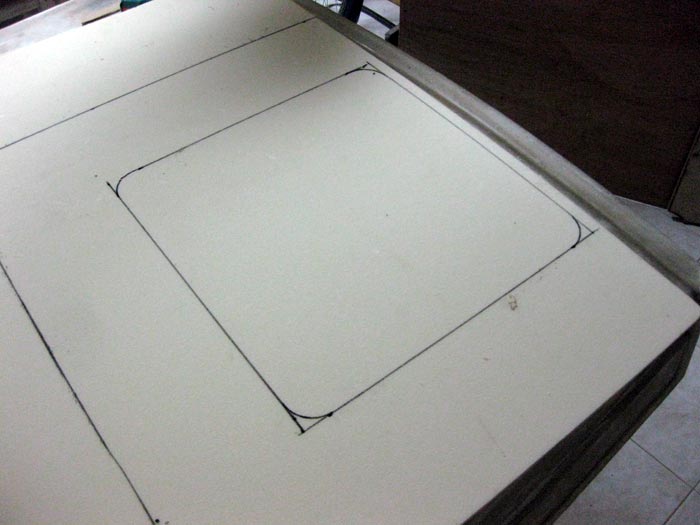
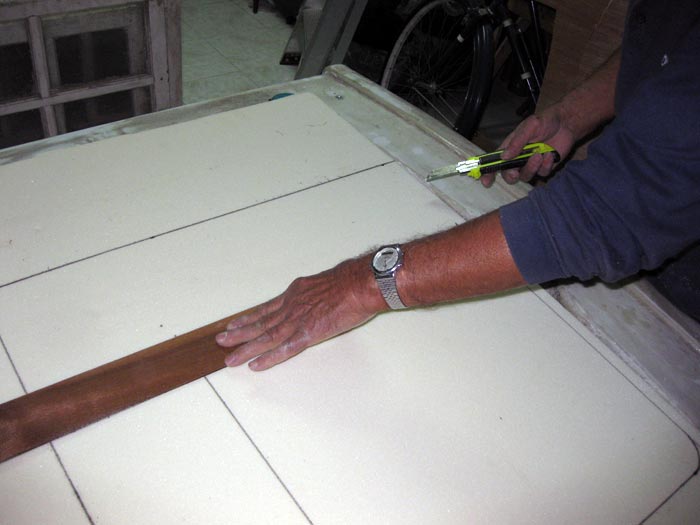
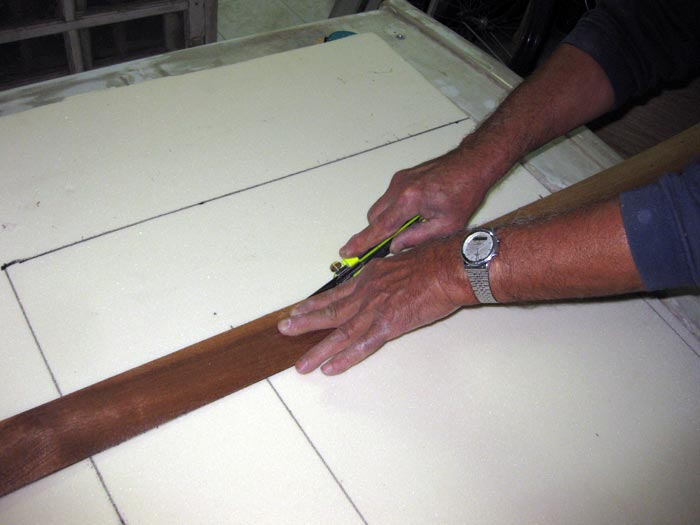
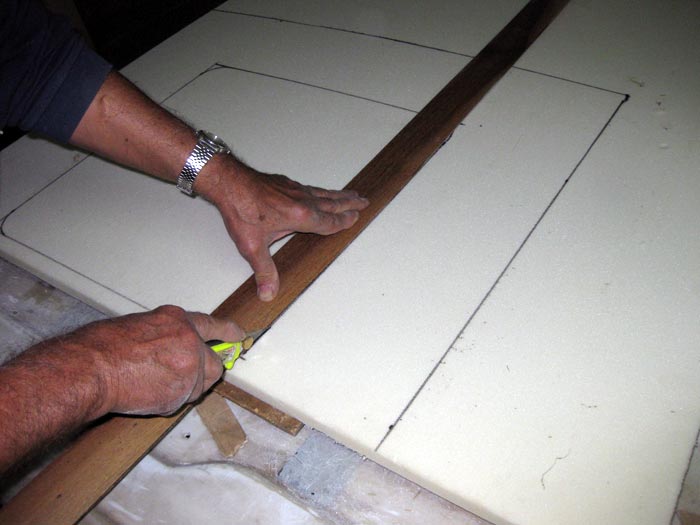
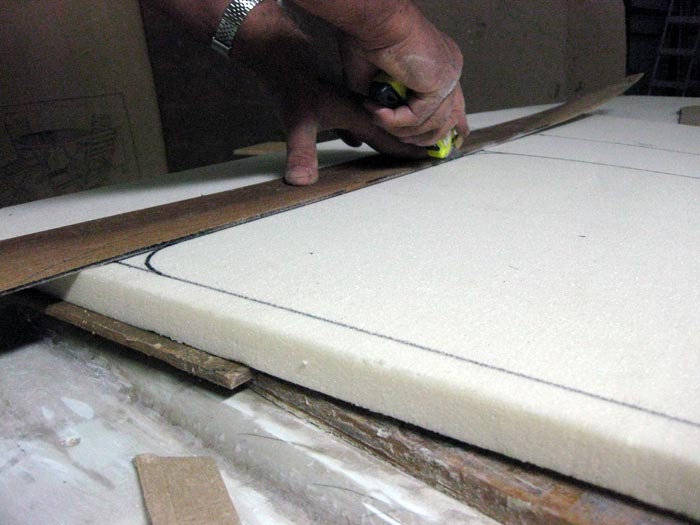
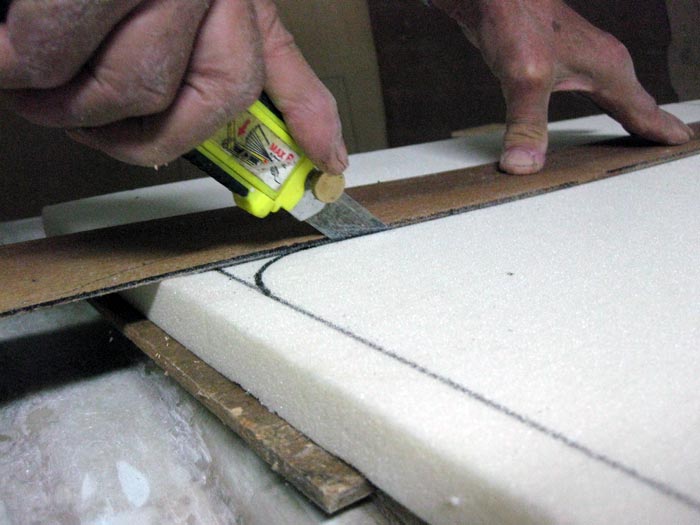
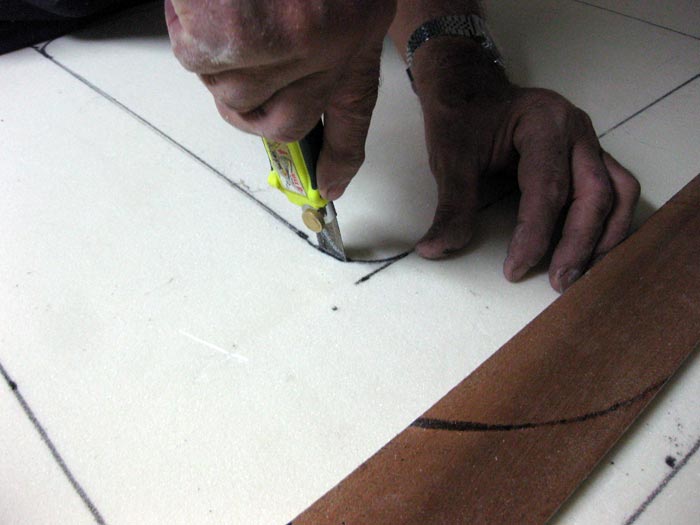
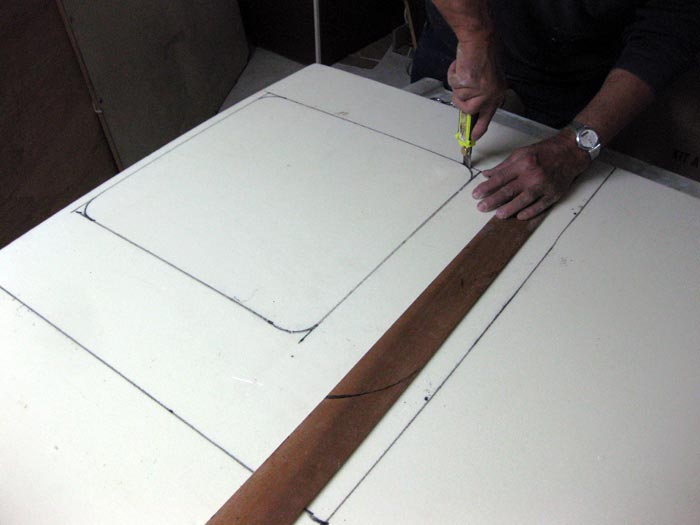
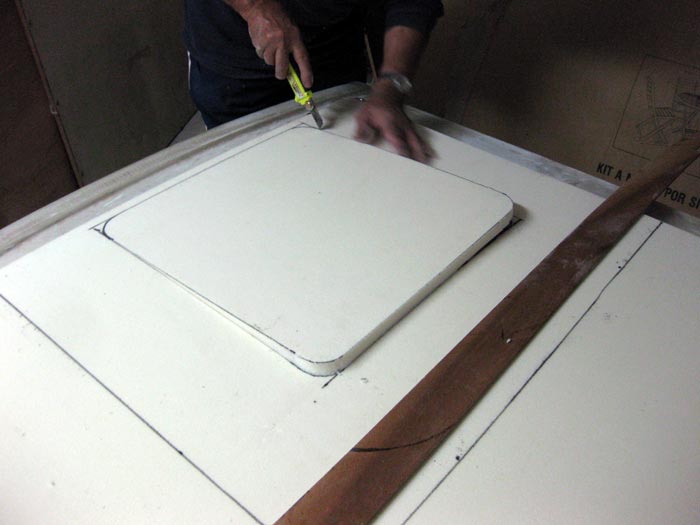
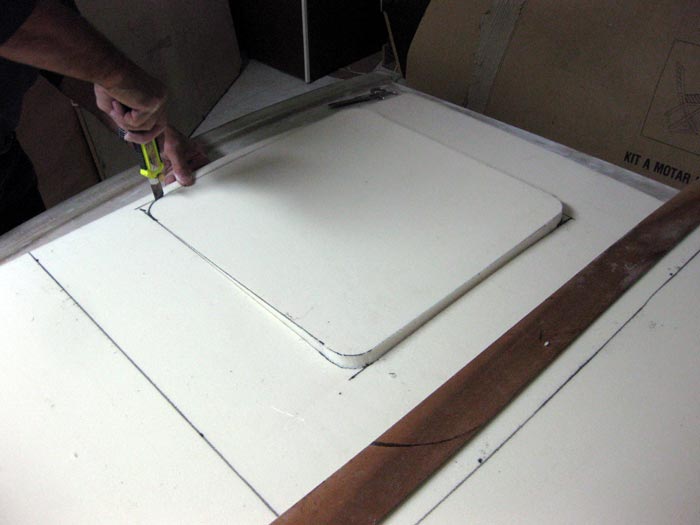
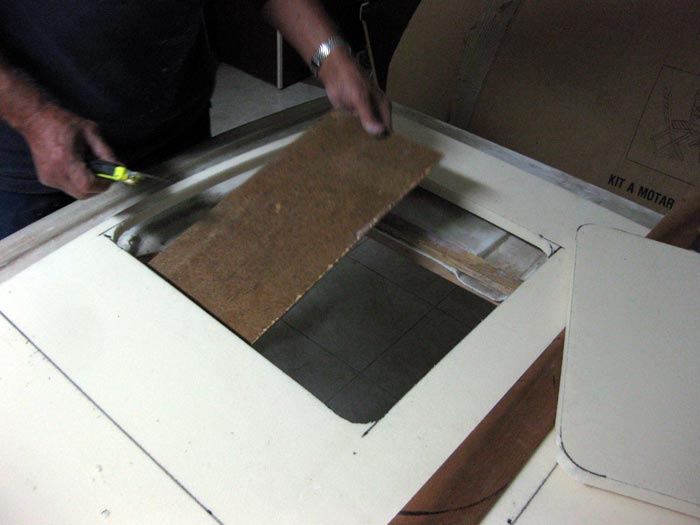
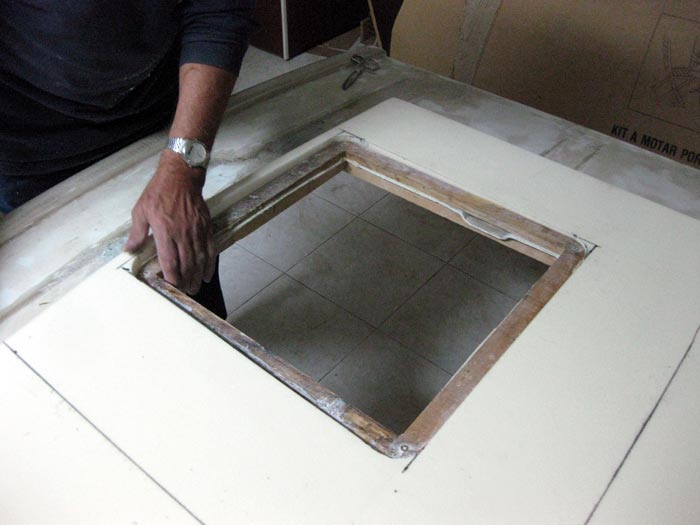
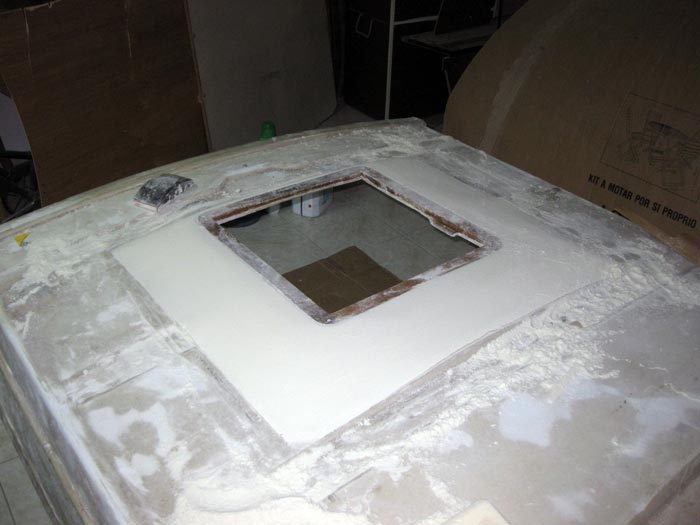
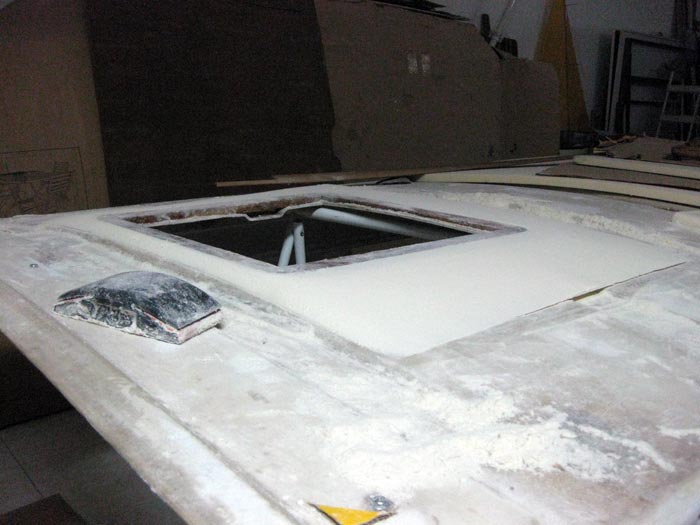
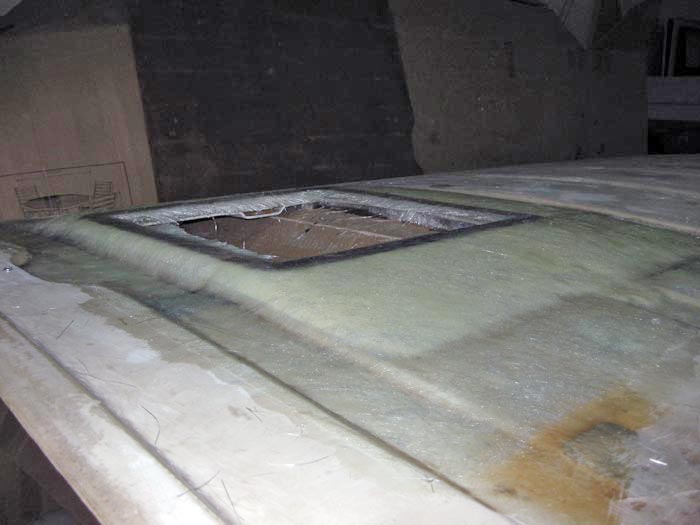
Since I had it already prepared for receiving a fiamma skylight...
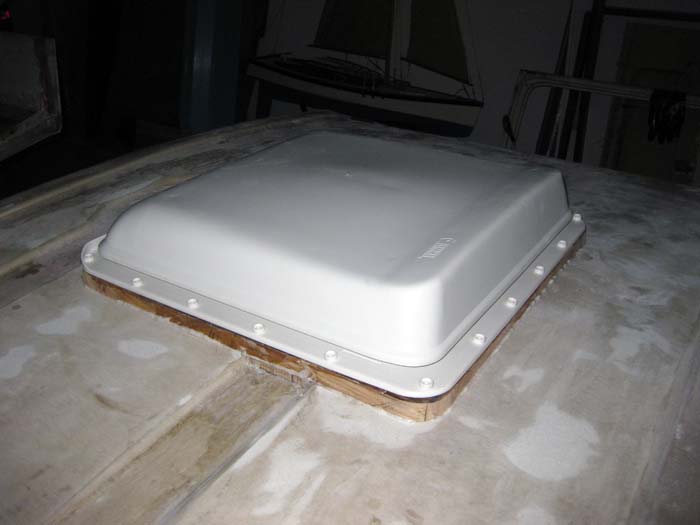
... making a wooden frame (because the pop top is curved and the skylight is flat) I decided to make it as if it was a part of the roof....
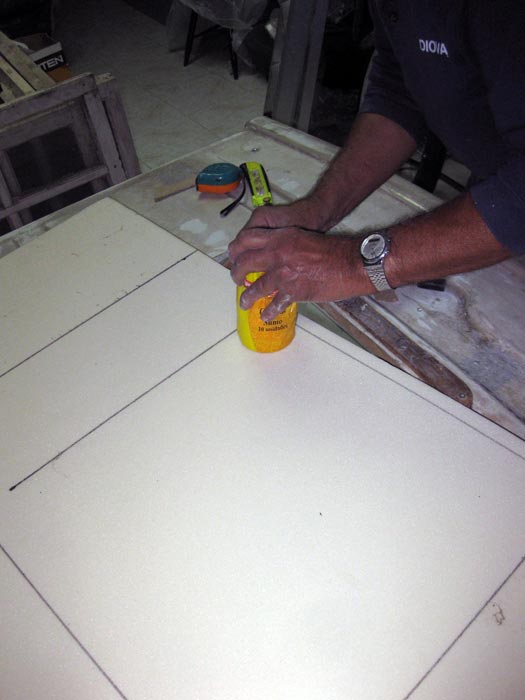
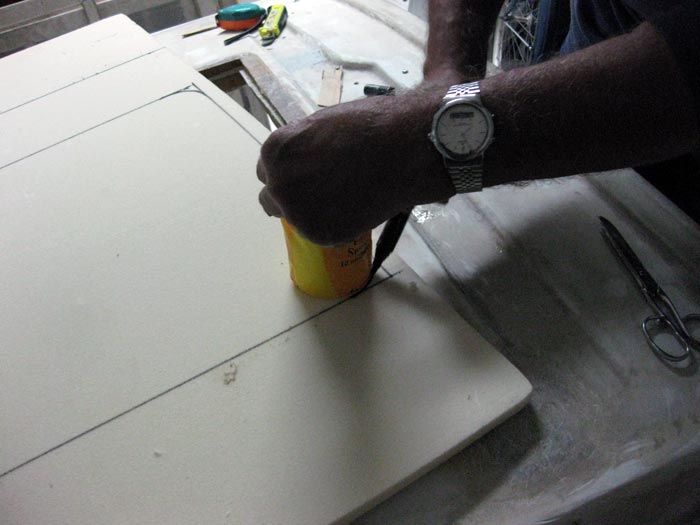
For that, I bought all the necessary and correct materials, since I started to making what I had in minf using fiberglass filler but soon I realized that was not the best way to make this:
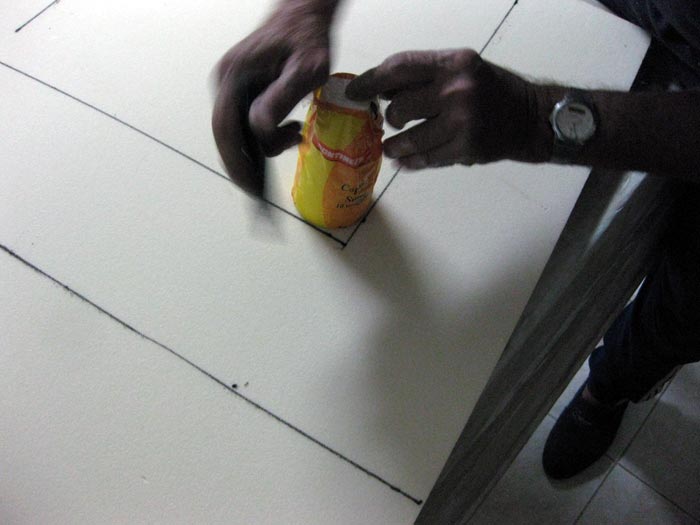
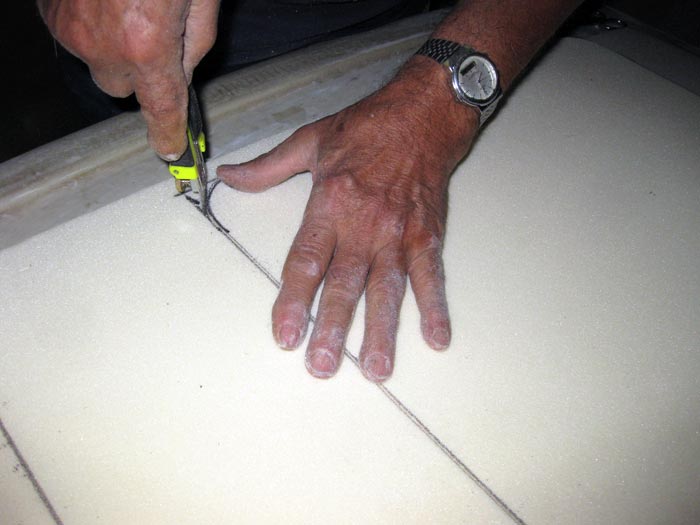
So with the help of a grinder, I took it all out :mrgreen:
... making a wooden frame (because the pop top is curved and the skylight is flat) I decided to make it as if it was a part of the roof....
For that, I bought all the necessary and correct materials, since I started to making what I had in minf using fiberglass filler but soon I realized that was not the best way to make this:
So with the help of a grinder, I took it all out :mrgreen:
dubscum
Well-known member
i love your bus and i love slammed ones, but really happy this one is staying high, it just suits it so well 8)
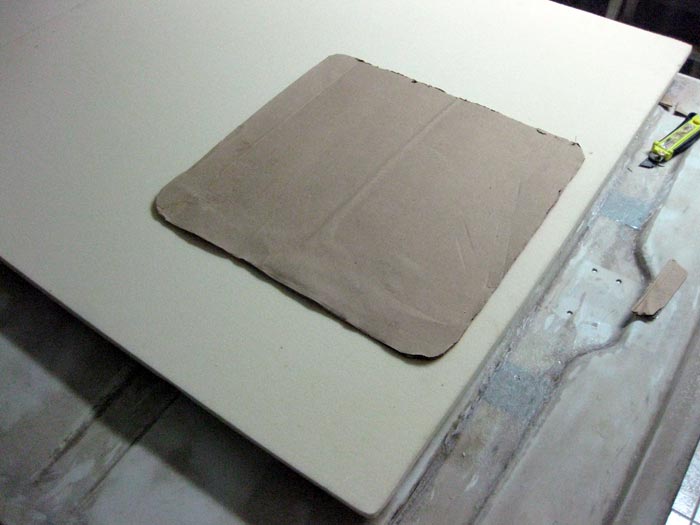

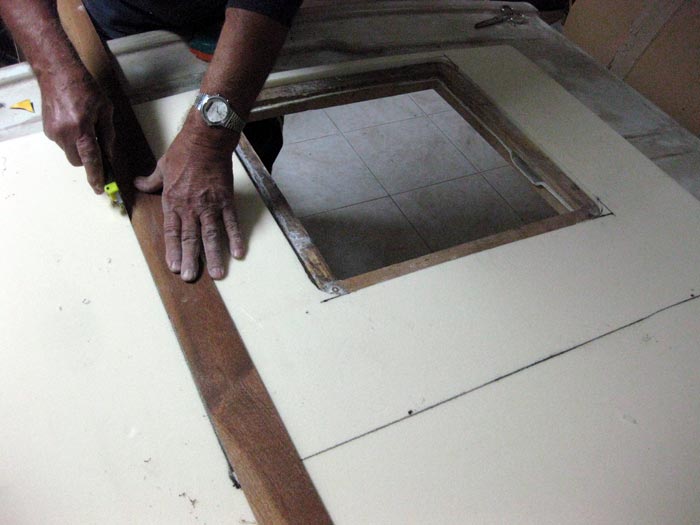
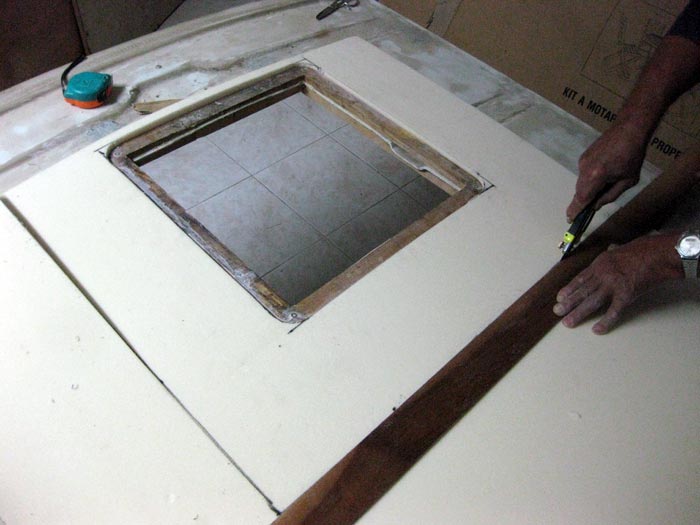
I then glued it to the poptop using some resin.
After it was glued in place, I started sanding it untill it reached the shape I had in mind:
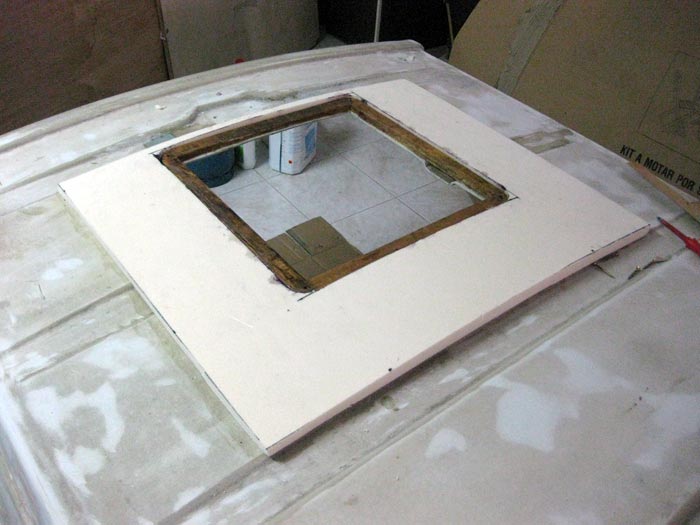
and after the first layers of fiberglass, it was looking like this:

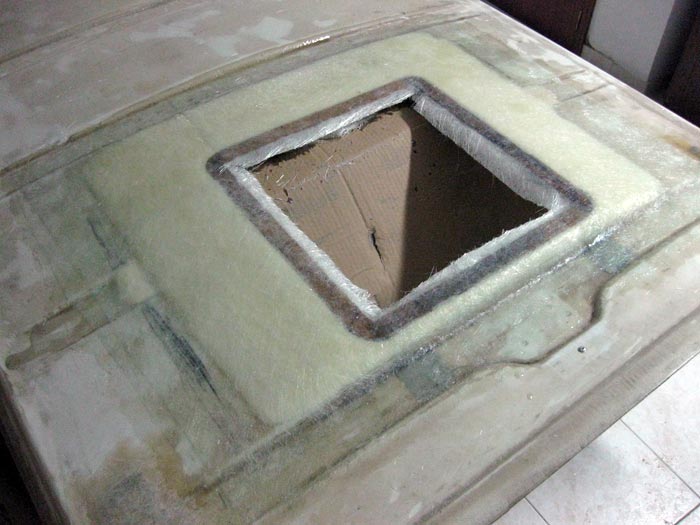
in the end, this was the result:
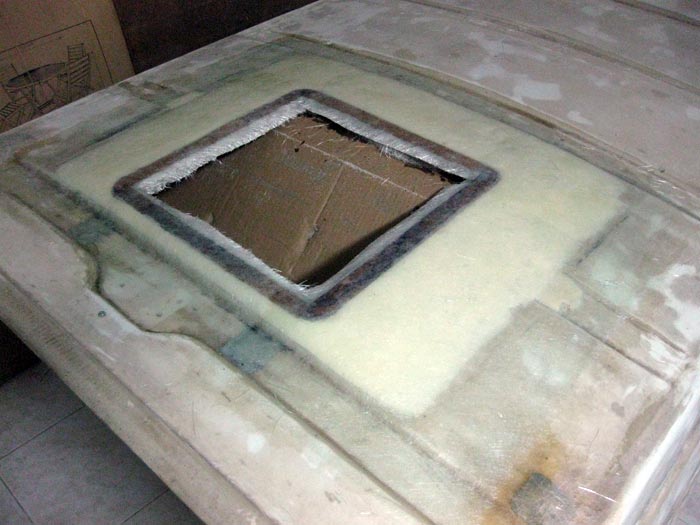
There's still a lot to be done in here also. In the end, it will look like it has always belong there.
Not bad for a first time doing these kind of tasks.
:mrgreen:
After it was glued in place, I started sanding it untill it reached the shape I had in mind:
and after the first layers of fiberglass, it was looking like this:
in the end, this was the result:
There's still a lot to be done in here also. In the end, it will look like it has always belong there.
Not bad for a first time doing these kind of tasks.
:mrgreen:
Thanks sonylr.... there's still a lot to be done in the poptop but in the end, I hope it will look nice and work properly 8)
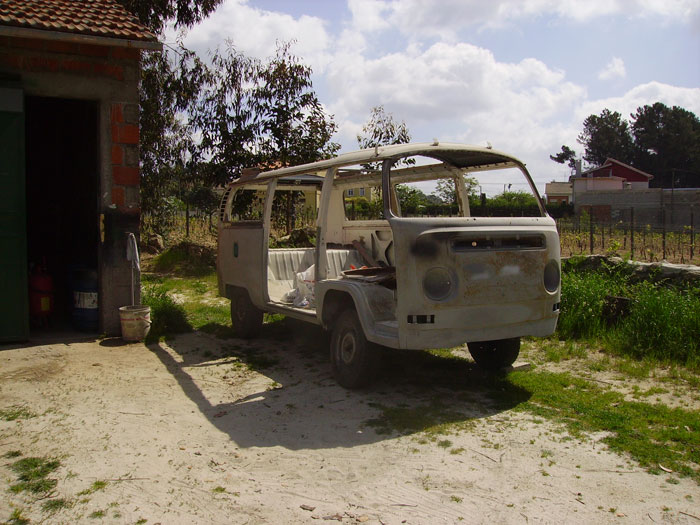
Hi Andy. Sorry for this late reply to your post. Everything is cool here, thanks for asking . Although you're probably getting some bad news from Portugal, some of us are still trying to get this country back to an upright position :lol: .
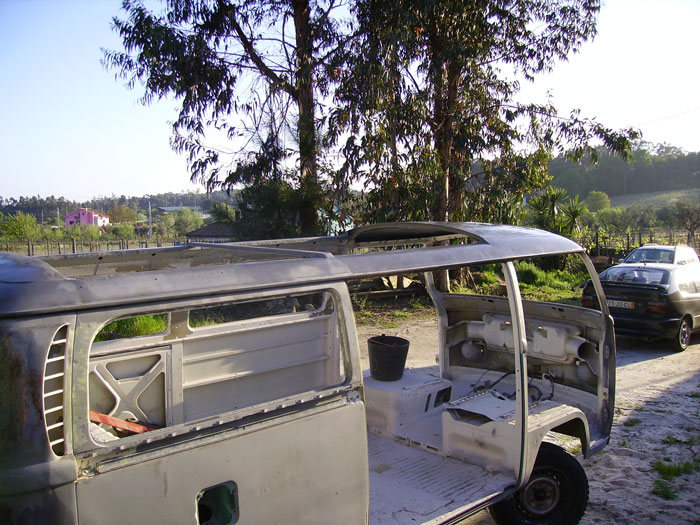
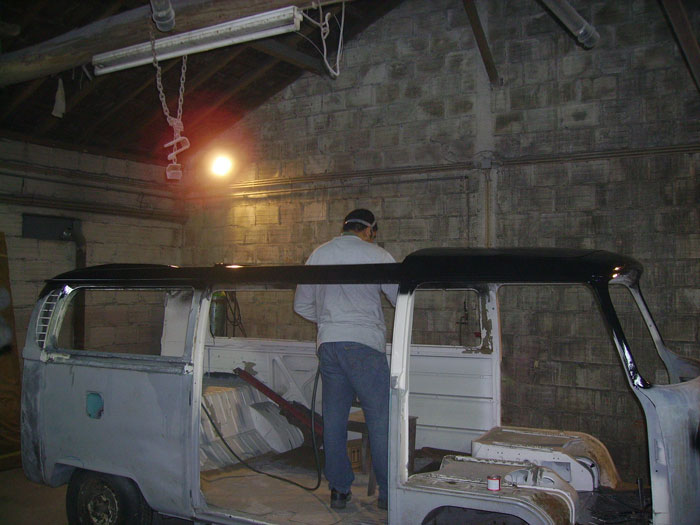
The project stoped during the Autumn and Winter because what's left to do in Hugo's bodyshop is to protect the bus against future corrosion (or at least, try to) and fix both cabin doors. But both tasks need some sand blast and there were no weather conditions to use the sandblaster. However and although the weather keeps being very instable with lots of rain in some days followed with some very warm ones, a couple of weekends ago, I went to Tondela and we made some progress .
So, here are the pictures
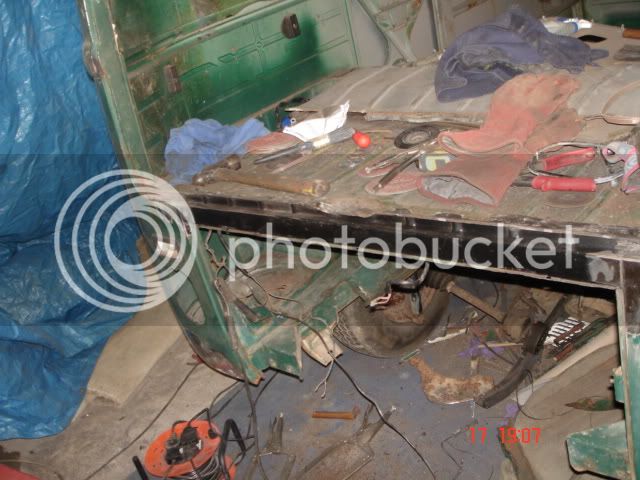
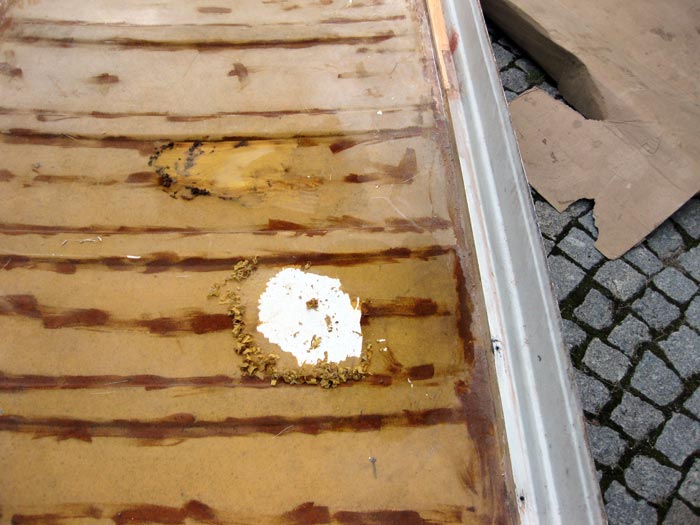
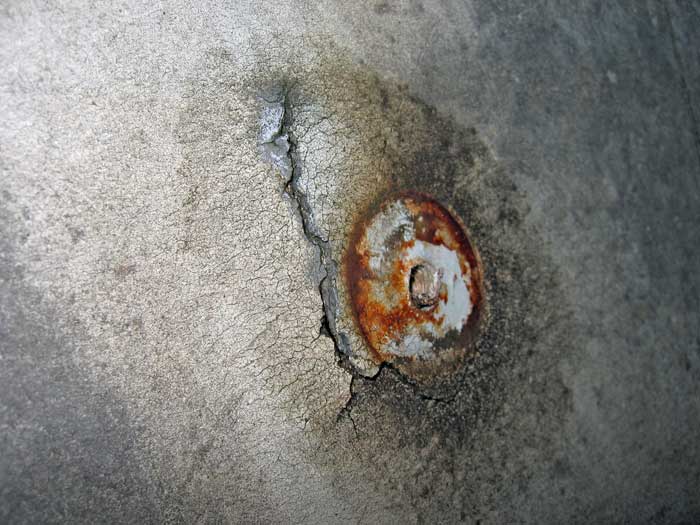
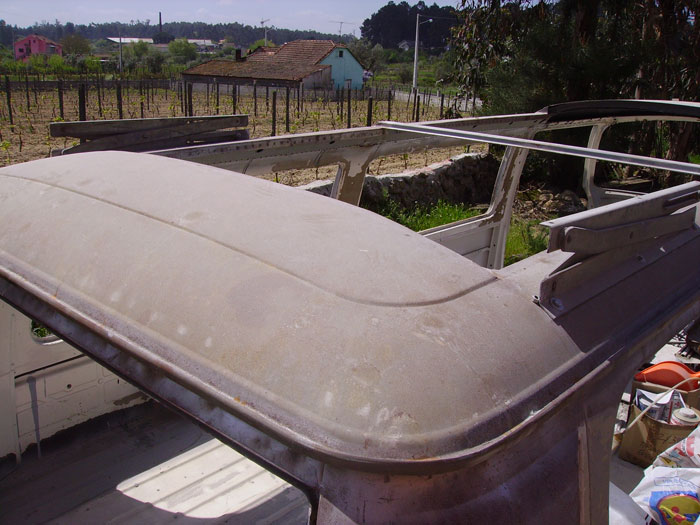
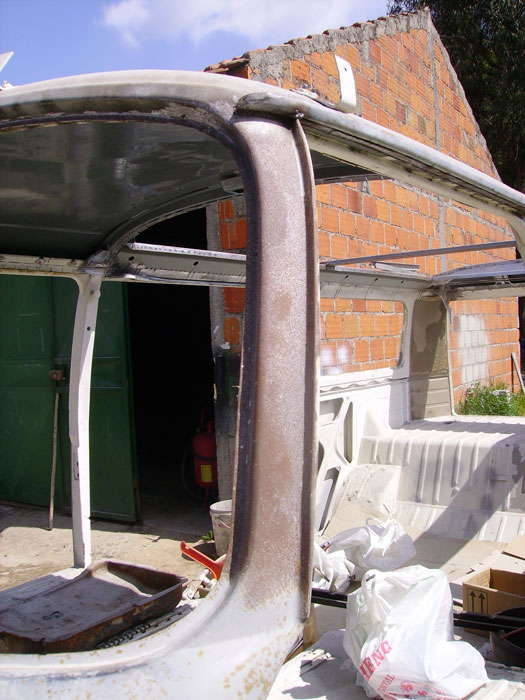
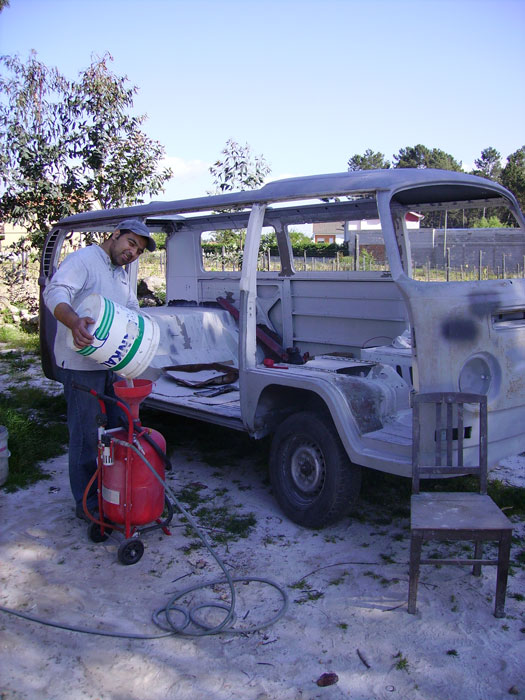
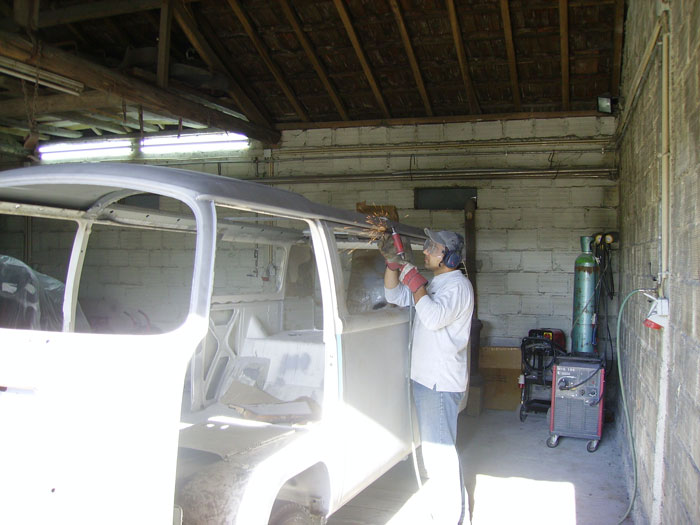
As it was a warm weekend I decided to start protecting the roof. But there was already some superficial rust in it so I used the sandblaster to clean it:
(some minor superficial rust)
Hi Andy. Sorry for this late reply to your post. Everything is cool here, thanks for asking
. Although you're probably getting some bad news from Portugal, some of us are still trying to get this country back to an upright position :lol: .The project stoped during the Autumn and Winter because what's left to do in Hugo's bodyshop is to protect the bus against future corrosion (or at least, try to) and fix both cabin doors. But both tasks need some sand blast and there were no weather conditions to use the sandblaster. However and although the weather keeps being very instable with lots of rain in some days followed with some very warm ones, a couple of weekends ago, I went to Tondela and we made some progress
.So, here are the pictures
As it was a warm weekend I decided to start protecting the roof. But there was already some superficial rust in it so I used the sandblaster to clean it:
(some minor superficial rust)
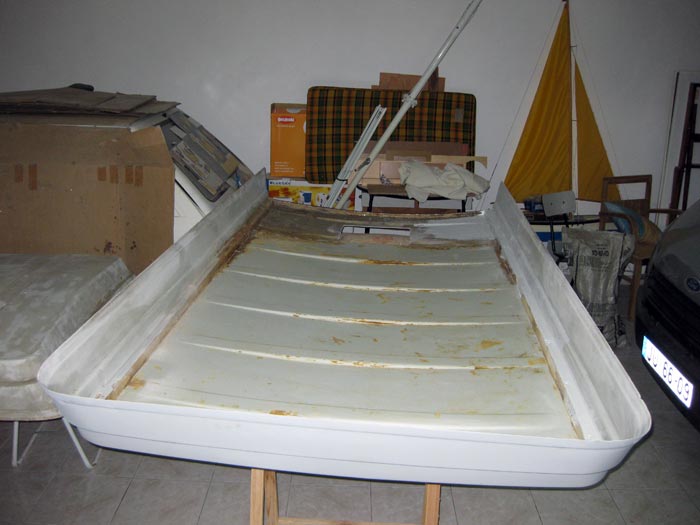
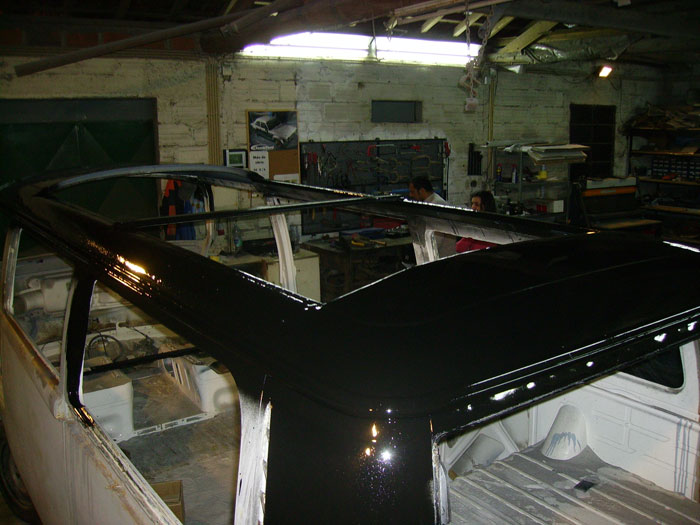
A couple of hours later, all the roof was cleaned....

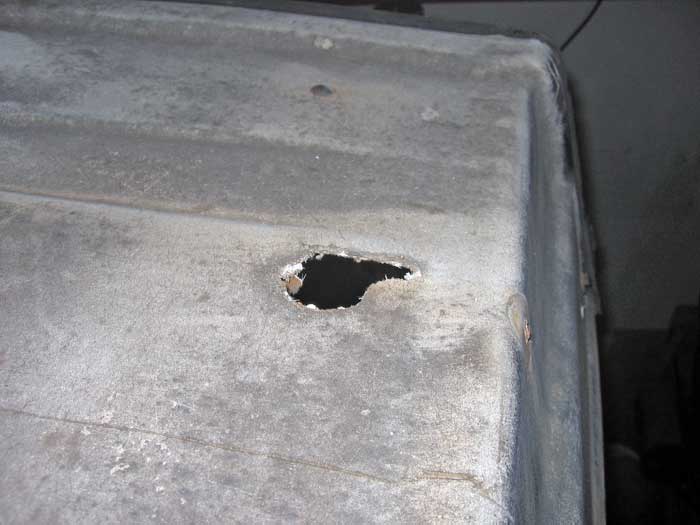
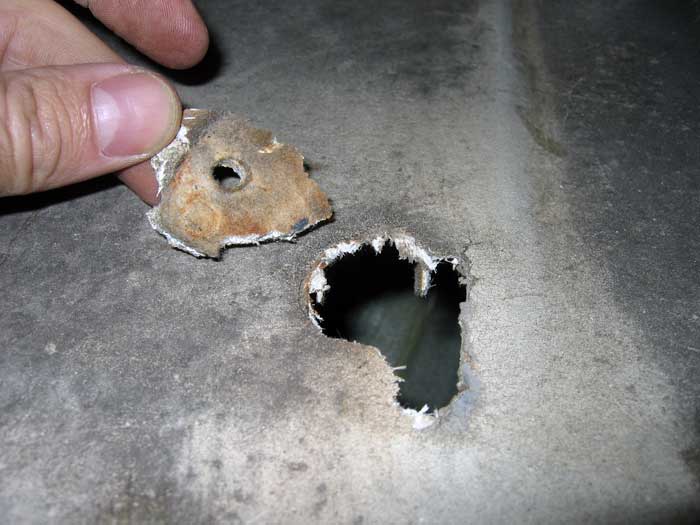
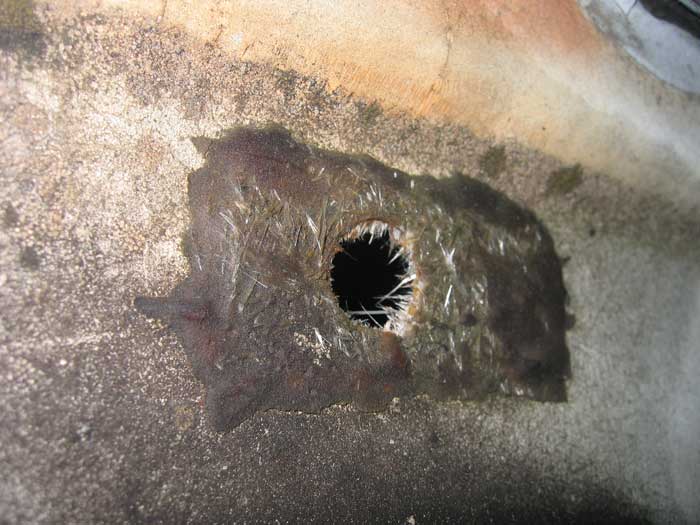
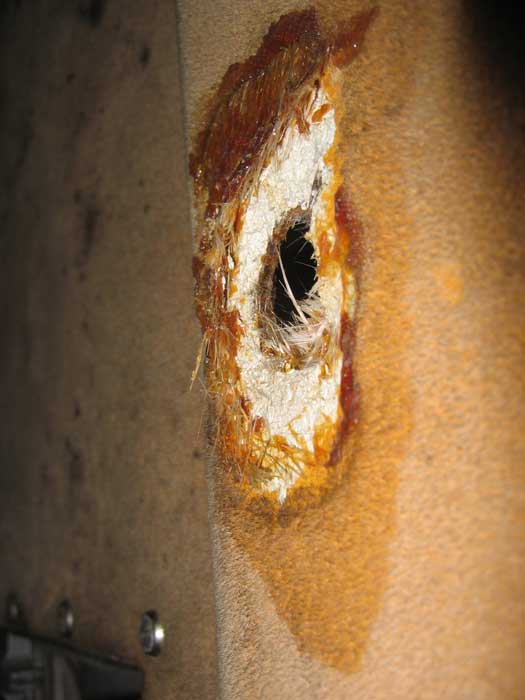
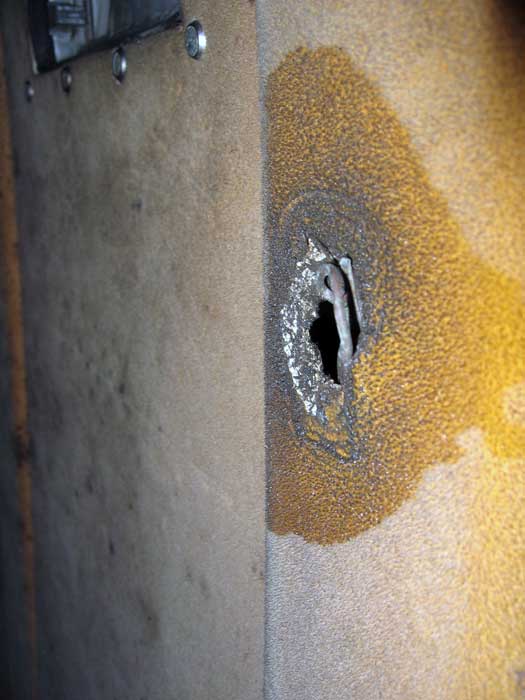
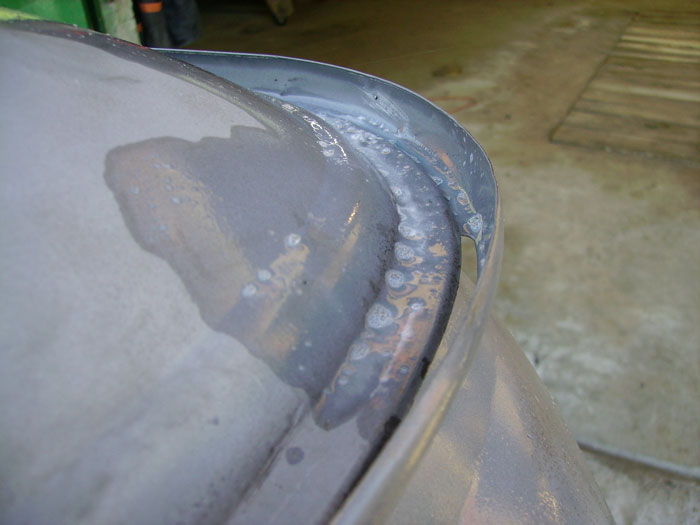
... but there was still a very small hole in the rain gutter (probably made by a nail) and we decided to fix it. So we pushed the bus inside Hugo's bodyshop.
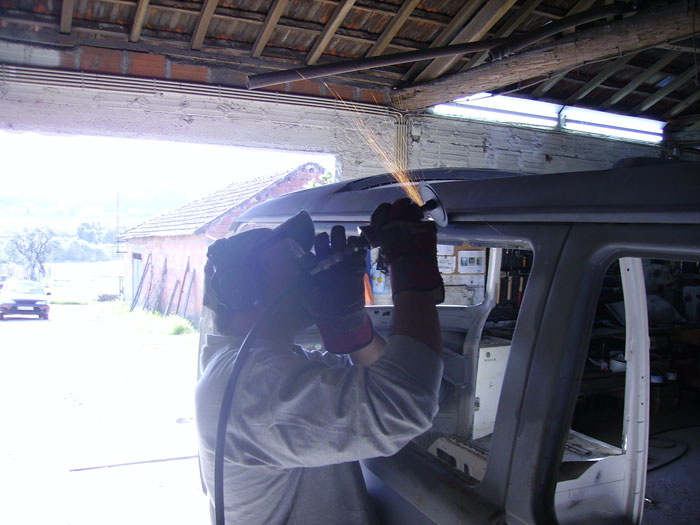
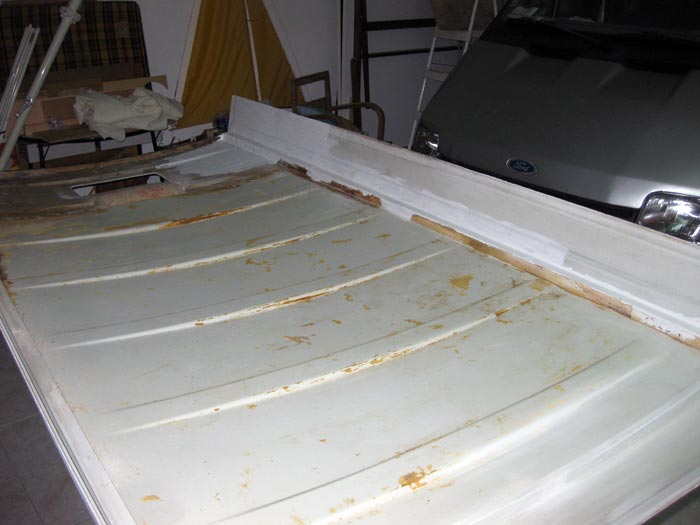
There was still some weldings to be properly grinded....
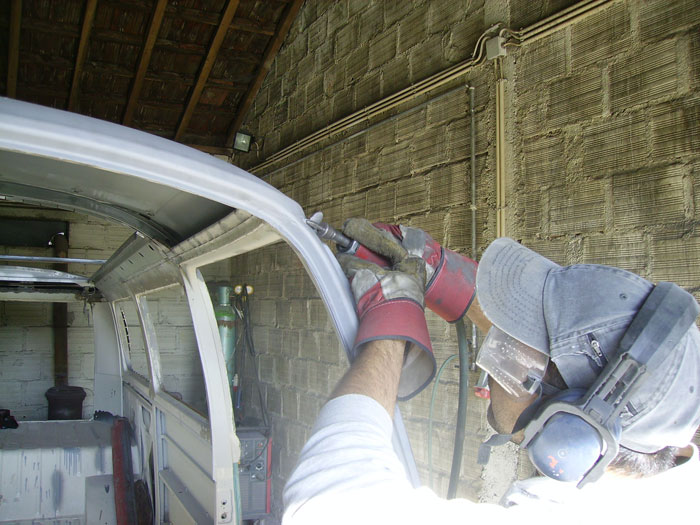
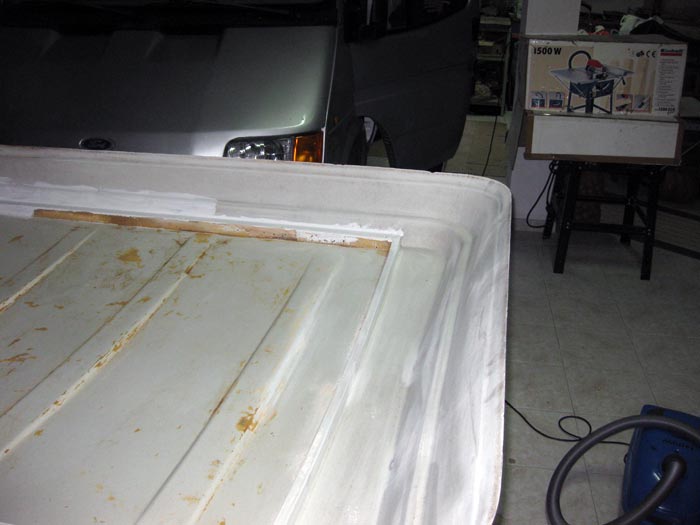
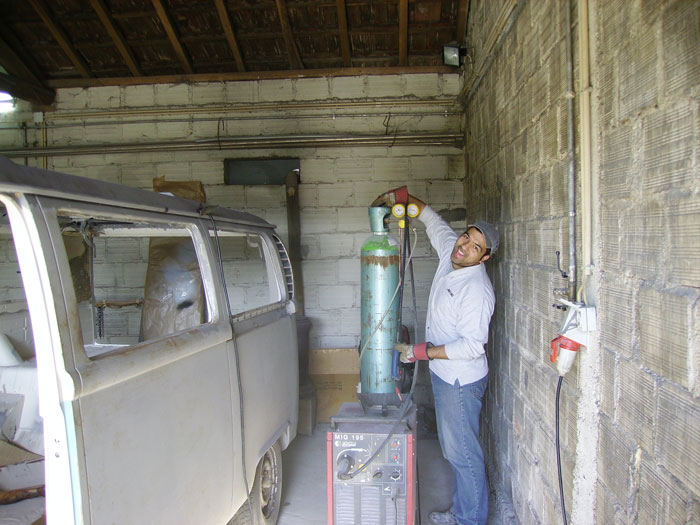
After, I decided to use Por-15 Marine Clean. After some minutes I washed it and we dried the roof with the help of compressed air and a hot air pistol (or blower )....
... but there was still a very small hole in the rain gutter (probably made by a nail) and we decided to fix it. So we pushed the bus inside Hugo's bodyshop.
There was still some weldings to be properly grinded....
After, I decided to use Por-15 Marine Clean. After some minutes I washed it and we dried the roof with the help of compressed air and a hot air pistol (or blower
)....

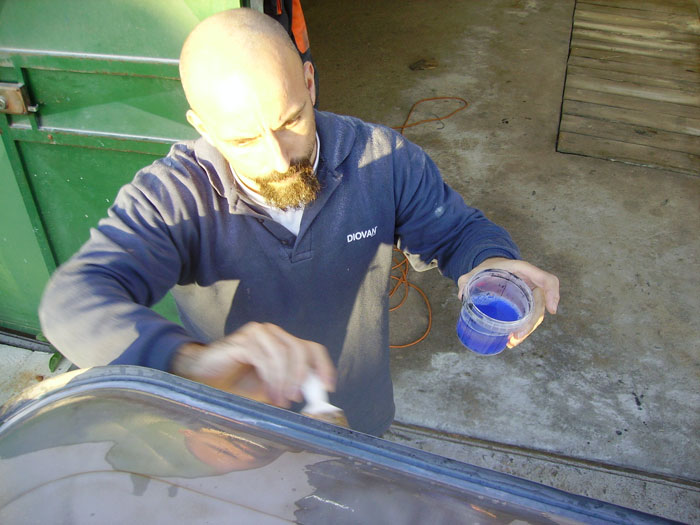
After we let it to work for 15/20 min's, we then washed the roof again and dried it completly once more.
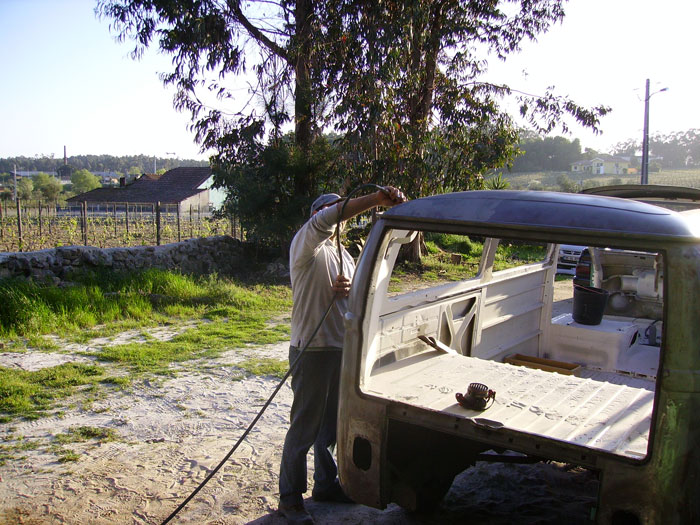
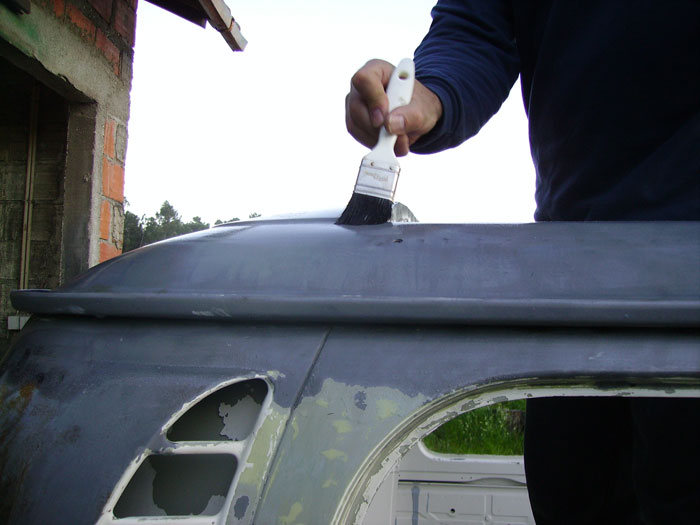
Once dry, we started painting it.
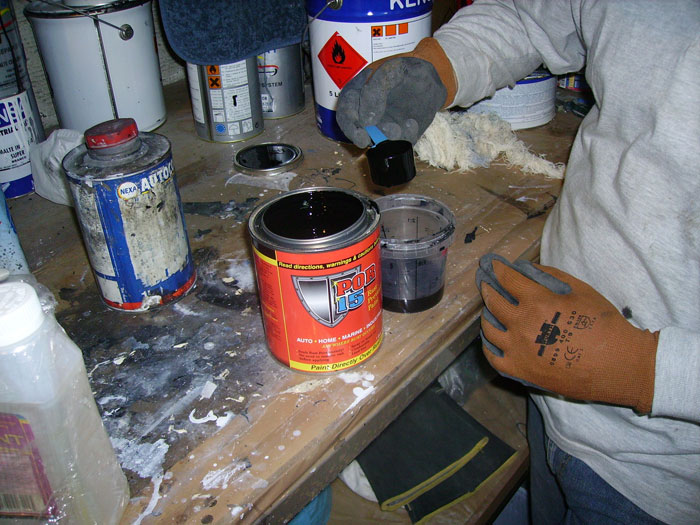
Using the right method, we prepared some Por-15 paint for the task.
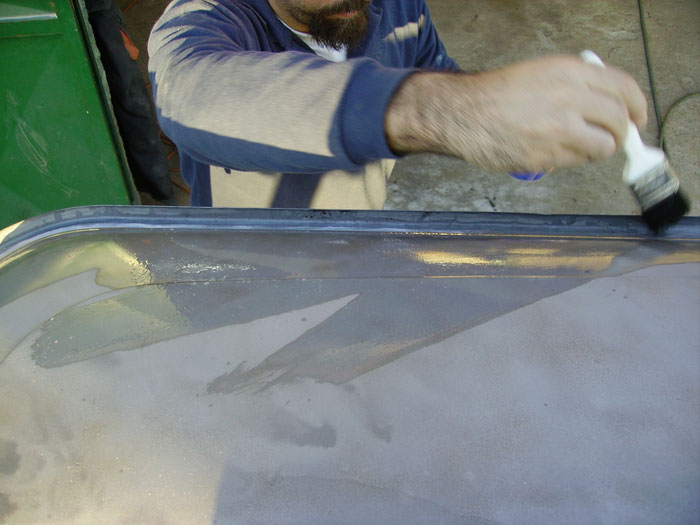
... and once everything was ready, we started painting it.
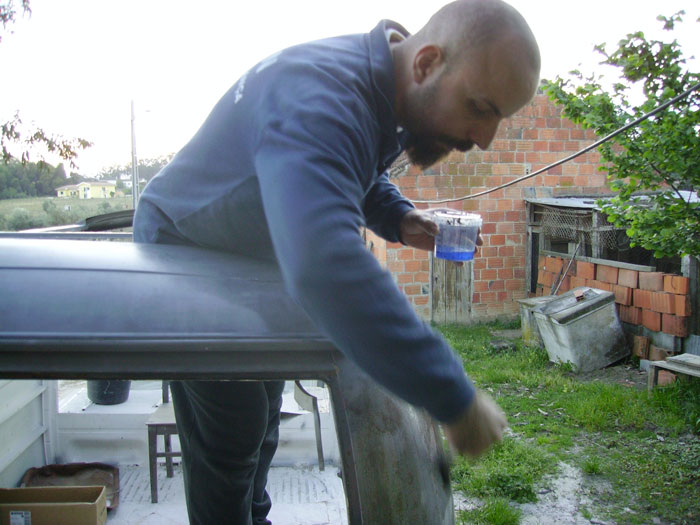
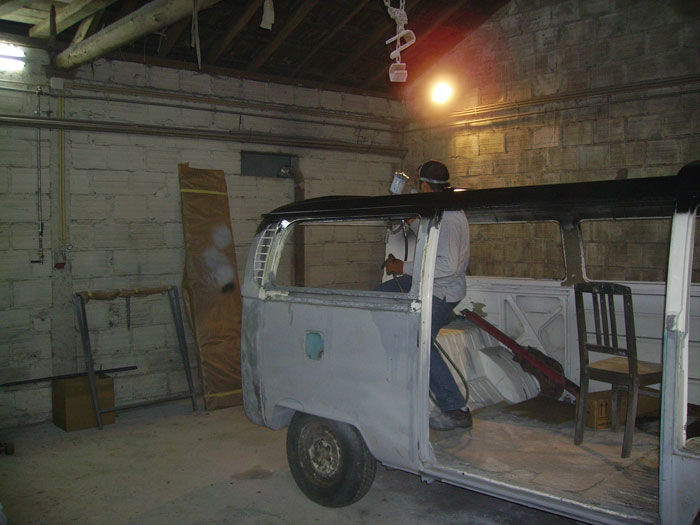
I used a brush in the rain gutter while Hugo was using his paint pistol.
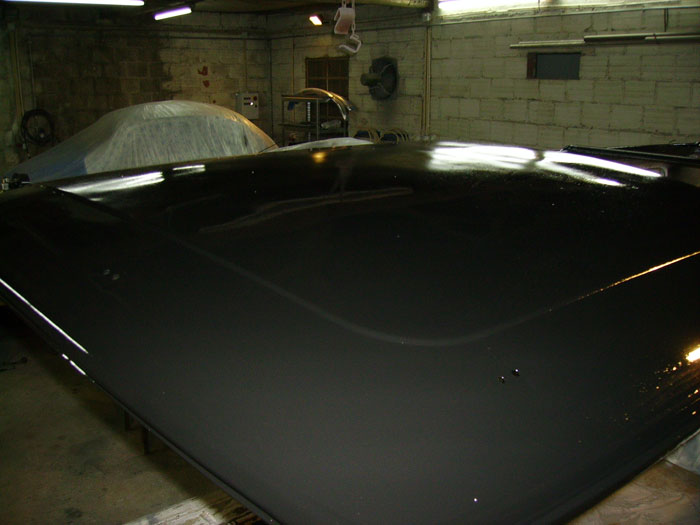
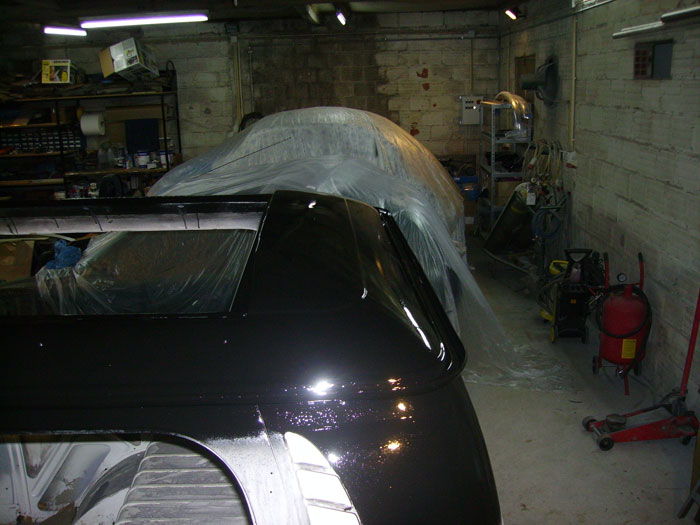
In the end it was looking good.
I just hope it works as well as they say it will :lol:
Once dry, we started painting it.
Using the right method, we prepared some Por-15 paint for the task.
... and once everything was ready, we started painting it.
I used a brush in the rain gutter while Hugo was using his paint pistol.
In the end it was looking good.
I just hope it works as well as they say it will :lol:
Similar threads
- Locked
Parts For Sale
now sold: 1600 engine for sale (august 2023)
- Replies
- 8
- Views
- 1K
Vehicle For Sale
1971 T2a Double Cab Pick Up
- Replies
- 0
- Views
- 671
- Replies
- 0
- Views
- 1K
Vehicle For Sale
1969 VW T2 Early bay - UK RHD - £13,750 ono
- Replies
- 2
- Views
- 1K