'69 Resto

Early Bay Forum

Help Support Early Bay Forum:

This site may earn a commission from merchant affiliate links, including eBay, Amazon, and others.
A couple of hours work at the unit last night resulting in some repair pieces around the air intake to the cargo area. This needed doing before i can fit the new cross member, top hat and outriggers.

P5250140.jpg

P5260148.jpg

P5260149.jpg

P5260151.jpg

P5260152.jpg

P5260150.jpg


I need to repair the inside of the chassis legs where the cross member fits tonight! ;)
 
Last night i finished the section off at the edge of the heater box behind the drivers seat.

P5260150.jpg

P5270155.jpg


I then played with the top hat section, cutting it to length and splitting it to go around the gear linkage tube.

P5270153.jpg

P5270156.jpg


And finally last night i cut out and made templates for the chassis to be fitted tonight.

P5270154.jpg

P5280159.jpg
 
Cheers budy, keeping me busy nearly every day! Planning on having her finished by October!! :? Got to get the good lady to the church in style!

Anyway, a bit more work on the chassis last night. Stuck in work today so hopefully i can grab a couple of hours Sunday morning.

P5280160.jpg

P5280161.jpg

P5280162.jpg

P5280163.jpg

P5280164.jpg
 
It was frustrating last week, I was stuck in work on a shut down for 12 hours everyday so didn't get to work on the van. I managed to grab an hour Friday night to get the o/s inner chassis repair done.

P6030166.jpg


I went down the unit Saturday for a few hours to continue the build before heading to another family bithday bash and a skin full of ale!

I got the Top hat sections welded in along with the front cross member and then ran out of time but did get the outriggers positioned ready for tonight!

P6050041.jpg

P6050042.jpg

P6050044.jpg

P6040034.jpg

P6040035.jpg
 
Started on the sills next as i want them in to line up the B piller when i replace them.

I started on the o/s as i thought this would be the easier and more straight forward side, maybe i was wrong! Once the spot welds were drilled out (all that i could see) and the use of my new favourite toy (air chisel) the inner and middle sill came away fairly easily. The outer sill always looked a bit suspect as it was welded from the outside! At first i thought it was because the inner and middle hadn't been replaced (just covered with the belly pan) so was easier to weld it that way. Partly true, but when the previous owner, or whoever bodged it removed the outer sill they cut the lip off the bottom of the middle panel! Now there's nowhere to weld the new outer sill too!!! So that has to be repaired.

P6080049.jpg

P6080053.jpg


At the back end the outriggers were removed, this was always the plan as there were no jacking points and part of the top hat above where the jacking points should be was rotton so this was cut back. The rear most outrigger was removed and it's top hat section had all the spot welds drilled out as this is rotton right accross and a new one is to be fitted.

P6100058.jpg

P6100057.jpg


My mate Stef was at the unit again to lend a hand, cheers Stef. He set about grinding what was left of the belly pans and bird dropping from the chassis.

P6100054.jpg


Tonight and the weekend's job's are to remove the rear cross member, rear top, hat, n/s outrigger's, sill's and repair the chassis. Say it fast and it doesn't sound much!! No beer or sun for me!! :cry:

P6100059.jpg

P6100061.jpg

P6100062.jpg

P6100063.jpg

P6100064.jpg

P6100065.jpg


The last 2 pictures of the rear outrigger is a new panel that was hammered over the original outrigger and not even welded on the inside!! :evil: Just shows i can't trust any work that's been carryed out on this van!!
 
Well done mate your doing things that I am doing also ,have to say yours looks in worse condition than mine so all credit to you for the work your doing I'm just learning to weld so things go on then they come off and so on good thread cheers Frankie.
 
Cheers Frankie, thanks for the positive feedback. It turns out it's a lot worse than it first looked! Stick at the welding, and remember it should sound like bacon frying!!
 
All the rear outriggers, cross member and top hat sections have now been removed.

P6120067.jpg

P6120068.jpg

P6120071.jpg


The rear chassis has been ground back and the rot cut out. The repairs to the chassis are underway.

P6120069.jpg

P6120070.jpg

P6160072.jpg

P6160073.jpg
 
Nice work dood, some nifty panel making skills there 8)
 
Looking good bud, and I reckon extra credits for all that chassis work being done on axle stands!!!!! :shock:
 
Thanks for the comments guy's.

buddysbuddy said:
Looking good bud, and I reckon extra credits for all that chassis work being done on axle stands!!!!! :shock:

Cheers Buddysbuddy, it isn't always easy or pain free...

Wow, i can't believe it's been 9 days since i last put up a post. It feels like i havn't got much done in that time yet have only had 3 days away from the unit! I've hit one of those stages where you're constantly doing something but not really seeing any return! or that's how it feels.

Anyway what have i done in those past 9 days..

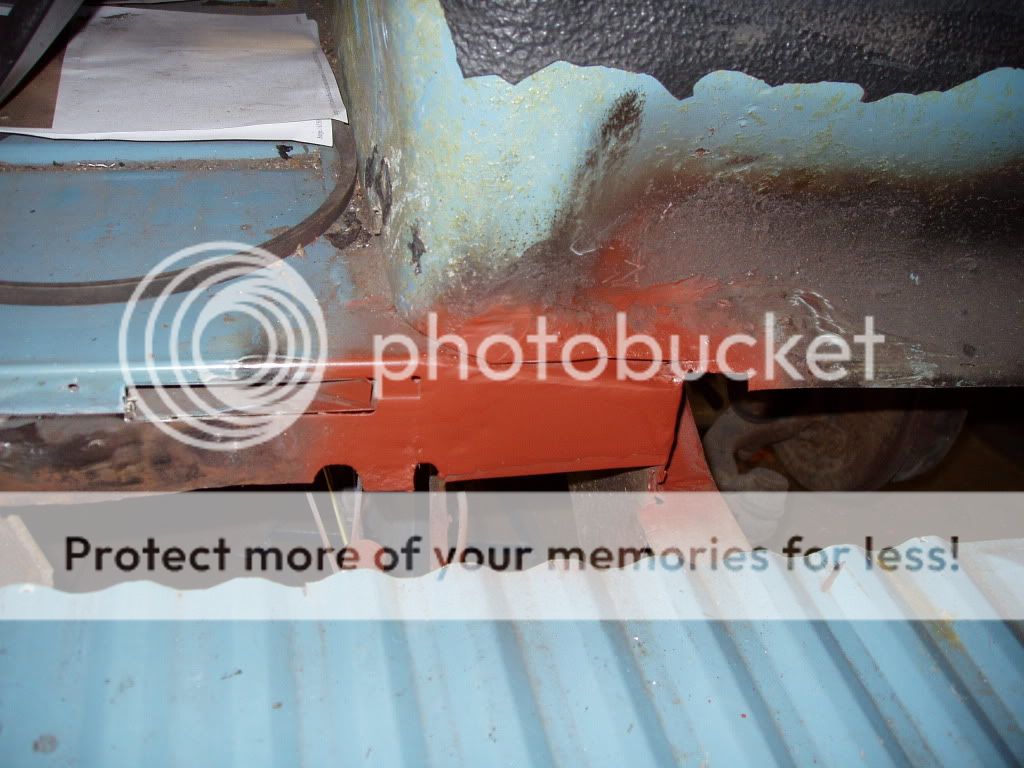
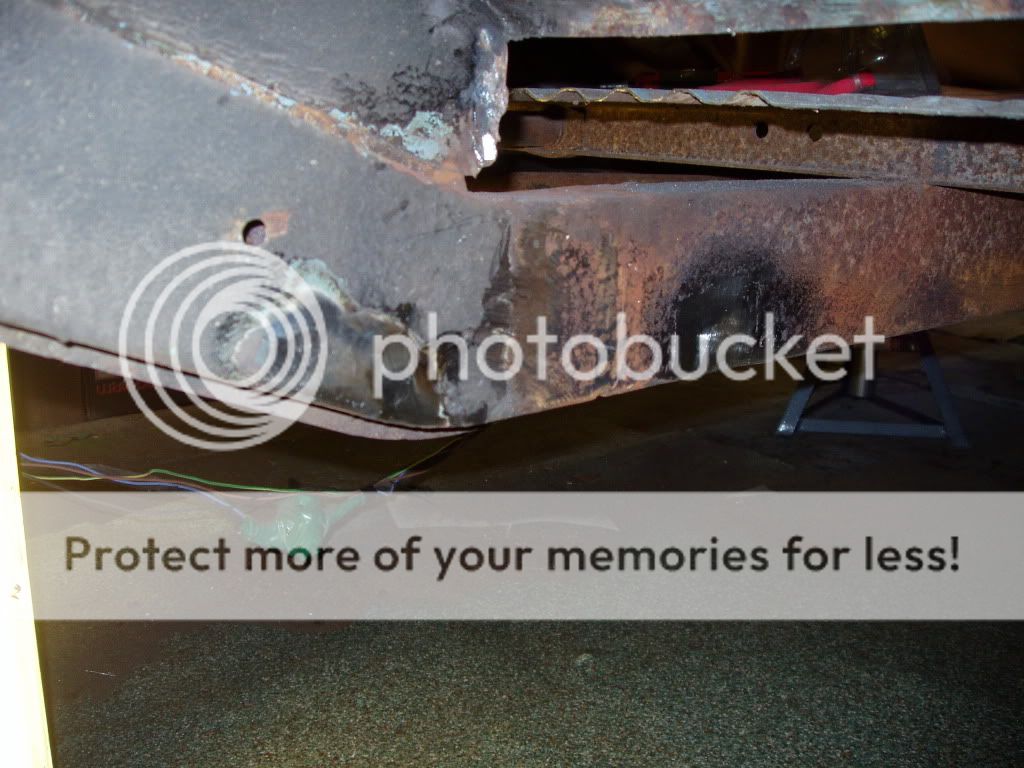
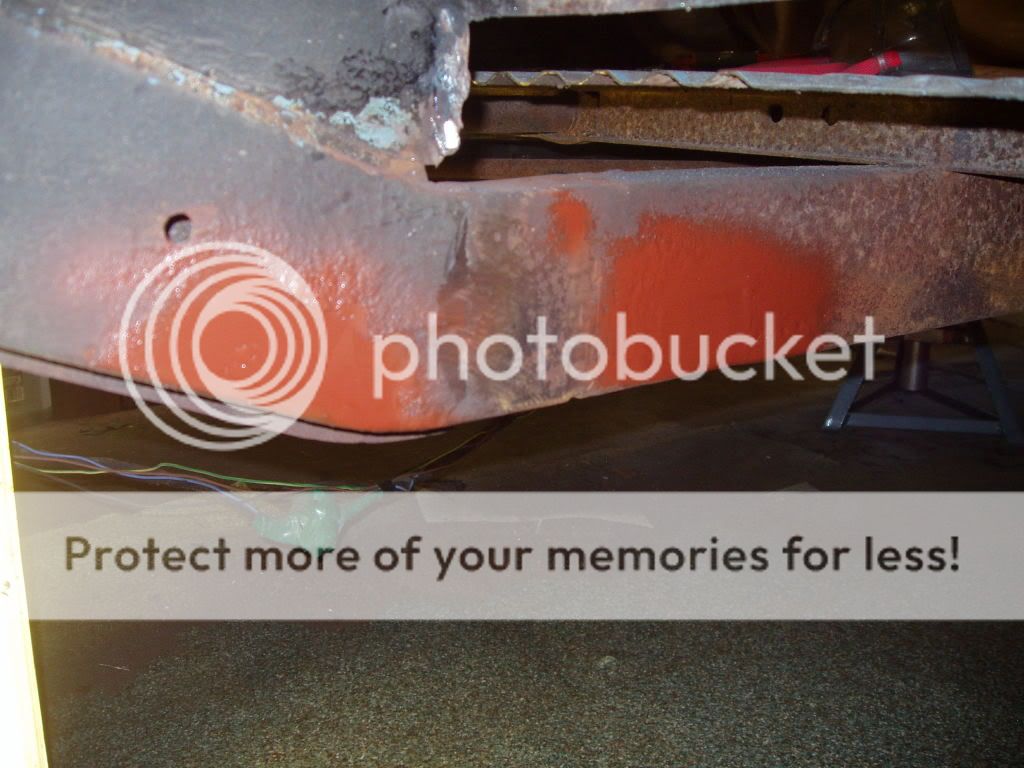
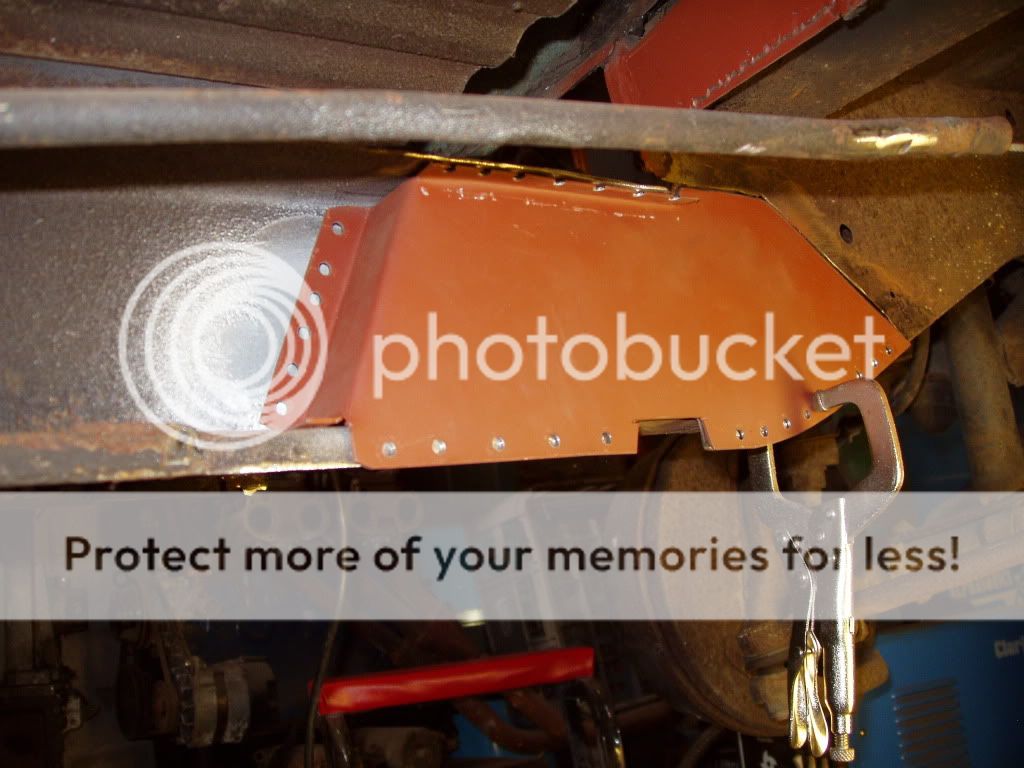
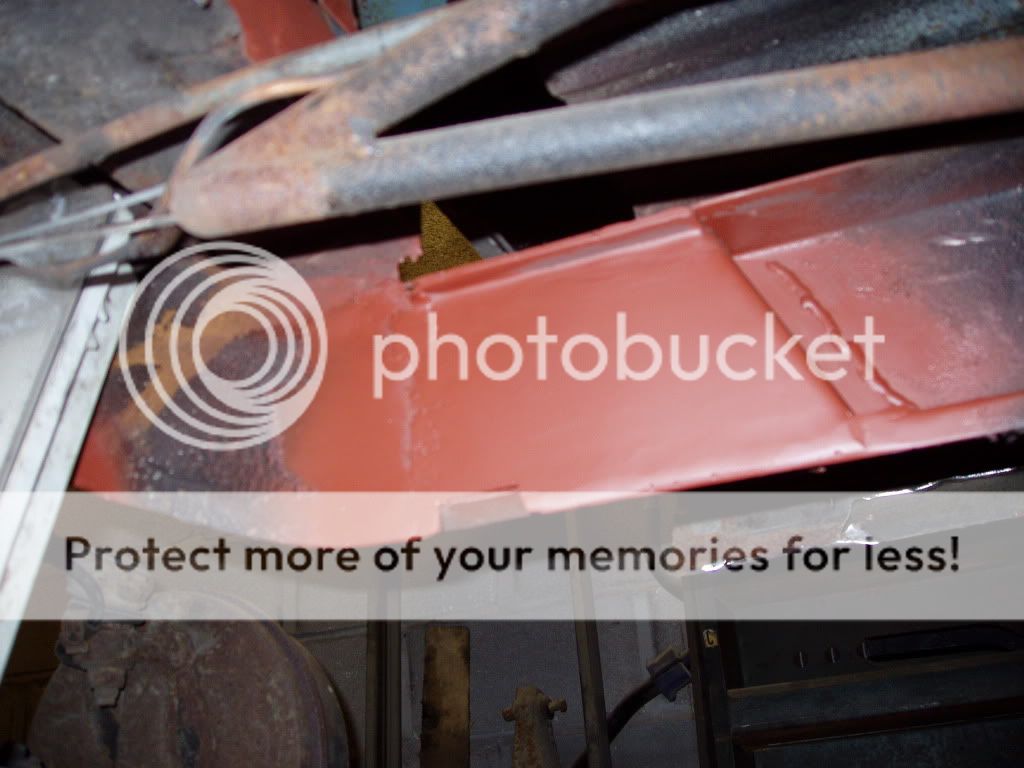
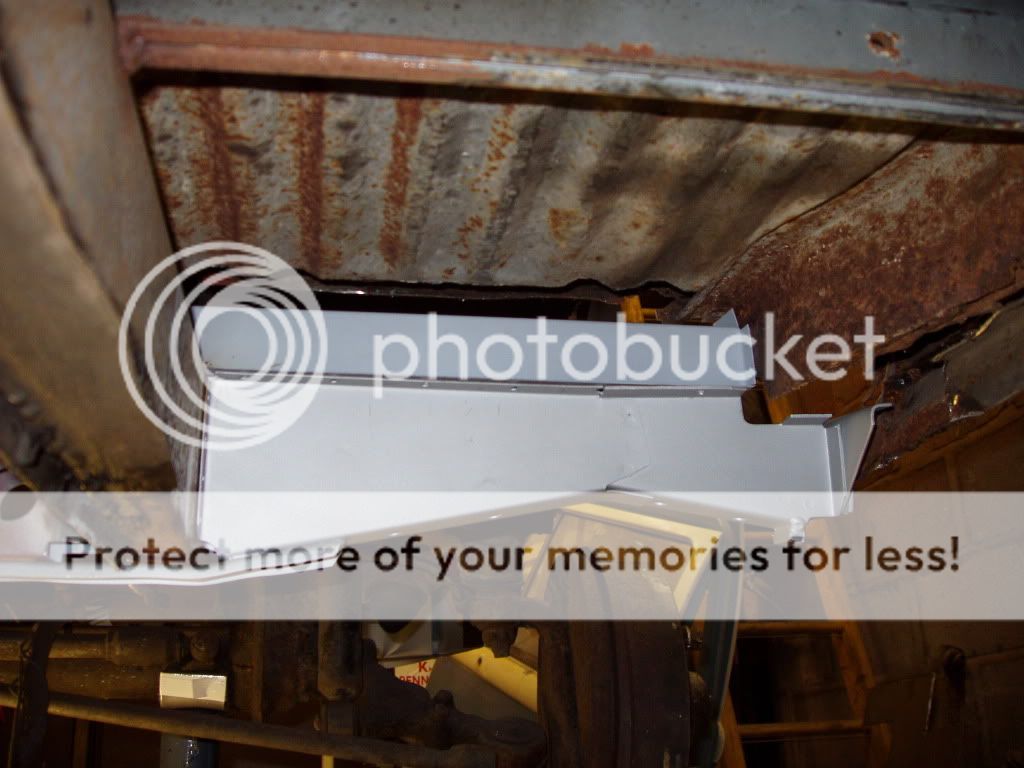
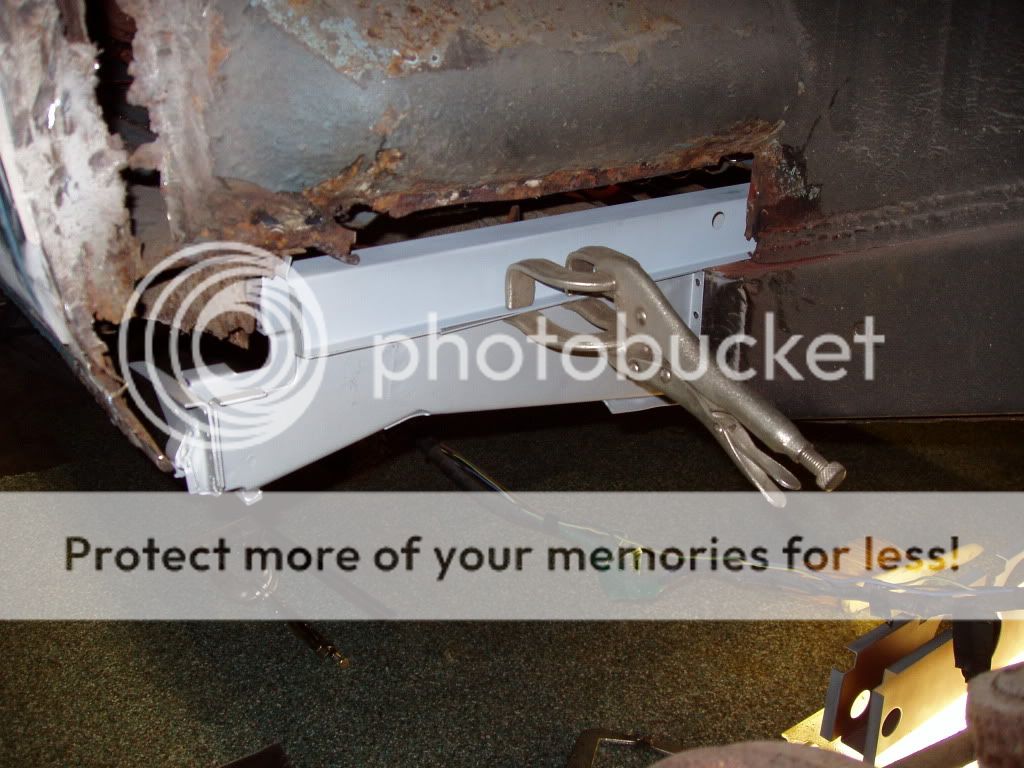
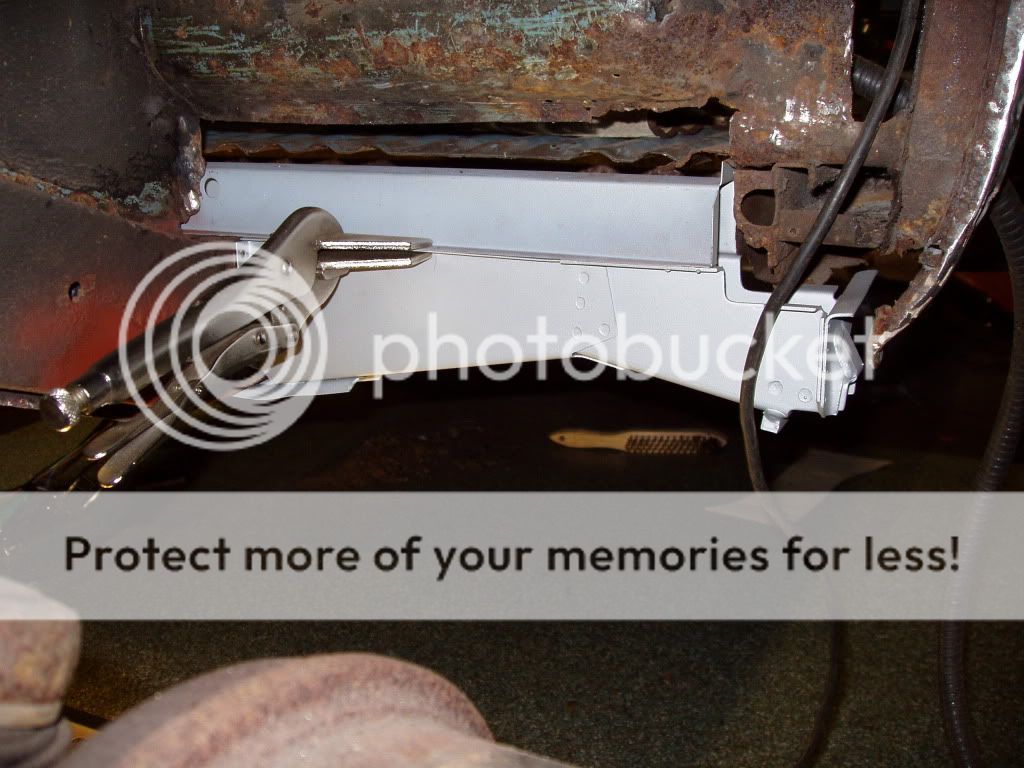
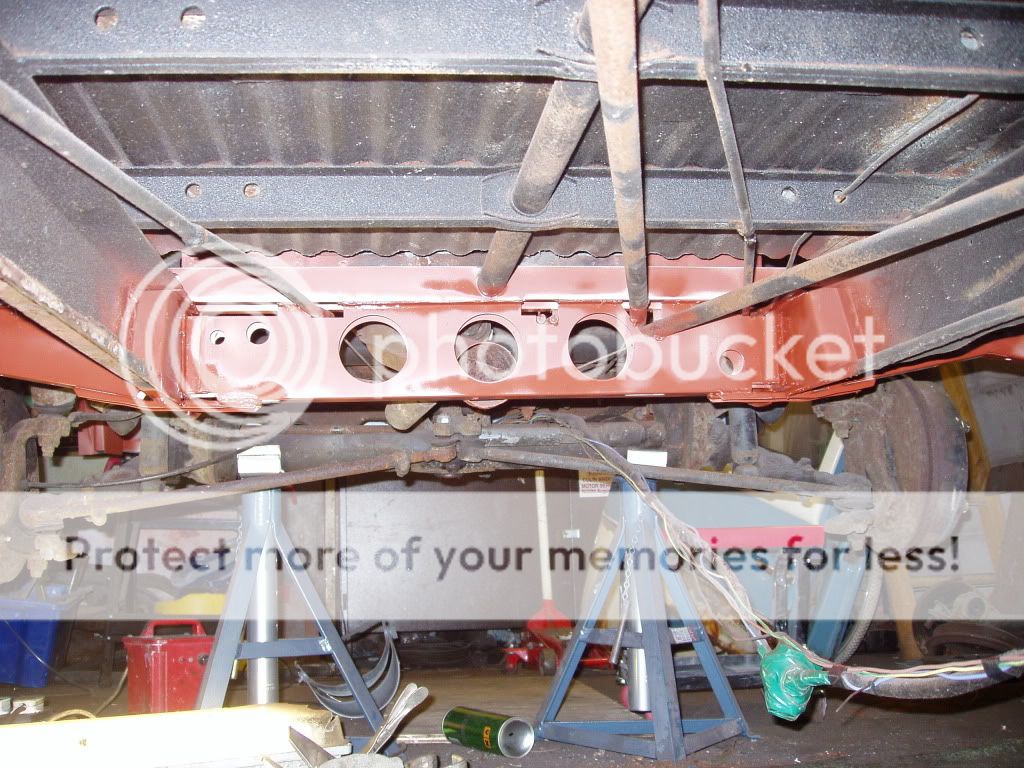
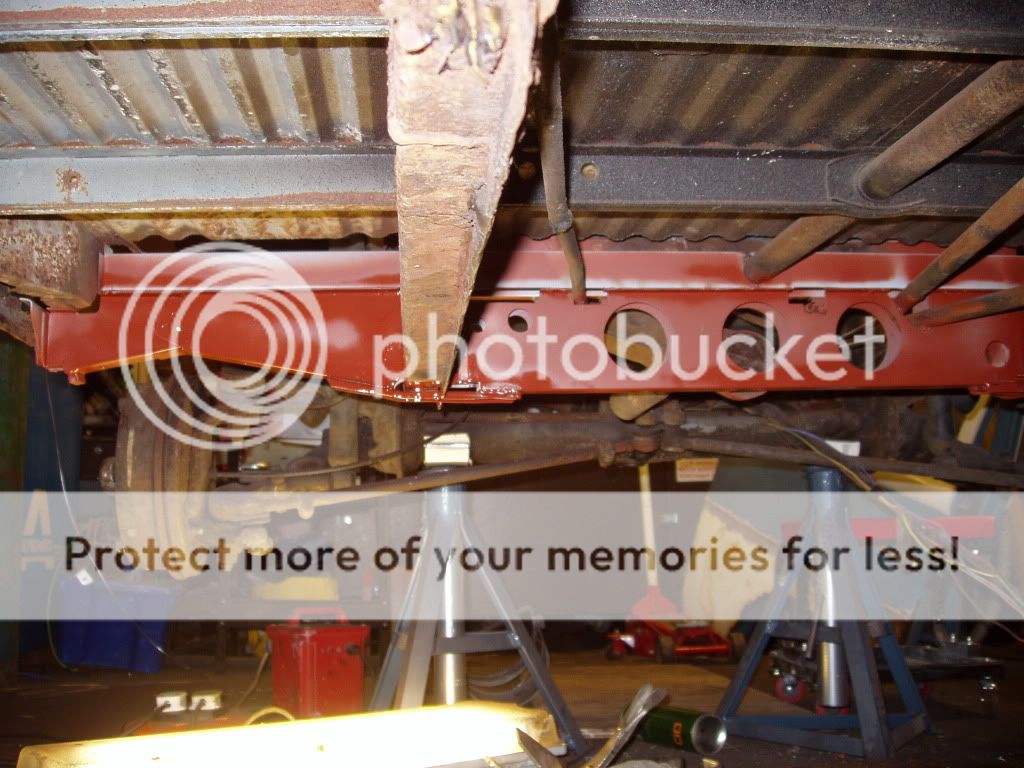
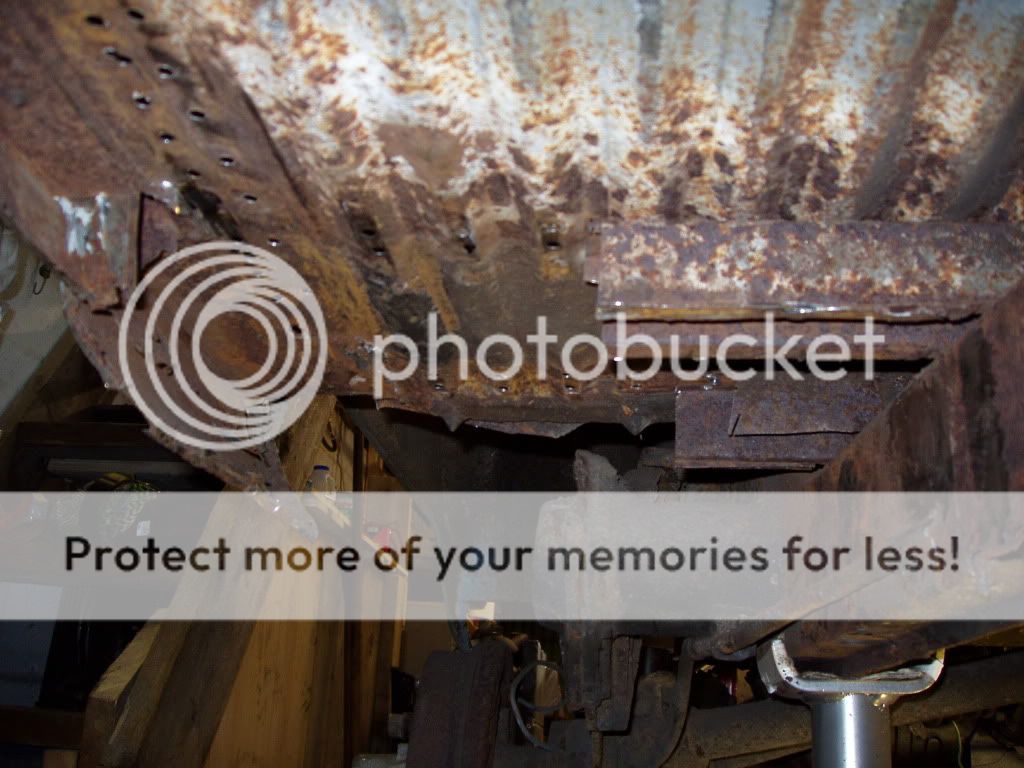
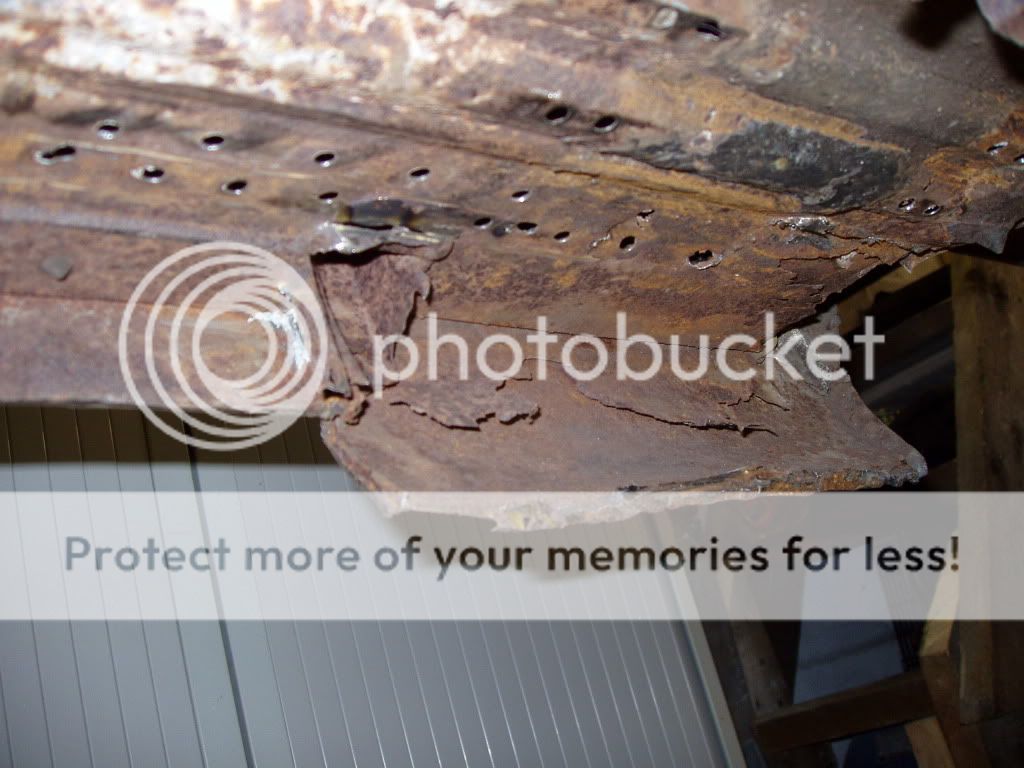
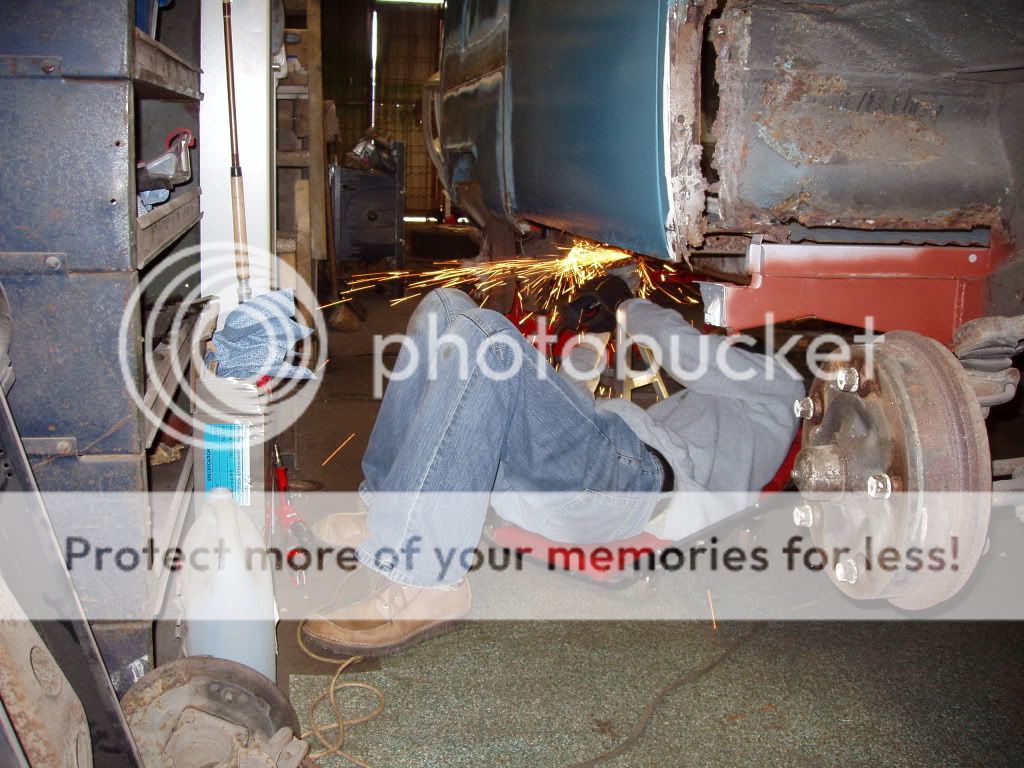
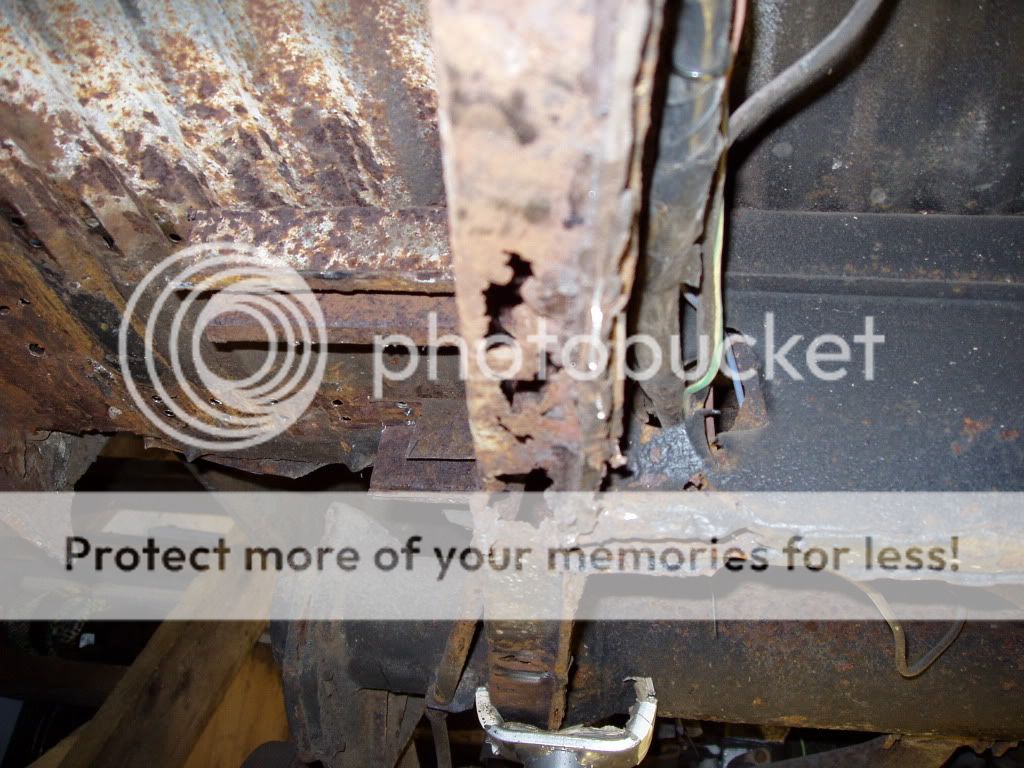
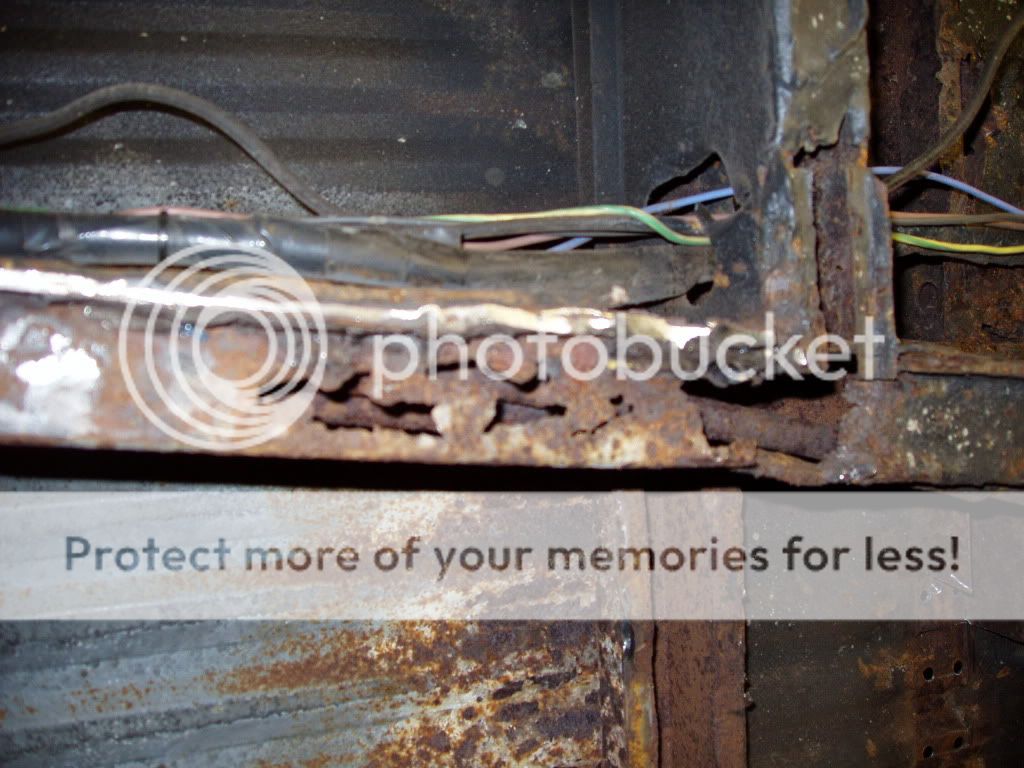
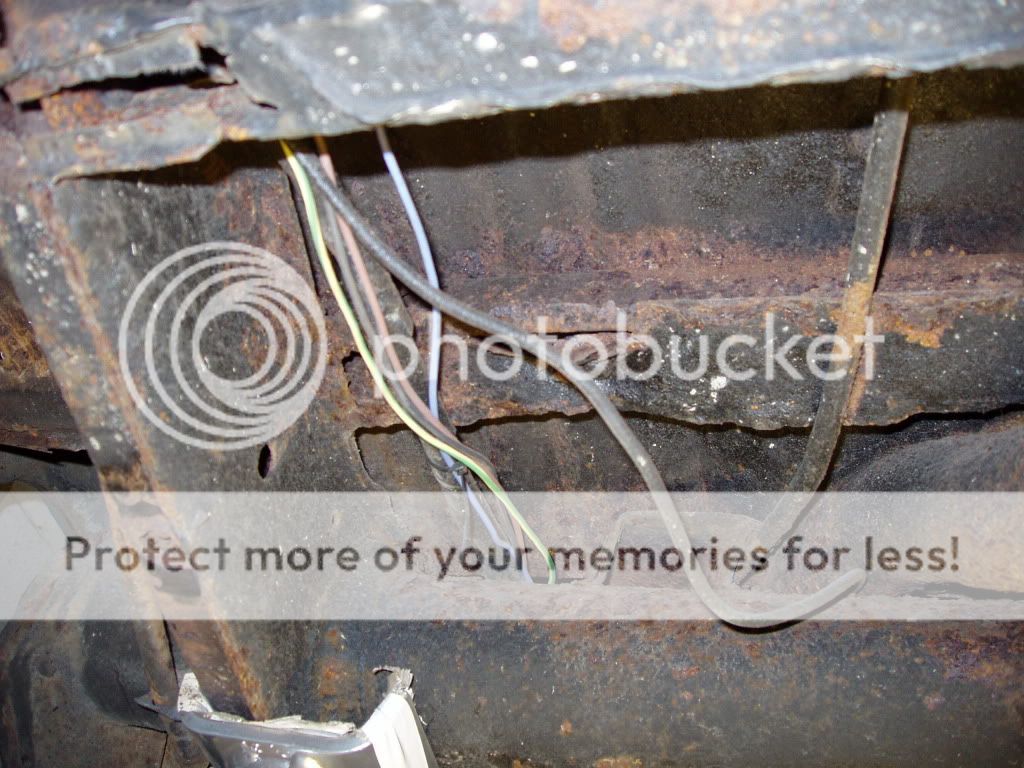
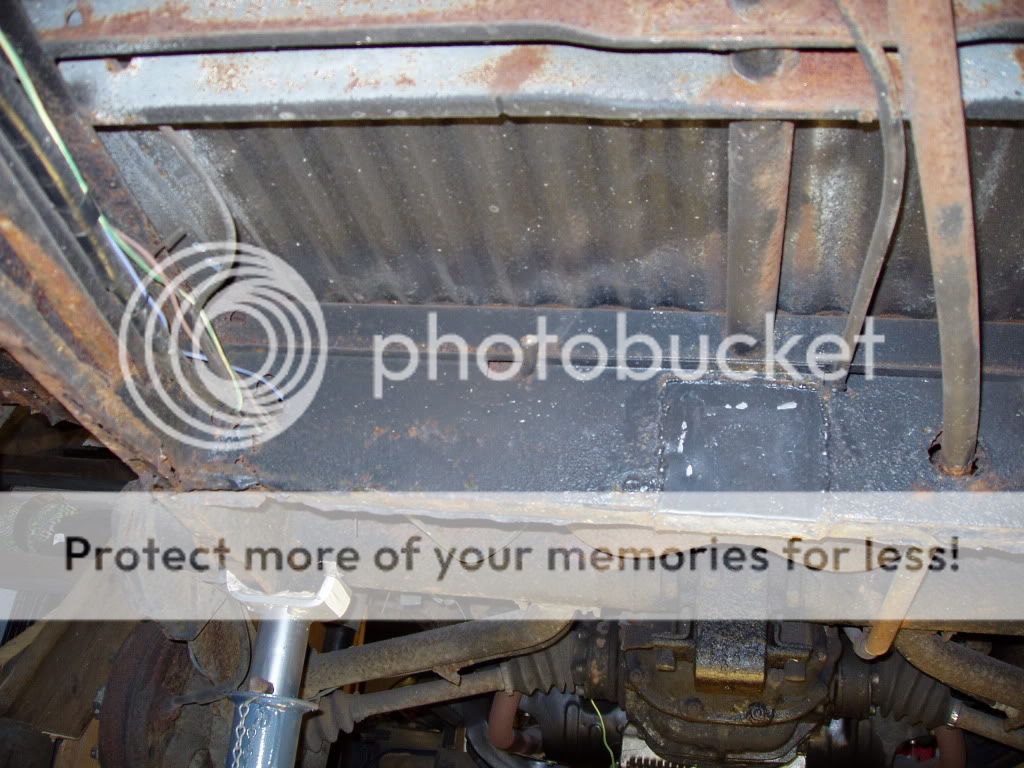
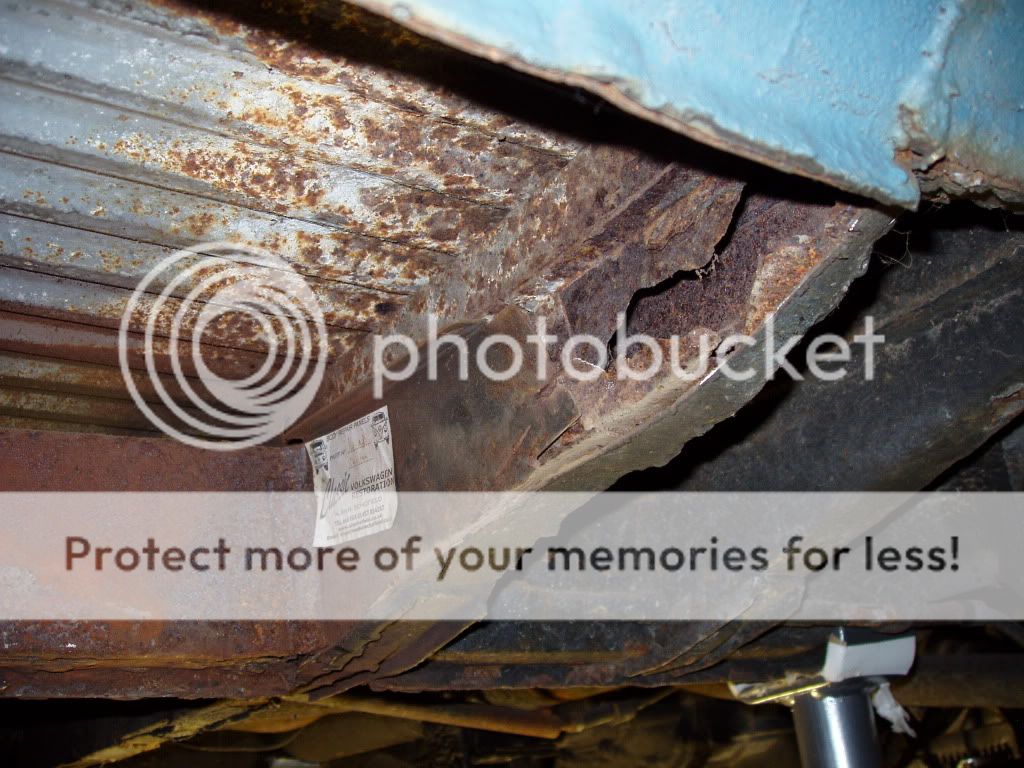
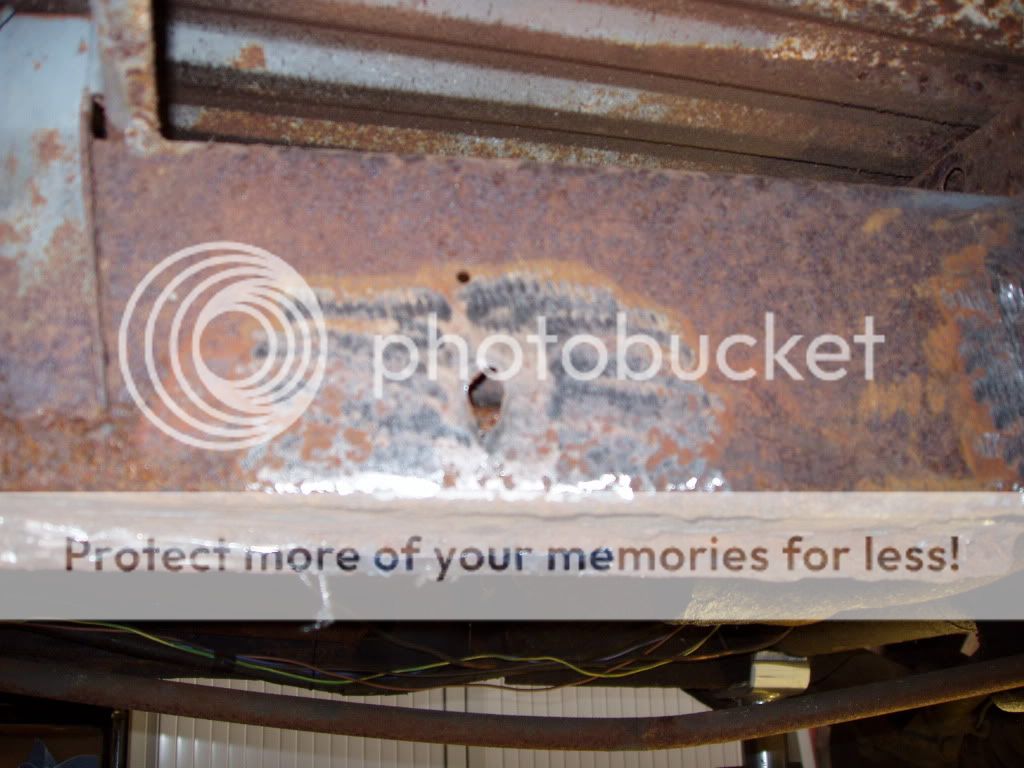
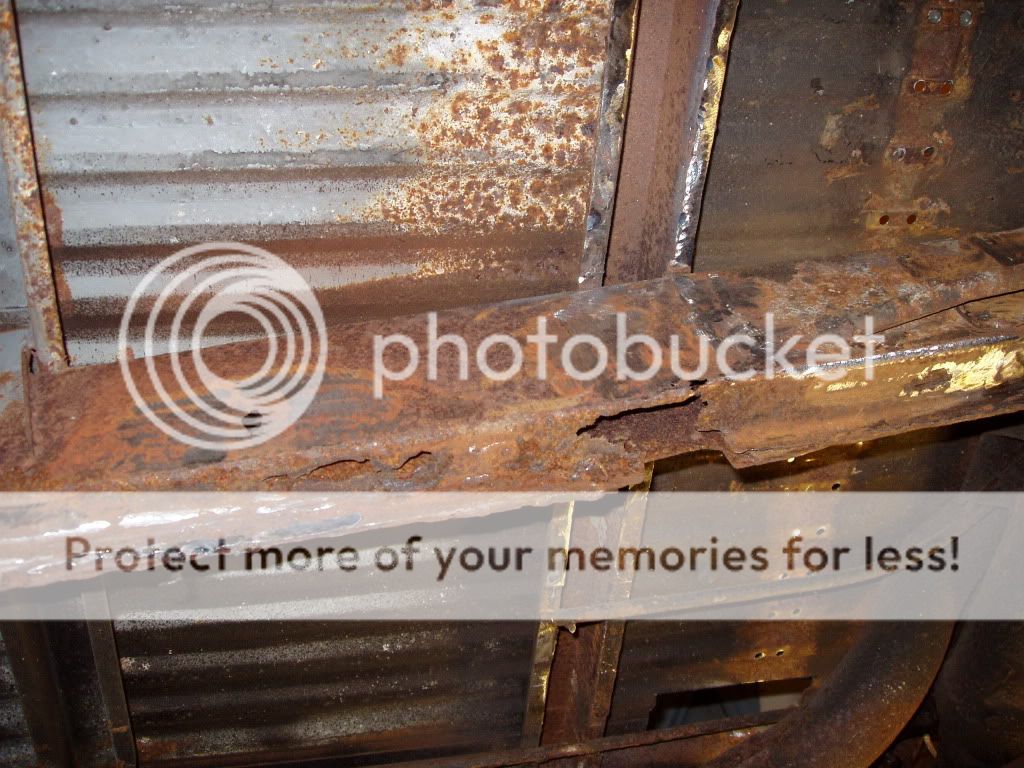
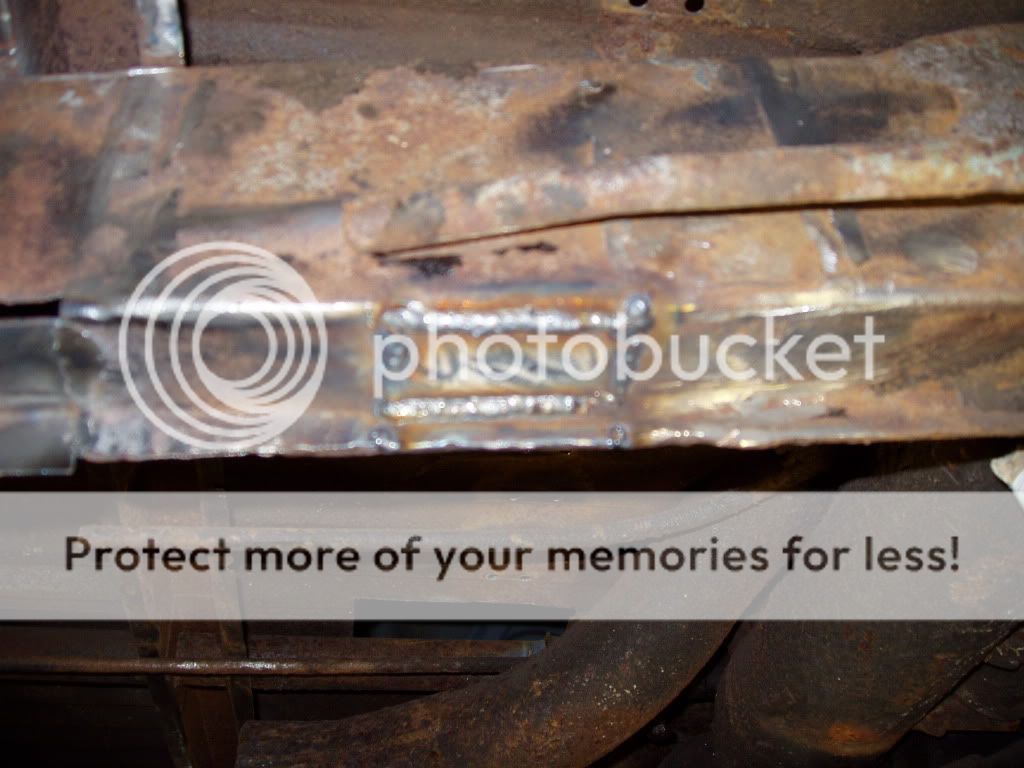
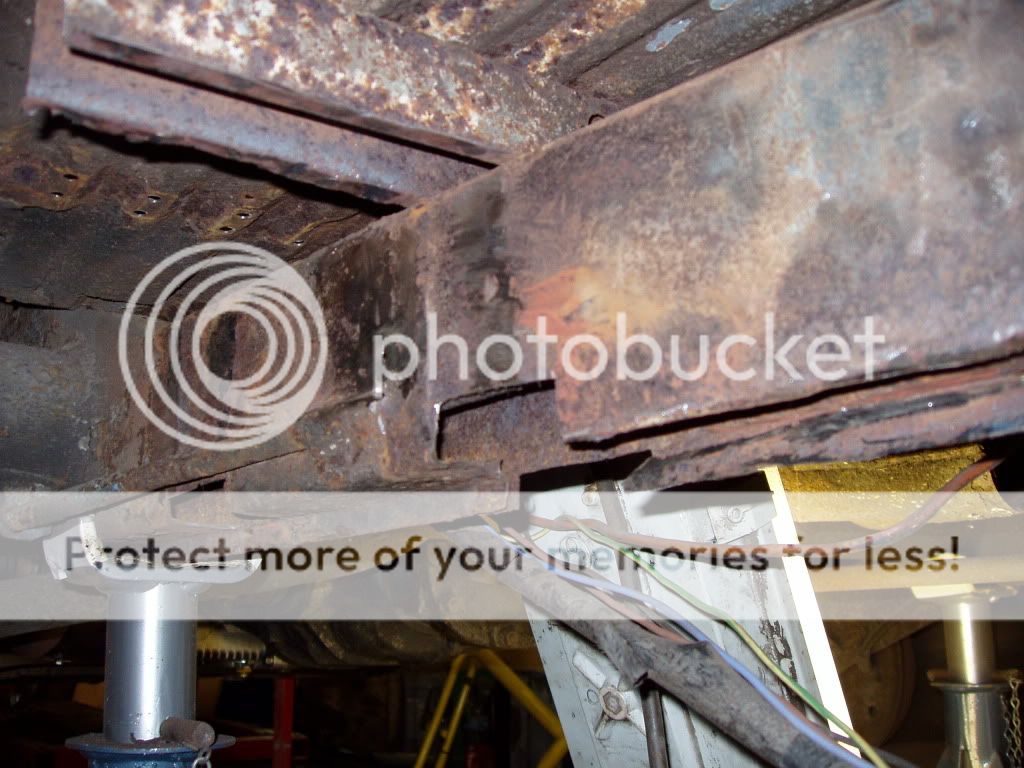
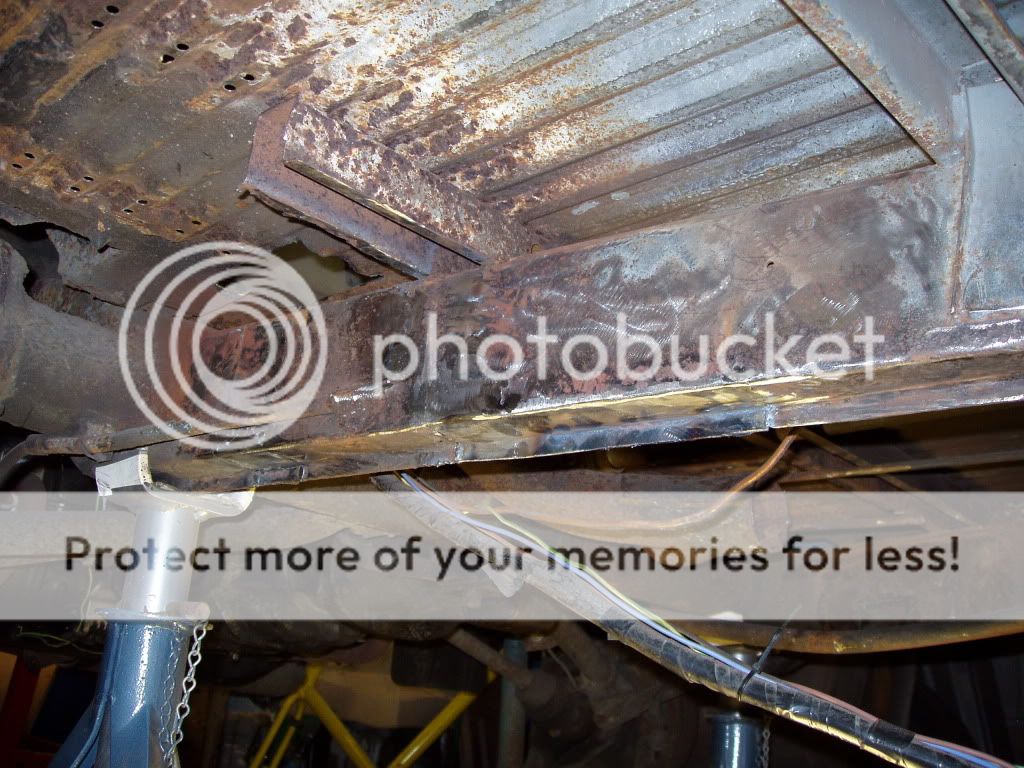
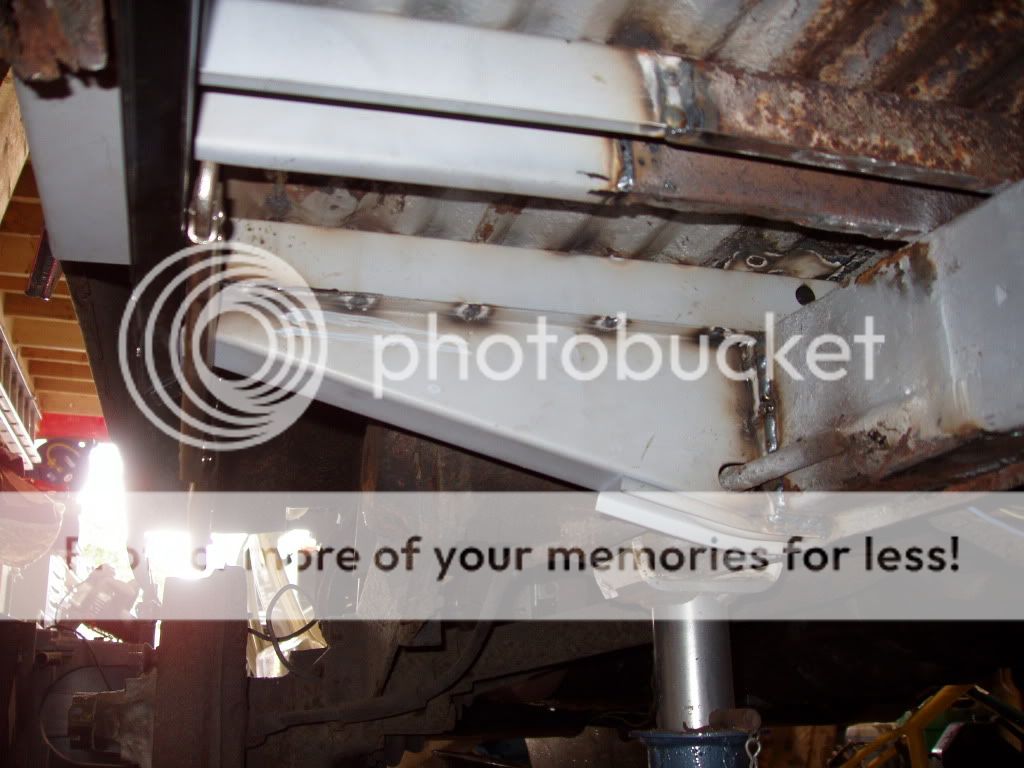
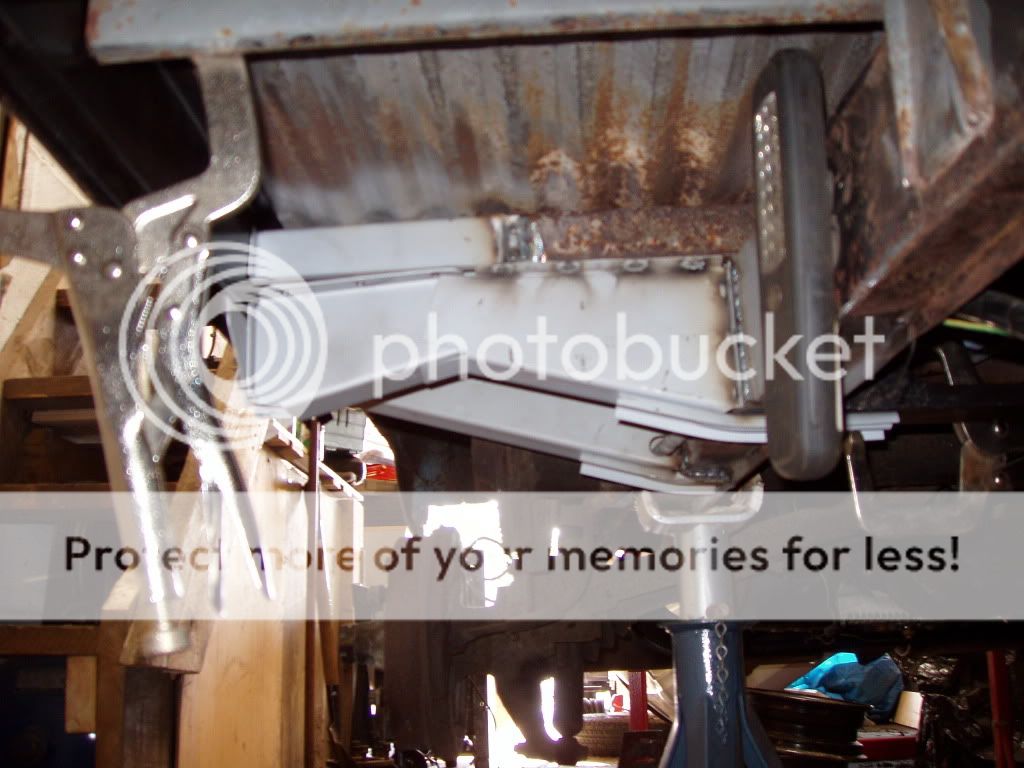
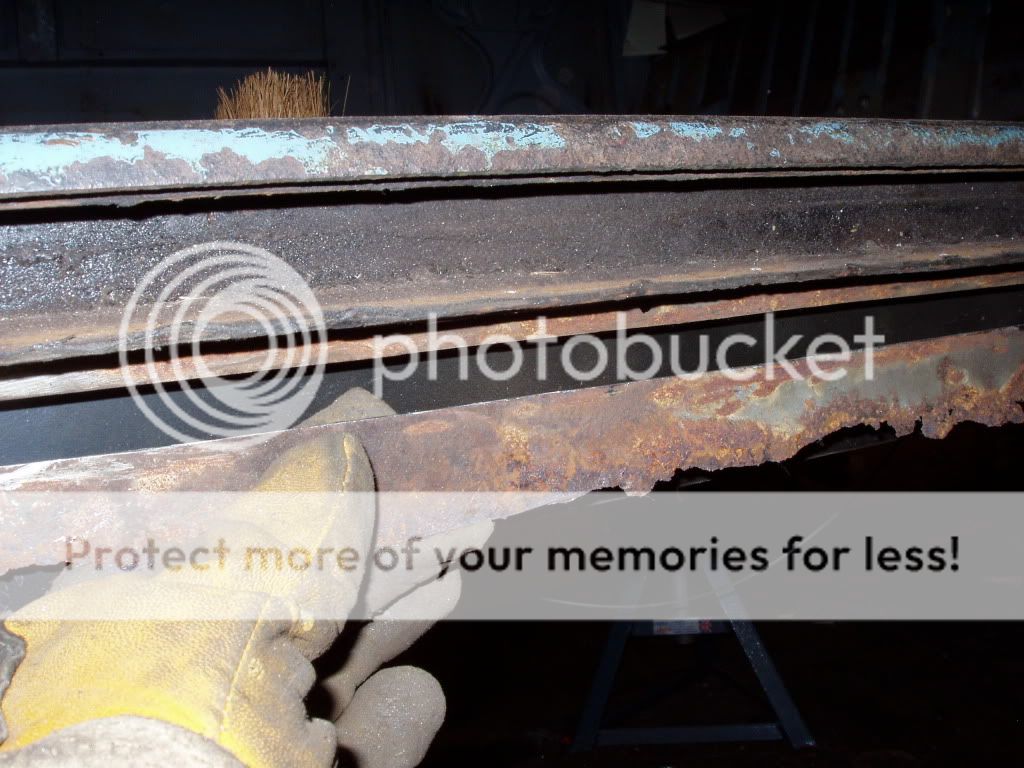
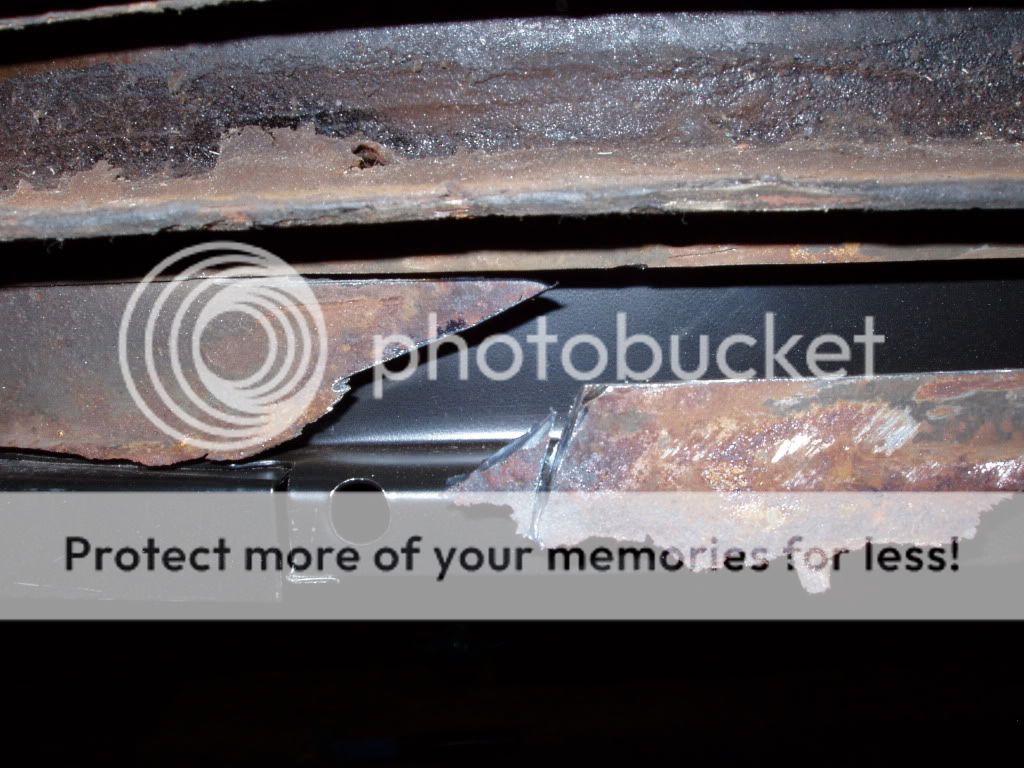
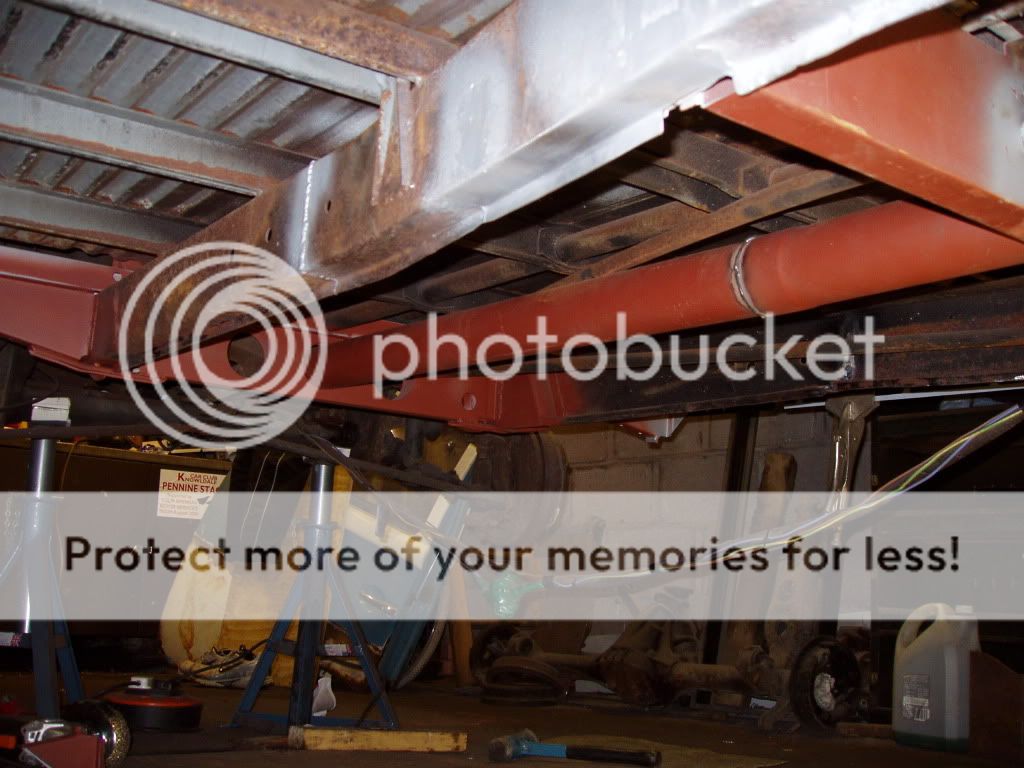
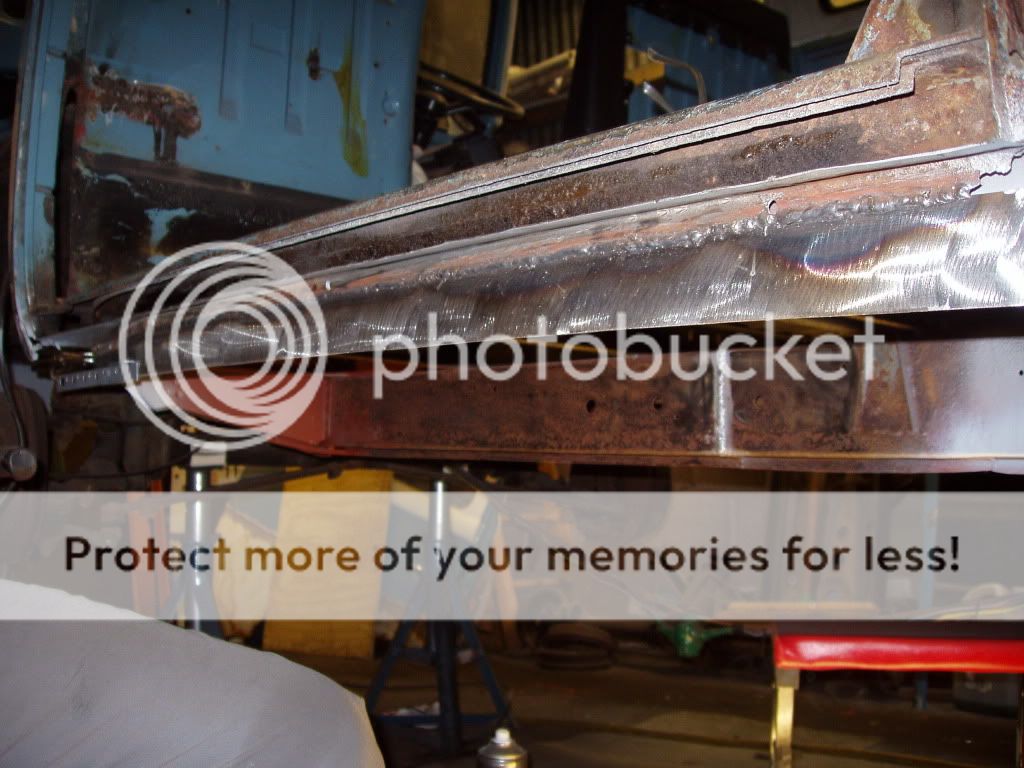
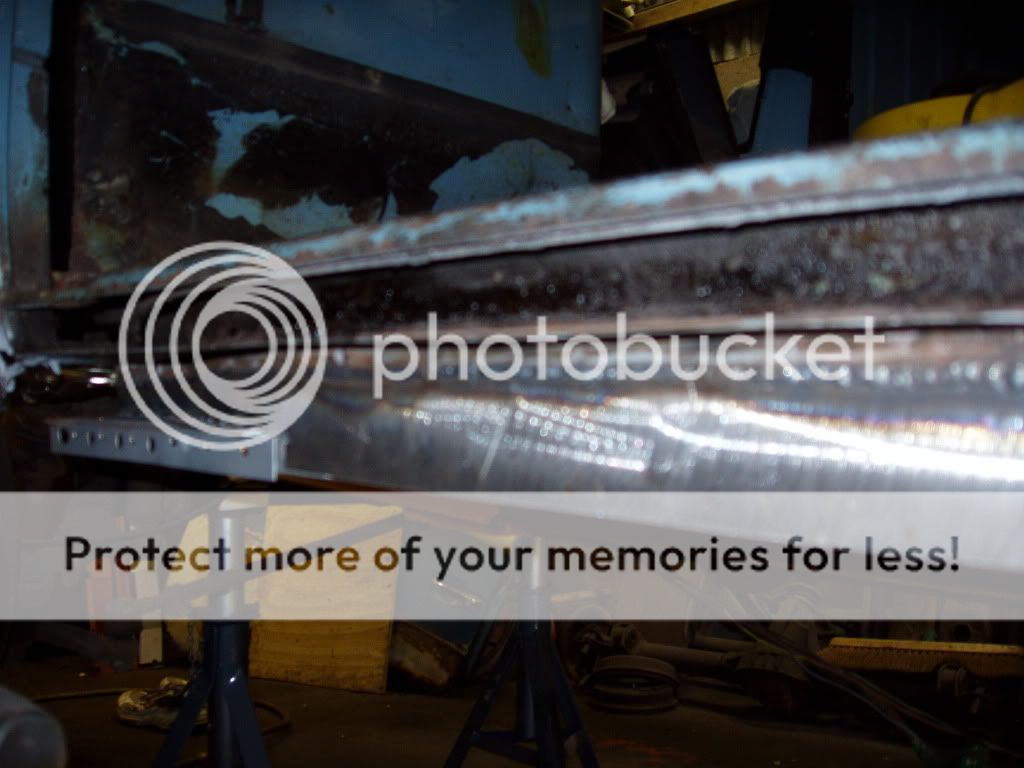
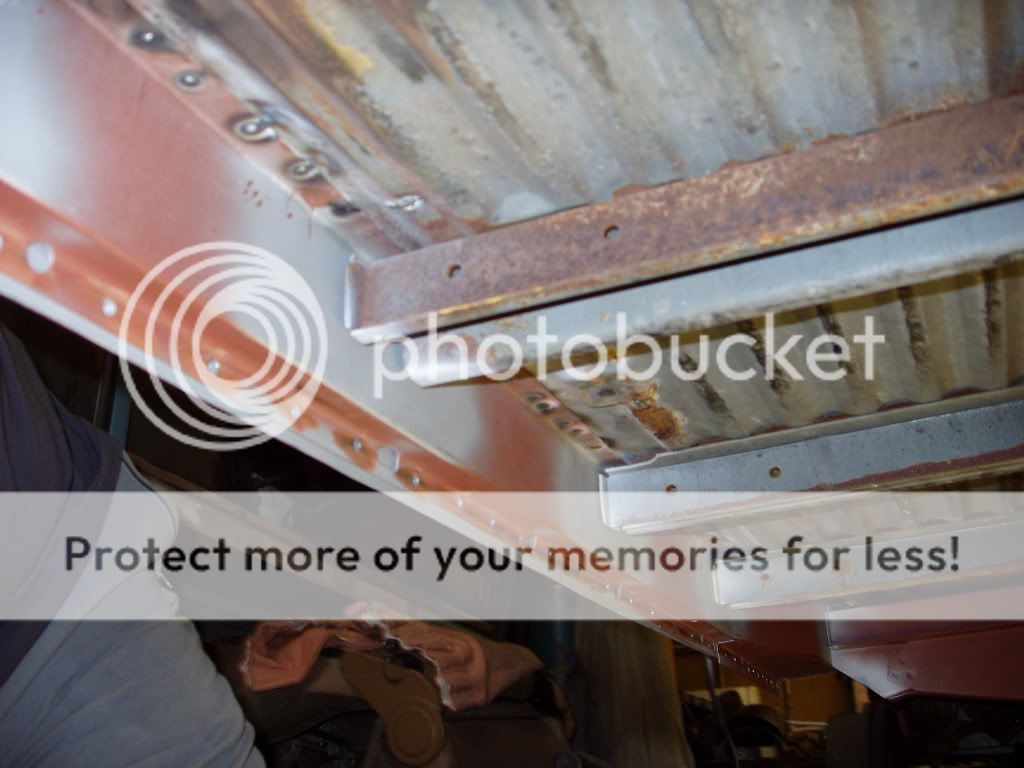
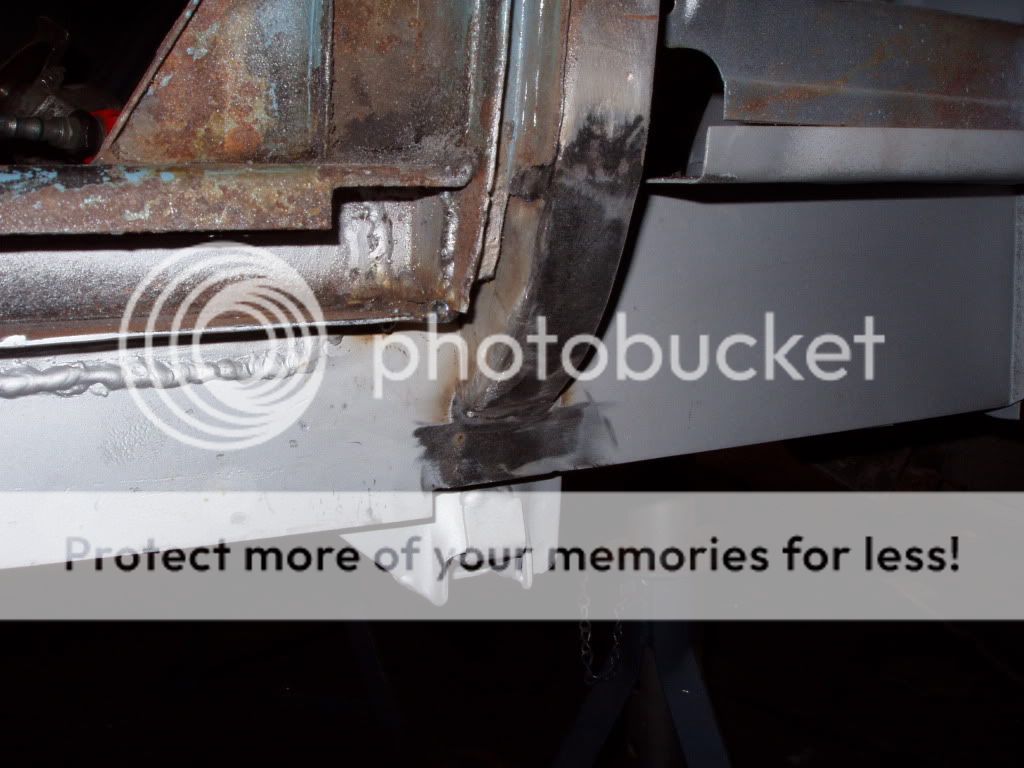
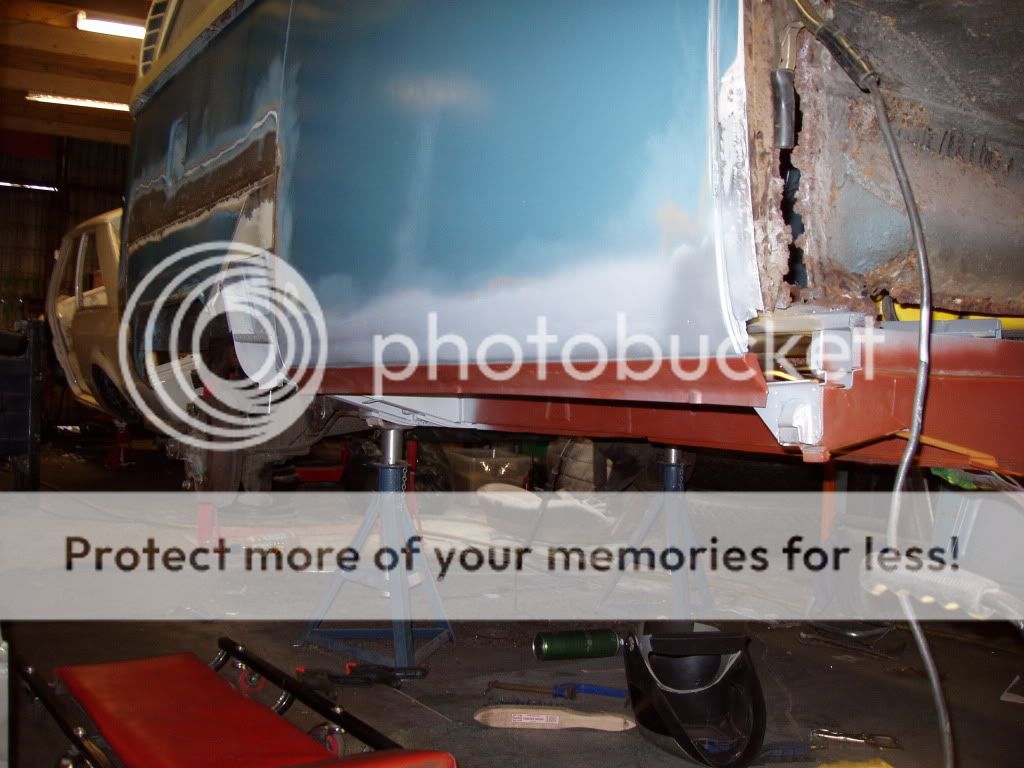
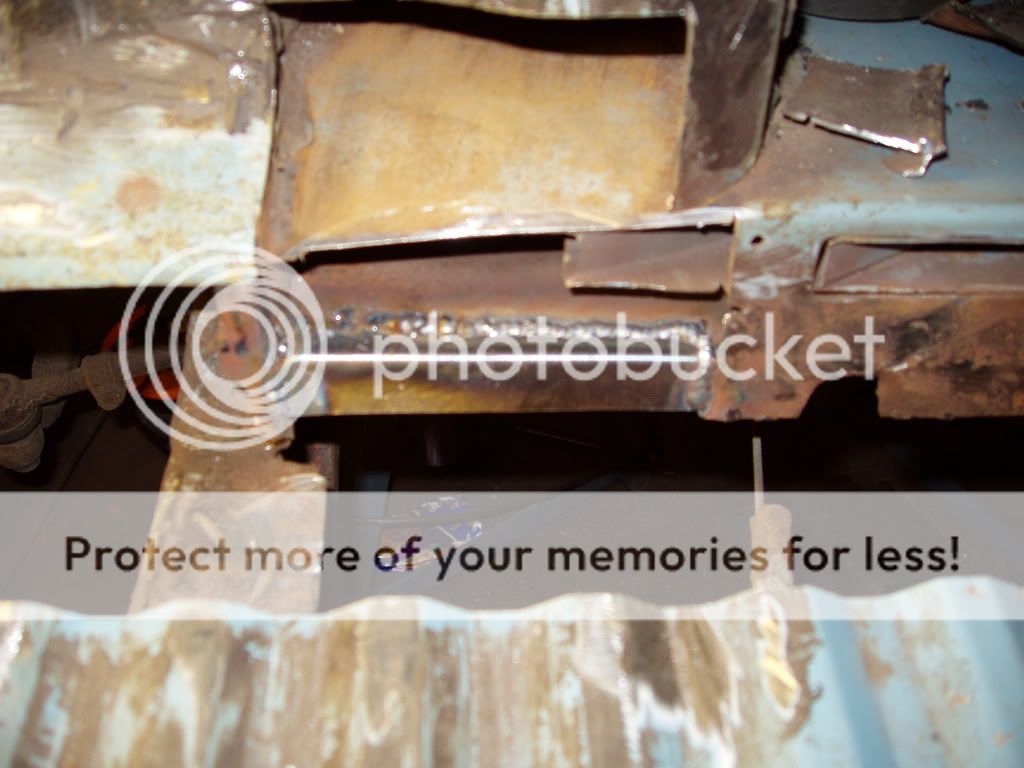
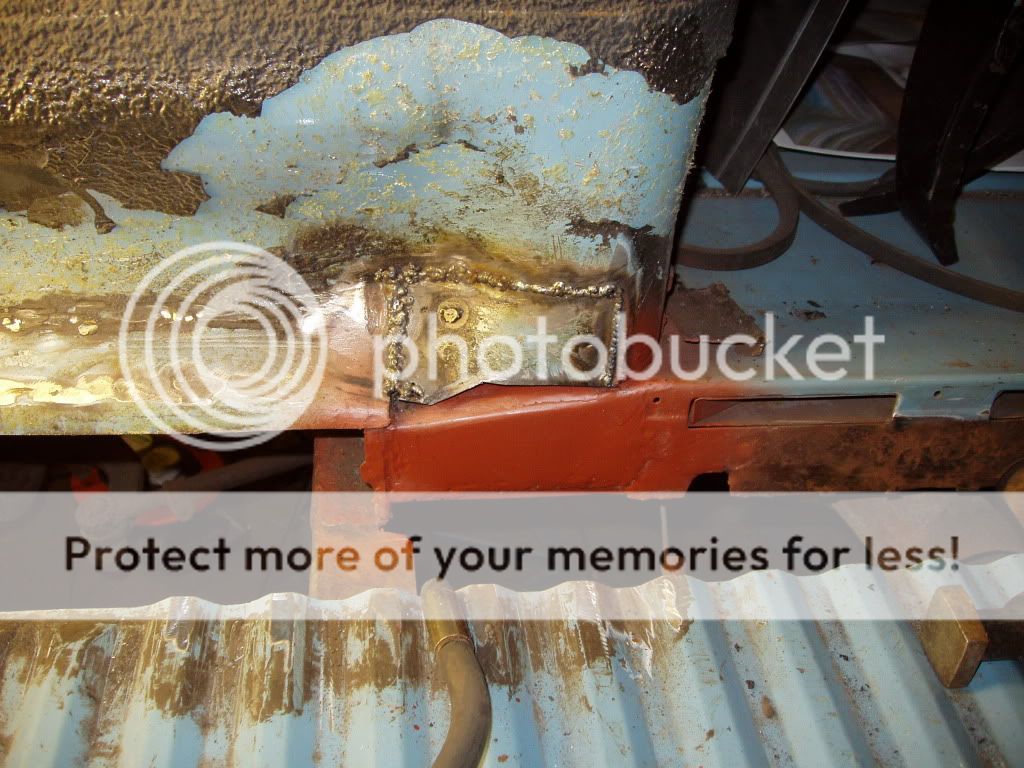
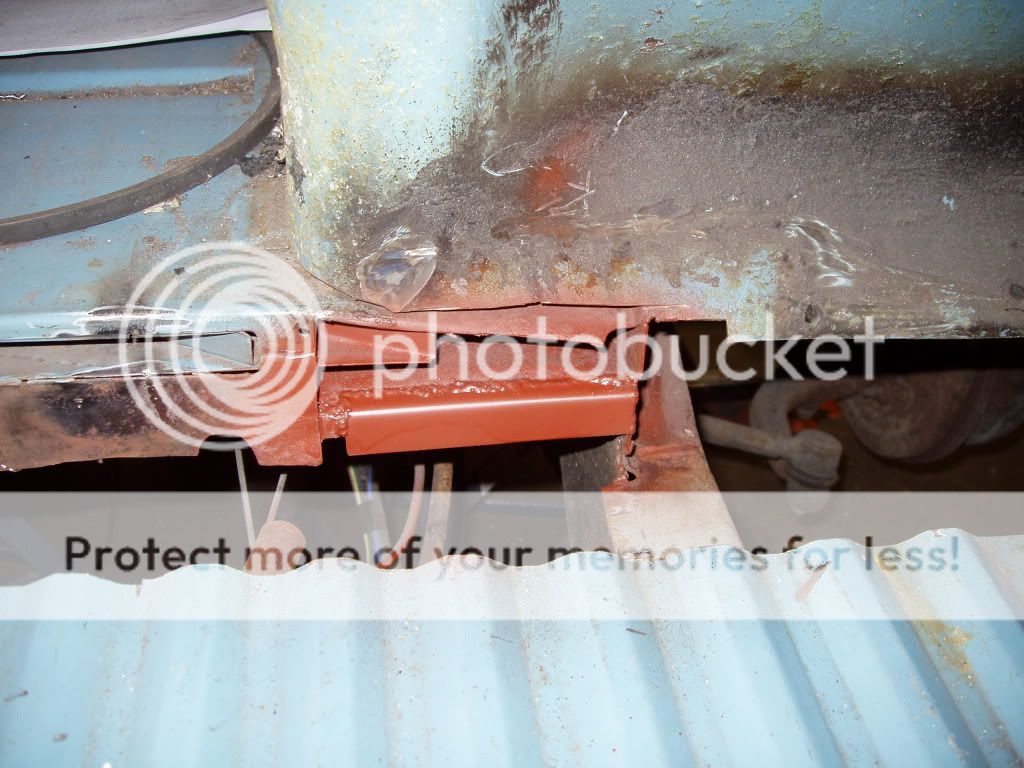
Cleaned all the chassis rails and repaired all rotton areas.

P6210075.jpg

P6210077.jpg

P6210078.jpg

P6220079.jpg

P6220080.jpg


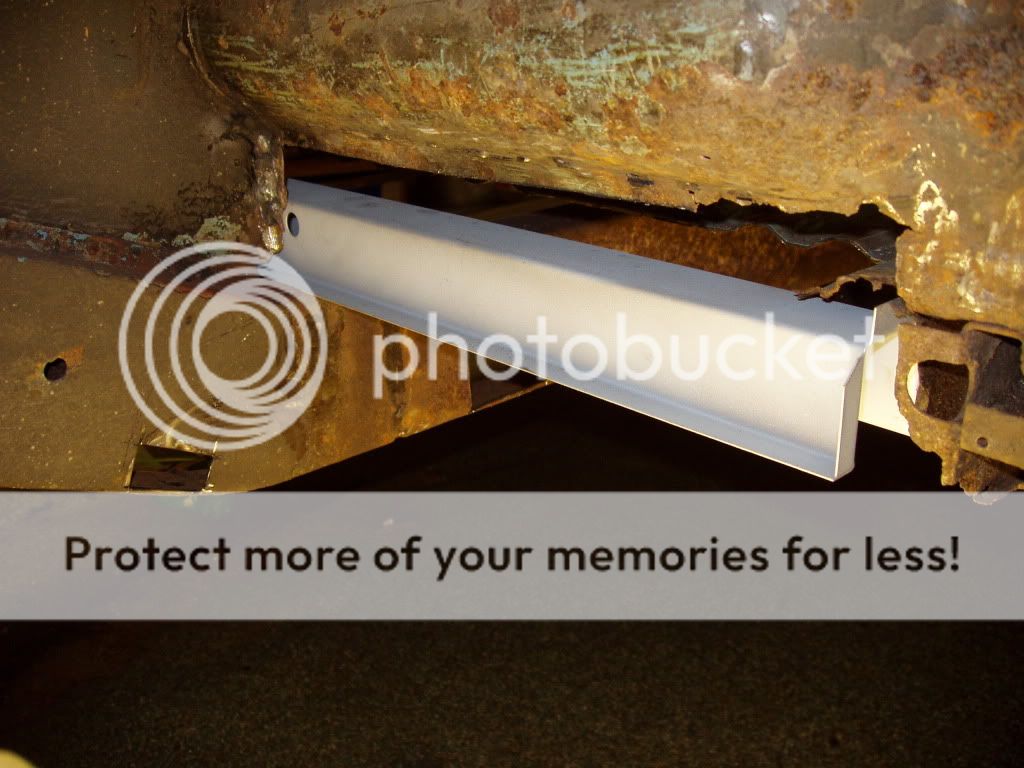
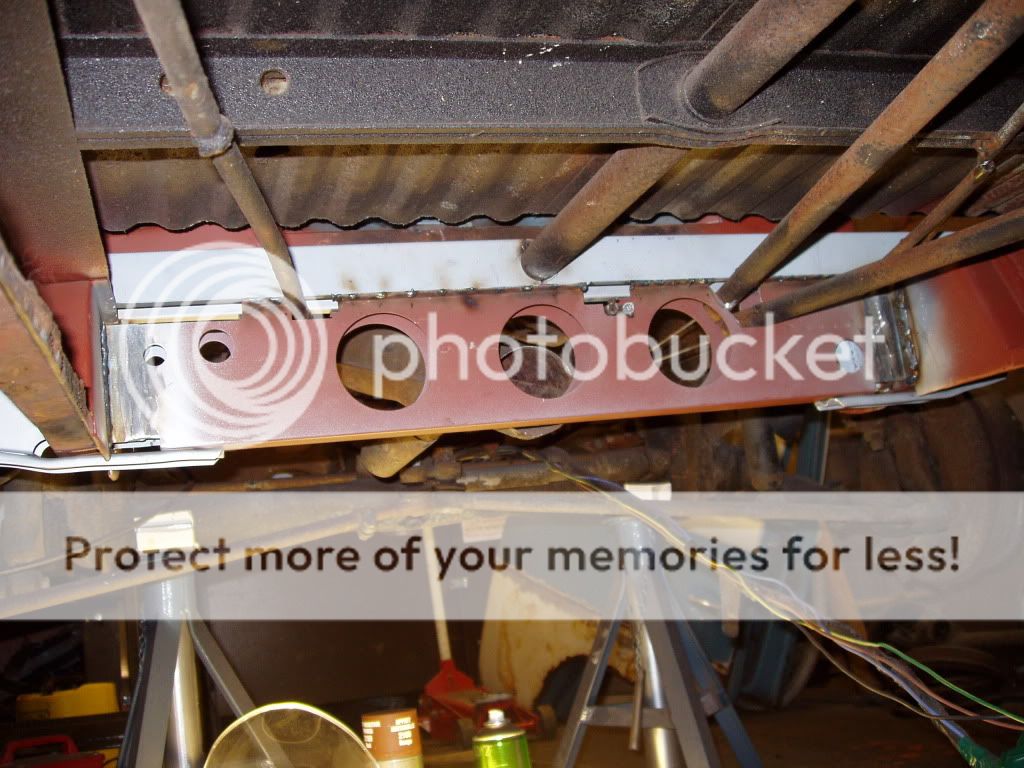
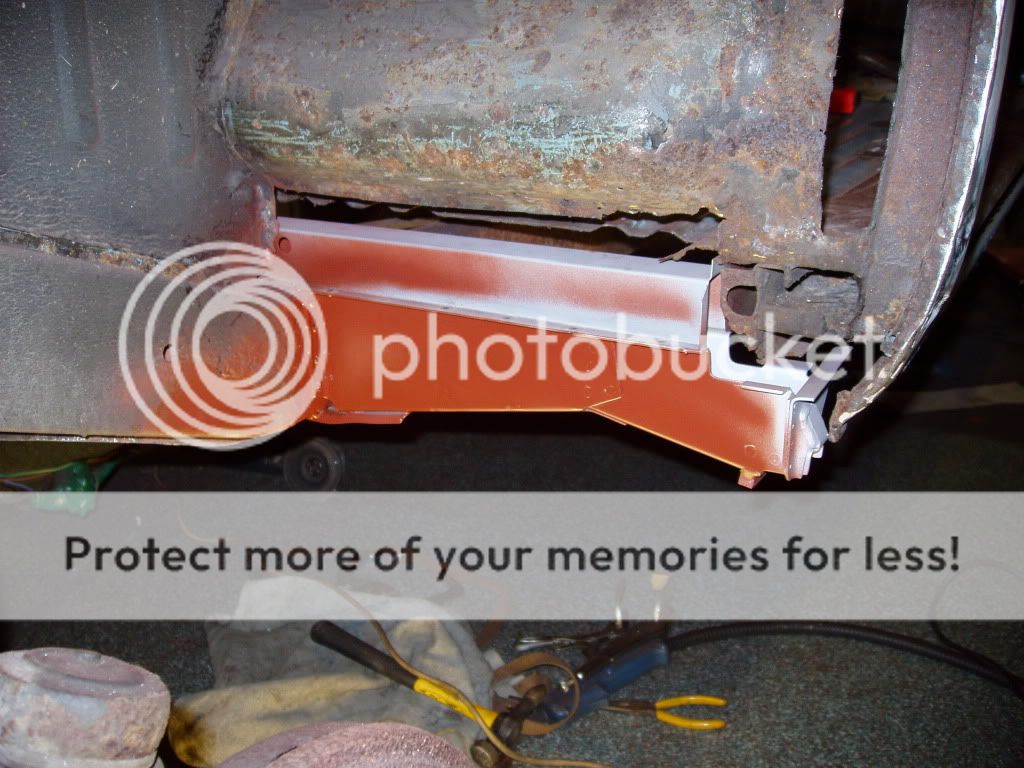
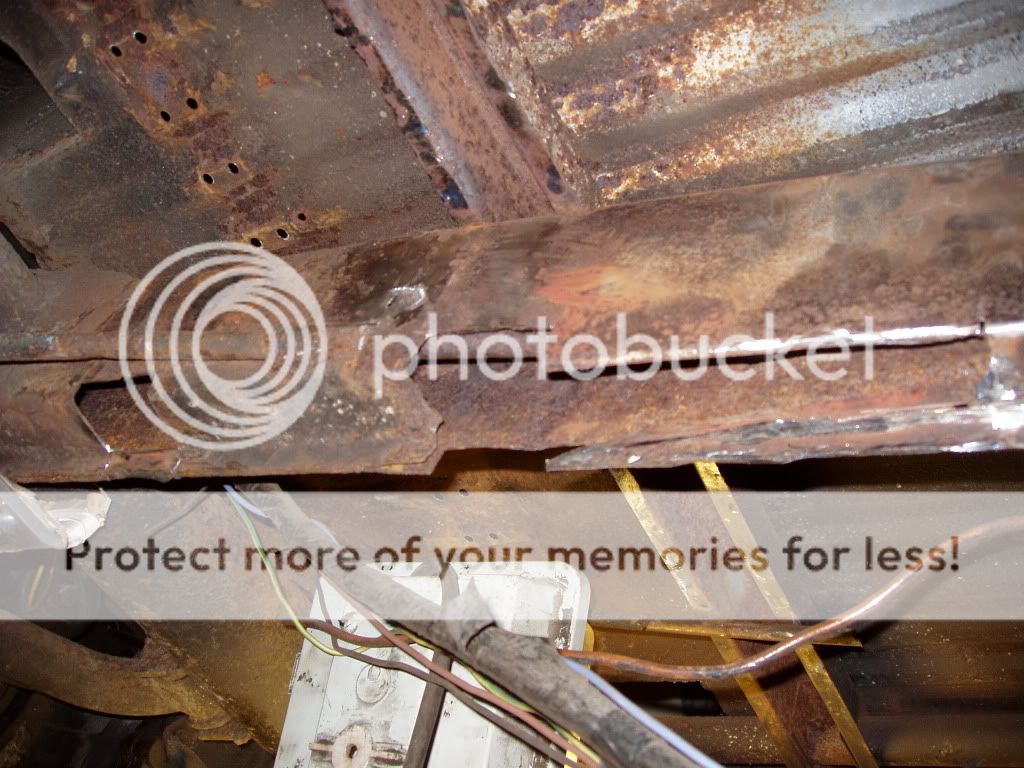
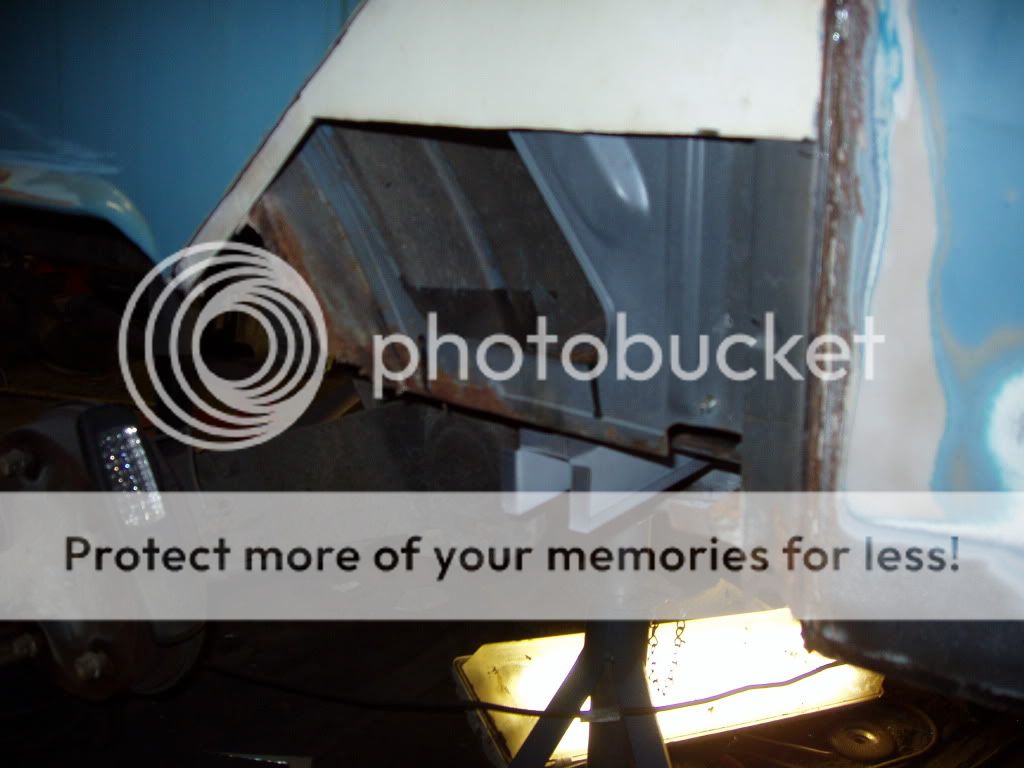
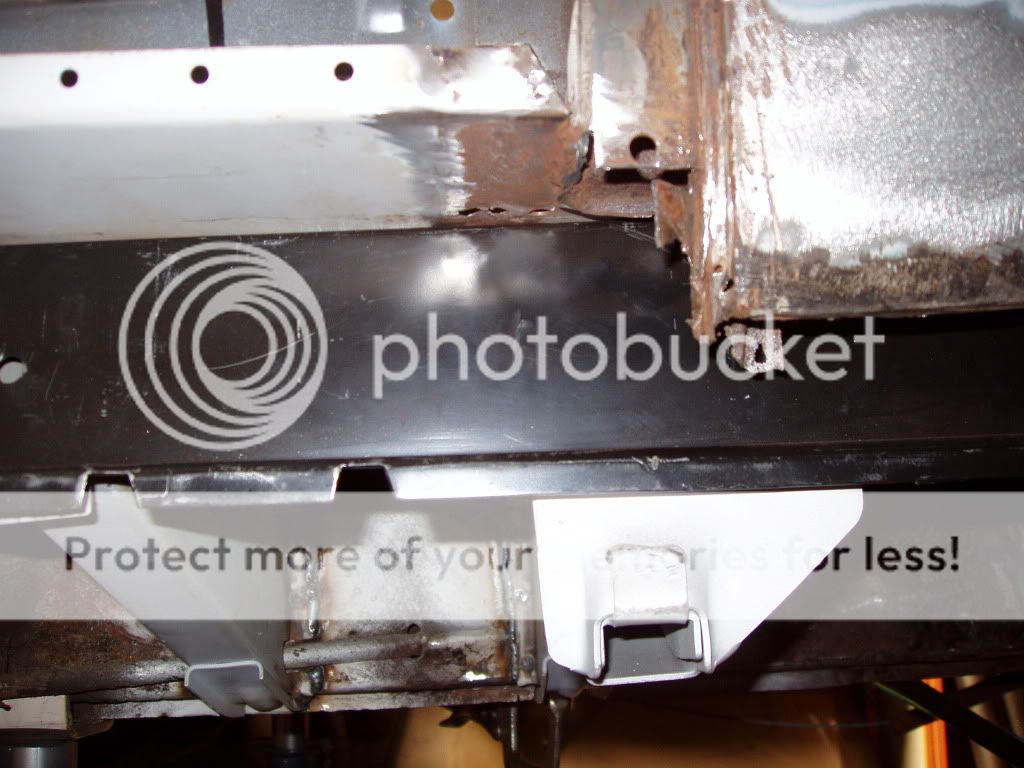
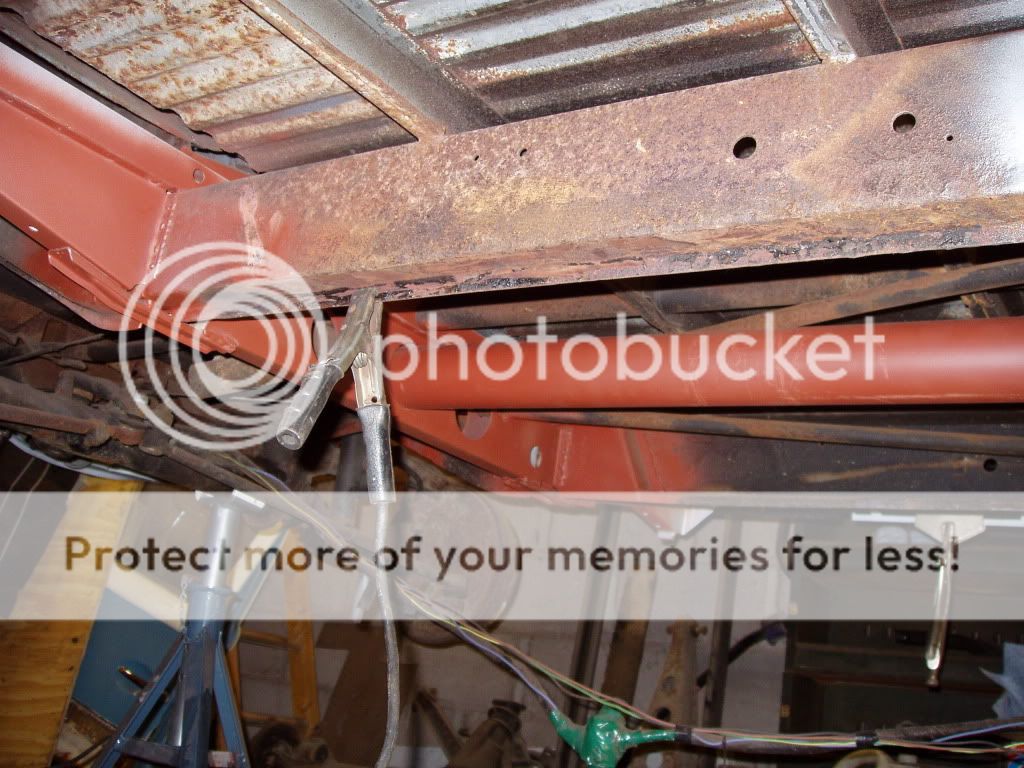
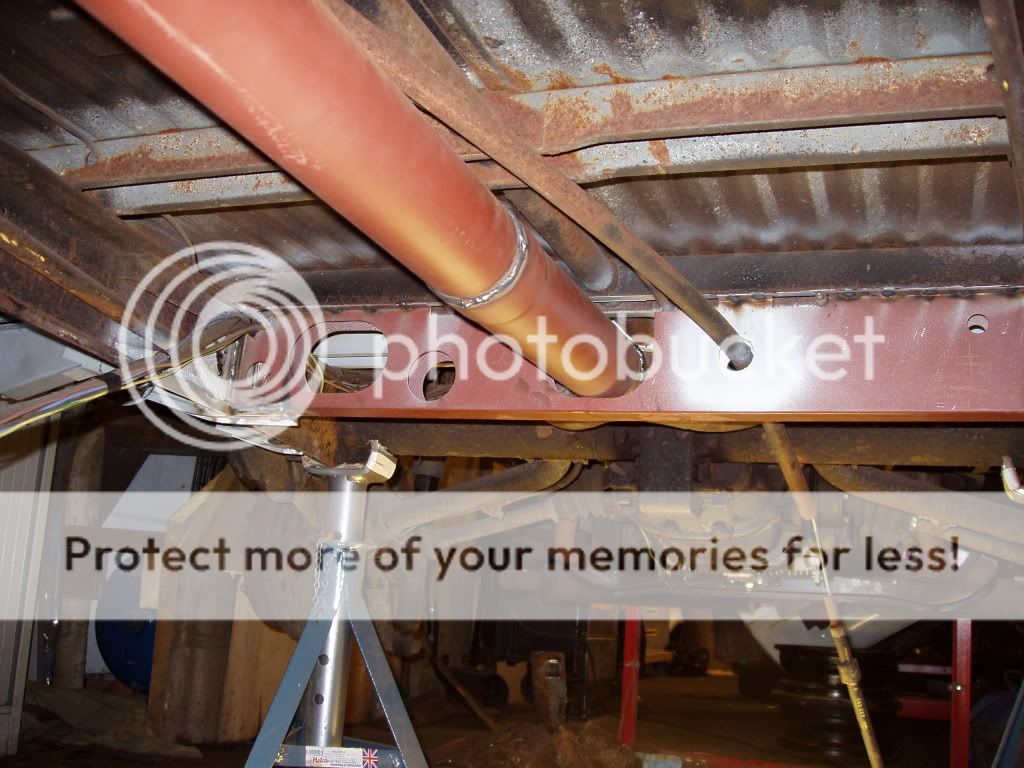
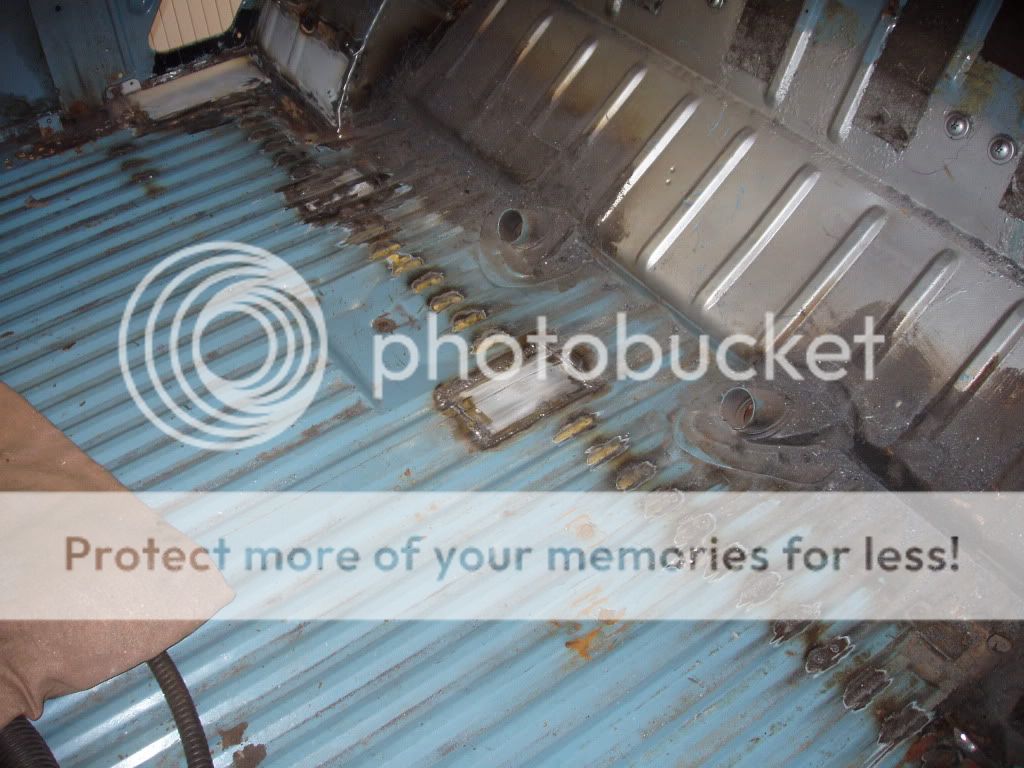
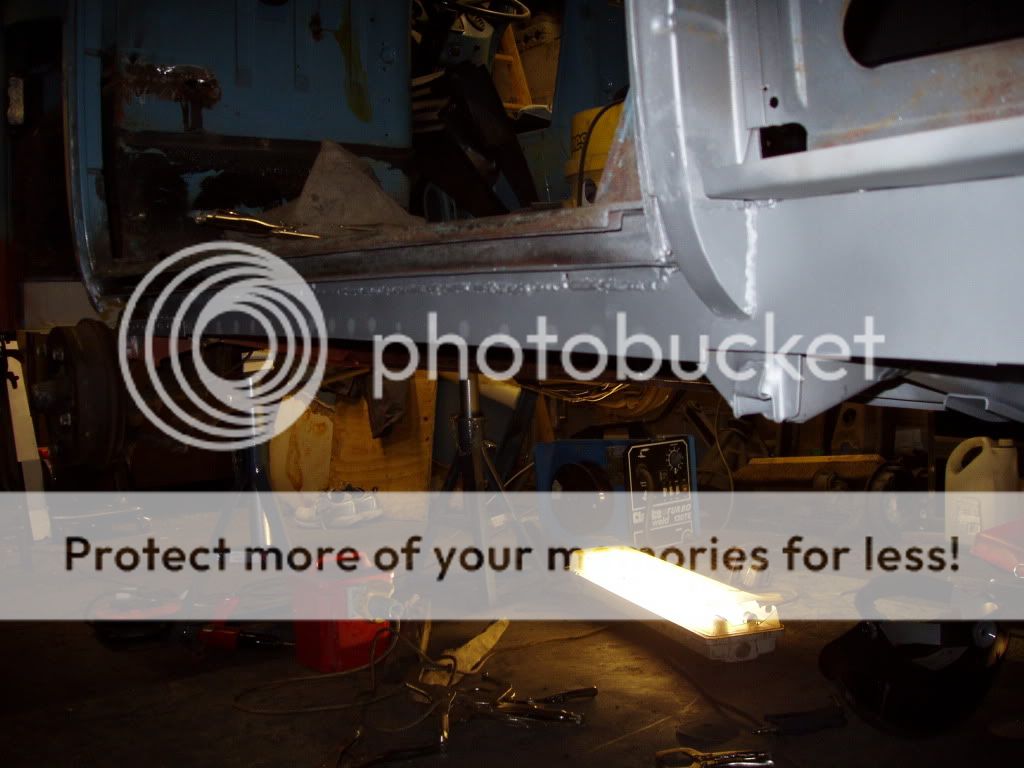
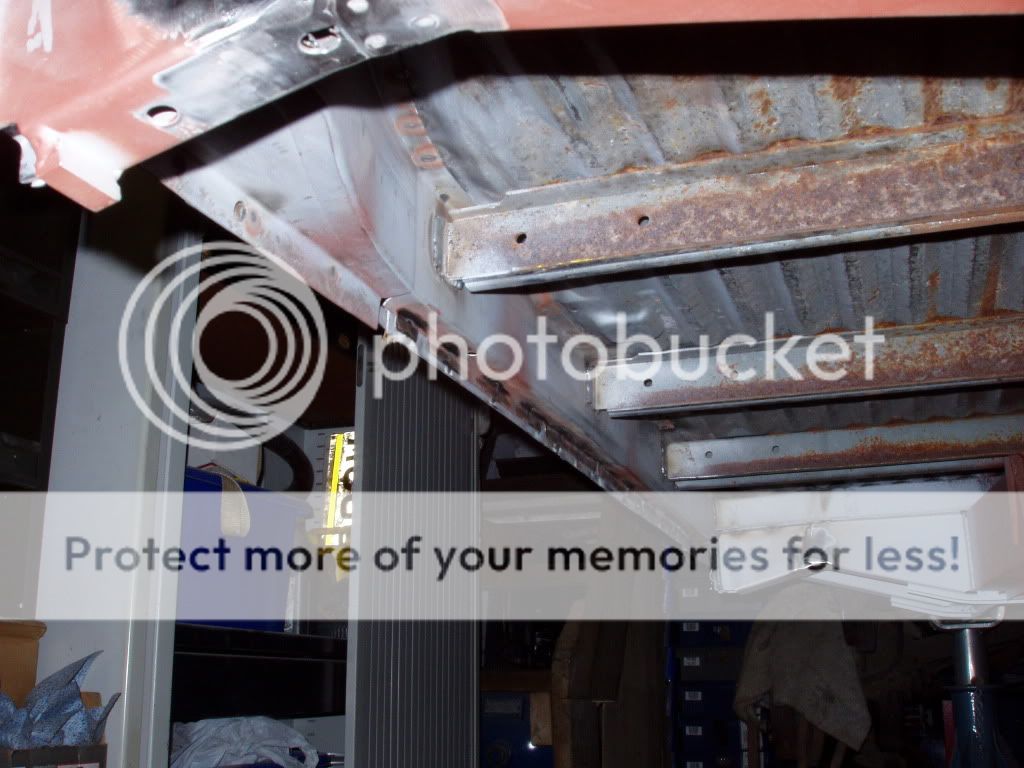
Rotary wire brushed the underside of the rear floor ready to fit the new top hat sections.

P6160074.jpg


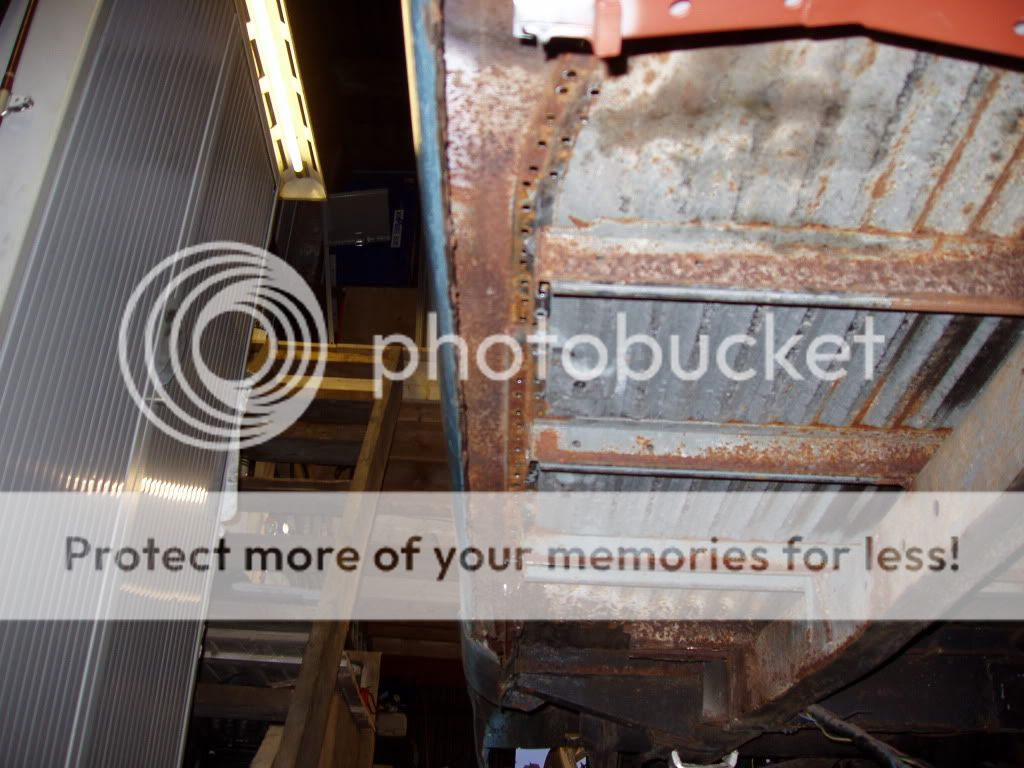
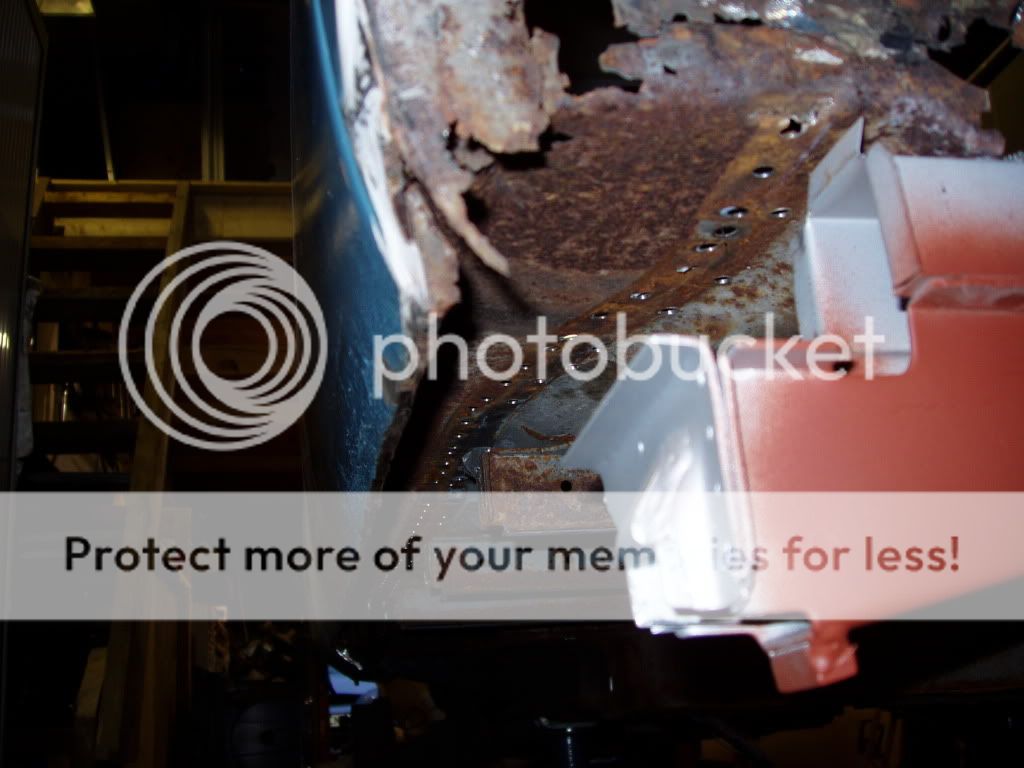
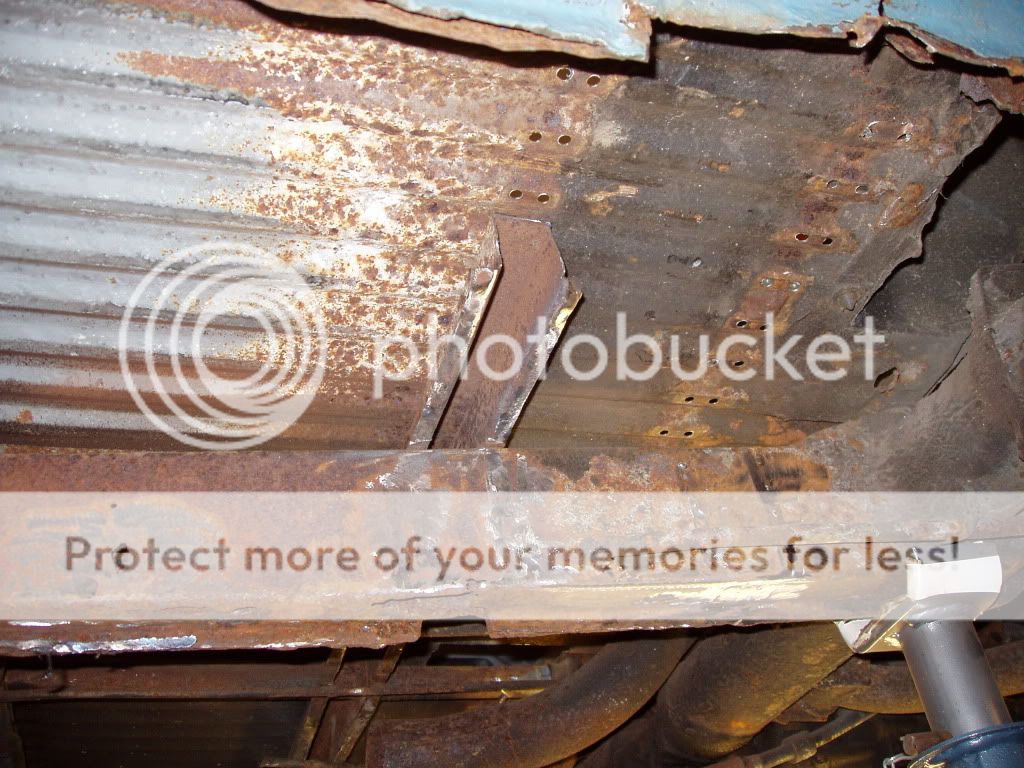
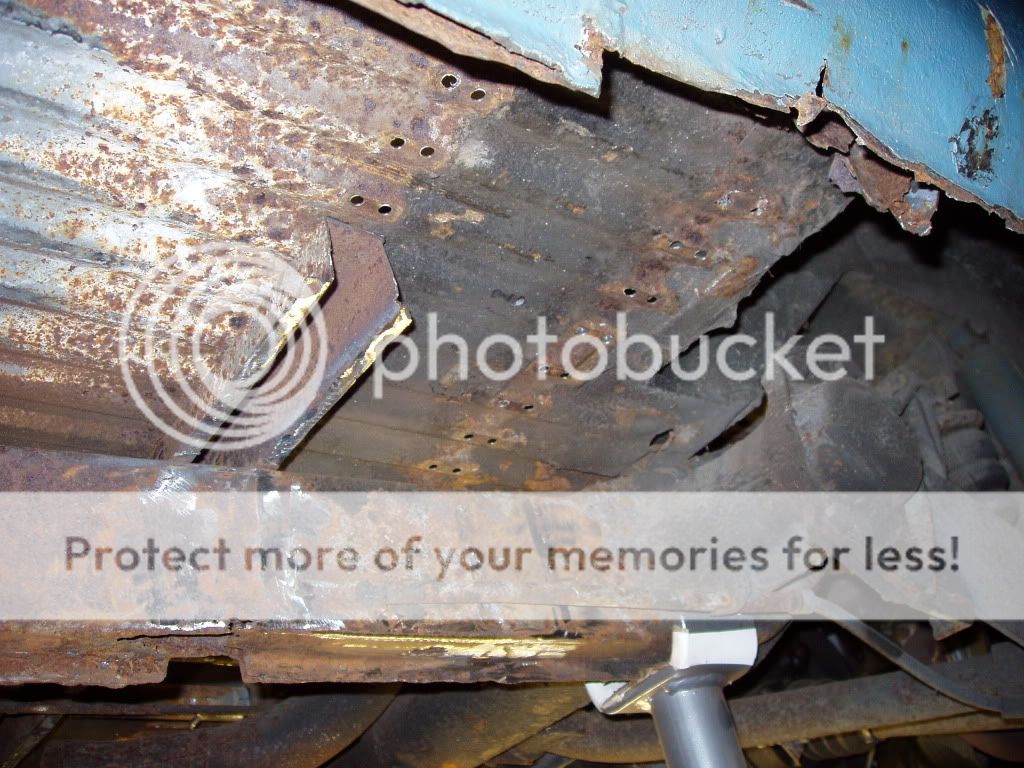
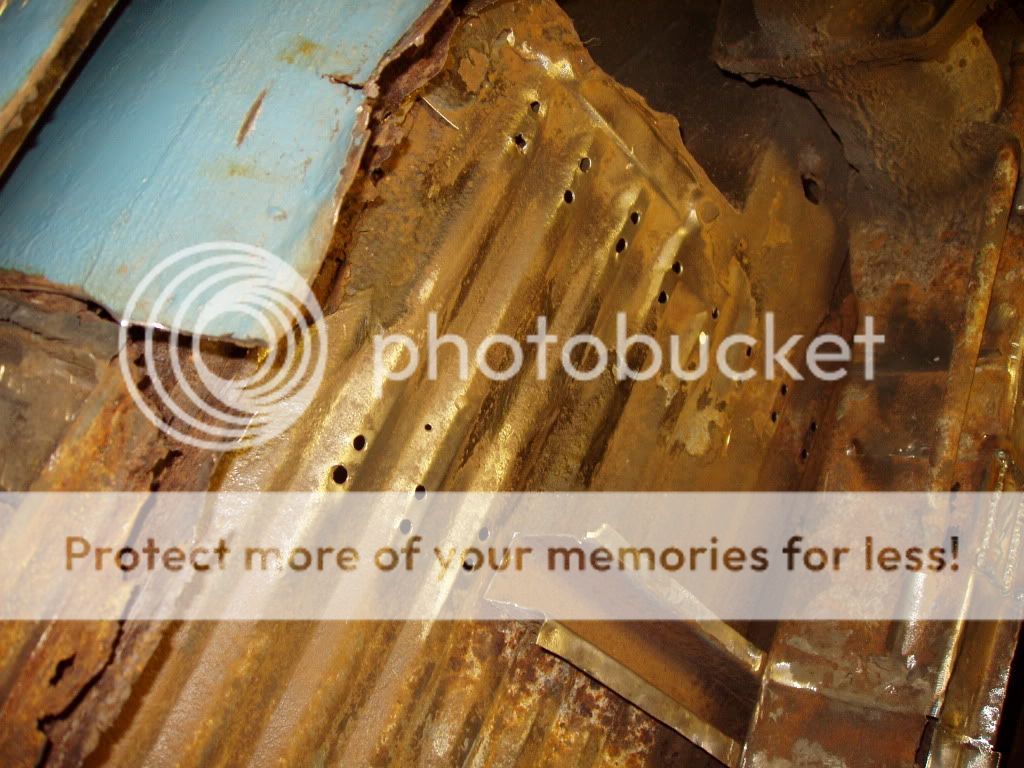
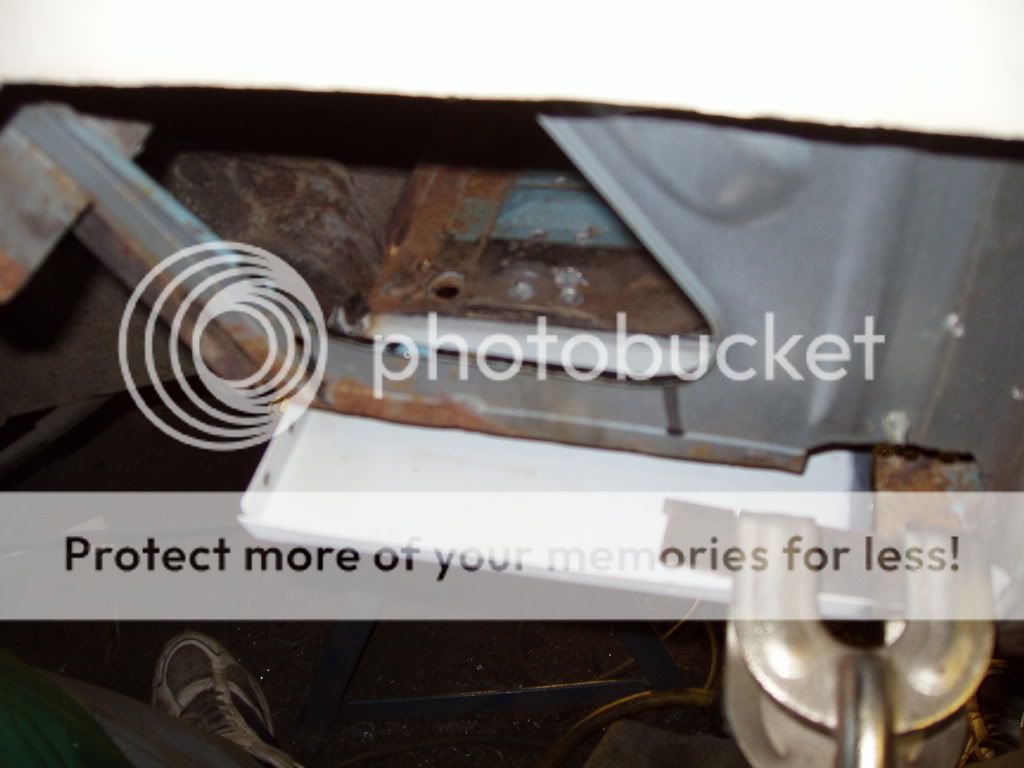
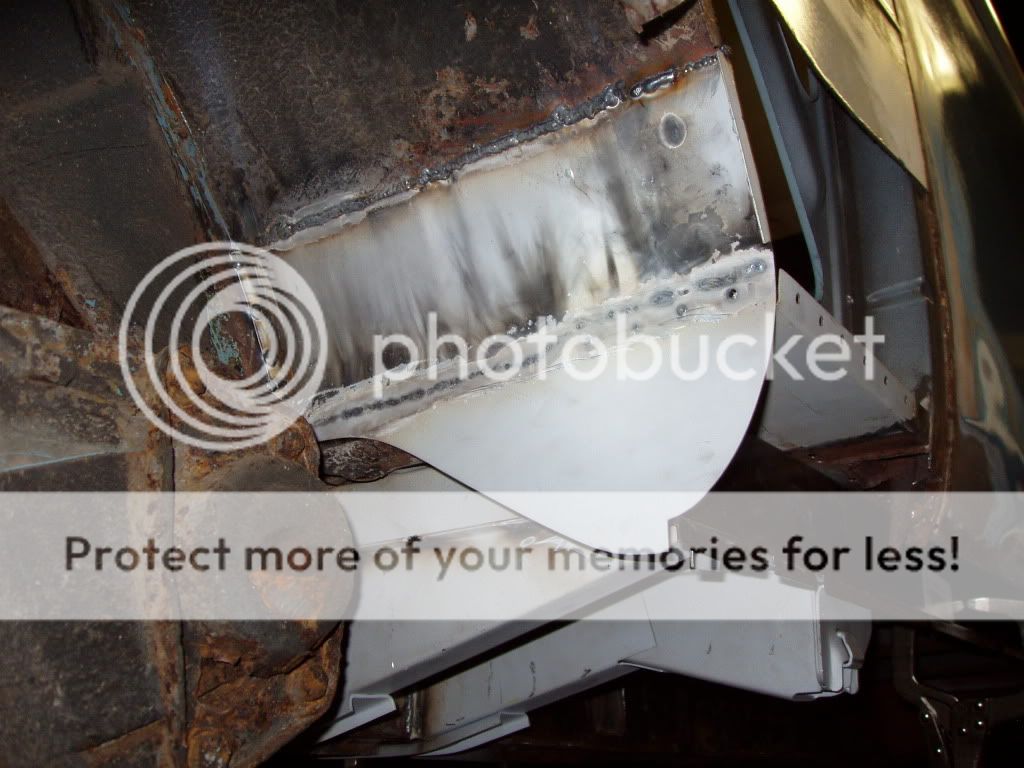
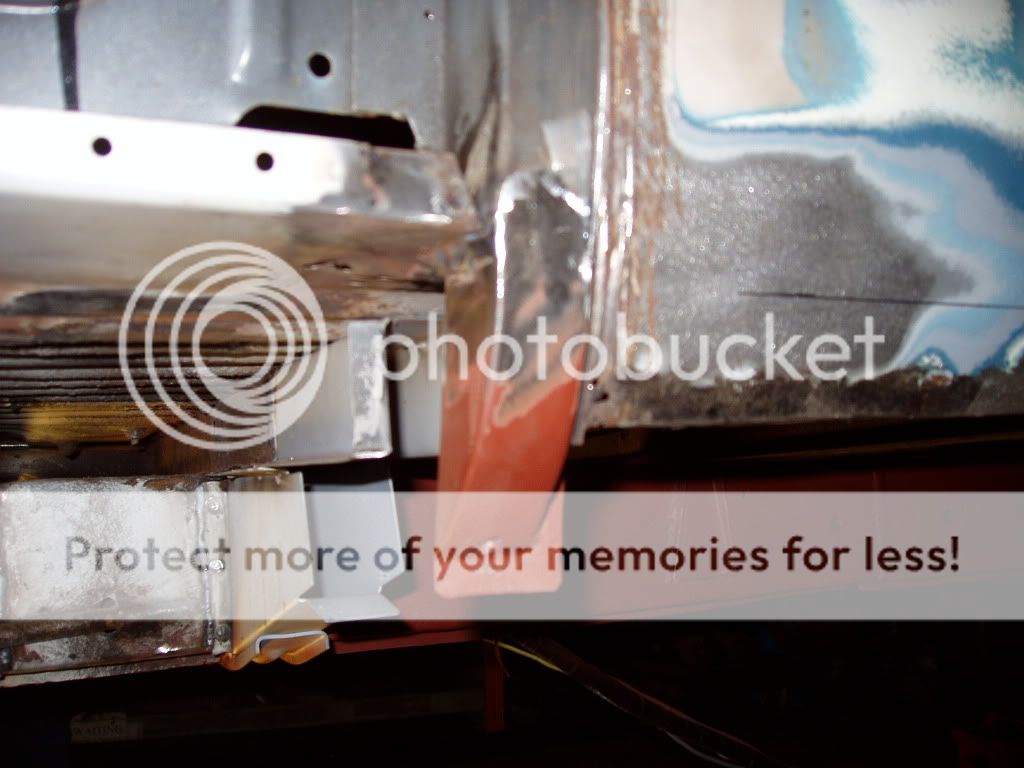
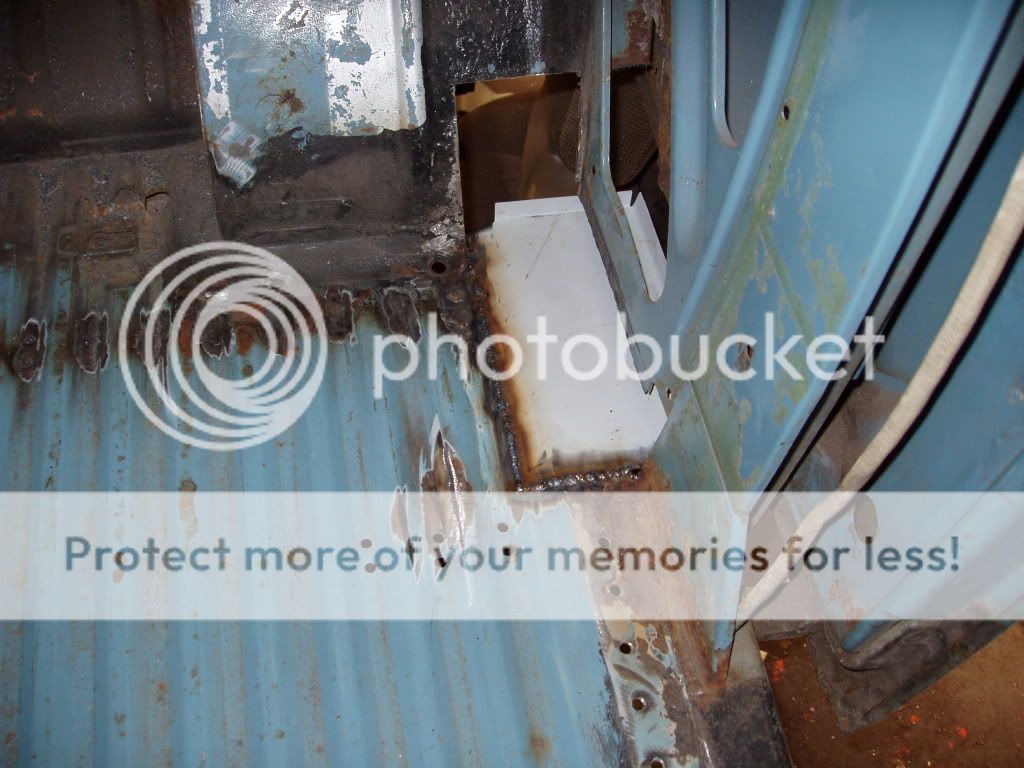
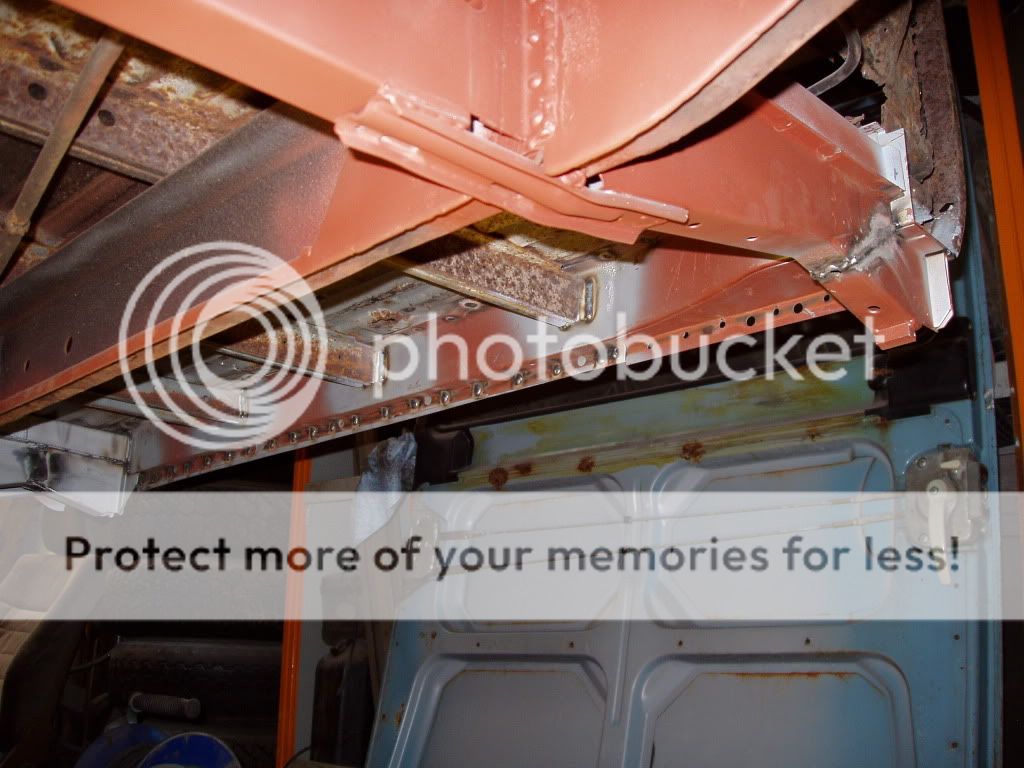
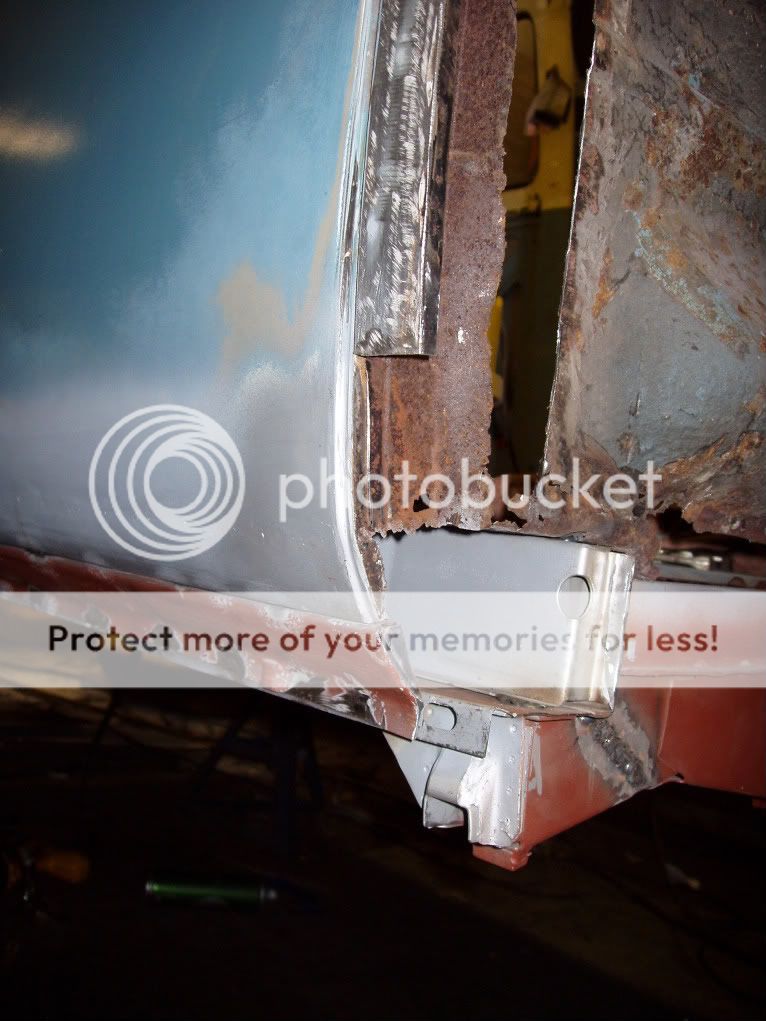
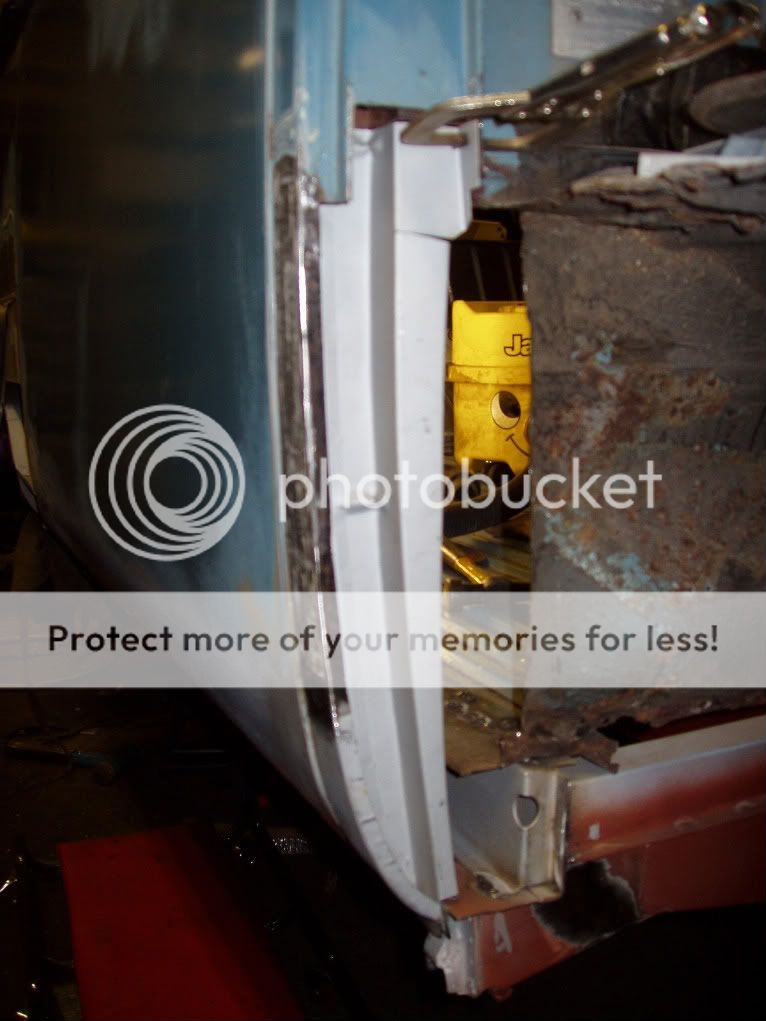
Removed some rotton floor section in the rear corners where they meet the rear arches. Cut out the rotton area of the inner rear wheel tub front closing panel ready for new metal.

P6230082.jpg

P6230081.jpg


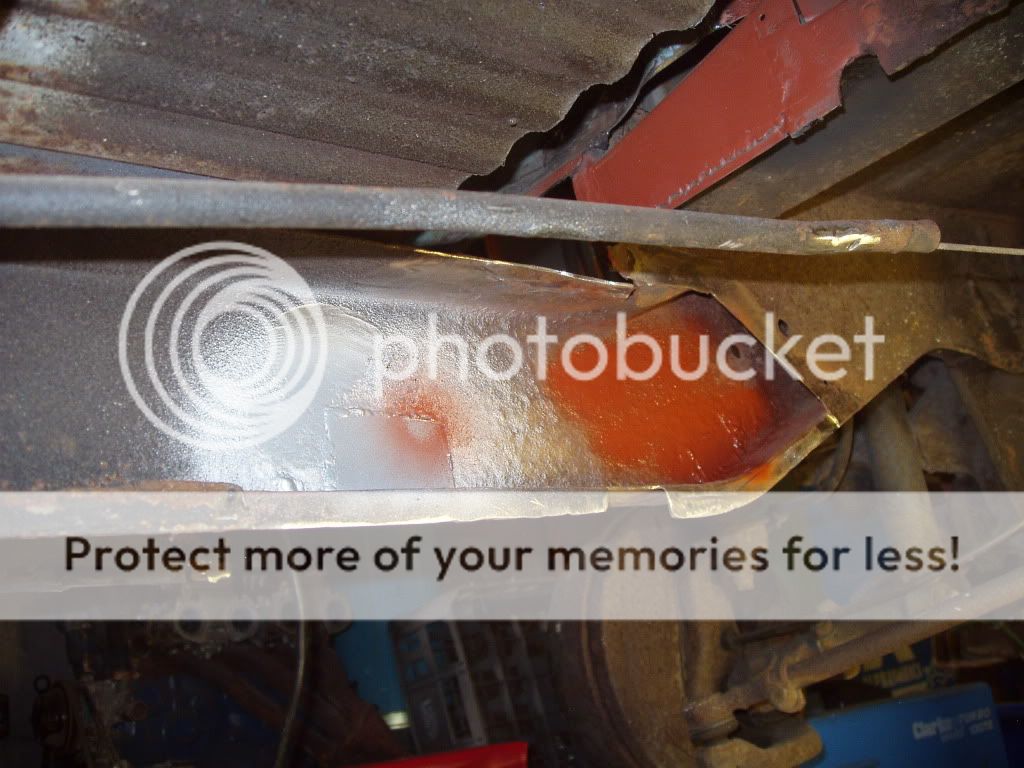
The section of floor removed above the chassis was to gain access for a repair on top of the chassis.

P6250089.jpg


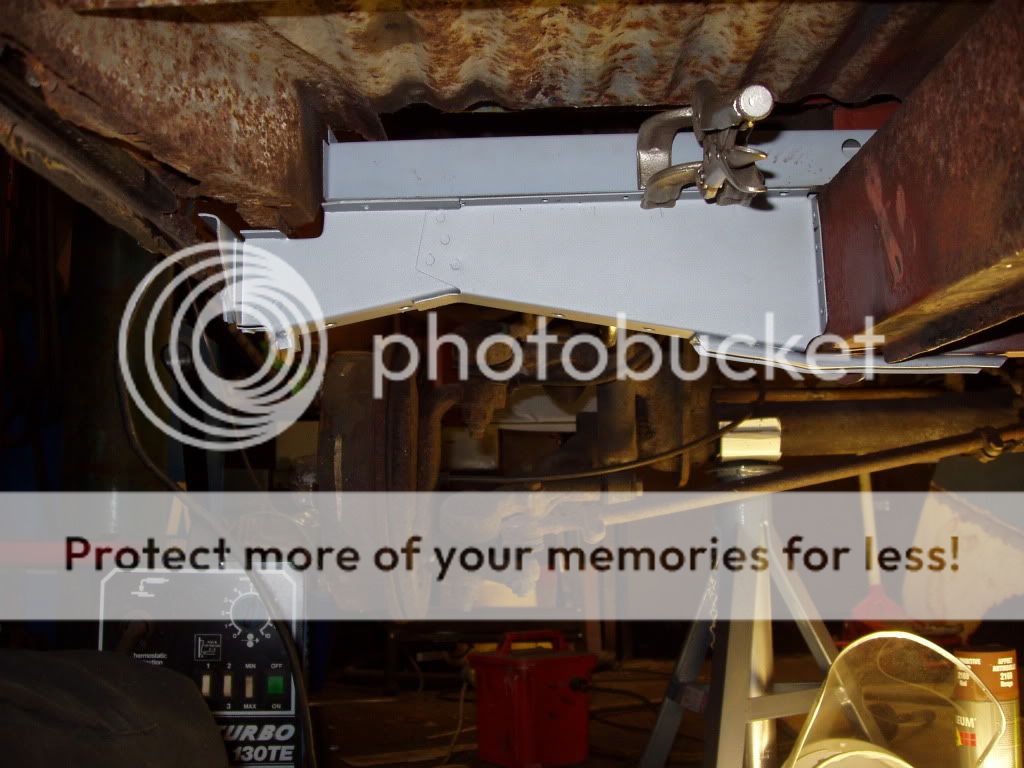
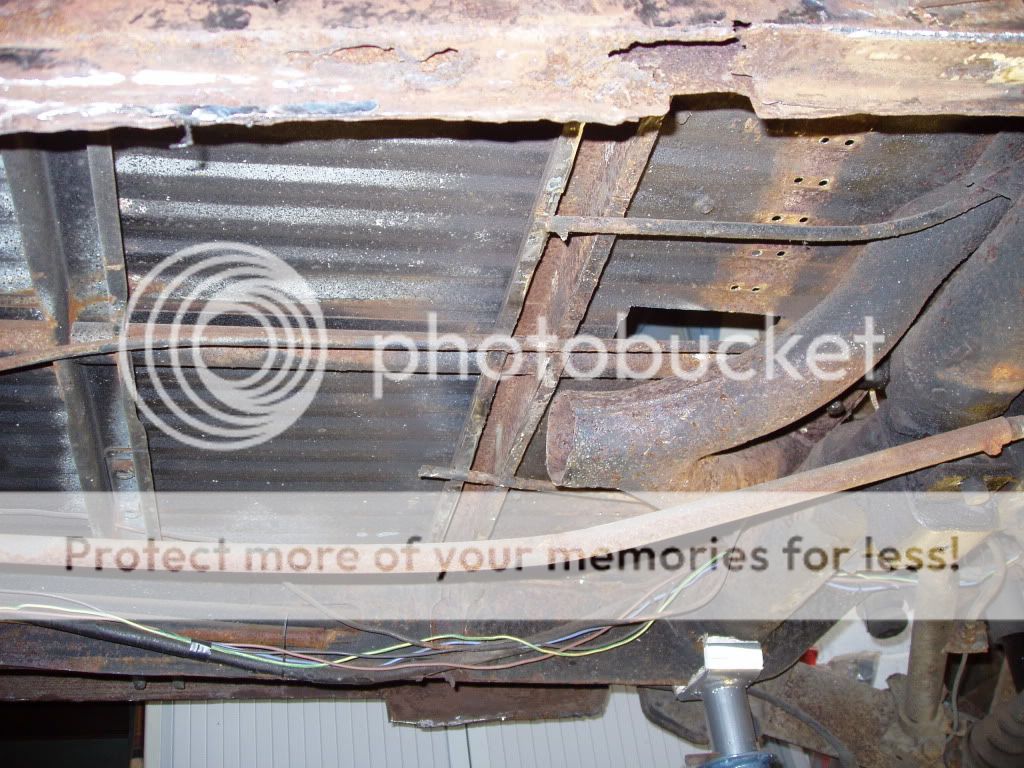
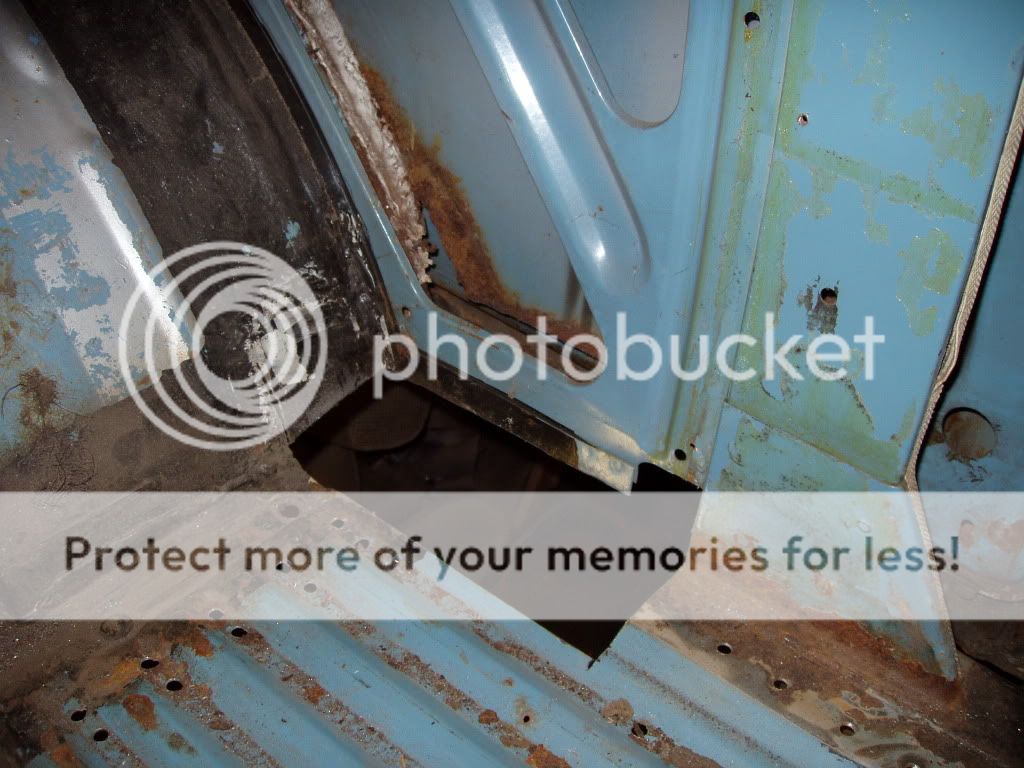
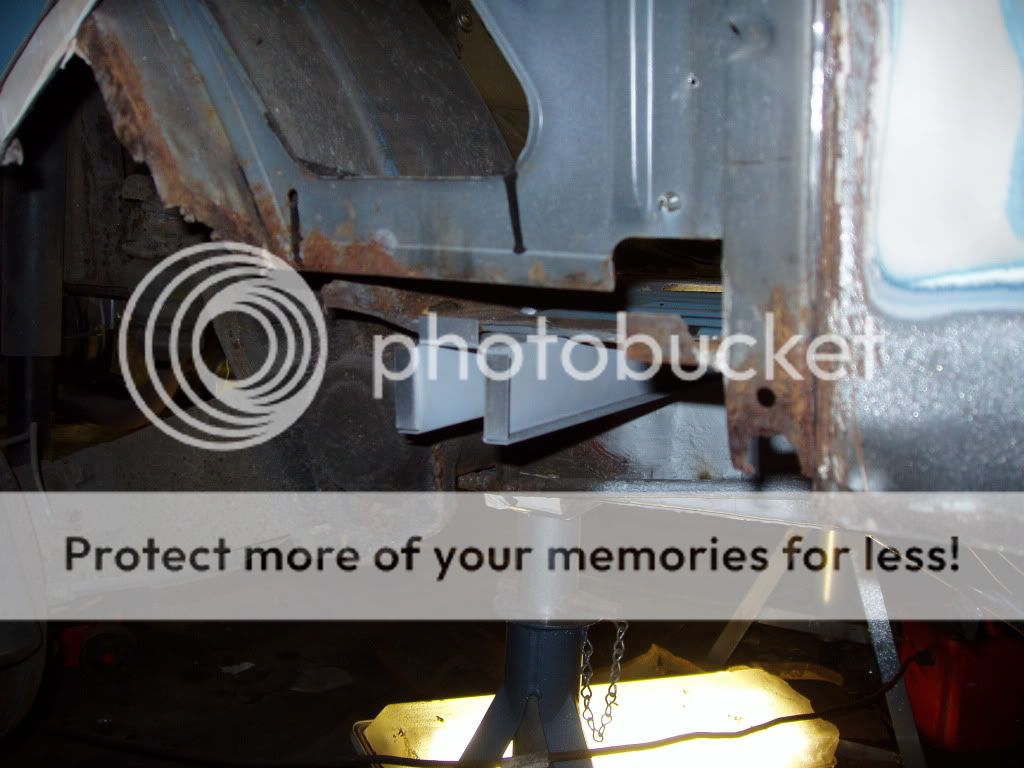
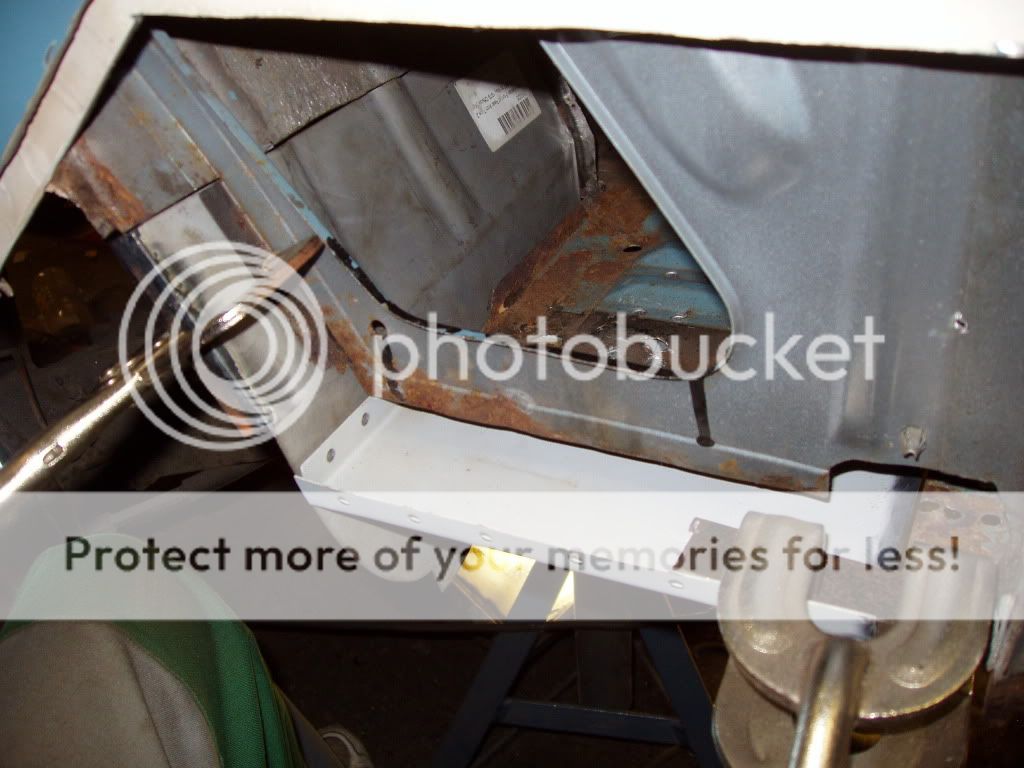
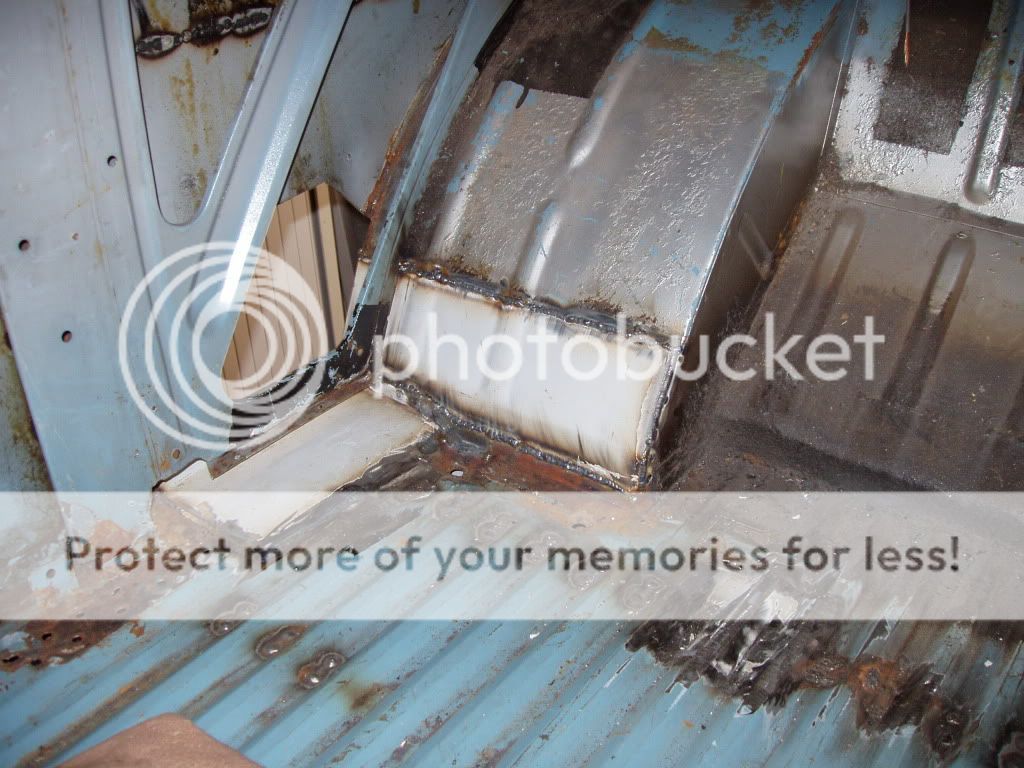
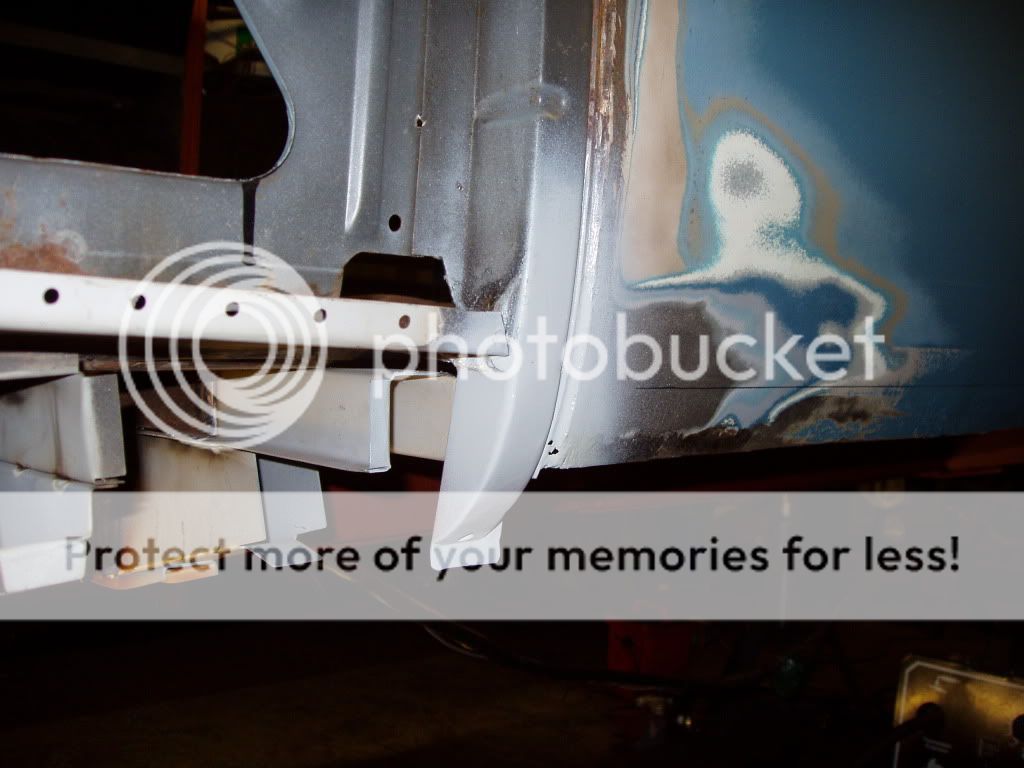
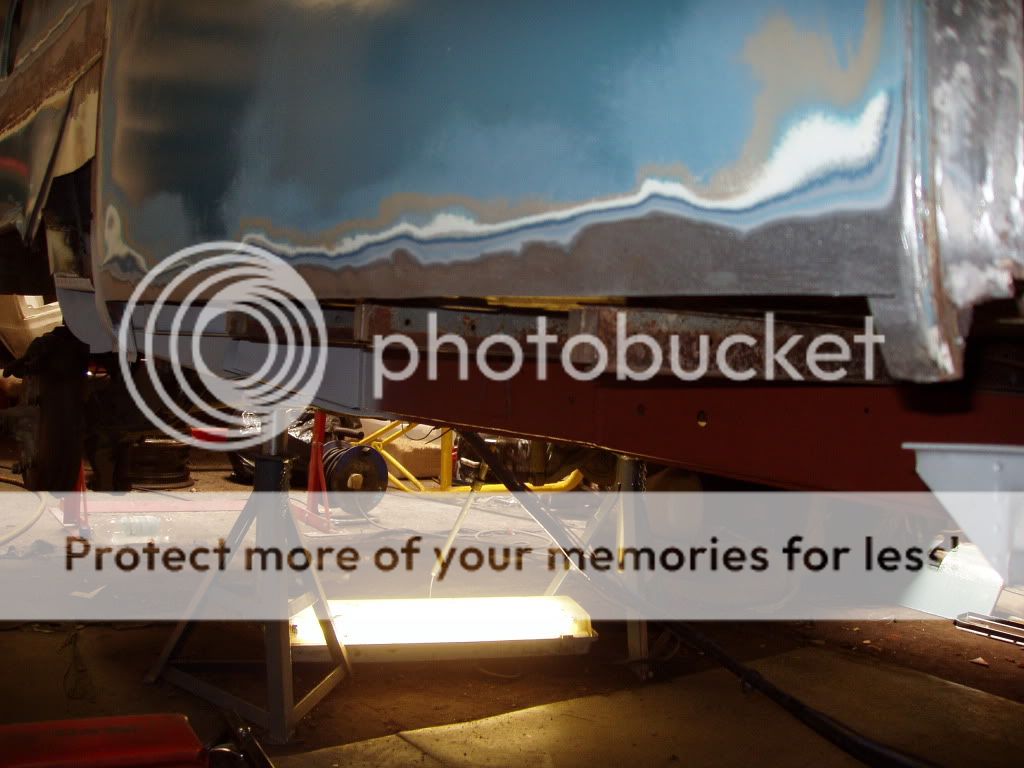
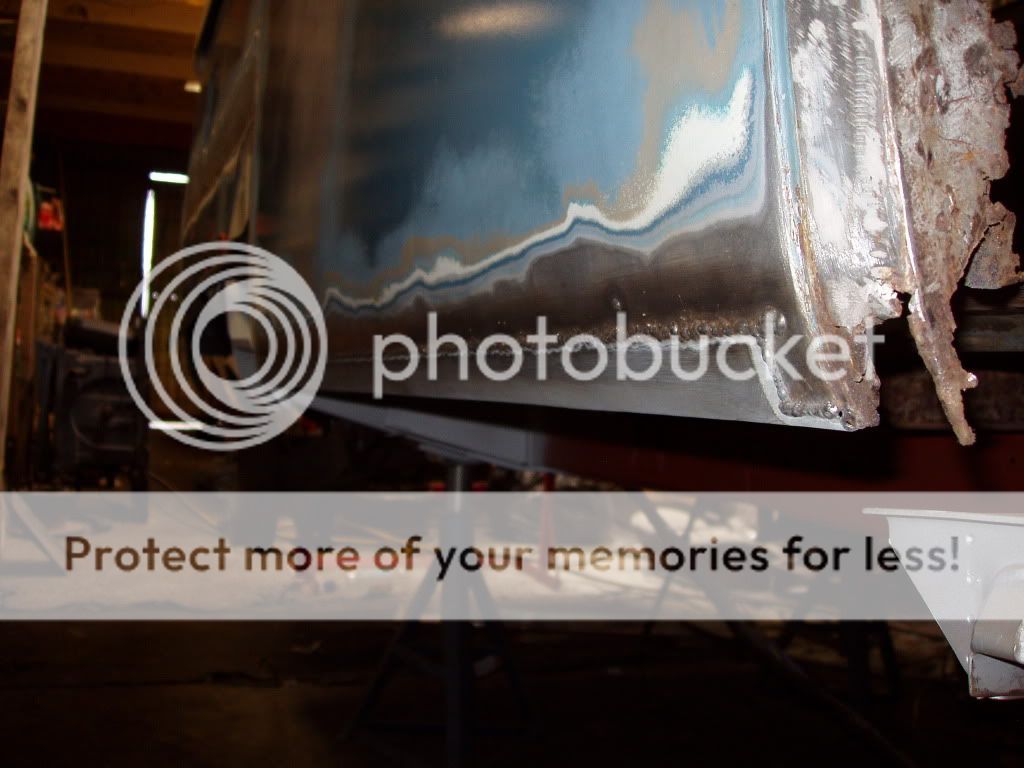
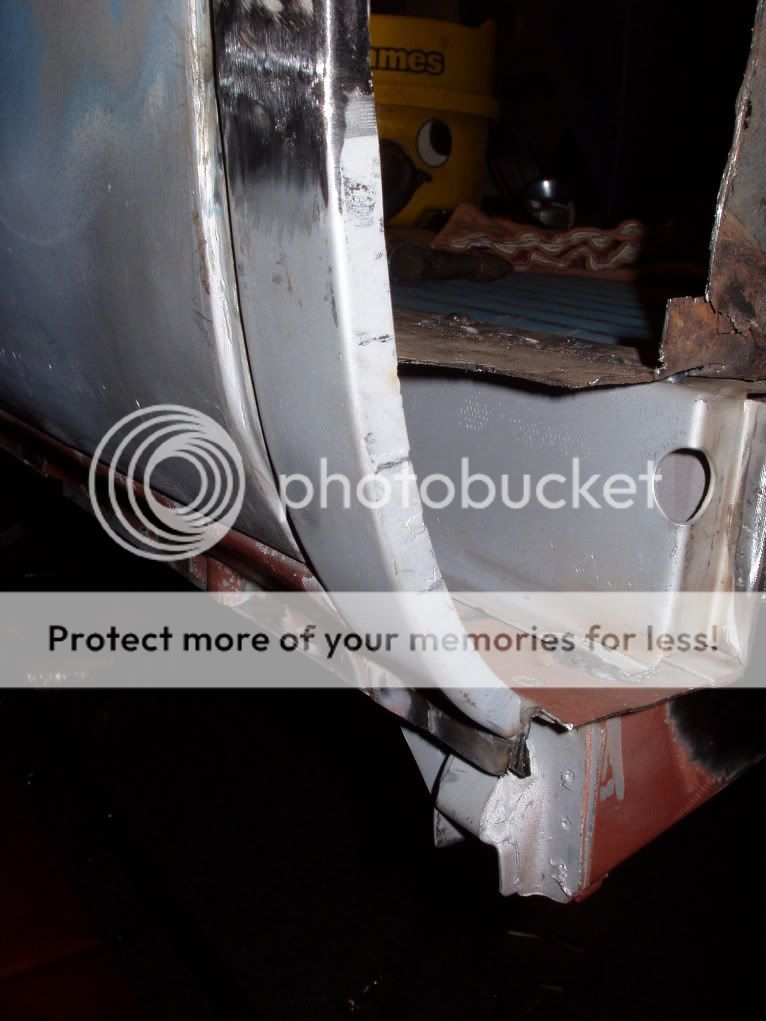
Cut out some of the rear arch to give better access to the rear floor and inner arch area and position the new rear most top hat section.

P6240084.jpg

P6240085.jpg


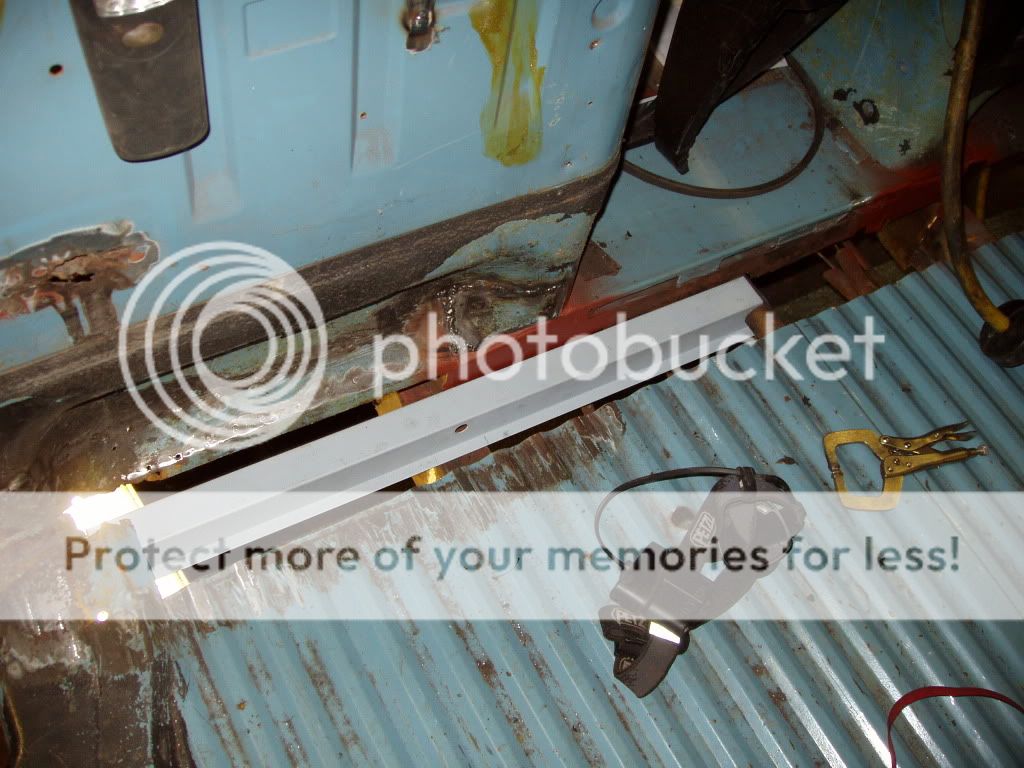
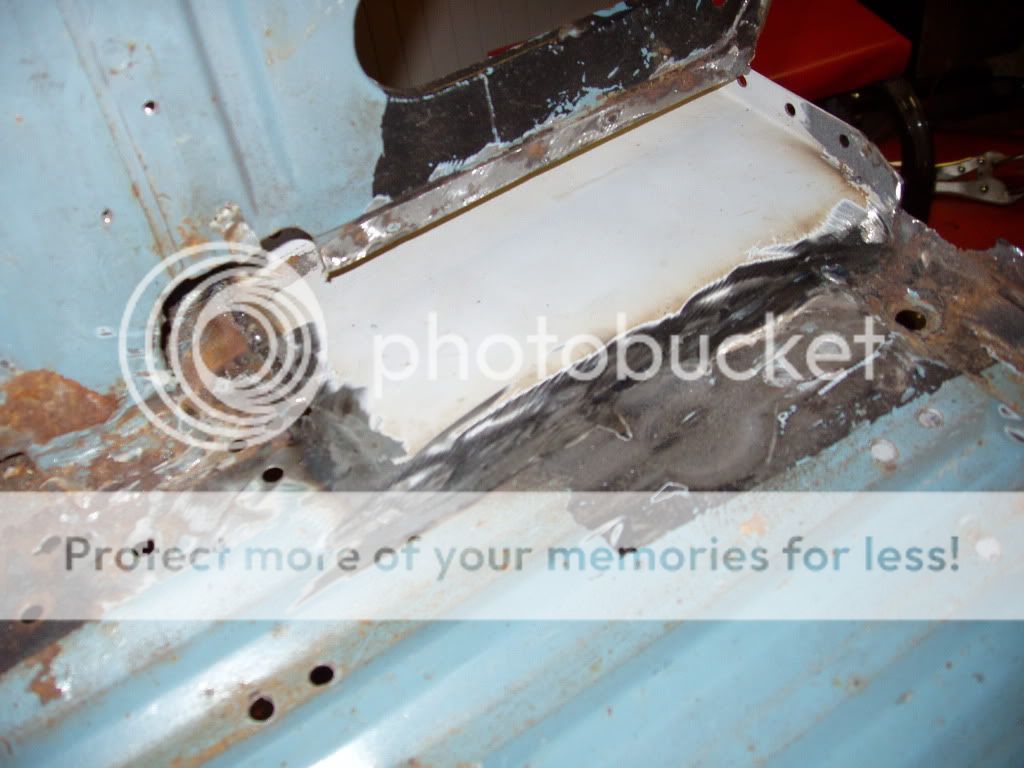
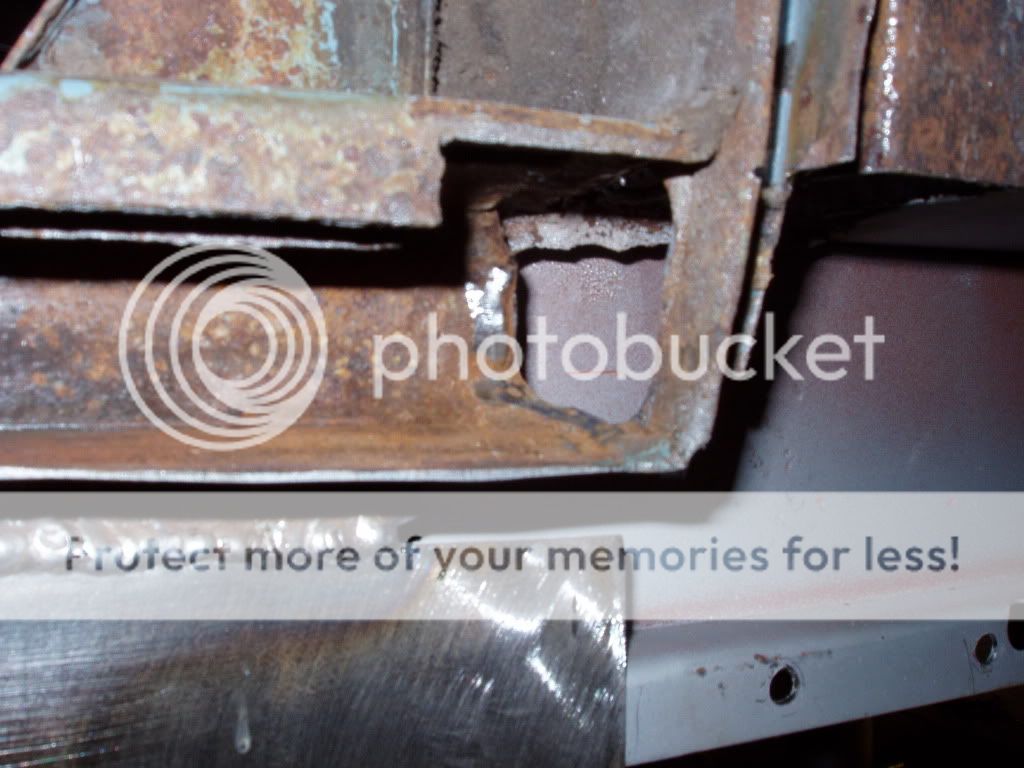
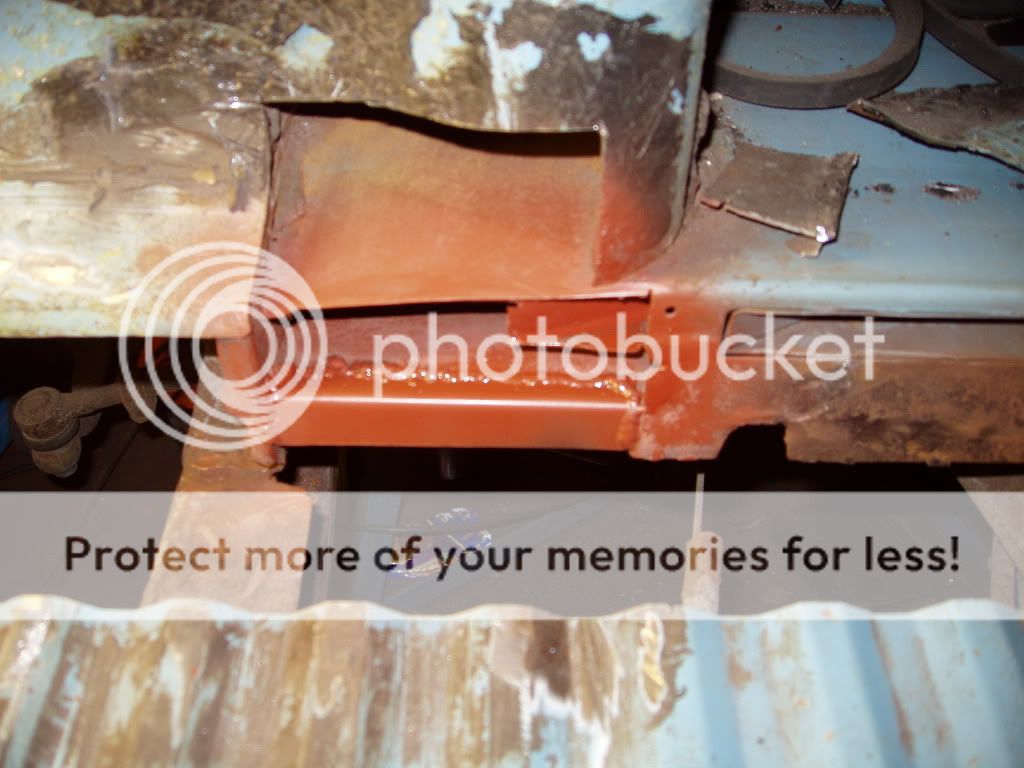
Made and fitted new rear floor sections.

P6250086.jpg

P6250087.jpg

P6250091.jpg


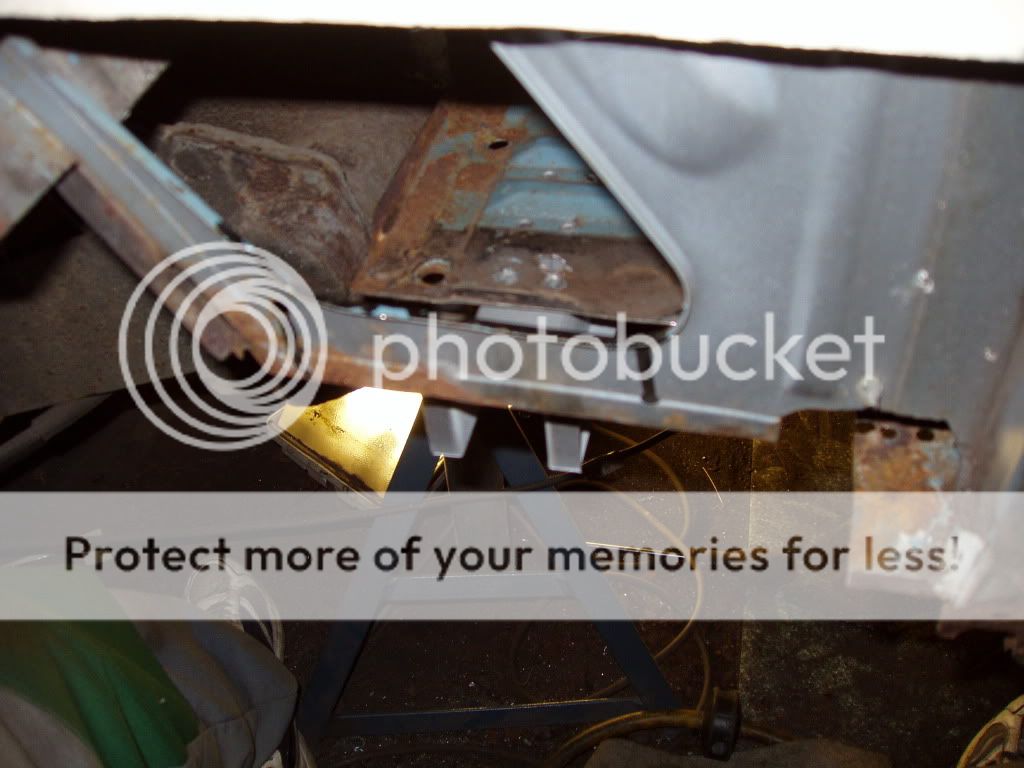
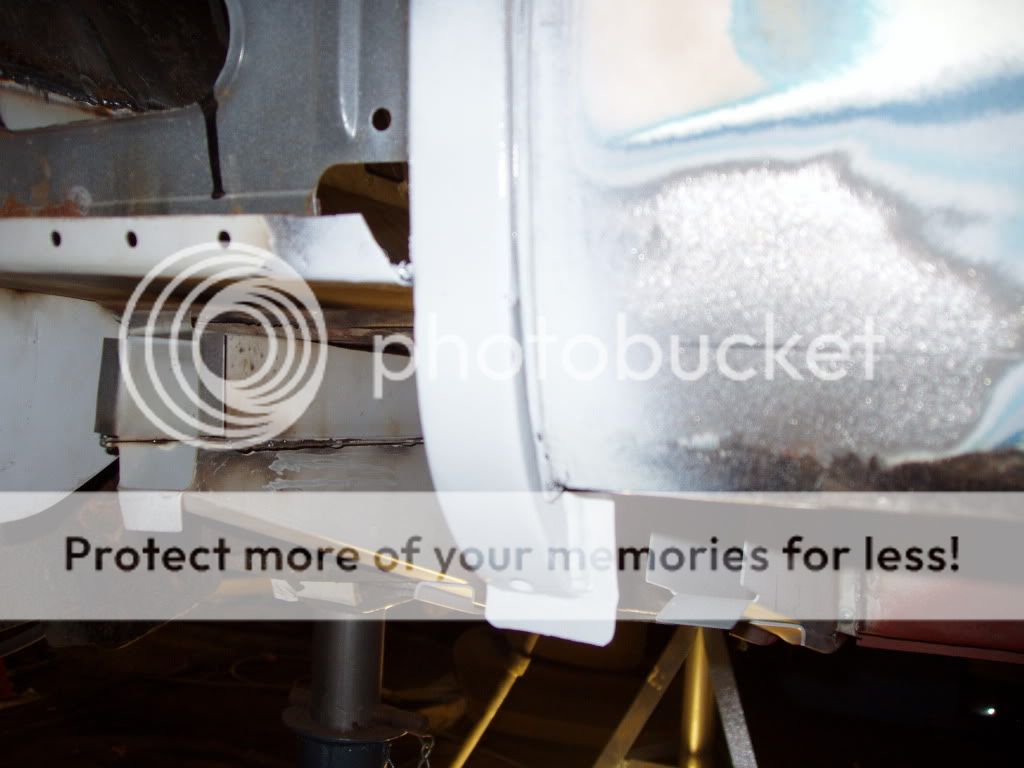
New inner wheel tub front closing panel checked with new floor section.

P6250088.jpg


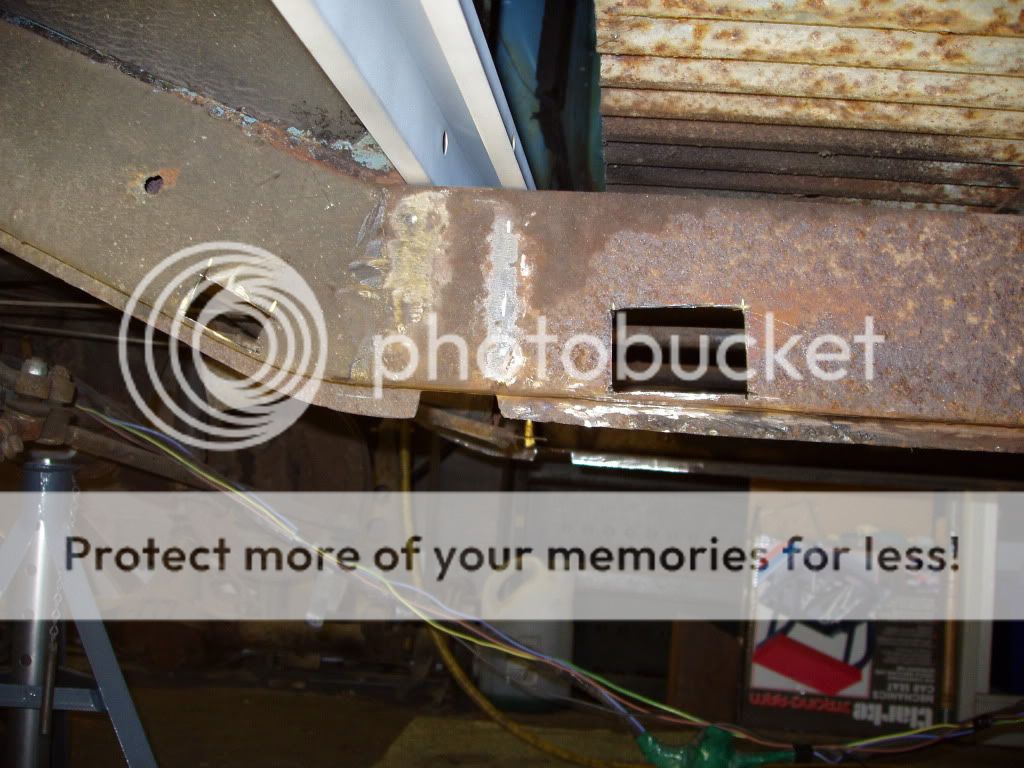
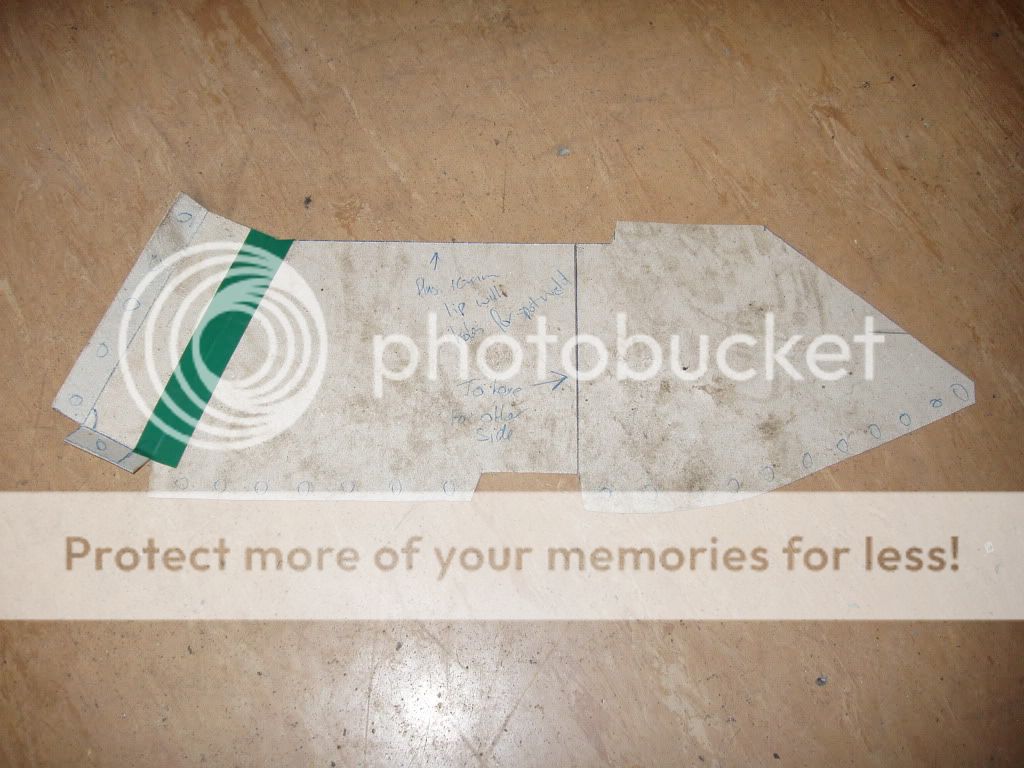
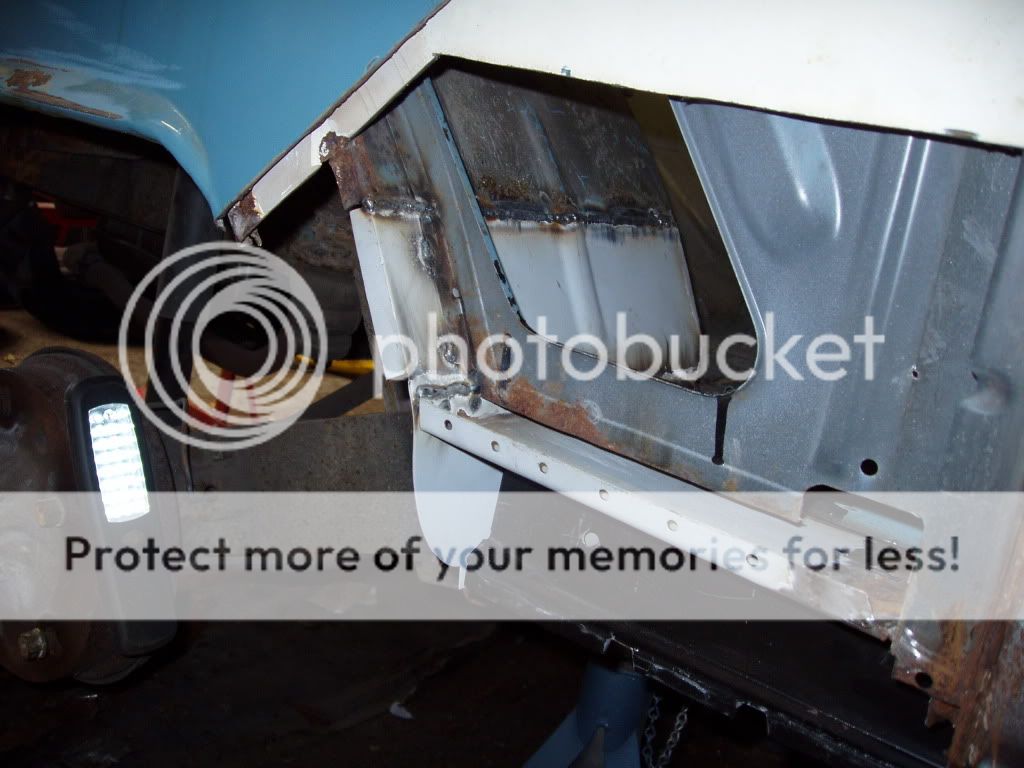
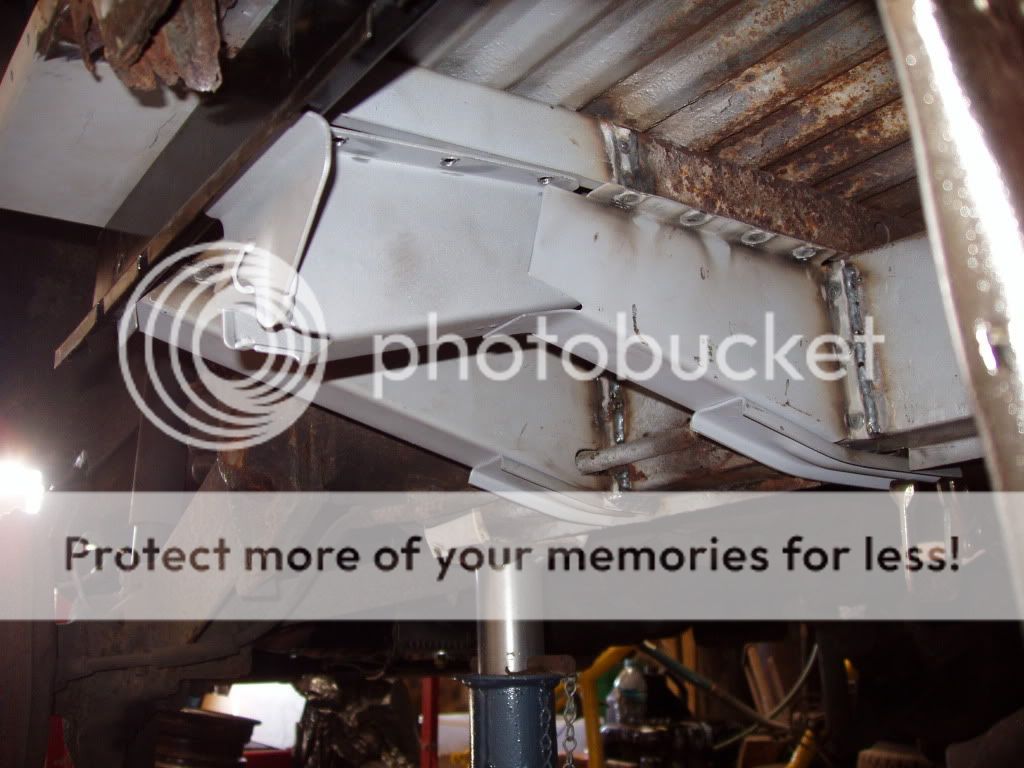
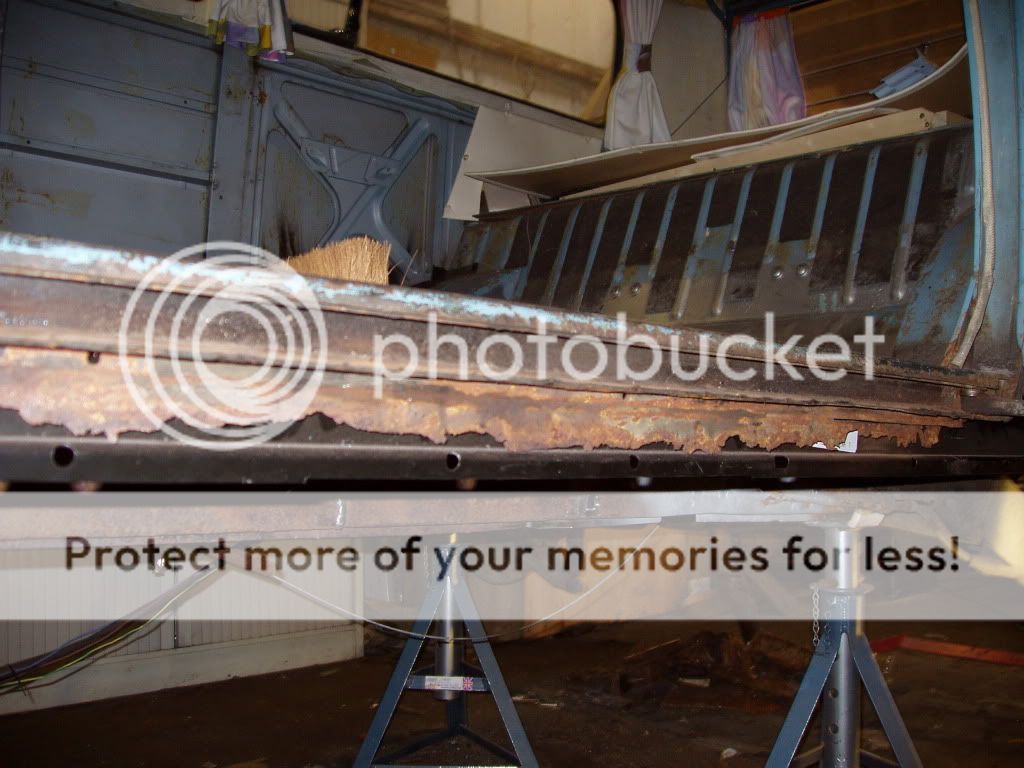
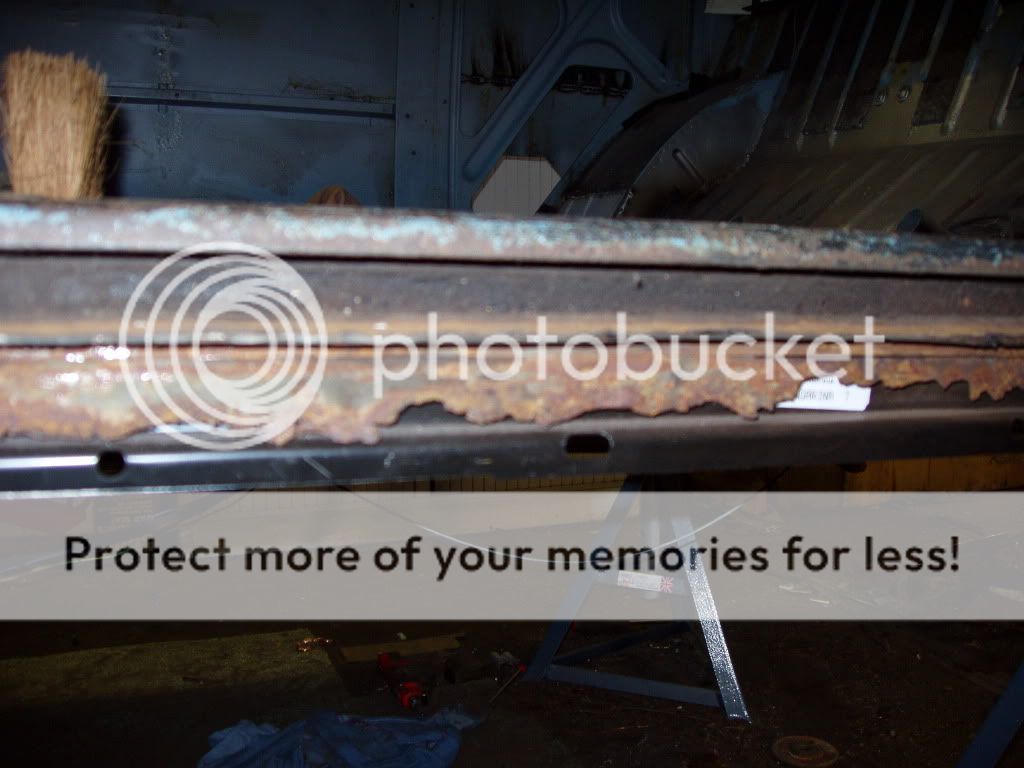
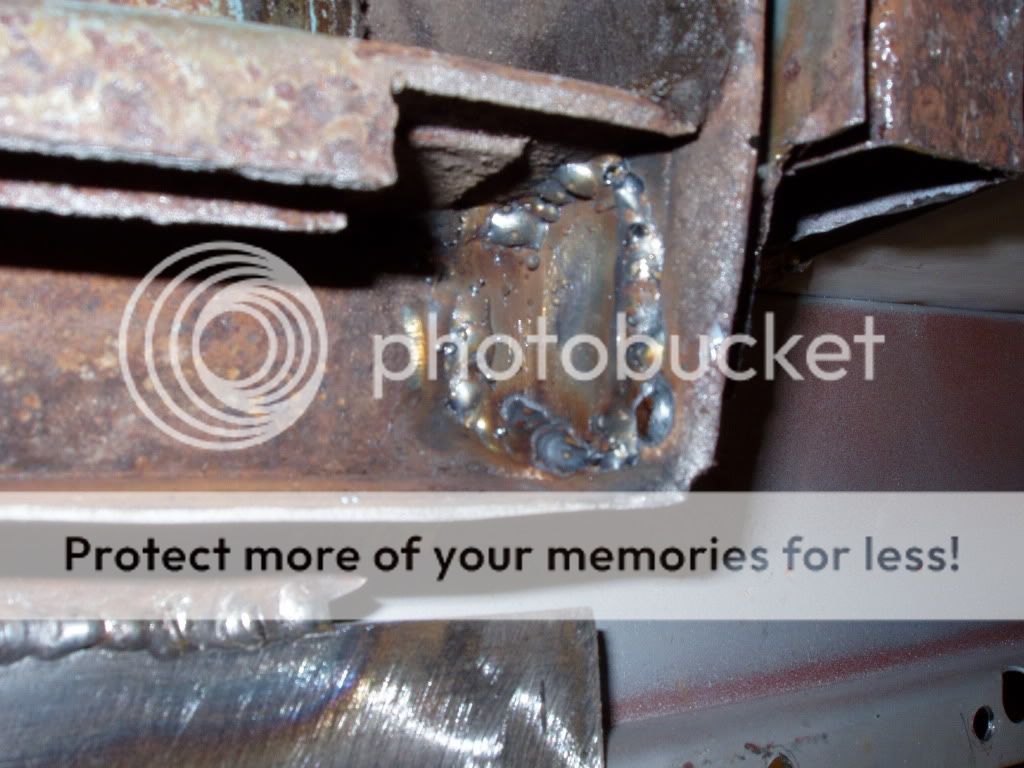
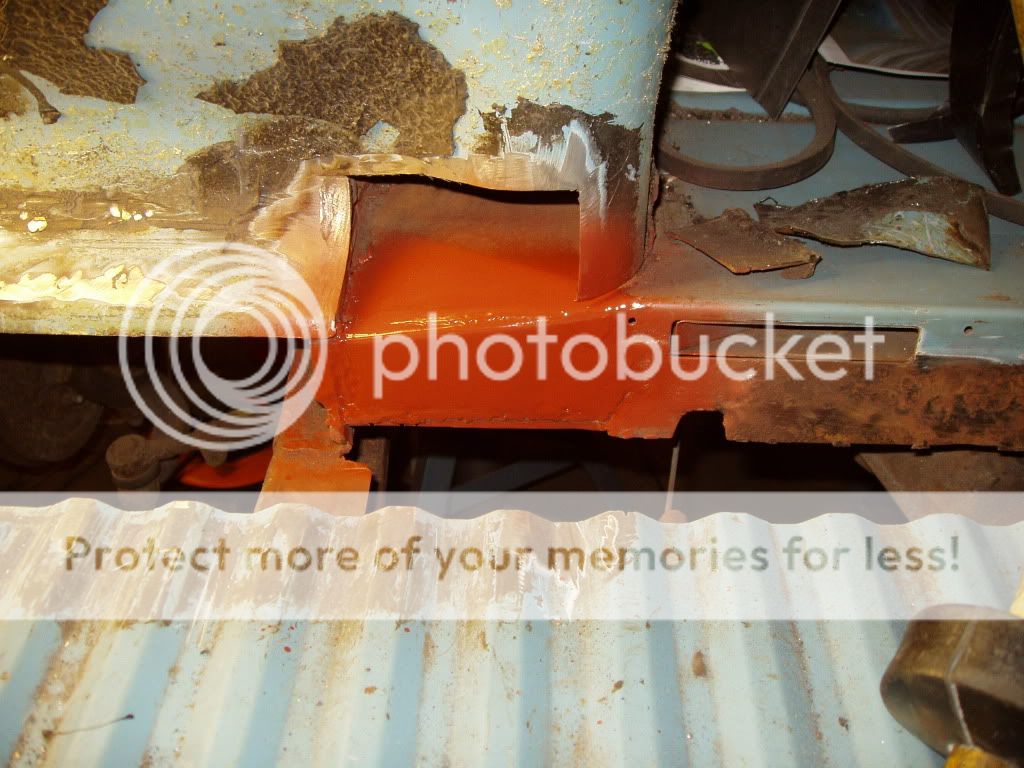
Measured and marked a new piece ready to be made for the bottom of the middle panel to accept the new outer sill (the previous bodger cut the lip off that the new sill welds to).

Next thing is to check the alignment of the new outriggers and top hat sections against the new inner sill!
 
Firstly a quick photo of the inner arch repair where it meets the floor corner.

P7040095.jpg

P7040096.jpg

P7040097.jpg


The top hat sections and rear outrigger are now all on and welded.

P7030092.jpg

P7030093.jpg

P7030094.jpg


Sill offered up ready for repair to C post.

P7040099.jpg


Inner sill on n/s positioned and the rot cut out from the middle sill so i can keep the original door track.

P7050101.jpg

P7050104.jpg

P7050106.jpg

P7050108.jpg


New heater pipe fitted.

P7070109.jpg

P7070110.jpg


New rear cross member fitted.

P7070111.jpg

P7070114.jpg
 
Hello all.

I fitted the piece of floor back in over the rear top hat section where it was welded around the gear linkage tube and filled all the spot welds.

P7110119.jpg


I made and fitted a new section of floor in front of the n/s rear wheel arch and replace the end of the top hat above the rear outrigger/jacking point.

P7110120.jpg


And also fitted the new repair panel to the wheel arch and fitted the new outriggers and jacking point.

P7200122.jpg


I added new metal to the middle sill/door track.

P7200124.jpg

P7200125.jpg


And welded in the new inner sill.

P7200127.jpg

P7230150.jpg


Then did some repairs to the end of the door track.

P7210128.jpg

P7210129.jpg


And repiared the C post.

P7220130.jpg

P7230133.jpg

P7230141.jpg


I then removed the damaged area at the bottom of the middle side panel where someone had cut of the lip during a previous attempt at repair.

P7110121.jpg


And fitted the new panel i made so the new sill could be welded on.

P7230135.jpg

P7230143.jpg

P7230148.jpg
 
Cheers Loxy ;)

I fitted the new middle and inner sills to the o/s and the rear jacking point last night.

P7280163.jpg


I then set about repairing the B post.

Before:-

P7260159.jpg


After:-

P7280162.jpg

P7280161.jpg


I then cut and prepped the inner B post ready for welding tonight.

P7280165.jpg
 
-- I'm getting flashbacks here :party0010: --

Your bus just has a little bit more work to be done on than mine :cry:

Hope you hang on till the end! Gonna look nice I bet.
Nice work.
 

Latest posts

Top