71 Dormobile D4/6

Early Bay Forum

Help Support Early Bay Forum:

This site may earn a commission from merchant affiliate links, including eBay, Amazon, and others.
Yes those monkeys are destructive. I had actually taken the precaution of removing my wipers and mirrors and folding the ariel down but it never occurred to me that they might take a shine to go-faster stripes. Must have cost me at least 3mph top speed on the way home - lol.

I think it was revenge on their part because we scared them. They were walking on the roof, which in a dormy has windows, so they were shocked when there were suddenly faces looking at them from underneath. (They went totally ape - hehe).

Yes the van is on French plates. When I moved out here back in 1988 I brought it with me, despite it being right hand drive. I thought of selling it before moving out here but it would only have fetched around £800 at the time. For that money I could not have bought anything in good condition out here. In 1988 even a renault 4 in good condition fetched £1000 out here. I'm glad I kept it, even though the steering wheel on the wrong side can be a pain at times.

Paul from VW speed shop has just emailed me to say he will shortly be sending me my engine kit. I'm really looking foreward to the build. I have never done one before so it will be a challenge. I shall post some pictures of progress as I go.
 
As promised, heres the engine build.

First I weighed each of the reciprocating parts. The digital scales are on a piece of plate glass perfectly level and i made reference marks on the scales surface so each component was in exactly the same place. This way repeated weighing gave consistent results.

Its amazing how little metal amounts to half a gram. The actual weight is not important. Just find the lightest of the set and machine the rest to that weight.

29.jpg


Next weigh the components in sets. Several variences can add up. With a little patience the mix n match method will even out any variations. Then I marked all the sets with felt tip pen to keep them in sets.

30.jpg


All the components must be carefully cleaned.

31.jpg


Use an airline to blow out oilways and get at awkward places.

32.jpg


Assembling the crank gears. This was a bit trikky because you have to fit the woodruff key and then drive the gear onto the crank but the gear grips onto the crank well before it reaches the woodruff key, so pre alignment is critical. It took me two attempts to get it right.
I didnt have a piece of tube the right diameter so I used a soft brass drift tapping round and round the gear. Heating this gear before hand did not make it slide on any easier.

33.jpg


After the spacer comes the dirtributor drive. This is fragile so keep well away from the edges when gently tapping into place. Heating it with an electric paint stripping gun made it much easier to fit.

34.jpg


When fitting the conrods the manual was a little confusing. CB unitec conrods dont have forge marks to face upwards. The manual said number stamps downwards. Just as well I checked. Turns out they should be fitted with bearing retainer slots downwards, which meant my number stamps faced upwards.

35.jpg


Fitting the shells to the rods.

36.jpg


Carefully check the mating srfaces of the crankcase. Its soft metal and transport / incorrect handling can easily cause burrs which will prevent correct sealing. Just like with paintwork, fingers can be more sensetive than checking by eye. Again make sure all is thoroughly clean and blow out all iolways, nooks and crannys with an airline.

37.jpg


Putting the works in the case. Make sure all is well oiled.

38.jpg


Making sure everything is in place including the cam end plug and that the timing marks are lined up.

39.jpg


Then add the other half of the case. The cam followers can tend to slide out as you fit the second half despite putting a little grease behind each flange.

40.jpg


Test fitting the flywheel to set endfloat with a dial guage. I shall have to re-do this because using the three thicker spacers in the packet still gives me 5 thou endfloat so I have ordered a second packet of shims so I can replace the 30 with a second 36.

41.jpg


I could not read the sizes on some of the shims so a micrometer came in handy.

42.jpg


Next I fitted the pistons, arrows toward flywheel.

43.jpg


Having trial fitted the barrels and cylinder heads I could cut the studs to the right length. Fitting only the lower studs gave me support for fitting the barrels whilst still letting me remove the piston ring compressor easily.
Ring gaps all in upper half of piston, oil control at top.

44.jpg


Fitting the widemouth pushrod tubes needed for ratio rockers.

45.jpg


Showing the demi hemi cut on the cyl heads.

46.jpg


Ratoi rockers have slipper feet and consequently the adjuster is at the pushrod end. Bolt up shafts are a must and rockers must be shimmed to correct alignment and freeplay.

47.jpg


Because of the slipper feet on the ratio rockers, lash caps must be fitted to the tops of the valve stems.

48.jpg


Yesterday, with the help of an adjustable pushrod, I cut the pushrods to length and fitted them. Clearances are done and rocker covers are on.

Well I'm up to the point where I need to take the old engine out to recover the parts I am reusing, like all the tin, which will need rubbing down and re-painting. For unknown reasons I previosley painted all the tin in a sort of military green and I shall be going back to standard black now.
 
WOW :shock:

Triffic job there Trikky2 - nice pics and good explantions.

Can't wait to see the finished article :lol:
 
Lovely van and fab history! 8)

My first intro to bays was c1969/70 at the tender age of 3 or 4. My parents hired a brand new Dormy D4/6 and we went to Bristol Zoo for the day. There were no photos to record the occaision, and I've always wondered whether that van has survived. :)
My parents went on to buy a new Danbury in '72. My most memorable and best holiday to date was in our van when we toured Scandinavia in '74. I still have the music cassette that was played over and over on that trip, on a radio like yours, Trikky2. I still play that tape from time to time, and it takes me straight back to that holiday! :lol:
Sadly my parents parted with the Danbury in 1988, much to my protestations. In hindsight I wish I'd nagged dad a bit more to keep it or to let me take it on! :roll:
 
Danbury Doug - what a nice story (apart from the end) and its always good
to have something that helps you go back in time and remember things as they were :)

At least you 've got a bay now so you should be able to reminisce even more :wink:
 
gninnam said:
Danbury Doug - what a nice story (apart from the end) and its always good
to have something that helps you go back in time and remember things as they were :)

At least you 've got a bay now so you should be able to reminisce even more :wink:

Yep, it's nice looking back from time to time, isn't it gninnam. :D
I'm trying to pursuade dad to scan some of his slides so that I can put pictures up at some stage of his bus when it was new, including one he took of a rather battered back end when the bus was less than a year old, after an encounter with a lorry in Spain that had suffered brake failure! :shock:

My third bay will be an early bay, I have promised myself that! 8)
 
Thanks everybody for the kind comments. Sorry its been such a long time since the last update.
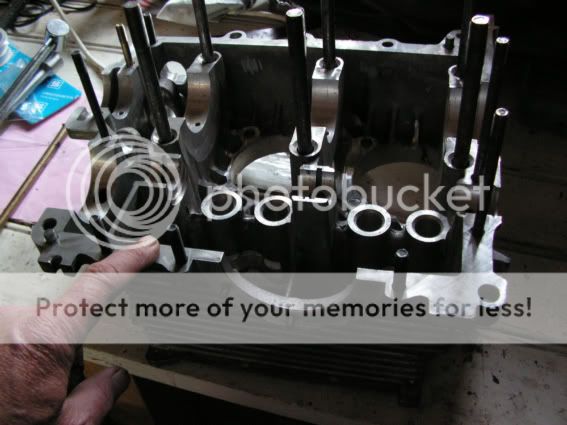
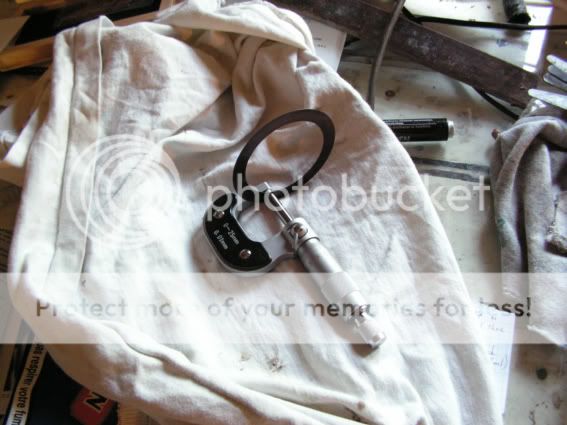
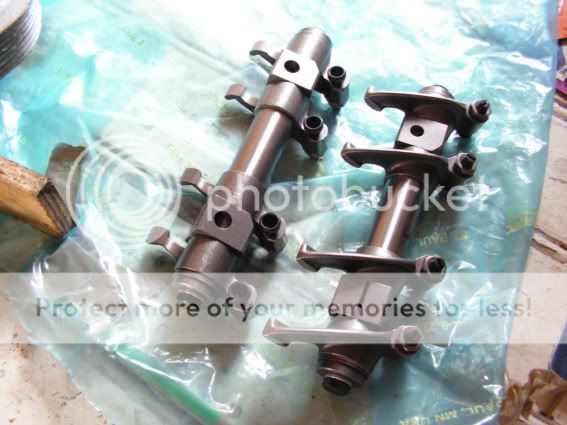
My project stalled for three weeks because i could not get any endfloat shims size 36 - I needed 3 of them. In the end I gave up trying and got the clearance by using four shims (3x24 and 1x 34). Although the book sais use three i could not see any technical reason why i could not use four.

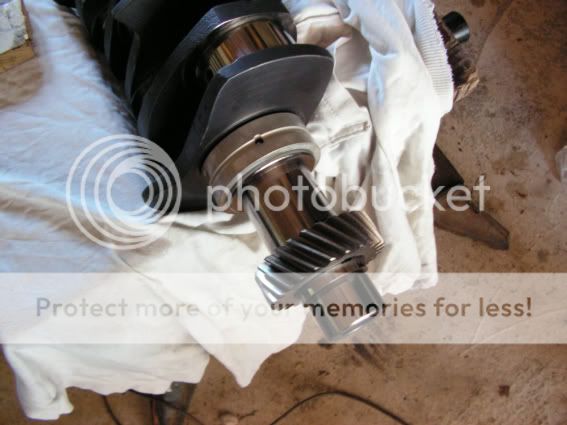
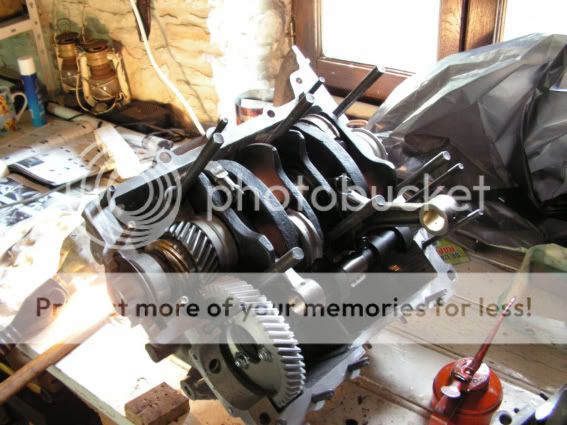
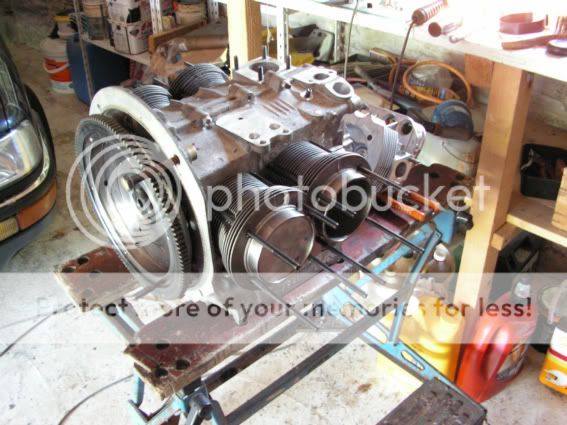
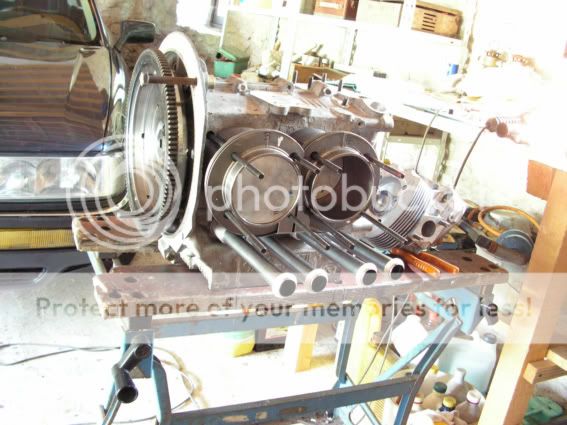
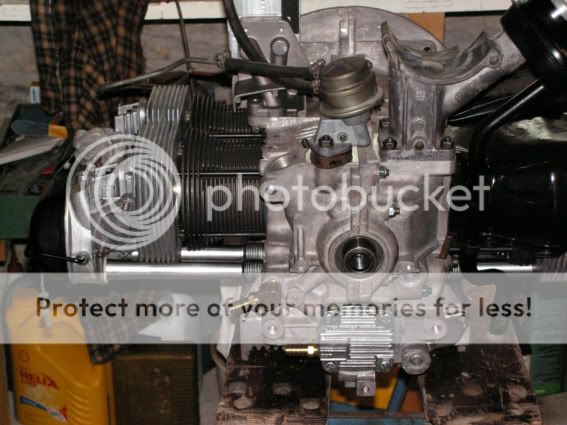
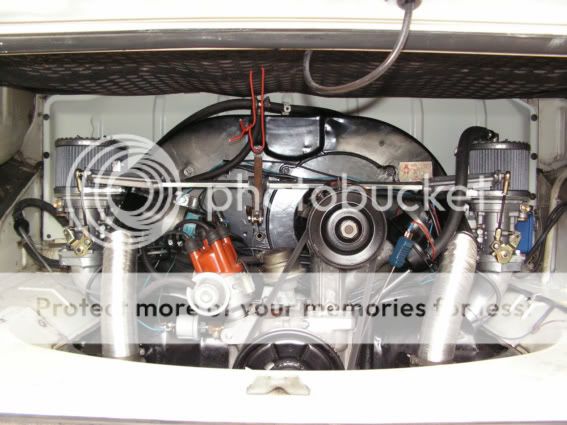
This pic shows the new engine and the full flow system. The tin behind the pully needs to be hammered to clear the brass fitting in the block. The connection on the oil pump exactly clears the engine mouting bar so no mods necessary here.

49.jpg


The tinware all went on quite easily requiring only the usual amount of fiddling to get it all sitting right. The gearbox has been changed with a recon one from a 2 litre with a 4.57 diff.

The clutch is a keneddy stage 1 since the standard clutch starts to slip at above 100bhp apparently. Kennedy reccomend you tighten the bolts to 30 instead of 23 ftlb. I had to go and get some high tensile bolts because when i tried to take the standard bolts up to 30 they snapped.

To my amazement the manifolds supplied with the weber carbs did not have any provision for a brake servo take-off. I used my little mig welder and with argon gas and welded a big blob of alloy onto the manifold a little below the carb mounting flange. Once machined down it gave me enought meat to drill and tap to screw in a gas fitting.

The engine was a lot more fiddly to fit back in the van since it now has to go in at an angle since the carbs wont clear the chassis/body so where it used to take me about 40 mins before, it now took me a couple of hours.

The remote filter tucks up nicely out of the way whist still being very easy to access. The brass unions supplied to fit into the oil filter top leaked like a sive however tight you screwed them in. I had to remove them and seal them with hylomar and plumbers hemp.

50.jpg


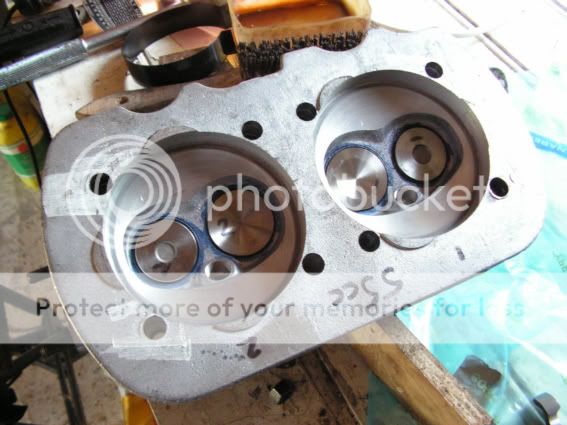
Before fitting the exhaust i looked at the heat exchangers and noticed the weld in the flange end was very thick - more so on one side than the other, so i ground these down and gained (on the bad side) 2 mm of port diameter.
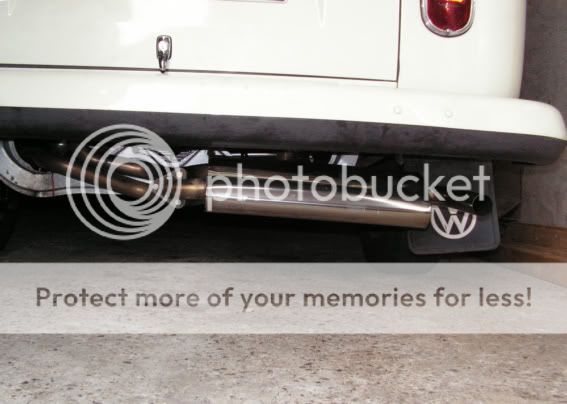
The four into one stainless header is a tight fit and only just clears allowing you to keep the rear panel and engine bar un-modified. Very precisely made - though, to my surprise, the support bracket for the silencer dit not meet the supplied mounting clip and I had to make a small extension to fit between the two. Its only a steady to prevent excessive vibration so its not a major problem - just a bit odd that with all this precision in the manufacture they made such a silly error.
As you can see in the picture, the exhaust sits about 4 cm lower than the original and I shall have to be a little more careful in future when going "off road". If this is the "quiet pack" I dread to think what the noisy one is like. I have to be careful not to accelerate too much in town since its quite noisy.

51.jpg


Heres what the engine looks like installed.

52.jpg


It was quite fiddely making the tubes from the heat exchangers come up through the tinware (because the 4 into1 does not have the little intermediate boxes).

The Idf 40's are lovely carbs and really easy to set up. They also have a vacuum take-off for the distributor which is ideal since i dont like 009's because they tend to give flat spots when pulling away and also dont give the extra advance on light throttle that improves fuel consumption.

I had to drill and tap the top of the aircleaner since there is no provision to attatch the engine breather tube.

As you can see I am testing a helper spring on the throttle lever. The linkage is well made and works well but is stiffer than the original so i have fitted a spring to help close the throttle. Once tested I shall make something a little more tidy. I also had to make the throttle cable tube a tighter fit in the fan housing since it tended to push through and leave me with only quarter throttle.

I have started running in the engine and the difference is unbelievable. The power and torque make it a pleasure to drive. At 80 kph its doing 2100 rpm. It barely notices inclines that used to be a struggle in top or required revving in third. Oil temp is between 90 and 100. Pressure max 5 bar cold, 3bar hot at 2500 rpm and 1.5 bar at tickover hot.

In conclusion:-
Although I have worked on VW aircooled engines for some years I had never before built one up "blueprinted" from all new and non standard parts so I was a beginner. If you are thinking about doing something like this then as long as you can cope with a standard engine build you will be able to do this. It just takes more time and care and you have to read up a lot to get all the info you need.

I listened to the professionals and took their advice as to the combination of modded parts that should go to make up the engine I wanted. I also read a lot on the web and bought the "interchange manual" and read it cover to cover.
My thanks to Paul at speedshop for his advice. I ended up buying nearly everything from Speedshop and all the parts fitted perfectly and were of good quality. (please note I have no connection with them and only got to know of them through their advert on the vzi forum)

Time - you need plenty of it. From my start in december it has taken seven months to finish. There is a lot of demand for performance stuff and limited suppliers, so you have to be patient and wait to get all the right parts and get the machine work done.

Specs - go for the best quality you wont regret it. Keep in mind the driveability of your road vehicle - keep it reliable and keep it driveable - nothing more tiresome on a long run in traffic filled roads than an over cammed engine. For normal driving torque is more important than bhp in my opinion.

Costs.
Well the basic engine was over £2000 and once you add in all the extras like stainless 4 into 1 header and exhaust, competition clutch, twin weber idf's its well over 3000.
Plus of course the 1000 for a rebuilt gearbox (mine was/is in perfect working order but at 70,000 miles it seemed a little foolish to put a 4.57 diff in it so i went for a complete recon unit instead.

So was it worth it?
Well I always wanted to build a blueprinted engine and I thought if I dont do it soon I probably never will.
If I wanted to go faster I could have taken the van back to England, sold it and bought a later square watercooled injection camper for less money than i sold mine for.
If I were to sell my van now its value has not risen anything like as much as I have spent on it.
So am I an idiot? - probably yes. But I am having fun :)
 
are all those bed cushions when the bed is set up original?? i dont have those, only the bed that goes up and slides over to line up with the back cussion. where are these stored when not in use? thanks.
 
Well its been a year so maybe its time for an update.

The new engine got run in last August. It was very tight and had to be tow started the first couple of times since the starter just could not cope. Initially it ran hot with the oil temperature going up to 115 C and causing me to stop for a break a couple of times during the first 2 or 300 miles. Then it started to run cooler and cooler and now it runs at 80 rising to 90 on the motorway. (Stock cooler).

I had to modify the throttle mechanism under the cab to give me a longer travel since the standard linkage, designed to open one throttle, just became much too sensitive when opening four throttles. I didnt want the pedal any higher so instead I removed the stop so now it goes down further than stock.

In May we had a 3 week holiday touring Portugal (and some of Spain) and to my surprise we got 29mpg overall, which included quite a lot of motorway. I guess the larger engine is more efficient with the twin webbers - and the longer gearing of the 2 litre final drive ratio must also help.

The new engine enables the van to keep up with the traffic and its now capable of holding on to 70mph on all but the steepest motorway inclines (which slow trucks to a crawl). A brief burst on a deserted stretch of level motorway took the speedo right round which probably equates to about 100mph (speedo reads 8% fast) but the limited dynamics of a bay means you really dont want to do more than about 80 for any length of time because it takes so much concentration. (and it gets noisy :lol: )

I prefer to cruise at 70-75 most of the time TBH.

The engine has behaved perfectly apart from a misfire which developed suddenly after about 2500 miles. No 3 was not firing until the revs rose. This turned out to be the plug which was fouled with a hard, dry black carbon. Cleaned it and all has been fine since.

Having always had stock engines before, which hardly ever needed topping up between changes, I was a little alarmed at the way this engine cunsumed over 5 litres of oil in the 3500 mile trip to Portugal. TBH I am still not 100% sure but its not leaking and its not making any blue smoke.

I thought maybe the breather system might be too aggressive (its stock linked to the top of one of the air filter tops) but, having put some fine stainless gauze in the filler neck, it doesent get covered in oil so it cant be that its drawing excessive oil mist.

I also wondered if the larger barrels and longer throw crank throwing oil about might mean I should only fill to halfway between the dipstick marks but the consumption remained the same (just had to top up half as much - twice as often :lol: )

I still find the single stainless quiet pack exhaust is too noisy and keep wondering if I might have a go at making my own out of stainless to make it both quieter and to improve ground clearance. (Yes - pulling out of a side turn onto the main road the exhaust grounded and has a big dent where it hit the bumper towing eye).

Heres some snaps of the trip :)

Picnic where a stream met the sea
PICT0001.jpg


Amazing colours of soft sandstone
PICT0040.jpg


PICT0039.jpg


Saw many Storks nesting
PICT0027.jpg


Another picnic spot
PICT0023.jpg


Abandoned Monastery
PICT0003.jpg


PICT0102.jpg


Hadnt realised how mountainous Potugal is
PICT0095.jpg


PICT0093.jpg


Mr and Mrs Trikky on a coastal campsite :lol:
PICT0038.jpg


Saw our first wild Bee Eaters :)
PICT0112.jpg


PICT0072.jpg


A beach cave made for 2
PICT0081.jpg


One of our wild camping spots
PICT0075.jpg


PICT0076.jpg


An unexpected visitor
PICT0049.jpg


The crowded beaches of Portugal
PICT0066.jpg


PICT0043.jpg


And coves
PICT0046.jpg


Exploring the rugged coast along unmade tracks - not suitable for lowered vehicles :lol:
PICT0056.jpg


PICT0077.jpg


PICT0058.jpg


Surfs Up :)
PICT0059.jpg
 
I know this is now the third question over 18 months regarding your simple bed modification, but if you don't ask...

I see how it works, and seems such a simple idea, but have you done anything to strengthen the edge of the bed alongside the sliding door? I have a standard dormobile bed and wince everytime the girlfriend sits on that edge of the bed - maybe I just have a creaky table!?
 
Benyon said:
I know this is now the third question over 18 months regarding your simple bed modification, but if you don't ask...

I see how it works, and seems such a simple idea, but have you done anything to strengthen the edge of the bed alongside the sliding door? I have a standard dormobile bed and wince everytime the girlfriend sits on that edge of the bed - maybe I just have a creaky table!?

Well the original table is very thick and heavy, I think its 3/4" and then has formica on both sides so I dont think the table will creak if its the original one.
I would suspect that if your getting creaks that its more likely to be the alloy fittings which need tightening up or the swivel pins that need lubrication.
The original Dormobile setup is very robust and we have on two occasions slept four adults in this bed without anything breaking - hehe - (dont ask :lol: )

ps. Th creaking might be the wooden bed base creaking as it moves against the formica, Might be worth putting a small felt strip on the part of the rear seat base that makes contact with the table :)
 
I have a replica interior, all oak (effect) and not an original sink...

18-1.jpg


Does the hinge in the seat rest on the table as well? This is the area I wondered whether it would be weak?
 
When the table is pushed to the back of its slot to support the bed the hinged part is resting/ overlapping onto the table by a good 10 cm so its not just the hinge bearing the weight, the wood is resting on the table as well.
 

Latest posts

Top