Another 72

Early Bay Forum

Help Support Early Bay Forum:

This site may earn a commission from merchant affiliate links, including eBay, Amazon, and others.

ground hugger

Well-known member
Joined
Oct 15, 2007
Messages
1,052
Reaction score
0
Location
On the road
Hi all :D
Ive been on Earlybay.com since 2007 and thought its about time I posted my story :roll: here goes

Back in 2007 I bought this of Ebay :shock: These are the Ebay photos

2b65_1.jpg


44d9_1.jpg


9bb4_1.jpg


Well :oops: "it was close and I wanted a van" finaly got it home after getting messed around with delivery.Wife eventualy got it sorted and it arrived on a banger racers trailer :lol: :lol:. I was at work and the wife hadn't seen it ,needless to say I got a phone call at work.
This is the view I got when I arrived home

000_0970.jpg


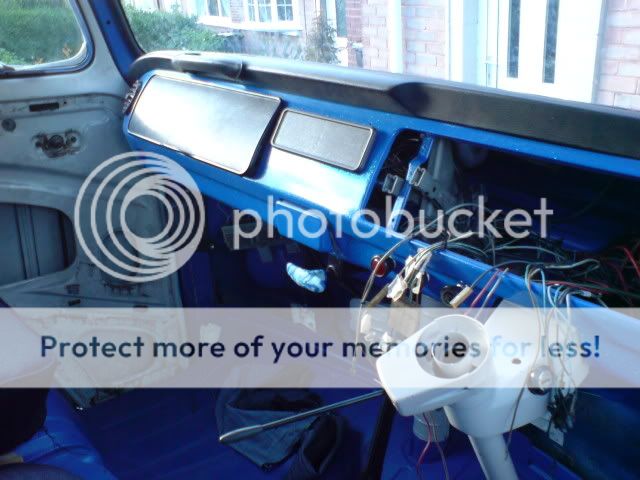
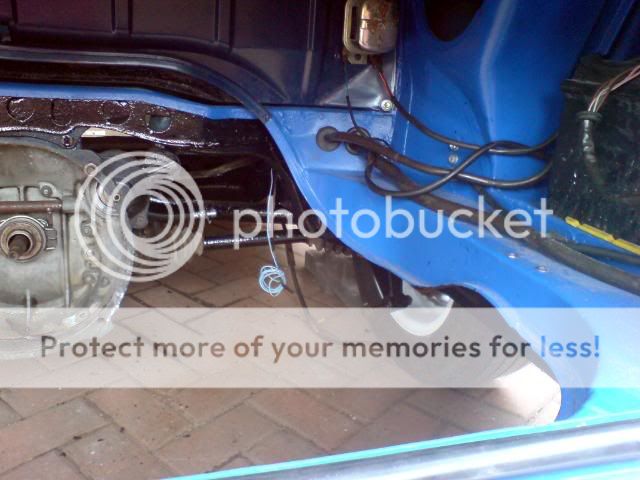
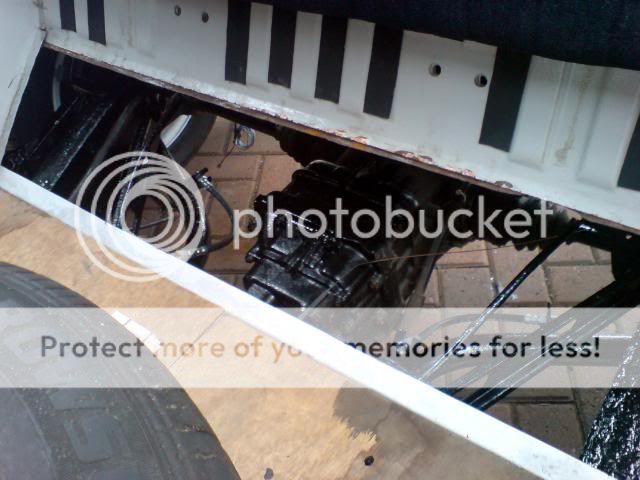
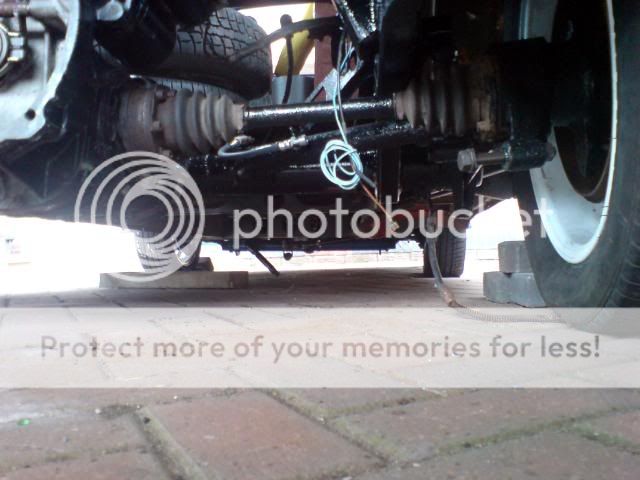
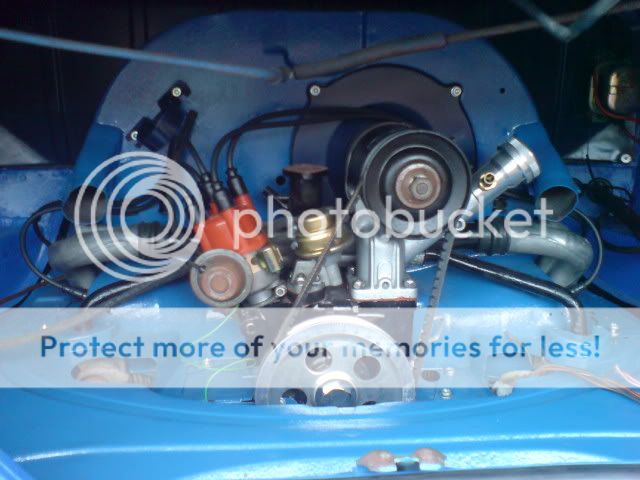
Next day I went out to have a look around it

DSC00057.jpg


000_0933.jpg


000_0934.jpg


000_0935.jpg


000_0936.jpg


000_0937.jpg


000_0939.jpg


000_0940.jpg


000_0946.jpg


000_0946.jpg


000_0945.jpg


000_0924.jpg


000_0925.jpg


000_0926.jpg


000_0932.jpg


000_0931.jpg


000_0930.jpg


000_0929.jpg


Didn't I do well :lol:.But on the upside it had an engine gearbox and two front seats :D .I applied for the log book "Guess what it didn't have one :roll: " and it was first registed 20 09 1972 and Im the 10th owner.The guy I bought it off wasn't on the log book as the previous owner.The previous owner lived in Twickenham and aquired it on 17 09 1990.
 
Fast forward 10 months,loads of welding done and renewed parts I ended up with it
looking like this after replacing
both doors ,engine lid,front inner and outer valance,rear valance,all jacking points/out riggers.top jhat sections,inner and outer steps,1/3rd of the guttering,inner and outer lower screen ,both sides of the front panel,cab floor both sides,outer sills,1/4 of the rear floor,front and rear centre sections,rear of front wheel arch's,front and rear of rear wheel arches,front inner wheel arch,grill,front chassis where it forks off both sides,rear inner sills,bottom of rear corners,loads of main chassis repairs,bumpstop mounts ,various window channel repairs etc.etc and a home made 3inch narrowed beam
DSC00252.jpg

DSC00271.jpg

I always thought I wanted a pale blue and white bus.But it just didn't look right
and things had to change.Just before winter I try'd a few colour changes
white,green,blue on the front panel and doors.couldn't decide still and he was left over winter looking like this

DSC00414.jpg

DSC00412.jpg

Ill post pics of the underside later :lol: I haven't taken any yet :) just useing whats on computer at the mo
 
decided on matt blue for the colour in the end and also cut the hole in the roof bigger for a rag top.The devon poptop wasn't what I had in mind from the begining so I bought a roof section to graft in so I could put a side tilting roof on .Then I spotted a rag top on ebay and won it for £30 but the cover was no good.Ive been quoted £180.00 :D to have one made up by local car trimmer but he can't do it for another 3 weeks :cry: parisbeetle wanted 65% of the original kit price plus post
and there shut for two weeks,so Ill go with the local trimmer as Ive got an idea for a removable roof lineing. it now looks like this for the moment
DSC00599.jpg

DSC00574.jpg

DSC00572.jpg

DSC00621.jpg

Still got got to put engine in ,finish the inside remove the rear wheel hubs to fit backing plates and studs .just finished doing the front studs today so I can fit alloys
 
rockandrollcamper1 said:
Good work. Did you do most of it yourself?

Cheers :D Yes ive done all the work welding,paint,mechanics .Rebuilt engine "yet to be try'd fingers crossed" on the drive and in the shead and still got loads to do.Had some help and advice on the beam ,shortening trackrods from Steve (67 BAY)and had it welded up by RAYNOT specialist welding ltd.not forgeting to mention everyone on Earlybay.com for answering questions and posting how they did theres.You can learn quite alot on here just by looking at other restorations
and how they tackled various jobs.Makes things a lot easier and gives you more confidence when doing things. Cheers...Dave
 
Holy cow! :shock: that was a real mess! i wouldnt know where to start.

top job you are doing,it looks great,love the wheels too 8)
 
67 BAY said:
Nearly there Dave, like the paint............

Steve
Hi Steve
I must say it looks a lot better on photos than it does in the flesh.I left all the dents in from over the years just to give it a bit of character ."No I didn't I just couldn't de arsed to fill them in :lol: " .The roof was a right pig to do it all reacted :cry: .Had to strip it all back then I got new neighbours :evil: :lol: .There not that bad ,but thought best not start spraying white paint allover so ended up brush painting it :shock:
Pilfered one of your ideas with the dash
DSC00493-1.jpg

Hmmmm Metal flake 8)
DSC00496.jpg

Lacquer sank in a few places but nothing to worry about,its no show bus after all.
Talking of show bus's Hows yours coming along you haven't posted any progress for a while.Ive fitted them gas shocks to the front and its raised it just right I think for you know what and the back ends going to get some hole cutter treatment soon.Im off all next week (No work) and could do with a little job doing if you dont mind.Ill ring you later......Dave
 
Few more pics ,could do with a clean
DSC00636.jpg

That rotten seat belt mount
DSC00637.jpg

Engine bay looking a lot better
DSC00633.jpg

And a few of the inside Rear seat base
DSC00625.jpg

Rear seat back fixed in place
DSC00624.jpg
Ive got some black vinyl material to put around the windows inside,Just need a new window seal for the drivers side rear window and a rear hatch seal.Im also planning on removing the metal inside behind the rear vents, as it doesn't look very nice and replacing it with some stainless sheet.This will also get covered inside with vinyl.
Close up of panel fabric
DSC00626.jpg

And this section Im going to make it removable
DSC00623.jpg
So I can have access to the rear and sort out some kind of heating connections(scratches head)
haven't realy thought to much about it yet :D
 
This bit is driving me mad
DSC00635.jpg

Ive lowered it two splines at the rear notched the spring plates
removed the bump stops.Removed the bumpstop mounting circular doings (Going to drill through the original mount and fit smaller bump stops).Problem is Ive only got about :? I can only get two fingers between the passenger side drive shaft and chassis.And the drivers side its even less due to slope on drive.Im going to have to chop a section out of the rear chassis,so I can have some kind of suspension travel as i dont want to beef up the rear shocks if I can help it.And I haven't noticed any one else with this problem on 2 clicks.Ive even removed the end caps to re check my marks and its ok :?
 
You're not alone with that concern..... I've got a 72 crossover too and mine has the 3" lowered Red 9 Design spring plates on the rear.... which once I'd fitted I decided it wasn't low enough and wished I'd gone for the 4" ones.... however instead of sending them back I played around (for hours admittedly) with various inner and outer spline combinations until I'd lowered it about another inch and was happy. All-in-all and having compared it with other buses I'd say I'm down about the equivalent of two outer splines and like you I noticed that I have only a fingers gap or so between the drive shaft and the chassis rail! :shock:

I too had considered notching the rails a little but just wasn't keen on cutting up anything I didn't have too... but to be honest having driven it as it was first, I've only ever heard the shafts knock a few times when I've been loaded up or hit a really large hump/bump in the road? I do have KYB shocks on the rear but it's not that hard. I'd try it (carefully) first and see how you go? :roll:

ps; Nice bus and great work!
 
Cheers Camperdan Ive got some KYB Gas-A-just shocks
that I fitted and they beefed the rear end up no end (not driven just jumped up and down on rear bumper :lol: ).I just had in mind having it a bit softer on the rear with more travel..I marked it up today to start chopping it out and thought i'd get away with a 50mm hole saw giving me about an extra 40mm of travel, then I realised that the rubber boot will probably snag on a hole that size :oops: so I sacked it for now.Ill fit the KYB's back on to get it on the road and see how it rides.Cheers..Dave

Fitted all new fuel breather pipes today.helicoiled the rear exhaust stud(cheers steve, oh the slabs have gone:D )and fitted engine.Got to sort out wires fit carb,fuel pipe etc.etc. Its just a standard 1600 with new B/P a splash of paint and some alloy bits.Just hope it runs :|

DSC00638.jpg
 
:D by the look of you avitar you back end is alot lower then mine .................. were talking busses right :shock: :lol: .

serious your bus looks real good mate keep the pics coming. I would love to see some photos of the rear chassis notchs

cheers
ash
 
dubscum said:
:D by the look of you avitar you back end is alot lower then mine .................. were talking busses right :shock: :lol: .

serious your bus looks real good mate keep the pics coming. I would love to see some photos of the rear chassis notchs

cheers
ash

Thanks
:lol: lower than yours :lol: Its the angle the picture was taken at :oops:
Drivers side
DSC00639.jpg

Passenger side
DSC00643.jpg

And my floor to arch size is 460 d/s and 480 p/s :? with 185/65/15s.
lowest part to the floor is bottom of the heat exchangers at 150mm and the
engine mounting bar is 185mm of the floor :cry: .Waiting for a 46mm socket and 3/4 bar to arrive then Im going to tackle the rear.Shocks won't sort that out with 23mm of travel :lol:
 
hello dave

its steve in rawmarsh i got red/black interior panels from you . your van looks very nice and very different from when i last saw it you have have made a really good job of it

i have 3/4 sliding T bar and 46mm socket if you want to borrow them
 

Latest posts

Top