

Really admire your positive approach to all this. Just shows how some people use ebay to lie and deceive, totally wrong. The work your doing is awesome - not many people would be able to turn this old camper around. cant wait for the next installment, and great to see the new metal going in 8)
You are using an out of date browser. It may not display this or other websites correctly.
You should upgrade or use an alternative browser.
You should upgrade or use an alternative browser.
Bunty - '71 Tin-Top Sunshine Bus Resto
- Thread starter Darrencambs
- Start date
Help Support Early Bay Forum:
This site may earn a commission from merchant affiliate
links, including eBay, Amazon, and others.
Darrencambs
Well-known member
- Joined
- Nov 14, 2010
- Messages
- 76
- Reaction score
- 0
r73 said:Really admire your positive approach to all this. Just shows how some people use ebay to lie and deceive, totally wrong. The work your doing is awesome - not many people would be able to turn this old camper around. cant wait for the next installment, and great to see the new metal going in 8)
Cheers r73. Thanks for the words of encouragement.. helps to keep me positive!
I've seen some of the ability of some of the guys on here, and I reckon my ability is pretty mediocre compared to some of the others I've seen.
Putting the new metal back in is much more enjoyable than cutting out all the rot - feels like all I've been doing for ages is exactly that! This being the first bus I've worked on, it is all a bit of a learning experience but I think I'm getting the hang of it now.
froggy
Well-known member
Before you know it it'll be finished and thats when the real work starts!
All the little bits and pieces will take a lot longer and will be more awkward but at least you will be able sit back and start enjoying the fruits of your labour
Any plans on the interior?
All the little bits and pieces will take a lot longer and will be more awkward but at least you will be able sit back and start enjoying the fruits of your labour
Any plans on the interior?
Darrencambs
Well-known member
- Joined
- Nov 14, 2010
- Messages
- 76
- Reaction score
- 0
Not sure on the interior yet. Probably just a mattress and a camping stove initially! I've downloaded some plans for replica westy and devon interiors, so may knock one of those up. Have also thought about turning it back into a microbus with rear and middle seats in, and to buy a drive away awning. Got plenty of time before that decision has to be made though.
I know the little bits take time (current Triumph TR6 restoration 'nearing' completion after about 6 years!)... sometimes seems like you're 90% there but still got 90% left still to do :roll: Plan with the bus is to get it to a stage where she's running and roadworthy, then finish the paint, interior, etc off as a rolling project.
Anyway, not making any progress sitting here. I'm gonna get my working gear on and head out to the barn :msn4:
Darrencambs
Well-known member
- Joined
- Nov 14, 2010
- Messages
- 76
- Reaction score
- 0
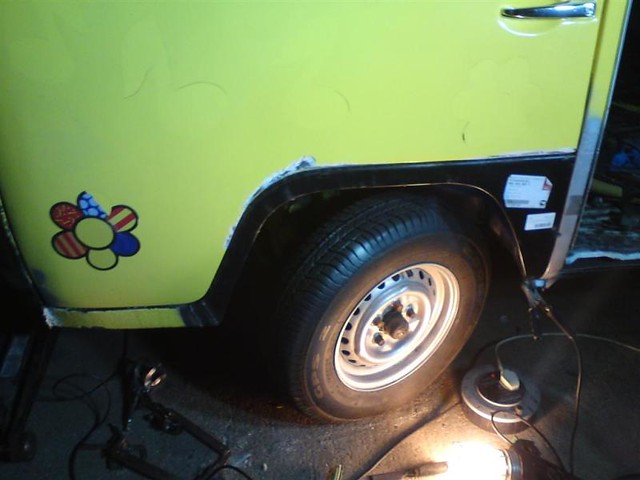
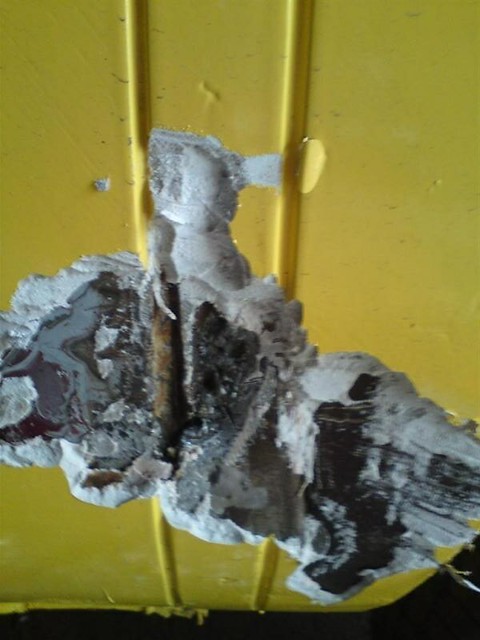
Had a couple of hours on my back under Bunty tonight before my other half came home.
Got the remnants of the old cross member ground out, cleaned up the chassis rails and now got the new cross member wrestled into place. Bit of a tight fit, but it's in now ready for welding once I've made sure it's lined up correctly.
Had to modify the o/s a little to get the brake pipe and other cable runs to fit as I guess this is a late bay part.
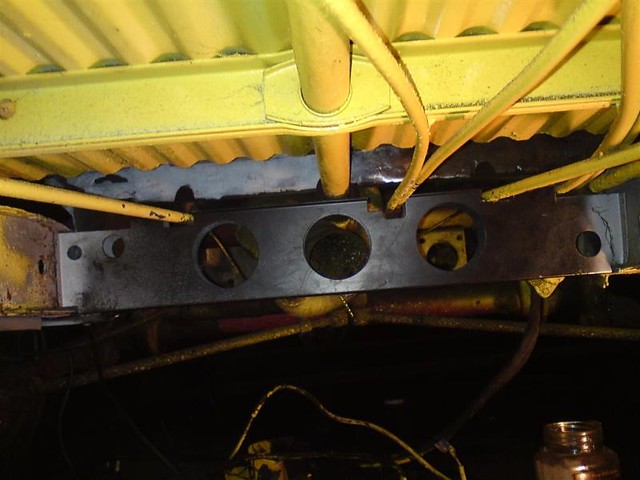
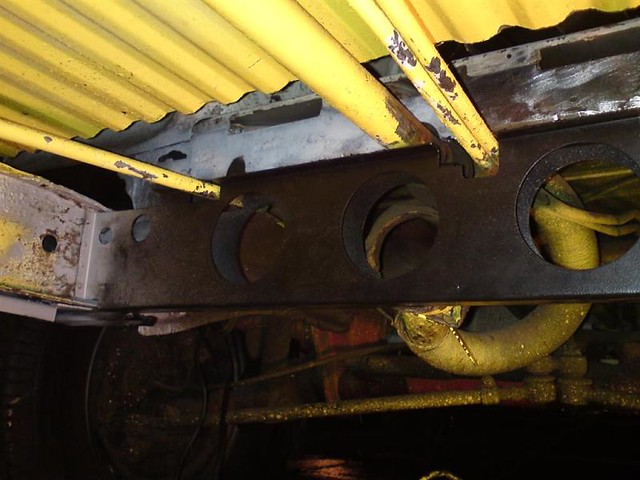
Hopefully get a chance to weld this and the top-hat in over the next few days.
Getting a lot of condensation in the barn at the moment, so I also need to get some of the welds dressed and splash a bit of paint on them to avoid the rust setting in.
Got the remnants of the old cross member ground out, cleaned up the chassis rails and now got the new cross member wrestled into place. Bit of a tight fit, but it's in now ready for welding once I've made sure it's lined up correctly.
Had to modify the o/s a little to get the brake pipe and other cable runs to fit as I guess this is a late bay part.
Hopefully get a chance to weld this and the top-hat in over the next few days.
Getting a lot of condensation in the barn at the moment, so I also need to get some of the welds dressed and splash a bit of paint on them to avoid the rust setting in.


$27.95 ($13.98 / Count)
Marketplace Auto Parts Window Crank Handle Set of 2 - Chrome with Black Knob - Compatible with 1968-1978 Volkswagen Beetle
Parts Geek LLC


$124.78
Revell 07009 Volkswagen T1 Samba Bus Model Kit, 1:16 Scale 27.2 cm, Multi-Color, 223
Outstanding Outlet USA


$28.56
$32.43
Airfix Quickbuild Volkswagen Light Blue Camper Van Brick Building Model Kit, Multicolor
Amazon Global Store UK


Darrencambs
Well-known member
- Joined
- Nov 14, 2010
- Messages
- 76
- Reaction score
- 0
Update...
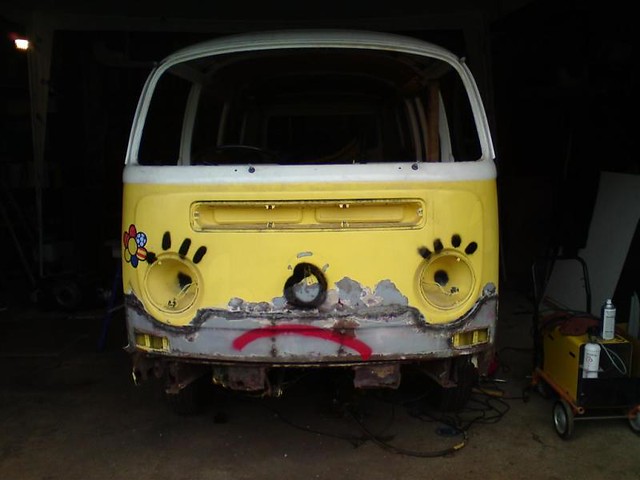
Making very slow progress - partly due to not having much spare time to do the work, and partly due to the fact I'm just damned slow when it comes to doing things... measure twice, cut once (measure a dozen times more like!).
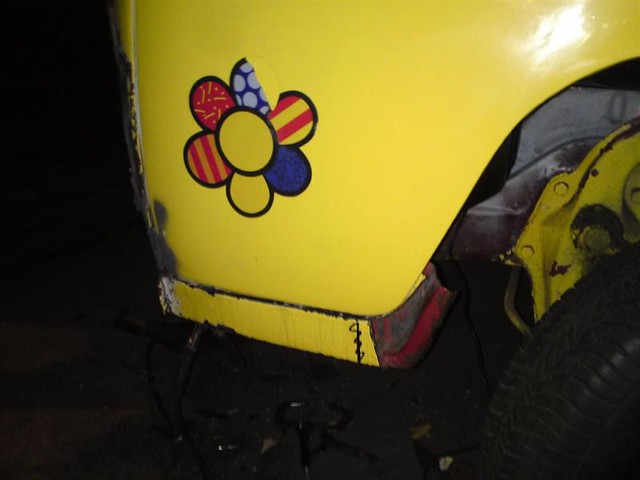
Bunty's not too impressed as you can see:
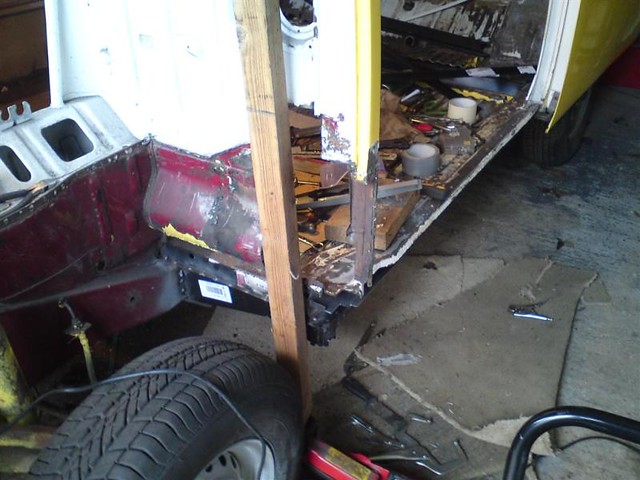
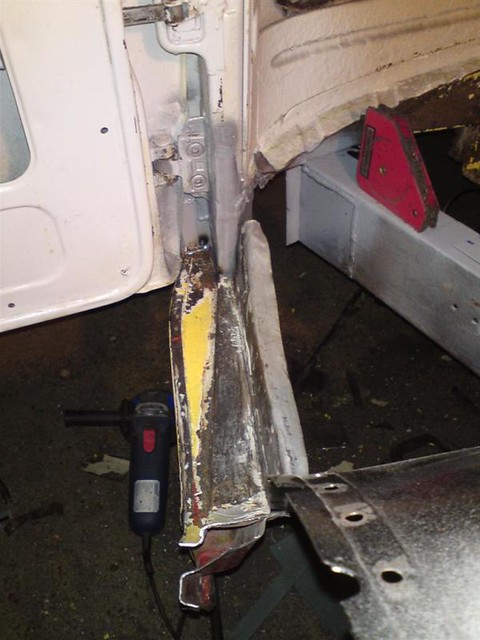
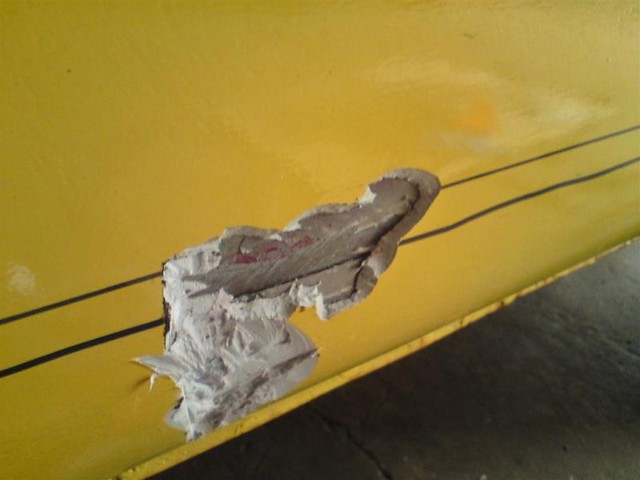
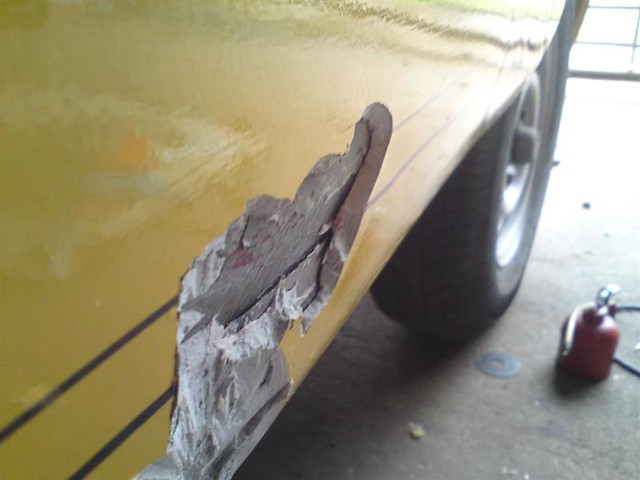
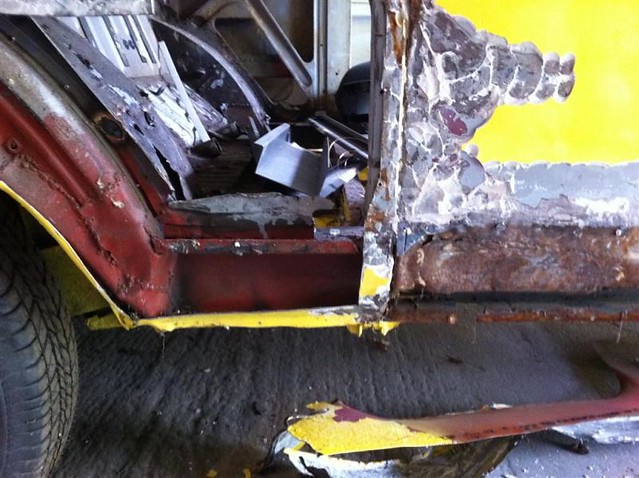
Have been working on getting the N/S B-post corner sorted. Started with cutting out the rotten part of the B-post, trying to keep the original pressings:
Wasn't sure whether the corner would drop a little when I separated it, so braced the door aperture with a length of wood under the roof / door aperture until the new section was welded in. Also took a measurement from the loading bay floor to a vertical point on the bulkhead behind the passenger seat.
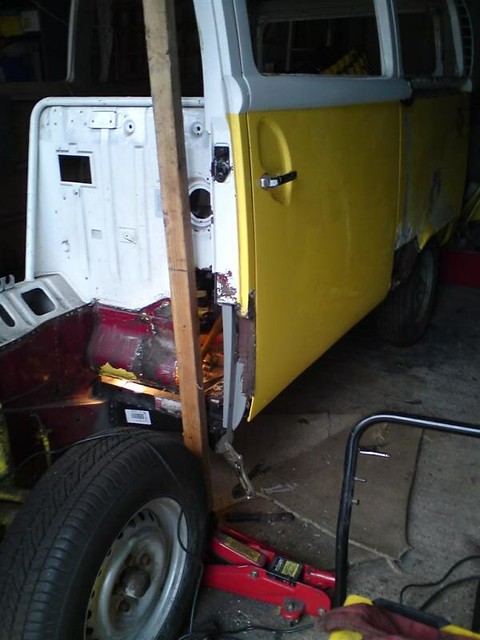
Sliding door back on to check alignment before cranking up the MIG

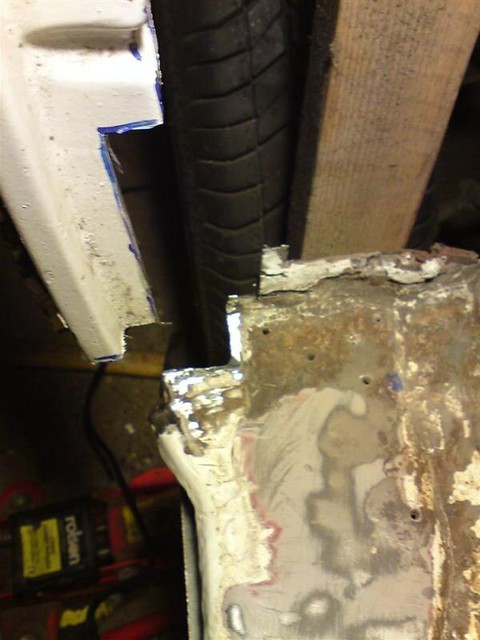
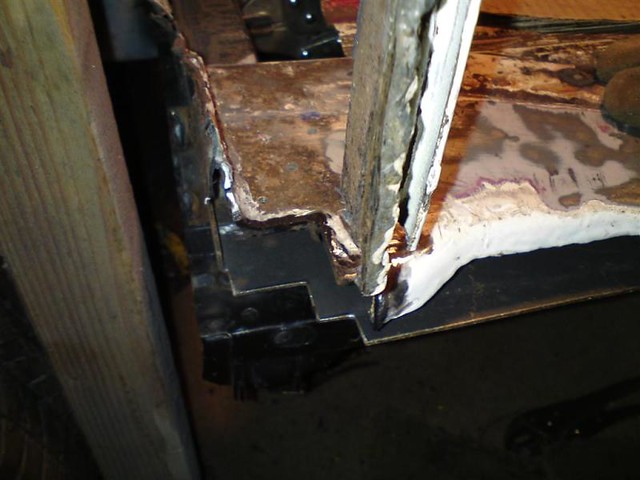
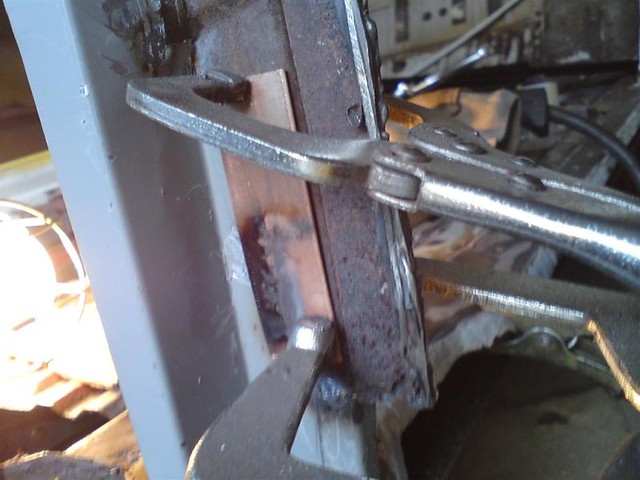
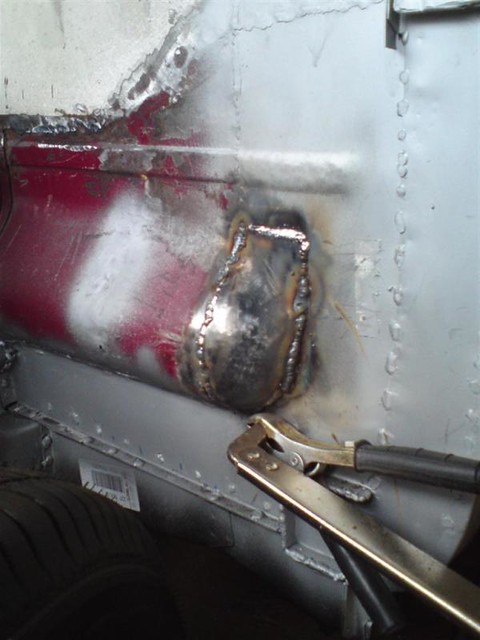
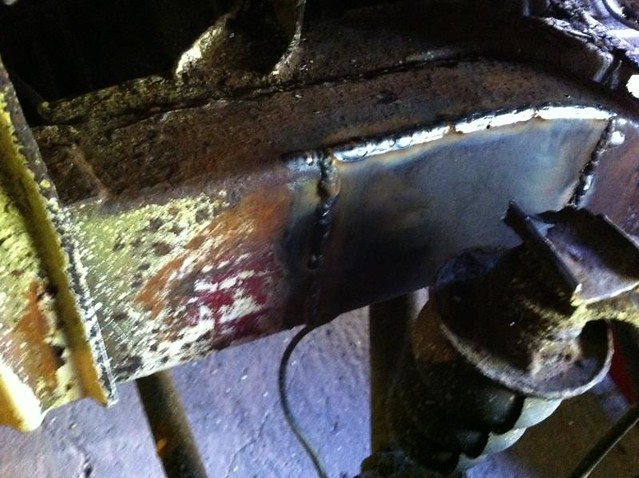
Handy tip for butt welding in thin metal: Clamp a piece of copper (flattened water pipe in this case) behind the panels. You can then weld without blowing through.
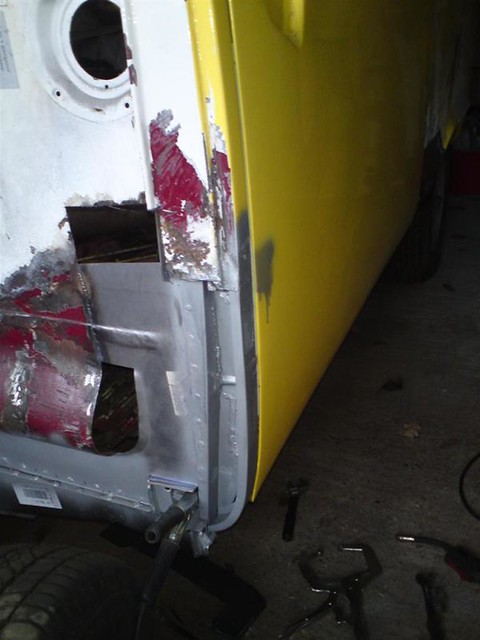
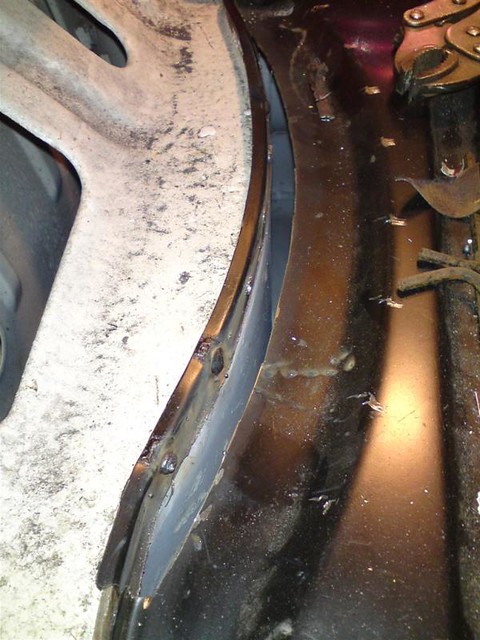
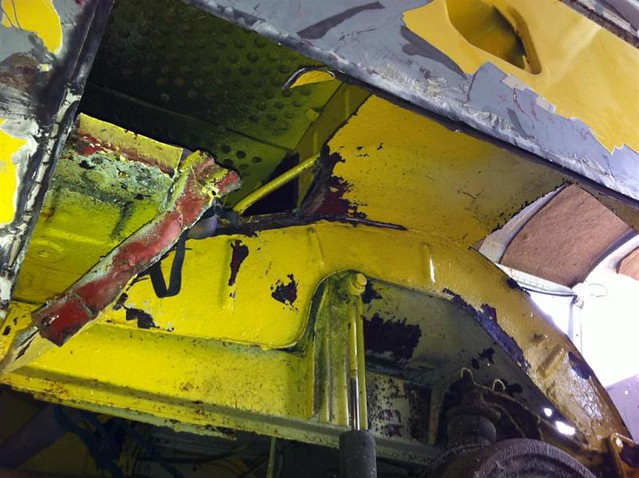
With the B-post now back in, time to work on the bulkhead. Not happy with these panels as they comprise the bulkhead and B-post in one. Also no swage line as per the original.

So I cut it to give a more 'factory' appearance. Will make my own B-post panel to incorporate the piece that slots in to close the sill.
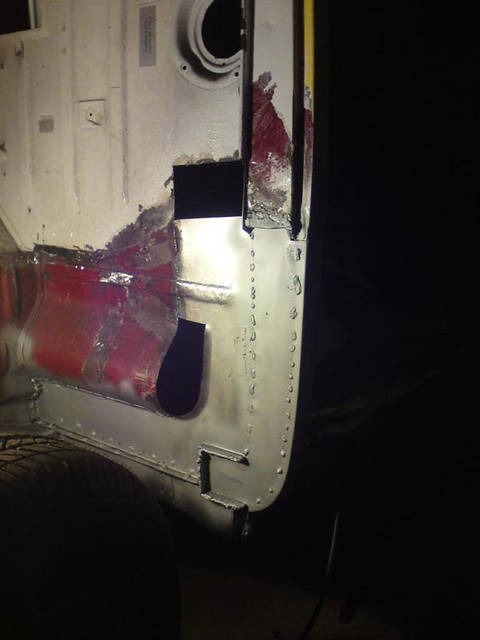
Welded in place. Just need to tidy a few welds and finish filling the holes with fresh metal. Have to make up the closing piece for 'the bulge' which should be fun.
Making very slow progress - partly due to not having much spare time to do the work, and partly due to the fact I'm just damned slow when it comes to doing things... measure twice, cut once (measure a dozen times more like!).
Bunty's not too impressed as you can see:
Have been working on getting the N/S B-post corner sorted. Started with cutting out the rotten part of the B-post, trying to keep the original pressings:
Wasn't sure whether the corner would drop a little when I separated it, so braced the door aperture with a length of wood under the roof / door aperture until the new section was welded in. Also took a measurement from the loading bay floor to a vertical point on the bulkhead behind the passenger seat.
Sliding door back on to check alignment before cranking up the MIG
Handy tip for butt welding in thin metal: Clamp a piece of copper (flattened water pipe in this case) behind the panels. You can then weld without blowing through.
With the B-post now back in, time to work on the bulkhead. Not happy with these panels as they comprise the bulkhead and B-post in one. Also no swage line as per the original.
So I cut it to give a more 'factory' appearance. Will make my own B-post panel to incorporate the piece that slots in to close the sill.
Welded in place. Just need to tidy a few welds and finish filling the holes with fresh metal. Have to make up the closing piece for 'the bulge' which should be fun.
Darrencambs
Well-known member
- Joined
- Nov 14, 2010
- Messages
- 76
- Reaction score
- 0
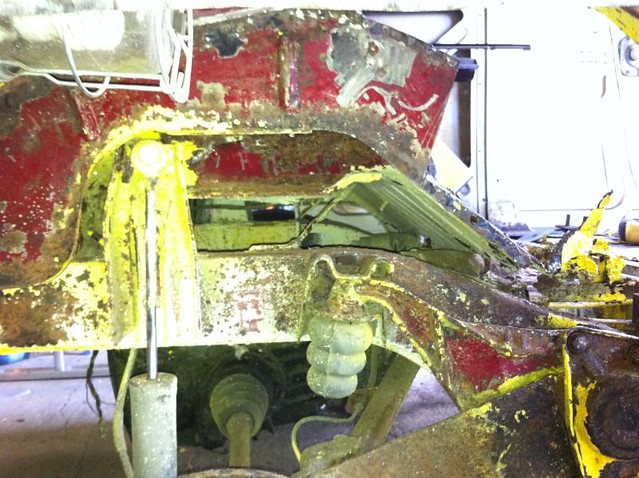
Did a trial fit of the seat pan. Fit, it doesn't - not the right profile to fit the curve, and not enough of a lip to fold over either. Will need to doctor this a fair bit before it fits properly:
Maybe when I come to doing the opposite side I'll leave some of the original in place to give me a lip to weld to.
I never had these problems with pattern parts when doing my TR6 - all tended to fit pretty well without much bother. I haven't fitted the JK outer sill to the bus yet as it seems to be completely the wrong profile, so I'm leaving that until I've got the B-post and C-post sections repaired to give me something to line the outer sill up with.
Darrencambs
Well-known member
- Joined
- Nov 14, 2010
- Messages
- 76
- Reaction score
- 0
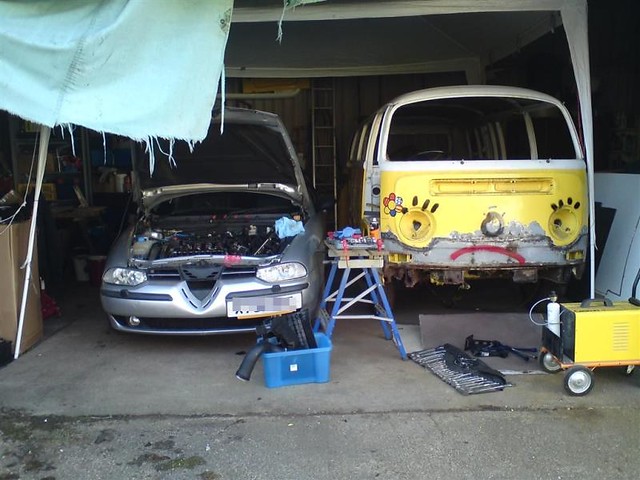
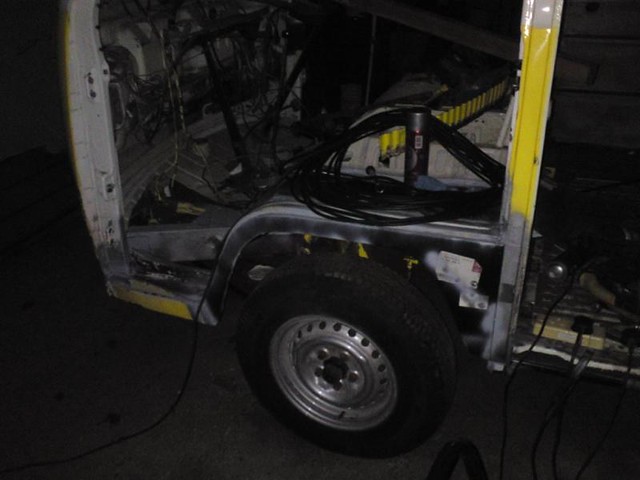
Still going..... a while since the last update as other things have been getting in the way of bus progress... one sick Alfa who's radiator decided it would finally give up the ghost a few days before the MOT was due. Fortunately I had one knocking around the barn in anticipation. So Bunty had some company for a while:
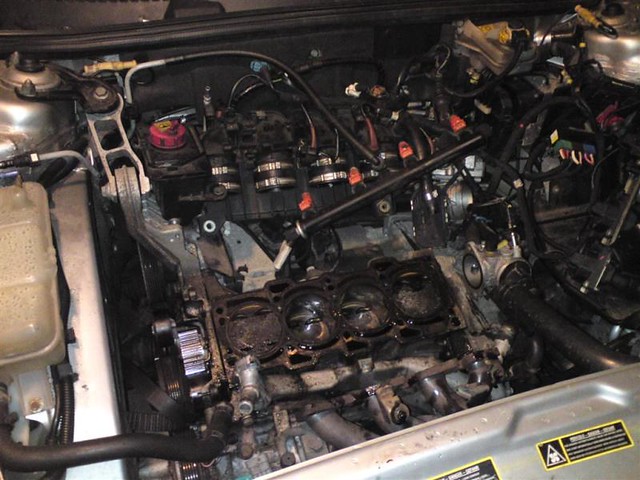
Took the opportunity to whip the head off and sort out a small oil leak that had been niggling me for a while:
So with the Alfa back together and through his MOT with flying colours, it's back to the Bus...
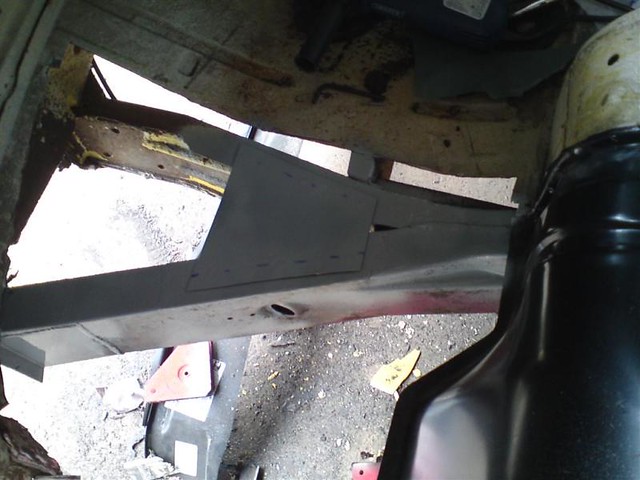
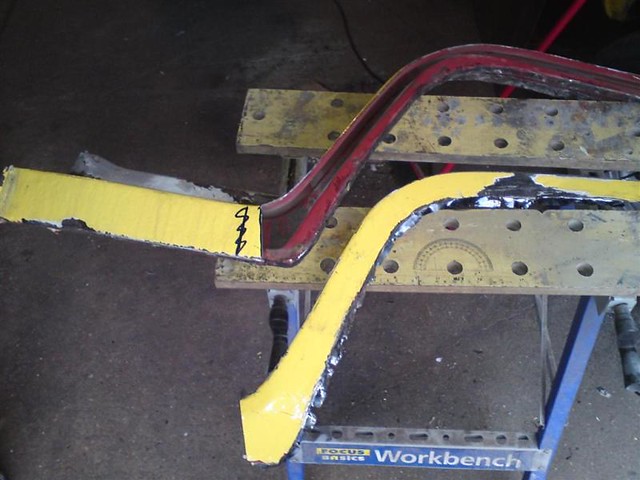
Chopped out the rot in the front chassis leg, and grafted in a new section:
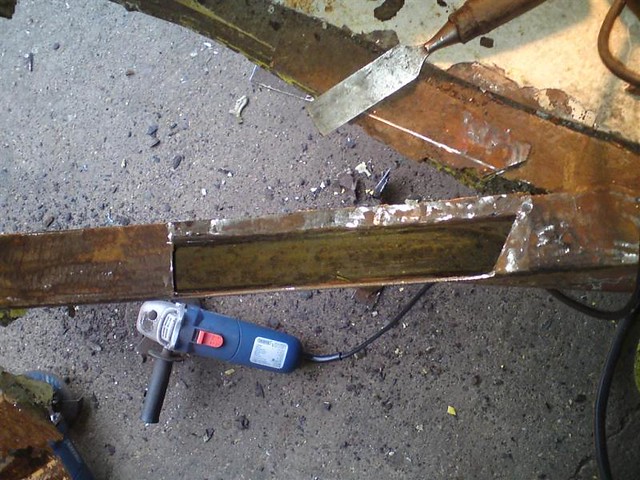
New bracing plate welded in, and the leading edge of the chassis leg replaced with fresh metal:
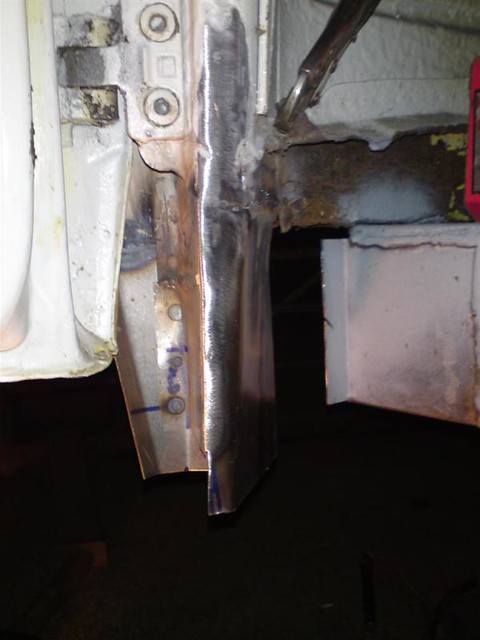
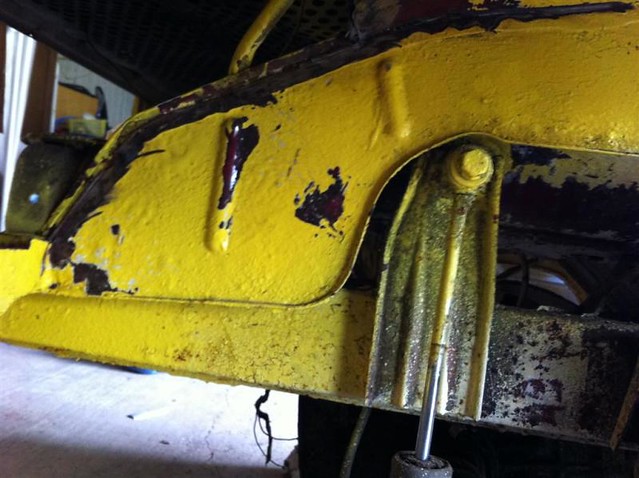
Got the B-post finisher in to give me a datum for the main B-post:
Made up the lower B-post and welded that in (not proud of my welding here - I was having a bad day I think! This will be tidied up later!):
Then turned my attention to 'the bulge' in the bulkhead, and shaped up what amounted to something akin to half a ****.... not sure quite what size... about a 34B I guess... but it helped me judge whether the shape was developing along the right lines! Again - the welding's not pretty, but should tidy up OK.
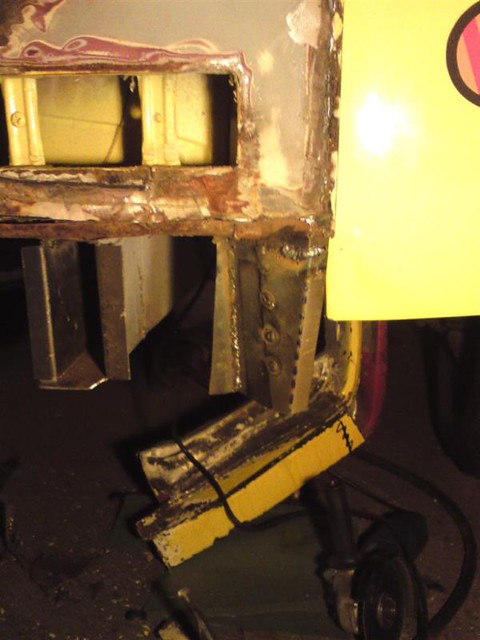
Not sure what happened to the wheel arch, but it's completely the wrong profile for the door line, so I started doctoring it in the hope I could reshape it enough. I've got a new outer repair panel which has the correct profile, so out came the corresponding part of the old one:
Had to get the bottom of the A-post rebuilt to give me a chance of getting the arch back in. A certain amount of guesswork here as there wasn't much left of the original... and what was there had been butchered by someone before me:
Despite attempting to wrestle and beat the arch into submission, there was no way it was going to fit properly. Nothing for it but to chop it in half and fit it in sections. Lined up the forward section, and tacked it in place:
It will need some work around the point that it turns the upward curve, but I reckon this is the only way I'm going to get it to give me uniform door gaps.
Seat pan is also tacked in to give me the line for the other half of the wheel arch. Another poorly shaped panel as this has a different inboard curve, so I've had to slice it open and it will need a patch grafting in:
That's pretty much it for now, but I'm looking forward to getting this corner finished and working my way round to the other side.
Got a few other projects that are on the cards soon though - MX5 needs to be serviced and MOT'd ready for the summer, and I'm hoping to get the TR6 body panels prepped up for spraying as soon as summer arrives.... Too many projects, too little time :roll:
Took the opportunity to whip the head off and sort out a small oil leak that had been niggling me for a while:
So with the Alfa back together and through his MOT with flying colours, it's back to the Bus...
Chopped out the rot in the front chassis leg, and grafted in a new section:
New bracing plate welded in, and the leading edge of the chassis leg replaced with fresh metal:
Got the B-post finisher in to give me a datum for the main B-post:
Made up the lower B-post and welded that in (not proud of my welding here - I was having a bad day I think! This will be tidied up later!):
Then turned my attention to 'the bulge' in the bulkhead, and shaped up what amounted to something akin to half a ****.... not sure quite what size... about a 34B I guess... but it helped me judge whether the shape was developing along the right lines! Again - the welding's not pretty, but should tidy up OK.
Not sure what happened to the wheel arch, but it's completely the wrong profile for the door line, so I started doctoring it in the hope I could reshape it enough. I've got a new outer repair panel which has the correct profile, so out came the corresponding part of the old one:
Had to get the bottom of the A-post rebuilt to give me a chance of getting the arch back in. A certain amount of guesswork here as there wasn't much left of the original... and what was there had been butchered by someone before me:
Despite attempting to wrestle and beat the arch into submission, there was no way it was going to fit properly. Nothing for it but to chop it in half and fit it in sections. Lined up the forward section, and tacked it in place:
It will need some work around the point that it turns the upward curve, but I reckon this is the only way I'm going to get it to give me uniform door gaps.
Seat pan is also tacked in to give me the line for the other half of the wheel arch. Another poorly shaped panel as this has a different inboard curve, so I've had to slice it open and it will need a patch grafting in:
That's pretty much it for now, but I'm looking forward to getting this corner finished and working my way round to the other side.
Got a few other projects that are on the cards soon though - MX5 needs to be serviced and MOT'd ready for the summer, and I'm hoping to get the TR6 body panels prepped up for spraying as soon as summer arrives.... Too many projects, too little time :roll:
Darrencambs
Well-known member
- Joined
- Nov 14, 2010
- Messages
- 76
- Reaction score
- 0
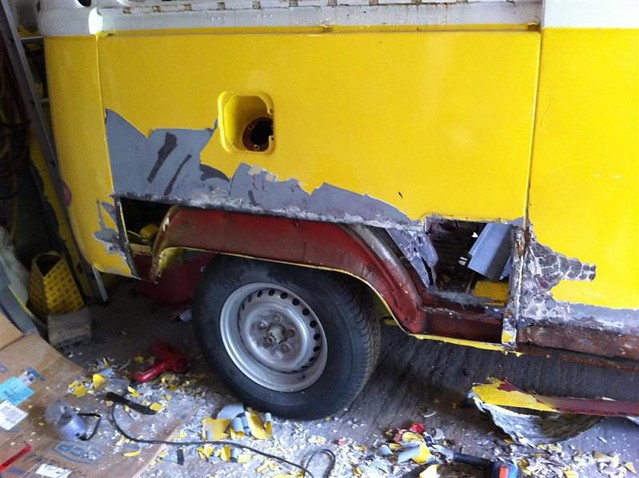
Got a bit more done to Bunty over the past few weeks. Not an awful lot, but have now managed to move on to the opposite side.
The passenger side wheel arch is now in:
Needs the floor welding in, but this will be done once I've got the front chassis rails all finished as the extra access space will be useful.
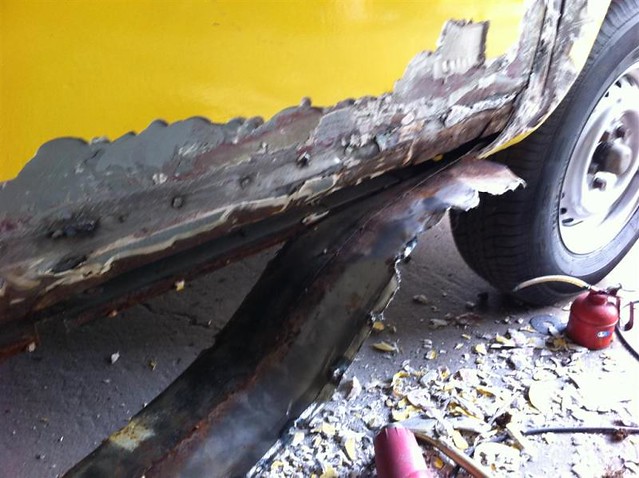
Have made a start on the driver's side, beginning with the sill. Rather than just wade in with the wire brush on the grinder, I thought I'd start digging... with the amount of filler I've found elsewhere I thought I'd avoid suffocating myself in a cloud of filler dust.
As expected, copious amounts of filler have been slopped over the bodger's repairs. The lines on the side are where I expected his repair to be welded in. I wasn't far out - fotunately it looks like I'll have something clean to work with above his bodgery.
A little creativity here with seams created from body filler:
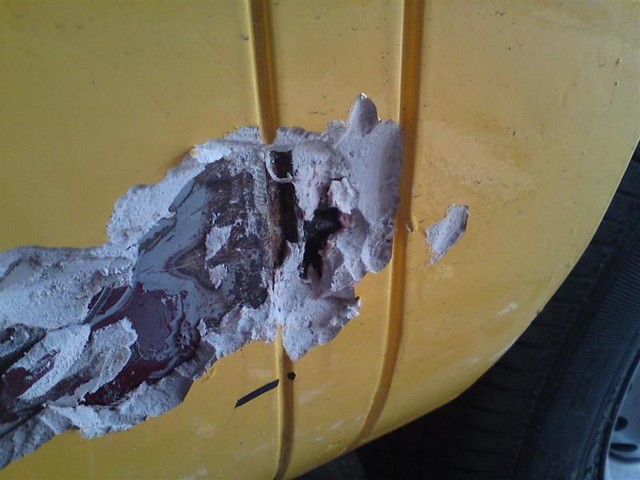
Chipped it all out and found all the filler was covering a patch that's tacked onto the lower sill and the side panel. I'll take this out and I have a new panel that should reach up to decent metal on the side panel.
Have started to slice out this patch and then on to removing the sill (I expect I'll find the remains of the old rusty sill beneath).
The passenger side wheel arch is now in:
Needs the floor welding in, but this will be done once I've got the front chassis rails all finished as the extra access space will be useful.
Have made a start on the driver's side, beginning with the sill. Rather than just wade in with the wire brush on the grinder, I thought I'd start digging... with the amount of filler I've found elsewhere I thought I'd avoid suffocating myself in a cloud of filler dust.
As expected, copious amounts of filler have been slopped over the bodger's repairs. The lines on the side are where I expected his repair to be welded in. I wasn't far out - fotunately it looks like I'll have something clean to work with above his bodgery.
A little creativity here with seams created from body filler:
Chipped it all out and found all the filler was covering a patch that's tacked onto the lower sill and the side panel. I'll take this out and I have a new panel that should reach up to decent metal on the side panel.
Have started to slice out this patch and then on to removing the sill (I expect I'll find the remains of the old rusty sill beneath).
Darrencambs
Well-known member
- Joined
- Nov 14, 2010
- Messages
- 76
- Reaction score
- 0
gninnam said:Never ceases to amaze me how much filler these bodge merchants use........
Good luck
Indeed! Judging by what I've removed so far, I reckon he must have used 25 to 30 litres of the stuff. Not cheap, but I guess there's always discount for buying in bulk! :roll:
I reckon I've got most of it now, although the rear end could well be full of it.
At least she'll be a few inches shorter and narrower now, so parking will be a little easier! lol!
the_troupster
Well-known member
Been following this one for a while. Really happy to see a geniune UK bus getting the love and attention it deserves!
Hopefully we'll both have something drivable for the shows this year...
Looking forward to the next installement and congratulations on all the hard/thorough work.
Jim
Hopefully we'll both have something drivable for the shows this year...
Looking forward to the next installement and congratulations on all the hard/thorough work.
Jim
Darrencambs
Well-known member
- Joined
- Nov 14, 2010
- Messages
- 76
- Reaction score
- 0
the_troupster said:Been following this one for a while. Really happy to see a geniune UK bus getting the love and attention it deserves!
Hopefully we'll both have something drivable for the shows this year...
Looking forward to the next installement and congratulations on all the hard/thorough work.
Jim
Thanks Jim. I think out of the two of us, it'll just be you that has a drivable bus this year.... got loads to do on this one! Every panel I take off reveals a shed load more work that needs to be done to stand a chance of getting her roadworthy :roll:
Just been looking at your thread and wishing I had one of those tilters - just the job for making access easier and avoiding the grinding sparks / blobs of weld down the back of the neck / up your sleeves!
Darrencambs
Well-known member
- Joined
- Nov 14, 2010
- Messages
- 76
- Reaction score
- 0
Time for another update...
Decided to start the off-side from the rear arch and work forward, which should culminate with me being able to tie the two front corners of the bus together and finish the repair that started all this :lol:
Picked off one of Mr Bodger's patch panels:
Then cut out the rear arch (was hoping to be able to save this, but I guess it will be easier just to buy new once it's ready to go back on):
All a bit of a mucking fuddle. The corners have various patches and there's quite a lot of the inner arch that's rotted out and been crudely patched, so it's all coming out and a new tub going in:
Having looked at the old and new panels, there is a little difference in the flat inner side where it meets up with the fuel tank housing and engine bay. I'll un-pick the tub and keep the original flat section here.
Oringinal panel :
New Panel :
Haven't really paid much attention to the state of the running gear, but it seems more ££££££'s will be required in order to satisfy the MOT man. Rear brake back plates are a bit on the crumbly side. I guess the previous owner would have sorted them out with a bit of filler!

Took a while to take the old inner tub out as it was patch upon patch and I wanted to make sure I still had the original attachment points in tact for when the new one goes in:
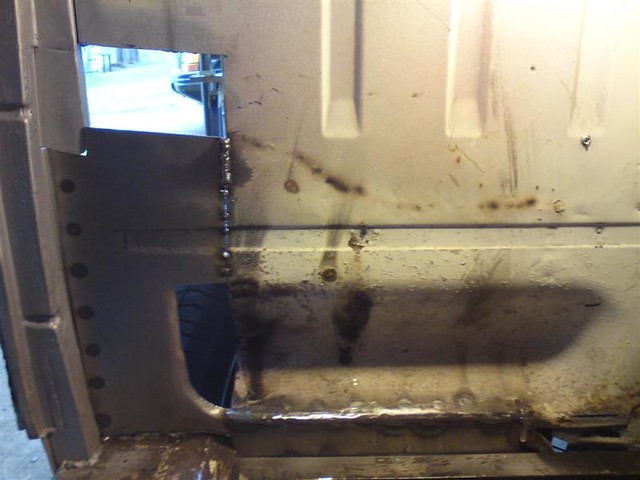
This is the front of the wheel arch where it meets C-post and sill. I counted four layers here:

Finally have it all out now though, and thankfully the yellow glow is starting to diminish.
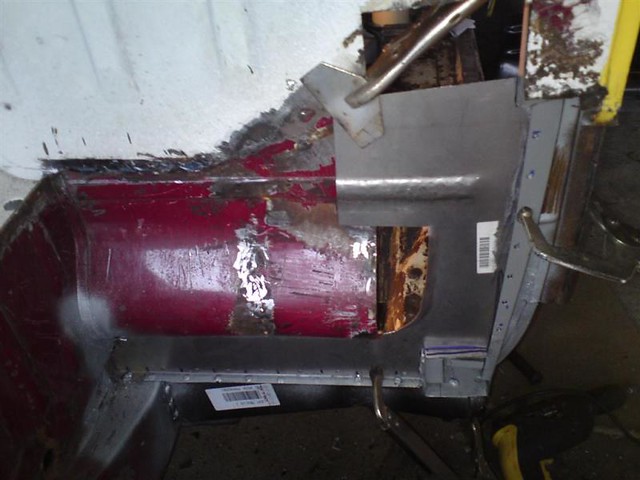
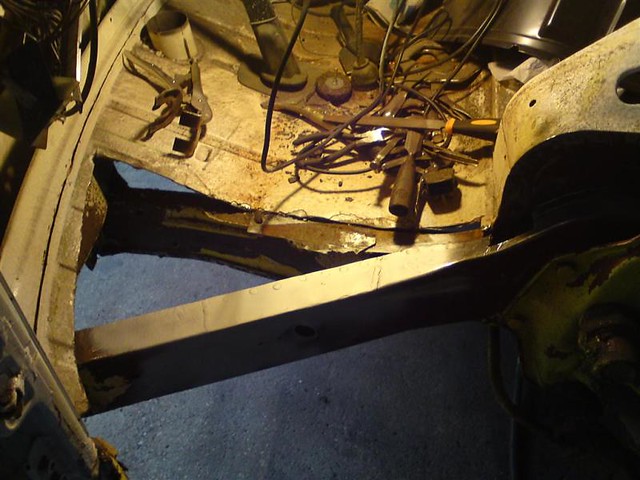
Found the typical Bump Stop / Chassis rot as I'd expected. I can see the bracket originally had a drain tube fashioned in so water could drain through, but I guess it doesn't take much road dirt to clog it up so salty water just sits on top and rots the bracket and chassis rail.

So, with the guard off the grinder and a thin cutting disc that had worn down to a fraction of it's original diameter, I managed to cut out part of the chassis rail (taking the crumbly bracket with it). Cut a piece of steel and welded that in. Now need to make up a new bracket to tie it all together, and clean up the rest of the bits I can get easy access to while the arch is out. Then I can crack on with getting the new wheel arch tub fixed in.
That's all for now. Hope to get a little bit more done this week - I'm afraid Katie and William will have to do without me cheering them on as I'll be up to my armpits in rusty bus on Friday. Planning on heading along to Stanford Hall on Sunday though to get some VW shaped inspiration and maybe bump into some fellow EarlyBayers.
Decided to start the off-side from the rear arch and work forward, which should culminate with me being able to tie the two front corners of the bus together and finish the repair that started all this :lol:
Picked off one of Mr Bodger's patch panels:
Then cut out the rear arch (was hoping to be able to save this, but I guess it will be easier just to buy new once it's ready to go back on):
All a bit of a mucking fuddle. The corners have various patches and there's quite a lot of the inner arch that's rotted out and been crudely patched, so it's all coming out and a new tub going in:
Having looked at the old and new panels, there is a little difference in the flat inner side where it meets up with the fuel tank housing and engine bay. I'll un-pick the tub and keep the original flat section here.
Oringinal panel :
New Panel :
Haven't really paid much attention to the state of the running gear, but it seems more ££££££'s will be required in order to satisfy the MOT man. Rear brake back plates are a bit on the crumbly side. I guess the previous owner would have sorted them out with a bit of filler!
Took a while to take the old inner tub out as it was patch upon patch and I wanted to make sure I still had the original attachment points in tact for when the new one goes in:
This is the front of the wheel arch where it meets C-post and sill. I counted four layers here:
Finally have it all out now though, and thankfully the yellow glow is starting to diminish.
Found the typical Bump Stop / Chassis rot as I'd expected. I can see the bracket originally had a drain tube fashioned in so water could drain through, but I guess it doesn't take much road dirt to clog it up so salty water just sits on top and rots the bracket and chassis rail.
So, with the guard off the grinder and a thin cutting disc that had worn down to a fraction of it's original diameter, I managed to cut out part of the chassis rail (taking the crumbly bracket with it). Cut a piece of steel and welded that in. Now need to make up a new bracket to tie it all together, and clean up the rest of the bits I can get easy access to while the arch is out. Then I can crack on with getting the new wheel arch tub fixed in.
That's all for now. Hope to get a little bit more done this week - I'm afraid Katie and William will have to do without me cheering them on as I'll be up to my armpits in rusty bus on Friday. Planning on heading along to Stanford Hall on Sunday though to get some VW shaped inspiration and maybe bump into some fellow EarlyBayers.
I just looked through all your work and I have to say I really admire all the work your doing on the bus, I think a lot of people would simply give up after finding what you have found.
Stanford Hall should give you plenty of inspiration, i'l be there from Saturday and on the look out for other EB's so might see you.
Luke.
Stanford Hall should give you plenty of inspiration, i'l be there from Saturday and on the look out for other EB's so might see you.
Luke.
Mate,
Loving your tenacity, work quality and effort here, great to see this being transformed and looking fwd to your updates
keep it up :!:
Still can't believe the kind of nobs out there doing jobs like that - shameful :evil:
Loving your tenacity, work quality and effort here, great to see this being transformed and looking fwd to your updates
keep it up :!:
Still can't believe the kind of nobs out there doing jobs like that - shameful :evil:
Similar threads
Vehicle For Sale
1968 Bay window T2 Dreamy
- Replies
- 3
- Views
- 479
Vehicle For Sale
Very rare Oslo edition SO69-01 1969 Early Baywindow £12K Ono
- Replies
- 0
- Views
- 1K