Bunty - '71 Tin-Top Sunshine Bus Resto

Early Bay Forum

Help Support Early Bay Forum:

This site may earn a commission from merchant affiliate links, including eBay, Amazon, and others.
Amazing what you are doing - it's a shame the PO hadn't the same skill and enthusiasm for the job. I thought my bus was a little rough until I saw what you have got into. Now I know why there are so few bays around where I live now - they all went to Europe!!

Keep the pics coming.

Al
 
Thanks for the encouragement guys. Glad to see people are following this thread as the nightmares unfold!

Been out for a bit tonight starting to make up a new pair of bump stop brackets as I don't think these are available anymore.

Maybe a bit over engineered, but I had a length of angle iron knocking around that looked right for the job. Started off by cutting a 'V' in one side:
5662522686_b66d51f23b_z.jpg


Then chamfered the edges of the cut so I could get decent penetration with the MIG:
5662522878_ec03c3e7ae_z.jpg


A little gentle persuasion...
5662523054_9beb910111_z.jpg


...and we have a 90 degree bracket. Made 4 of these so I can make a matching pair to do both N/S and O/S.
5662523196_2f94bcf8e7_z.jpg


Cut a cross piece from some more angle iron, and set it up ready to weld together.
5662523364_b6e43d0cce_z.jpg


Not quite the finished article, but you get the idea...
5662523730_7af466293a_z.jpg


It needs attacking with the grinder to smooth down the welds and narrow the depth of the sides so the inner corner of the 'L' becomes a smooth radius. It won't look original but should be reasonably tidy. I'll either fill the well in the cross piece with seam sealer and wax once the bracket is fitted... or may even seal it up completely with a small plate.
 
gninnam said:
Nice bit of fabrication going on there 8)

Clever sod :lol:

Cheers Andy, I know they say the camera never lies, but it does seem to look better in the pics than it does in real life!

Anyway, got it finished and fitted this evening so I can now get on with tidying up this corner and getting the new wheelarch tub welded in.

Finished bracket with a few holes drilled in for plug welding to the chassis:
5666335826_2ed9c739bb_z.jpg


5666336156_4da9326db7_z.jpg


Clamped in place ready for welding. I noticed the axle horn sprung inward a couple of mm when I cut the old bracket loose, so the block of wood is knocked in there to take it back to the original position (not sure if this makes any difference to the wheel alignment, but I thought it must be in that position for a reason)
5666336550_7da98a7f0c_z.jpg


Welded in place and given a dusting of etch primer. All the nooks and crannies will be seam sealed to try to prevent water seeping into the joints. I'd given the chassis a quick going over with a die grinder to take off some of the surface rust - hence the very orange glow. I'll give the chassis a dose of rust converter tomorrow.
5665768085_4d6d62507c_z.jpg
 
Fantastic job there. I would have thrown the towel in way before I got to the stage you are at.Hats off to you.

Look forward to seeing it all finished.


Richard
 
..yay! :)

Looking good there mate .. the bump stop hangers made me smile cos i've just done mine ...

Bugger to cut off aren't they! :D

Hilly
 
Cheers Richard. I'm looking forward to seeing it finished too! Got a little while before that happens though :roll:

Got the new rear wheelarch tub welded in. Needed a bit of persuasion for it to meet the flanges around the fuel filler neck - a couple of jacks and pieces of wood sorted that out though.
5680520855_a61a824dc7_z.jpg


5680521067_0edd1a50e9_z.jpg


It was the wrong profile for a '71, so the inner rear corner had to be split open and a filler patch put in.
5680521291_c962766ff9_z.jpg


One thing I noticed about the new tub was the fact there was no hole for the eyelet that was on the original panel. The old mounting wasnt reinforced, so not a seatbelt anchor. Does anyone know what they are for? If you're wondering what I'm talking about, it's these eyelets pointed out in this pic. One on each inner arch, and one on the rear bulkhead:
5681084172_7d67615cf8_z.jpg


With the wheelarch tub now in, I can start working my way towards the front of the bus. I'll get the chassis rails sorted first, then put the jacking points and outrigger in, then do the sill.
Took out the top-hats and jacking point / outrigger to find a small hole in the top that needed to be cut out and repaired.
5681084990_fc59276a6e_z.jpg

5680522789_ce3d5e5e7c_z.jpg


Also need to graft a new 8 inch section in the bottom of the rail just forward of where the handbrake cable comes through. I did cut a piece from a new repair section, but it's the wrong profile AGAIN for the intended purpose. I don't think there's been a single repair panel that I haven't had to alter in some way to fit which is very frustrating. I've had to unfold and refold this edge to give it the correct depth (new fold along the blue line):
5680523639_36c96998c7_z.jpg


That's as far as it goes at the mo.
 
Hilly_70 said:
..yay! :)

Looking good there mate .. the bump stop hangers made me smile cos i've just done mine ...

Bugger to cut off aren't they! :D

Hilly

Hi Hilly,

Just seen your post. Those brackets are a bugger to be sure. There was a couple of inches I just couldn't get the angle grinder to reach, so I ended up using a dremel.... those little cutting discs just break off and disappear if you're not careful. I must have used about 6 of them to do that one small piece! :lol:
 
Time for a small update....

First time working on the bus for a few weeks - Kids and work kept me busy last weekend... Weekend before that made a trip to Stanford Hall for some VW shaped inspiration (Pics of the show here if you're interested [ http://www.flickr.com/photos/darren-cambs/sets/72157626507988873/ ] ). Great to see some amazing VWs there.

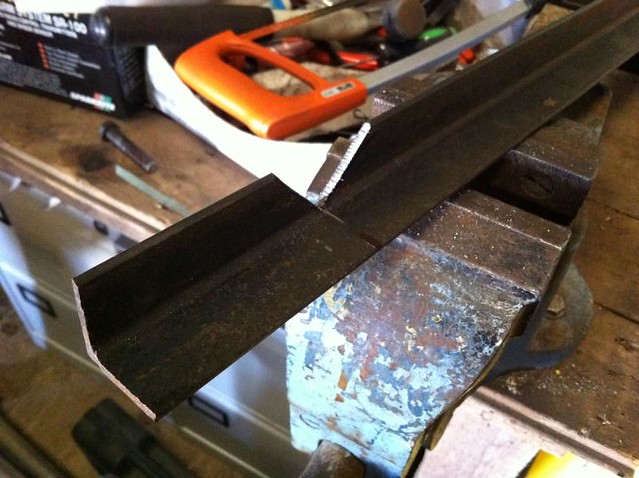
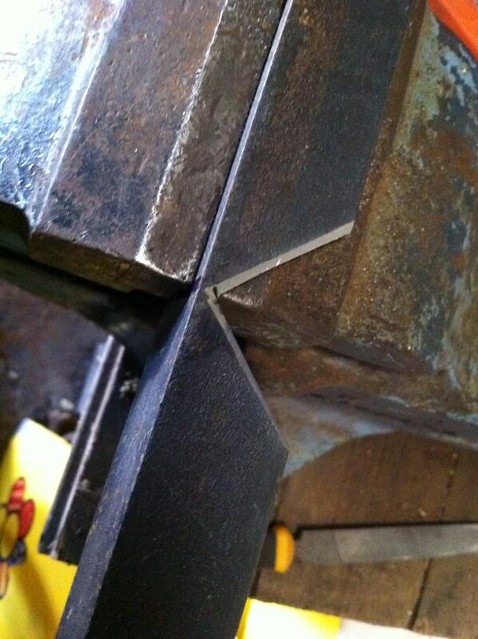
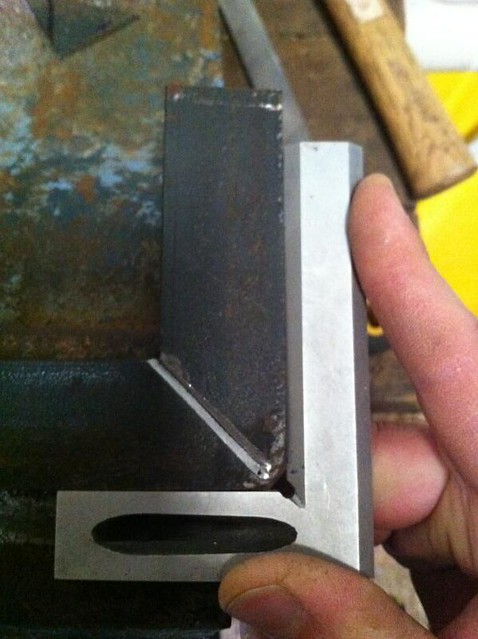
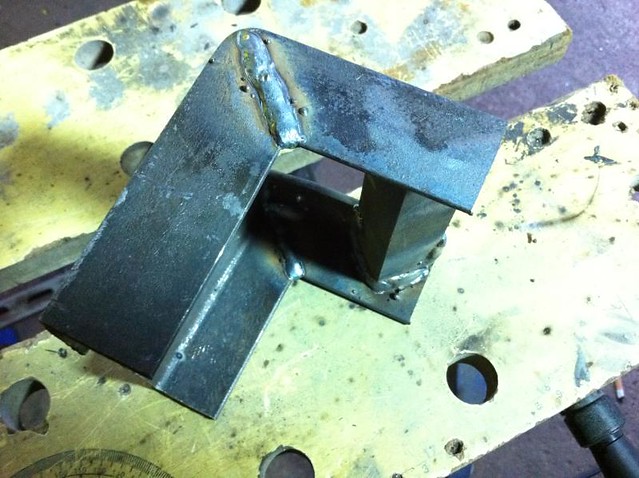
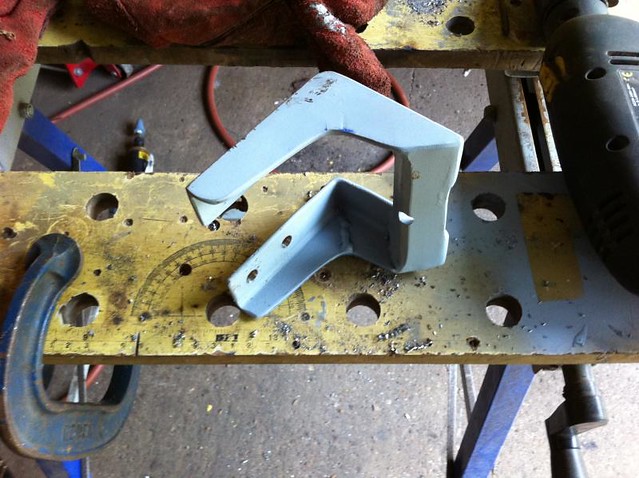
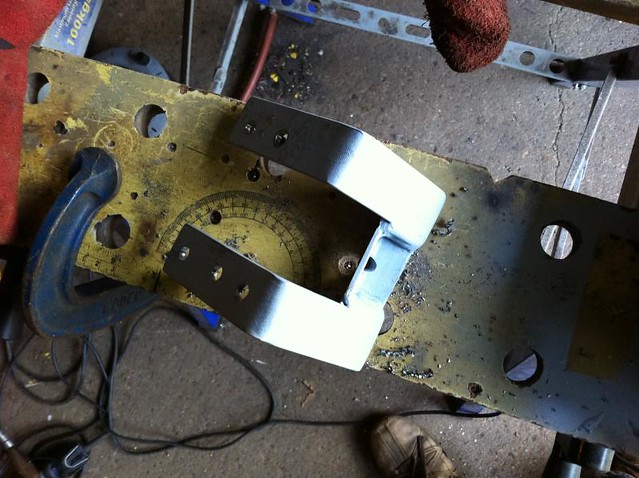
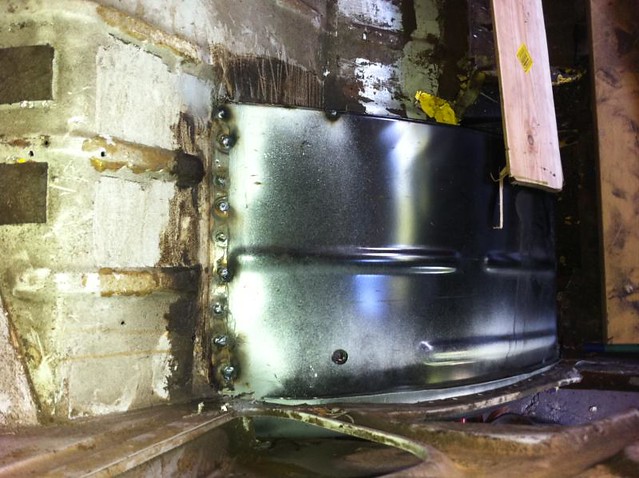
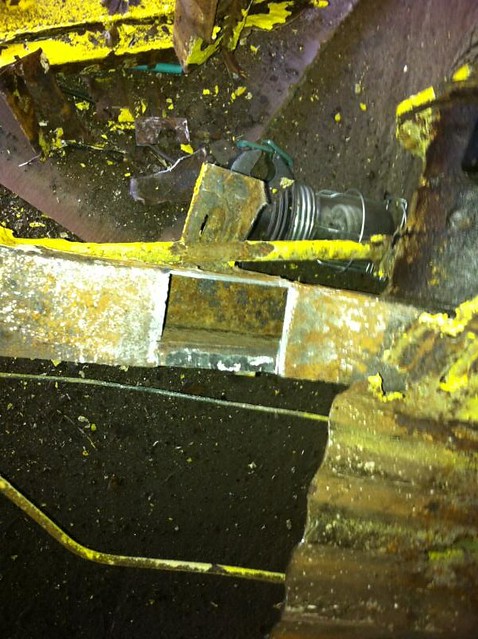
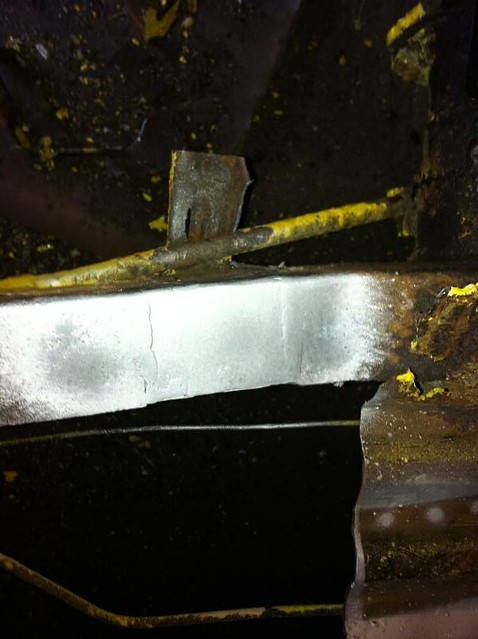
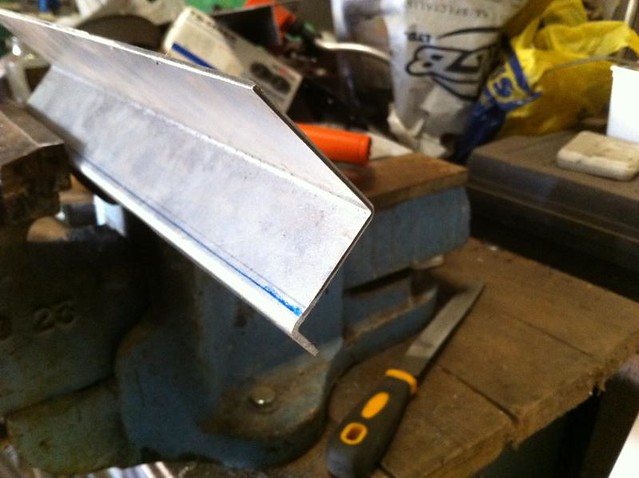
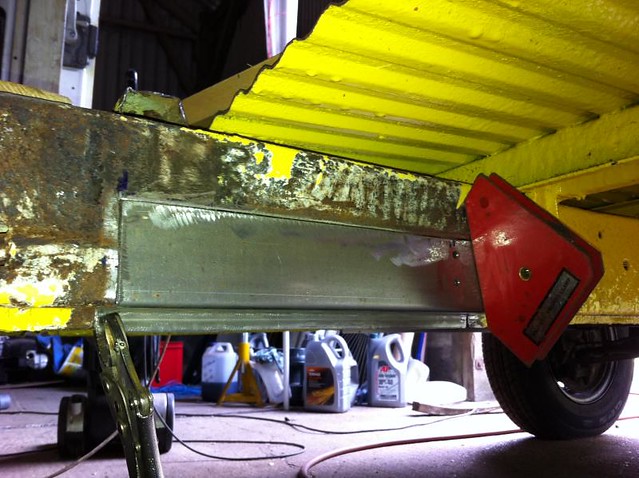
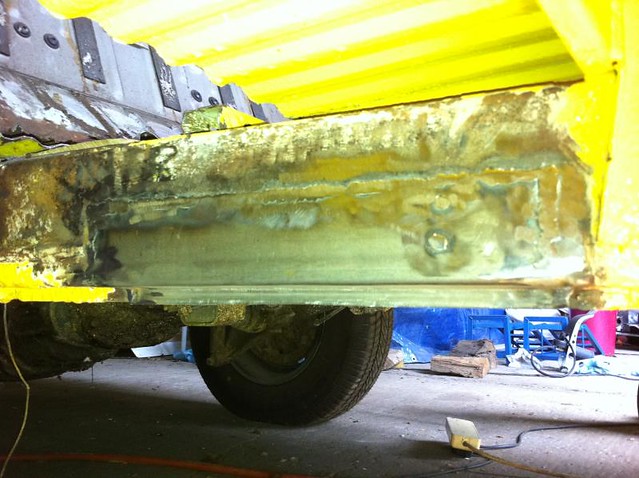
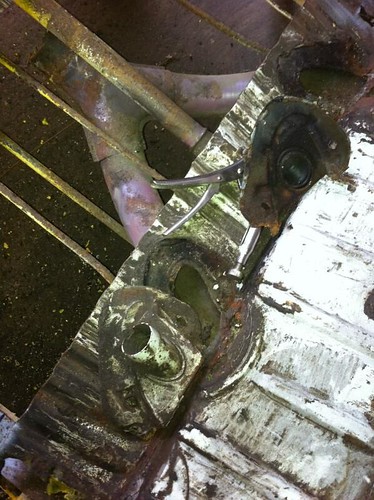
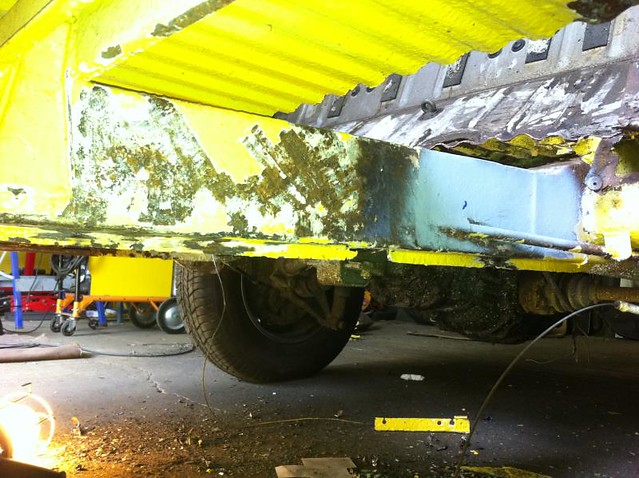
Got some welding done on the O/S rear chassis rail. This was the bit I was re-folding in the previous post. All fitted in quite nicely:
5723689180_382ae8dee9_z.jpg


5723689458_f70bd14263_z.jpg


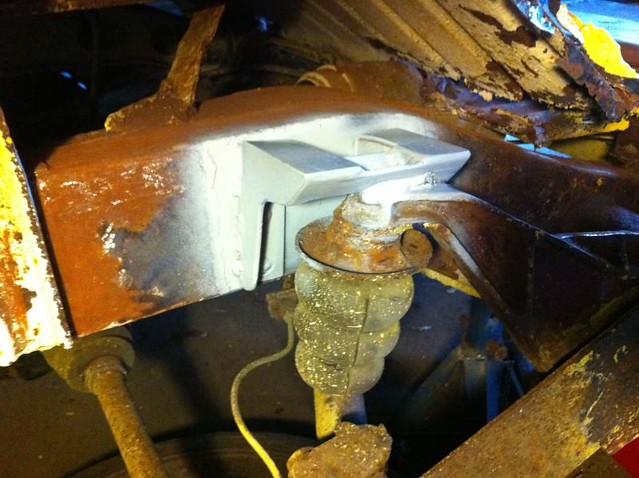
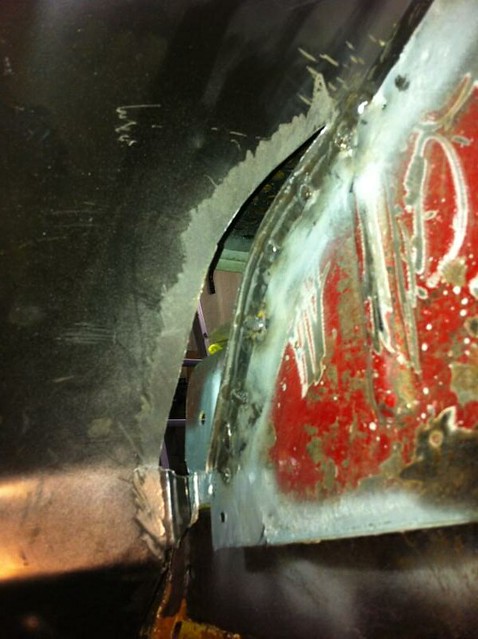
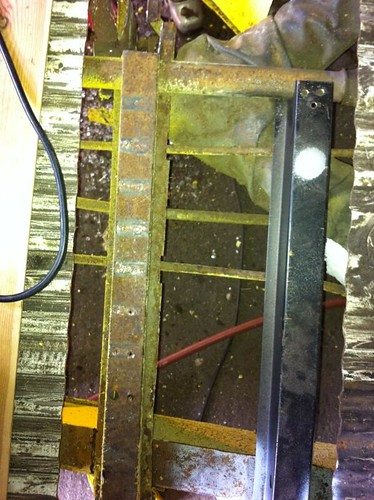
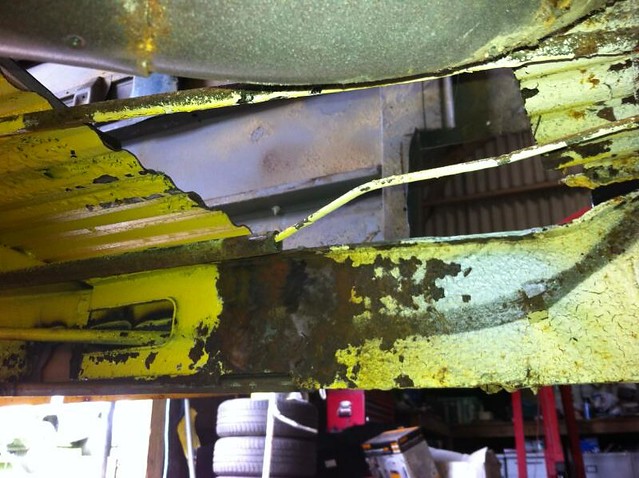
Then took out the Top Hats, Cross member, Jacking Points and Outriggers from both sides. I'd gotten a bit ahead of myself a few months back and already plug welded the top hat to the N/s outrigger, but decided to cut the old outrigger out to make sure the chassis was sound here:
5723134503_07aefd8667.jpg


5723690372_b5ed5ee297.jpg


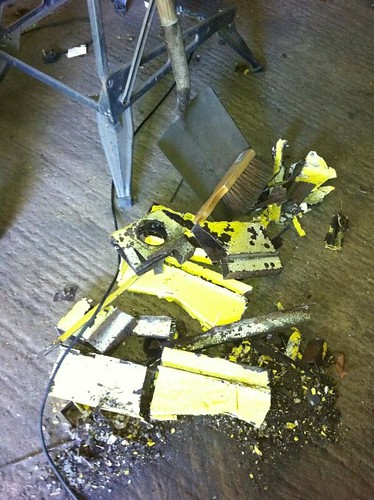
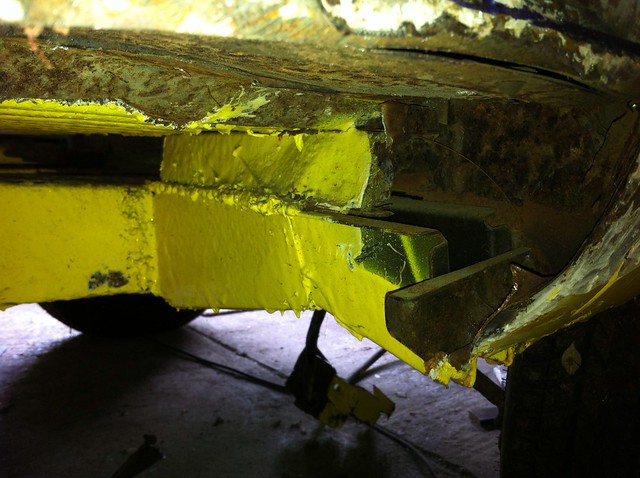
Just a selection of the debris. I'll be glad when all this day-glo yellow is gone. Am REALLY beginning to hate this colour :evil:

5723690736_3f23b19f68.jpg


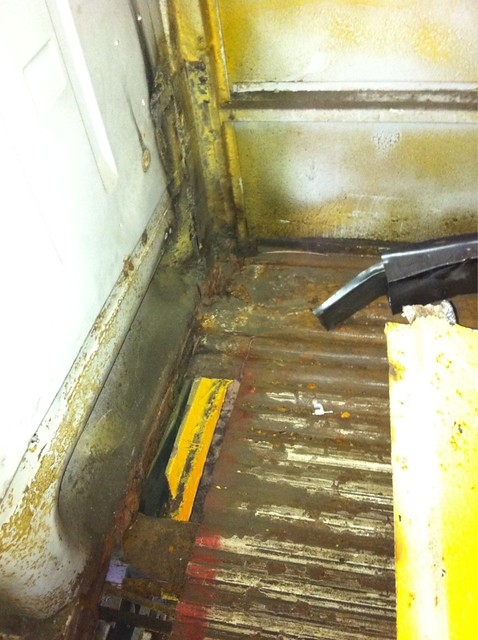
Managed to unscrew the floor vents - expecting to be able to remove the hot air ducting. Unfortunately I found out the ducts are actually welded to the floor. Guess that will be yet more fabrication when it comes to getting the floor in. Still, I'd have done the lower half of the bus by then, so what's a few heat ducts? :roll: :lol: :roll: :cry:

5723691318_046df2a45d.jpg


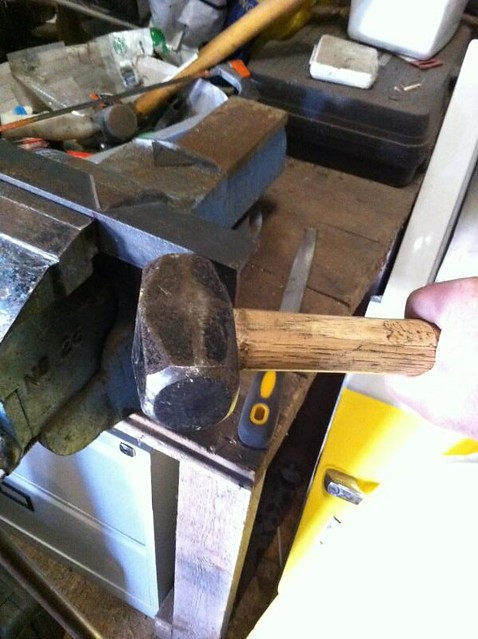
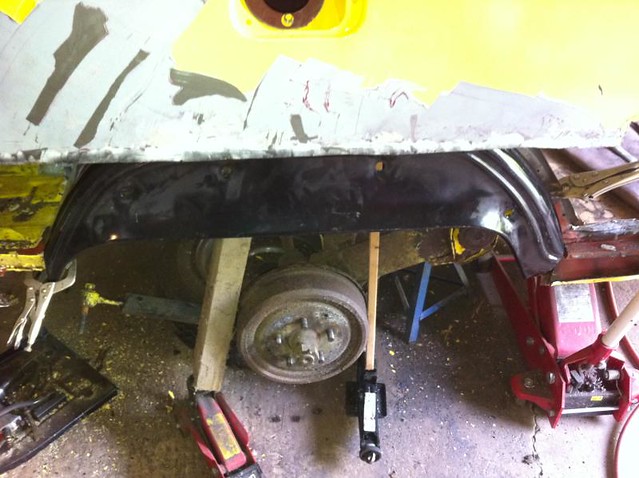
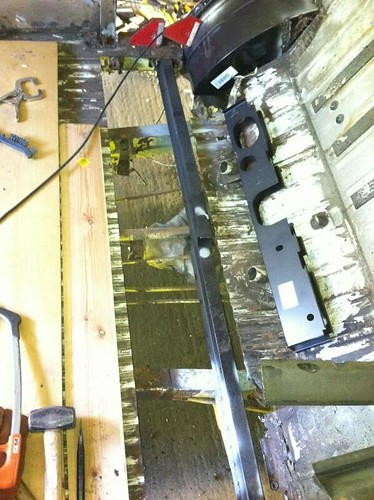
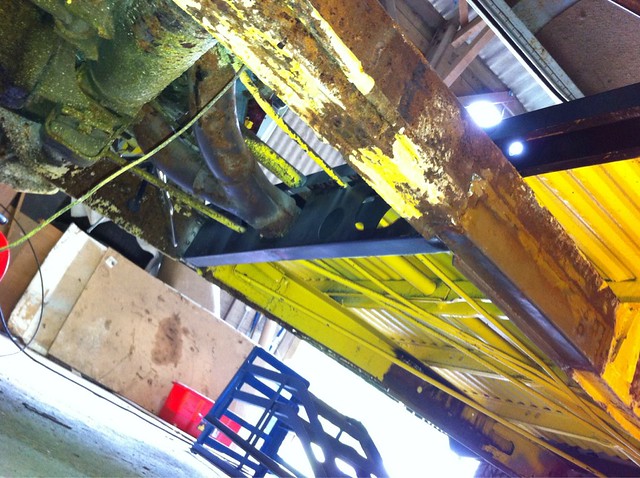
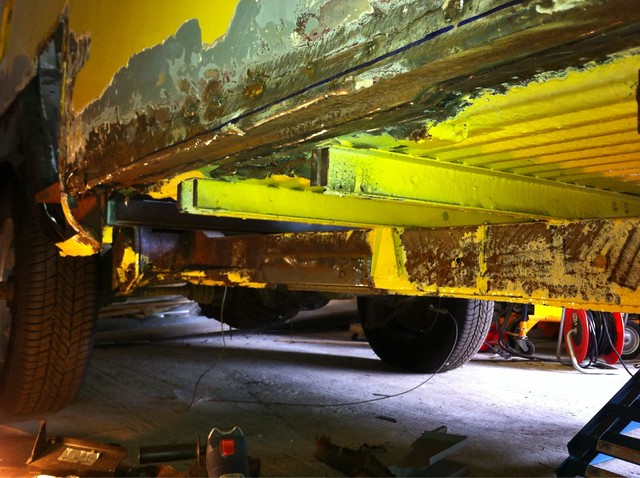
Most of today been cutting and grinding out the remnants of the crossmember, outriggers and jacking points and cleaning up the areas ready to weld the new ones in.

Doesn't sound like much, but it takes bloody ages. Lying on your back under a rusty bus, isn't it amazing that wherever you position yourself, there's always a bracket, piece of floor, piece of chassis that ensures the grinding sparks are directed up your nose / in your ear / through the tiny gap between face and goggles / up trouser leg / down sleeve / etc. I did find a couple of very useful tools when I was rumaging around in the barn recently though - forgot I had them and they were tucked at the bottom of a drawer. Air chisel has been worth it's weight in gold though for slicing off the rotten stuff and even for chipping off the 'orrible yellow paint and stonechip.

5723138899_7569a94274.jpg


5723691844_14ef317cd5_z.jpg


5723137887_8325e40518_z.jpg


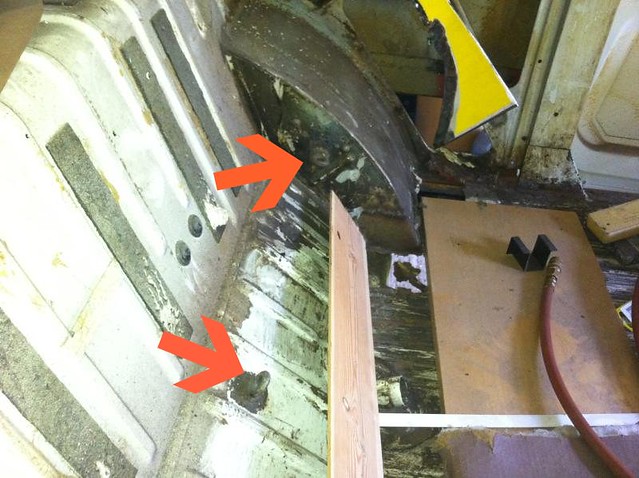
Also ground off the remnants of the old belly pans that the PO had left attached to the chassis rails. He'd just sliced them off with a cutting disc (he'd nicked through the main battery feed cable too, so that would have been fun when the battery was connected up).

5723137379_d6641e429b_z.jpg


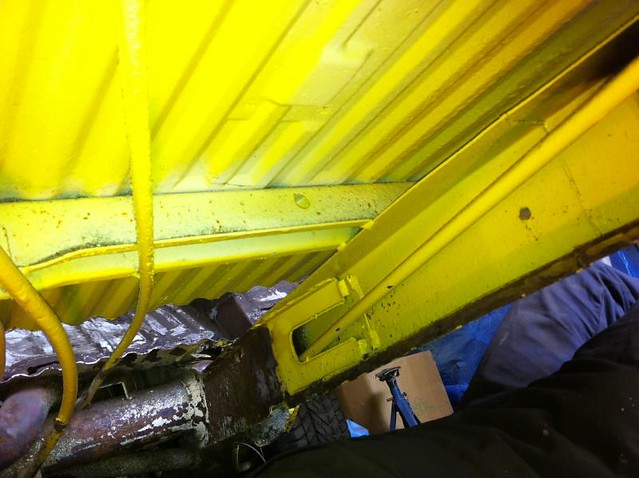
N/s chassis rail has a couple of holes I need to cut out and let in a new piece. Not too bad though.
5723693228_02f2b1100f.jpg


N/s is pretty sound (already replaced the front section):
5723693758_cfa1d7db13_z.jpg


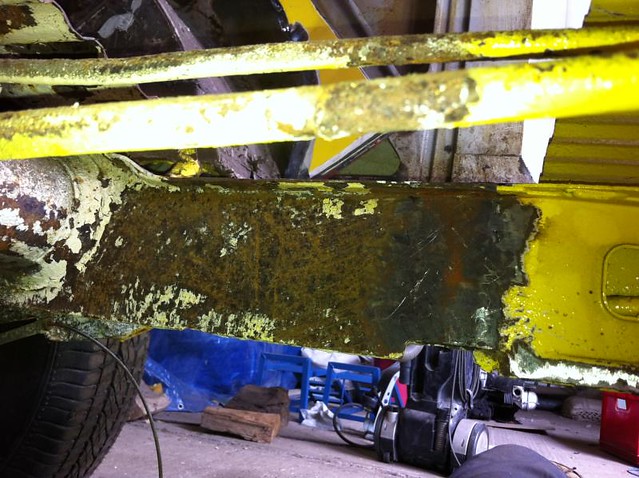
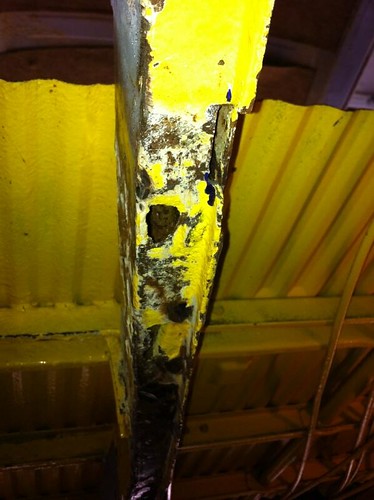
O/s is going to need the lower 1-2 inches replacing along its entire length though.

That's it for now. Will update when I've got the new stuff welded in.
 
Looking good with the fabrication you have managed 8)

Is it a die grinder next to the chisel - nice bit of kit ;)
 
Cheers Andy.

Been offline for a while with computer problems, so haven't replied until now.

Yes that is a die grinder. Only a cheapy SIP one, but it does come in very handy (when you remember you've got one stashed somewhere in a drawer!). Could do with one of those cut-off tools that look very similar - handy for cutting in areas that are hard to get at (bump stop brackets). I did see a guy on another site had turned a mandrel to fit in a die grinder to make use of his old cutting discs that had shrunk too small to be any use in a grinder... going to need a lathe to turn one of those though!
 
Hi all

Apologies for my absence (did anyone notice??!!).

Can't believe it's nearly a year since I last posted in here. Bunty has unfortunately been mothballed since then to allow me to concentrate my time on finishing my TR6 restoration. After just over 6 years of every-other-Sunday, or less, that's now road legal.... Taxed from 1st may, but not turned a wheel on tarmac yet due to the severe drought conditions and the fact I haven't fitted the hood yet.

So, Bunty will soon be hauled out from her cobweb infested corner of the barn and the weldathon will continue!

We're hoping to get along to Stanford Hall this weekend for some Early Bay shaped inspiration. Probably head over in the Jeep, and take a couple of canoes and waders so we can ensure we get there and back ok.
 
Finally got cracking on the bus again this weekend after getting the TR6 finished. That's been on the road for the past month, but I had a couple of weekends tied up with getting the hood fitted and actually taking it out for a spin between downpours.

So, my weekends will now be spent laying on my back under a VW getting showered in grinding sparks, flakes of rust and welding spatter.

This weekend was spent firstly trying to remember where I'd got to, and what my restoration plan was. I got the rear cross-member welded in, plus the top-hat that sits above it:

7358944980_d6d2f52765_z.jpg


Then I had a good look at the floors (or what's left of them), and decided replacement is the best option. The O/S is shot in the front and rear corners and at various points along the edge where it meets the side panel:

7358948016_1d4e134918_z.jpg


To keep some reference points I decided to get the inner sill in first. I've chopped out what's left of the old inner sill and strengthener. The new inner sill will be plug welded to the ends of the top-hats initially, then to the new floors when they go in:

7358937086_d94ee2b657_z.jpg


PO has totally screwed up the lower portion of the side panel: smacking it in with a big hammer so he could dollop a load of filler over his comedy welding. So i've cut it off level with the floor bottom at the moment and hope I can salvage most of what's above that line.

With the inner sill fitted, I'll have a reference point for reconstructing this corner. Sad I'll have to remove the previous owner's masterpiece here - cock-eyed jacking point.... nothing above it with any strength and welds that are barely strong enough to hold it onto the chassis:

7173698913_2789103905_z.jpg


So, we're making a little progress again. Slightly slow going as I'm having to get my eye in again having had a year or so off from the cutting and welding.
 
Darrencambs said:
Bunty has unfortunately been mothballed since then to allow me to concentrate my time on finishing my TR6 restoration. After just over 6 years of every-other-Sunday, or less, that's now road legal.... Taxed from 1st may, but not turned a wheel on tarmac yet due to the severe drought conditions and the fact I haven't fitted the hood yet.

Looks really good (had a little poke around on the interweb :msn4: )

7160161204_6104cab08a_z.jpg


Now, back to the bus...
 
Glad your back on it, give me something to read thru the oncoming winter............. :lol:

Keep up the top work 8)
 
All,

Sorry this thread has been a little dead for a while now. Been lots going on which means I've had very little time on the bus. Did manage to get the TR6 in Practical Classics mag this month which had a couple of sneaky glimpses of the bus (http://on.fb.me/QwYHVD" onclick="window.open(this.href);return false;)... hopefully get her in there in her own right one day.

I did get some work done this weekend. Finished chopping out the offside front jacking point, discovered that Mr Bodger (previous owner) had gouged a whole in the chassis rail with his angle grinder when he replaced the old jacking point.... then covered up the 3 inch gouge with the new jacking point (I should point out here that in his wisdom, he decided that a rear nearside jacking point was the best item to fit to the o/s jacking point, and also felt that it would be best positioned at a random angle in both planes, then tacked on with pigeon poo so that it would barely be able to support it's own weight let alone the weight of the bus.....).

Sooooo.... with the jacking point and half a bucket of filler (super strenth chassis filler I assume) out of the way, I was able to see that the rail needed a 12 inch strip letting in to repair some of the previous bodges and corrosion. That's now welded in. The inner o/s sill is welded on to the top hats and crossmembers, and the front and rear o/s jacking points are ready to go in. Decided saving the floors is futile, so I'm going to take them out and replace with new ones. What's there at the moment gives a decent reference point though.

I've taken a few pics which i need to get loaded up to flickr then posted in here, and will try to get that done soon.

The focus is now back on the bus, so hopefully this thread will be revived again. Currently considering getting a roll-over jig for her as I'm getting a bit tired of grinding sparks and welding spatter dropping in my ears. Money that could be spent on the bus, but I figure the jig can always be sold on when I'm done.

Plan of attack now is to get the o/s B-post corner / bulkhead rebuilt, then new wheel tub and arch, front ends of the chassis 'Y' sections and the A-post all repaired. That done, it will finally allow me to finish the repair of the lower front clip which was the original job I'd set out to do! :roll:

Then it's 'just' replace the rear n/s wheel tub, new rear arches, rear lower corners, both battery trays, part of the rear bulkhead....... and she'll then be ready for prepping for paint. :lol:
 
Just been reading about the tr6 in pc, looks like a great job. Good luck with the rest of the van. Wish I had your skills!
 
kevinhall said:
Just been reading about the tr6 in pc, looks like a great job. Good luck with the rest of the van. Wish I had your skills!

Cheers Kevin. I'm quite pleased with the overall result considering I was learning as I went along. All good practice for tackling the bus!

Just had a look through your rebuild thread. Seems we've had similar issues with previous 'restorers' and their industrial sized buckets of body filler!
 
tomedwar72, creationblue, Thanks for your posts back in September. Sorry I missed them when I revived this thread! Thanks for the words of encouragement.
 
Darrencambs said:
kevinhall said:
Just been reading about the tr6 in pc, looks like a great job. Good luck with the rest of the van. Wish I had your skills!

Cheers Kevin. I'm quite pleased with the overall result considering I was learning as I went along. All good practice for tackling the bus!

Just had a look through your rebuild thread. Seems we've had similar issues with previous 'restorers' and their industrial sized buckets of body filler!

Indeed, and that magic super strength chassis filler! Crazy what some people will do!
 

Latest posts

Top