You are using an out of date browser. It may not display this or other websites correctly.
You should upgrade or use an alternative browser.
You should upgrade or use an alternative browser.
Cunning Bus Project
- Thread starter cunning plan
- Start date


Help Support Early Bay Forum:
This site may earn a commission from merchant affiliate
links, including eBay, Amazon, and others.
cunning plan
Well-known member
- Joined
- Jul 15, 2008
- Messages
- 2,625
- Reaction score
- 1
- Location
- Northamptonshire
- Year of Your Van(s)
- 1968
- Van Type
- Clipper / Microbus
So I am currently on a self-imposed spending freeze, which is making work on the bus even slower than it was before. I am only fitting parts that I already have 'in stock' or other tasks that just require time rather than new parts.
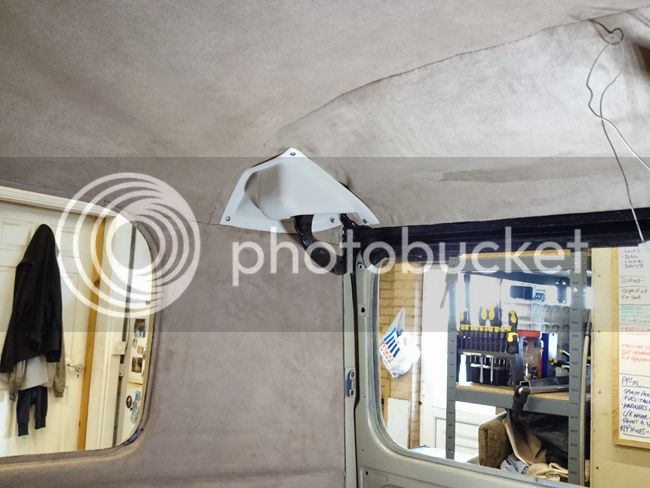
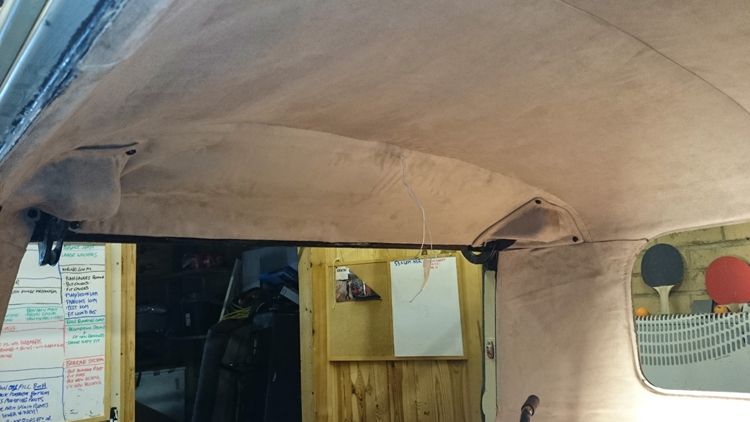
I have had these hinge covers on the shelf for a while, which to be honest, I am not totally keen on, however, they are better than the metal hinge of the boot hatch and cover the necessary headlining cuts.
The other side for comparison - Open.
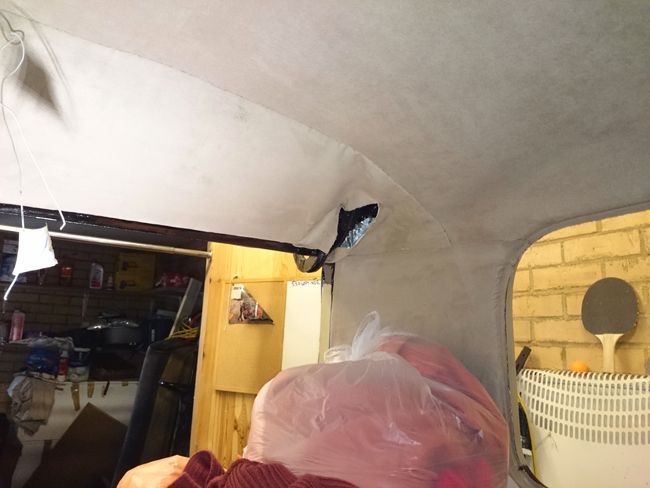
The other side for comparison - Closed.
Half-closed.
Clear and closed.
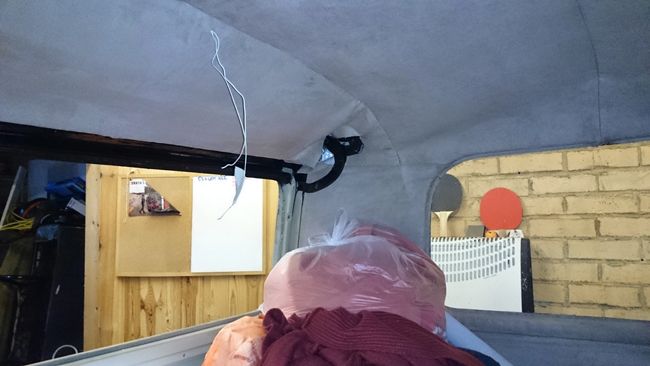
The screws I am using are nice stainless ones, but I did not like the contrast between the headlining material, the plastic of the cover and the screws. So I found a number-plate cap-screw-cover and tried it on one of the screws, which I think looks better.
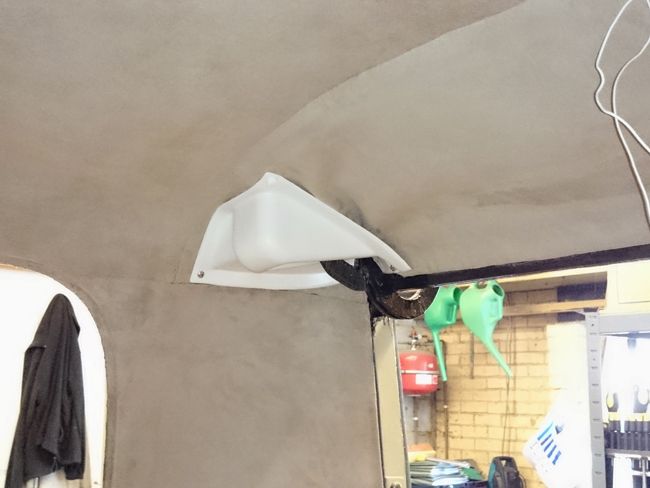
I only had one cap though, so I will have to get some more :lol:
I will probably also try to put some more material into the gaps to make it look more integrated. Alternativly, another option would be to cover the hinge covers in the same material as the headlining.. Hmm, I might have a go :rocknroll:
___
[92%] Fit Headlining extra material around windows (Need to tidy / Hinge covers / Cover joins)
[0%] Wiring Loom diagram (This was 10%, but now back to 0% for a change in direction.
[0%] Wiring Loom component purchase
[0%] Wiring Loom fabricate
[0%] Paint rear drums
[0%] Fit rear drums
[0%] Plan and purchase complete Hydraulic braking system
[0%] Fit Complete Hydraulic braking system
[0%] Fit Accelerator Cable
[0%] Rear Windows Tints
[0%] Rear Windows Install
[0%] Revise Front Axle / Brake Drums / Track-Rods / Re Torque all

I have had these hinge covers on the shelf for a while, which to be honest, I am not totally keen on, however, they are better than the metal hinge of the boot hatch and cover the necessary headlining cuts.
The other side for comparison - Open.
The other side for comparison - Closed.
Half-closed.
Clear and closed.
The screws I am using are nice stainless ones, but I did not like the contrast between the headlining material, the plastic of the cover and the screws. So I found a number-plate cap-screw-cover and tried it on one of the screws, which I think looks better.
I only had one cap though, so I will have to get some more :lol:
I will probably also try to put some more material into the gaps to make it look more integrated. Alternativly, another option would be to cover the hinge covers in the same material as the headlining.. Hmm, I might have a go :rocknroll:
___
[92%] Fit Headlining extra material around windows (Need to tidy / Hinge covers / Cover joins)
[0%] Wiring Loom diagram (This was 10%, but now back to 0% for a change in direction.
[0%] Wiring Loom component purchase
[0%] Wiring Loom fabricate
[0%] Paint rear drums
[0%] Fit rear drums
[0%] Plan and purchase complete Hydraulic braking system
[0%] Fit Complete Hydraulic braking system
[0%] Fit Accelerator Cable
[0%] Rear Windows Tints
[0%] Rear Windows Install
[0%] Revise Front Axle / Brake Drums / Track-Rods / Re Torque all
- Joined
- Apr 22, 2012
- Messages
- 2,279
- Reaction score
- 314
- Location
- Dorset
- Year of Your Van(s)
- 1971
- Van Type
- Dormobile
I like those covers .....MMMMMMMMMMMMMMMMMM Maybe
Good work there, keep going ,amazing what one can achieve when one has to. :lol: :lol:
J & P
Good work there, keep going ,amazing what one can achieve when one has to. :lol: :lol:
J & P
cunning plan said:So I am currently on a self-imposed spending freeze, which is making work on the bus even slower than it was before. I am only fitting parts that I already have 'in stock' or other tasks that just require time rather than new parts.
I have had these hinge covers on the shelf for a while, which to be honest, I am not totally keen on, however, they are better than the metal hinge of the boot hatch and cover the necessary headlining cuts.
The other side for comparison - Open.
The other side for comparison - Closed.
Half-closed.
Clear and closed.
The screws I am using are nice stainless ones, but I did not like the contrast between the headlining material, the plastic of the cover and the screws. So I found a number-plate cap-screw-cover and tried it on one of the screws, which I think looks better.
I only had one cap though, so I will have to get some more :lol:
I will probably also try to put some more material into the gaps to make it look more integrated. Alternativly, another option would be to cover the hinge covers in the same material as the headlining.. Hmm, I might have a go :rocknroll:
___
[92%] Fit Headlining extra material around windows (Need to tidy / Hinge covers / Cover joins)
[0%] Wiring Loom diagram (This was 10%, but now back to 0% for a change in direction.
[0%] Wiring Loom component purchase
[0%] Wiring Loom fabricate
[0%] Paint rear drums
[0%] Fit rear drums
[0%] Plan and purchase complete Hydraulic braking system
[0%] Fit Complete Hydraulic braking system
[0%] Fit Accelerator Cable
[0%] Rear Windows Tints
[0%] Rear Windows Install
[0%] Revise Front Axle / Brake Drums / Track-Rods / Re Torque all
Looking ace bud, if you don't like the colour of those covers try using Plastikote paints.
It's a really good idea to put a hold on spending, I've kind of done the same, only problem is my bus now has no wheels! :lol: Oh well that plans out the window :lol:
cunning plan
Well-known member
- Joined
- Jul 15, 2008
- Messages
- 2,625
- Reaction score
- 1
- Location
- Northamptonshire
- Year of Your Van(s)
- 1968
- Van Type
- Clipper / Microbus
Buss69 said:Looking ace bud, if you don't like the colour of those covers try using Plastikote paints.
I didn't think of the plastic paints, but that would have been another good alternative solution.
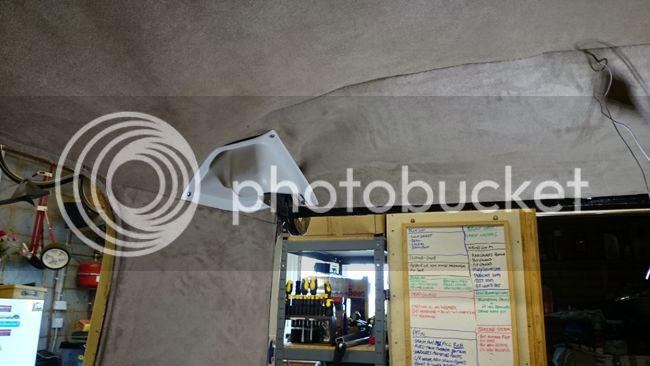
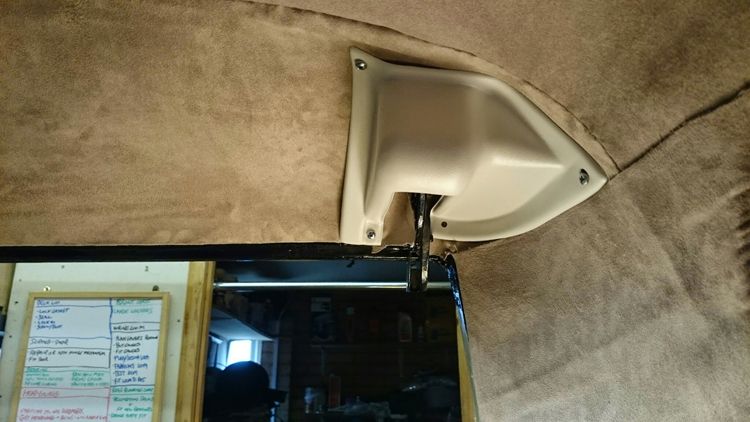
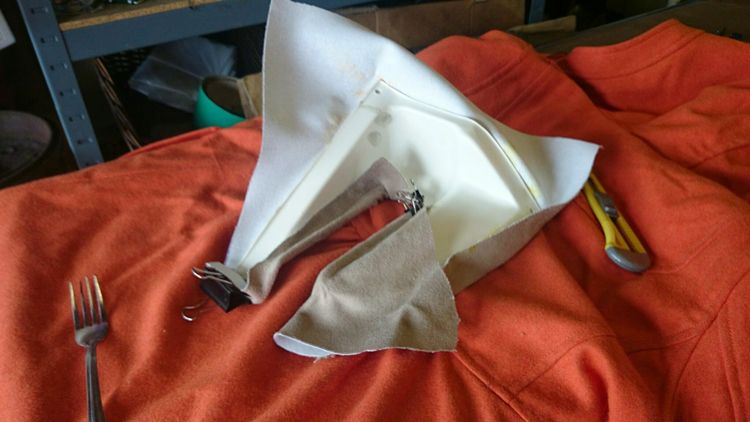
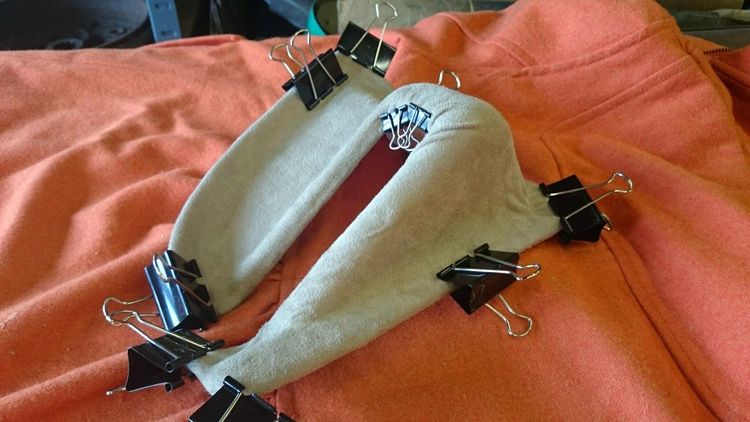
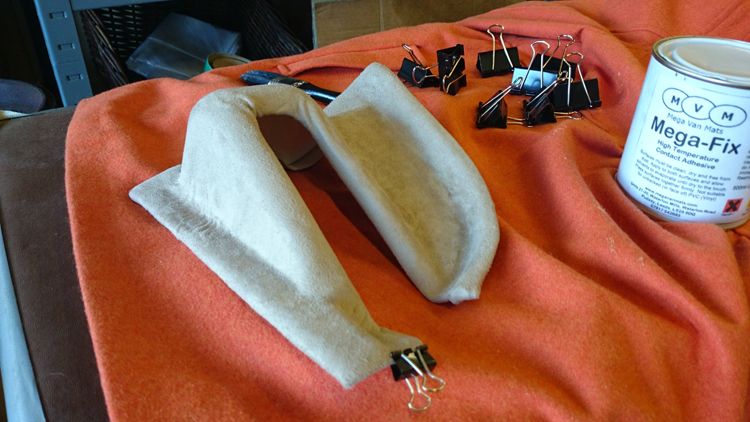
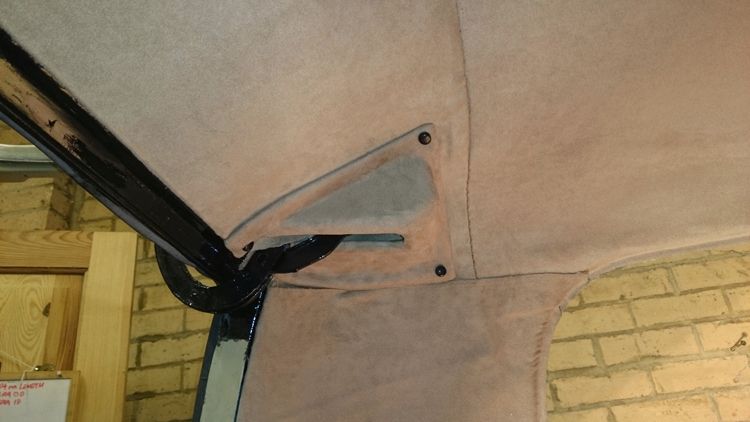
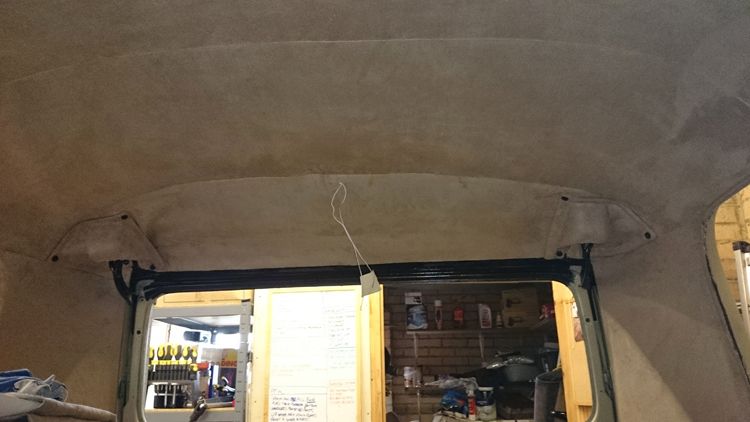
I went ahead and covered them with some spare headlining material.
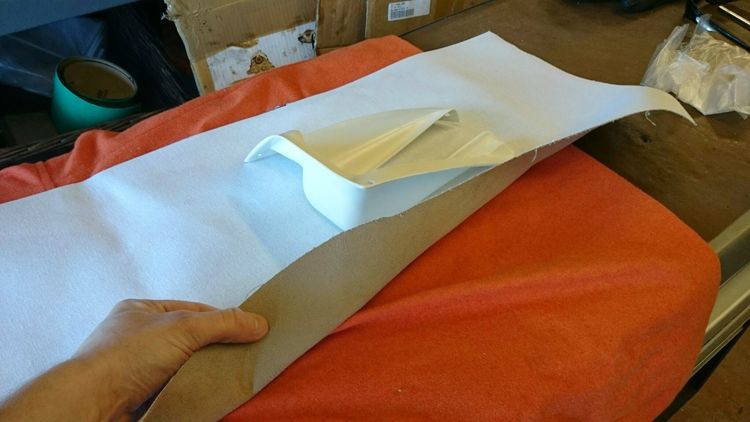
It took me a few goes as it was difficult to stretch and press the material down to prevent ruffles, air-bubbles and ridges, especially on the corners where you have to stretch the material in different directions due to the convex and concave shapes. For such small pieces, they were quite 'technical' to do.
I mock fitted both covers before covering them and I am a little disappointed in the quality of the covers considering how much they cost (£45/50 IIRC). The right-side one was pretty good, but as you can see above, the left was not moulded correctly where it is skewed out of position, meaning that the holes do not line up correctly.
- A fork. Useful tool.
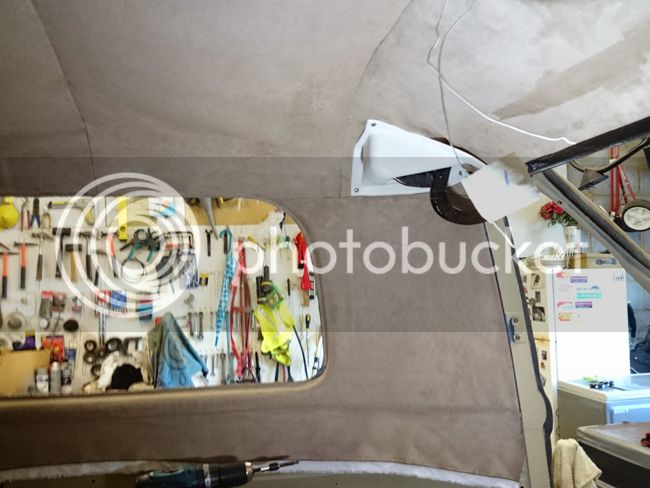
Right-side complete.
Left-side complete.
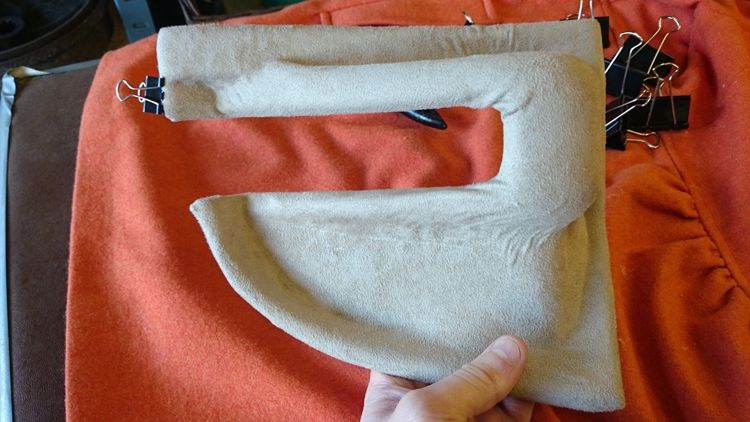
Both sides installed.
I used black number-plate screw-caps to tidy the screws.
I think that looks much better than the dodgy white plastic covers. They looked a bit 'cheap'. :|
____
[100% Complete] Fit Headlining extra material around windows (Need to tidy / Hinge covers / Cover joins)
[0%] Wiring Loom diagram (This was 10%, but now back to 0% for a change in direction.
[0%] Wiring Loom component purchase
[0%] Wiring Loom fabricate
[0%] Paint rear drums
[0%] Fit rear drums
[0%] Plan and purchase complete Hydraulic braking system
[0%] Fit Complete Hydraulic braking system
[0%] Fit Accelerator Cable
[0%] Rear Windows Tints
[0%] Rear Windows Install
[0%] Revise Front Axle / Brake Drums / Track-Rods / Re Torque all
those hinge covers look great covered in the matching material


$9.37
Empi 4429 Ivory Sun Visor Clips for Vw Bug 1965-1967/ Vw Bus 1968-1979, Pair
MOORE PARTS SOURCE


$9.94
$10.95
Empi 00-4428-B VW Bug, Beetle, Sun Visor Clips, Type 1, 68-79, Black, Pair
MOORE PARTS SOURCE


$24.61
Airfix Quickbuild Volkswagen Camper Van Red Brick Building Plastic Model Kit J6017, Multicolour
Amazon Global Store UK


$10.00
Volkswagen Genuine VW Driver Gear VW Logo Specifications T-Shirt Tee - X-Large - Black
wolframitersqga

$41.88
$46.95
Billet Window Crank, for All Years VW Beetle, Pair, Compatible with Dune Buggy
✅ Dune Buggy Warehouse


- Joined
- Apr 22, 2012
- Messages
- 2,279
- Reaction score
- 314
- Location
- Dorset
- Year of Your Van(s)
- 1971
- Van Type
- Dormobile
Smoooth work there. Wondering if hinge covers will go on with locker in place?
Another job..............mmmmmmmmmmmmmmmmm :roll:
Nice job there sir.
J & P
Another job..............mmmmmmmmmmmmmmmmm :roll:
Nice job there sir.
J & P
cunning plan
Well-known member
- Joined
- Jul 15, 2008
- Messages
- 2,625
- Reaction score
- 1
- Location
- Northamptonshire
- Year of Your Van(s)
- 1968
- Van Type
- Clipper / Microbus
Thanks gents! arty0021:
arty0021:cunning plan said:Buss69 said:Looking ace bud, if you don't like the colour of those covers try using Plastikote paints.
I didn't think of the plastic paints, but that would have been another good alternative solution.
I went ahead and covered them with some spare headlining material.
It took me a few goes as it was difficult to stretch and press the material down to prevent ruffles, air-bubbles and ridges, especially on the corners where you have to stretch the material in different directions due to the convex and concave shapes. For such small pieces, they were quite 'technical' to do.
I mock fitted both covers before covering them and I am a little disappointed in the quality of the covers considering how much they cost (£45/50 IIRC). The right-side one was pretty good, but as you can see above, the left was not moulded correctly where it is skewed out of position, meaning that the holes do not line up correctly.
- A fork. Useful tool.
Right-side complete.
Left-side complete.
Both sides installed.
I used black number-plate screw-caps to tidy the screws.
I think that looks much better than the dodgy white plastic covers. They looked a bit 'cheap'. :|
____
[100% Complete] Fit Headlining extra material around windows (Need to tidy / Hinge covers / Cover joins)
[0%] Wiring Loom diagram (This was 10%, but now back to 0% for a change in direction.
[0%] Wiring Loom component purchase
[0%] Wiring Loom fabricate
[0%] Paint rear drums
[0%] Fit rear drums
[0%] Plan and purchase complete Hydraulic braking system
[0%] Fit Complete Hydraulic braking system
[0%] Fit Accelerator Cable
[0%] Rear Windows Tints
[0%] Rear Windows Install
[0%] Revise Front Axle / Brake Drums / Track-Rods / Re Torque all
Dude those covers look excellent now, so, so much better. I noticed as well you mentioned you're changing direction for the wiring, what are you gonna do? Watson's-Street Works Loom maybe?
cunning plan
Well-known member
- Joined
- Jul 15, 2008
- Messages
- 2,625
- Reaction score
- 1
- Location
- Northamptonshire
- Year of Your Van(s)
- 1968
- Van Type
- Clipper / Microbus
Dude those covers look excellent now, so, so much better. I noticed as well you mentioned you're changing direction for the wiring, what are you gonna do? Watson's-Street Works Loom maybe?[/quote]
Thanks buddy :mrgreen:
Wiring loom has fallen down the list, but still probably one of the next major projects to complete.
____
Update:
Started to get the front axle organised and make a list of parts and tasks.
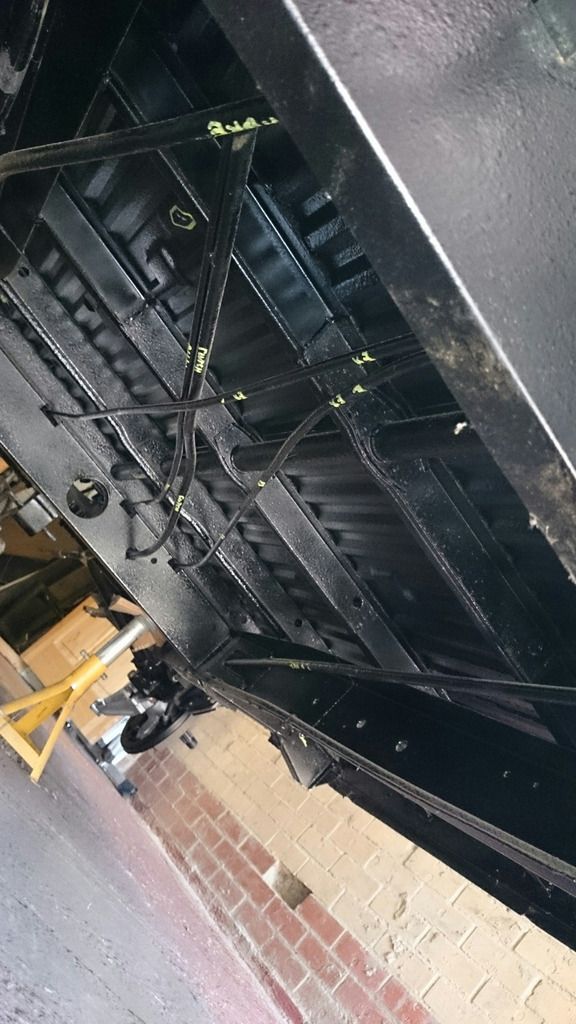
Labelled all of the various tubes to make installation a bit easier.
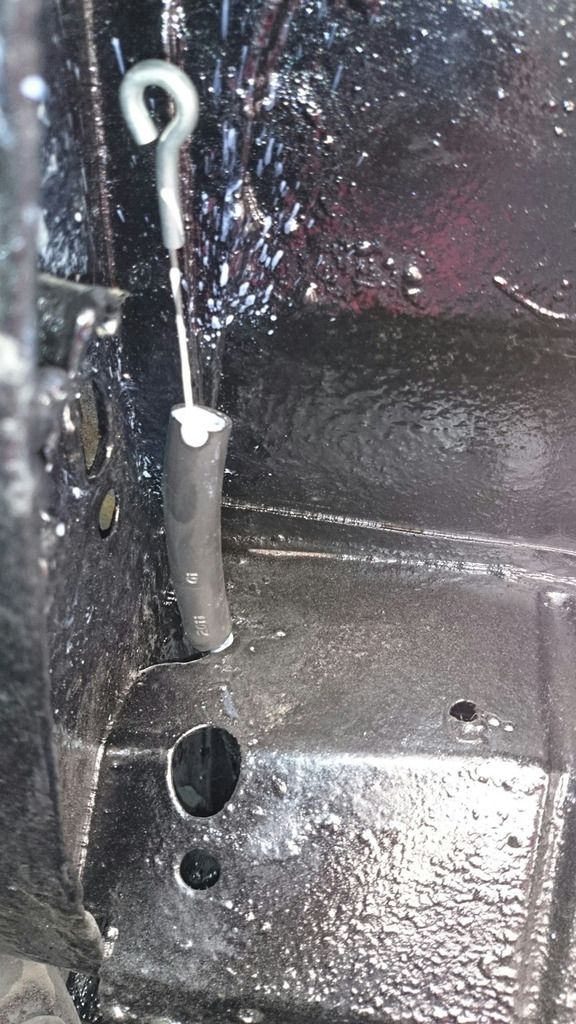
Whilst I was there, I installed a new accelerator cable that I have had on the shelf for a while after filling the tube with loads of Lithium grease to help the cable slip in (teeheehee) and protect it. Although, I was not happy that the end of the cable tube was quite open and sat in a position on the chassis that seemed like it could let dirt and water in. So I extended the tube with some rubber fuel hose to provide more protection.
Thanks buddy :mrgreen:
Wiring loom has fallen down the list, but still probably one of the next major projects to complete.
____
Update:
Started to get the front axle organised and make a list of parts and tasks.
Labelled all of the various tubes to make installation a bit easier.
Whilst I was there, I installed a new accelerator cable that I have had on the shelf for a while after filling the tube with loads of Lithium grease to help the cable slip in (teeheehee) and protect it. Although, I was not happy that the end of the cable tube was quite open and sat in a position on the chassis that seemed like it could let dirt and water in. So I extended the tube with some rubber fuel hose to provide more protection.
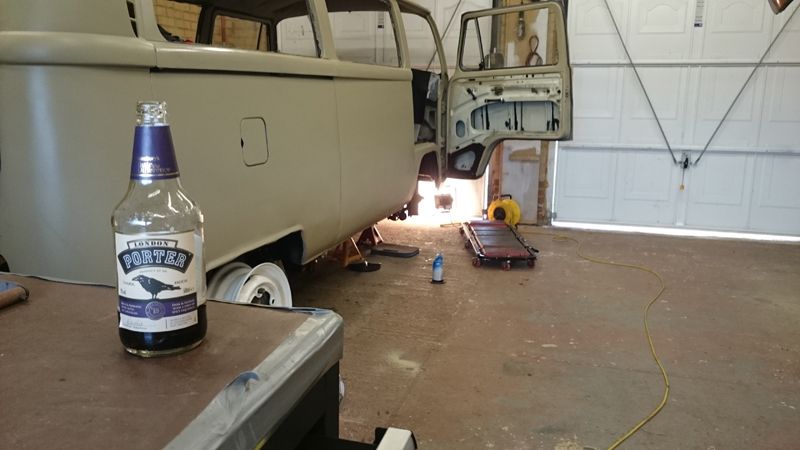
The underside looks amazing and the rear suspension and brakes look mint. Have to say you doing yours has motivated me to do mine. So is your underside undersea or POR15?
As far as your loom goes have you contacted Autosparks or maybe even Watsons Street Works in the US? I'm pretty sure Autosparks have a range of add ons for extras on their looms. Worth a chat anyway.
As far as your loom goes have you contacted Autosparks or maybe even Watsons Street Works in the US? I'm pretty sure Autosparks have a range of add ons for extras on their looms. Worth a chat anyway.
cunning plan
Well-known member
- Joined
- Jul 15, 2008
- Messages
- 2,625
- Reaction score
- 1
- Location
- Northamptonshire
- Year of Your Van(s)
- 1968
- Van Type
- Clipper / Microbus
Buss69 said:The underside looks amazing and the rear suspension and brakes look mint. Have to say you doing yours has motivated me to do mine. So is your underside undersea or POR15?
Really? Thanks
:mrgreen: So I'm copying you and your loom and you're copying my chassis :lol: The underside is Schultz mixed with underseal. I think you need a proper air compressor and spray-gun setup to spray it, so it was done at Dubs and Classics.
Buss69 said:As far as your loom goes have you contacted Autosparks or maybe even Watsons Street Works in the US? I'm pretty sure Autosparks have a range of add ons for extras on their looms. Worth a chat anyway.
Thanks for the head's up! :shadey:
cunning plan
Well-known member
- Joined
- Jul 15, 2008
- Messages
- 2,625
- Reaction score
- 1
- Location
- Northamptonshire
- Year of Your Van(s)
- 1968
- Van Type
- Clipper / Microbus
Managed to progress with some projects on the bus last week, but I have only just had a chance to upload the pictures and update this thread.
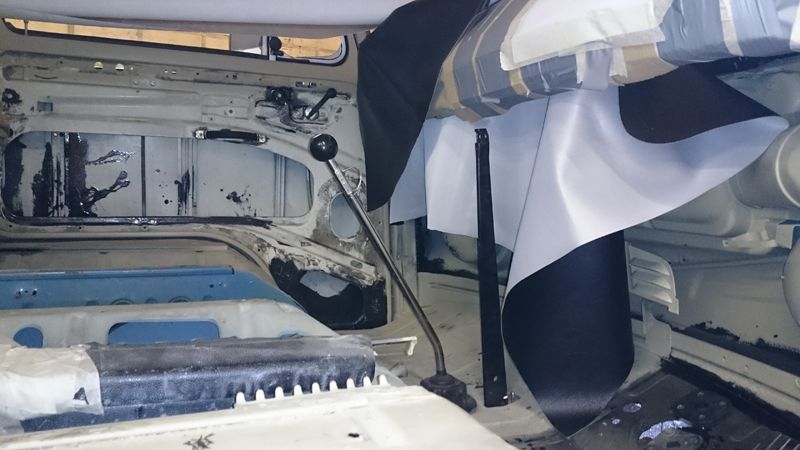
The first job was to mock-up the Handbrake mechanism. Whilst I was there, it seemed a shame to leave the gear-stick out of the fun, so I mocked that up as well! :mrgreen:

The cables look like they will be too short by around 30mm, for some reason. I have checked a few times and they are routed correctly and they cannot be the wrong cables, Later Bay ones for example, as those cables are much shorter as they finish under the cab area and then attach to a load divider bar. These cables get all the way to almost where they should be, but I doubt they will reach the handbrake fixing points. The brake-drum shoes are not tight at all, loose in-fact!.
I think I will extend the threaded bar. :|
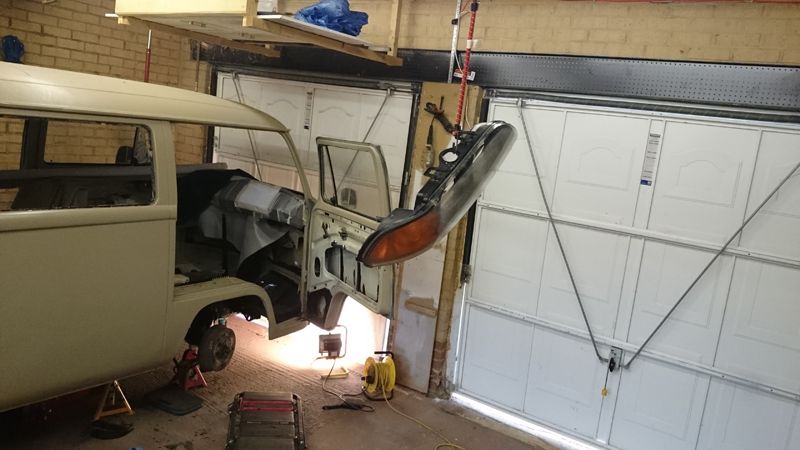
Whilst I was at it, testing the multi-tasking skills, we removed, dismantled, dried, cleaned, resealed and reinstalled a 5-Series headlight in an attempt to stop condensation.
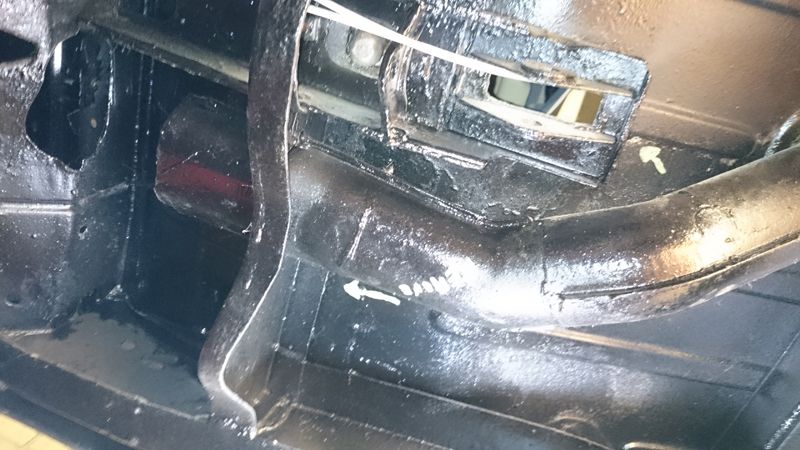
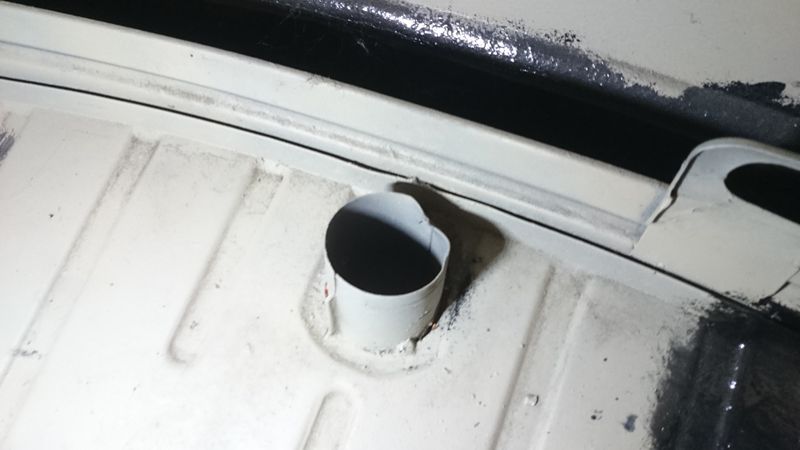
The next task was to grind off part of the old metal heater-tube ducting. There are a few reasons for this, firstly, it is old and metal, the metal attracts condensation and rust etc. Secondly, it opens up some chassis space near the front beam. Lastly, it is a slight / minuet weight saving. The plan is to run a separate Eberspacher-type heater further back on the chassis, then use plastic, flexible piping to move the heat and airflow forward, connecting onto the bottom of the Totem-pole in the cab, then distributed either on to the screen or back into the rest of the bus.
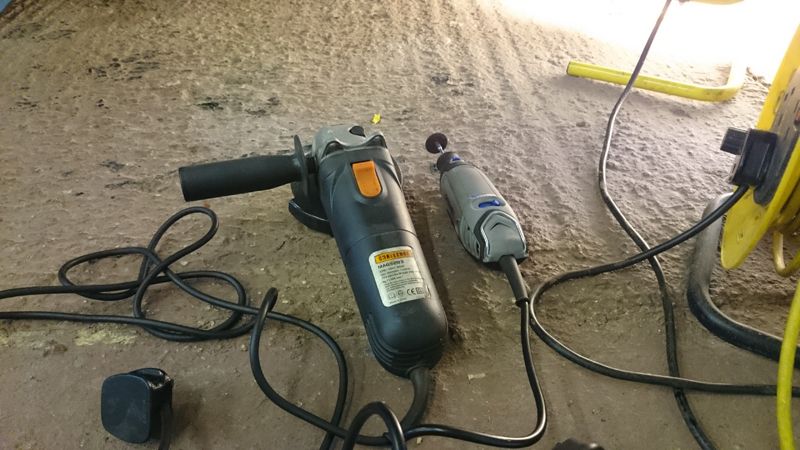
Tools ready.
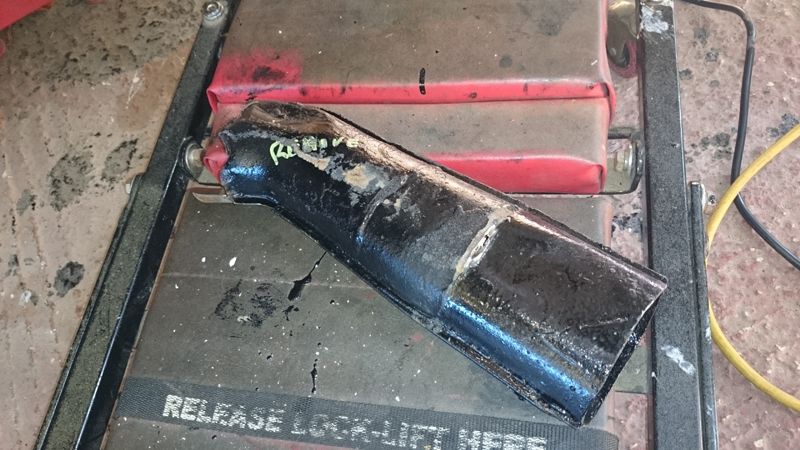
Complete.
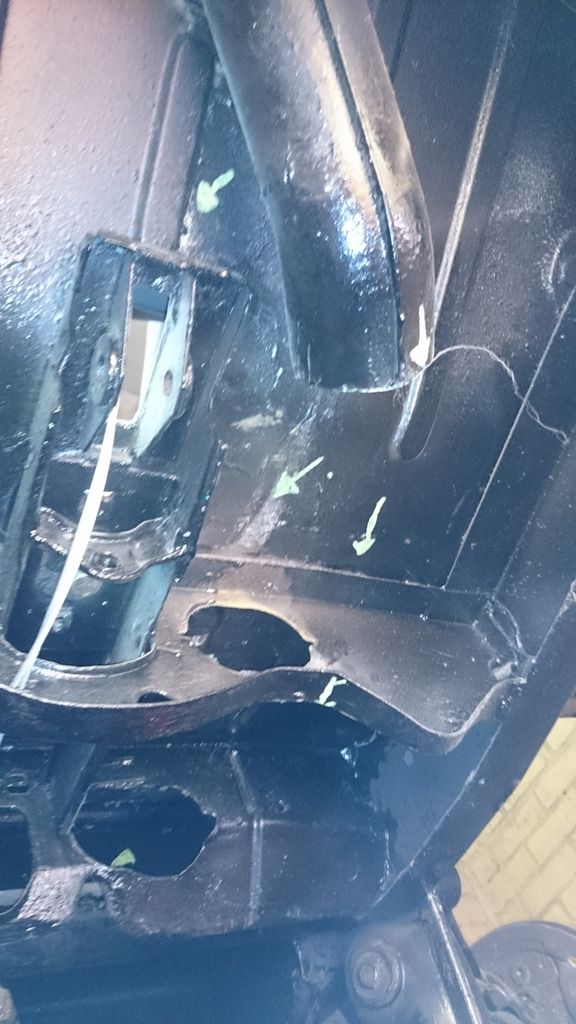
Space! Notice the lower half of the cab Totem-pole remains. This will get cleaned up and temporally blocked, ready for the new plastic tubing in the future.
Talking of the Totem-pole, here is the lower fixing which was slightly bent at the back for some reason.

So some gentle tapping massaged it back into a circle shape.
Project Progress:
[0%] Wiring Loom diagram. (I really need to start finding some time to begin planning this).
[0%] Wiring Loom component purchase. (Waiting on above)
[0%] Wiring Loom fabricate. (Waiting on above)
[0%] Paint rear drums.
[0%] Fit rear drums.
[0%] Plan and purchase complete Hydraulic braking system.
[0%] Fit Complete Hydraulic braking system.
[100% Complete] Fit Accelerator Cable.
[0%] Accelerator Peddle Components. (Going to look at Buttys Bits for this as I have read good things about his conversion kit).
[0%] Rear Windows Tints.
[0%] Rear Windows Install.
[5%] Revise Front Axle / Brake Drums / Track-Rods / Re Torque all.
[10%] Handbrake Mechanism.
[5%] Chassis Tidy (Annoying one, which delays progress. There are some areas of the chassis (more than I was expecting) which could do with tidying / sealing. Some of the joins are not as close / tidy as they should be, which I think will become a water trap.
The first job was to mock-up the Handbrake mechanism. Whilst I was there, it seemed a shame to leave the gear-stick out of the fun, so I mocked that up as well! :mrgreen:
The cables look like they will be too short by around 30mm, for some reason. I have checked a few times and they are routed correctly and they cannot be the wrong cables, Later Bay ones for example, as those cables are much shorter as they finish under the cab area and then attach to a load divider bar. These cables get all the way to almost where they should be, but I doubt they will reach the handbrake fixing points. The brake-drum shoes are not tight at all, loose in-fact!.
I think I will extend the threaded bar. :|
Whilst I was at it, testing the multi-tasking skills, we removed, dismantled, dried, cleaned, resealed and reinstalled a 5-Series headlight in an attempt to stop condensation.
The next task was to grind off part of the old metal heater-tube ducting. There are a few reasons for this, firstly, it is old and metal, the metal attracts condensation and rust etc. Secondly, it opens up some chassis space near the front beam. Lastly, it is a slight / minuet weight saving. The plan is to run a separate Eberspacher-type heater further back on the chassis, then use plastic, flexible piping to move the heat and airflow forward, connecting onto the bottom of the Totem-pole in the cab, then distributed either on to the screen or back into the rest of the bus.
Tools ready.
Complete.
Space! Notice the lower half of the cab Totem-pole remains. This will get cleaned up and temporally blocked, ready for the new plastic tubing in the future.
Talking of the Totem-pole, here is the lower fixing which was slightly bent at the back for some reason.
So some gentle tapping massaged it back into a circle shape.
Project Progress:
[0%] Wiring Loom diagram. (I really need to start finding some time to begin planning this).
[0%] Wiring Loom component purchase. (Waiting on above)
[0%] Wiring Loom fabricate. (Waiting on above)
[0%] Paint rear drums.
[0%] Fit rear drums.
[0%] Plan and purchase complete Hydraulic braking system.
[0%] Fit Complete Hydraulic braking system.
[100% Complete] Fit Accelerator Cable.
[0%] Accelerator Peddle Components. (Going to look at Buttys Bits for this as I have read good things about his conversion kit).
[0%] Rear Windows Tints.
[0%] Rear Windows Install.
[5%] Revise Front Axle / Brake Drums / Track-Rods / Re Torque all.
[10%] Handbrake Mechanism.
[5%] Chassis Tidy (Annoying one, which delays progress. There are some areas of the chassis (more than I was expecting) which could do with tidying / sealing. Some of the joins are not as close / tidy as they should be, which I think will become a water trap.
- Joined
- Apr 22, 2012
- Messages
- 2,279
- Reaction score
- 314
- Location
- Dorset
- Year of Your Van(s)
- 1971
- Van Type
- Dormobile
All going according to plan then................ :lol: :lol: :lol:
Keep up the good work.
J & P
Keep up the good work.
J & P
cunning plan
Well-known member
- Joined
- Jul 15, 2008
- Messages
- 2,625
- Reaction score
- 1
- Location
- Northamptonshire
- Year of Your Van(s)
- 1968
- Van Type
- Clipper / Microbus
gas1man said:All going according to plan then................ :lol: :lol: :lol:
Keep up the good work.
J & P
:lol: Exactky :roll: :| :shadey: :satanlook:
Just thought of the deck-lid seal!
Project Progress:
[0%] Wiring Loom diagram. (I really need to start finding some time to begin planning this).
[0%] Wiring Loom component purchase. (Waiting on above)
[0%] Wiring Loom fabricate. (Waiting on above)
[0%] Paint rear drums.
[0%] Fit rear drums.
[0%] Plan and purchase complete Hydraulic braking system.
[0%] Fit Complete Hydraulic braking system.
[100% Complete] Fit Accelerator Cable.
[0%] Accelerator Peddle Components. (Going to look at Buttys Bits for this as I have read good things about his conversion kit).
[0%] Rear Windows Tints.
[0%] Rear Windows Install.
[5%] Revise Front Axle / Brake Drums / Track-Rods / Re Torque all.
[10%] Handbrake Mechanism.
[5%] Chassis Tidy (Annoying one, which delays progress. There are some areas of the chassis (more than I was expecting) which could do with tidying / sealing. Some of the joins are not as close / tidy as they should be, which I think will become a water trap.
[0%] Fit Deck-Lid / Engine hatch seal
monkeyvanwestybike
Well-known member
- Joined
- Nov 11, 2009
- Messages
- 800
- Reaction score
- 5
- Location
- Hampshire New Forest
- Year of Your Van(s)
- After 1972
- Van Type
- 79 sunroof deluxe
Nice work there!
I wish I had a double Garage
I wish I had a double Garage
cunning plan
Well-known member
- Joined
- Jul 15, 2008
- Messages
- 2,625
- Reaction score
- 1
- Location
- Northamptonshire
- Year of Your Van(s)
- 1968
- Van Type
- Clipper / Microbus
monkeyvanwestybike said:Nice work there!
I wish I had a double Garage
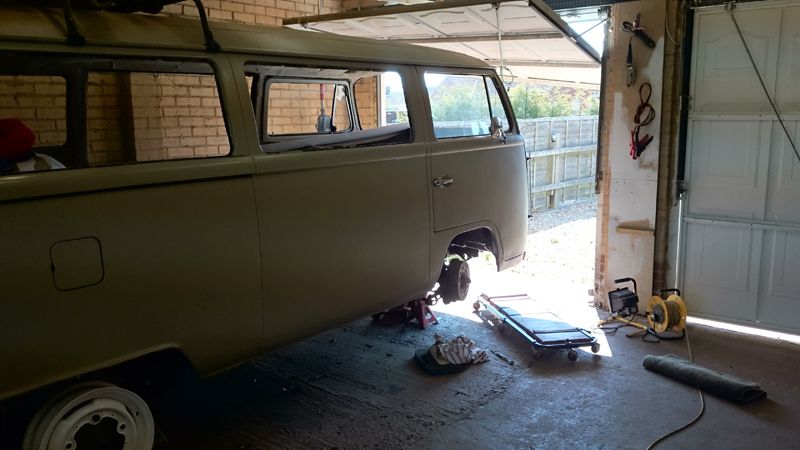
Thanks! It's not mine, but it makes working on the bus much more convenient for sure.
Handbrake
After removing any traces of rust from the Handbrake leaver, I repainted it, then sealed the back with silicone sealant, whilst leaving a small section open to allow and condensation to drain. I decided to do this as the bottom quarter of the leaver is exposed to the road and will accumulate water and dirt, leading to more rust. It just seemed logical to seal it up.
All dry, ready to be installed.
Installed on a new pivot pin with new clips and fresh grease.
Moves smoothly.
Engine Bay / Deck Lid Repair
I was about to install the deck-lid rubber when I noticed that the lip which holds the rubber was bent.
So, I gently tapped it back into shape using an Allen-key as a mould, which, seemed to work well.
However, the tapping cracked some of the protection paint, therefore I had to key and degrease it ready for another top-coat.
Engine Bay / Deck Lid Rubber Seal
This rubber seal came with the bus when I bought it. It was new and in a bag with 'Engine Lid Seal '68-'70' on the label, so I assume it is the correct one. However, the seal was one complete piece, which meant that the removable valance would pull the whole seal with it when it was removed for access to the engine. I decided to cut the seal at an angle and install the seal as a two piece, one on the Engine Bay surround and one on the valance.
The angle of the cuts should mean that the seal joins and seals when the Deck-lid is closed.
Project Progress:
[3%] Wiring Loom diagram.
[0%] Wiring Loom component purchase. (Waiting on above)
[0%] Wiring Loom fabricate. (Waiting on above)
[0%] Paint rear drums.
[0%] Fit rear drums.
[0%] Plan and purchase complete Hydraulic braking system.
[0%] Fit Complete Hydraulic braking system.
[0%] Accelerator Peddle Components. (Going to look at Buttys Bits for this as I have read good things about his conversion kit).
[0%] Rear Windows Tints.
[0%] Rear Windows Install.
[5%] Revise Front Axle / Brake Drums / Track-Rods / Re Torque all.
[70%] Handbrake Mechanism.
[5%] Chassis Tidy (Annoying one, which delays progress. There are some areas of the chassis (more than I was expecting) which could do with tidying / sealing. Some of the joins are not as close / tidy as they should be, which I think will become a water trap.
[80%] Fit Deck-Lid / Engine hatch seal
- Joined
- Apr 22, 2012
- Messages
- 2,279
- Reaction score
- 314
- Location
- Dorset
- Year of Your Van(s)
- 1971
- Van Type
- Dormobile
Managed to find time for the bus??????????? :lol:
Busy boy at work then , which is a good thing!!!!!!!! Helps pay the bus bills :lol: :lol:
Looking good!!!As always
J & P
Busy boy at work then , which is a good thing!!!!!!!! Helps pay the bus bills :lol: :lol:
Looking good!!!As always
J & P
cunning plan
Well-known member
- Joined
- Jul 15, 2008
- Messages
- 2,625
- Reaction score
- 1
- Location
- Northamptonshire
- Year of Your Van(s)
- 1968
- Van Type
- Clipper / Microbus
gas1man said:Managed to find time for the bus??????????? :lol:
I know :lol: I always feel that 'slow' is not a strong enough word for the speed of my project :sign0001:
As you say though, work has to come first