DELUXE CLOCKS AND TACHOMETERS - 1st batch now on sale

Early Bay Forum

Help Support Early Bay Forum:

This site may earn a commission from merchant affiliate links, including eBay, Amazon, and others.

What product would you be interested in?

  • I would possibly buy a clock

    Votes: 36 32.1%
  • I would possibly buy a Tachometer

    Votes: 91 81.3%
  • I wouldn't purchase either product

    Votes: 5 4.5%

  • Total voters
    112
I'd like a clock but the reason i have never bought a seond hand one is price so if a new is similar prices then it would count me out.

7K rev counter are ample for 95% of aircooled engines. But again no good for me.

Its great to see people putting back into the scene by getting these things produced.

My only thought would be don't order dependant on how many people say they want one as i can bet at least 40% of those people won't have the cash when your shipment arrives.
 
Alex VW Heritage said:
My only thought would be don't order dependant on how many people say they want one as i can bet at least 40% of those people won't have the cash when your shipment arrives.

It could be worth operating like Trowel has done with the script badges. If you want one you pay for it, then it is produced. Then you get it even if you don't want it, and it isn't left to the OP to try and shift it (after all he is doing us the favour! :))

Unless of course the OP is rich, will have 50 produced and will sell them as and when!
 
Hey all

There is no doubt that there is some interest in these products. I'm a year behind schedule and that no ones fault but my own. I have most of the components to make a prototype but haven't yet put it all together.

My clocks and tachos will both be using quality VDO components to operate them. This will give you a bit of confidence in the quaity.

They will be back lit like the original clock with a taper ring reflecting the light onto the dial face.

Tha tacho will have an operaing range of 7000 RPM so at 4000RPM's the needle will be swinging 180 degrees.

The components will all sit in a steel cup similar to the original with a brass bezel. I realise these are all hidden behind the dash but it does make it a little nicer in my opinion.

The dial faces have been printed on steel and colour matched to the original dials. They have then been pressed and domed to match the original face so if you have a late bay all the detail is present.

I've spent lots in the last 2 years on engineering and tooling and will never make my money back which is fine with me. I will have a working prototype in the next month fully tested and ready to produce. The cost will be a little more then the prices quoted for the other ones here. Just keep inmind there is a 70 pound tacho and thousands in tooling going into each guage, so if you want a cheap tacho then screw a sunpro into your dash.

Here's a sneak peak. Finally some motivation to get these done. Click on the image to enlarge.

 
bout time ya pulled ya finger out ya ass and got this sorted.thelab rat is ready and waiting ;)
 
Doing my best to sort stuff out from holidays here in Cornwall folks. I'll hit the road running next week. Hang in there. :D
 
Well here it is guys.

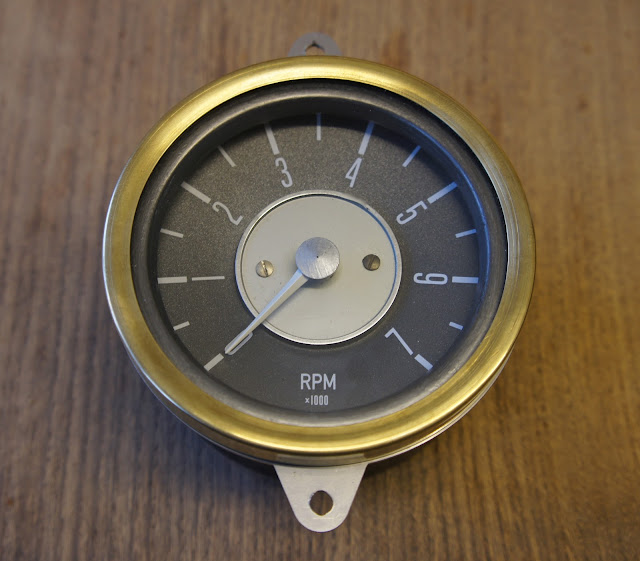
It has taken some time but now I have a working prototype. As you can see it is an exact replica of the original gauges.

It is back lit as per the original gauges.
The globes have been tinted green and will be dimed down to match the cluster lighting.
The internal unit used is a high quality VDO series 1 80mm Tachometer. Like this one here. http://www.coolairvw.co.uk/Item/Shop_by_Product~Electrical_Products~Gauges_-P-_Switches~VDO_Gauges/V333355/VDO_86mm_Series_1_7000RPM_Tachometer.html" onclick="window.open(this.href);return false;
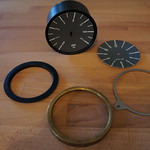
The unit is all encased in a steel cup like the original clocks and mounted with a stainless steel ring.
The brass bezel has been added to keep with the original clock design and for a bit of bling.
After much deliberation I decided to go with RPM X 1000. I personally think it looks better and I didn't want it to look like another speedometer
Installation is simple. One wire goes to the negative side of the coil. Second wire goes to a switched 12V power supply. Third wire is the ground. Fourth wire goes from the bulbs to the headlight switch. Very easy to install the only real challenge is running a single wire under the bus to the coil.

The prototype will be fully tested this week.
Parts are on order and should be with in the next fortnight.
Gauges will be available to purchase around the same time.
Still calculating final costs per unit but they will be reasonably priced.

Soooooooo here it finally is. I appreciate all your feedback. Please keep in mind this is a prototype. The final product will be more refined and without any flaws or blemishes.

DSC02537.JPG
 

Latest posts

Top